
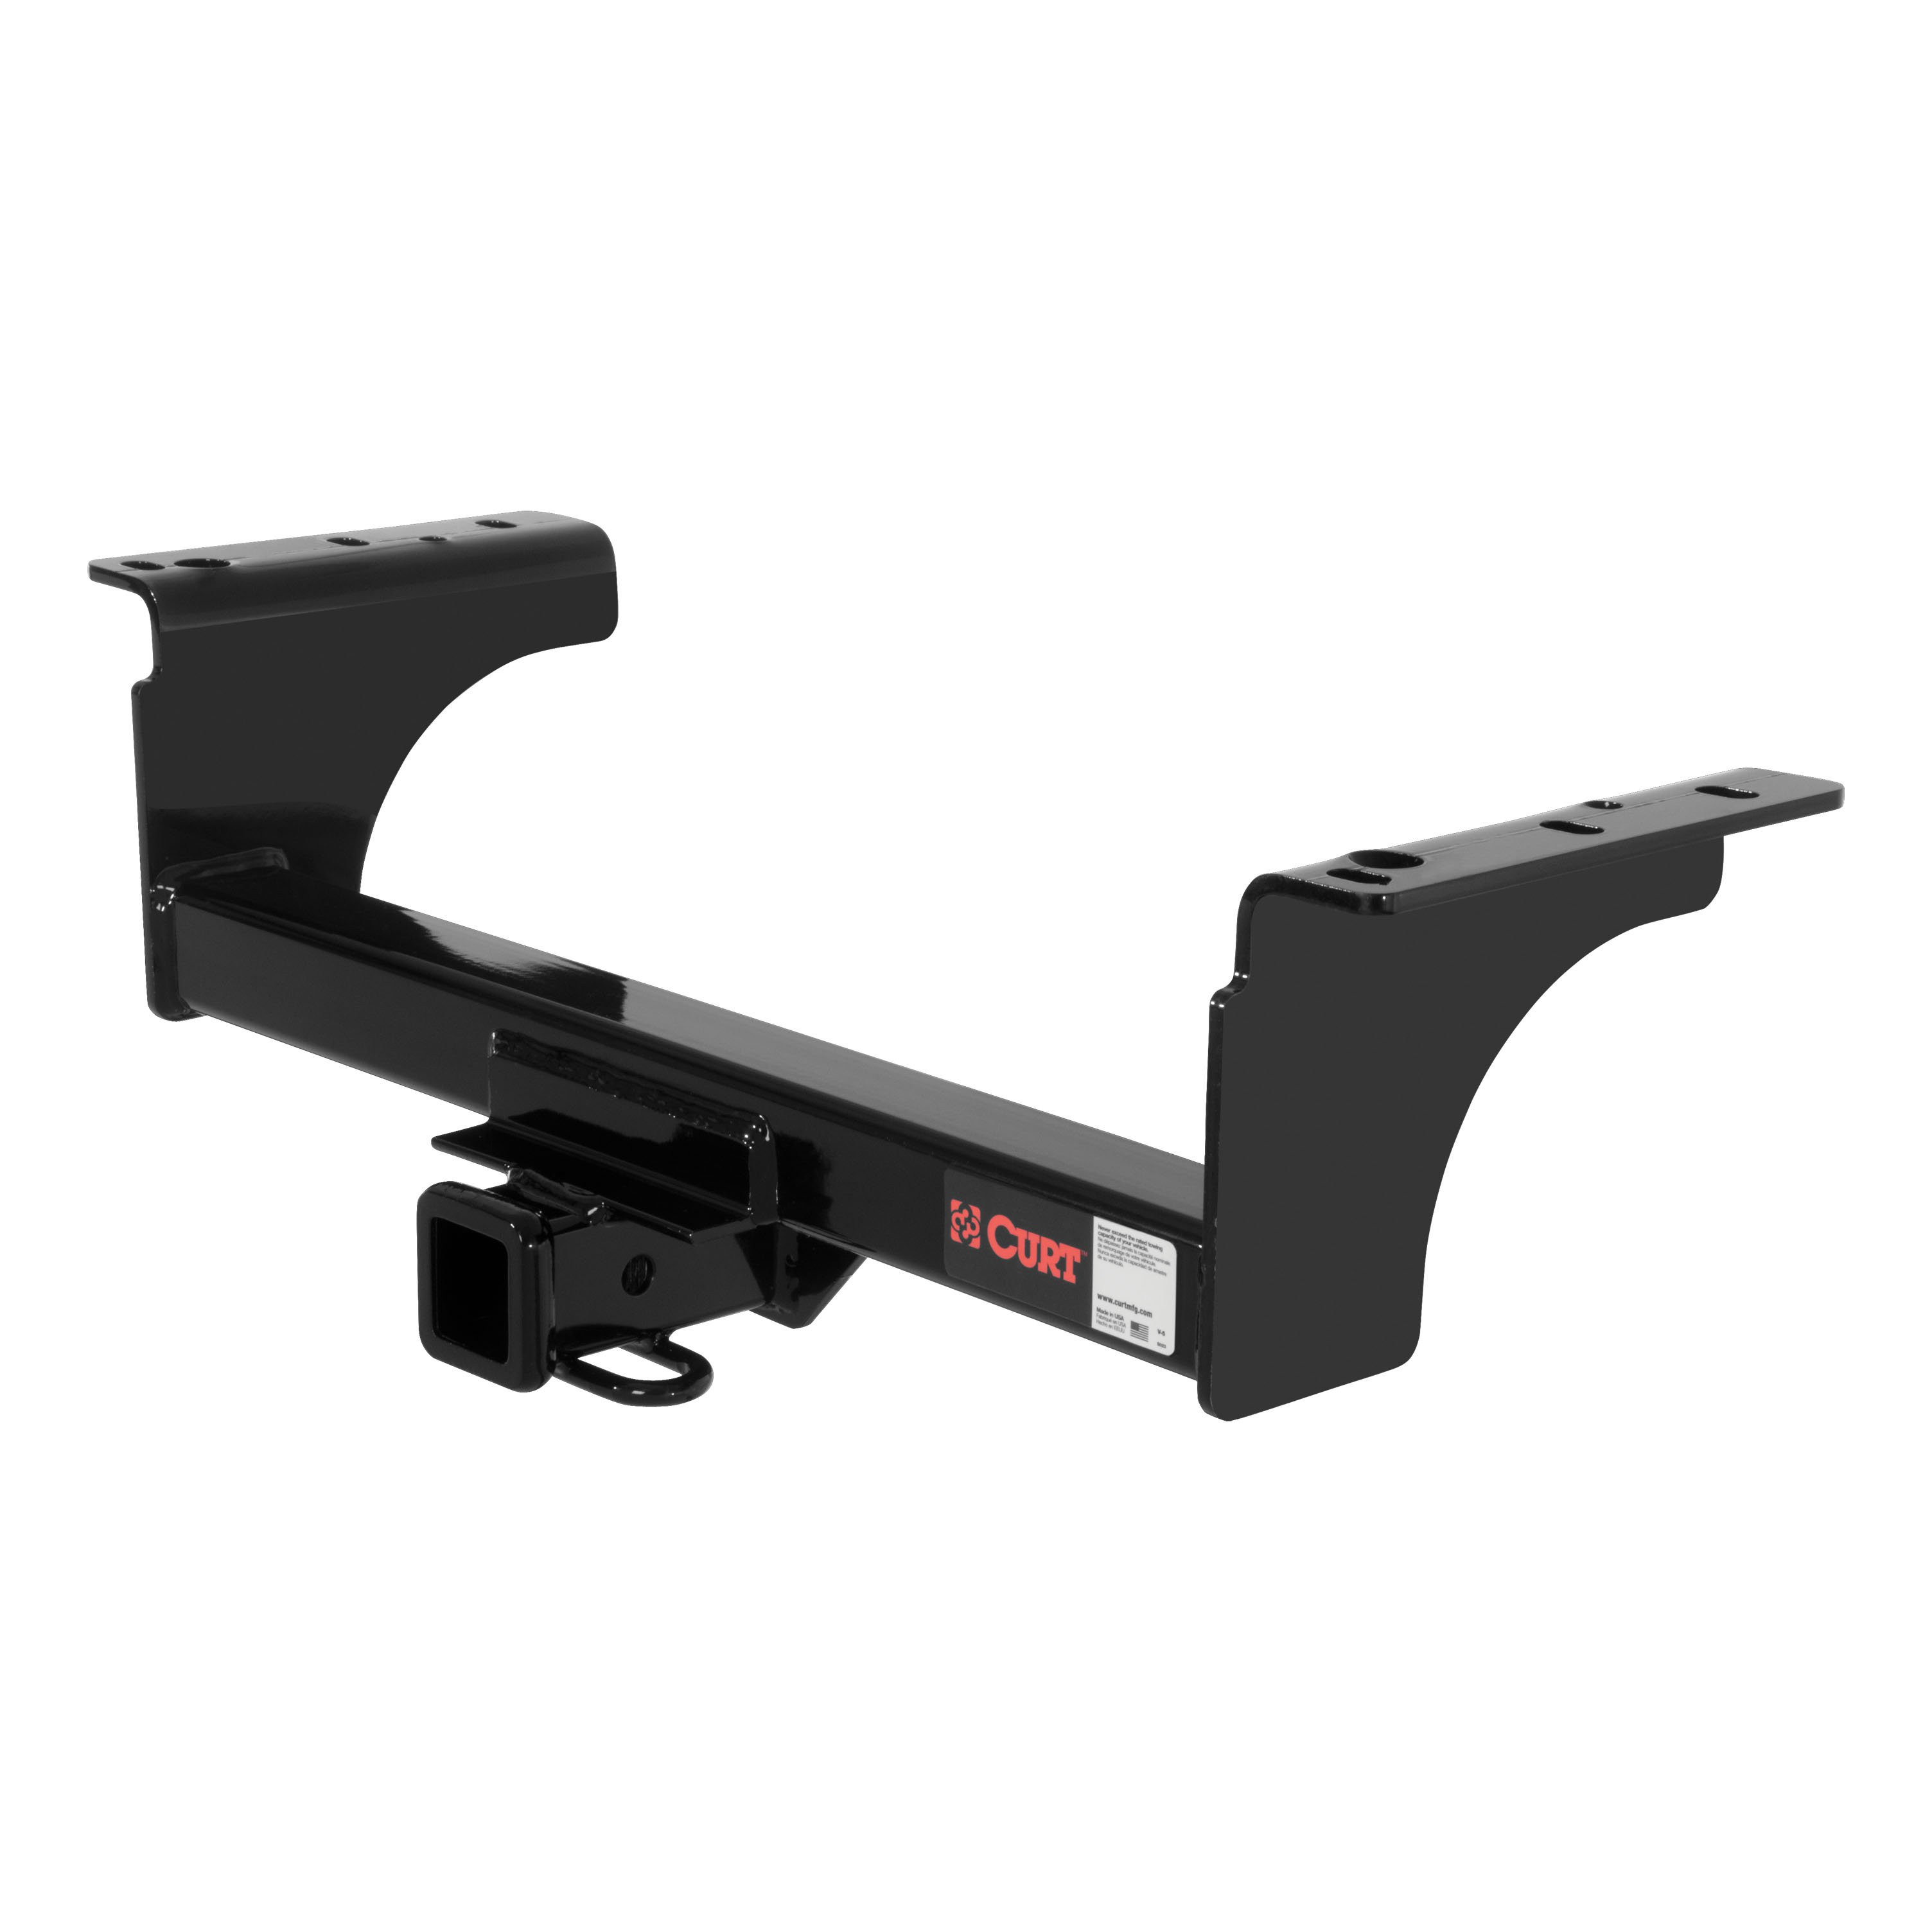
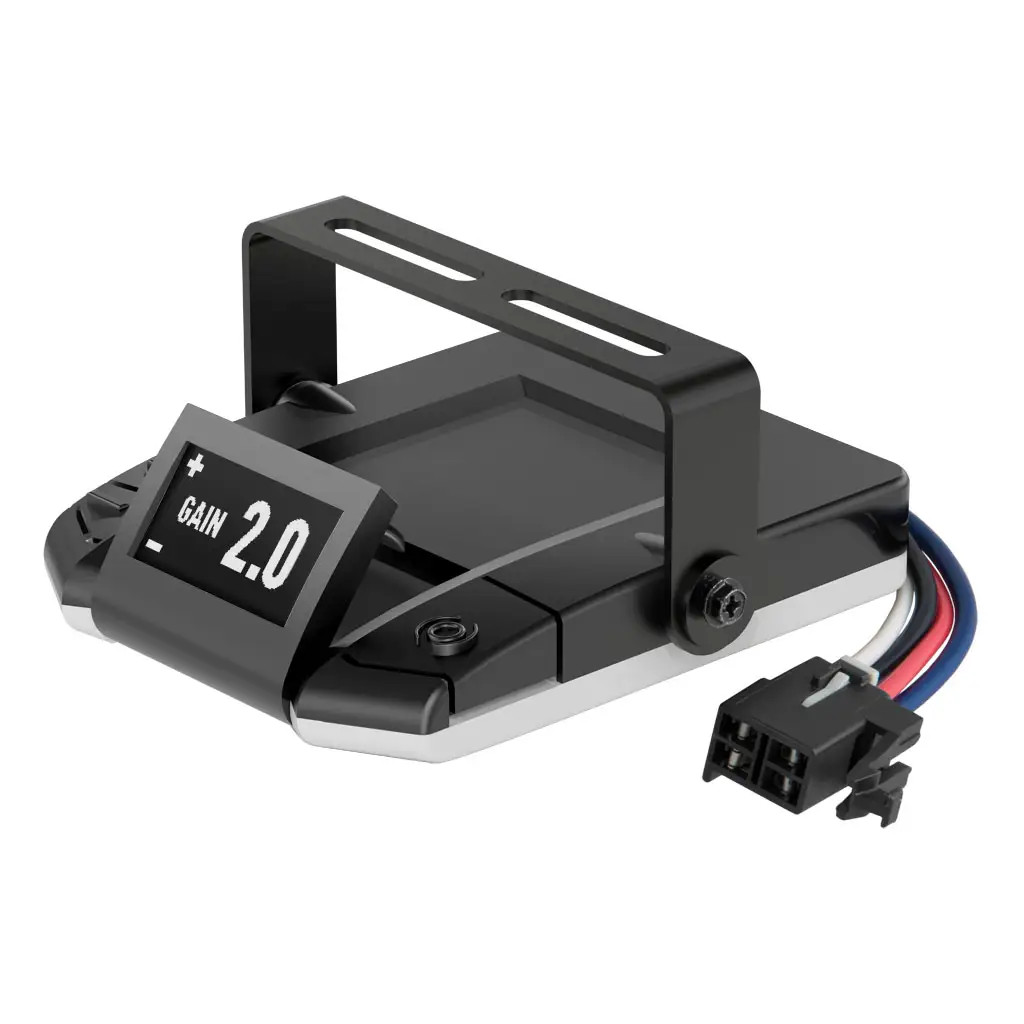
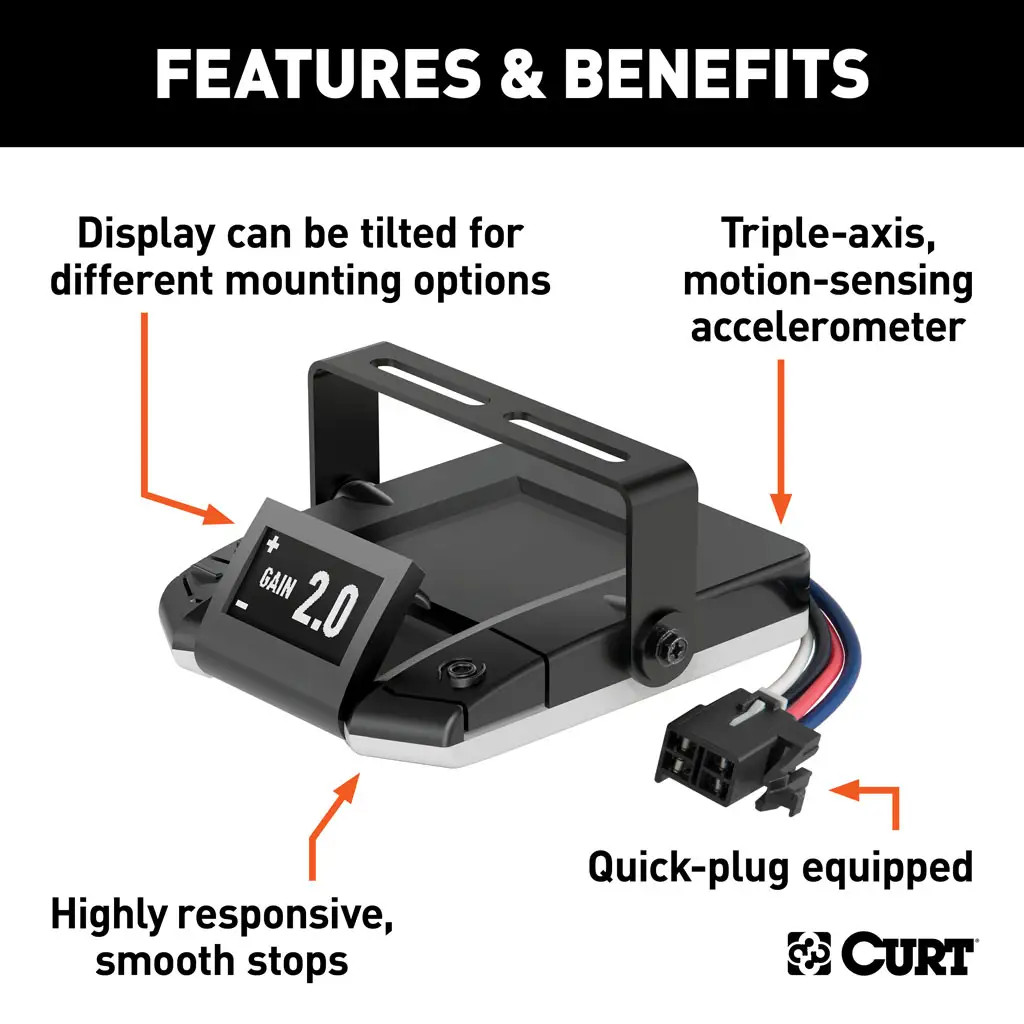
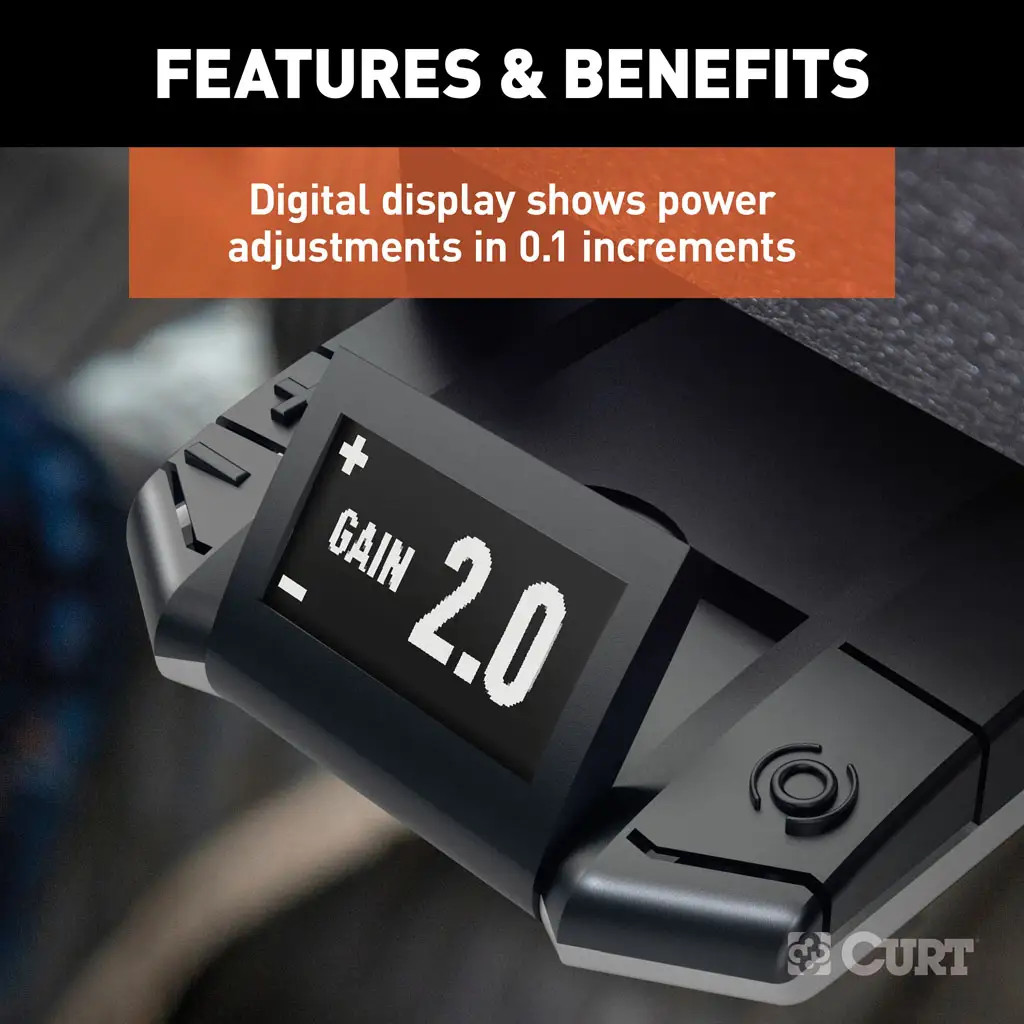
07-10 Dodge Ram 3500 Cab & chassis 2 CURT Trailer Hitch + Assure Proportional Brake Controller Kit HBCW752CURTOriginal price was $1,136.60. Current price is $839.36.In Stock
View productOur in-house experts typically reply within one business day.

CURT
Verify Fitment
Select your vehicle to confirm this part fits.


Always the correct part
We know our products
Quality Products
Free Shipping!
Always the correct part
We know our products
Quality Products
Free Shipping!
| Main Body Shape | Square |
| Material | Carbon Steel |
| Mount Type Description | Blank |
| Receiver Tube Size | 2 IN |
| Side Application Type Description | Blank |
| Tongue Weight (TW) | 2,550 LB |
| Warranty | Limited Lifetime Warranty (One-Year Finish, One-Year Parts) |
| Weight Carrying Capacity (WC) | 17,000 LB |
| Weight Distribution (WD) | 17,000 LB |
| Weight Distribution Tongue Weight (WDTW) | 2,550 LB |
| Side Application Type Description | Blank |
| T-Connector Location | T3,T5 |
| Warranty | One-Year Limited Warranty |
| Electrical System Type | 2W |
| Finish | N/A |
| Material | Blank |
| Mount Type Description | Blank |
| Output Type | 4-Way Flat |
| Ball Diameter | 2 IN |
| 10282 | Yes |
| Color | Black |
| Drop | 2 IN |
| Gross Trailer Weight (GTW) | 7,500 LB |
| Material | Carbon Steel |
| Receiver Tube Size | 2 IN |
| Shank Diameter | 2 IN |
| Tongue Weight (TW) | 750 LB |
| Truckload Dom Pickup Location | Eau Claire, Wi |
| Warranty | Limited Lifetime Warranty (One-Year Finish, One-Year Parts) |
Notes:
Notes:

CURT offers a variety of high-quality trailer hitches and accessories for select vehicle models. Find the perfect fit for your towing needs at TowUniverse.
CURT, a Lippert brand, offers a complete line of towing products and is the leading manufacturer of custom-fit trailer hitches. We offer the broadest selection of custom-fit hitches, and each one is designed, welded, and coated in Wisconsin.
CURT is also a leader in flat towing products, as well as 5th wheel, gooseneck, and weight distribution hitches, ball mounts, electrical components, cargo solutions, and other towing accessories.
For everything from passenger cars and vans to full-size pickups and SUVs, CURT is 'The First Name in Towing Products®.'
Experts available to answer your questions
Call 888-634-94941 compatible vehicles
| Year | Make & Model | Notes |
|---|---|---|
| 2007 - 2010 | Dodge Ram 3500 | Cab & chassis |
Yes, the 07-10 Dodge Ram 3500 Cab & chassis 2 CURT Trailer Hitch + Assure Proportional Brake Controller Kit HBCW751 (Part #HBCW751) is designed to fit the 2007-2010 Dodge Ram 3500.
The 07-10 Dodge Ram 3500 Cab & chassis 2 CURT Trailer Hitch + Assure Proportional Brake Controller Kit HBCW751 (Part #HBCW751) fits the following vehicles: 2007-2010 Dodge Ram 3500. Always verify your specific year, make, and model before ordering.
The 07-10 Dodge Ram 3500 Cab & chassis 2 CURT Trailer Hitch + Assure Proportional Brake Controller Kit HBCW751 (Part #HBCW751) fits 2007-2010 Dodge Ram 3500 models. The 2010 model year is the last year covered by this part number. For newer models, check for an updated version.
The 07-10 Dodge Ram 3500 Cab & chassis 2 CURT Trailer Hitch + Assure Proportional Brake Controller Kit HBCW751 (Part #HBCW751) Refer to the included instructions for installation details. Basic hand tools are typically all you need.
Yes, the 15400 is designed for 2001-Present Chevrolet Silverado 3500 HD cab and chassis models with 34" wide frames. Confirm your frame width is 34" before purchasing.
Yes, the 15400 is compatible with 2008-Present Dodge Ram 4500/5500 HD cab and chassis models with 34" wide frames. Verify your frame width is 34" before installation.
Yes, the 15400 fits 2001-Present GMC Sierra 3500 HD cab and chassis with 34" wide frames. Ensure your frame width is 34" wide.
When used as a weight-carrying hitch, the 15400 has a gross load capacity of 17,000 lbs. trailer weight and 2,550 lbs. tongue weight. When used as a weight-distribution hitch, the capacity is also 17,000 lbs. trailer weight and 2,550 lbs. tongue weight. However, you must not exceed your vehicle manufacturer's recommended towing capacity, which may be lower.
The hitch weight is 60 lbs.
The kit includes 6 M16x2 hex flange bolts (Class 10.9), 6 M16 flat washers, 6 M16 lock washers, and 6 M16x2 hex nuts. All fasteners are zinc-plated (YZ).
You will need: a ratchet, torque wrench, 21mm socket, drill, 25/32" drill bit, chisel, grinder, clamps, and center punch. Drilling is required for installation.
Yes. For Dodge chassis, remove the temporary license plate bracket and return bracket and hardware to the owner in Step 1. For Chevrolet/GMC models, this is also required on select models as part of Step 1a.
Yes, drilling is required. You must drill 3 holes on each side of the frame rail using a 25/32" drill bit. The hitch is used as a template to mark hole locations. On select GM models, you may need to enlarge existing holes instead of drilling new ones.
Yes. On all Dodge models, you must remove the rear-most rivet on the bottom of each frame rail. On select Chevrolet and GMC models, you must remove the rear-most rivet on the bottom of the frame rail approximately 3-1/2" from the end of the frame rails. Use a chisel and grinder to remove rivets.
On select Chevrolet and GMC models, you must remove the two rear-most fuel tank shield bolts from the frame rail and return the hardware to the owner. Support the fuel tank shield as necessary during this step. The hitch side plates will slide between the frame rail and fuel tank shield during installation.
All M16 hardware must be torqued to 195 ft-lbs. This applies to both Dodge and Chevrolet/GMC installations.
Raise the hitch into position and place the rear edges of the horizontal flanges flush with the end of the frame rails. Clamp the hitch to the frame rail before drilling.
You have two alignment options depending on your specific model: (a) Align the 1" diameter slot with the rivet on the bottom of the frame rail on each side and clamp in place, or (b) Align the rear-most rivet removed in Step 1c with the existing holes from Step 1b and clamp in place. The hitch side plates will slide between the frame rail and fuel tank shield. Choose the option that fits your application.
You must drill or enlarge 3 holes on each side of the frame rail, for a total of 6 holes. On select GM models, this includes holes in the fuel tank shield tab. Use the hitch as a template to mark hole locations.
Periodically check the receiver hitch to ensure that all fasteners are tight and that all structural components are sound. This helps maintain safe operation and extends the life of the hitch.
No. You must not exceed your vehicle manufacturer's recommended towing capacity, even though the hitch is rated for 17,000 lbs. trailer weight and 2,550 lbs. tongue weight. Always follow your vehicle's towing limits.
The 15400 fits 2001-Present Chevrolet Silverado 3500 HD, 2001-Present GMC Sierra 3500 HD, 2007-Present Dodge Ram 3500 HD, and 2008-Present Dodge Ram 4500/5500 HD cab and chassis models with 34" wide frames.
Yes, drilling is required. You must drill 3 holes on each side using a 25/32" drill bit. A drill, chisel, grinder, clamps and center punch are required tools.
All M16 bolts must be torqued to 195 ft-lbs.
The hitch is rated for 17,000 lbs. trailer weight and 2,550 lbs. tongue weight. However, you must not exceed your vehicle manufacturer's recommended towing capacity.
On select Chevrolet and GMC models, you must remove the two rear-most fuel tank shield bolts. Support the fuel tank shield as necessary. The hitch side plates slide between the frame rail and shield.
The kit includes: one 30 amp auto-resetting circuit breaker, two #10 ring terminals, two 3/8" ring terminals, two 1/2" ring terminals, three 12-10 gauge butt connectors, 10 feet of 10 ga black/white duplex wire, 20 feet of 10 ga blue cross-linked wire, and eight 8.5" cable ties.
Yes, but with a critical difference: these vehicles require the stop signal wire to be spliced to the light green wire on the turn signal harness connector under the dash, not to the brake pedal switch. Do NOT connect to the red wire with green stripe, as serious damage may occur. All other vehicles connect to the brake pedal switch instead.
You will need: a test light, wire stripper/cutter, crimp tool, and 3/8" box end wrench. The test light is used to identify the cold (switched) side of the brake pedal switch.
Yes. The manual cautions to disconnect the tow vehicle's negative battery cable before installation. Reconnect it only in the final step after all wiring is complete.
Mount the 30 amp circuit breaker near the tow vehicle's positive battery terminal. This keeps the power wire run as short as possible and protects the circuit.
Use 10 gauge (10 ga) black wire from the duplex wire included in the kit. Strip 3/8" of insulation from each end. Crimp a #10 ring terminal to the end that attaches to the circuit breaker stud labeled 'BAT', and a 3/8" or 1/2" ring terminal (sized to fit your battery terminal) to the end that attaches to the positive battery terminal.
Feed the 10 ga duplex wire from the brake controller in the cockpit through the firewall into the engine compartment toward the battery. Cut to length as needed. At the battery end, crimp a 3/8" or 1/2" ring terminal to the white wire and a #10 ring terminal to the black wire. Attach the black wire to the circuit breaker stud labeled 'AUX' and tighten the nut with a 3/8" box end wrench.
When passing the duplex wire through the firewall into the engine compartment, use an existing grommet, add a new grommet, or fill the hole with silicone rubber to insulate and protect the wire. The same protection applies when passing the blue cross-linked wire through any sheet metal at the rear of the vehicle.
In the cockpit, attach the black duplex wire to the brake controller's battery wire (typically black) and the white duplex wire to the brake controller's ground wire (typically white). Use either one of the supplied yellow butt connectors or solder the leads together and insulate with heat shrink tubing.
Locate the brake pedal switch on the back side of the vehicle's brake pedal. Use a test light or volt meter to identify the 'cold' or switched side—this terminal will only show power when the brake pedal is depressed. Attach the stop signal wire (typically red) from the brake controller to the cold side of the switch using a wire tap.
Locate the semi-circle turn signal harness connector on the steering column under the dash. It has two rows of wires: a row of four and a row of seven. Attach the stop signal wire (typically red) from the brake controller to the light green wire using a wire tap. Do NOT connect to the red wire with green stripe, as serious damage may occur.
Feed the 10 ga blue cross-linked wire from the brake controller to the trailer connector at the rear of the vehicle, taking up any slack in the wire. When passing through any sheet metal, use an existing grommet, add a new grommet, or fill the hole with silicone rubber to protect the wire.
Attach the blue cross-linked wire to the brake controller's electric brake wire (typically blue) using one of the supplied yellow butt connectors or by soldering and insulating with heat shrink tubing. At the rear of the vehicle, trim any loose blue wire and attach it to the trailer connector's electric brake terminal. Refer to the trailer connector's wiring diagram for the correct terminal location.
Secure any loose wires with the cable ties provided. Connect the black power wire from the circuit breaker to the positive side of the battery. Connect the white ground wire from the brake controller to the negative side of the battery. Finally, reconnect the tow vehicle's negative battery cable to the battery.
The circuit breaker is 30 amps and auto-resetting. It must be mounted near the positive battery terminal and connected directly to the positive battery terminal via the included black 10 gauge wire.
Use a 3/8" box end wrench to tighten the nuts on the circuit breaker studs labeled 'BAT' and 'AUX'.
The kit includes 10 feet of 10 gauge black/white duplex wire for the battery and brake controller connections, and 20 feet of 10 gauge blue cross-linked wire for the electric brake signal to the trailer connector.
Black wire connects to the positive battery and circuit breaker. White wire connects to the brake controller ground and negative battery. Red wire is the stop signal wire from the brake controller. Blue wire is the electric brake signal wire. The manual notes these are 'typically' these colours but recommends confirming with your brake controller documentation.
Yes. You can solder the leads together and insulate with heat shrink tubing as an alternative to using the supplied yellow butt connectors. This applies to connections between the duplex wire and the brake controller wires, and between the blue cross-linked wire and the brake controller.
The black power wire must connect directly to the positive battery terminal via the 30 amp circuit breaker. Connecting to the fuse panel or any other accessory wiring may damage vehicle wiring and cause trailer brake failure. The circuit breaker protects the circuit and must be the only protection between the battery and the brake control system.
Do NOT connect the stop signal wire to the red wire with green stripe on the turn signal harness. Serious damage may occur. Connect only to the light green wire. Also, do not connect to the brake pedal switch on these vehicles; use the turn signal harness instead.
The kit is universal but requires an existing trailer connector and brake controller. 1989-1991 Ford E & F-Series with ABS use a different stop signal connection (turn signal harness instead of brake pedal switch). Consult your brake controller documentation for compatibility.
No drilling is required. The kit connects to existing components: the battery, brake controller, brake pedal switch (or turn signal harness on 1989-1991 Ford E & F-Series with ABS), and trailer connector.
Do NOT connect the stop signal wire to the red wire with green stripe on the turn signal harness—serious damage may occur. Connect to the light green wire instead, and do not use the brake pedal switch.
Connecting to the fuse panel or accessory wiring may damage vehicle wiring and cause trailer brake failure. The 30 amp circuit breaker must be the only protection between the battery and the brake control system.
Yes, Curt part 55317 is designed for Dodge Dakota. It is also compatible with Dodge Pickup, Dodge Ram Fullsize, Dodge Ramcharger, and Plymouth Trailduster.
Yes, the 55317 T-connector is compatible with Dodge Ram Fullsize, as well as Dodge Dakota, Dodge Pickup, Dodge Ramcharger, and Plymouth Trailduster.
The 55317 T-connector includes cable ties to secure loose wires. The manual does not specify the quantity of cable ties or list any other included hardware.
The taillight wiring harness is located on the driver's side along the frame rail. You will find connectors that match those on the T-connector.
On the driver's side, separate the vehicle's taillight connectors carefully without damaging the locking tabs. Insert the T-connector end with the yellow wire between the separated connectors.
Route the T-connector end with the green wire to the passenger side, taking care to avoid areas that may cut or pinch the wire. Separate the passenger-side taillight connectors without damaging the locking tabs, then insert the green wire T-connector end between them, as you did on the driver's side.
Route the 4-flat connector to the center of the vehicle and secure it in a convenient location that is out of the way. Use the cable ties provided to secure any loose wires.
Before drilling, verify that miscellaneous items hidden behind or under any surface are not present. This will avoid damage to hidden components and prevent personal injury.
The manual identifies the T-connector as having a yellow wire end for the driver's side and a green wire end for the passenger side, but does not specify which trailer light functions (brake, turn, ground, etc.) these wires control. Consult the vehicle's wiring diagram or contact Curt Manufacturing for this information.
When separating the vehicle's connectors, handle them carefully and do not damage the locking tabs. Route the T-connector wires to avoid areas that may cut or pinch them.
The 55317 is designed for Dodge Dakota, Dodge Pickup, Dodge Ram Fullsize, Dodge Ramcharger, and Plymouth Trailduster.
The 55317 includes cable ties to secure loose wires. No other hardware or tools are listed in the manual.
The manual includes a warning to verify hidden items before drilling, but does not describe any drilling procedure. Contact Curt Manufacturing or consult your vehicle's service manual to confirm whether drilling is required for your specific application.
Locate the taillight connectors on the driver's side frame rail. Separate them carefully without damaging the locking tabs, insert the yellow wire T-connector end between them, then repeat on the passenger side with the green wire T-connector end. Route the 4-flat to the vehicle centre and secure with the provided cable ties.
The 4-way flat electrical adapter converts a vehicle's 4-way flat trailer connector to other trailer connector types (6-way round, 7-way RV blade, or dual 4-way flat). This allows you to tow trailers with different connector styles. Single-output models (57184, 57183, 57185, 57626, 57676) convert to one connector type; dual-output models (57604, 57624, 57672, 57674, 57102) provide two different connector outputs simultaneously.
Yes. Your vehicle must be equipped with a 4-way flat trailer connector. If your vehicle does not have one, you will need to install a custom wiring harness or other 4-way flat trailer connector before installing this adapter.
Both convert a 4-way flat connector to a 7-way RV blade. The difference is that 57185 includes a mounting bracket, while 57184 does not.
Both convert a 4-way flat connector to a 6-way round. The difference is that 57626 includes a mounting bracket, while 57183 does not.
Curt offers three dual-output models that provide both a 4-way flat and a 7-way RV blade output: part numbers 57672, 57674, and 57102. All three include a mounting bracket.
Curt offers two dual-output models that provide both a 4-way flat and a 6-way round output: part numbers 57604 and 57624. Both include a mounting bracket.
You will need: a 1/8" drill bit, drill, Phillips screwdriver, wire stripper, cutting tool, terminal crimpers, and a test light. The manual also lists three self-tapping screws (#10 - 1/2") as required, though these are not included with the product.
No. The three self-tapping screws (#10 - 1/2") used to attach the mounting bracket are not included and must be purchased separately.
Mount the combination harness in a location on the tow vehicle that is within reach of the trailer's wiring harness and near the center of the vehicle. The mounting bracket (if included) should be attached to the vehicle's bumper or other suitable surface.
Yes. You must drill two 1/8" holes: one for the grounding point and one (or more) for the mounting bracket. Before drilling, you must check for brake lines, fuel lines, wiring and other components that may be hidden behind or under the surface to avoid damage.
No. You must never attach the mounting bracket directly to the hitch by cutting, welding or drilling into the hitch. Mount it to the vehicle's bumper or other suitable surface instead.
The adapter uses four wires: Yellow (auxiliary or back-up lights), Blue (electric brakes), Black (positive power with appropriate inline fuse), and White (ground). All wires except black and white must be connected using 12 gauge (minimum) wire and butt connectors to the appropriate vehicle functions.
The white wire is the ground connection. It must be attached with a ring terminal to a 1/8" hole drilled in a suitable grounding point on the vehicle using a #10 - 1/2" self-tapping screw. This ground connection is required for the harness to work properly. The white wire on the vehicle's 4-way flat connector does not support the ground (-) functions of the combination harness.
Yes. The black wire (positive power) must be connected with an appropriate inline fuse. The manual does not specify the fuse amperage rating.
Use 12 gauge (minimum) wire for all connections. The manual specifies this minimum gauge for the remaining wires (yellow, blue, and black) when connecting to appropriate vehicle functions.
Failing to properly ground the product can cause loss of warranty, overheating and potential fire. The white wire must be securely attached to a clean grounding point using a #10 - 1/2" self-tapping screw in a 1/8" hole. The area must be clean of dirt, debris or undercoating.
Before drilling, you must check for brake lines, fuel lines, wiring and any other components that may be hidden behind or under the surface. Drilling into these components can cause damage and personal injury.
Do not exceed the product rating or the tow vehicle lamp load rating, whichever is lower. Exceeding either rating can cause damage or unsafe operation.
Confirm proper function with a test light or by using a properly functioning trailer. This verifies that all connections are working correctly before towing.
Secure any loose wires using cable ties or equivalent product to prevent them from moving, catching on components, or becoming damaged.
Your vehicle must have a 4-way flat trailer connector. If it does not, you will need to install a custom wiring harness or other 4-way flat connector first. Check the part number table to confirm the adapter converts to the connector type you need.
You must purchase three #10 - 1/2" self-tapping screws for the mounting bracket. You will also need an appropriate inline fuse for the black (positive power) wire; the manual does not specify the amperage.
Yes, you must drill two 1/8" holes: one for grounding and one for the mounting bracket. Before drilling, check for brake lines, fuel lines and wiring behind the surface. Never drill into the hitch.
Yellow = auxiliary/back-up lights; Blue = electric brakes; Black = positive power (needs inline fuse); White = ground (must be properly grounded or warranty is void and fire risk exists). Use 12 gauge minimum wire and butt connectors.
Proper grounding of the white wire is critical. Failing to ground it properly can cause loss of warranty, overheating and fire. The grounding point must be clean of dirt, debris and undercoating.
Test with a test light or by using a properly functioning trailer to confirm all connections work. Secure loose wires with cable ties.
On Sale Today
Original price was $1,084.60. Current price is $804.36.You save $280.24 (26%)
Free Shipping
Ships free on all orders
 Authorized Dealer
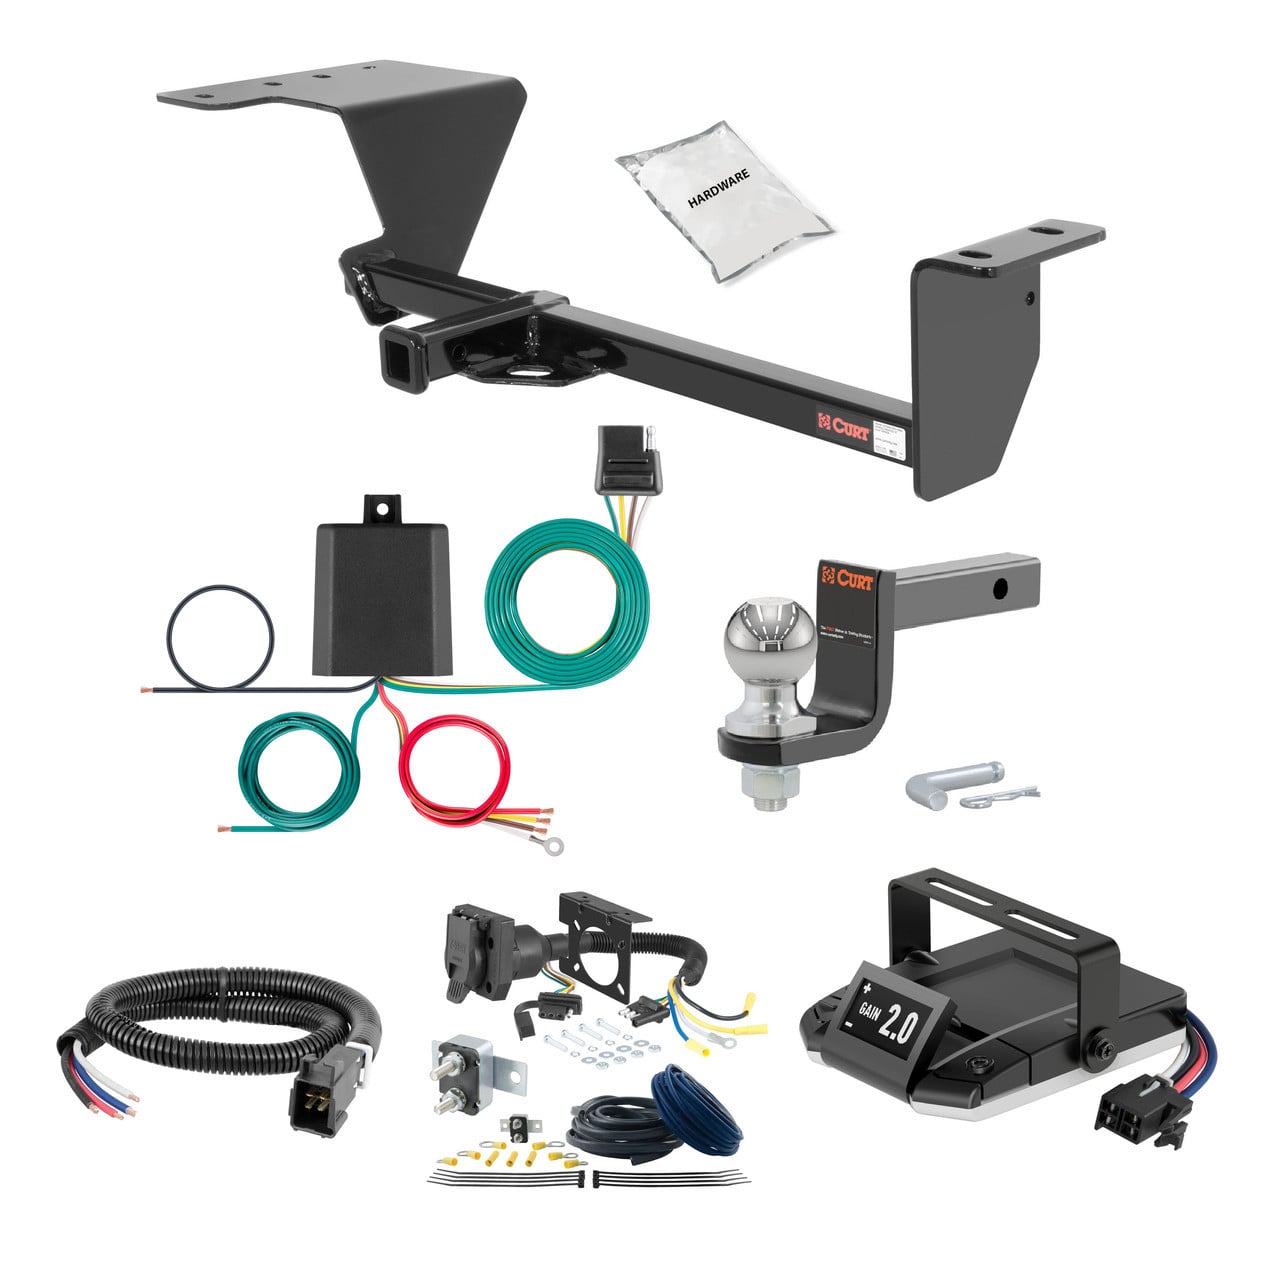
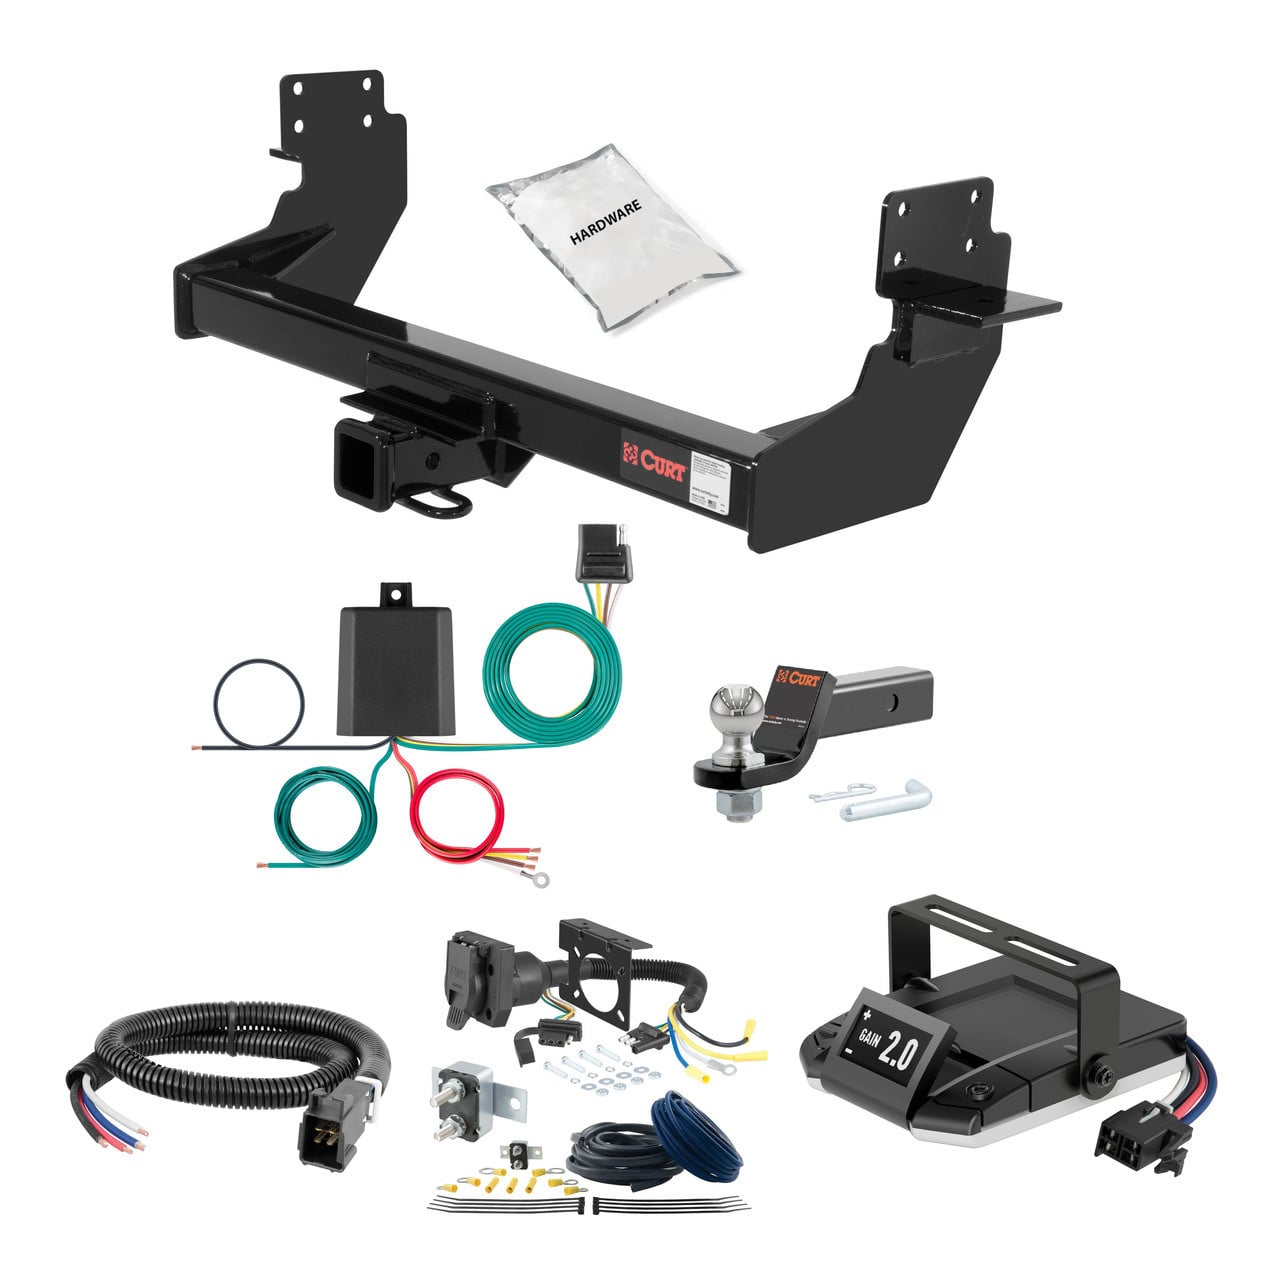


Quick Ship
In stock and ready to ship — order now!
FREE ShippingFREE SHIPPING
Estimated delivery Mon, Nov 23 - Thu, Nov 26
Order before 2 PM EST Monday–Friday for same-day processing
Guaranteed safe & secure checkout
No reviews have been added for this product.