

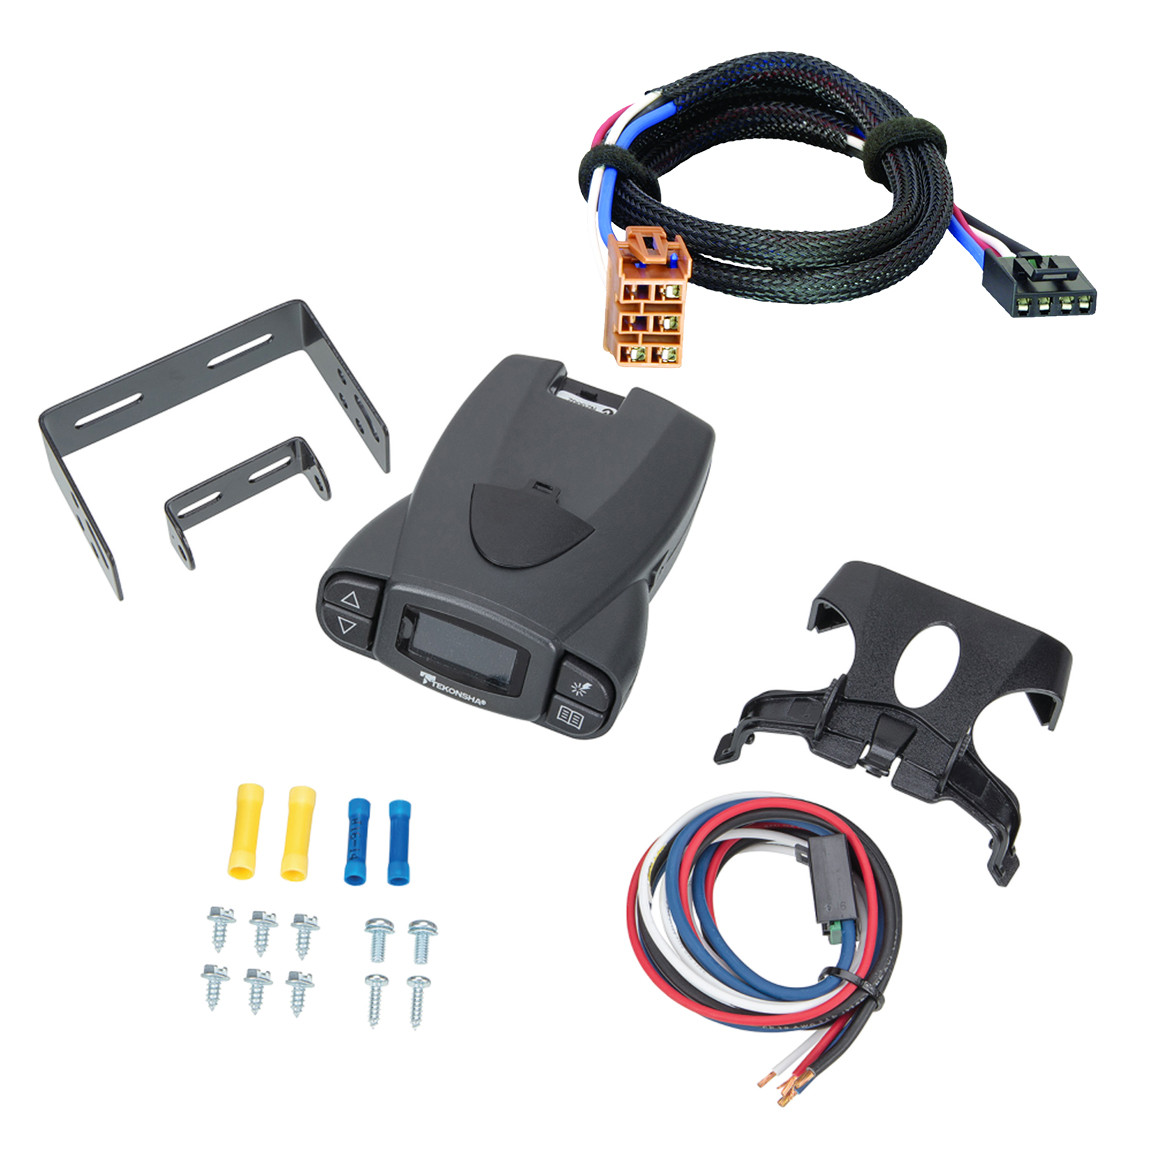
2002-2002 Cadillac Escalade Tekonsha Prodigy P3 Proportional Brake Controller for Trailers with 1 to 4 Axles Black 90195TekonshaOriginal price was $268.75. Current price is $228.76.Out of Stock
View productOur in-house experts typically reply within one business day.

Tekonsha
Verify Fitment
Select your vehicle to confirm this part fits.



Always the correct part
We know our products
Quality Products
Free Shipping!
Always the correct part
We know our products
Quality Products
Free Shipping!

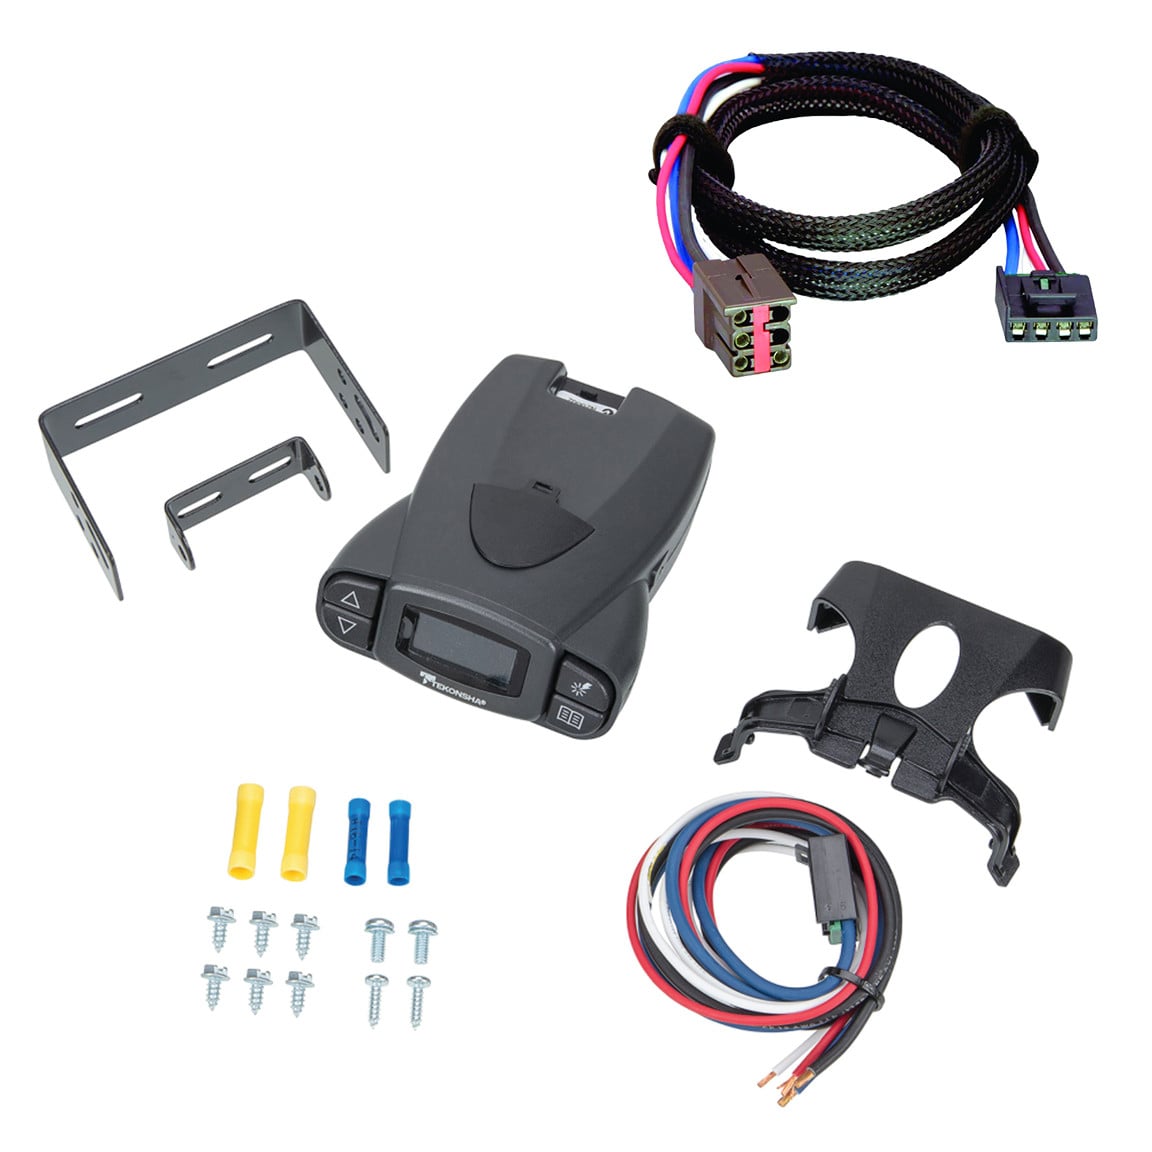
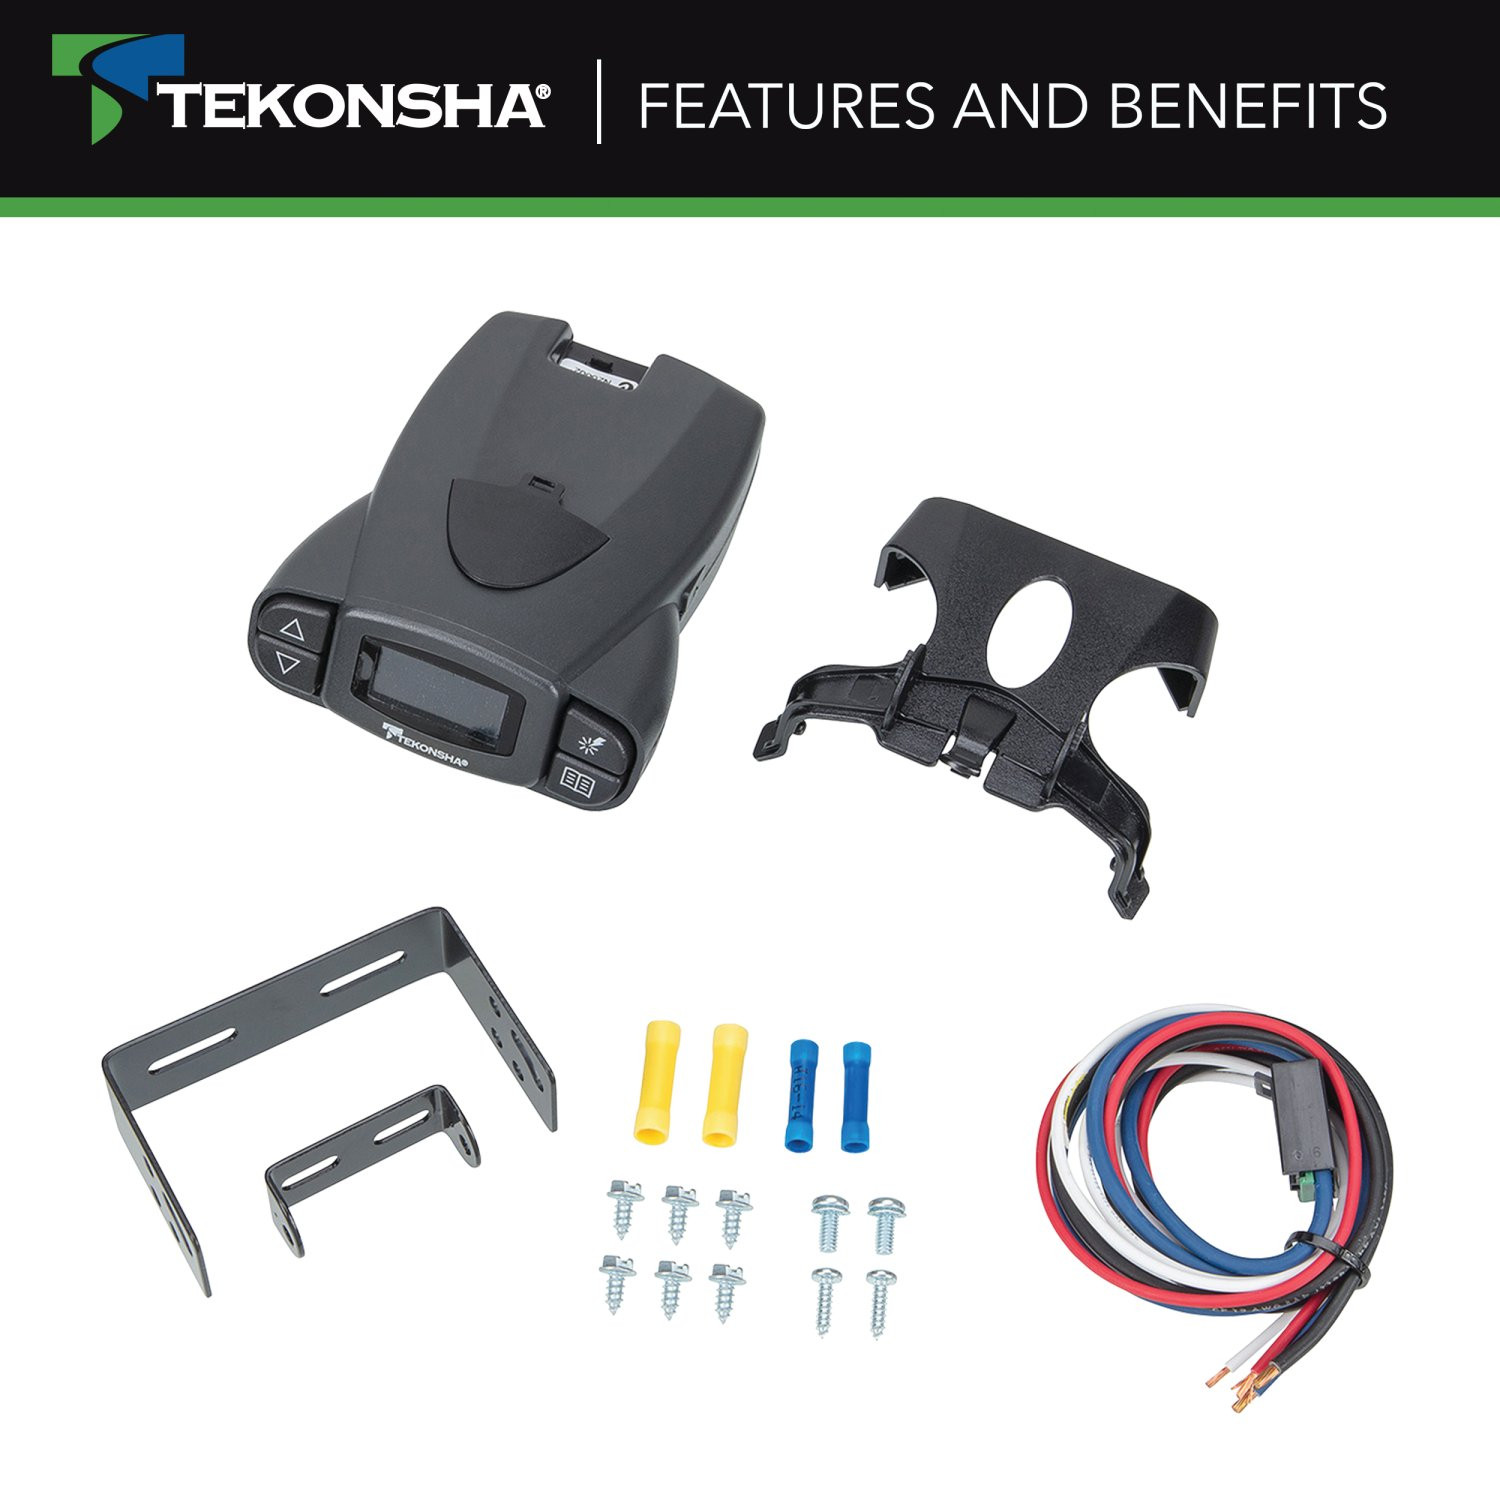
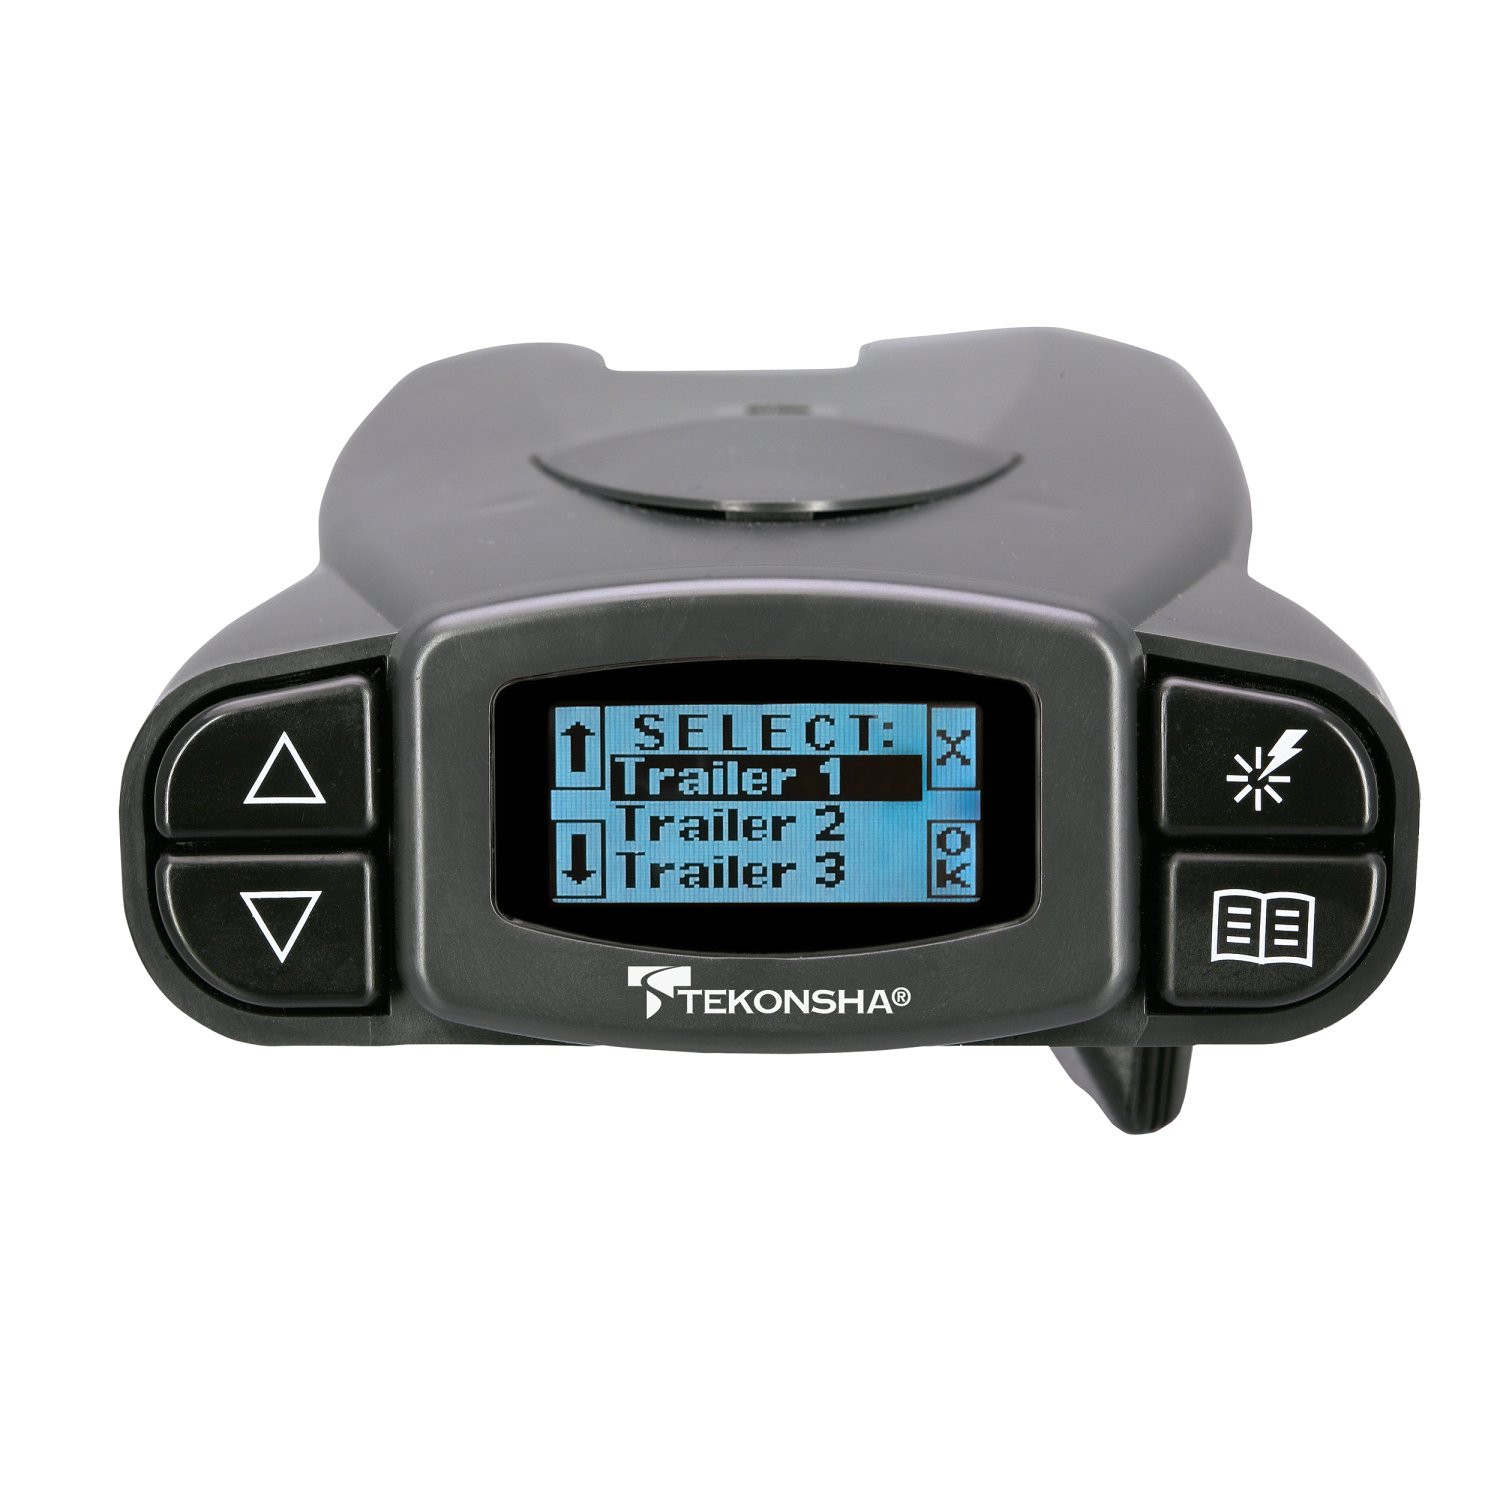
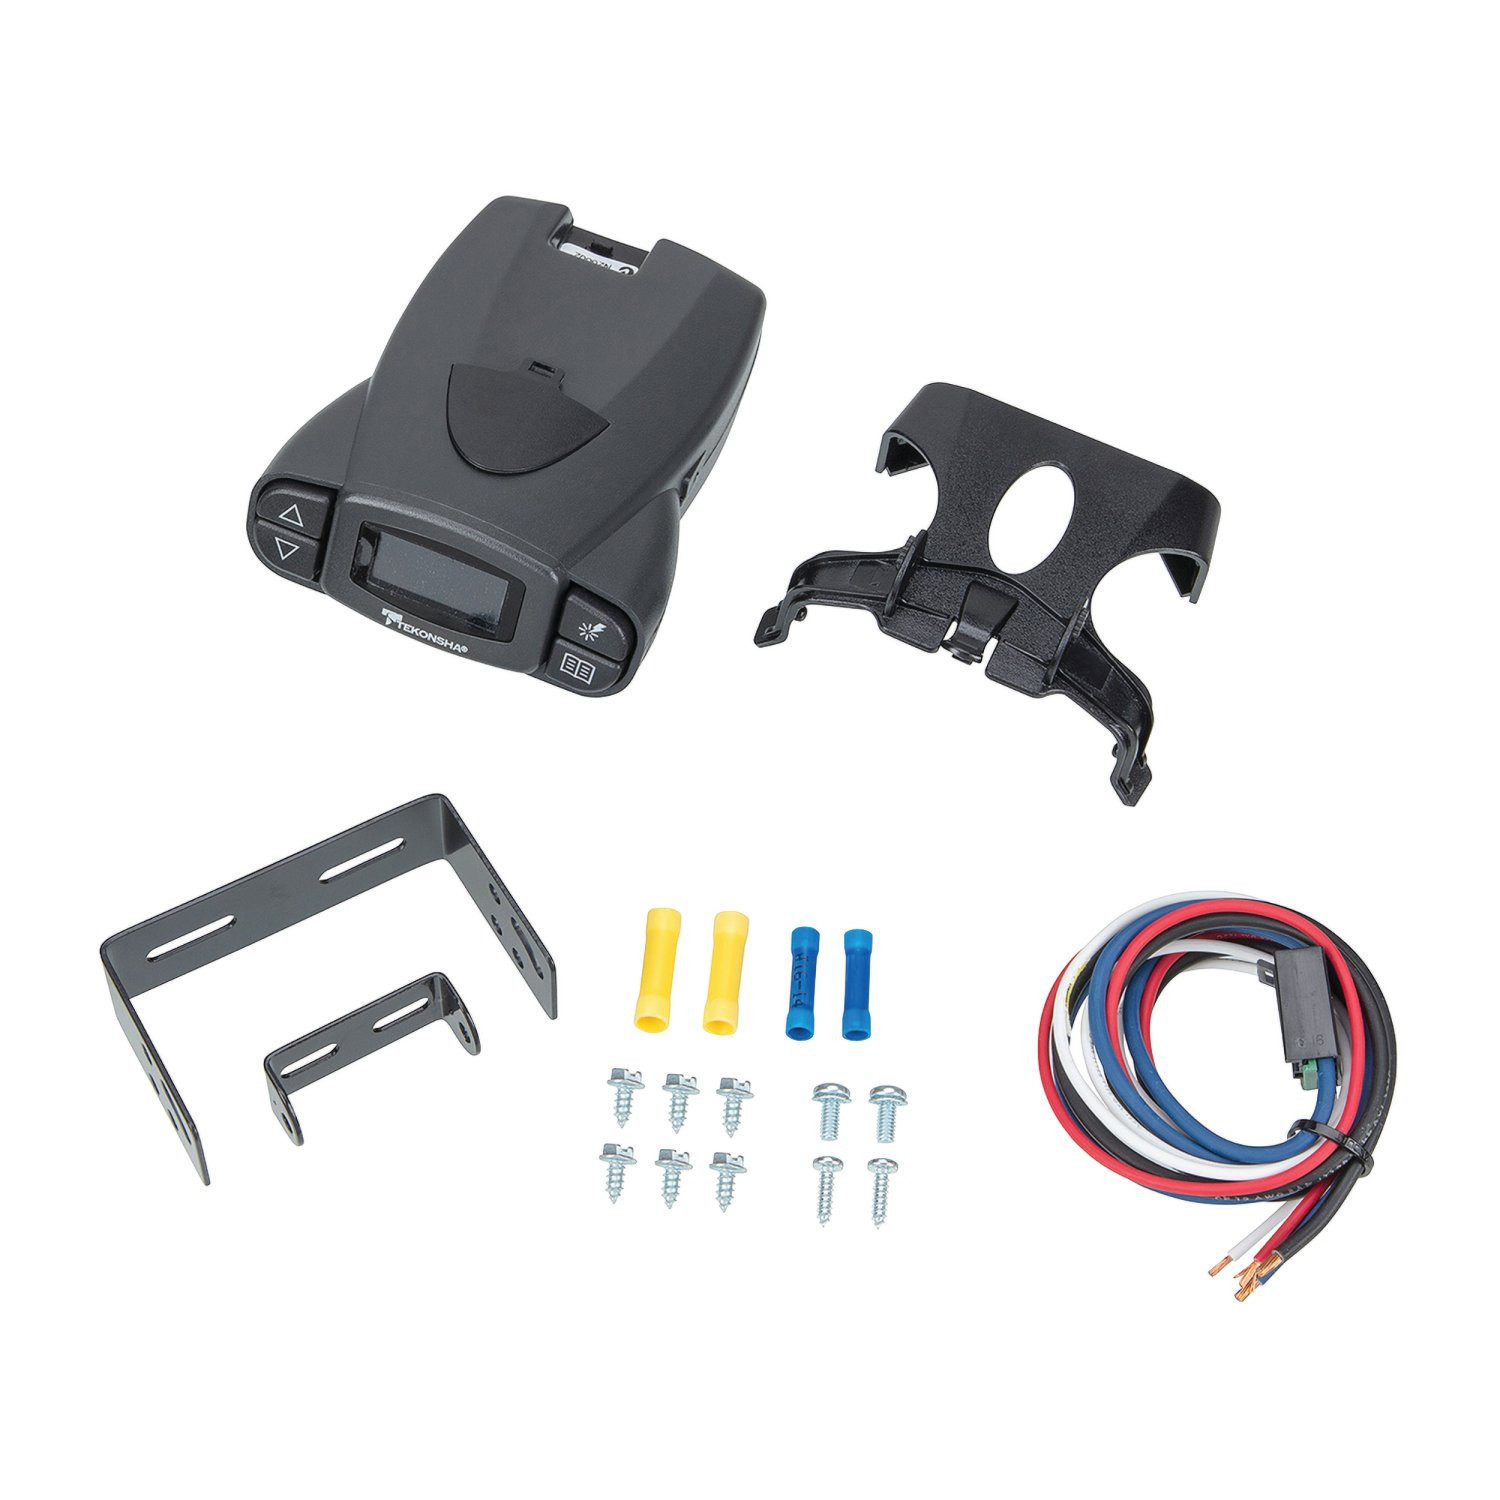
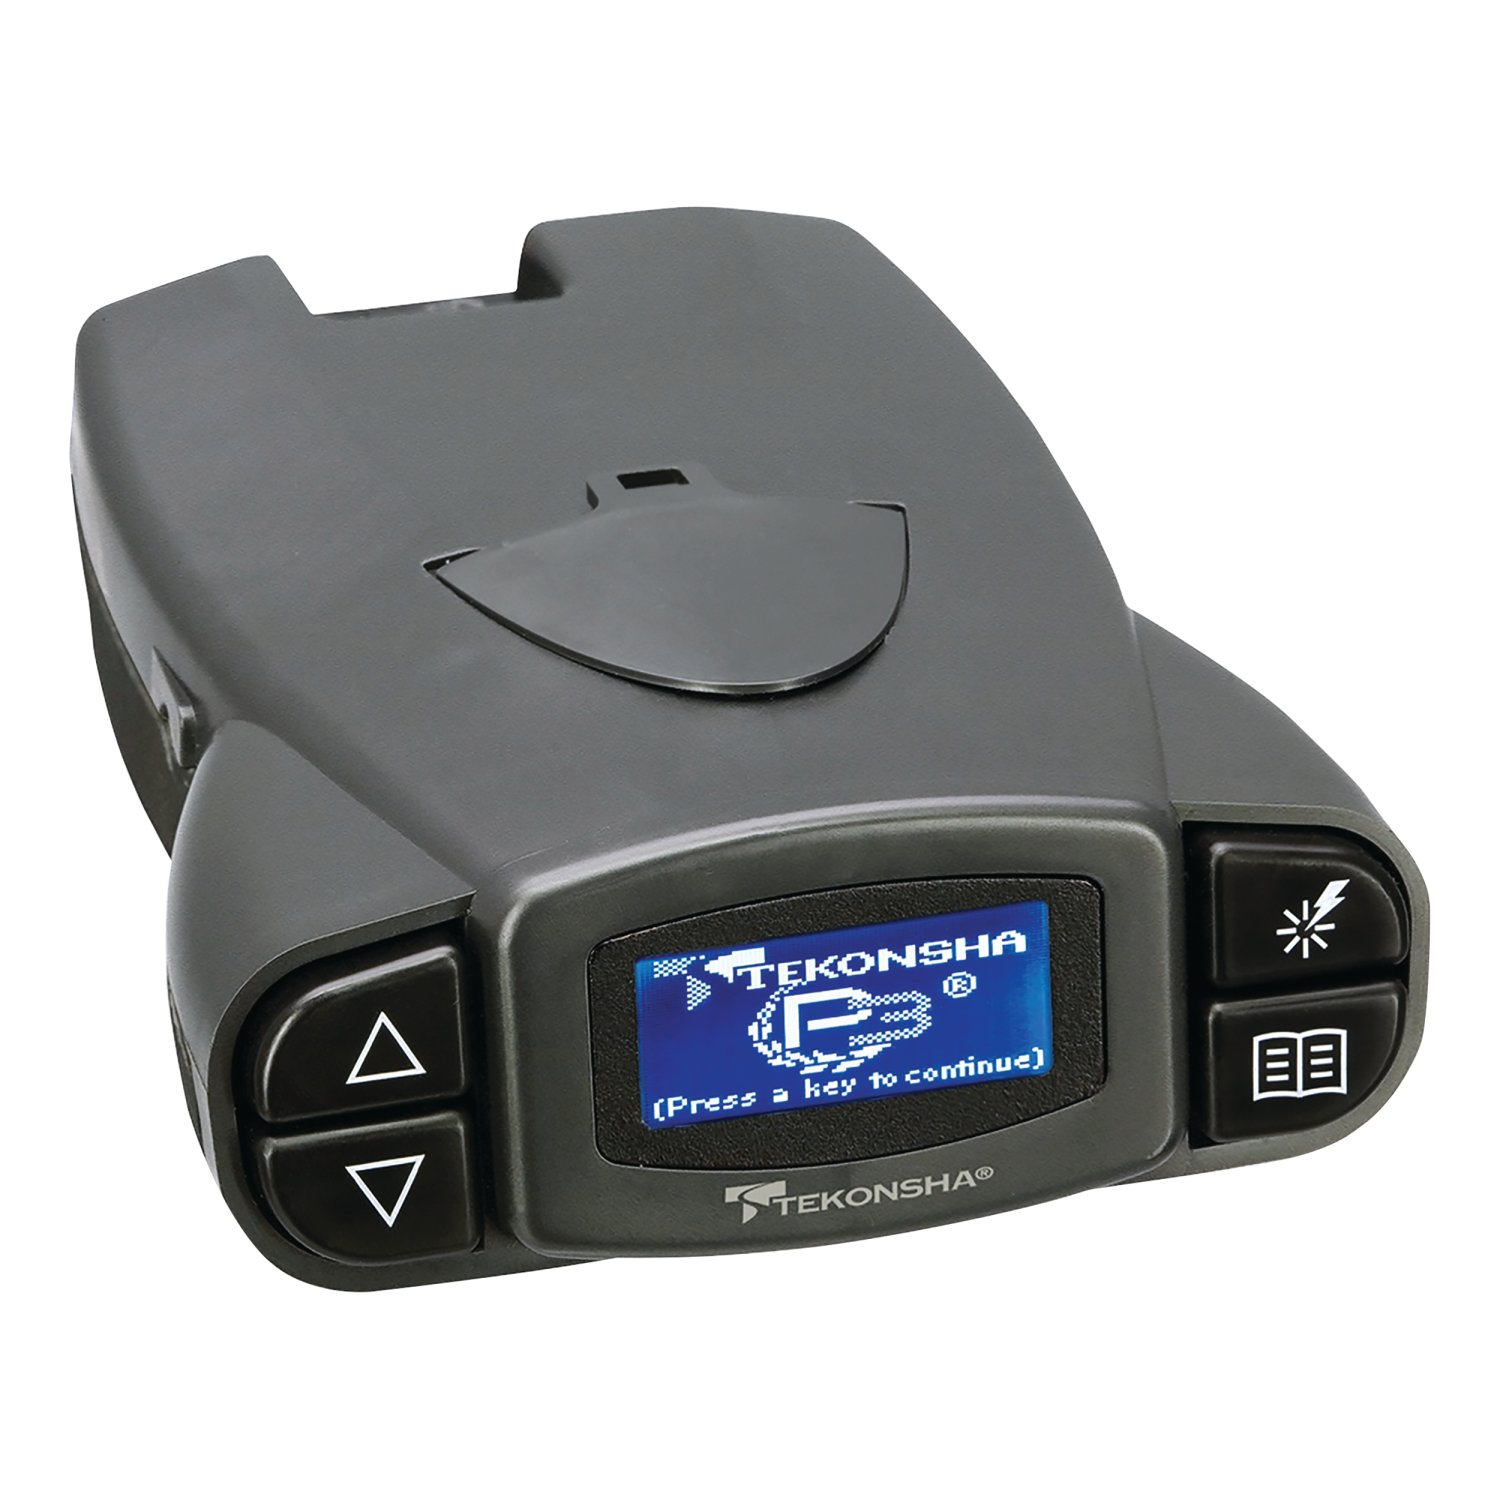
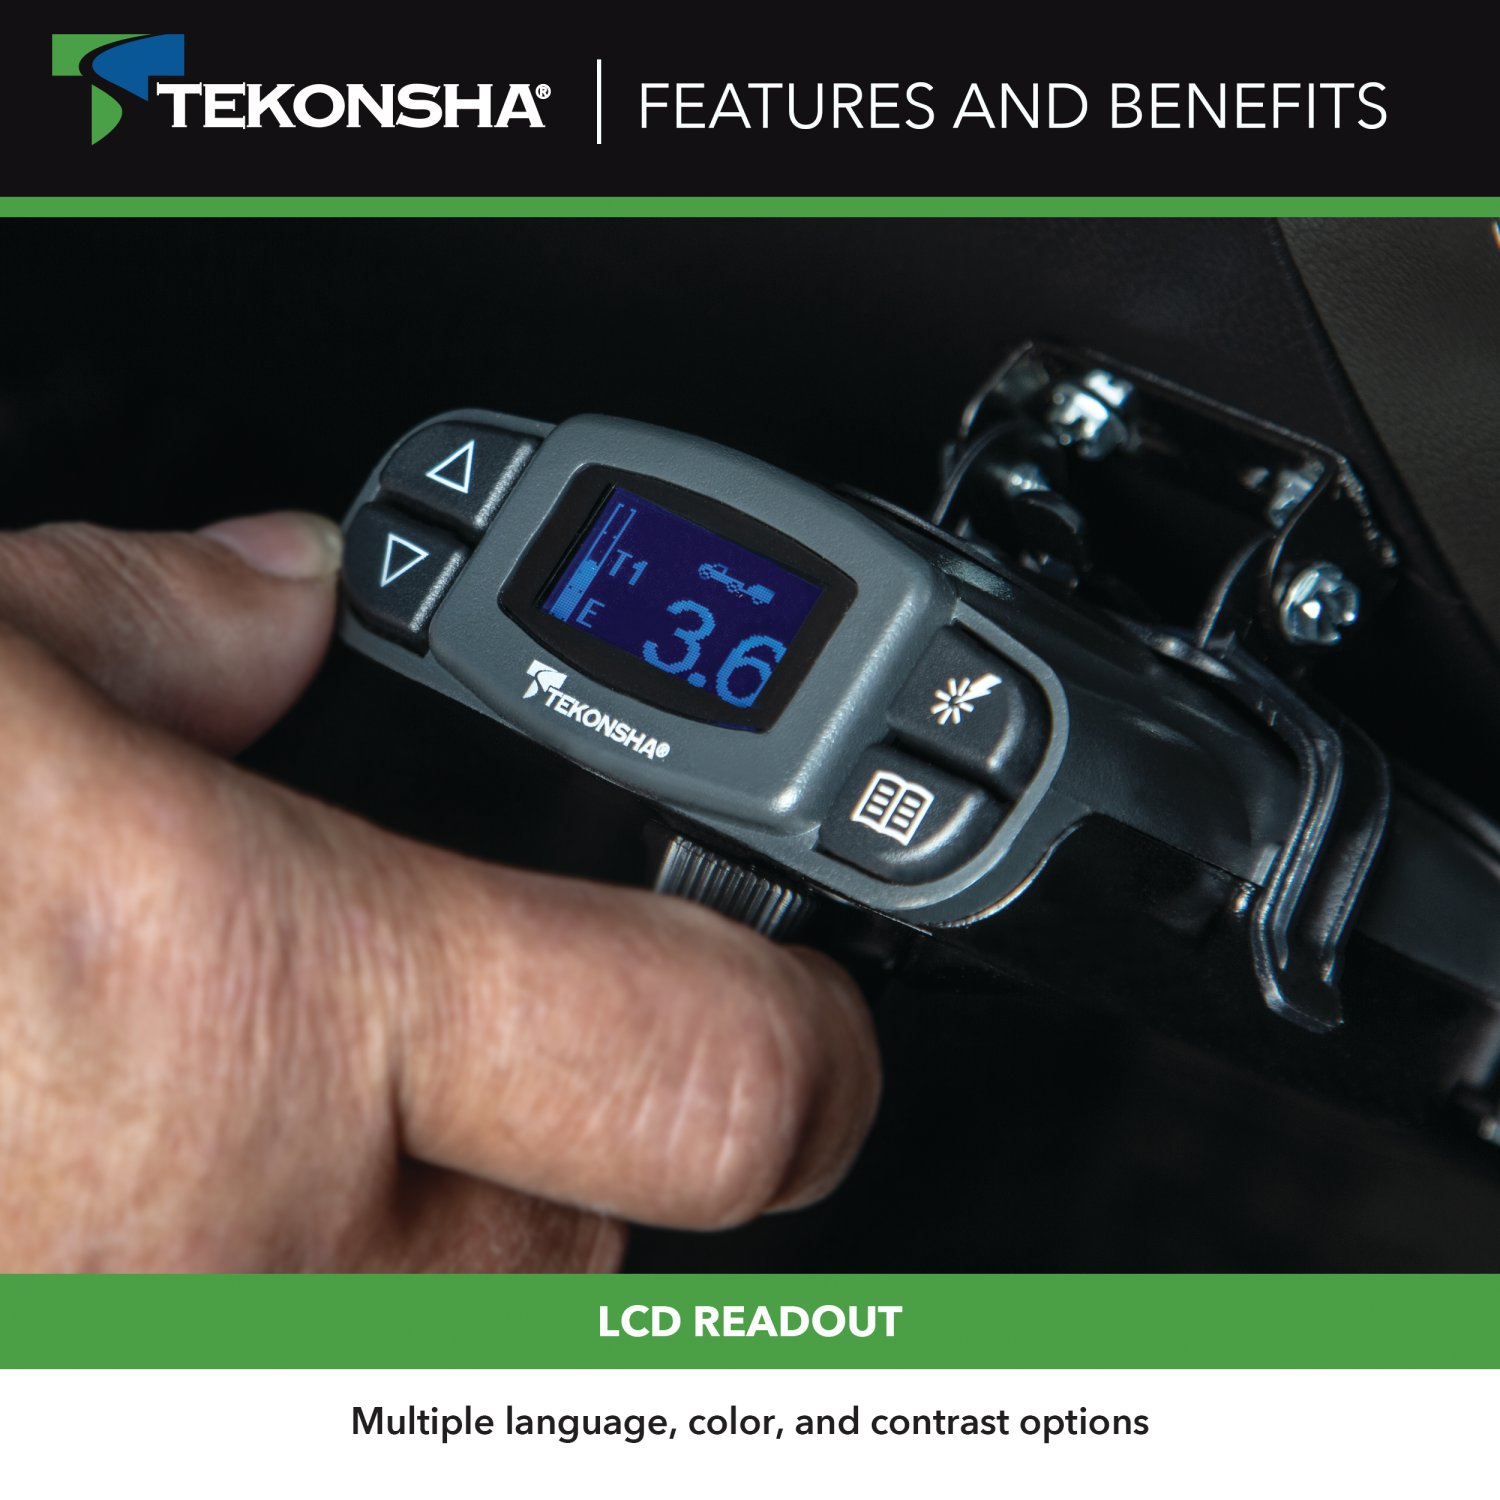
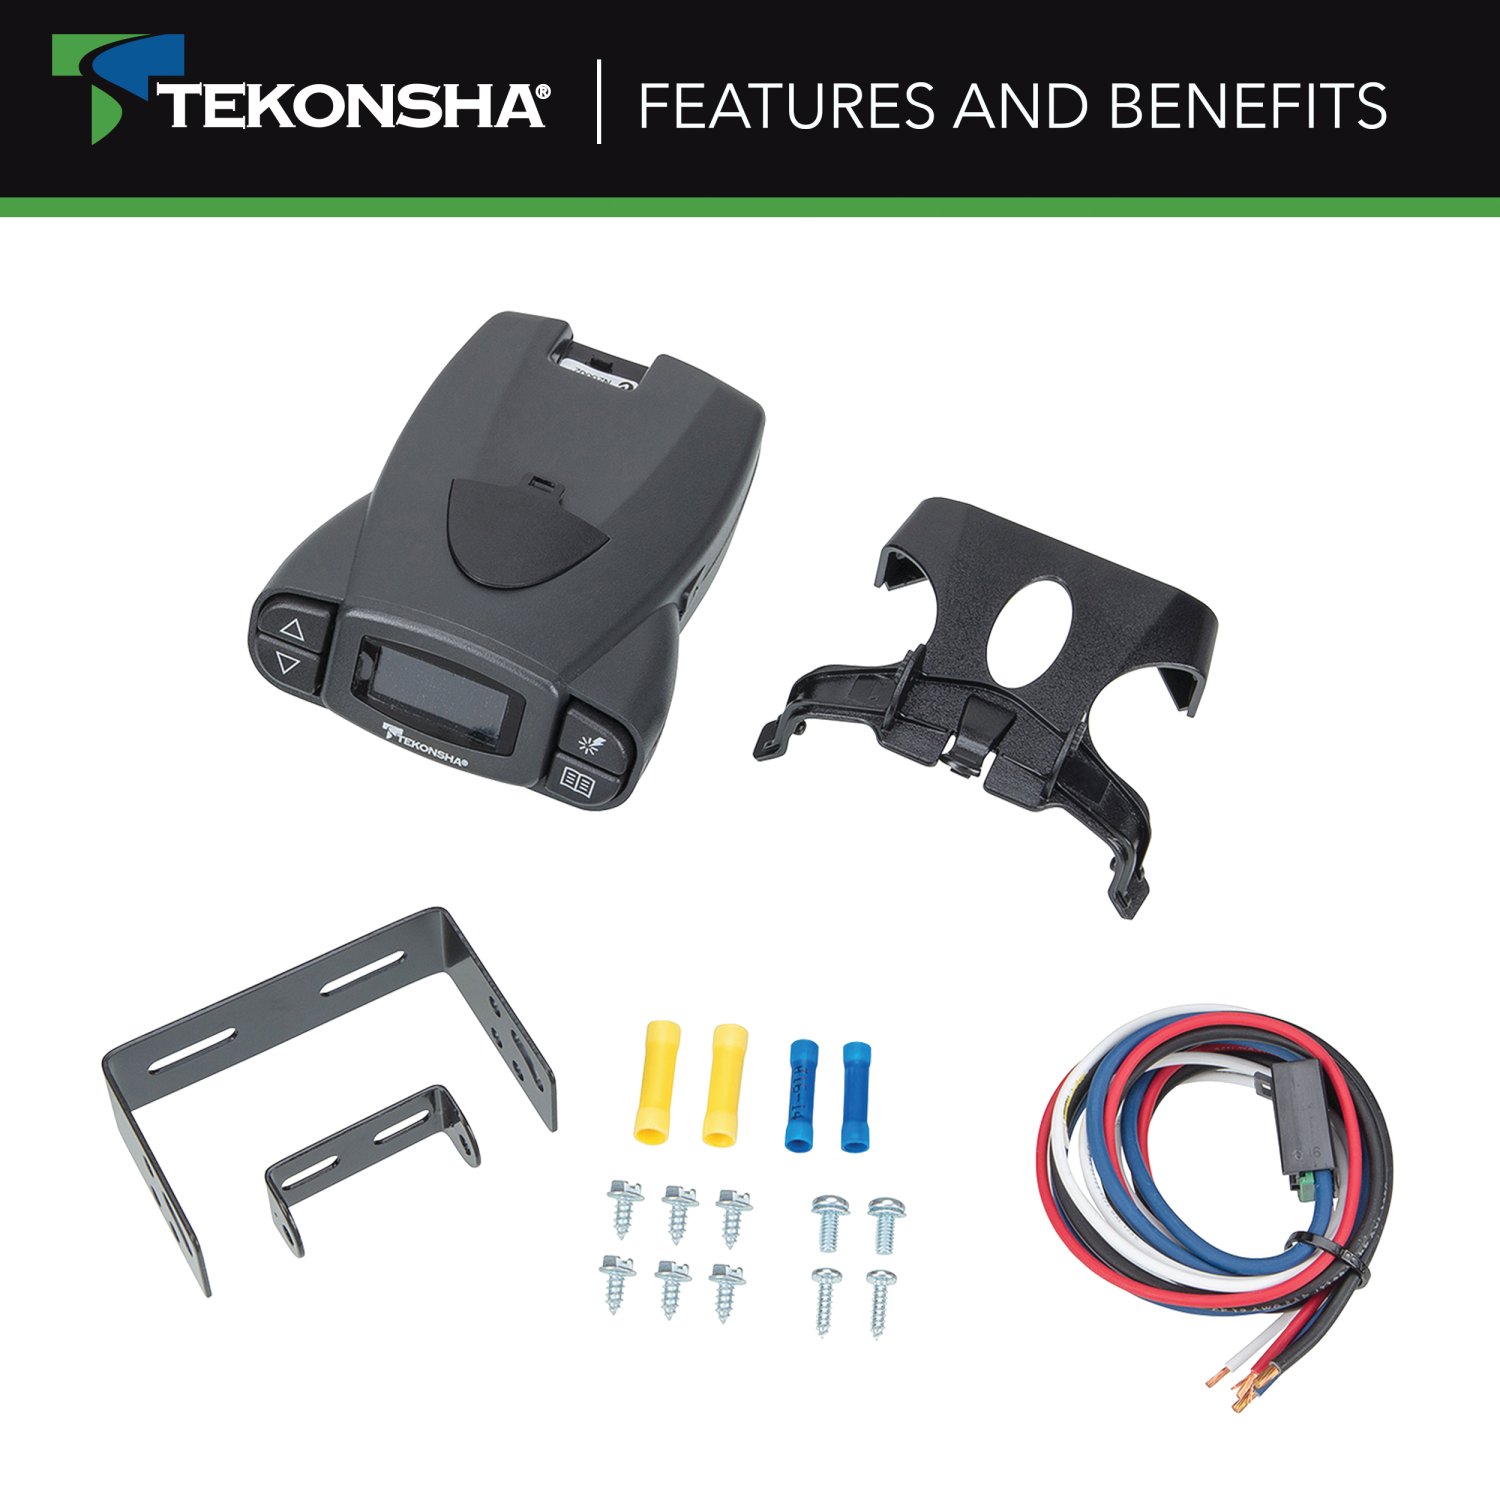
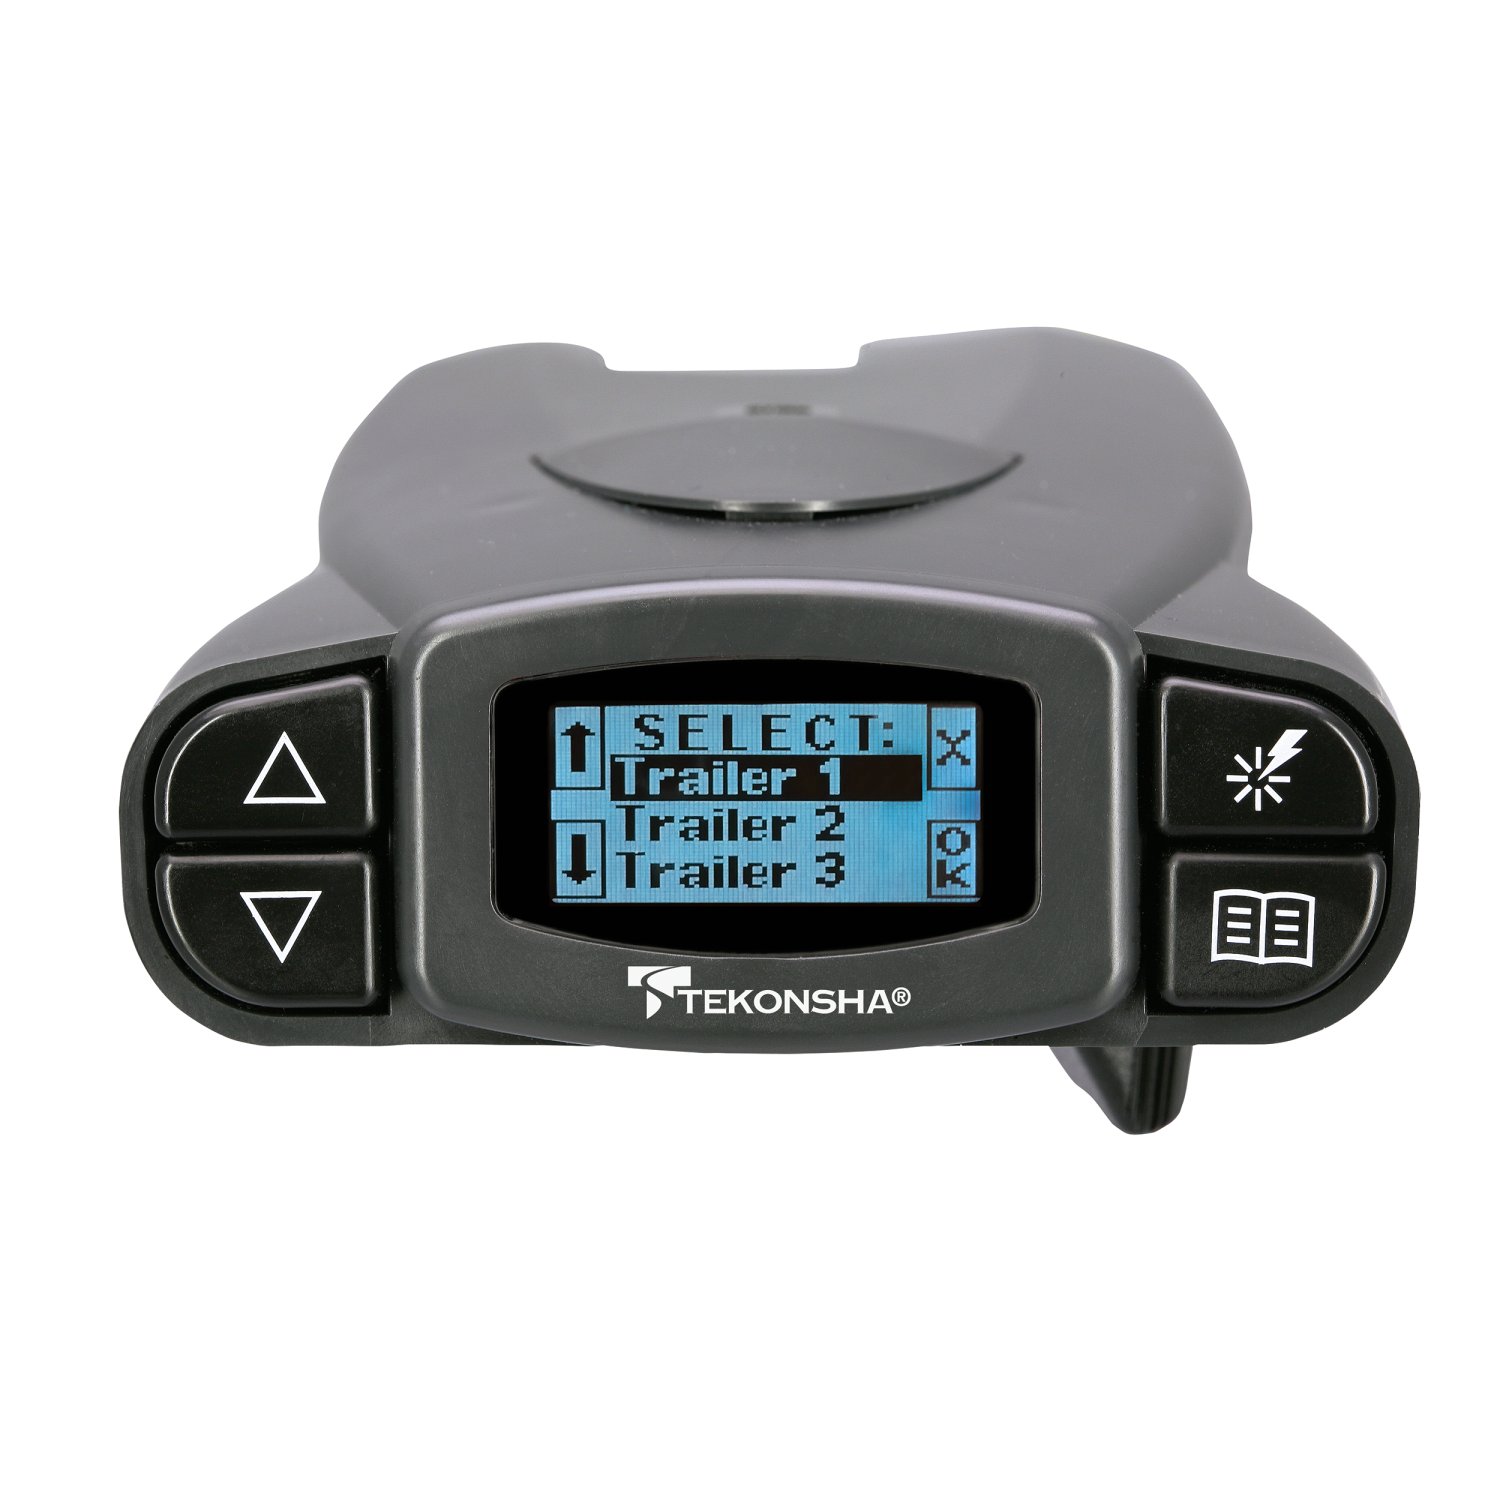
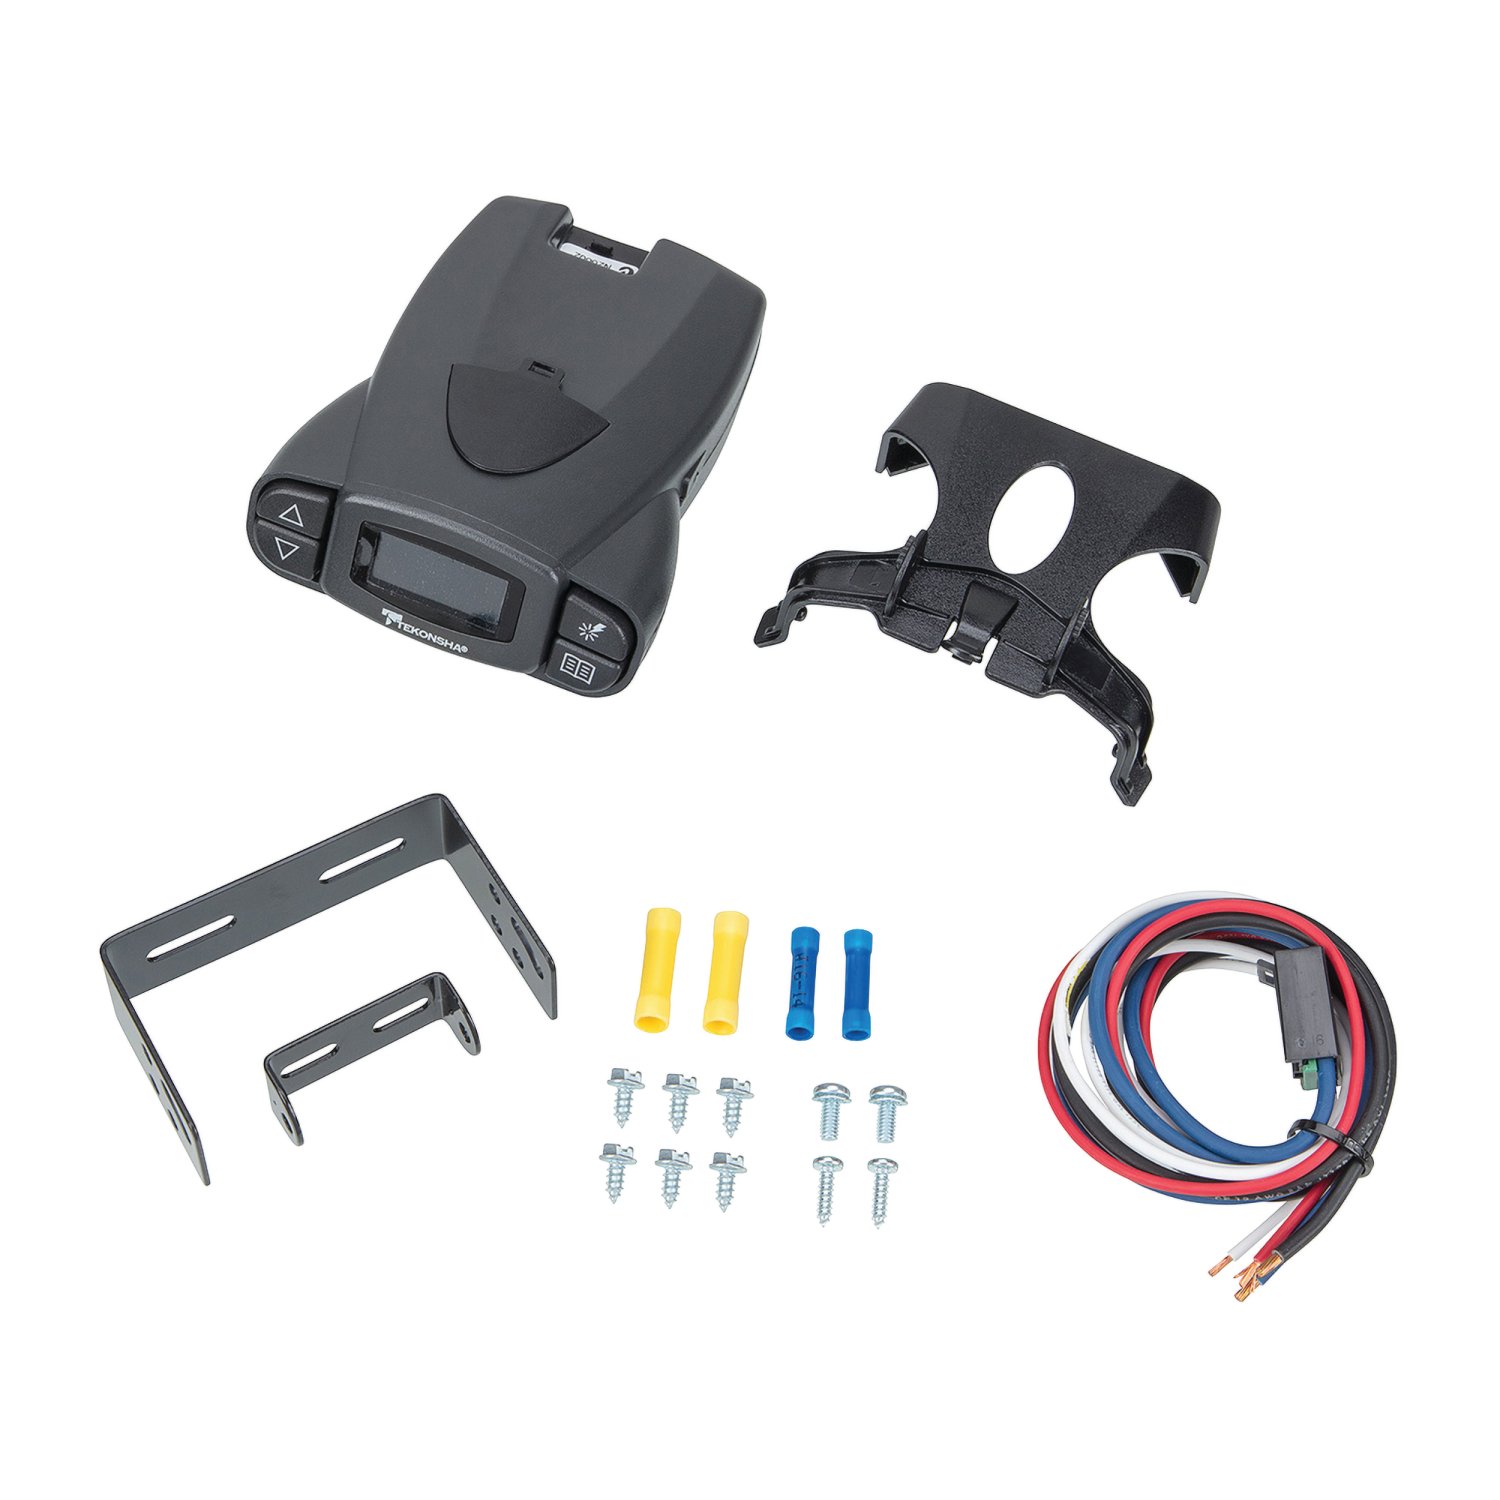
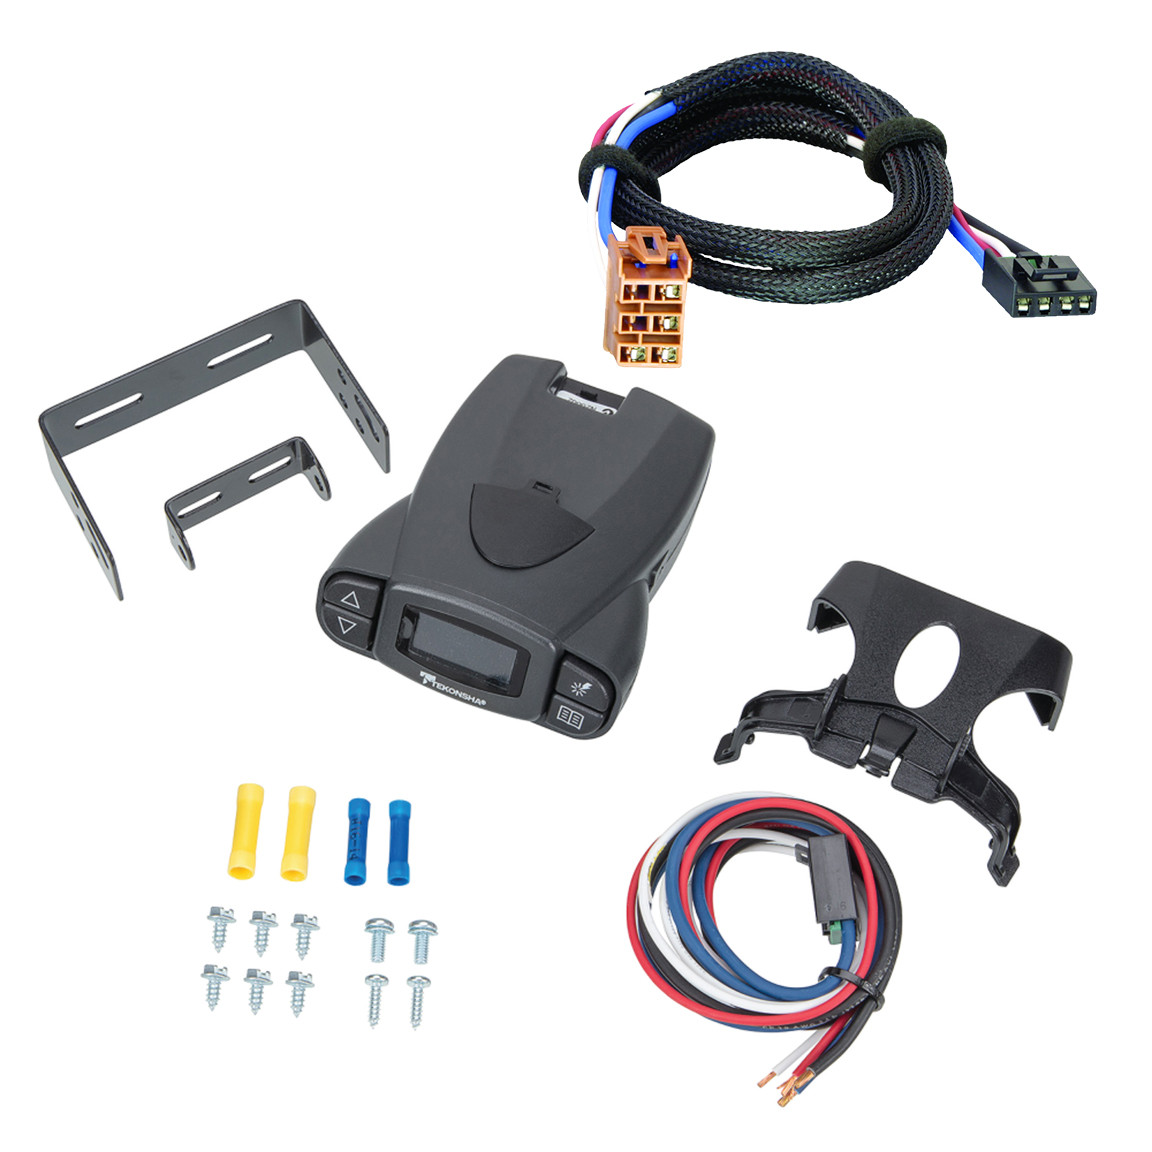
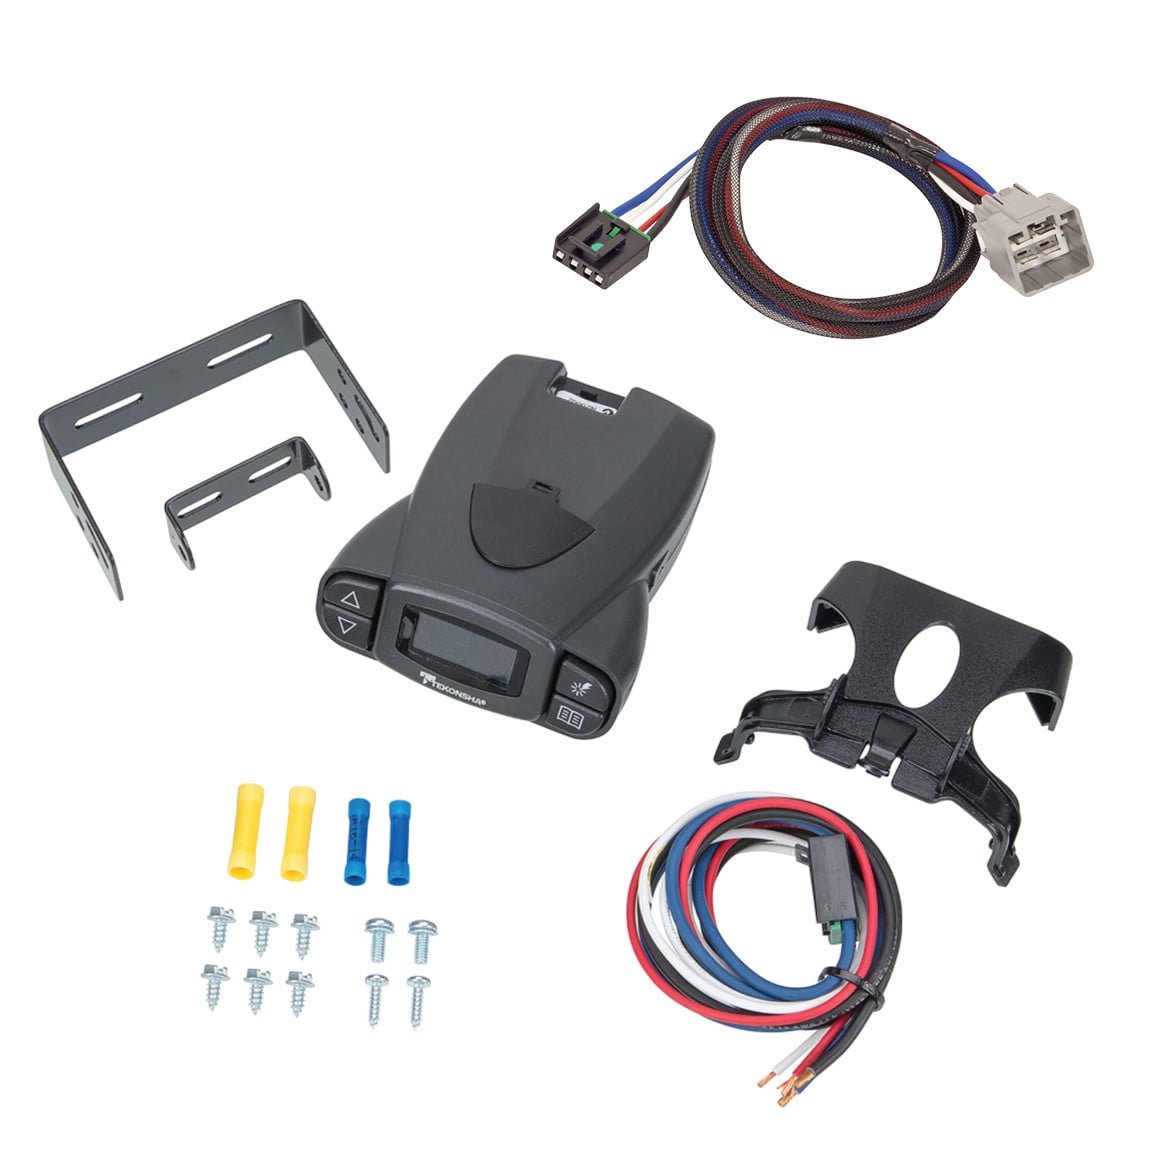
The Tekonsha Prodigy P3 electric trailer brake controller is the epitome of excellence when it comes to trailer braking. As one of the most asked for units on the market, this proportional brake controller utilizes primary sensor technology to provide a smooth braking response in any stopping situation. With up-front push-button controls and a distinct, tri-lingual, multi-color LCD display, this intelligent brake controller makes it easy to adjust trailer braking preferences and monitor braking activity. The Prodigy P3 shares many of the same great features as the Prodigy P2, including a power output button to quickly and easily set your desired braking power, a boost option that lets you apply up to three levels of additional trailer braking power, especially when hauling heavier loads, and manual override. You can also choose between electric or electric over hydraulic braking, and more, with just the push of a button! What sets the P3 apart is its storage. With this unit, you have the ability to create and store up to five trailer settings and/or driver preferences and easily adjust them as needed. This compact, dash-hugging proportional brake control has everything you need to stop safely when on the road. When you?re done towing, the P3?s snap-in dash mounting clip, Plug & Play port for two plug adapters, and removeable electrical connector allow the unit to be quickly stored. The Prodigy P3 works with trailers with 1-4 axles, comes with all the mounting hardware needed for installation, and is backed by a limited lifetime warranty.
| BRAND: | TEKONSHA |
| PART NUMBER: | 90195 |
| WARRANTY: | Limited Lifetime Warranty |
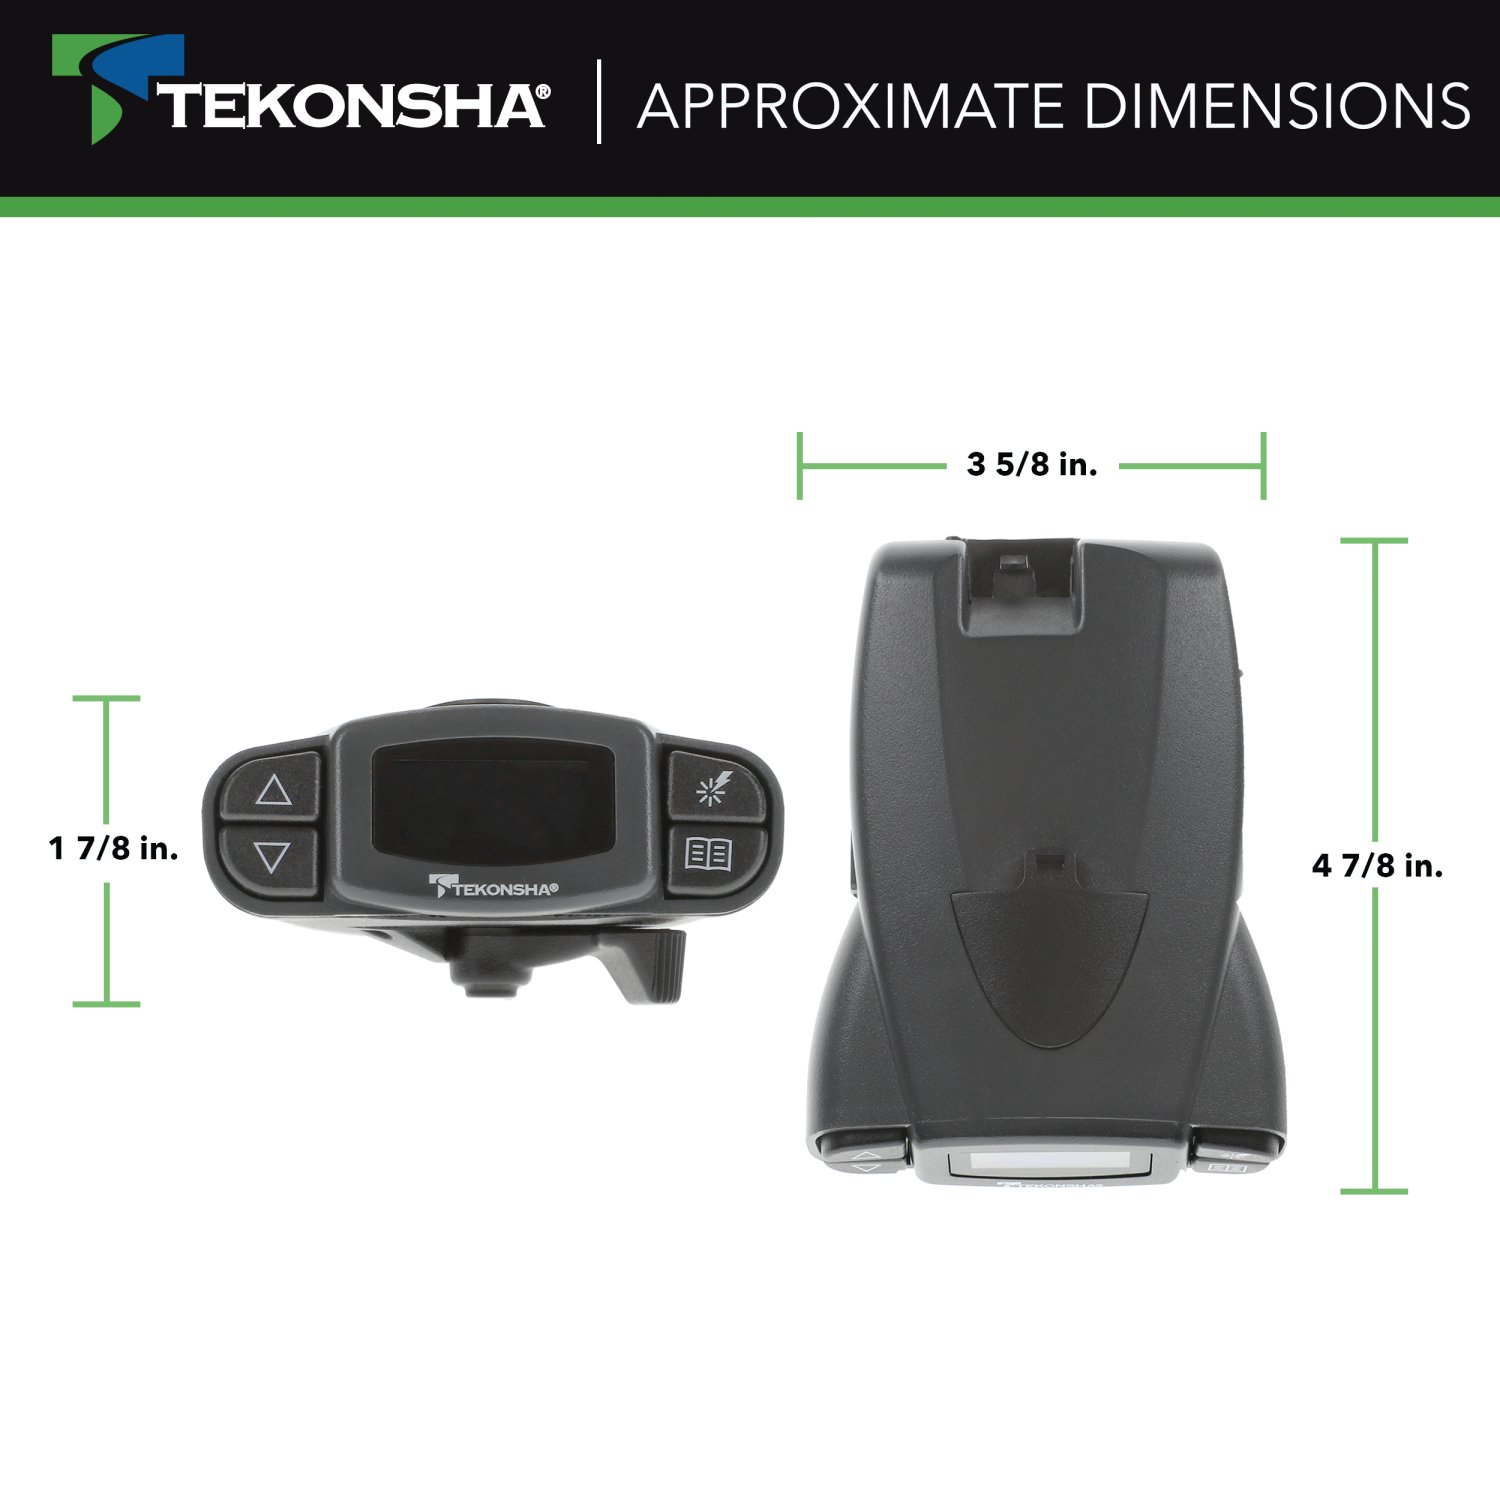
| WEIGHT: | 1.4 LBS |
| MATERIAL: | PLASTIC |
| BRAKE CONTROL TYPE: | PROPORTIONAL |
| TRAILER BRAKE WHEEL QUANTITY: | UP TO EIGHT WHEELS |
| LEVELING CAPABLE: | Self-leveling |
| BRAKE TYPE: | Electric or Electric over Hydraulic |
| Diagnostic Capable: | YES |
| DISPLAY TYPE: | DIGITAL OUTPUT |
| HYDRAULIC CONNECTIONS: | NO |
| SOLID STATE CONSTRUCTION: | YES |
| CIRCUIT BREAKER PROTECTED: | YES |
| HOUSING COLOR: | BLACK |
| BRACKET INCLUDED: | YES |
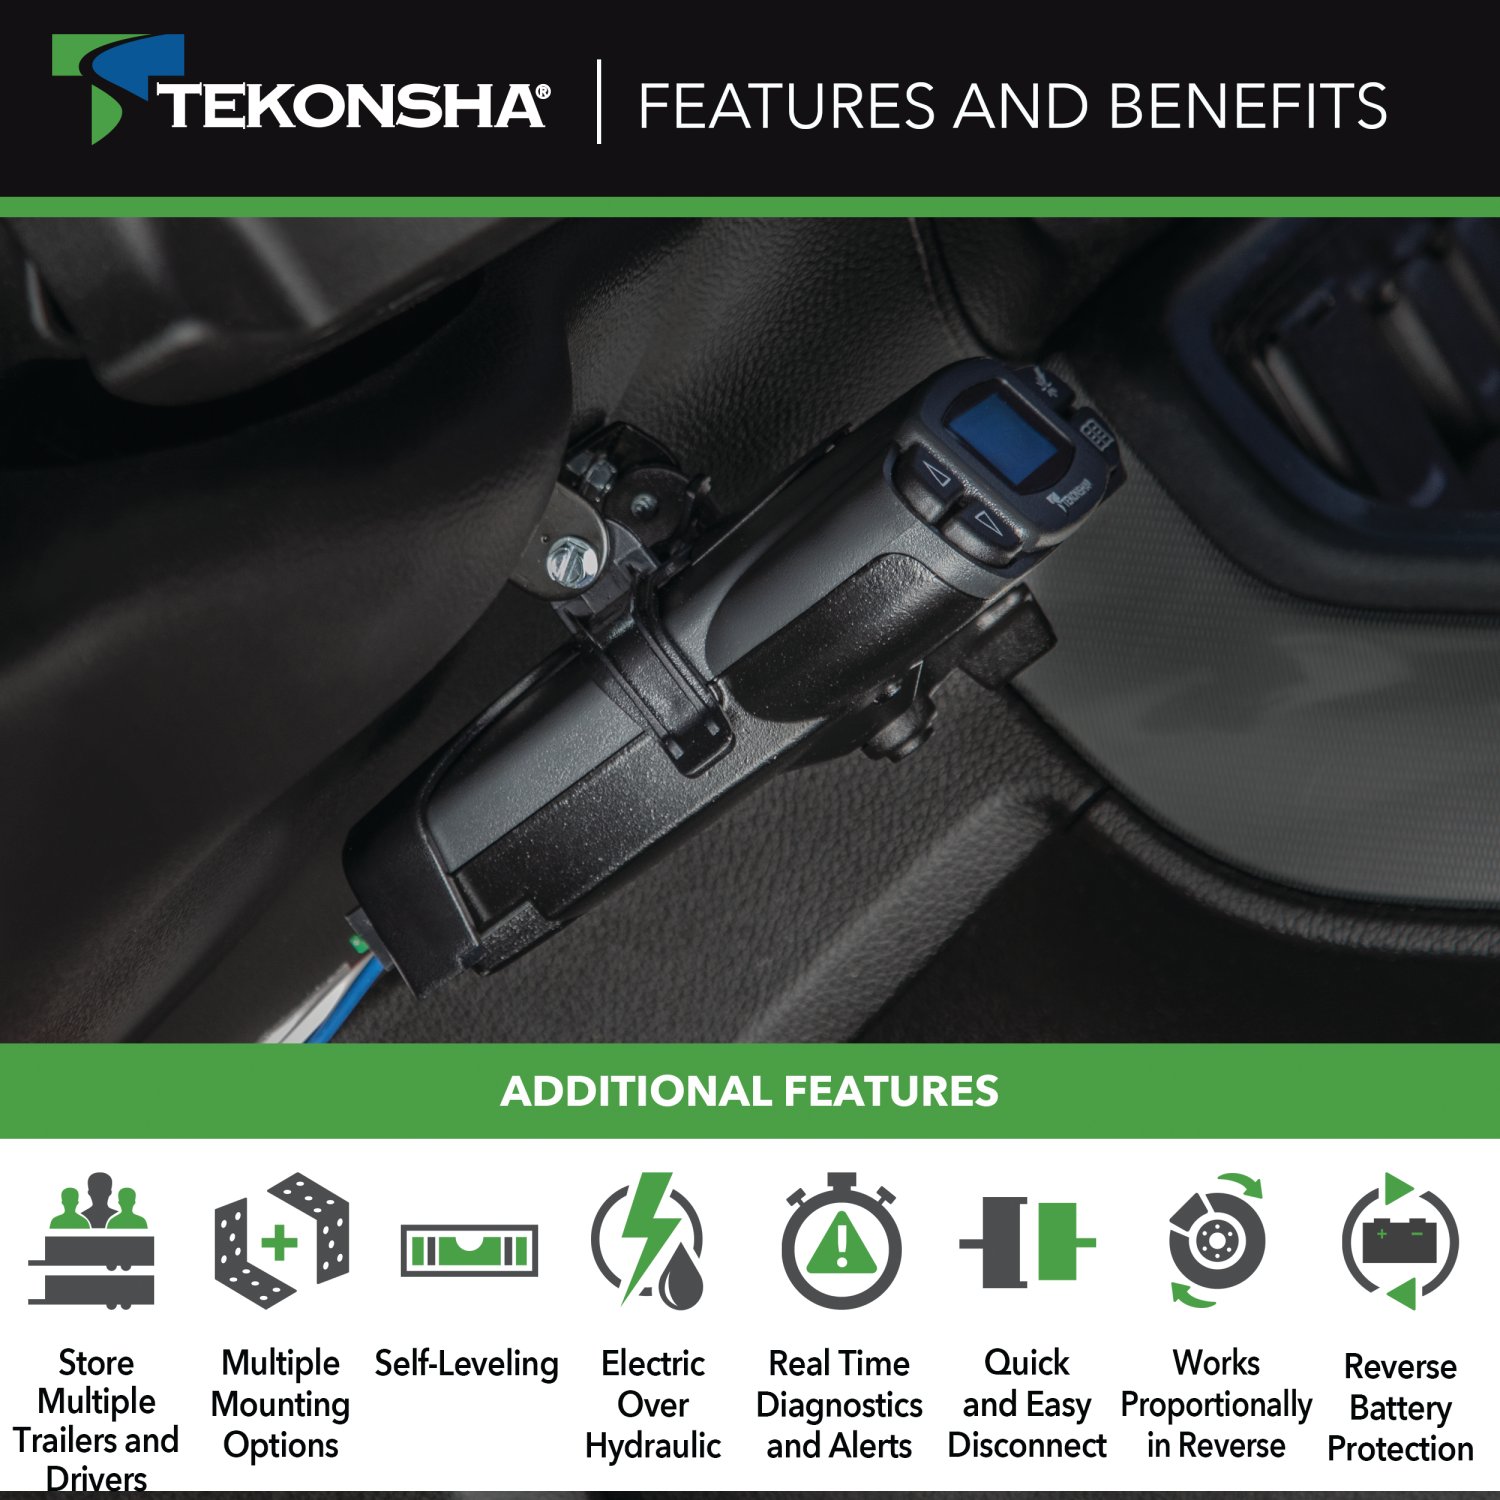

Tekonsha is a leading manufacturer of electronic trailer brake controllers, pioneering the category in the 1970s. The lineup spans proportional units such as the Prodigy P3 and Prodigy iD, time-delayed controllers, the wireless Prodigy RF, plus vehicle-specific wiring harnesses, adapters and trailer brake components engineered for smooth, predictable stopping at any speed.
Tekonsha Engineering Company began in 1964 building RV steps and mirrors. Within a few years it had found its real calling, and by the 1970s Tekonsha was pioneering the manufacture of electronic trailer brake controllers, the product category that still defines the brand. More than half a century later it remains the reference name in trailer braking and is part of the Horizon Global group alongside Reese, Draw-Tite, Fulton, Bulldog and Wesbar.
A brake controller is the component that tells a trailer's electric brakes how hard to work and when, and getting that right is the difference between a controlled stop and a shove from behind. Tekonsha builds both major types. Proportional controllers use an internal accelerometer to sense how quickly the tow vehicle is slowing and apply trailer braking to match, so light braking stays light and hard braking is immediate. Time-delayed controllers ramp to a preset output over a fixed interval, a simpler and more economical approach that suits occasional towing.
The current brake controller range covers most of that ground. The Prodigy iD pairs with a phone through Tekonsha's EDGE technology for setup and monitoring, the P3 offers storable settings for multiple trailers and a trilingual colour LED display, the Prodigy P2 adds a dimmable display and boost mode for heavier loads, and the Voyager keeps operation simple and dependable. The Prodigy RF mounts to the trailer itself and controls wirelessly, which suits rental fleets and drivers who swap tow vehicles.
Installation is supported by vehicle-specific brake control harnesses that plug into a factory connector rather than requiring cut-and-splice wiring, along with mounting brackets and adapters. Matched controller bundles pair a unit with the correct harness. Products are tested to meet and often exceed published industry standards.
Experts available to answer your questions
Call 888-634-94941 compatible vehicles
| Year | Make & Model | Notes |
|---|---|---|
| 2002 - 2010 | Mercury Mountaineer | w/Factory Tow Package |
The 2002-2010 Mercury Mountaineer Tekonsha Prodigy P3 Proportional Brake Controller for Trailers with 1 to 4 Axles Black 90195 (Part #90195 70291) fits 2002-2010 Mercury Mountaineer models. The 2010 model year is the last year covered by this part number. For newer models, check for an updated version.
Yes, the 2002-2010 Mercury Mountaineer Tekonsha Prodigy P3 Proportional Brake Controller for Trailers with 1 to 4 Axles Black 90195 (Part #90195 70291) is designed to fit the 2002-2010 Mercury Mountaineer.
The 2002-2010 Mercury Mountaineer Tekonsha Prodigy P3 Proportional Brake Controller for Trailers with 1 to 4 Axles Black 90195 (Part #90195 70291) fits the following vehicles: 2002-2010 Mercury Mountaineer. Always verify your specific year, make, and model before ordering.
The 2002-2010 Mercury Mountaineer Tekonsha Prodigy P3 Proportional Brake Controller for Trailers with 1 to 4 Axles Black 90195 (Part #90195 70291) Refer to the included instructions for installation details. Basic hand tools are typically all you need.
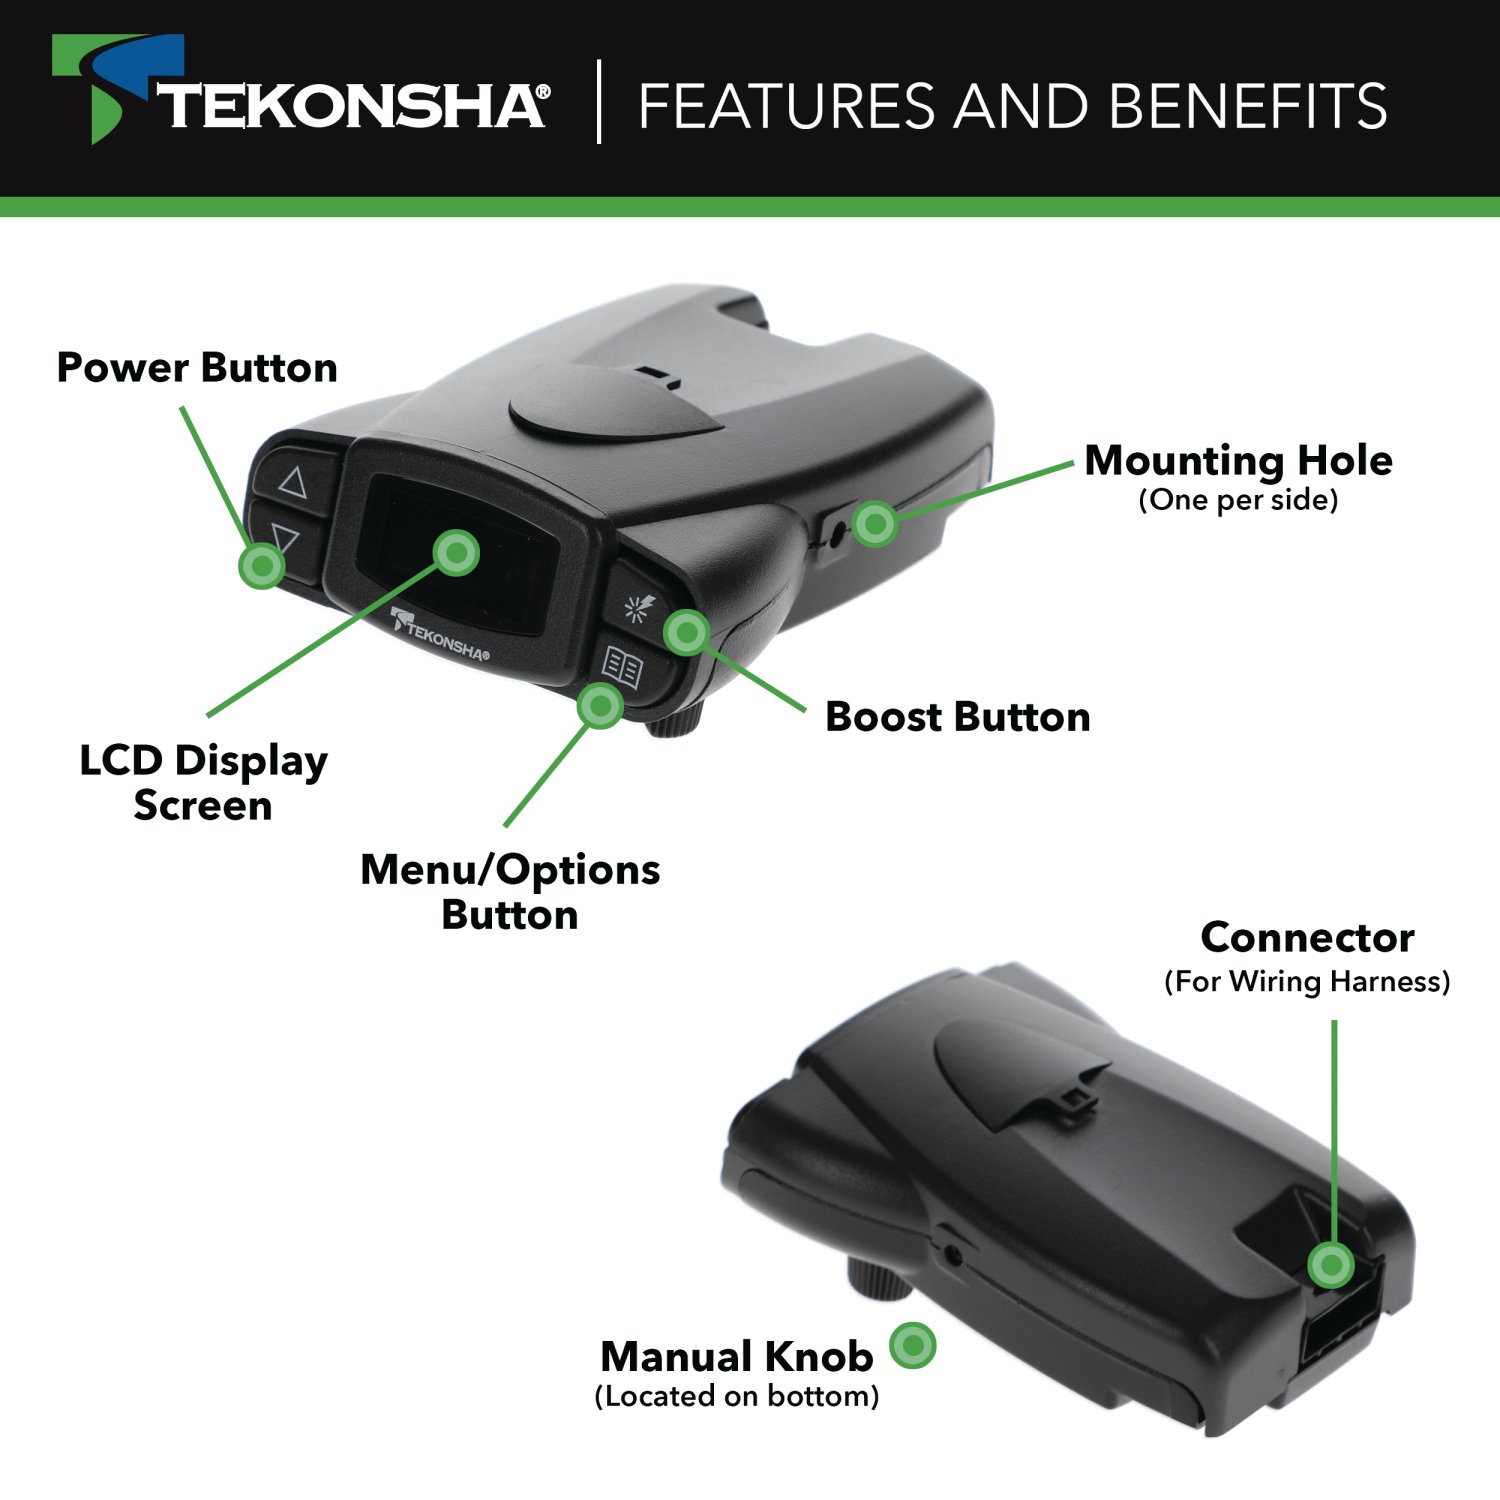
The P3 is an electronic brake control for trailers with 2, 4, 6, or 8 brake applications. It uses an inertial sensor to detect deceleration and proportionally apply power to trailer brakes based on how hard the tow vehicle is braking. It also features a Hold function (25% power at standstill for over 5 seconds) and Boost settings (B1, B2, B3) for more aggressive braking.
The P3 can be configured for either electric or hydraulic brakes. You must select the brake type during setup by pressing Menu/Options, selecting Brake Type, and choosing Electric or Hydraulic.
The P3 includes a pigtail wiring harness and mounting hardware: #8 x 3/8" machine screws with internal tooth washers for traditional bracket mount, or #8 x 3/8" self-tapping screws for under-dash pocket mount. Do not use longer screws as they may damage the unit.
The manual does not specify whether drilling is required. It provides two mounting options (traditional bracket mount and under-dash pocket mount) but does not detail the preparation of the mounting surface. Consult the specific mounting location requirements or contact Tekonsha at 1-888-785-5832.
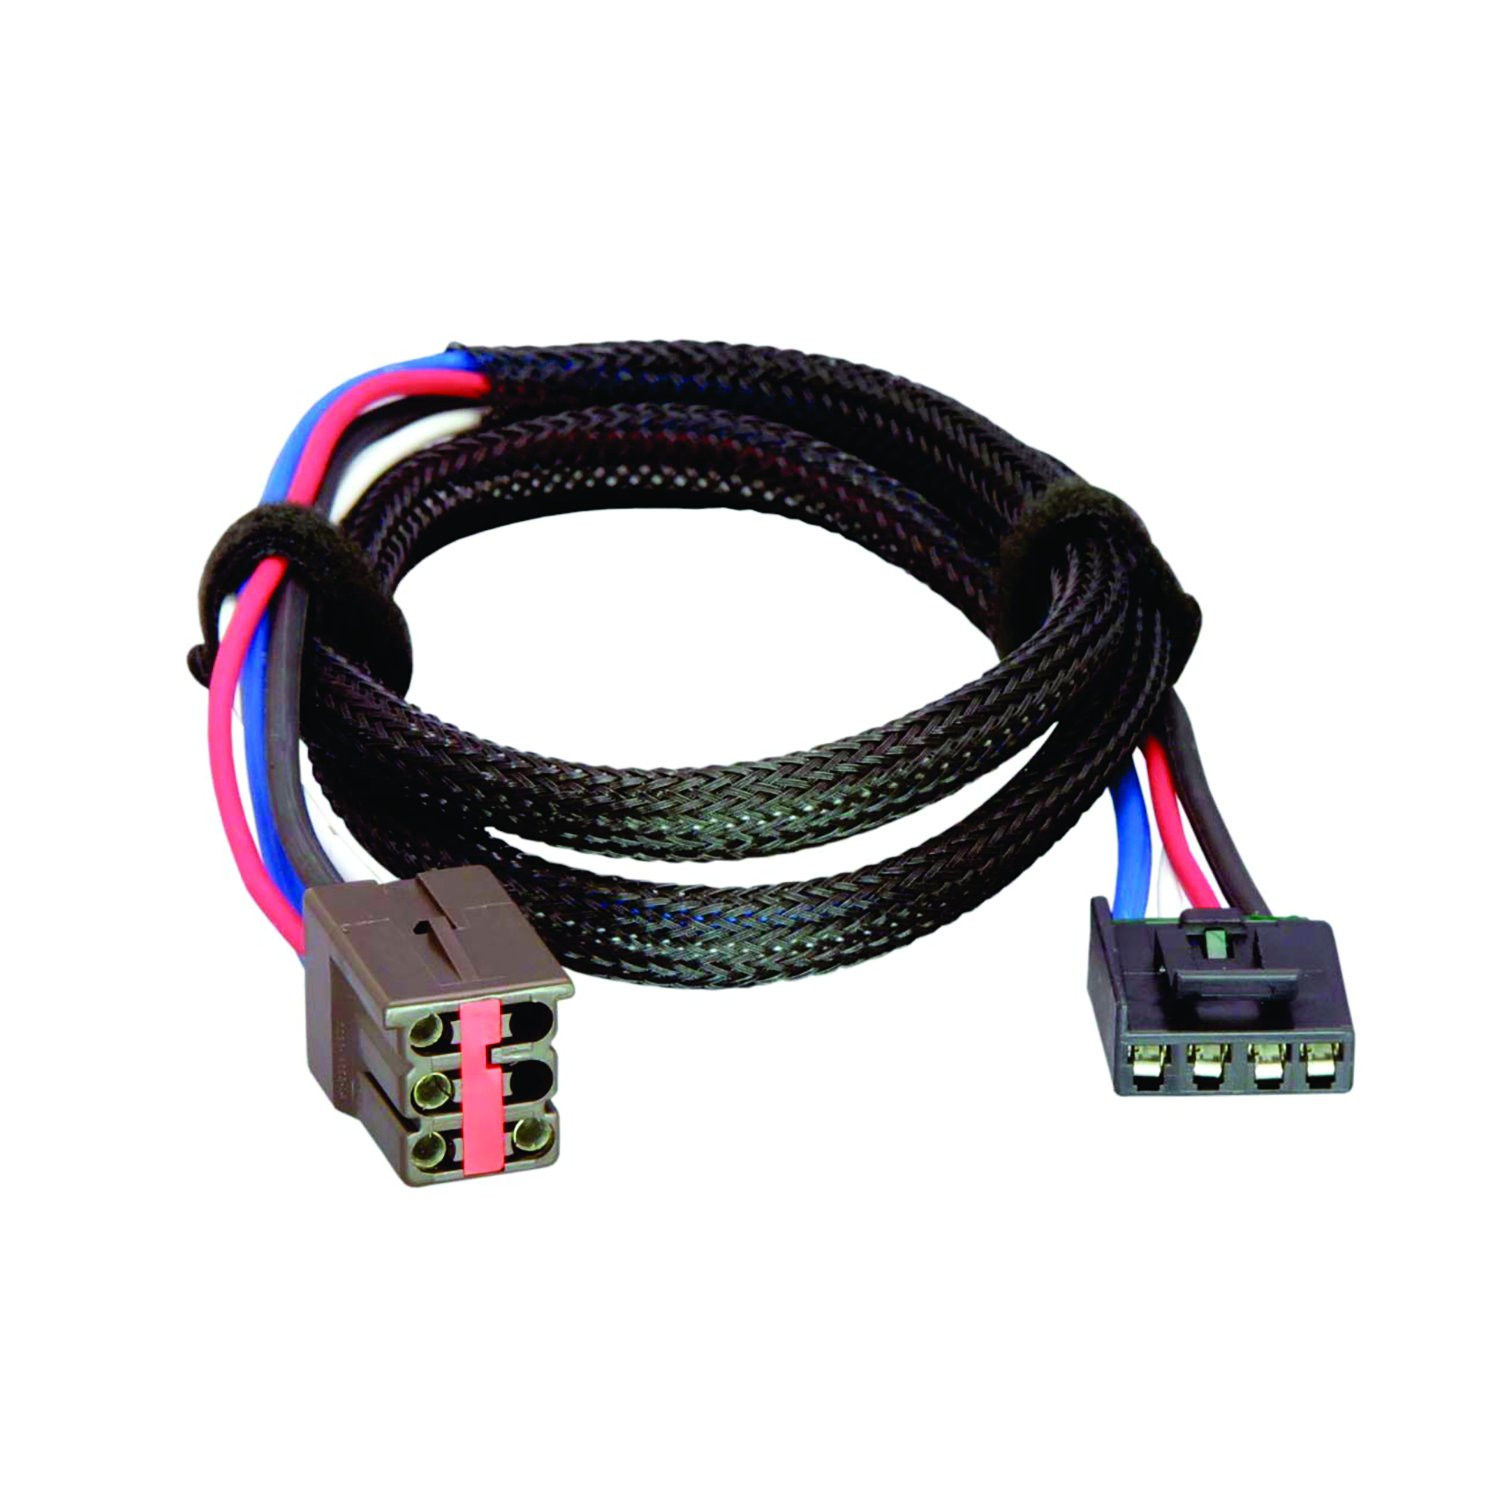
Yes. If your vehicle came with a factory tow package that included a 7-way connector, you can purchase a Tekonsha OEM-specific wiring harness with the P3 connector on one end and your vehicle's connector on the other.
The P3 power output range is 0.0 to 15 volts. You set the power level using the Power Buttons, and the display shows the current voltage output to the trailer brakes.
The Hold function automatically applies 25% of the power setting to hold the trailer in place while you are at a standstill with the brake pedal applied for longer than 5 seconds. It releases when you release the brake pedal.
Boost is a feature with three levels (B1, B2, B3) that increases the sensitivity of the inertial sensor for more aggressive trailer braking. B1 starts at approximately 13% power; B2 and B3 start at approximately 25% power. Use Boost when you want trailer brakes to lead the tow vehicle's braking, when towing a full vs. empty trailer, or if trailer brakes are worn. Boost is not intended for icy road conditions.
1. Connect trailer to tow vehicle with engine running and set power to 6.0 using Power Buttons. 2. Drive on a dry level paved surface at 25 mph and fully apply the Manual Knob. 3. If brakes lock up, turn power down; if braking is insufficient, turn power up. 4. Repeat until power is set just below wheel lockup or at maximum braking force. 5. Test with low-speed brake pedal stops to verify the setting. Always warm trailer brakes first by driving 1/4 mile at 45 mph with manual lever engaged at low level.
Proportional braking means the P3 uses an inertial sensor to detect how hard the tow vehicle is decelerating and automatically applies proportional power to the trailer brakes. The harder you brake, the more power is sent to the trailer brakes. This creates a unified braking feel between the tow vehicle and trailer.
Yes. The P3 will apply the appropriate brake voltage based on deceleration when backing a trailer, providing proportional braking in reverse.
Yes. Press and hold the Boost button continuously for 5 seconds with the brake pedal depressed. The display will show an "R" arrow icon flashing. Boost and Hold will automatically return to your previous settings after 3 minutes, or you can press the Boost button again to restore them sooner.
The P3 can be mounted from 0 to 360 degrees vertically in the direction of travel. However, the front of the P3 must be horizontal and the unit must be parallel to the direction of travel. The P3 will automatically acquire and maintain the proper level setting and will automatically adjust as you travel up or down hills.
Yes. Do not mount or activate RF-generating items such as cell phones or two-way radios within 12 inches of the brake control, as they can interfere with the P3's operation.
Two mounting options are provided: (1) Traditional Bracket Mount using a mounting bracket and #8 x 3/8" machine screws with internal tooth washers, or (2) Under Dash Pocket Mount using a T Slot Mount, small metal bracket, and #8 x 3/8" self-tapping screws. Both require mounting to a solid surface. Do not use longer screws as they may damage the unit.
After successful wiring, you should see: (1) Power to P3 without trailer connected; (2) Power to P3 with trailer connected and Boost engaged (B1); (3) Manual Knob activated without trailer; (4) Manual knob activated with trailer showing voltage output (e.g., 5.4 volts, range 0.0 to 15 volts); (5) Power saving mode if no motion or activity for 15+ minutes.
Press the Menu/Options Button to view the Setup screen. Select/highlight Brake Type and press OK. Select/highlight Electric or Hydraulic and press OK. Select/highlight Confirm and press OK. The screen will display the Brake Type Setting (E for Electric or H for Hydraulic) in the lower left corner.
The manual provides a chart with recommended Boost settings based on trailer weight compared to vehicle weight (with properly adjusted trailer brakes): Trailer weighs less than vehicle: Boost OFF or B1; Trailer weighs approximately same as vehicle: Boost OFF, B1, or B2; Trailer weighs up to 25% more: B1, B2, or B3; Trailer weighs up to 40% more: B2 or B3; Trailer weighs over 40% more: B3. Select based on your towing situation, driving preference, and trailer brake condition.
The P3 troubleshooting menu displays voltage and current information by wire color: Black wire = vehicle battery voltage; Red wire = voltage from stoplight switch with brake pedal depressed; Blue wire = average voltage provided to trailer brakes and current provided to trailer brakes.
GCWR (Gross Combined Weight Rating) is the maximum combined weight of the tow vehicle and trailer as specified by the vehicle manufacturer. The P3 manual warns that GCWR must never exceed the vehicle manufacturer's recommendation. Exceeding GCWR can compromise vehicle control and safety.
Warm trailer brakes tend to be more responsive than cold brakes. To warm trailer brakes before setting power, drive a short distance (1/4 mile) at 45 mph with the manual lever engaged enough to cause trailer braking at a low level. This ensures accurate power calibration.
If power is set too high, trailer brakes may lock up and the wheels may skid. Skidding trailer wheels can cause loss of directional stability of both the trailer and tow vehicle. Power should never be set high enough to cause trailer brake lockup; instead, set it just below wheel lockup or at a sufficient force to achieve maximum braking power.
When power is set correctly, you should feel unified braking between the trailer and tow vehicle. The trailer should brake proportionally with the tow vehicle without locking up or providing insufficient braking force.
Trailer brakes should be adjusted after the first 200 miles of operation (when brake shoes and drums have seated) and at 3,000-mile intervals, or as use and performance requires. Increased Boost settings may be needed if trailer brakes are worn; refer to Appendix A or a dealer for brake adjustment or repair.
1. Jack up trailer on adequate capacity jack stands (follow trailer manufacturer recommendations; do not lift on axle or suspension). 2. Remove adjusting hole cover from the adjusting slot on the bottom of the brake backing plate. 3. With a screwdriver or standard adjusting tool, rotate the starwheel to expand brake shoes until the wheel is very difficult to turn. 4. Rotate the starwheel in the opposite direction until the wheel turns freely with slight lining drag. 5. Replace the adjusting hole cover and lower the wheel. 6. Repeat on all brakes. For drop spindle axles, use a modified adjusting tool with approximately 80-degree angle.
Yes. Press Menu/Options to view Setup screen, select Help, then Display. You can adjust: Brightness (High/Normal/Low), Color (Pink/White/Blue/Light Blue/Cyan/Green/Light Green/Orange/Magenta), and Contrast (Normal/High). High contrast displays text in black on a colored background.
Yes. The P3 allows you to store up to 5 different trailer presets. Press and hold the Boost button for 2 seconds until the Select menu appears. Arrow down to select the preferred Trailer setting and press OK. You can then customize Brake Type, Power Setting, Boost Setting, Language, and Brightness/Color/Contrast for each preset.
The P3 supports English, French, and Spanish. To change language, press Menu/Options, select Help, then Language, and choose your preferred language.
This warning indicates that the trailer is connected but the P3 has lost its connection to the battery ground. Check that the ground wire (black wire) is securely connected to a clean, solid ground point on the tow vehicle.
This warning indicates that the P3 detects an excessive current overload condition during operation. This may indicate a short circuit or fault in the trailer brake wiring or brakes. Check all wiring connections and consult a dealer if the problem persists.
This warning indicates either (1) the brake output wire is shorted to ground during idle condition, or (2) a test light or non-Tekonsha tester is being used and causing the warning. Check that the brake output wire (blue wire) is not damaged or touching ground. If using a test light, use only Tekonsha testers to avoid false warnings.
This warning indicates that power to the P3 was interrupted during braking, or the stop lamp was active while connecting power to the trailer brake control. Ensure the power connection (red wire) is secure and that you do not connect power while the brake pedal is depressed or the stop lamp is active.
This warning indicates one of four possible issues: (1) Trailer is not connected to the tow vehicle; (2) Trailer is connected but there is an open circuit on the brake line; (3) Trailer connector is disconnected or corroded; (4) Loss of trailer brake magnet ground. Check the trailer connection, inspect the brake line for breaks, clean corroded connectors, and verify the brake magnet ground is secure.
Press Menu/Options to view Setup screen. Select Help and press OK. Select Trouble Shoot and press OK. The menu displays four diagnostic functions: vehicle battery voltage (black wire), stoplight switch voltage with brake pedal depressed (red wire), average voltage to trailer brakes (blue wire), and current to trailer brakes (blue wire).
First, verify the trailer is properly connected and the brake type (Electric or Hydraulic) is correctly set. Use the troubleshooting menu to check: (1) vehicle battery voltage (black wire) should be present; (2) stoplight switch voltage (red wire) should show when brake pedal is depressed; (3) voltage to trailer brakes (blue wire) should increase when braking. If voltage is present but brakes do not respond, the trailer brakes may need adjustment or repair (see Appendix A or consult a dealer).
The Electric Trailer Brake Control Wiring Adapter is a connector that allows you to plug an electric trailer brake control unit into your vehicle's existing electric brake control harness. It interfaces between the brake control and the vehicle's 6-pin connector, enabling the brake control to receive power and brake signals from your vehicle.
The adapter is designed for most vehicles equipped with an electric brake control harness and a 6-pin connector. The manual provides specific harness locations for Ford Full Size Van (underneath and left of steering column), Ford Explorer and Mercury Mountaineer (behind glove box on passenger side, or underneath and left of steering column taped to another harness near the emergency brake pedal), and most other vehicles (under the dash near the center console). Consult your vehicle's owner's manual or contact the manufacturer if your vehicle is not listed.
On a Ford Full Size Van, the electric brake control harness is located underneath and to the left of the steering column.
On a Ford Explorer or Mercury Mountaineer, the electric brake control harness is located behind the vehicle glove box on the passenger side, or it may be located underneath and to the left of the steering column, taped to another harness near the emergency brake pedal.
The adapter uses a 6-pin connector that mates with the 6-pin connector at the end of the vehicle's electric brake control harness.
Yes. Before installation, you must verify that battery power is supplied to the connector. Use a test light to carefully probe the connector, or follow the wires to their source to ensure they do not dead end without connections behind the instrument panel. If power is present, proceed directly to plugging in the adapter. If no power is present, you will need to use an electric brake control wiring kit to route power to the connector.
If your vehicle's electric brake control connector has no power, you must use an electric brake control wiring kit. Follow the wiring kit's installation instructions to route all wires. You will need to cut the vehicle connector's battery feed wire (leaving enough wire to reconnect using the supplied butt connector) and cut the trailer brake wire (leaving enough wire to reconnect using the supplied butt connector). Then proceed with plugging in the adapter.
1. Locate your vehicle's electric brake control harness (location varies by vehicle model). 2. Verify battery power is supplied to the connector using a test light. 3. If no power is present, use an electric brake control wiring kit to route power (cut and reconnect wires as instructed). 4. Plug the brake control adapter into the vehicle's electric brake control harness connector. 5. Follow all brake control manufacturer's installation instructions and mount the unit as directed. 6. Perform test procedures as instructed by the brake control manufacturer.
Yes. The manual cautions that you must plug the brake control adapter into the mating receptacle on the backside of the brake control before attaching it to the vehicle connector.
The adapter is rated for a maximum of 4 axles and 8 brakes at 24 amps. Do not exceed the lower of your towing manufacturer's rating or this limit. Overloading the circuit can cause fires.
Wear safety glasses and use all safety precautions during installation. Read and follow all vehicle warnings and installation instructions before beginning. Complete the installation per the electric brake control manufacturer's instructions and perform all test procedures as instructed.
Overloading the circuit can cause fires. You must not exceed the lower of your towing manufacturer's rating or the adapter's maximum of 4 axles and 8 brakes (24 amps). Always consult your vehicle's owner's manual and instruction sheet for additional information.
The adapter fits most vehicles with an electric brake control harness and 6-pin connector. Specific locations are provided for Ford Full Size Van, Ford Explorer, and Mercury Mountaineer. Check your vehicle's owner's manual or contact the manufacturer if your vehicle is not listed.
Only if your vehicle's brake control connector has no battery power. Use a test light to verify power before installation. If power is present, you can proceed directly to plugging in the adapter.
Only if your vehicle's brake control connector has no battery power. In that case, you will need to cut the battery feed wire and trailer brake wire and reconnect them using butt connectors supplied with an electric brake control wiring kit. If power is already present, no cutting is required.
The adapter is rated for a maximum of 24 amps (4 axles, 8 brakes). Do not exceed the lower of your towing manufacturer's rating or this limit, as overloading can cause fires.
Yes. After plugging in the adapter, you must complete the installation per the electric brake control manufacturer's instructions, mount the unit as directed, and perform all test procedures as instructed.
On Sale Today
Original price was $268.75. Current price is $229.07.You save $39.68 (15%)
Free Shipping
Ships free on all orders
 Authorized Dealer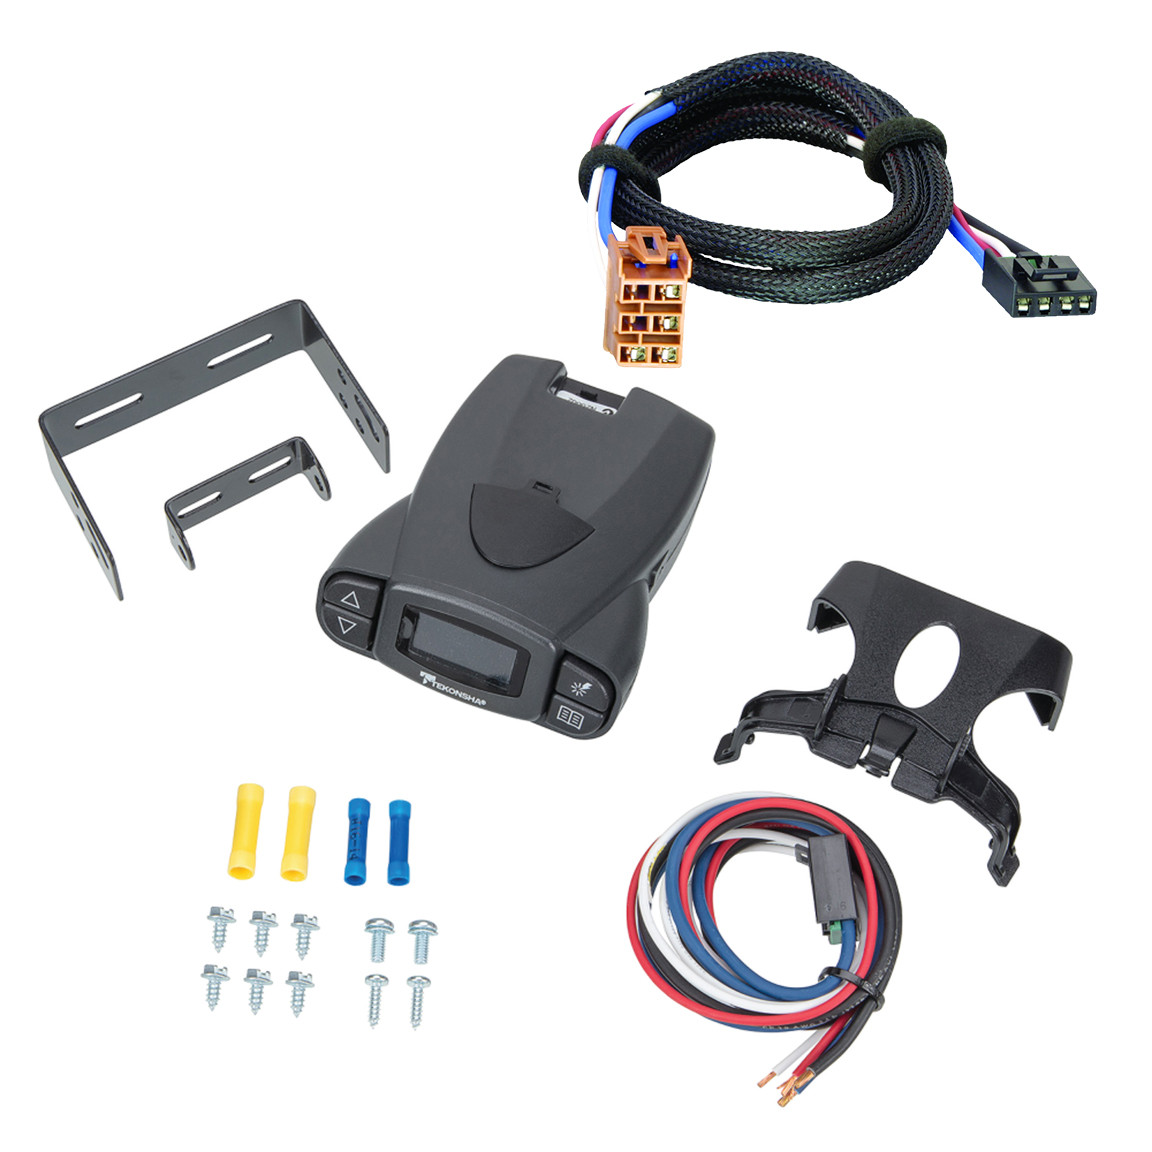
FREE ShippingFREE SHIPPING
Estimated delivery Wed, Sep 23 - Sat, Sep 26
Order before 2 PM EST Monday–Friday for same-day processing
Guaranteed safe & secure checkout
No reviews have been added for this product.