2003-2006 Chevrolet Avalanche 2500 CURT Spectrum Integrated Proportional Trailer Brake ControllerCURTOriginal price was $304.95. Current price is $269.95.In Stock
View productOur in-house experts typically reply within one business day.

CURT
Verify Fitment
Select your vehicle to confirm this part fits.
2003 - 2006 Chevrolet Avalanche 1500
Confirmed to Fit






Always the correct part
We know our products
Quality Products
Free Shipping!
Always the correct part
We know our products
Quality Products
Free Shipping!
Includes mounting hardware
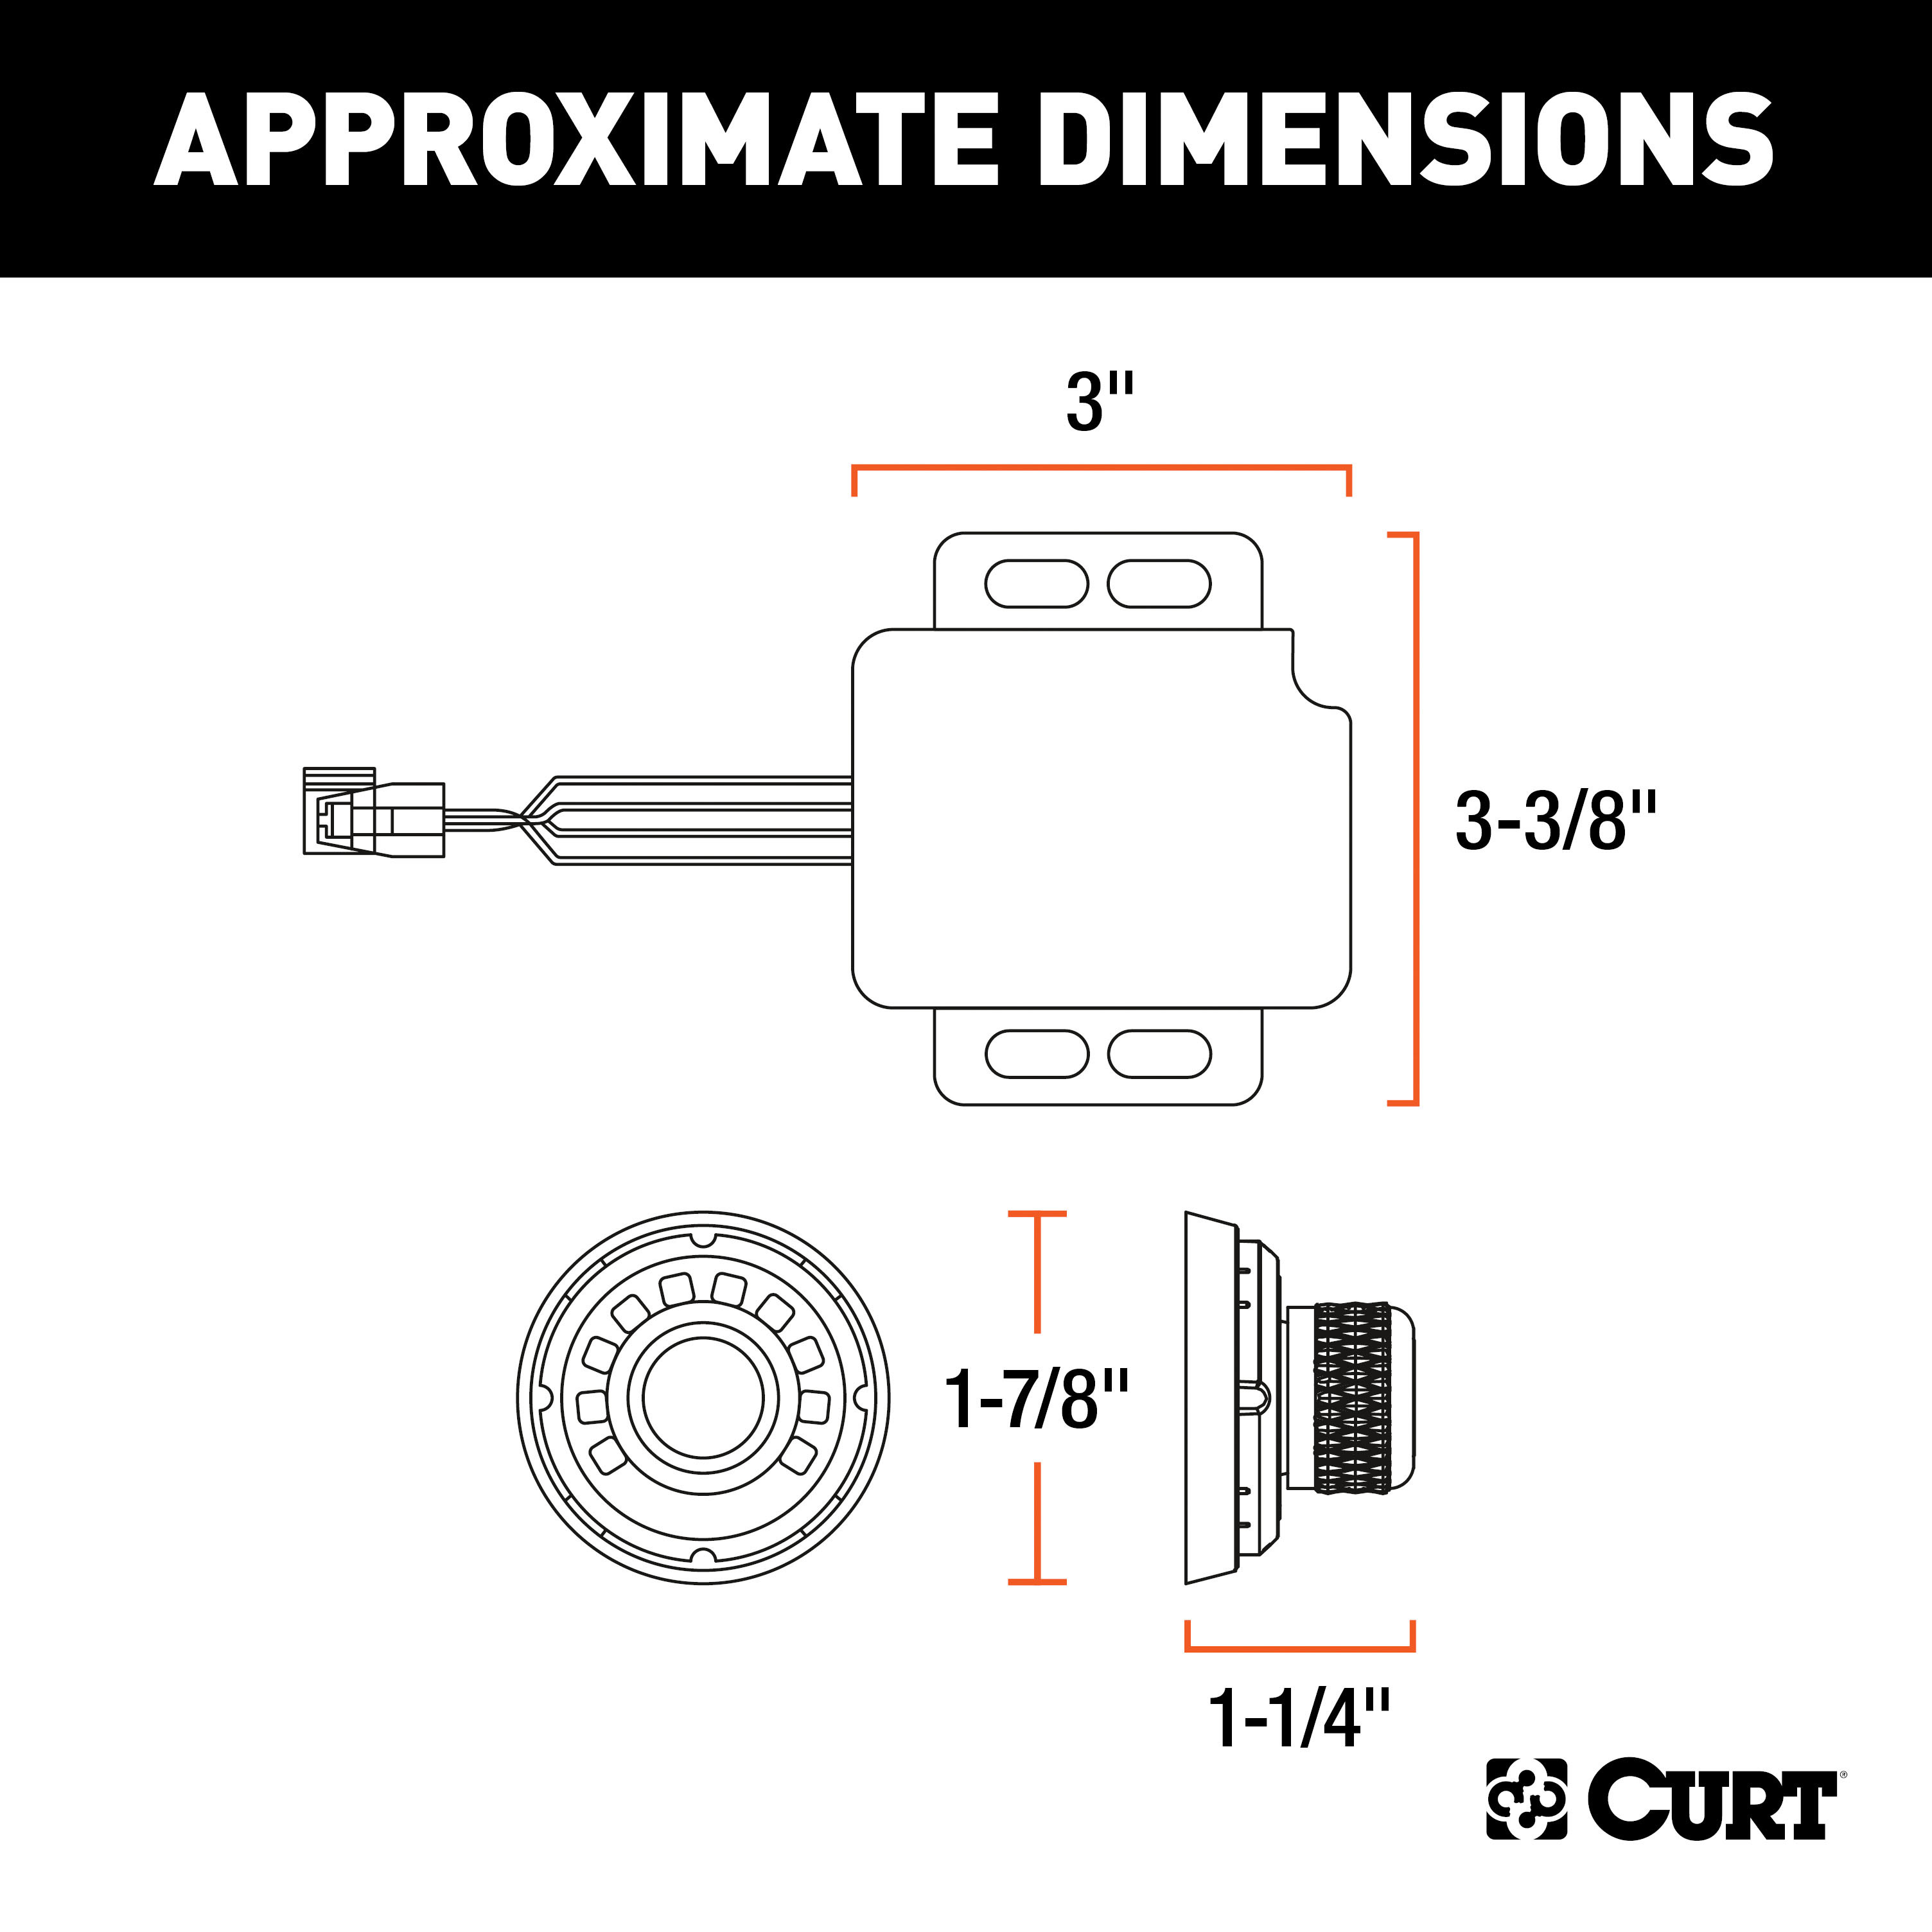
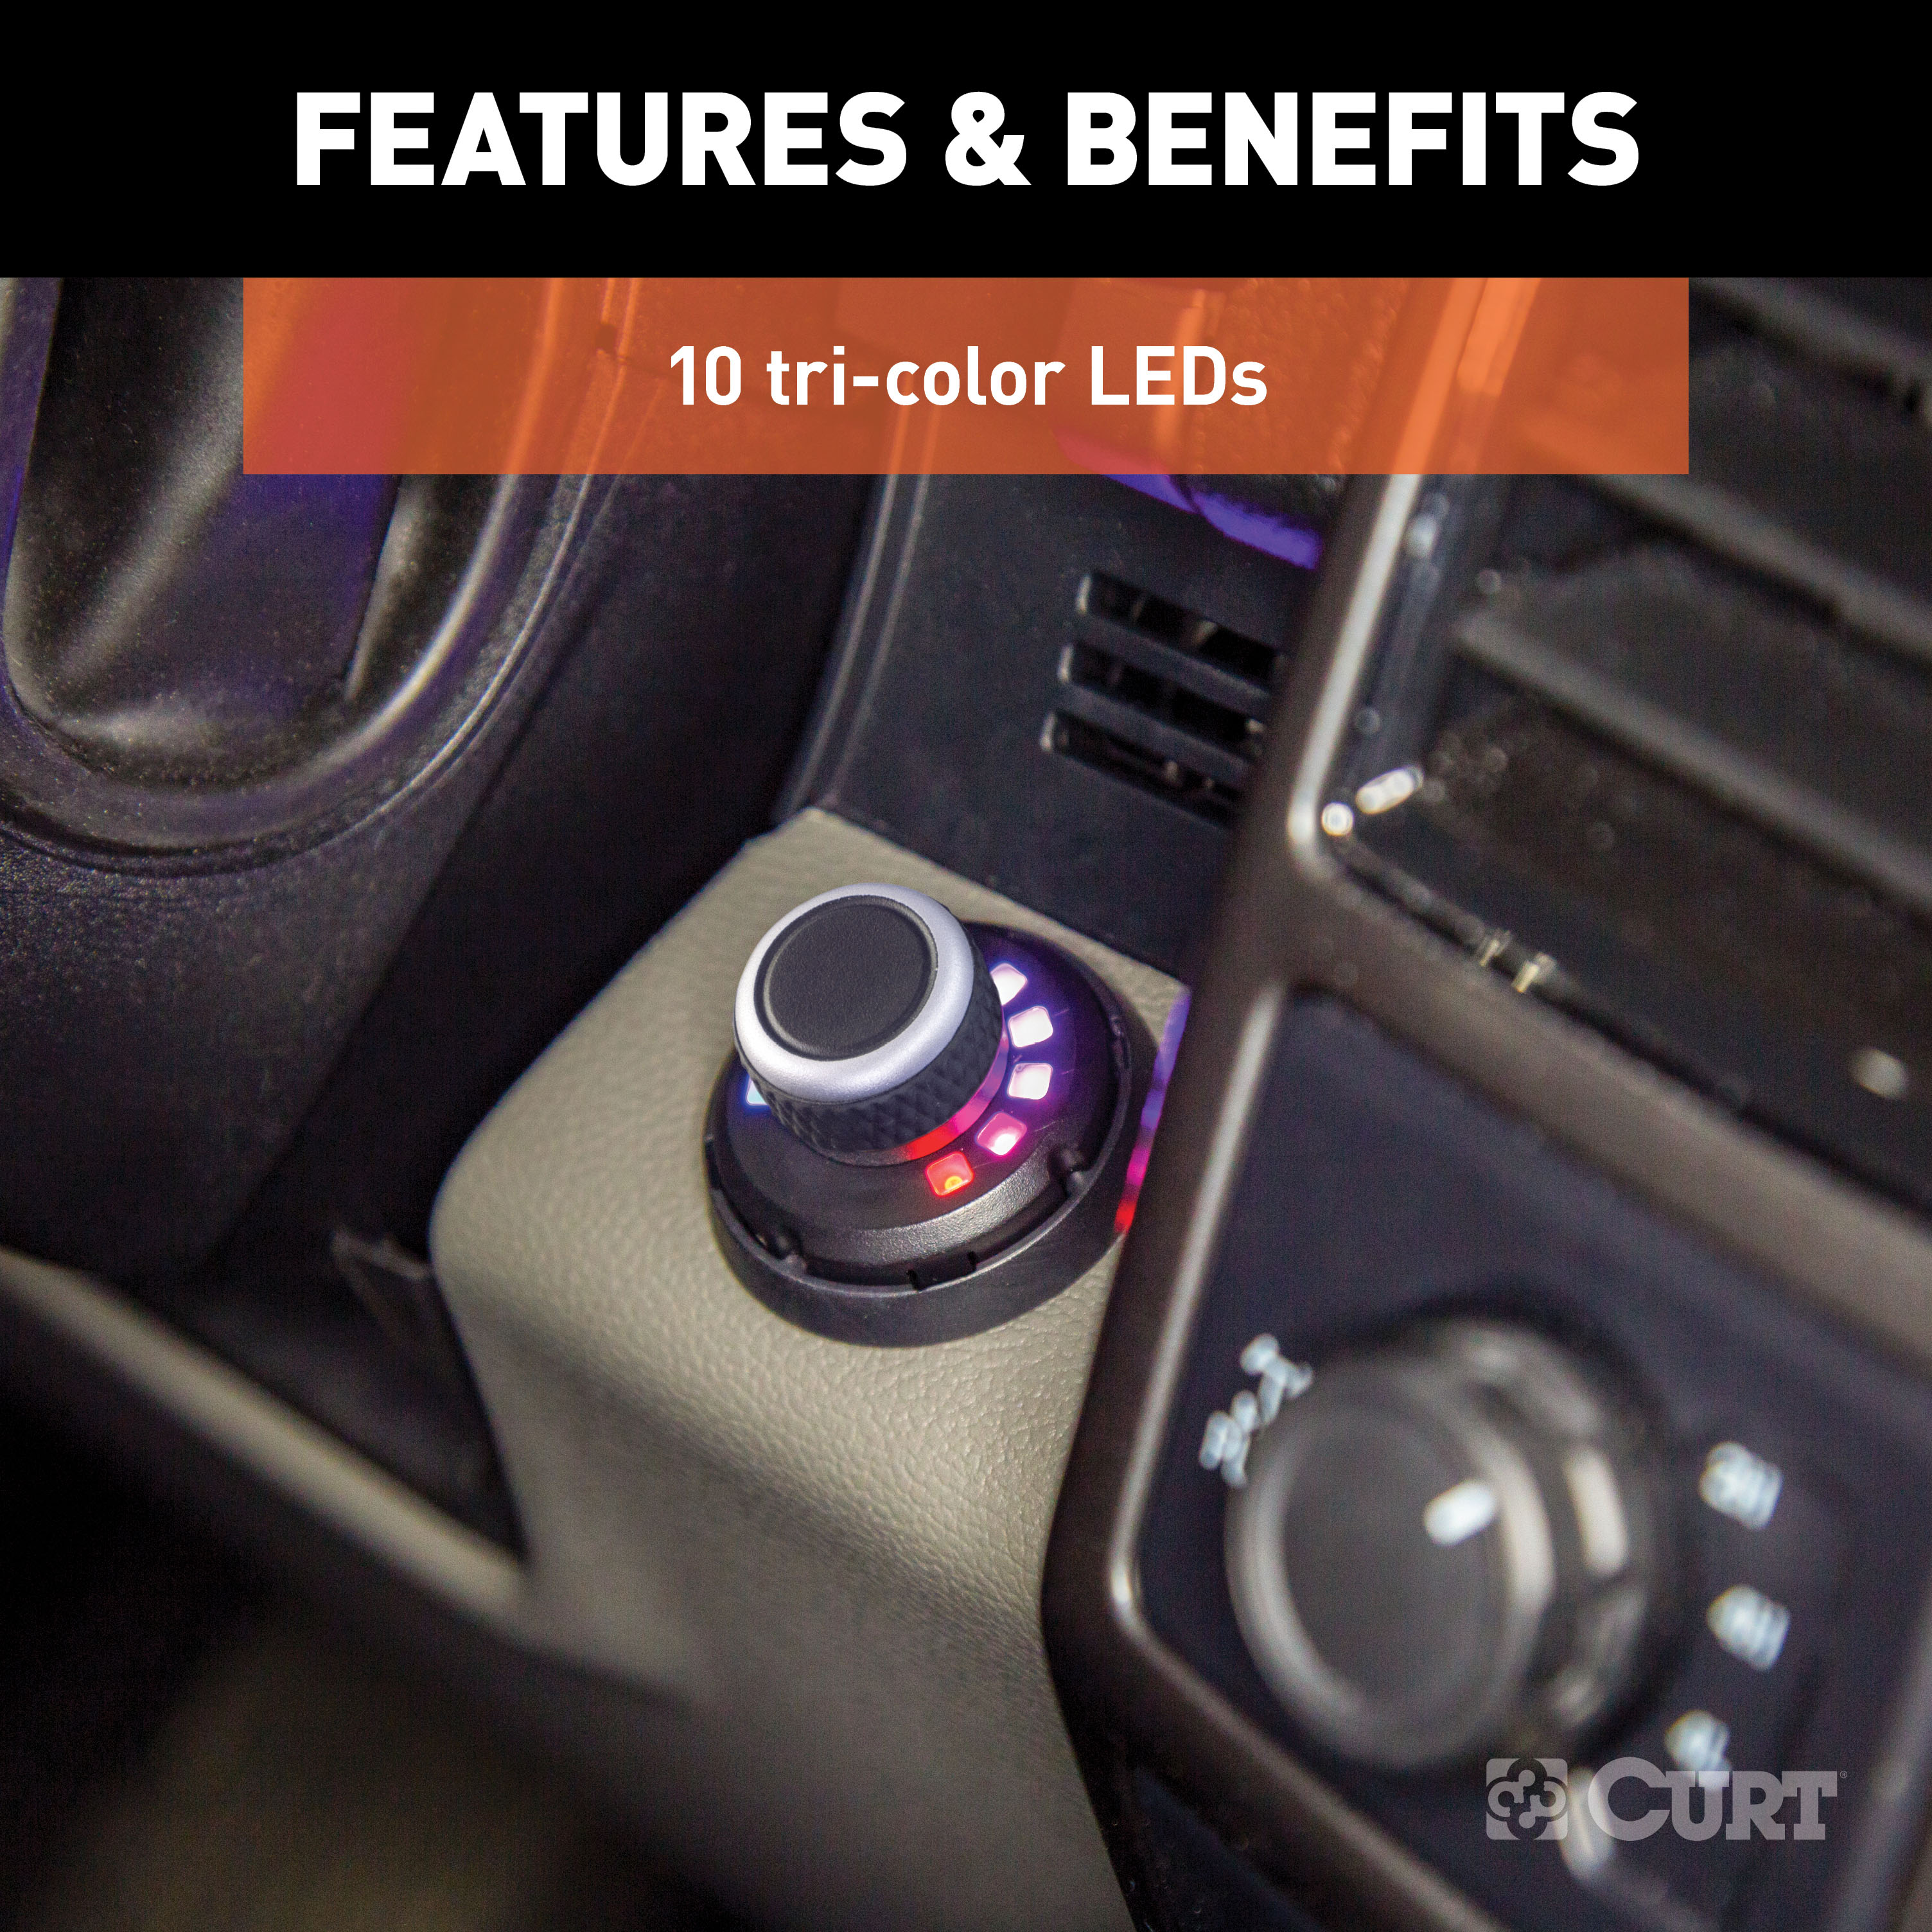
Knob outside diameter is 1.9"
Patent #10,960,860

Includes mounting hardware

Warranty: Limited Lifetime
Installation Time Exact (Minutes): 0
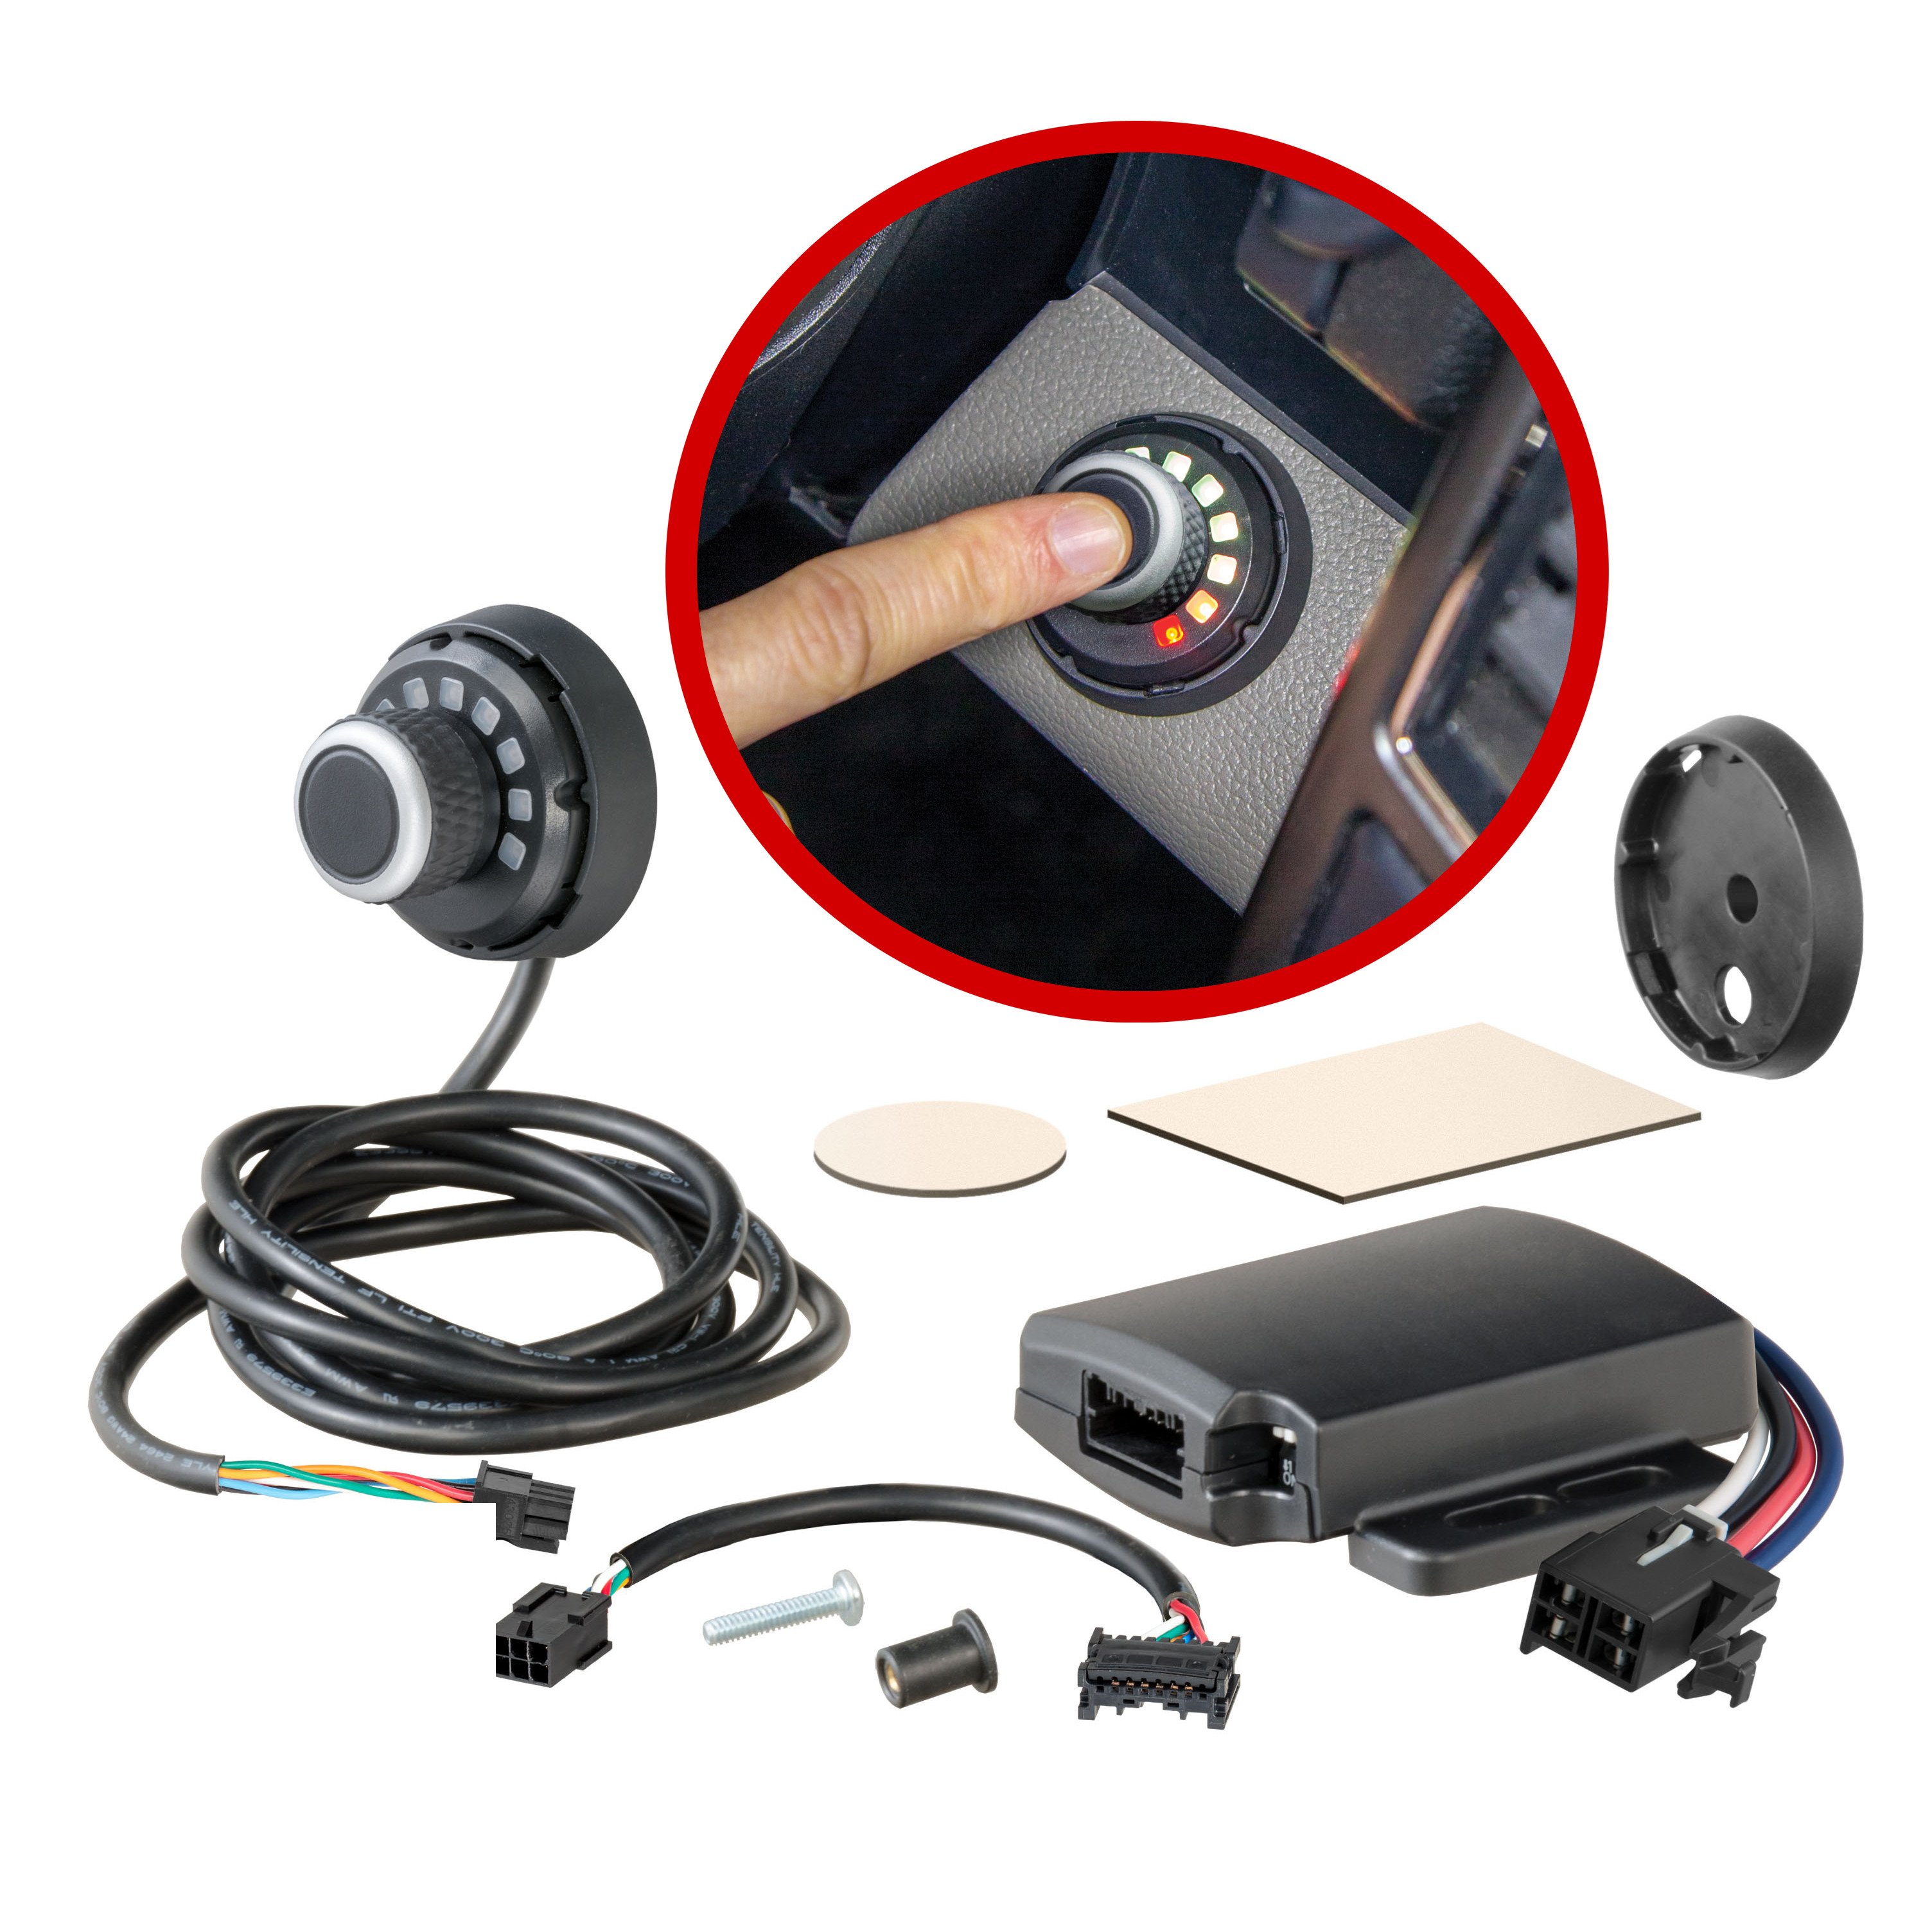
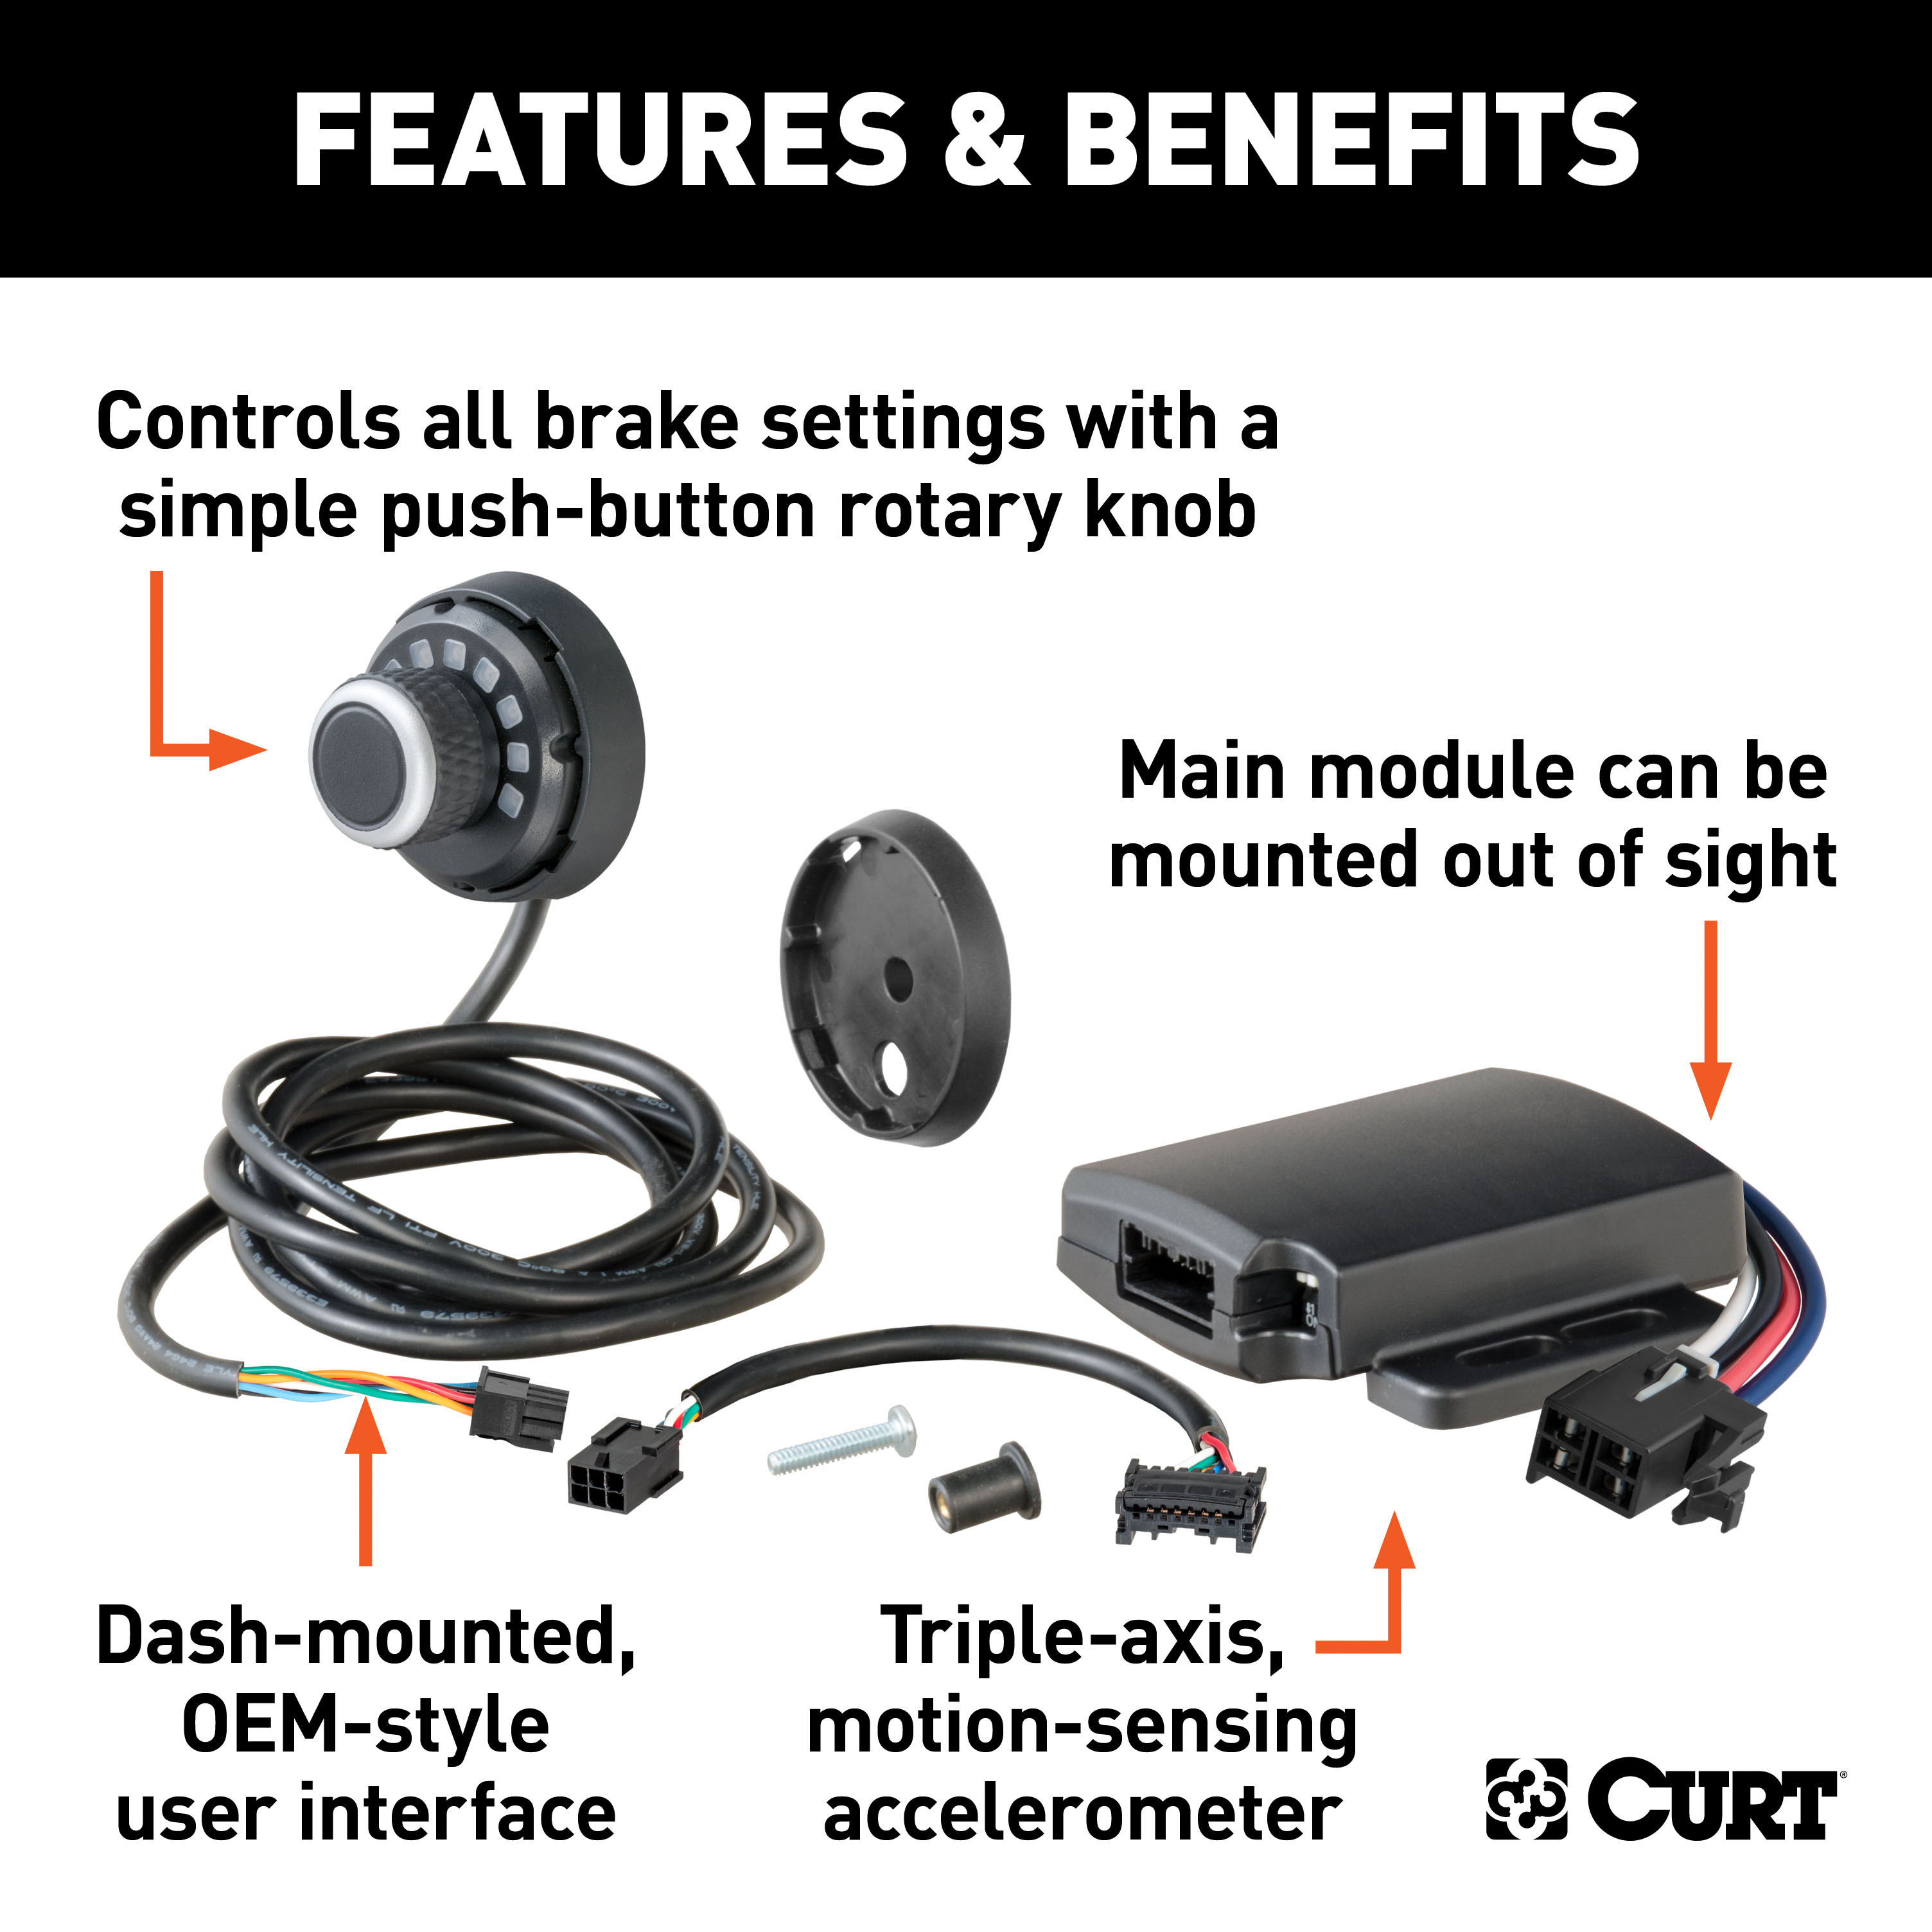
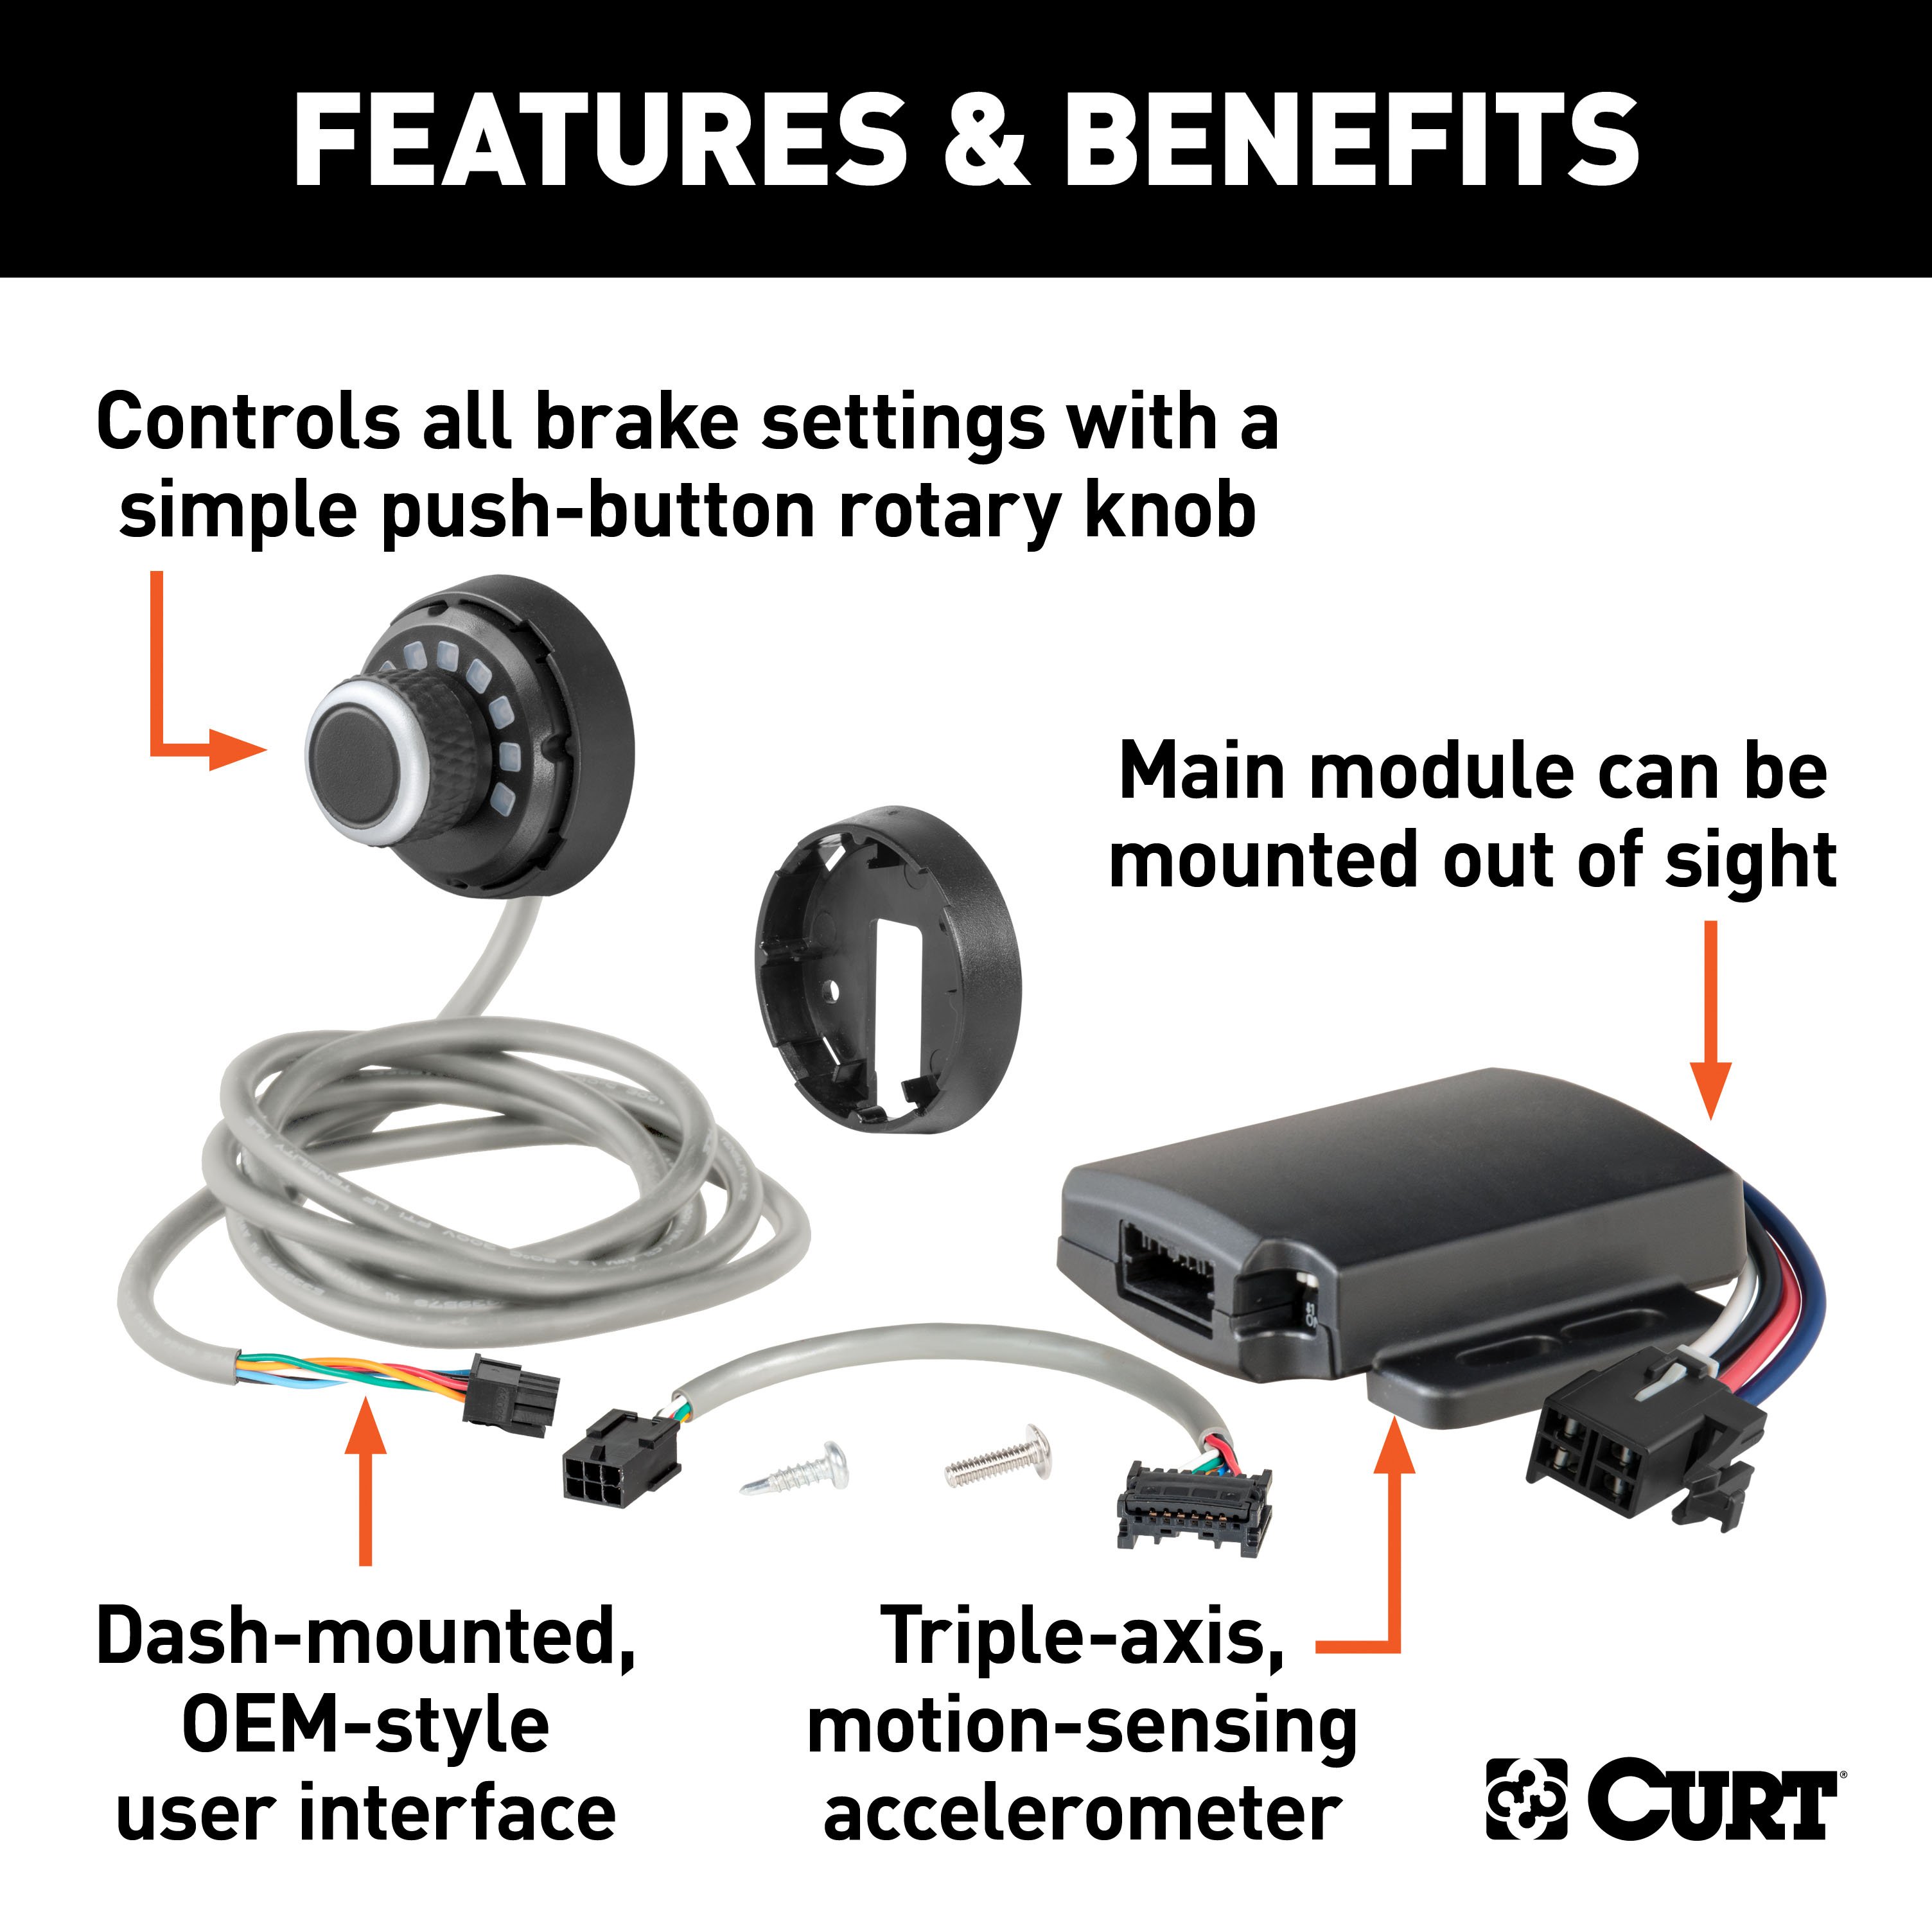
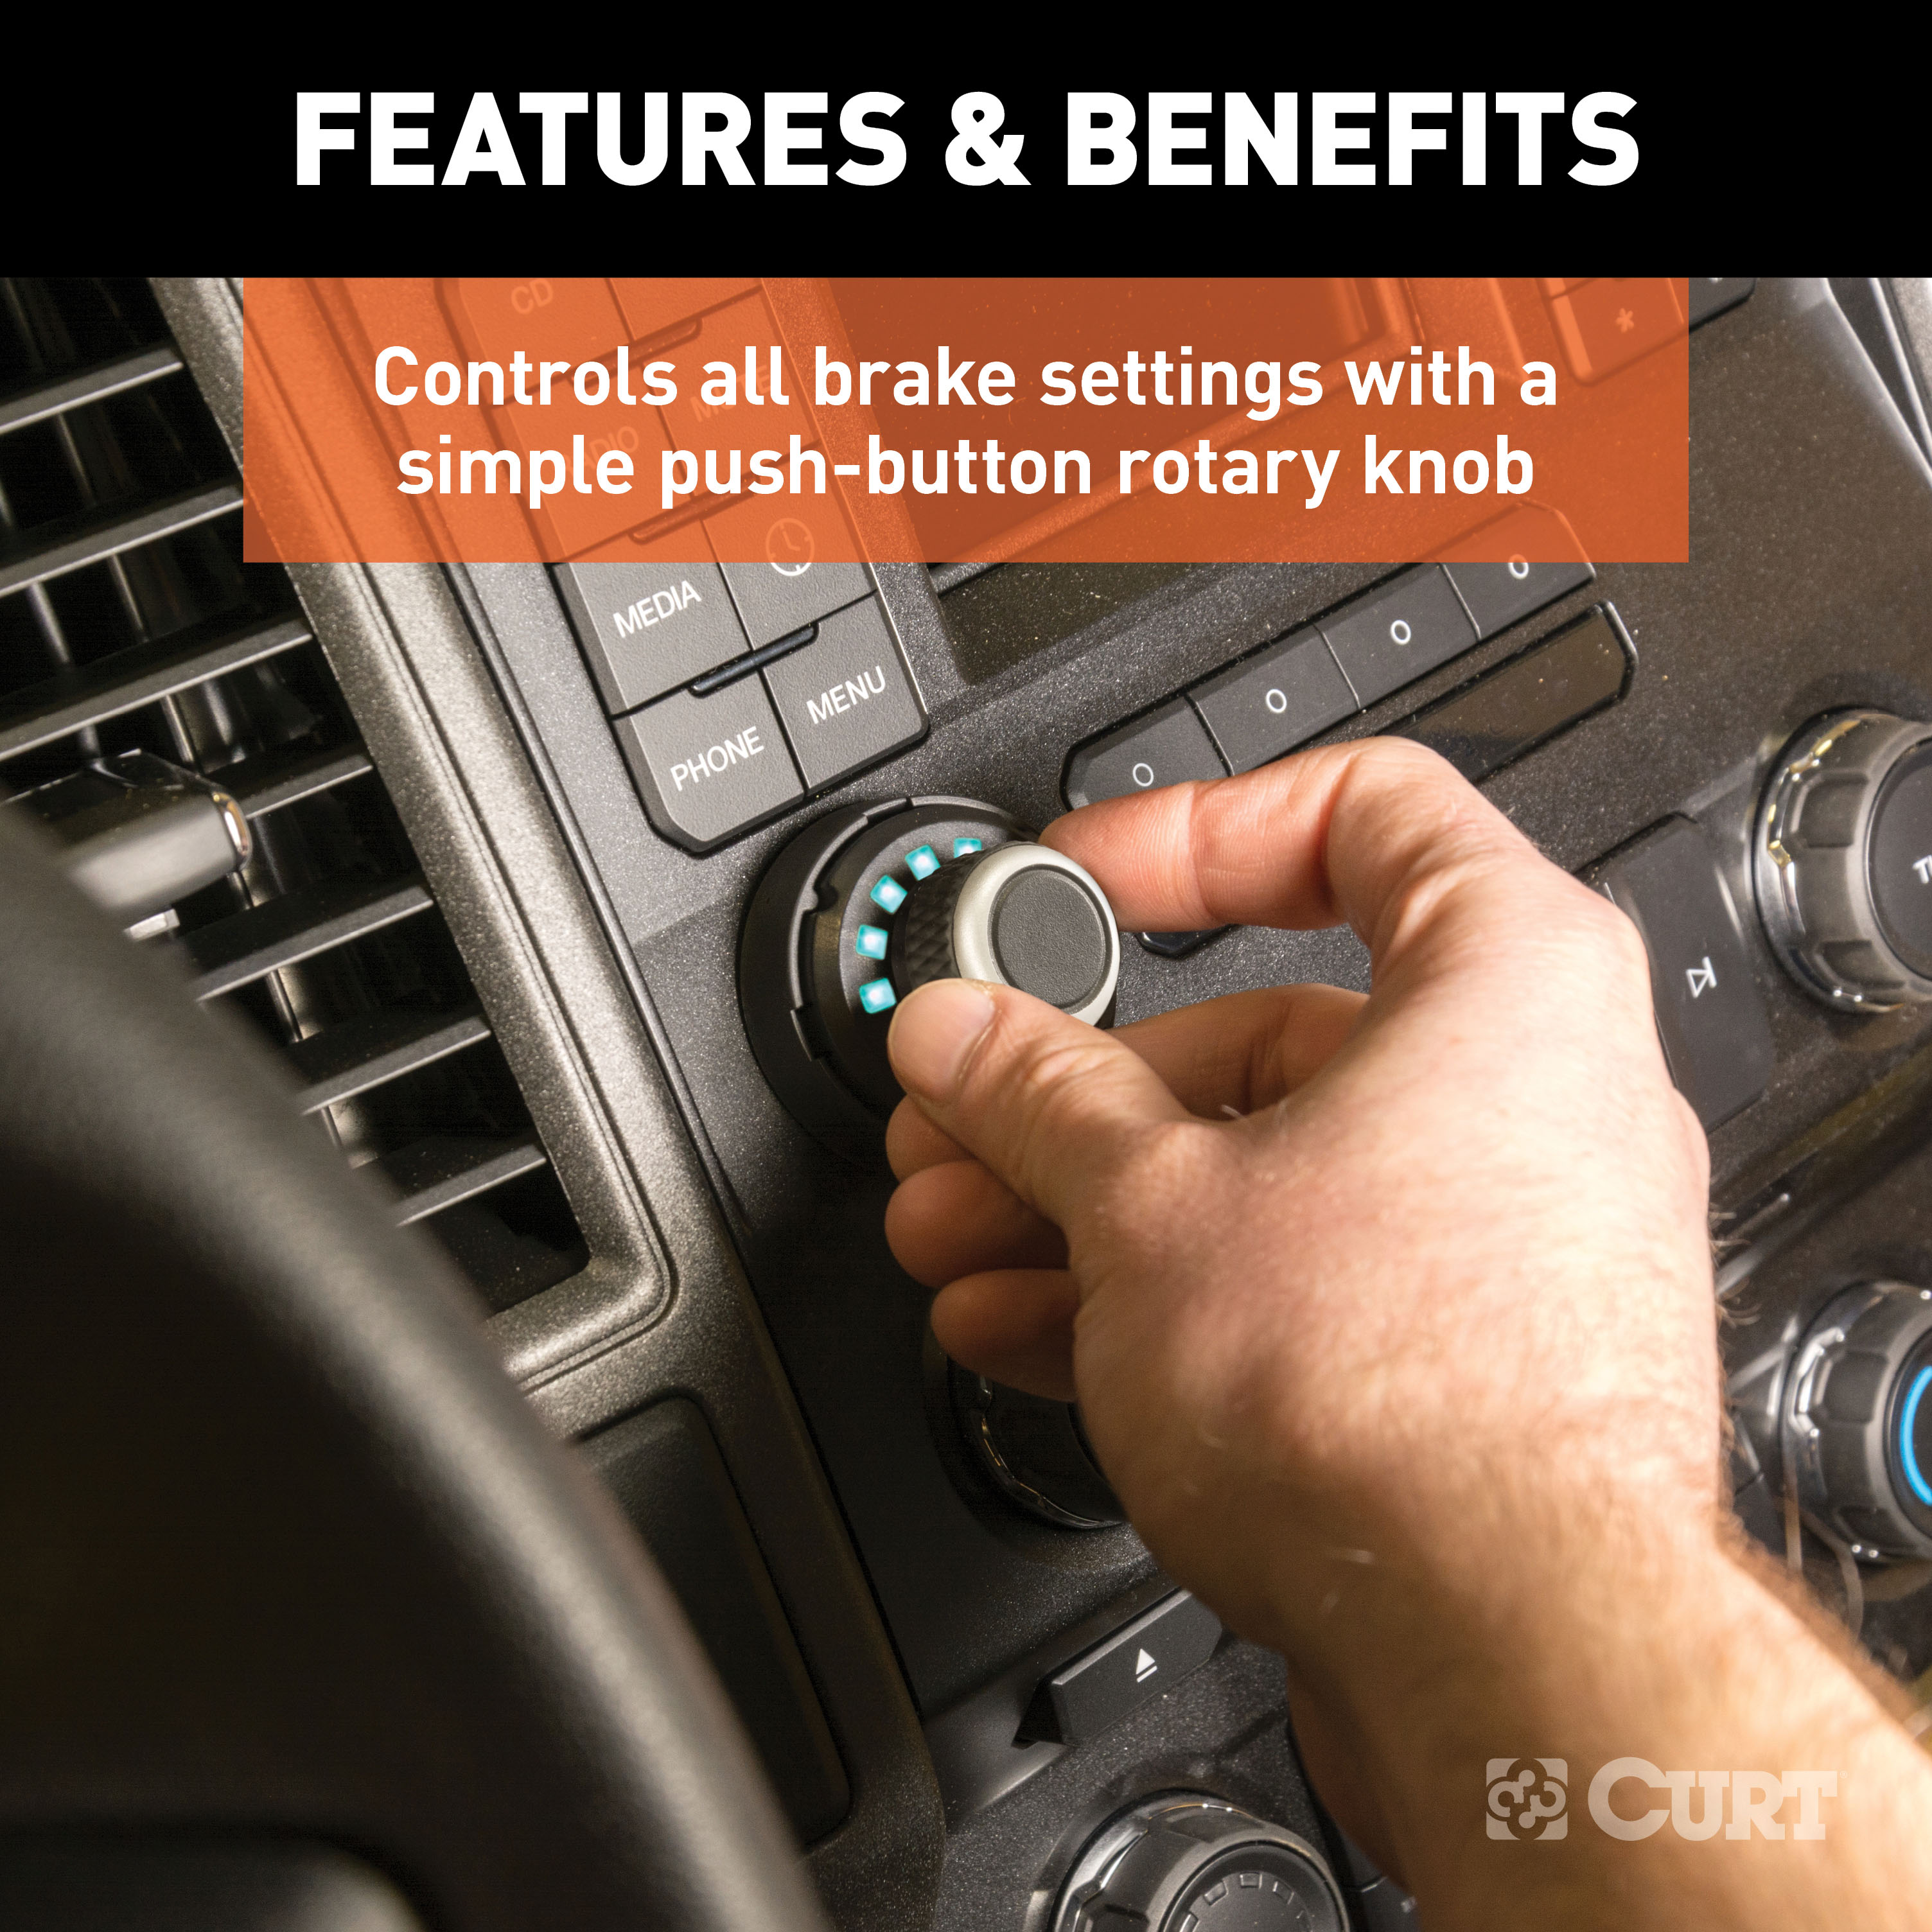
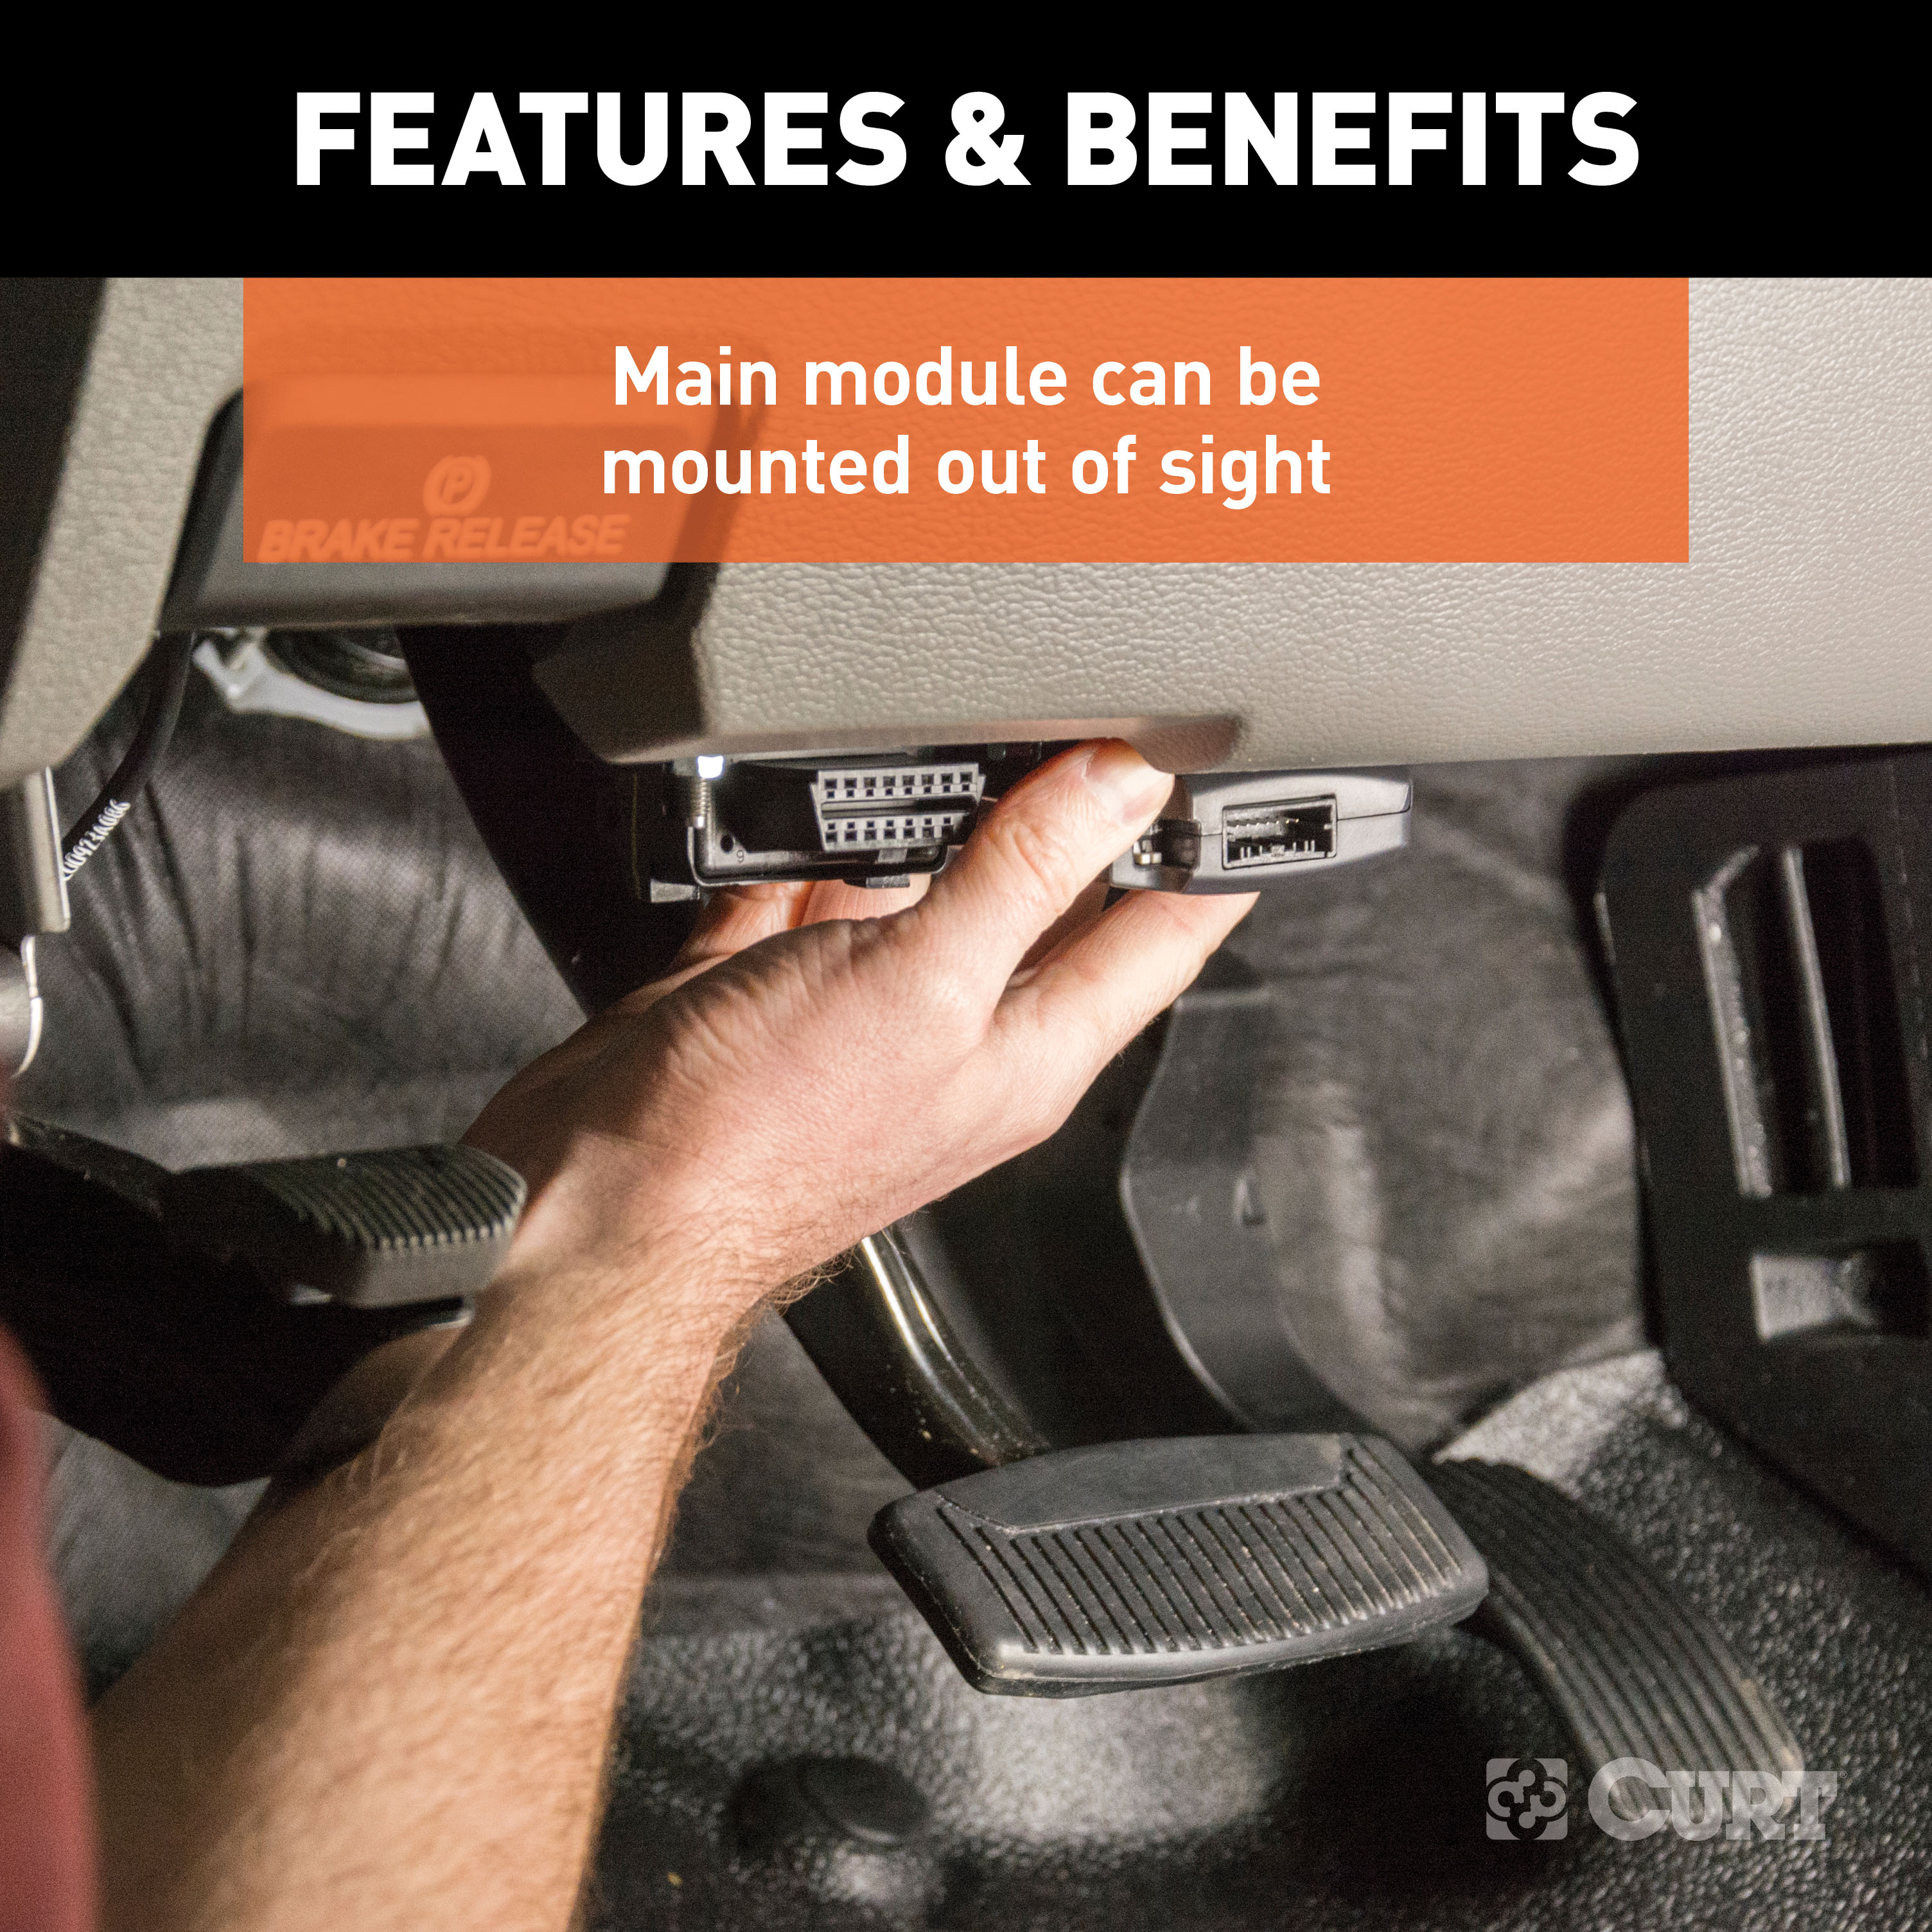
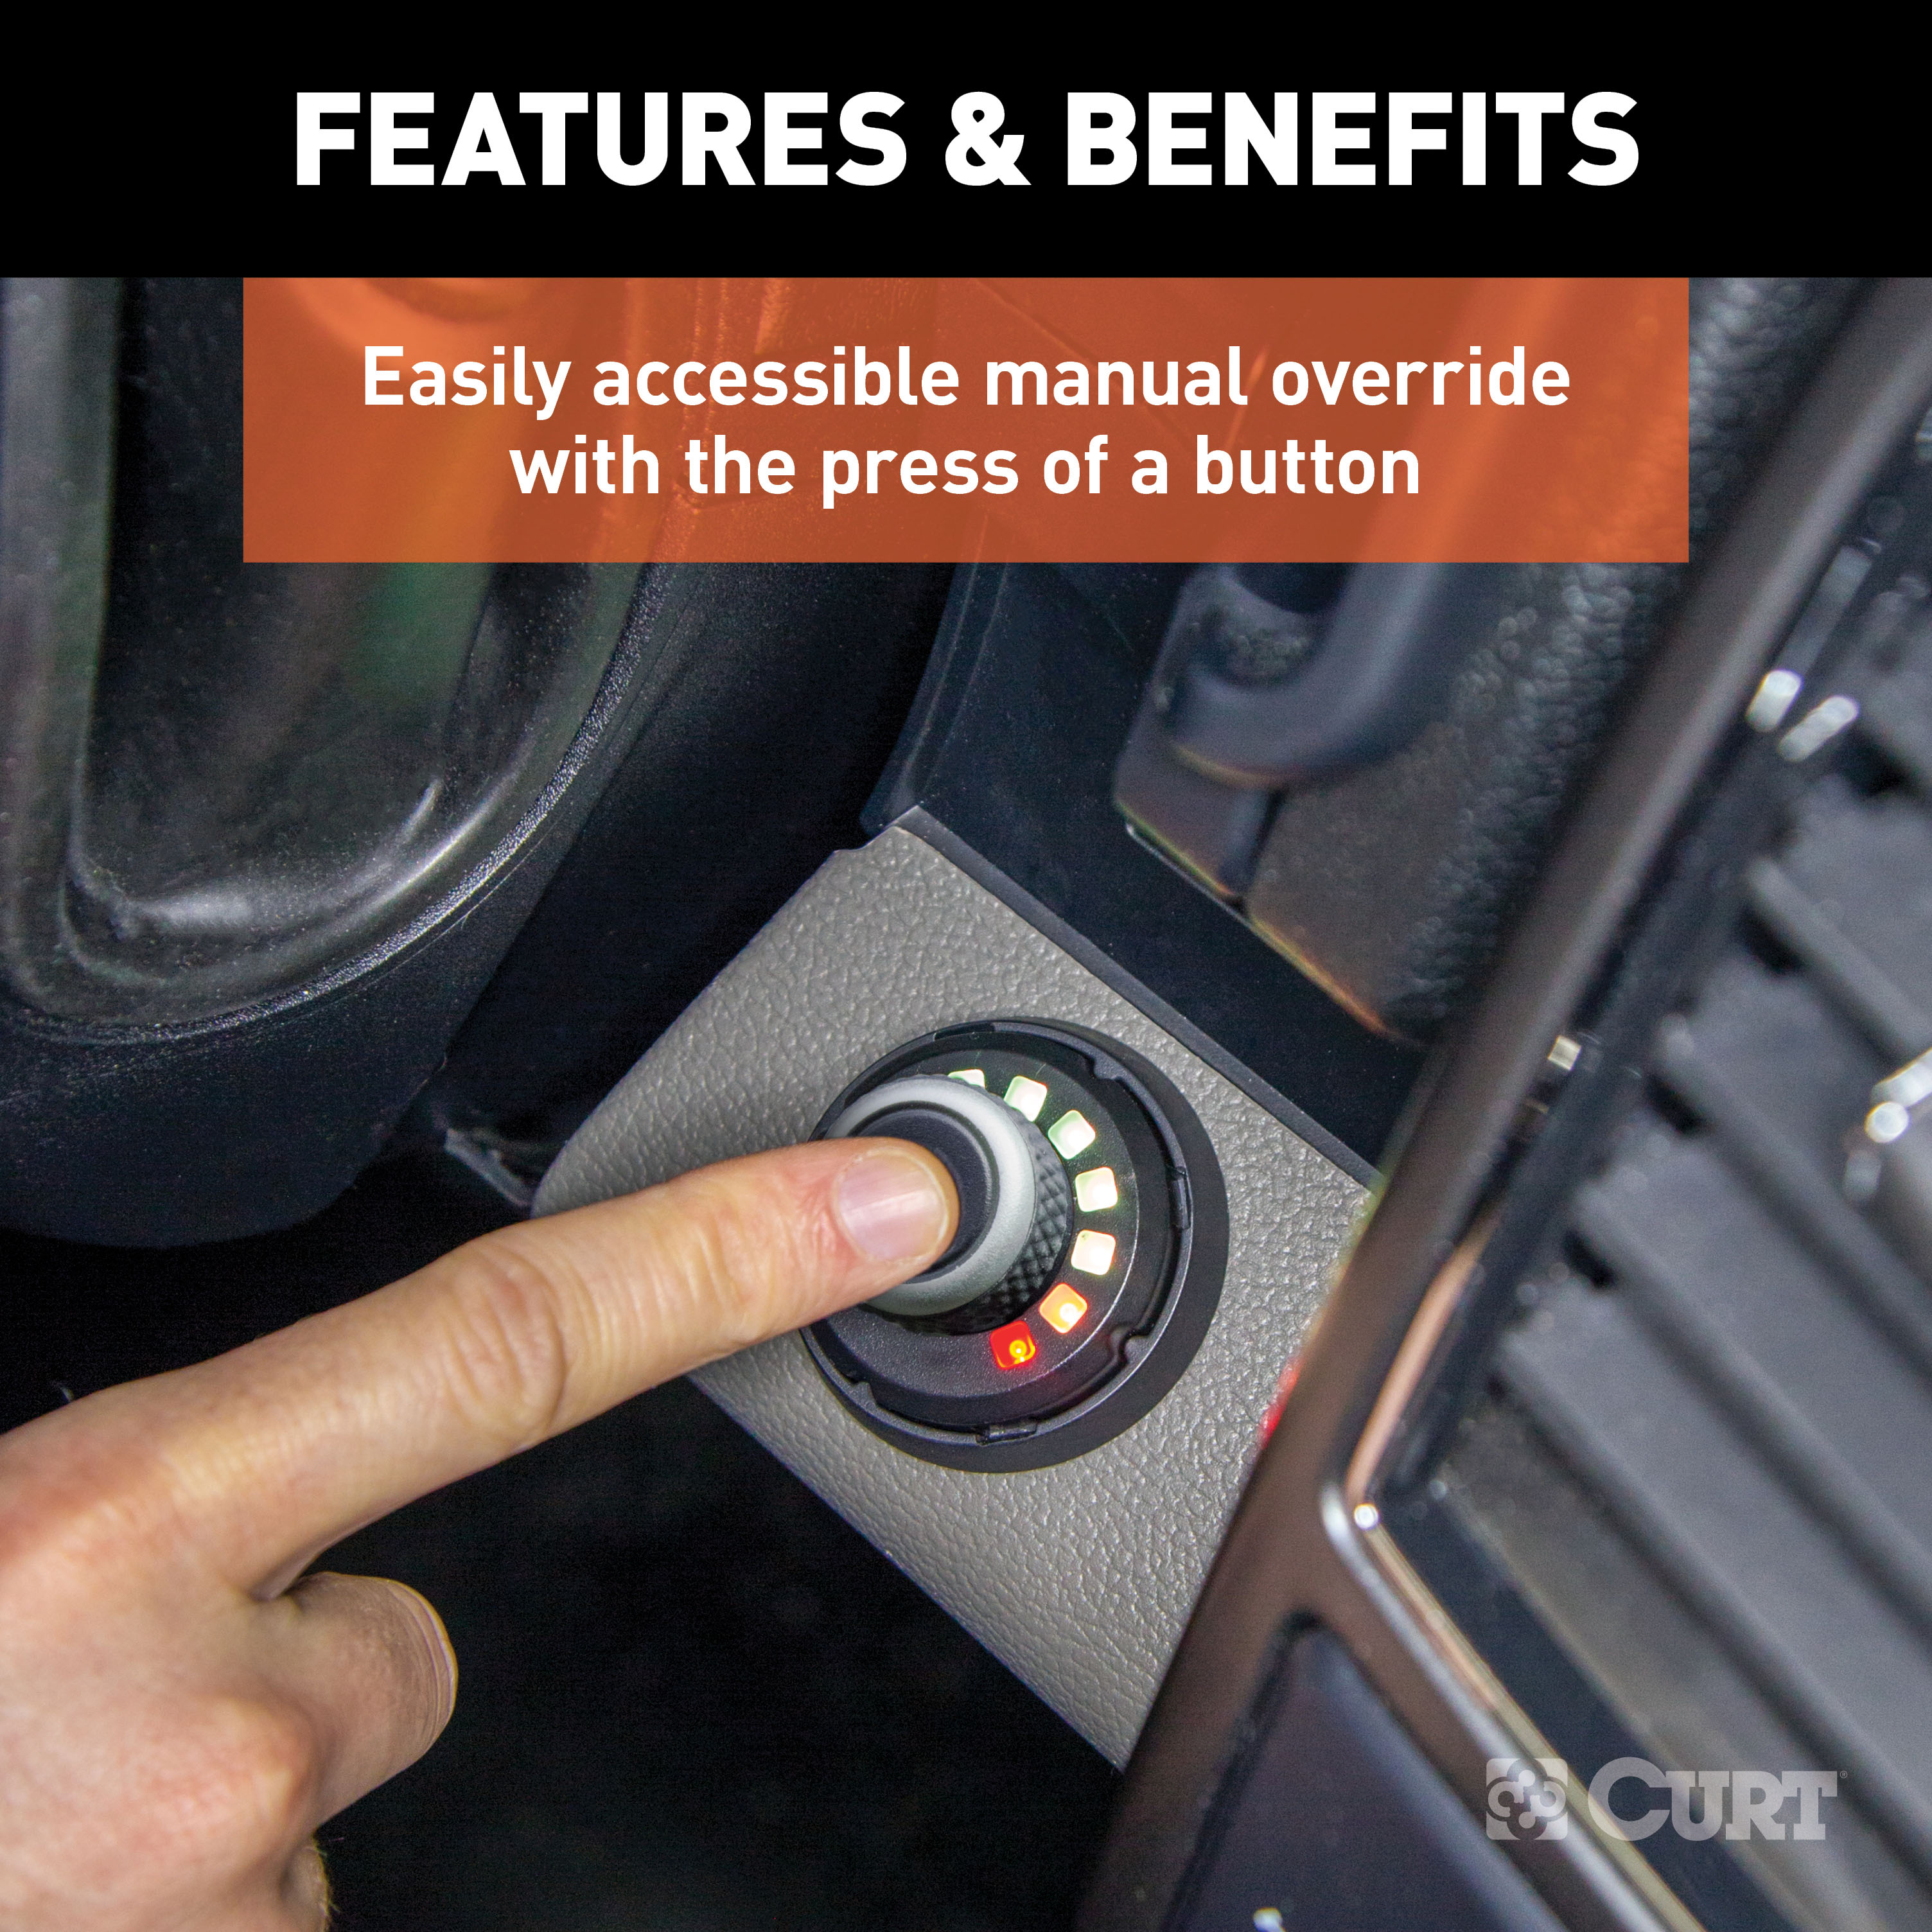
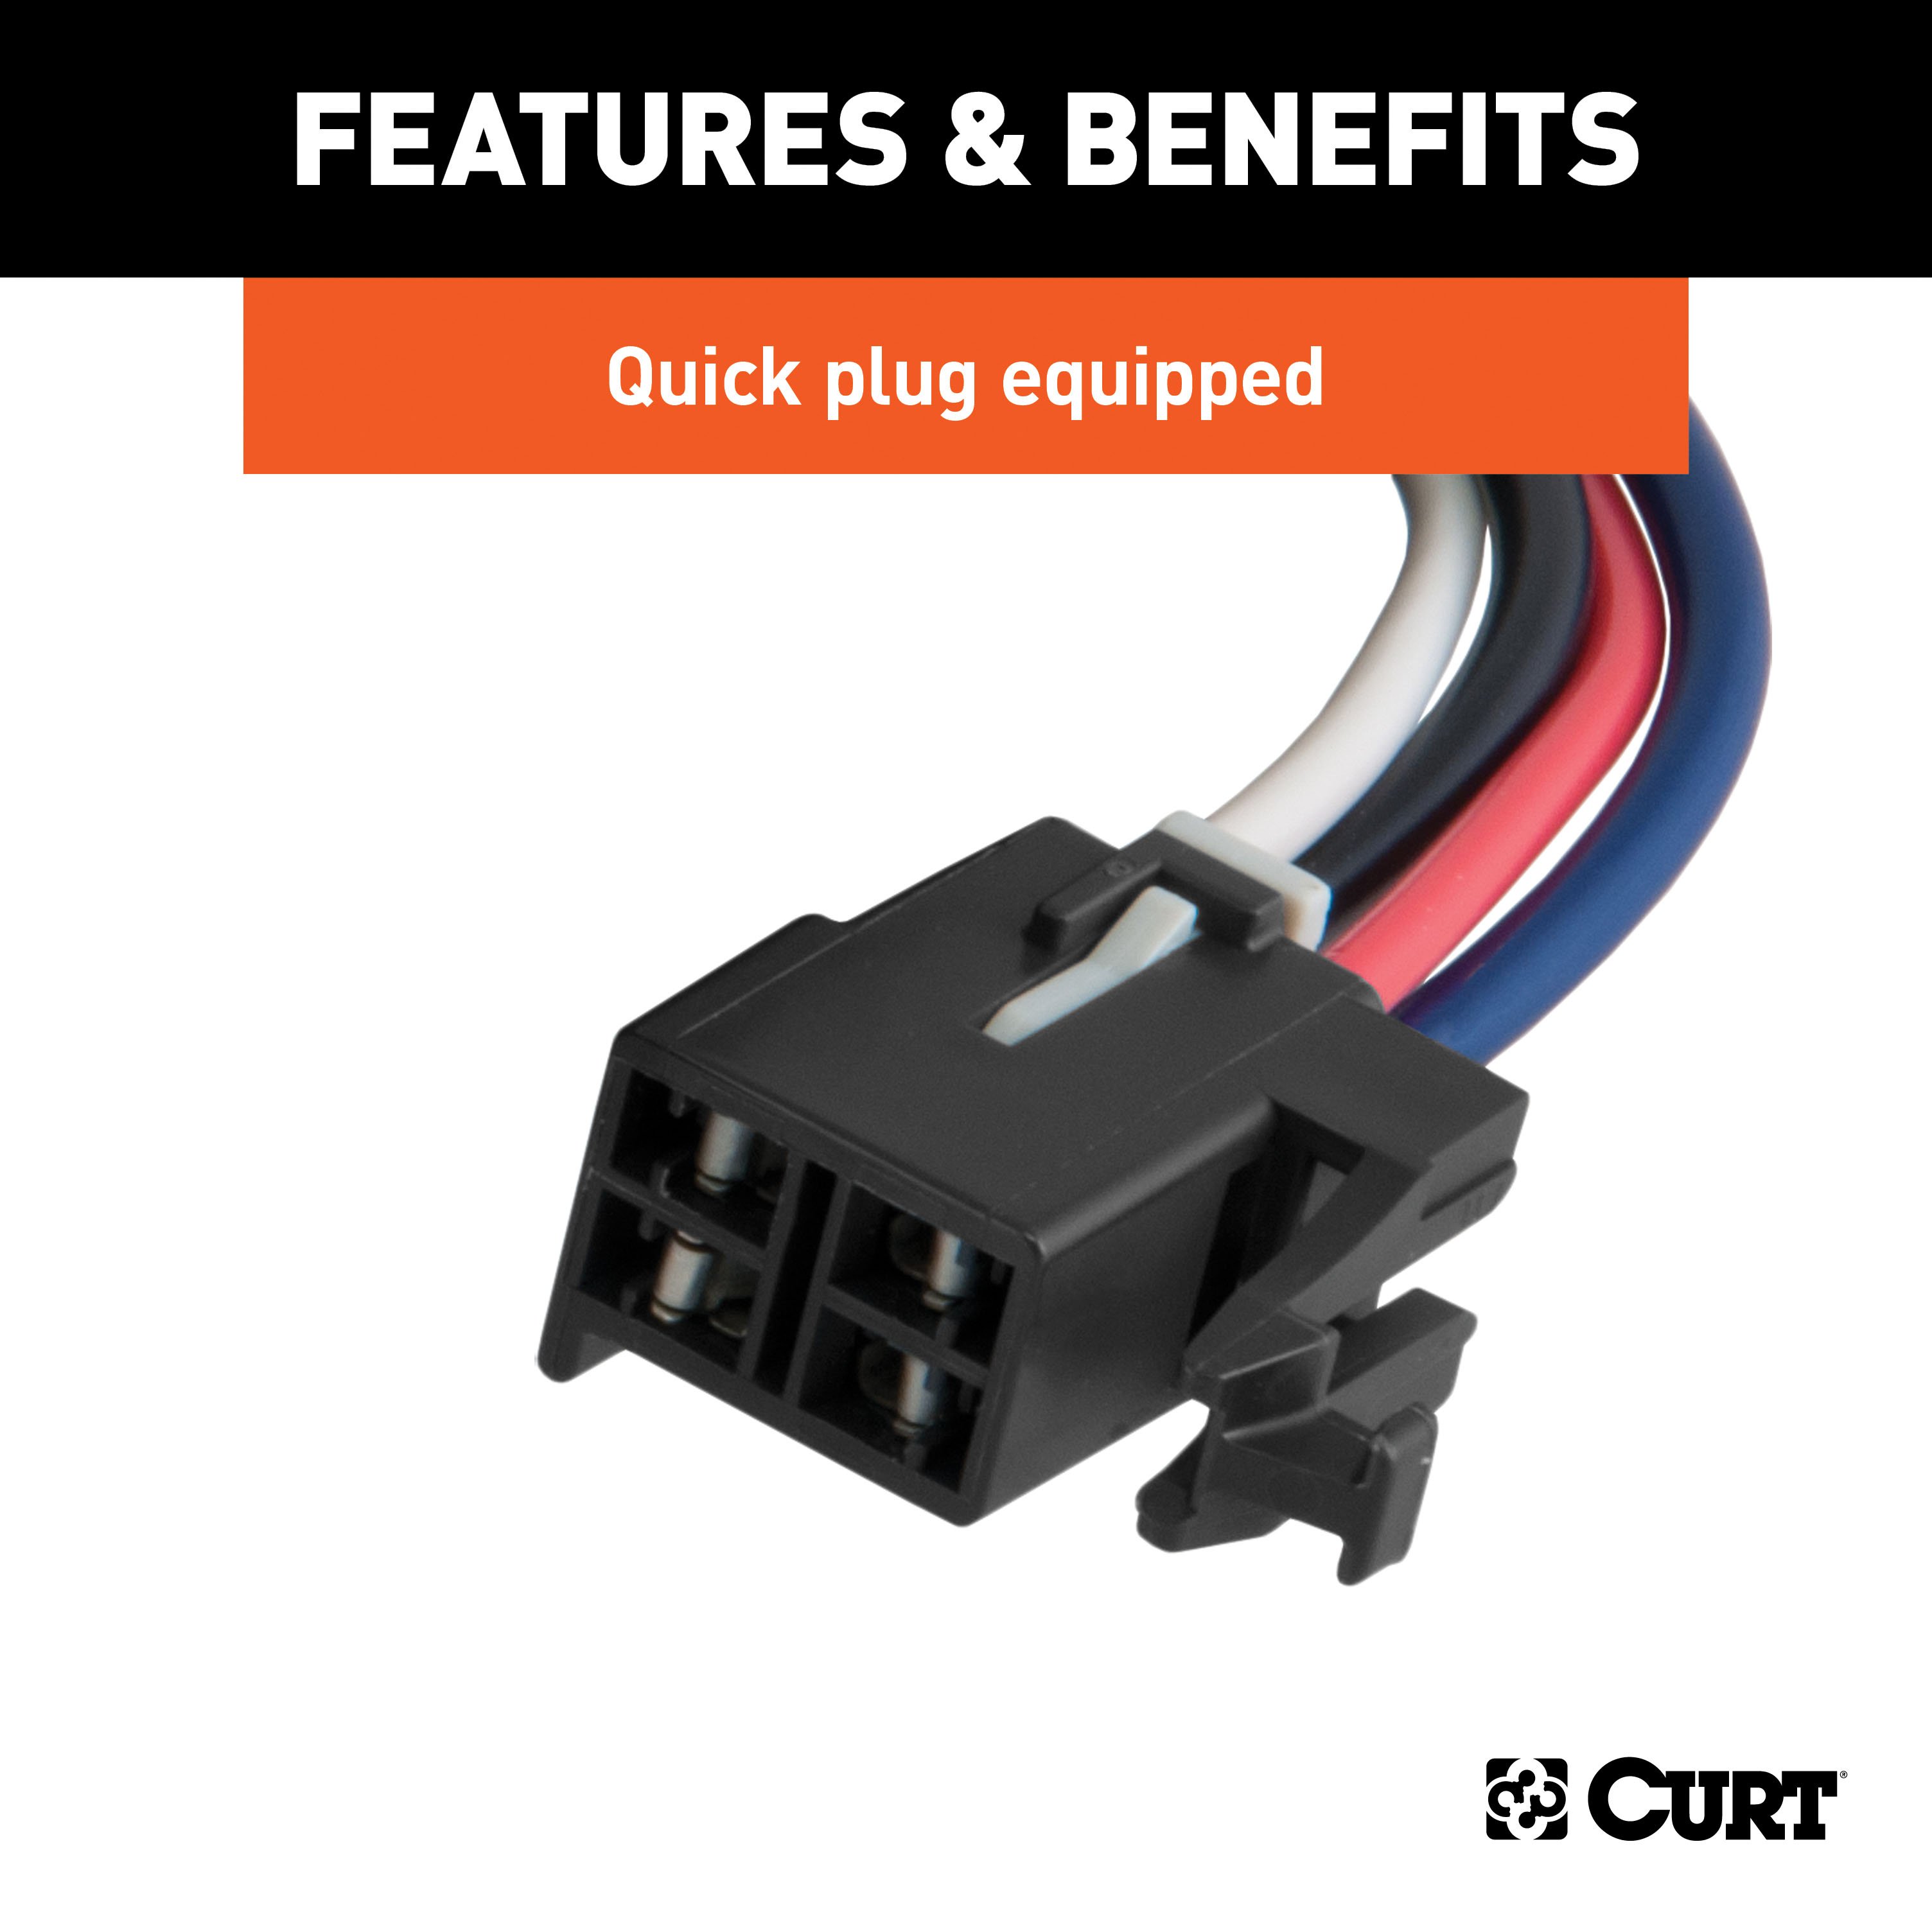
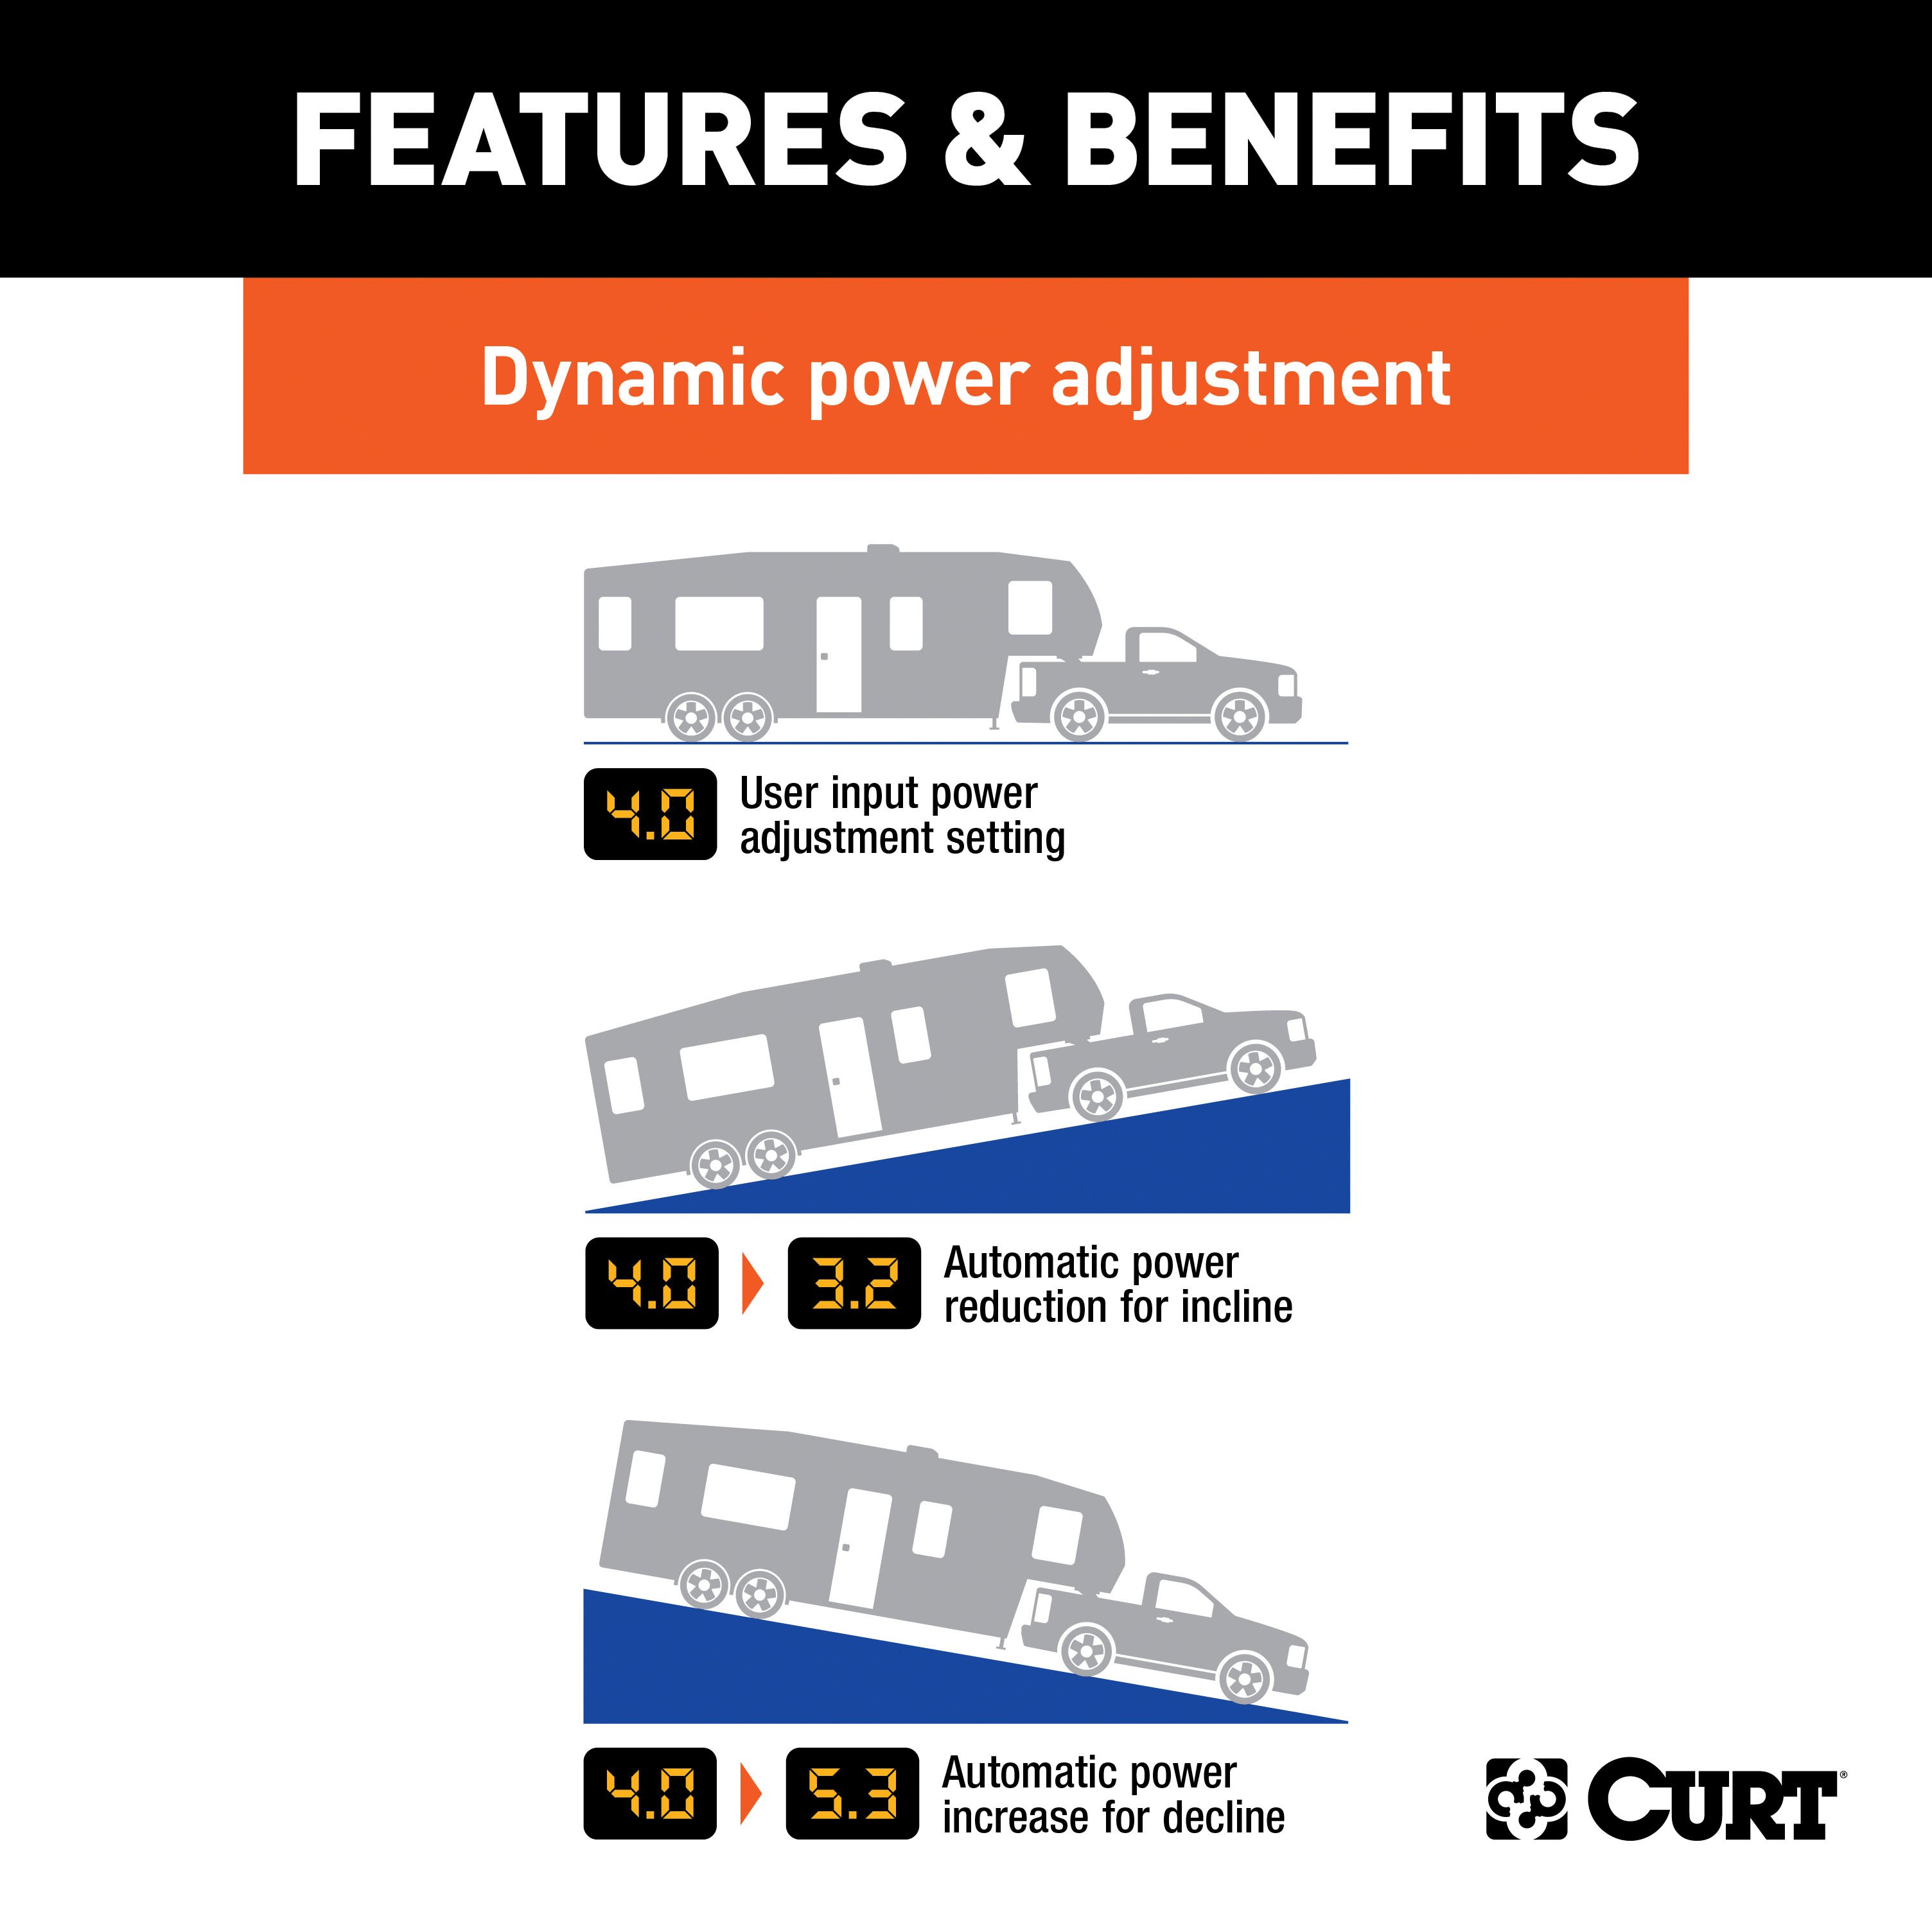
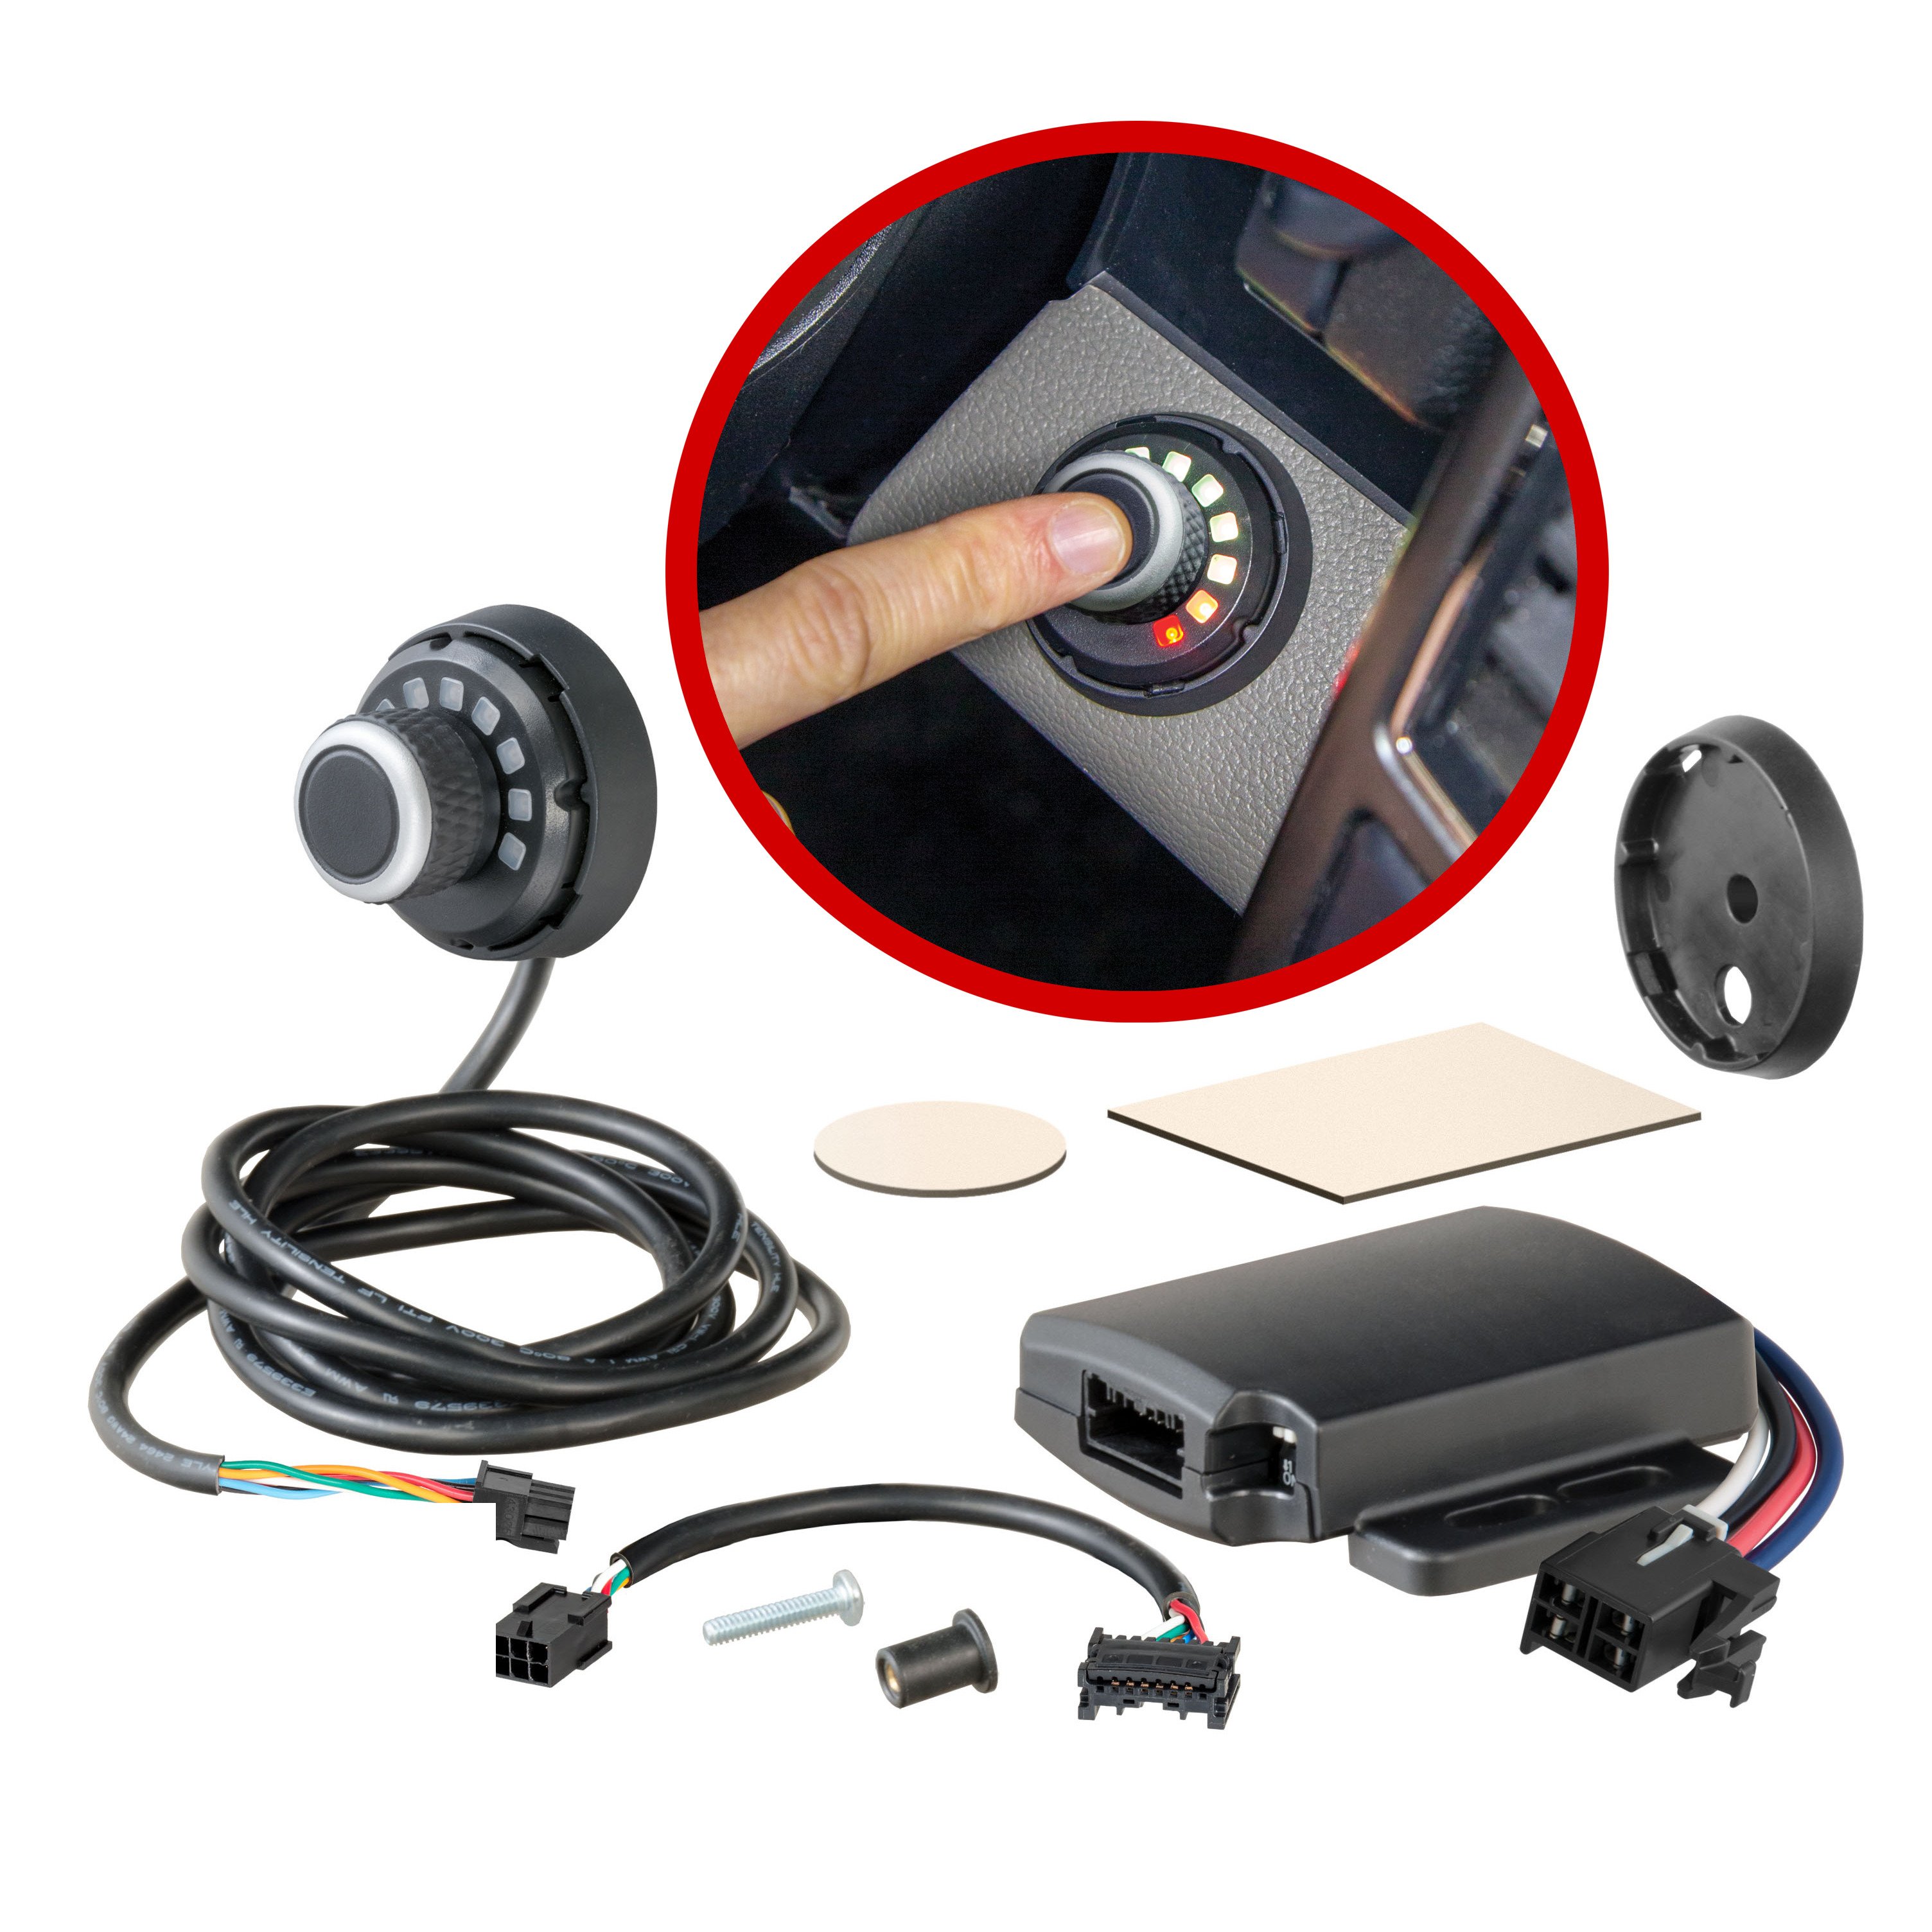
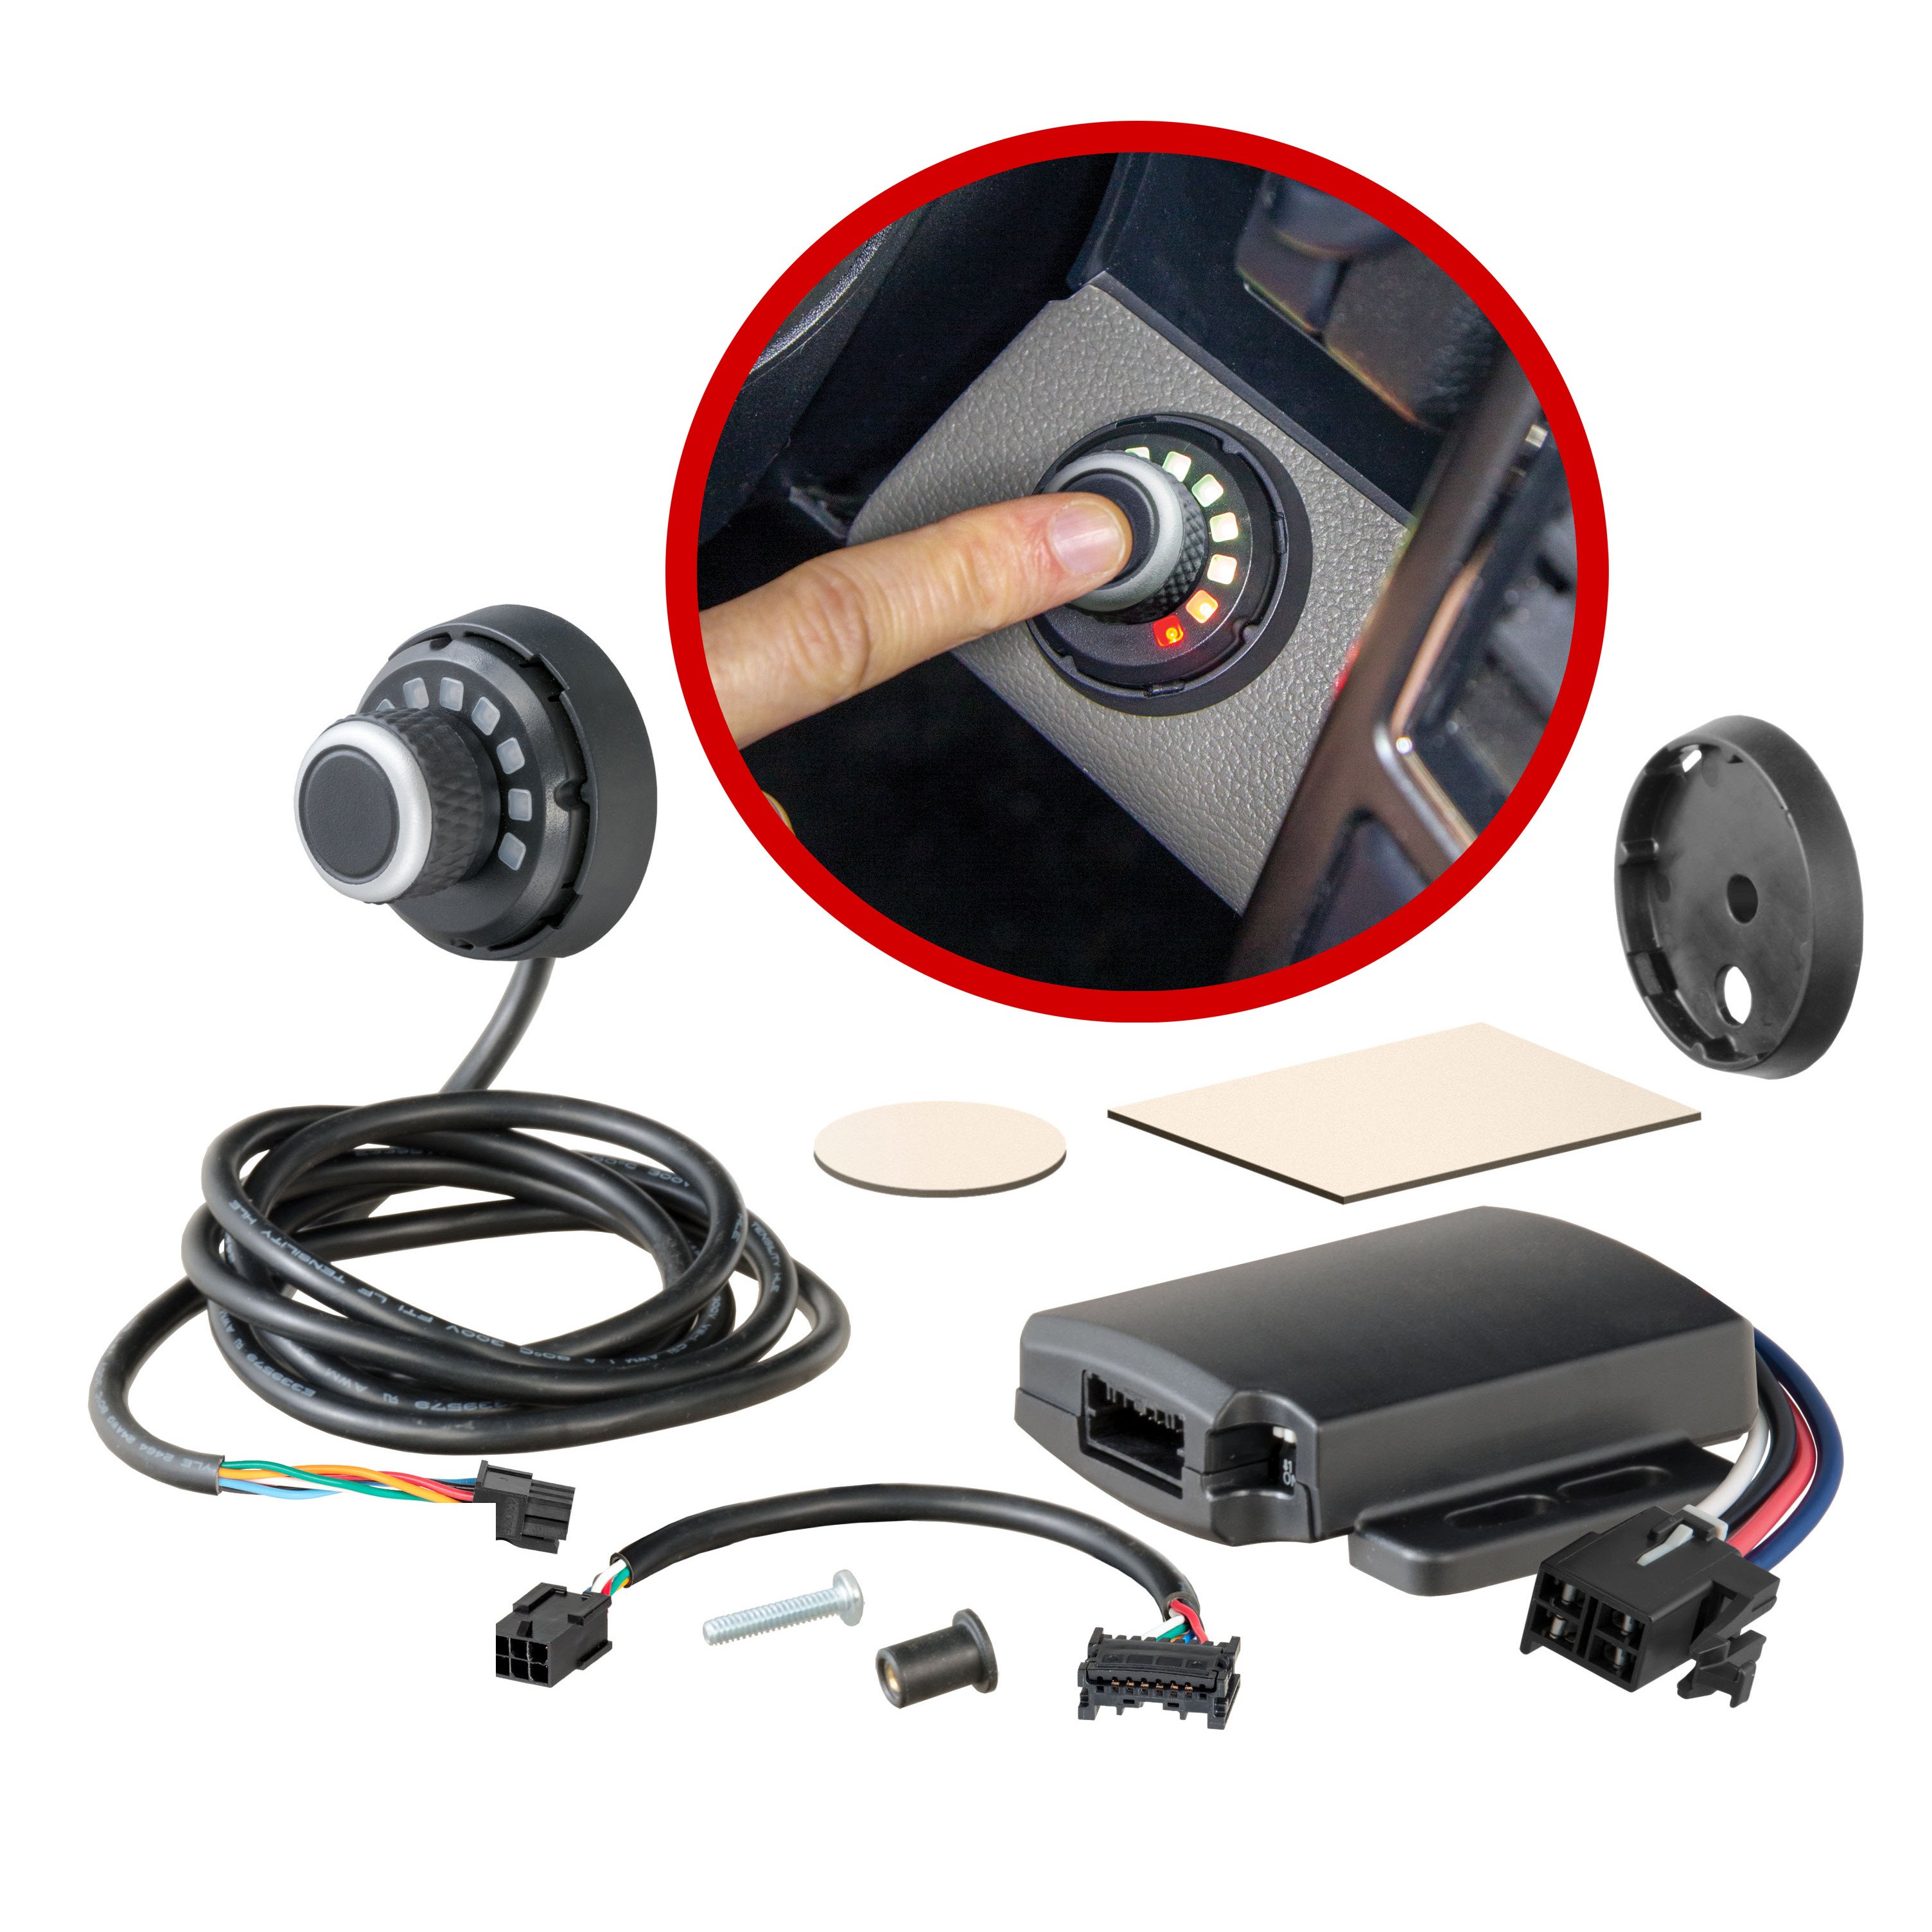
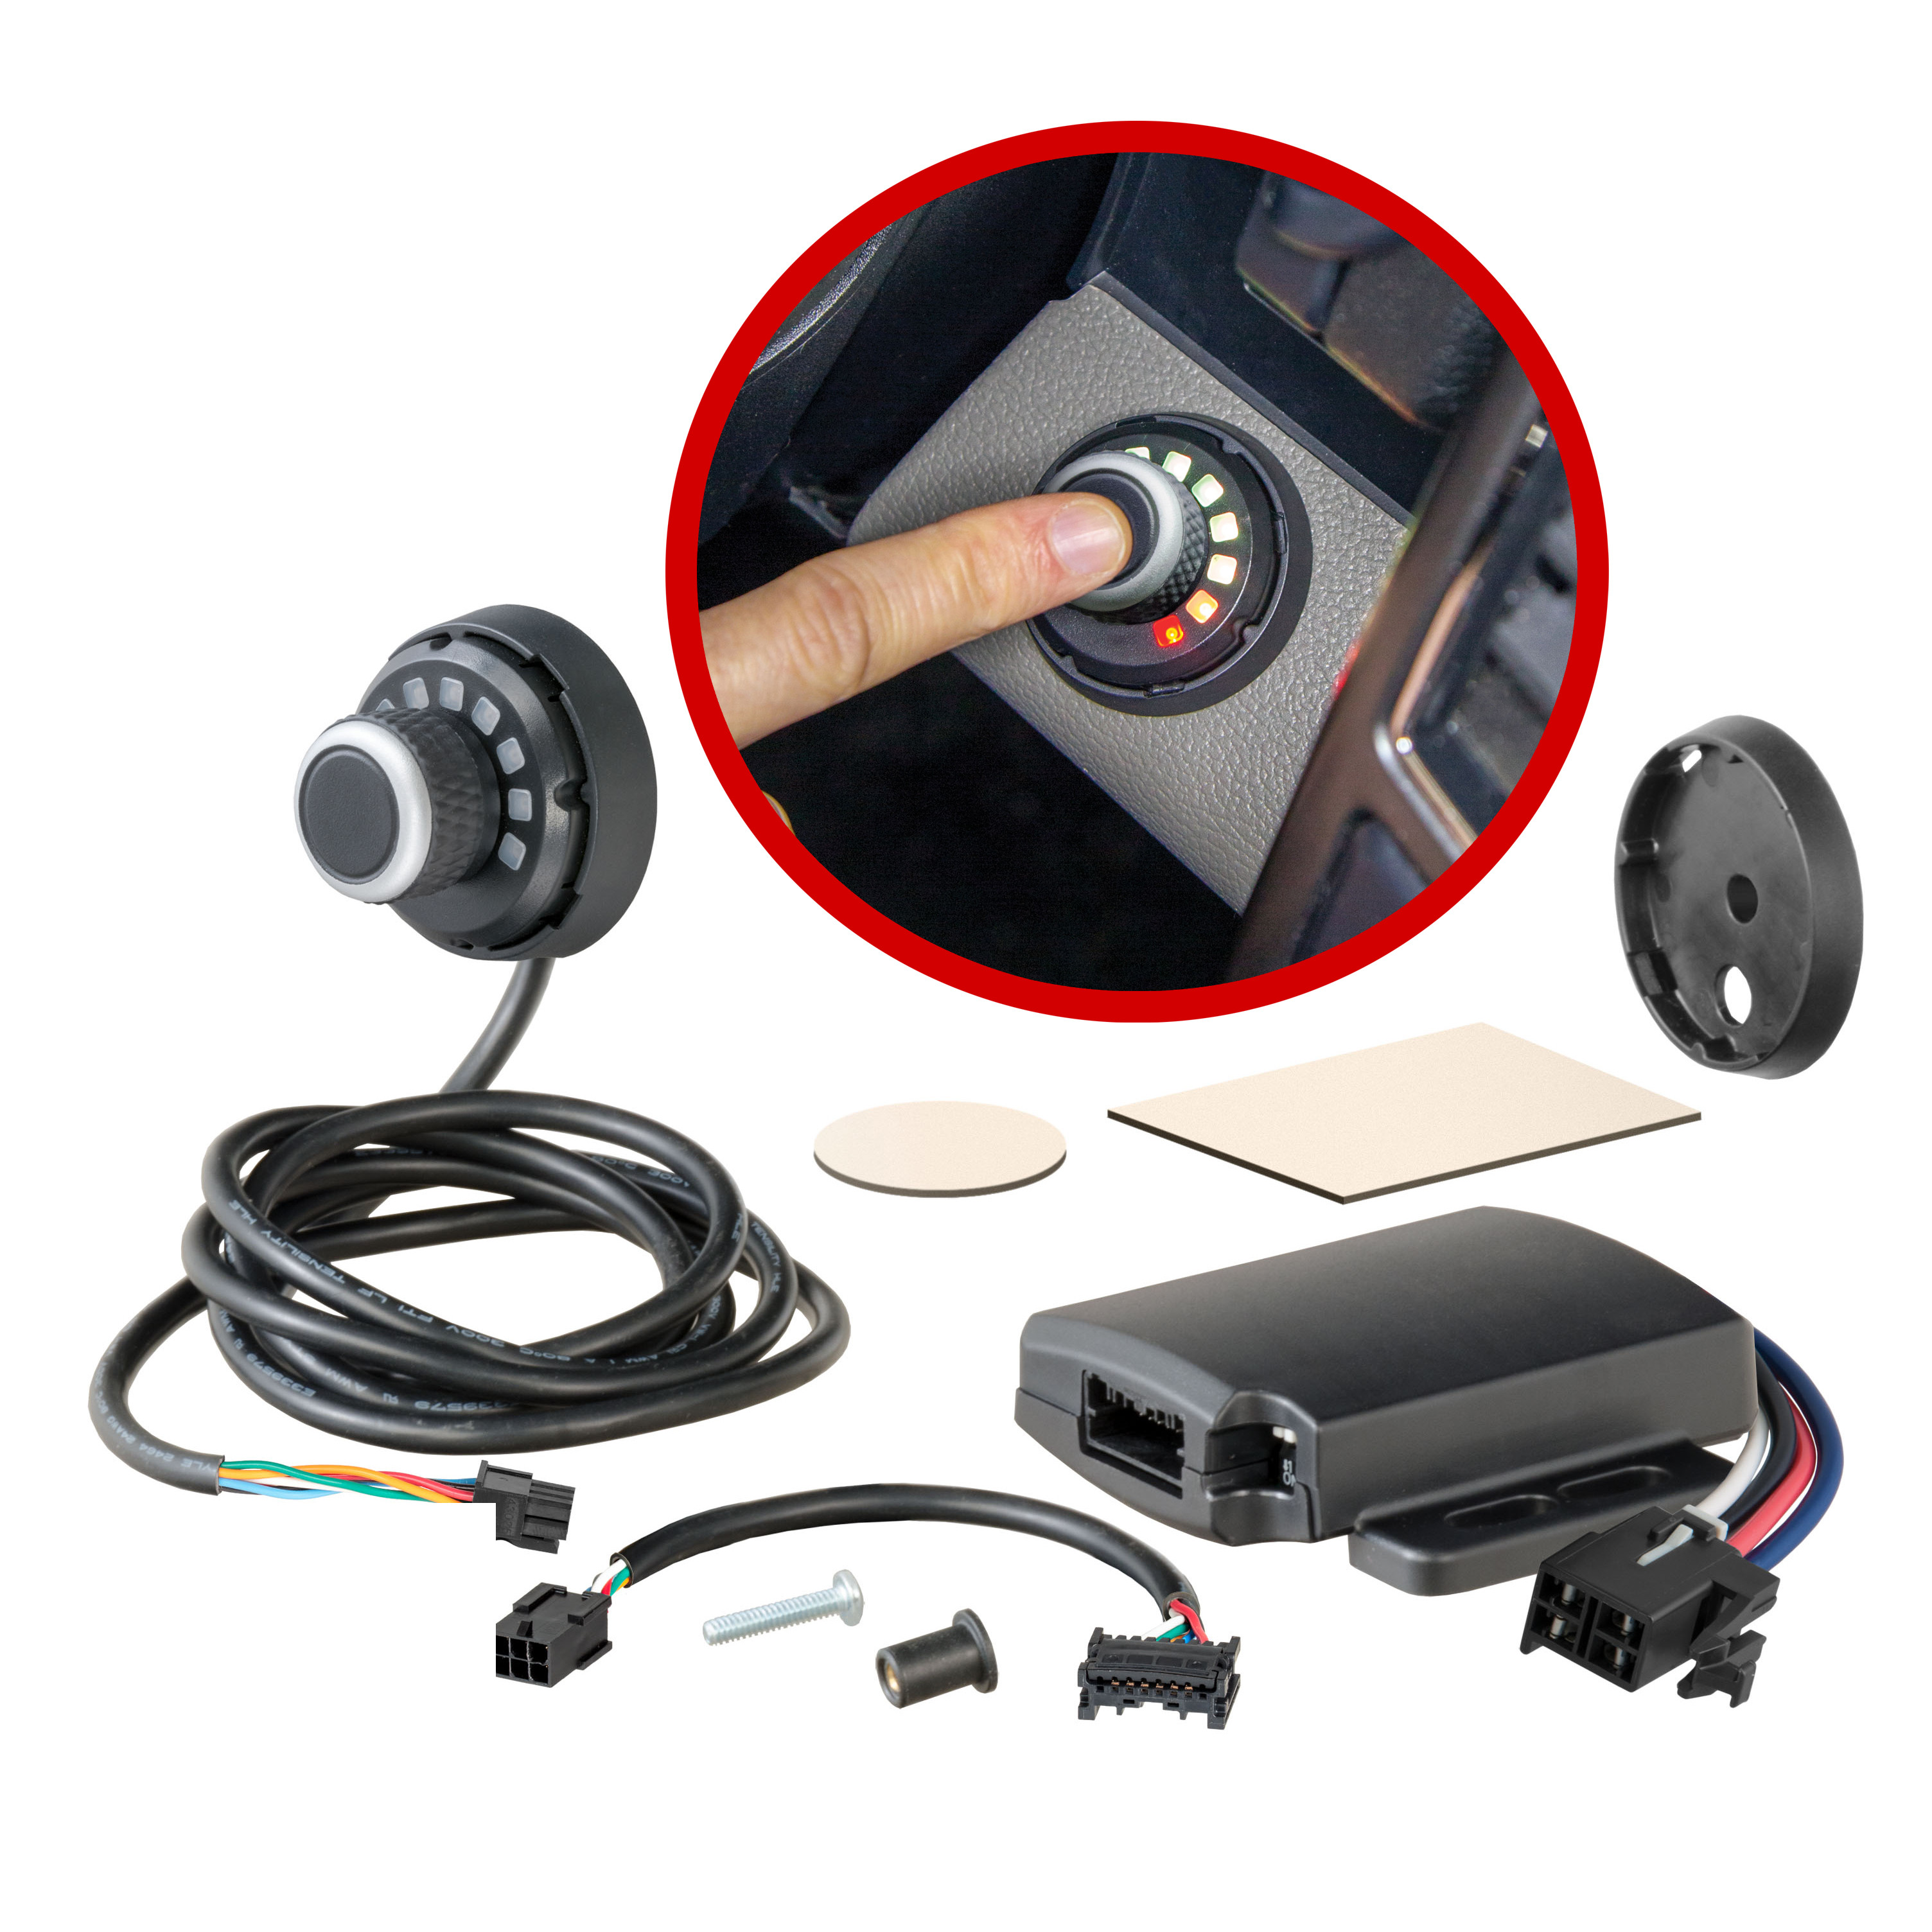
The CURT Spectrum trailer brake controller provides powerful brake operation while maintaining a clean, consistent OE look and feel on the dash of your vehicle. It is comprised of a main module and a separate user interface. This interface is a simple rotary knob with a push-button and ten tri-color LEDs to control and monitor all trailer brake activity. It also features a triple-axis accelerometer for highly responsive, smooth stops on any grade. The separated module and interface of the Spectrum brake controller allow it to integrate with the vehicle unlike any other. The main module can be mounted behind the dash and completely out of sight. The separate rotary knob provides a sleek, subtle interface that mounts on the dash of the vehicle wherever desired. It features ten LEDs with three colors each (red, green and blue) to indicate trailer brake activity and power adjustment. The rotary knob and integrated push-button allow for simple and effective operation of the control settings and manual adjustment. The Spectrum trailer brake controller offers superior safety and helps protect the life of your vehicle and trailer with its advanced triple-axis accelerometer. This integrated circuit detects the motion of the vehicle and trailer when making stops and applies the precise amount of brake power for maximum efficiency and effectiveness. The three axes of the circuit also enable the brake control to compensate when going up or down a hill. Like most CURT brake controllers, the Spectrum installs using one of our vehicle-specific quick plug harnesses. It also has automated leveling and calibration capabilities to simplify and speed up the installation process. The Spectrum trailer brake controller comes with mounting hardware for a complete installation.

CURT offers a variety of high-quality trailer hitches and accessories for select vehicle models. Find the perfect fit for your towing needs at TowUniverse.
CURT, a Lippert brand, offers a complete line of towing products and is the leading manufacturer of custom-fit trailer hitches. We offer the broadest selection of custom-fit hitches, and each one is designed, welded, and coated in Wisconsin.
CURT is also a leader in flat towing products, as well as 5th wheel, gooseneck, and weight distribution hitches, ball mounts, electrical components, cargo solutions, and other towing accessories.
For everything from passenger cars and vans to full-size pickups and SUVs, CURT is 'The First Name in Towing Products®.'

Experts available to answer your questions
Call 888-634-94941 compatible vehicles
| Year | Make & Model | Notes |
|---|---|---|
| 2003 - 2006 | Chevrolet Avalanche 1500 | — |
Yes, the 2003-2006 Chevrolet Avalanche 1500 CURT Spectrum Integrated Proportional Trailer Brake Controller (Part #51170-27) is designed to fit the 2003-2006 Chevrolet Avalanche 1500.
The 2003-2006 Chevrolet Avalanche 1500 CURT Spectrum Integrated Proportional Trailer Brake Controller (Part #51170-27) fits 2003-2006 Chevrolet Avalanche 1500 models. The 2006 model year is the last year covered by this part number. For newer models, check for an updated version.
The 2003-2006 Chevrolet Avalanche 1500 CURT Spectrum Integrated Proportional Trailer Brake Controller (Part #51170-27) fits the following vehicles: 2003-2006 Chevrolet Avalanche 1500. Always verify your specific year, make, and model before ordering.
The 2003-2006 Chevrolet Avalanche 1500 CURT Spectrum Integrated Proportional Trailer Brake Controller (Part #51170-27) Refer to the included instructions for installation details. Basic hand tools are typically all you need.
The Spectrum™ Brake Control 51170 is an electronic brake control unit that manages trailer braking when towing. It allows the driver to control trailer brake output through a rotary knob with LED display mounted in the vehicle cab, and includes automatic braking activation when the tow vehicle's brakes are applied. The system features manual control, output adjustment, sensitivity adjustment, and brightness control modes.
The 51170 is compatible with most tow vehicles equipped with a factory brake control plug. Check your vehicle owner's manual for plug availability and location. If your vehicle does not have a factory brake control plug, you can use the CURT universal brake control wiring kit #51500. For vehicle-specific quick plug harnesses, see the CURT catalog for availability.
Yes. If your tow vehicle is not equipped with a factory brake control plug, CURT recommends purchasing the CURT universal brake control wiring kit #51500 to complete the installation. Alternatively, hard wiring will be necessary.
The following tools are required: (1) Drill, (2) Drill bit, 5/16", (3) Phillips screwdriver, (4) Pry tool. A small pointed tool is also needed to adjust the two small switches located at the front of the main module.
The kit includes: (1) Main module, (2) Main module adhesive pad, (3) LED display rotary knob, (4) Jumper harness for LED display, (5) Base plate, (6) Base plate adhesive pad, (7) Screw, and (8) Zip ties.
Depending on your vehicle, you may need one or more of the following: (1) Brake control harness supplied with the tow vehicle (if equipped), (2) CURT quick plug harness—custom connector for specific vehicles (see CURT catalog for availability), (3) CURT #51515 / #51516 quick plug with pigtails, or (4) CURT #51500 universal brake control wiring kit. Check your vehicle owner's manual for factory plug availability.
Yes. Disconnect the tow vehicle's negative battery terminal from its battery post before beginning the installation process.
The main module's positive (with 30-amp circuit breaker) and ground wires must be connected directly to the tow vehicle's battery using a minimum of 10-gauge stranded wire. Connecting to existing wiring or an alternate ground may damage the vehicle's circuits, lead to failure of the brake control module, loss of trailer brakes or vehicle fire. Mount the 30-amp auto-reset circuit breaker as close to the battery as possible.
The 30-amp auto-reset circuit breaker must be mounted as close to the battery as possible.
Install the LED display rotary knob before installing the main module. The main module must be connected to the LED display rotary knob before it is mounted in place.
There are two options: (1) Drill mount option—drill two holes through the base plate and secure with two Phillips head fasteners, then drill a 1/2" hole or route the cable through the center, or (2) Surface adhesive mount option—place the base plate adhesive pad onto the base plate and adhere the base plate to the dash. In both cases, insert the LED display rotary knob into the base plate with the LEDs in the upright position and press down until you hear a 'click'.
The LED display must be mounted securely to a solid surface and must be easily reached by the driver. The area behind the mounting location must be clear to avoid damage while drilling. The orientation of the knob must be visible and accessible to the driver. When inserting the knob into the base plate, ensure the top of the LED arc is facing the upright direction.
The main module should be mounted securely to a solid surface, preferably under the dash. The unit must be firmly mounted in place to prevent improper operation and/or brake failure. Secure the main module using the provided main module adhesive pad and/or zip-ties.
Drilling is required only if you choose the drill mount option for the LED display base plate. You will need to drill two holes for the Phillips head fasteners and a 1/2" hole for the cable. If you choose the surface adhesive mount option, no drilling is required for the base plate. A 5/16" drill bit is required for the fastener holes.
Drill a 1/2" hole for the LED display cable, or route the cable out the slot provided in the base plate.
The main module uses 10-gauge stranded wire for the positive (black) and ground (white) connections to the battery. A 10-gauge blue wire connects from the tow vehicle's trailer plug 'BRAKE' terminal to the brake control. All connections to the main module use 10/12-gauge butt connectors. The black wire connects to the 'AUX' side of the 30-amp circuit breaker.
When passing wires through sheet metal, always go through an existing grommet. If there is no grommet, install one or use silicone sealant to protect the wires from sharp edges.
The red brake input wire connects to the tow vehicle's brake light circuit and is required to activate the Spectrum™ brake control. The brake light connection is still required to activate the brake control regardless of the brake light activation switch setting. The red wire must not be connected to the ground side of the stoplight switch or shorted to ground, as this will cause the LED display to show red for more than 10 seconds.
Disconnect the electrical plug between the trailer and tow vehicle before testing a breakaway switch. Failure to disconnect may damage the brake control unit.
Avoid mounting the brake control module near a CB radio or other RF transmitter.
The main module and rotary knob must be mounted firmly in place. Failure to do so could lead to improper operation and/or brake failure.
Once all electrical connections are complete, plug the trailer's electrical connector into the tow vehicle's plug while parked on a level surface. This initiates the mounting position calibration mode, shown by a green LED in ramp-up sequence. With the trailer connected and engine running, adjust the output by pressing the rotary knob to enter output control mode (green-red LEDs), then rotate the knob as needed. Adjust the sensitivity by pressing the rotary knob to enter sensitivity control mode (blue-red LEDs), then rotate the knob as needed. The vehicle must be in park or neutral with the parking brake applied, foot off the brake pedal, and no manual control actuation.
To recalibrate, unplug the trailer's electrical connector and re-plug it in. The green LED in ramp-up sequence will appear on the LED display to indicate calibration is occurring.
Drive forward on a dry and level paved or concrete surface at approximately 25 mph and apply the vehicle's brakes. If trailer braking is insufficient, rotate the LED display knob clockwise to increase output. If the trailer brakes lock up, rotate the knob counter-clockwise to decrease output. Repeat until stops are firm, just short of lock up. Once output is set, adjust sensitivity by pressing the brake pedal at approximately 25 mph. If the stop seems slow, rotate the knob clockwise to increase sensitivity. If too aggressive, rotate counter-clockwise to decrease sensitivity. Make several stops at various speeds and adjust until stops are smooth and firm. Output and sensitivity adjustments should only be made while stopped, with the transmission in park or neutral, parking brake applied, foot off the brake pedal, and no manual control actuation.
The four modes are: (1) Brightness Control—default state; rotate clockwise to increase brightness, counter-clockwise to decrease; (2) Manual Control—press and hold the button to activate; red LEDs light up proportionally to brake output; (3) Output Control—rotate clockwise to increase braking output, counter-clockwise to decrease; green represents lowest setting, red represents highest; (4) Sensitivity Control—rotate clockwise to increase sensitivity, counter-clockwise to decrease; blue represents lowest setting, red represents highest. After 10 seconds of no user input, the interface switches to brightness mode and the display goes to sleep.
Output control establishes the maximum amount of power available to the trailer brakes when braking (except when manual control is set for 100% braking). Manual control is used for situations where slow reduction in speed is desirable; as the manual control is pushed, the brake control begins to apply the trailer brakes. Manual control can be set to either limit output to the output control setting (factory default) or allow 100% output regardless of the output control setting, using the switch at the rear of the unit. Sensitivity adjustment has no effect on manual control.
The LED display shows six indicator sequences: (1) Brightness (white)—default control state; (2) Manual (red progression)—shows manual brake control activation; (3) Calibration (ramp-up)—green LEDs light up in clockwise sequence seven times when power is applied and trailer is connected; (4) Output (green-red progression)—shows output setting when control is activated; (5) Sensitivity (blue-red progression)—shows sensitivity setting; (6) Disconnected (blue flashing)—indicates when trailer has been disconnected or if brakes are pressed with no trailer connected; (7) Overloaded (red and yellow flashing)—indicates overload or short-circuit condition.
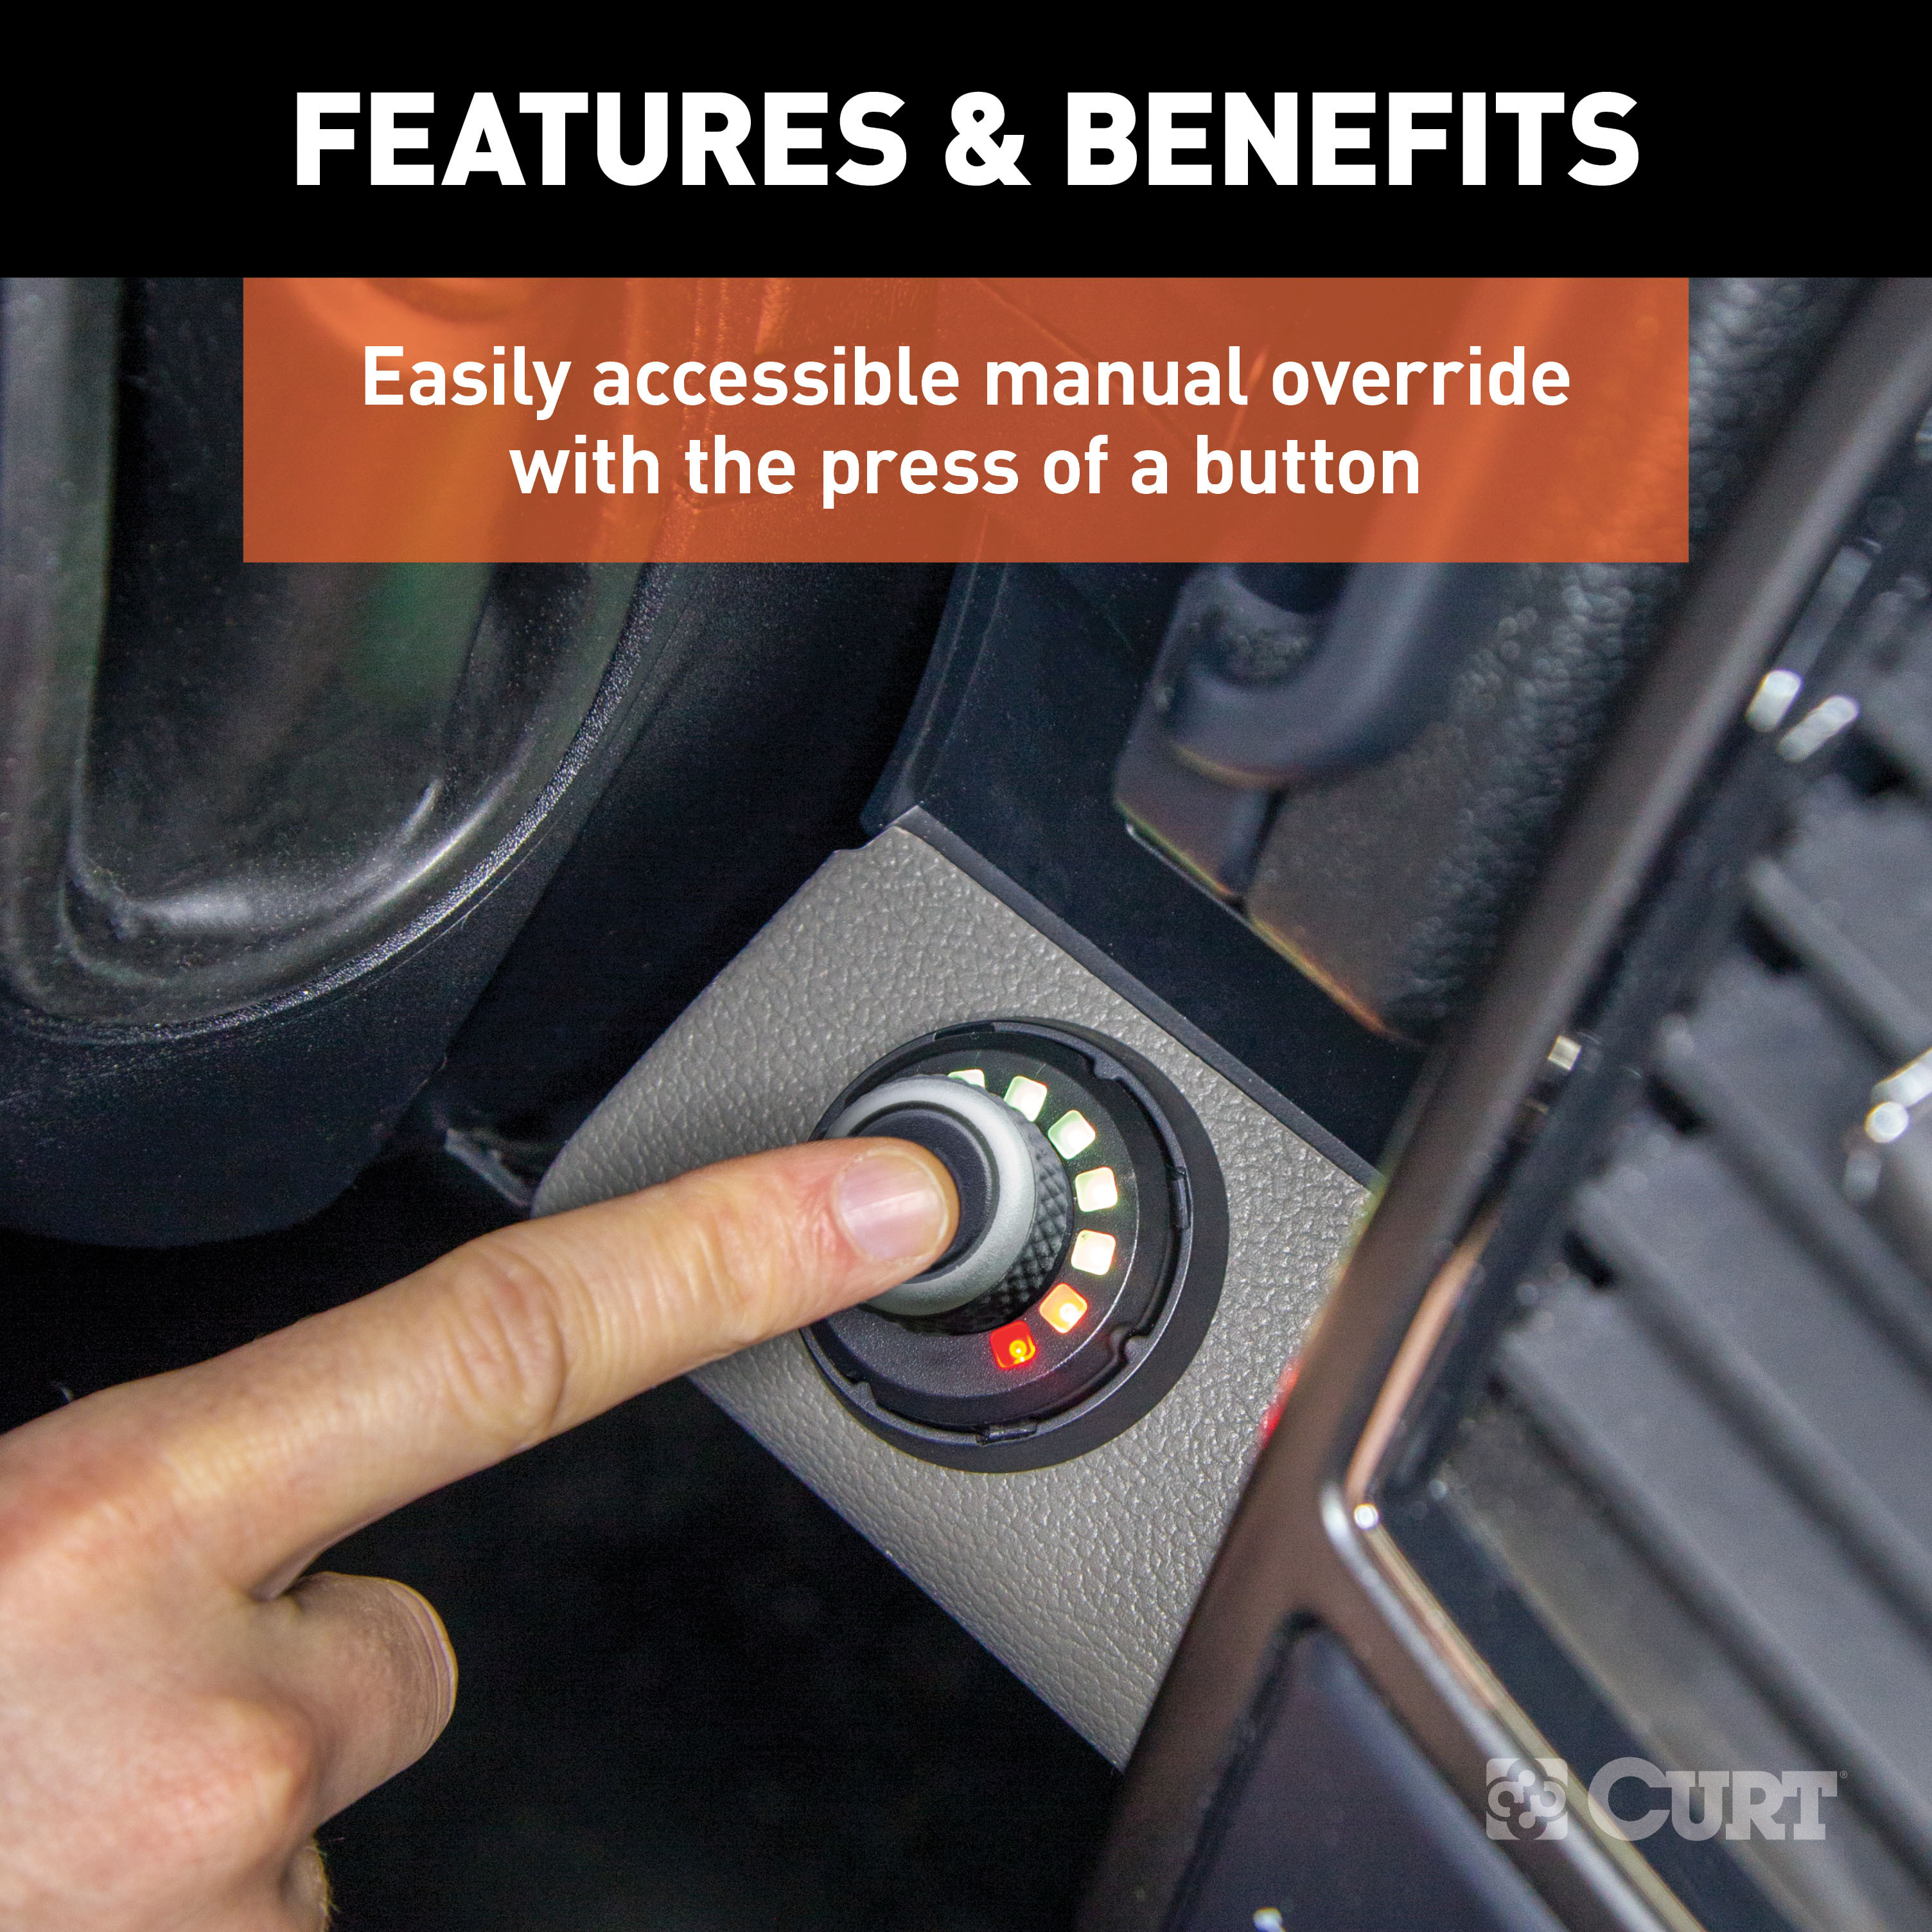
Manual control allows the driver to apply trailer brakes independently of the tow vehicle's brakes by pressing and holding the rotary knob button. The manual output functions as time-based and ramps up over time. The red LEDs light up in sequence proportionally to the brake output. While holding the button down, you can adjust the gain by rotating the knob clockwise to increase or counter-clockwise to decrease the gain. Releasing the button returns to the previous mode. Manual control can be set to limit output to the output control setting (factory default) or allow 100% output, using the switch at the rear of the unit.
Sensitivity control adjusts trailer brake aggressiveness. Rotating the knob clockwise increases sensitivity (blue to red), while counter-clockwise decreases sensitivity. Sensitivity adjustment has no effect on manual control. The sensitivity control can be adjusted for individual driver preference, trailer load changes or changing road conditions. After 10 seconds of no user input, the interface switches to brightness mode and the display goes to sleep.
Brightness control is the default control state of the LED display. Rotating the knob clockwise increases the brightness of the display, while counter-clockwise decreases the brightness. This allows you to adjust the display visibility based on lighting conditions in the vehicle cab.
The calibration indicator shows a green LED ramp-up sequence (green LEDs light up in clockwise sequence seven times) and indicates when the brake control is self-calibrating. This occurs when power is applied to the brake control and a trailer is connected. This ensures power to the Spectrum™ and indicates the unit is ready for operation.
The disconnected indicator shows blue flashing LEDs and indicates when the trailer has been disconnected. If the brakes are pressed with no trailer connected, the indicator shows steady blue as long as the brake pedal is held.
The overload indicator shows red and yellow LEDs flashing in sequence and indicates when the brake control is in an overload or short-circuit condition. The LEDs will continue to flash red and yellow in sequence until the overload condition is removed.
There are two small switches located at the front of the main module, next to the port. Switch #1 (left) controls the unit's brake light activation feature. Factory default is 'ON' (switch down), which activates the tow vehicle and trailer brake lights when the manual control is actuated. Moving the switch up to 'OFF' turns off the brake light activation feature. Switch #2 (right) controls the level of output available to the trailer brakes when using manual control. Factory default is 'ON' (switch down), which limits the manual control output to the level set using the output control. Moving the switch up to 'OFF' allows 100% of the output to the brakes when the manual control is actuated regardless of the output control setting.
No. Output and sensitivity adjustments should only be made while stopped, with the transmission in park or neutral, parking brake applied, foot off the brake pedal, and no manual control actuation. Output and sensitivity settings will be lit a few seconds after the adjustments are made and will then go into brightness mode.
The 51170 is compatible with most tow vehicles equipped with a factory brake control plug. Check your vehicle owner's manual for plug availability. If your vehicle lacks a factory plug, use the CURT universal brake control wiring kit #51500.
You will need: drill, 5/16" drill bit, Phillips screwdriver, pry tool, and a small pointed tool to adjust the switches on the main module.
Yes, disconnect the tow vehicle's negative battery terminal before beginning installation.
Drilling is required only if you choose the drill mount option for the LED display base plate. You will drill two holes for fasteners and a 1/2" hole for the cable. The adhesive mount option requires no drilling.
The positive and ground wires must use a minimum of 10-gauge stranded wire connected directly to the tow vehicle's battery with a 30-amp auto-reset circuit breaker mounted as close to the battery as possible.
The positive and ground wires must connect directly to the tow vehicle's battery using minimum 10-gauge stranded wire. Connecting to existing wiring or an alternate ground may damage vehicle circuits, cause brake control failure, loss of trailer brakes or vehicle fire.
Plug the trailer's electrical connector into the tow vehicle's plug while parked on a level surface. This initiates calibration mode, shown by a green LED ramp-up sequence. Then adjust output and sensitivity with the trailer connected and engine running.
No power to the brake control, no ground, reversed black and white wires on the main module, or LED display plug connector not wired correctly are the likely causes. Check the brake control wiring connections, ensuring the black wire connects to the 'AUX' side of the 30-amp circuit breaker and the white wire is properly connected to ground. Verify the LED display plug connector is wired correctly to the main module.
The red wire is connected to the ground side of the stoplight switch or is shorted to ground. Check and repair the red wire connections according to the Wiring section of the manual. The red wire must connect to the brake signal from the tow vehicle, not to ground.
The brake control unit may be mis-wired or there may be contamination in the trailer plug socket. Check the brake control wiring connections and clean and dry the trailer plug socket.
The red wire is connected to the ground side of the stoplight switch or is shorted to ground. Check the brake control wiring. You may also need to change the switch setting in the Manual Control section. Verify the red wire connects to the brake signal, not to ground.
There is a short in the blue wire of the main module or trailer plug. Locate and correct the short in the blue wire, which carries the brake output signal.
There is an accelerometer error. Unplug the trailer connector and plug it back in to reset the calibration.
There is no connection between the brake control and trailer brakes (blue circuit). Confirm the trailer is connected, confirm the connector terminal positions are correct, and check that the trailer brakes are functioning properly.
The trailer connector is mis-wired. Confirm the trailer connector terminal positions are correct according to the wiring diagram.
There is a short or overload in the trailer brakes. Troubleshoot the trailer brake circuit per the brake manufacturer's instructions.
The trailer connector is mis-wired. Confirm the trailer connector terminal positions are correct according to the wiring diagram.
The trailer connector is mis-wired. Check and correct the connector wire positions according to the wiring diagram.
There is a loss of trailer connection due to unplugged connector or bad wiring. Stop and check the trailer connector to ensure it is properly plugged in and the wiring is intact.
On Sale Today
Original price was $304.95. Current price is $269.95.You save $35.00 (11%)
Free Shipping
Ships free on all orders
 Authorized Dealer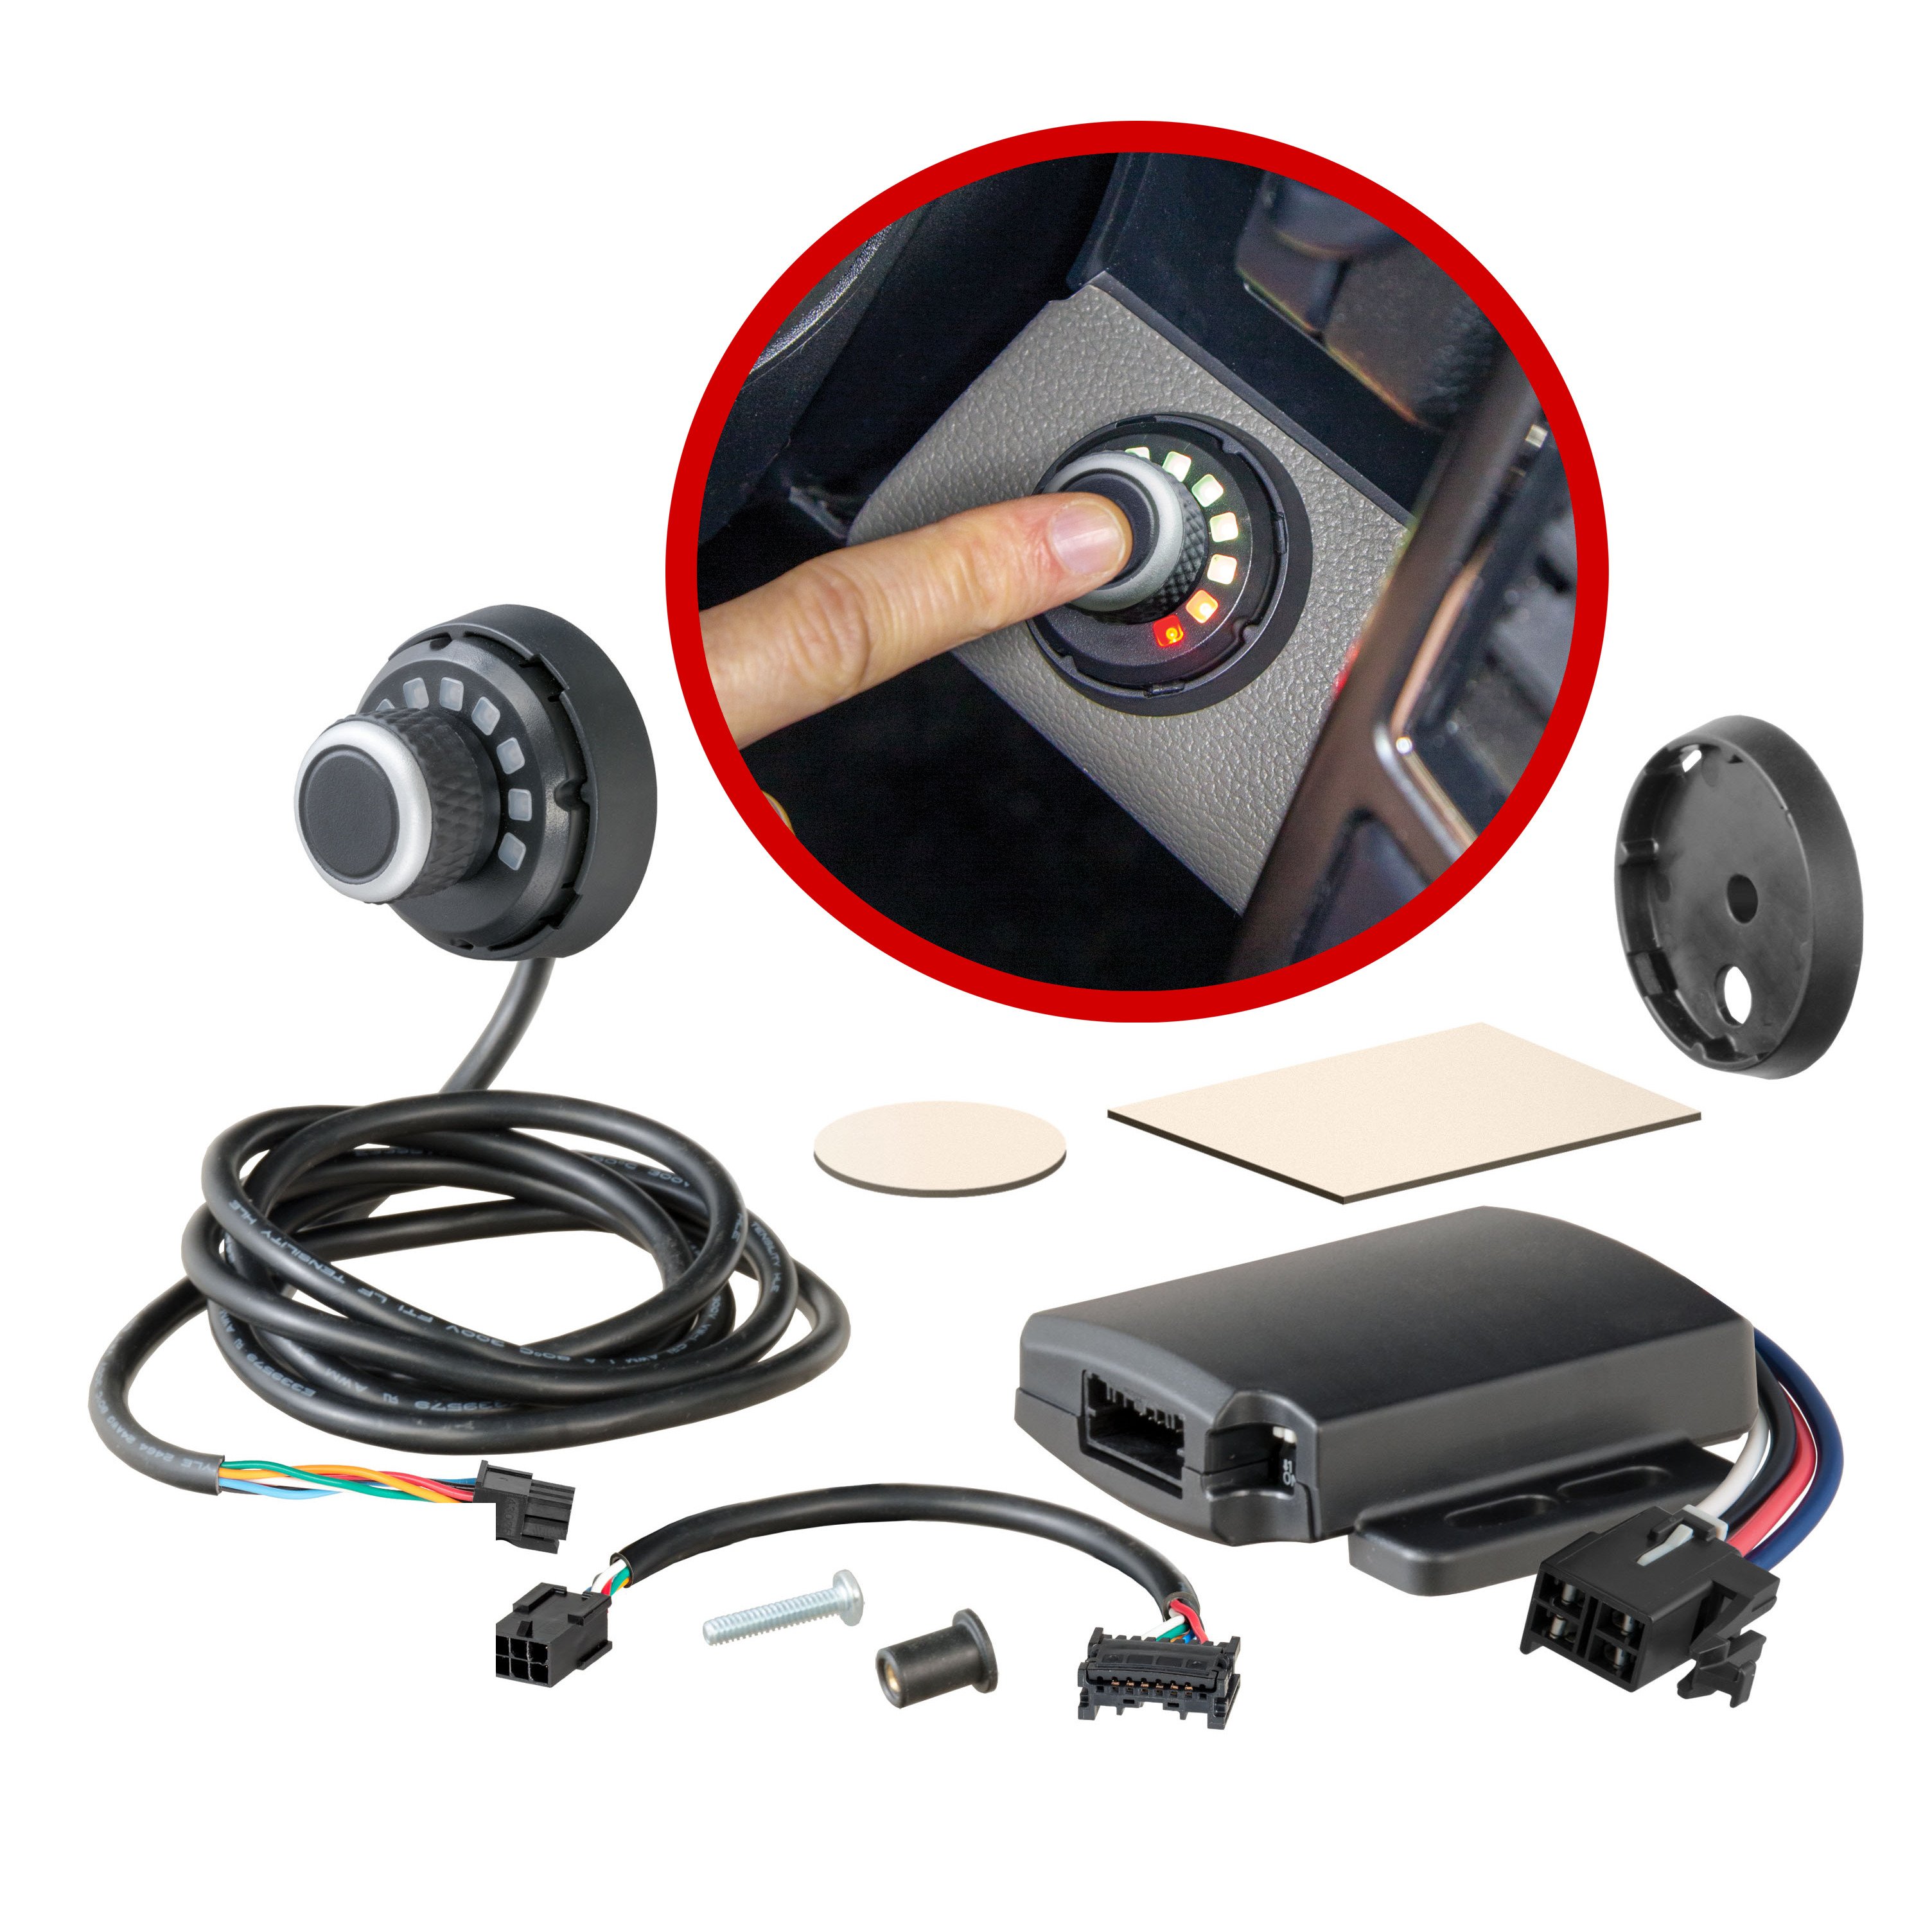
Quick Ship
In stock and ready to ship — order now!
FREE ShippingFREE SHIPPING
Estimated delivery Wed, Sep 23 - Sat, Sep 26
Order before 2 PM EST Monday–Friday for same-day processing
Guaranteed safe & secure checkout
No reviews have been added for this product.