
ARIES ActionTrac 69.6" Powered Running Boards, Select Jeep Wrangler JL Step Nerf Bar KitARIESOriginal price was $2,410.95. Current price is $1,720.00.In Stock
View productOur in-house experts typically reply within one business day.

ARIES
Verify Fitment
Select your vehicle to confirm this part fits.







Always the correct part
We know our products
Quality Products
Free Shipping!
Always the correct part
We know our products
Quality Products
Free Shipping!
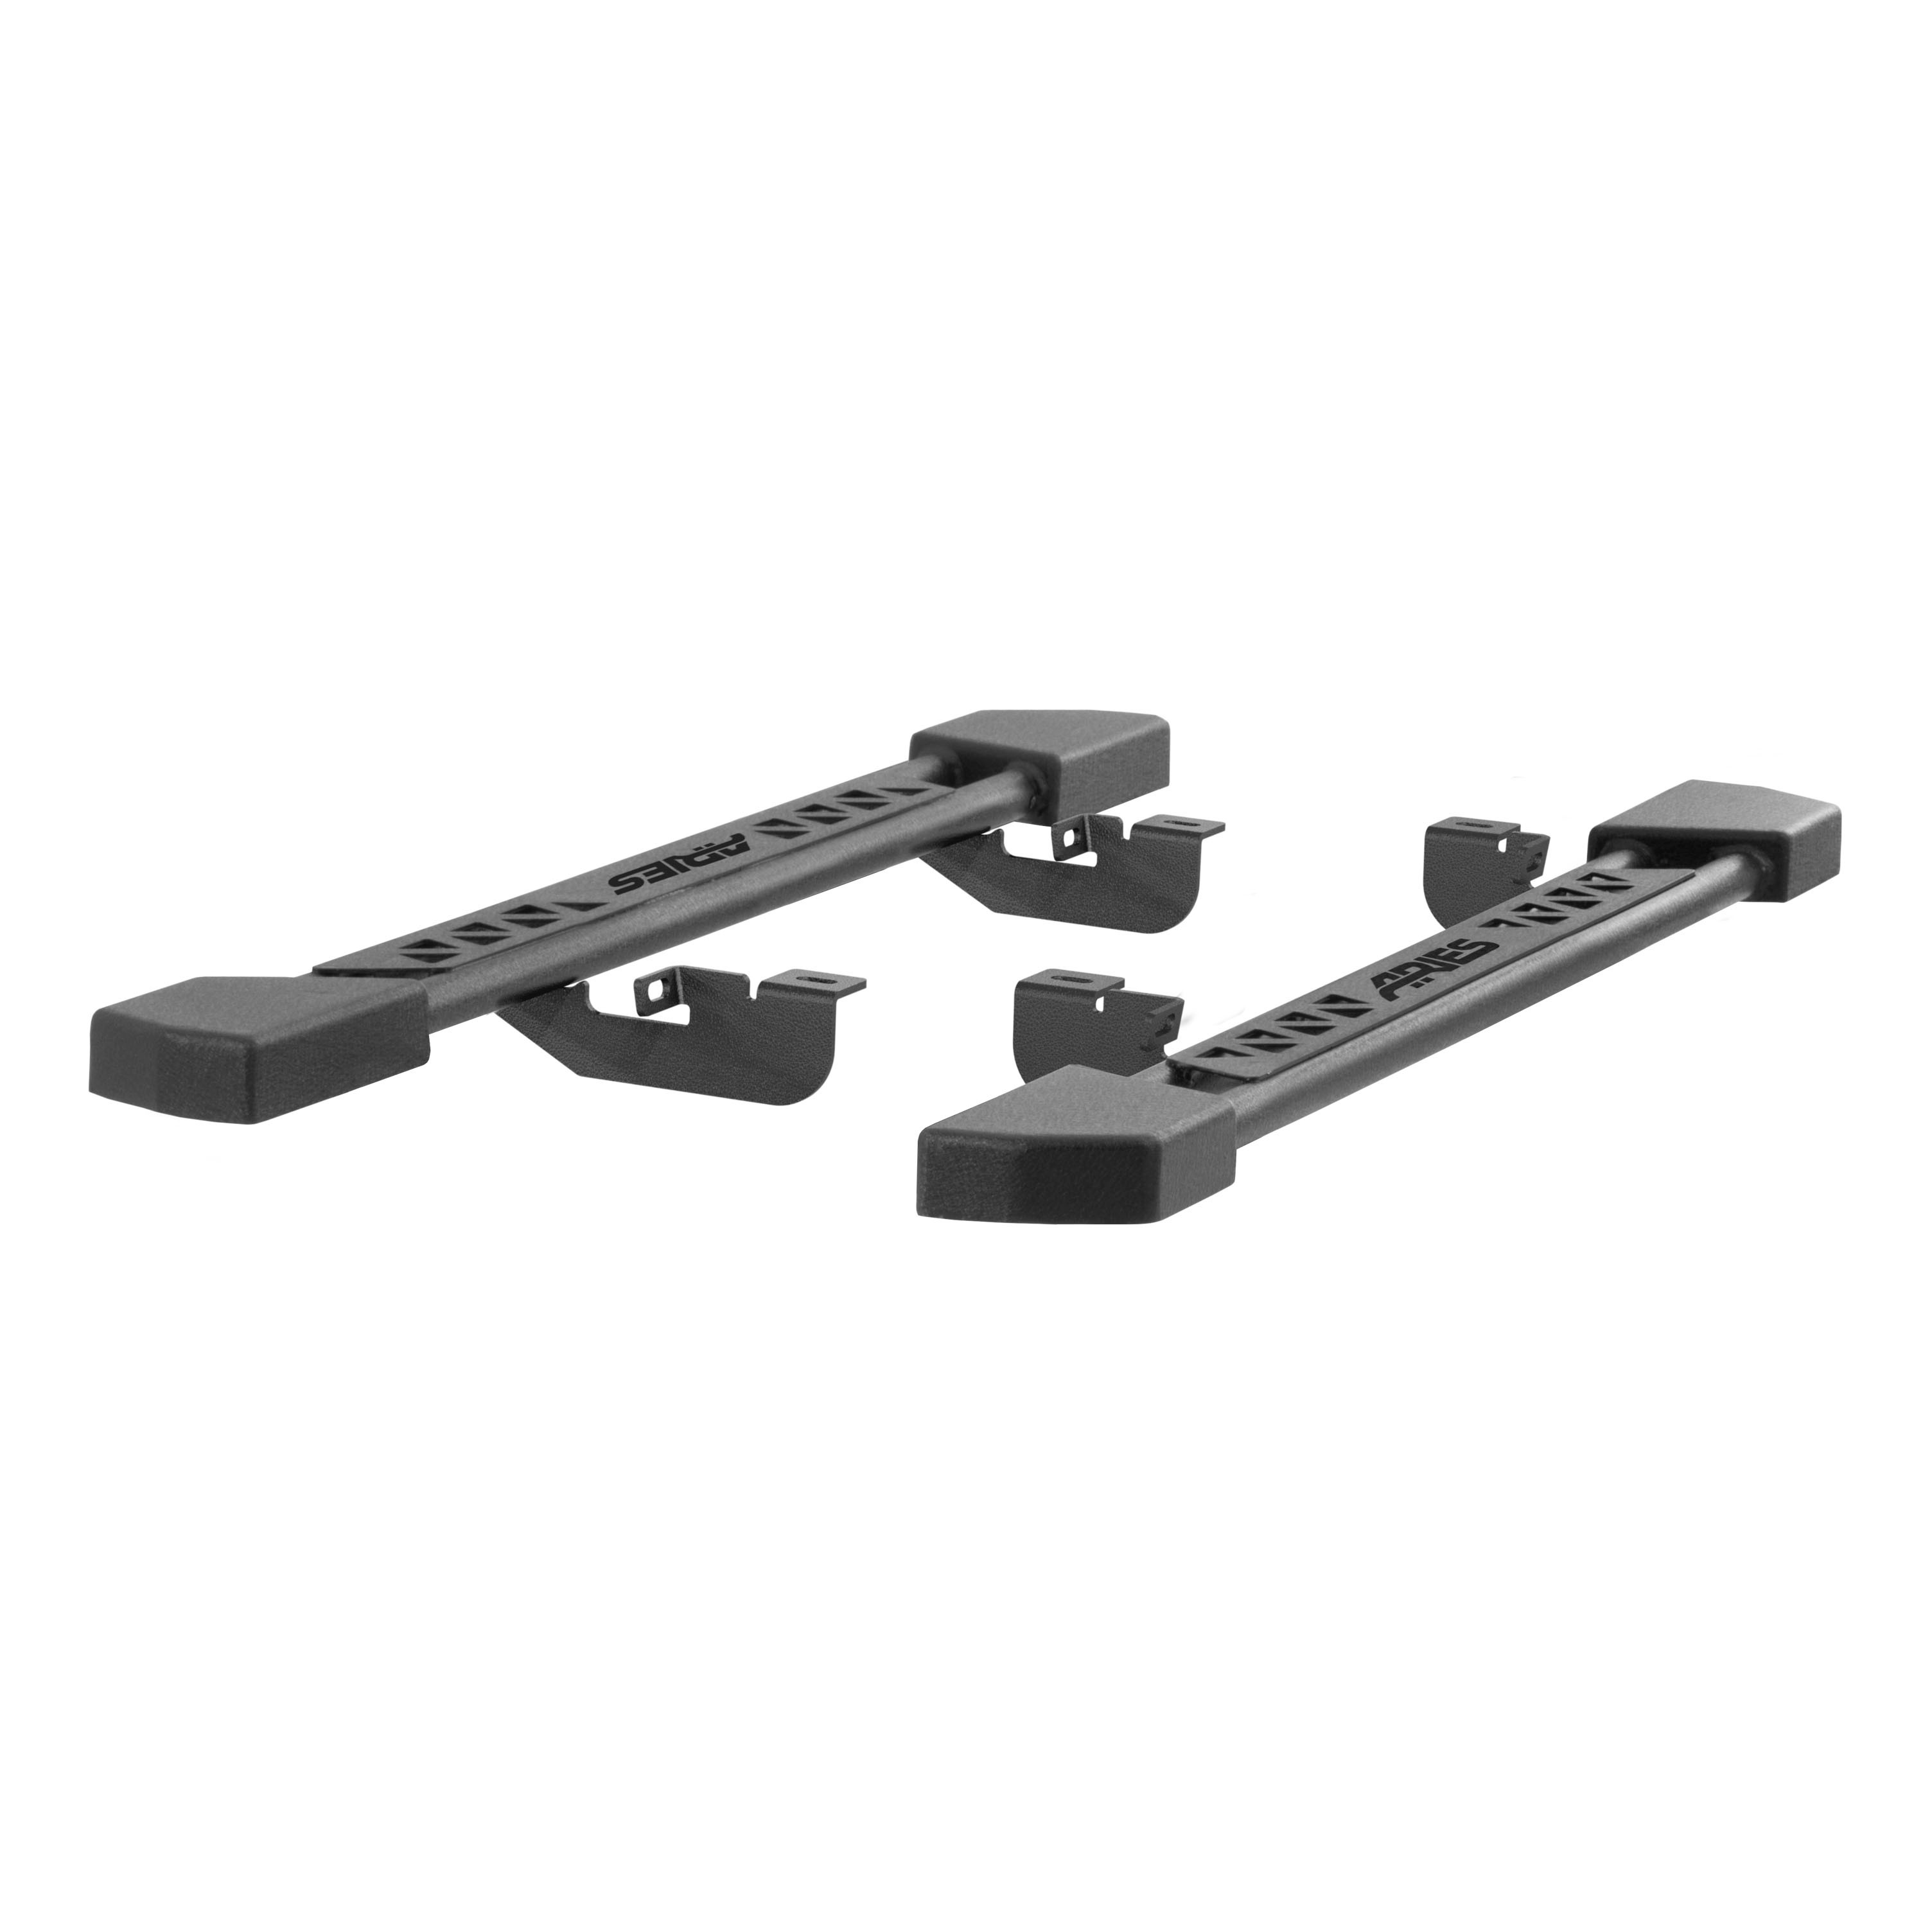
Includes one pair of running boards, mounting hardware and wiring harness
These boards are not a substitute for rocker bars
65" stepping surface, 69.6" overall length


Warranty: Limited Lifetime Warranty (Five-Year Finish, Three-Year Parts)
Finish: CARBIDE BLACK POWDER COAT
Material: Aluminum
Side Component Type: Board and Bracket
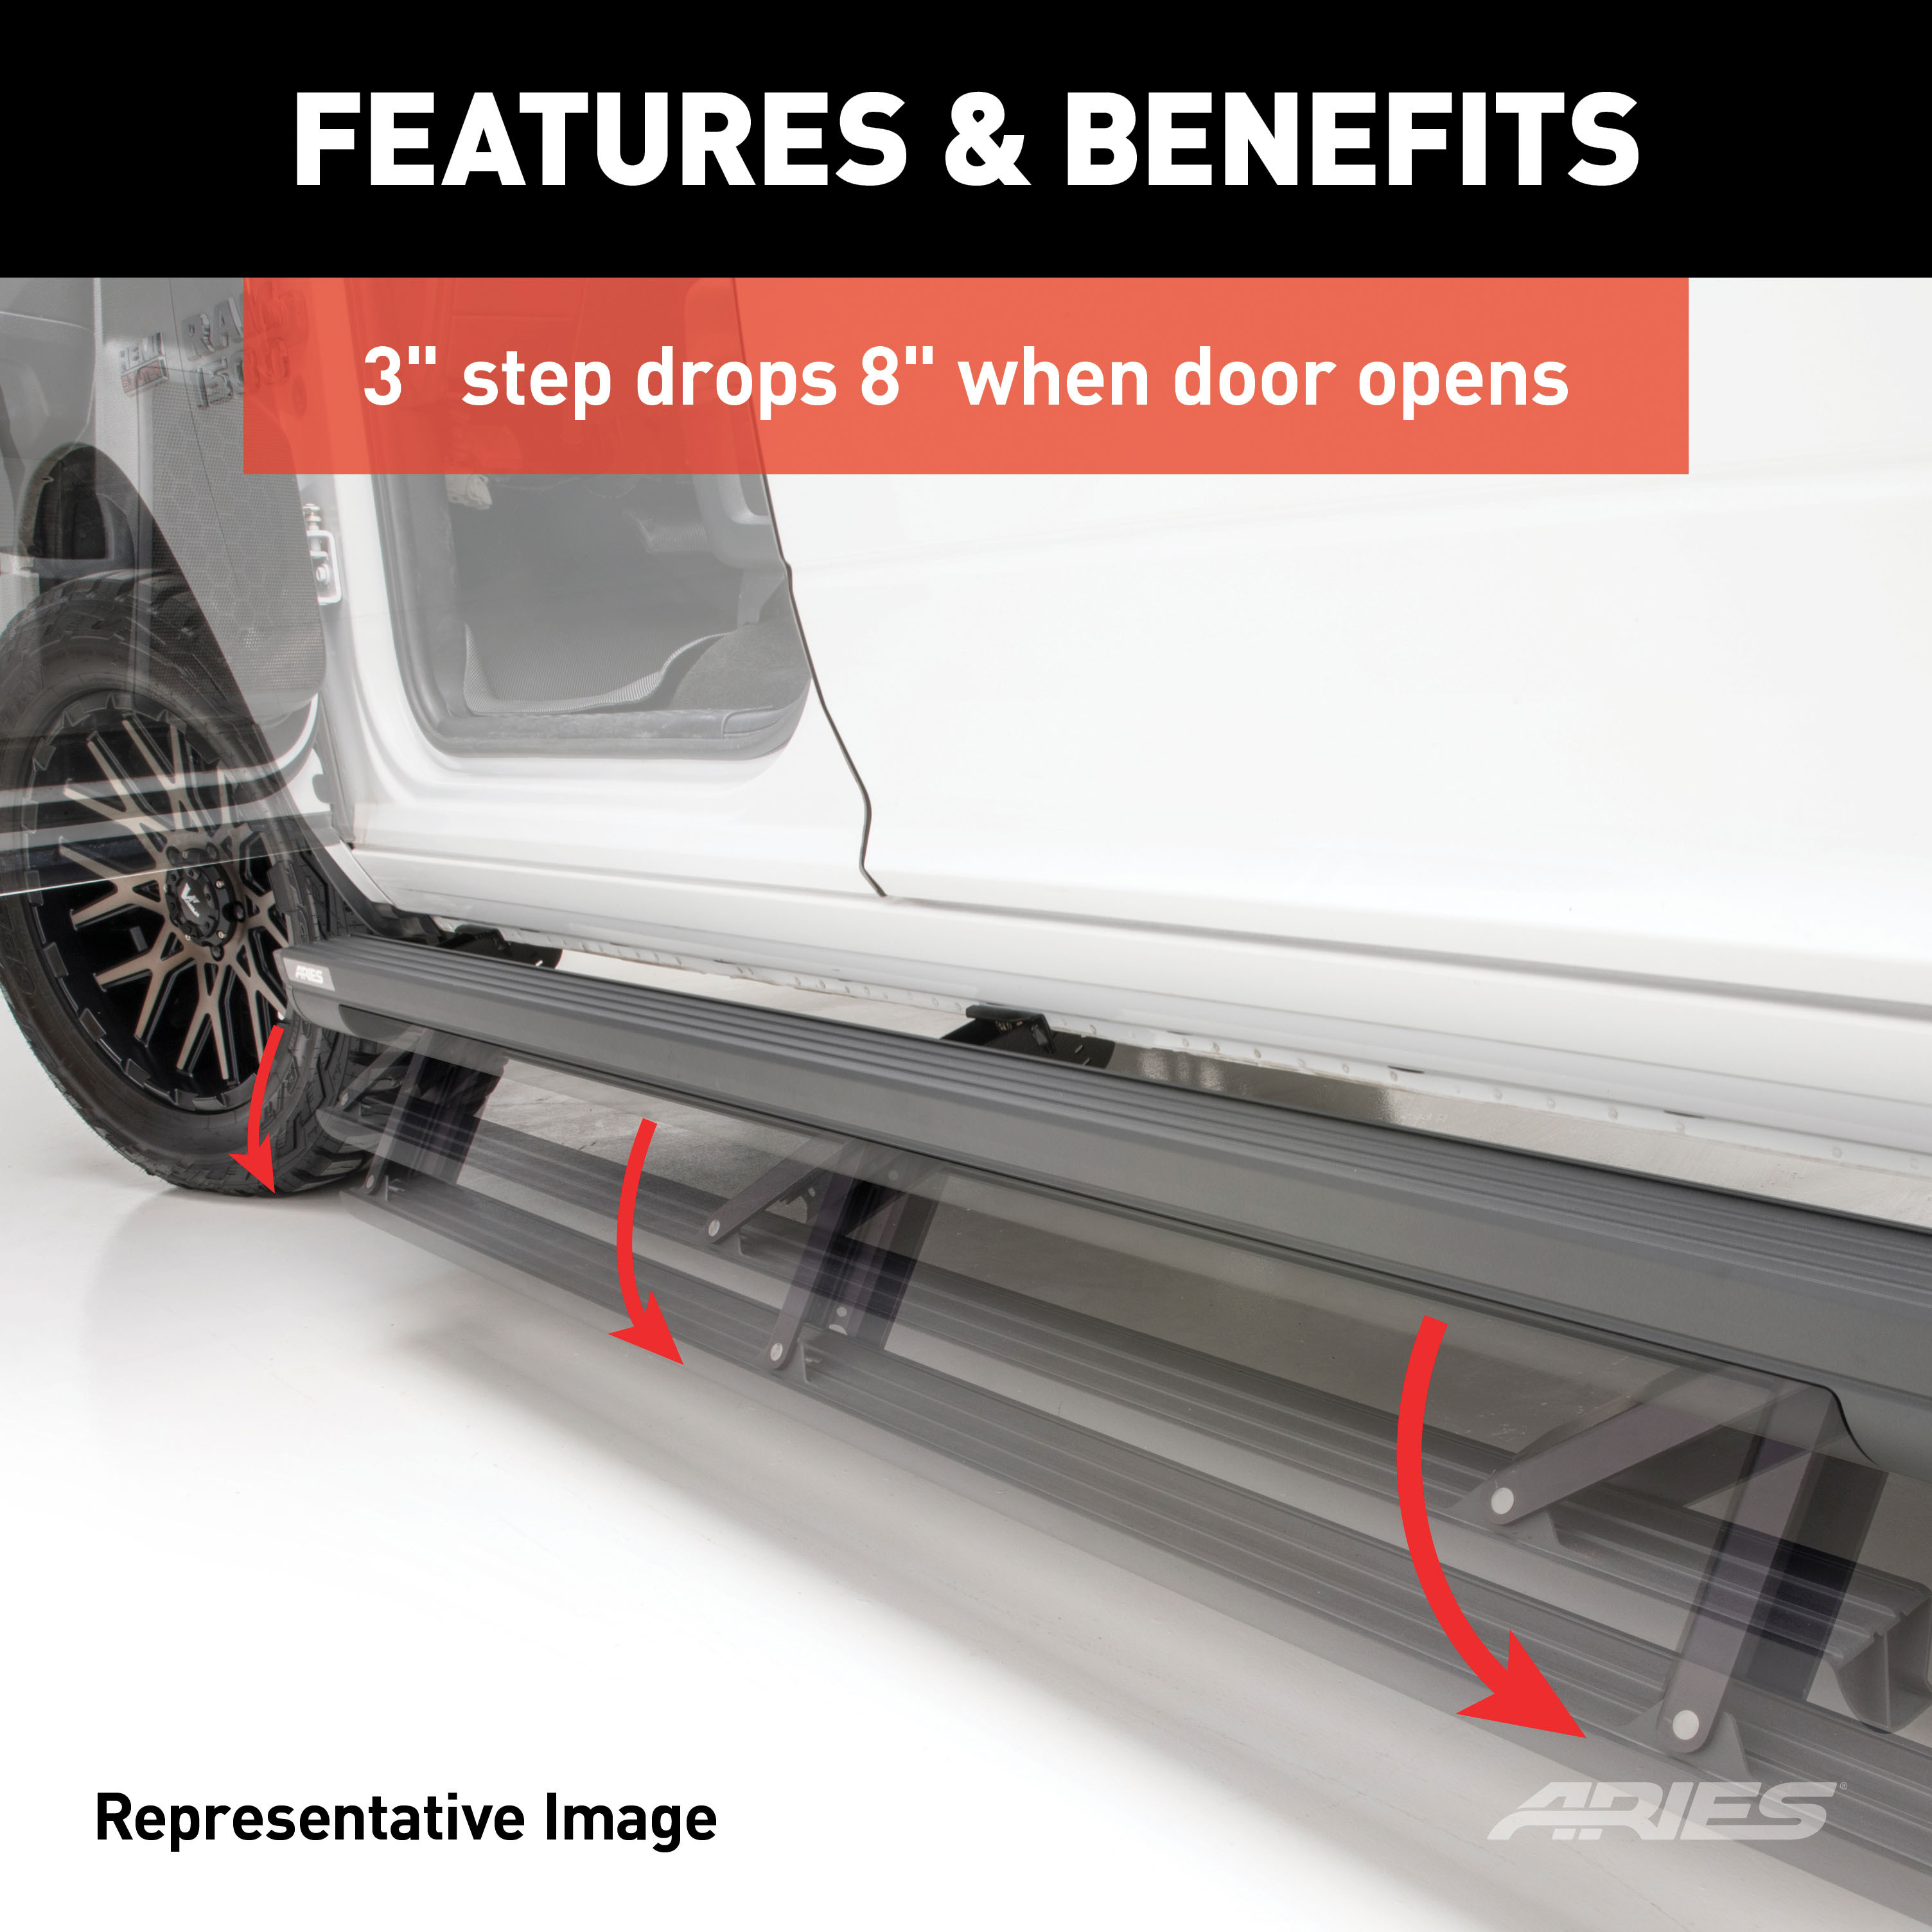
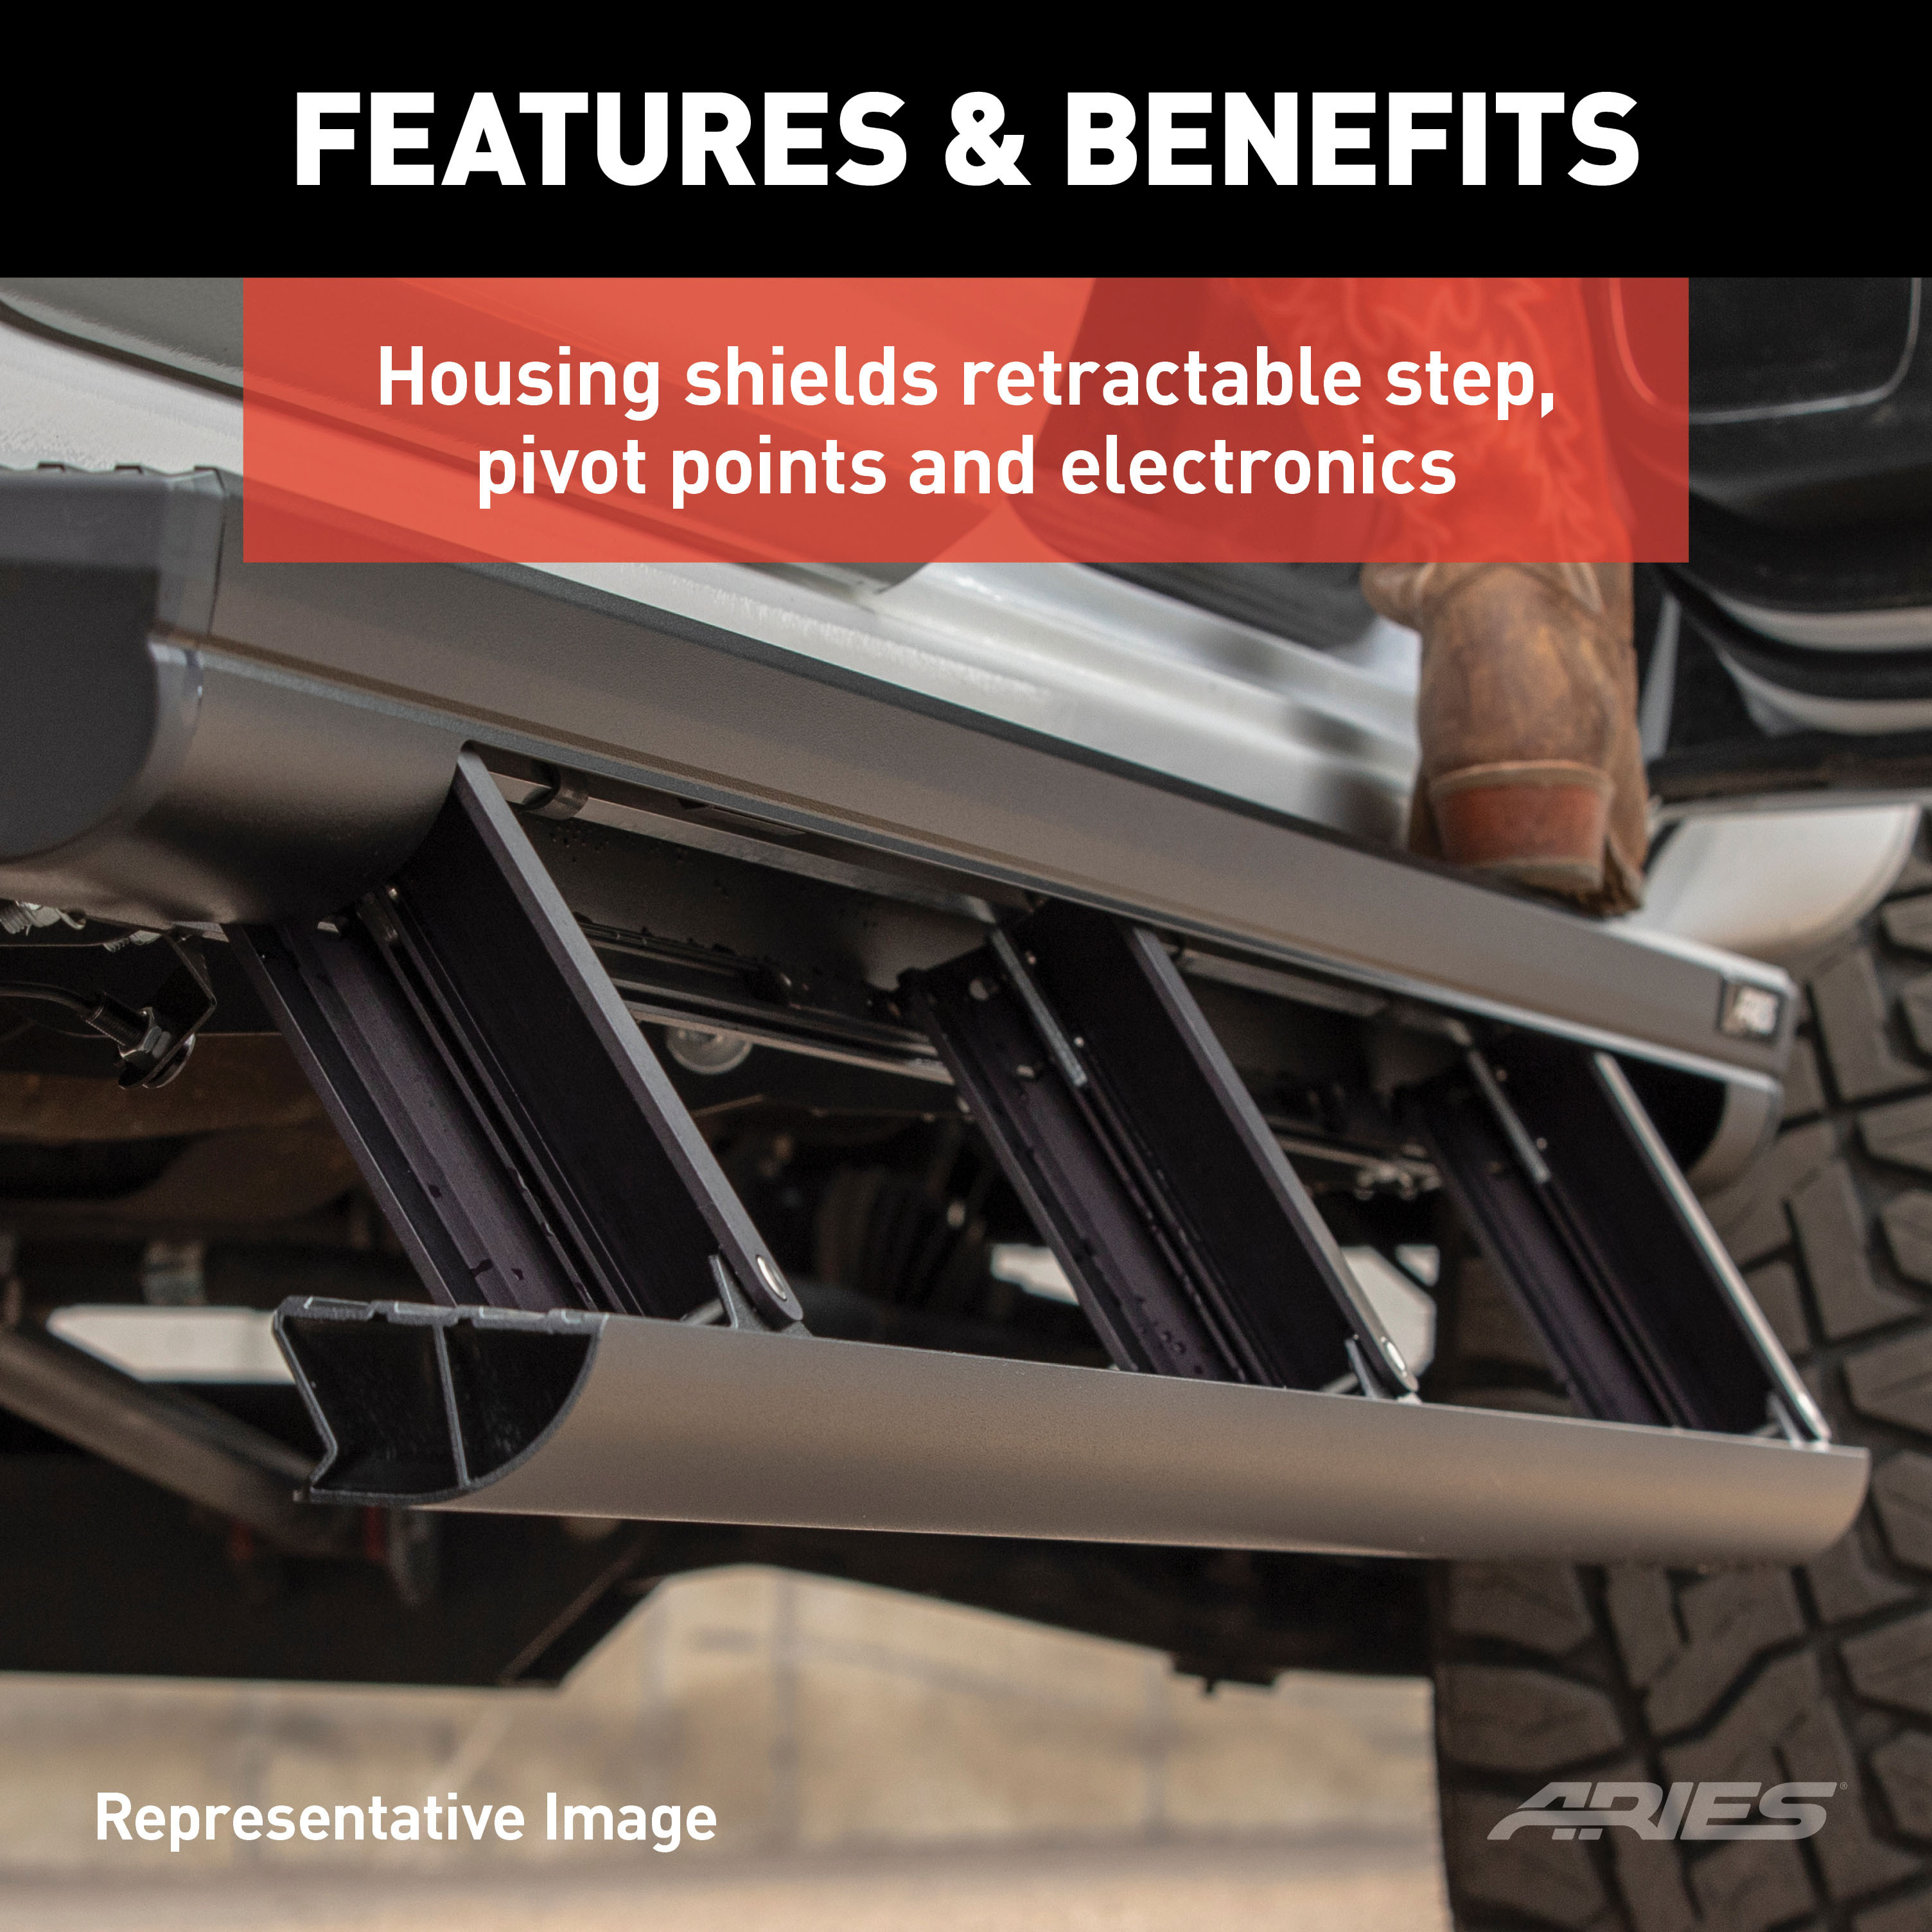
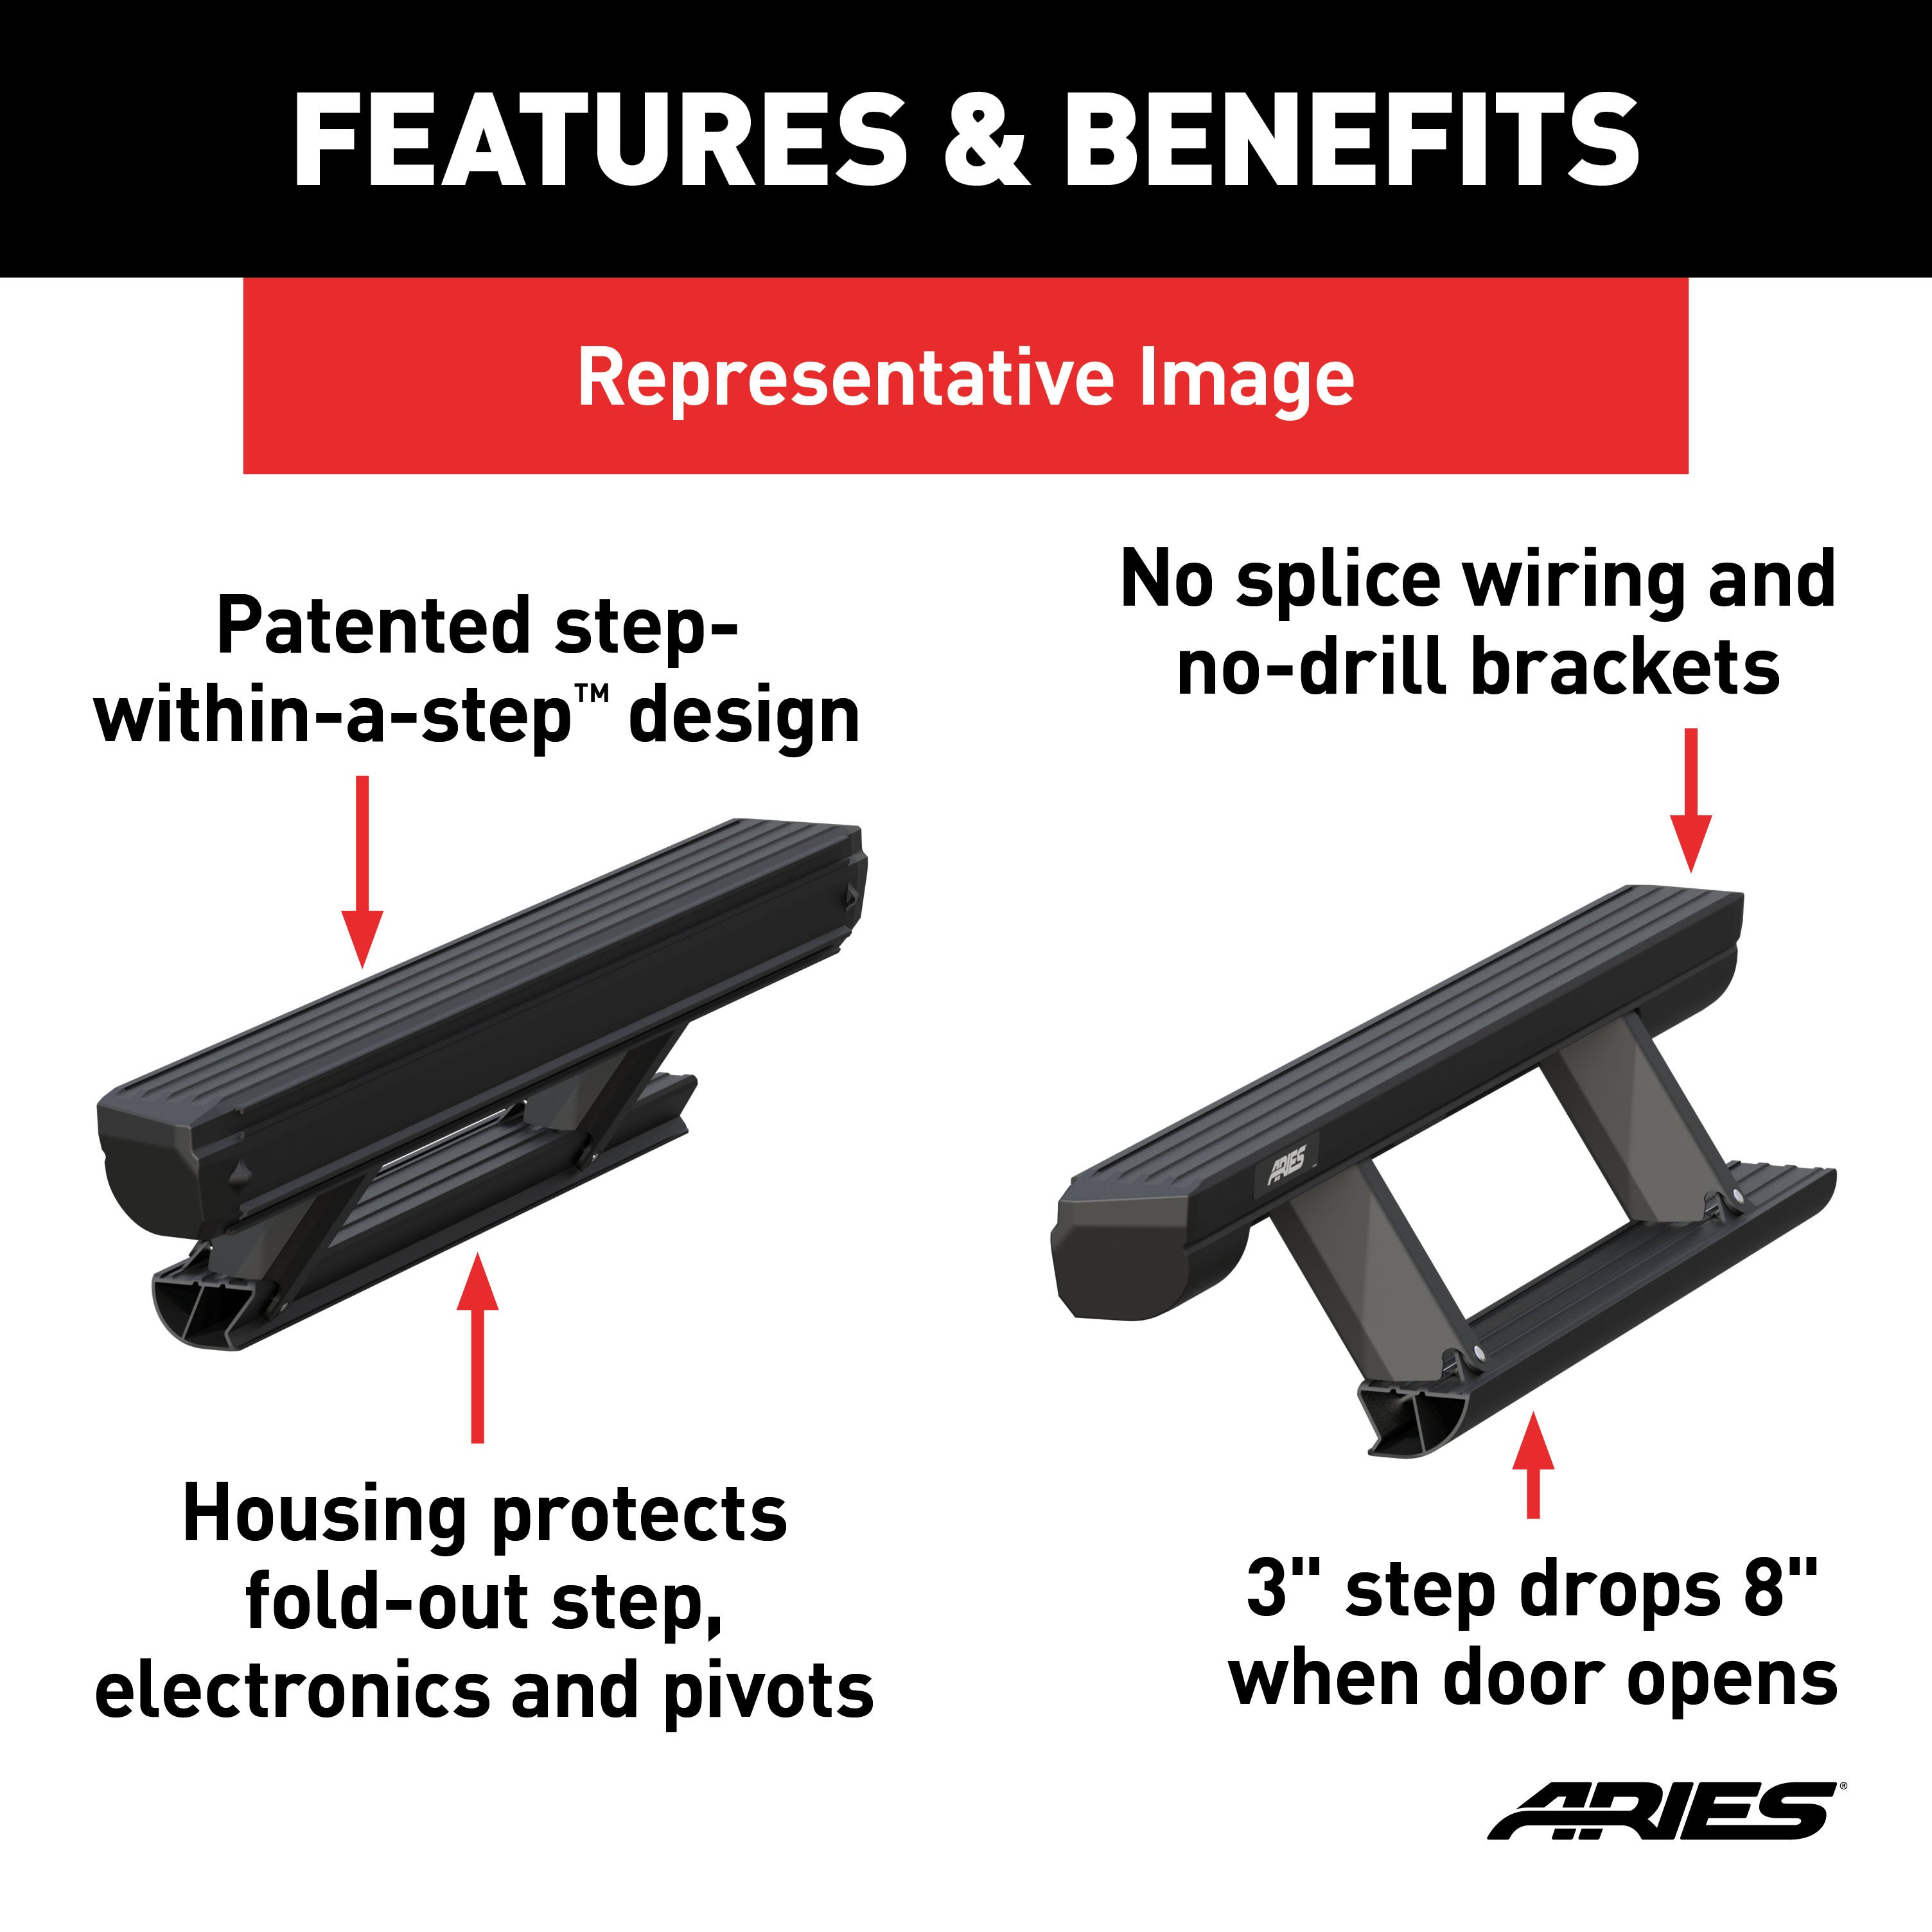
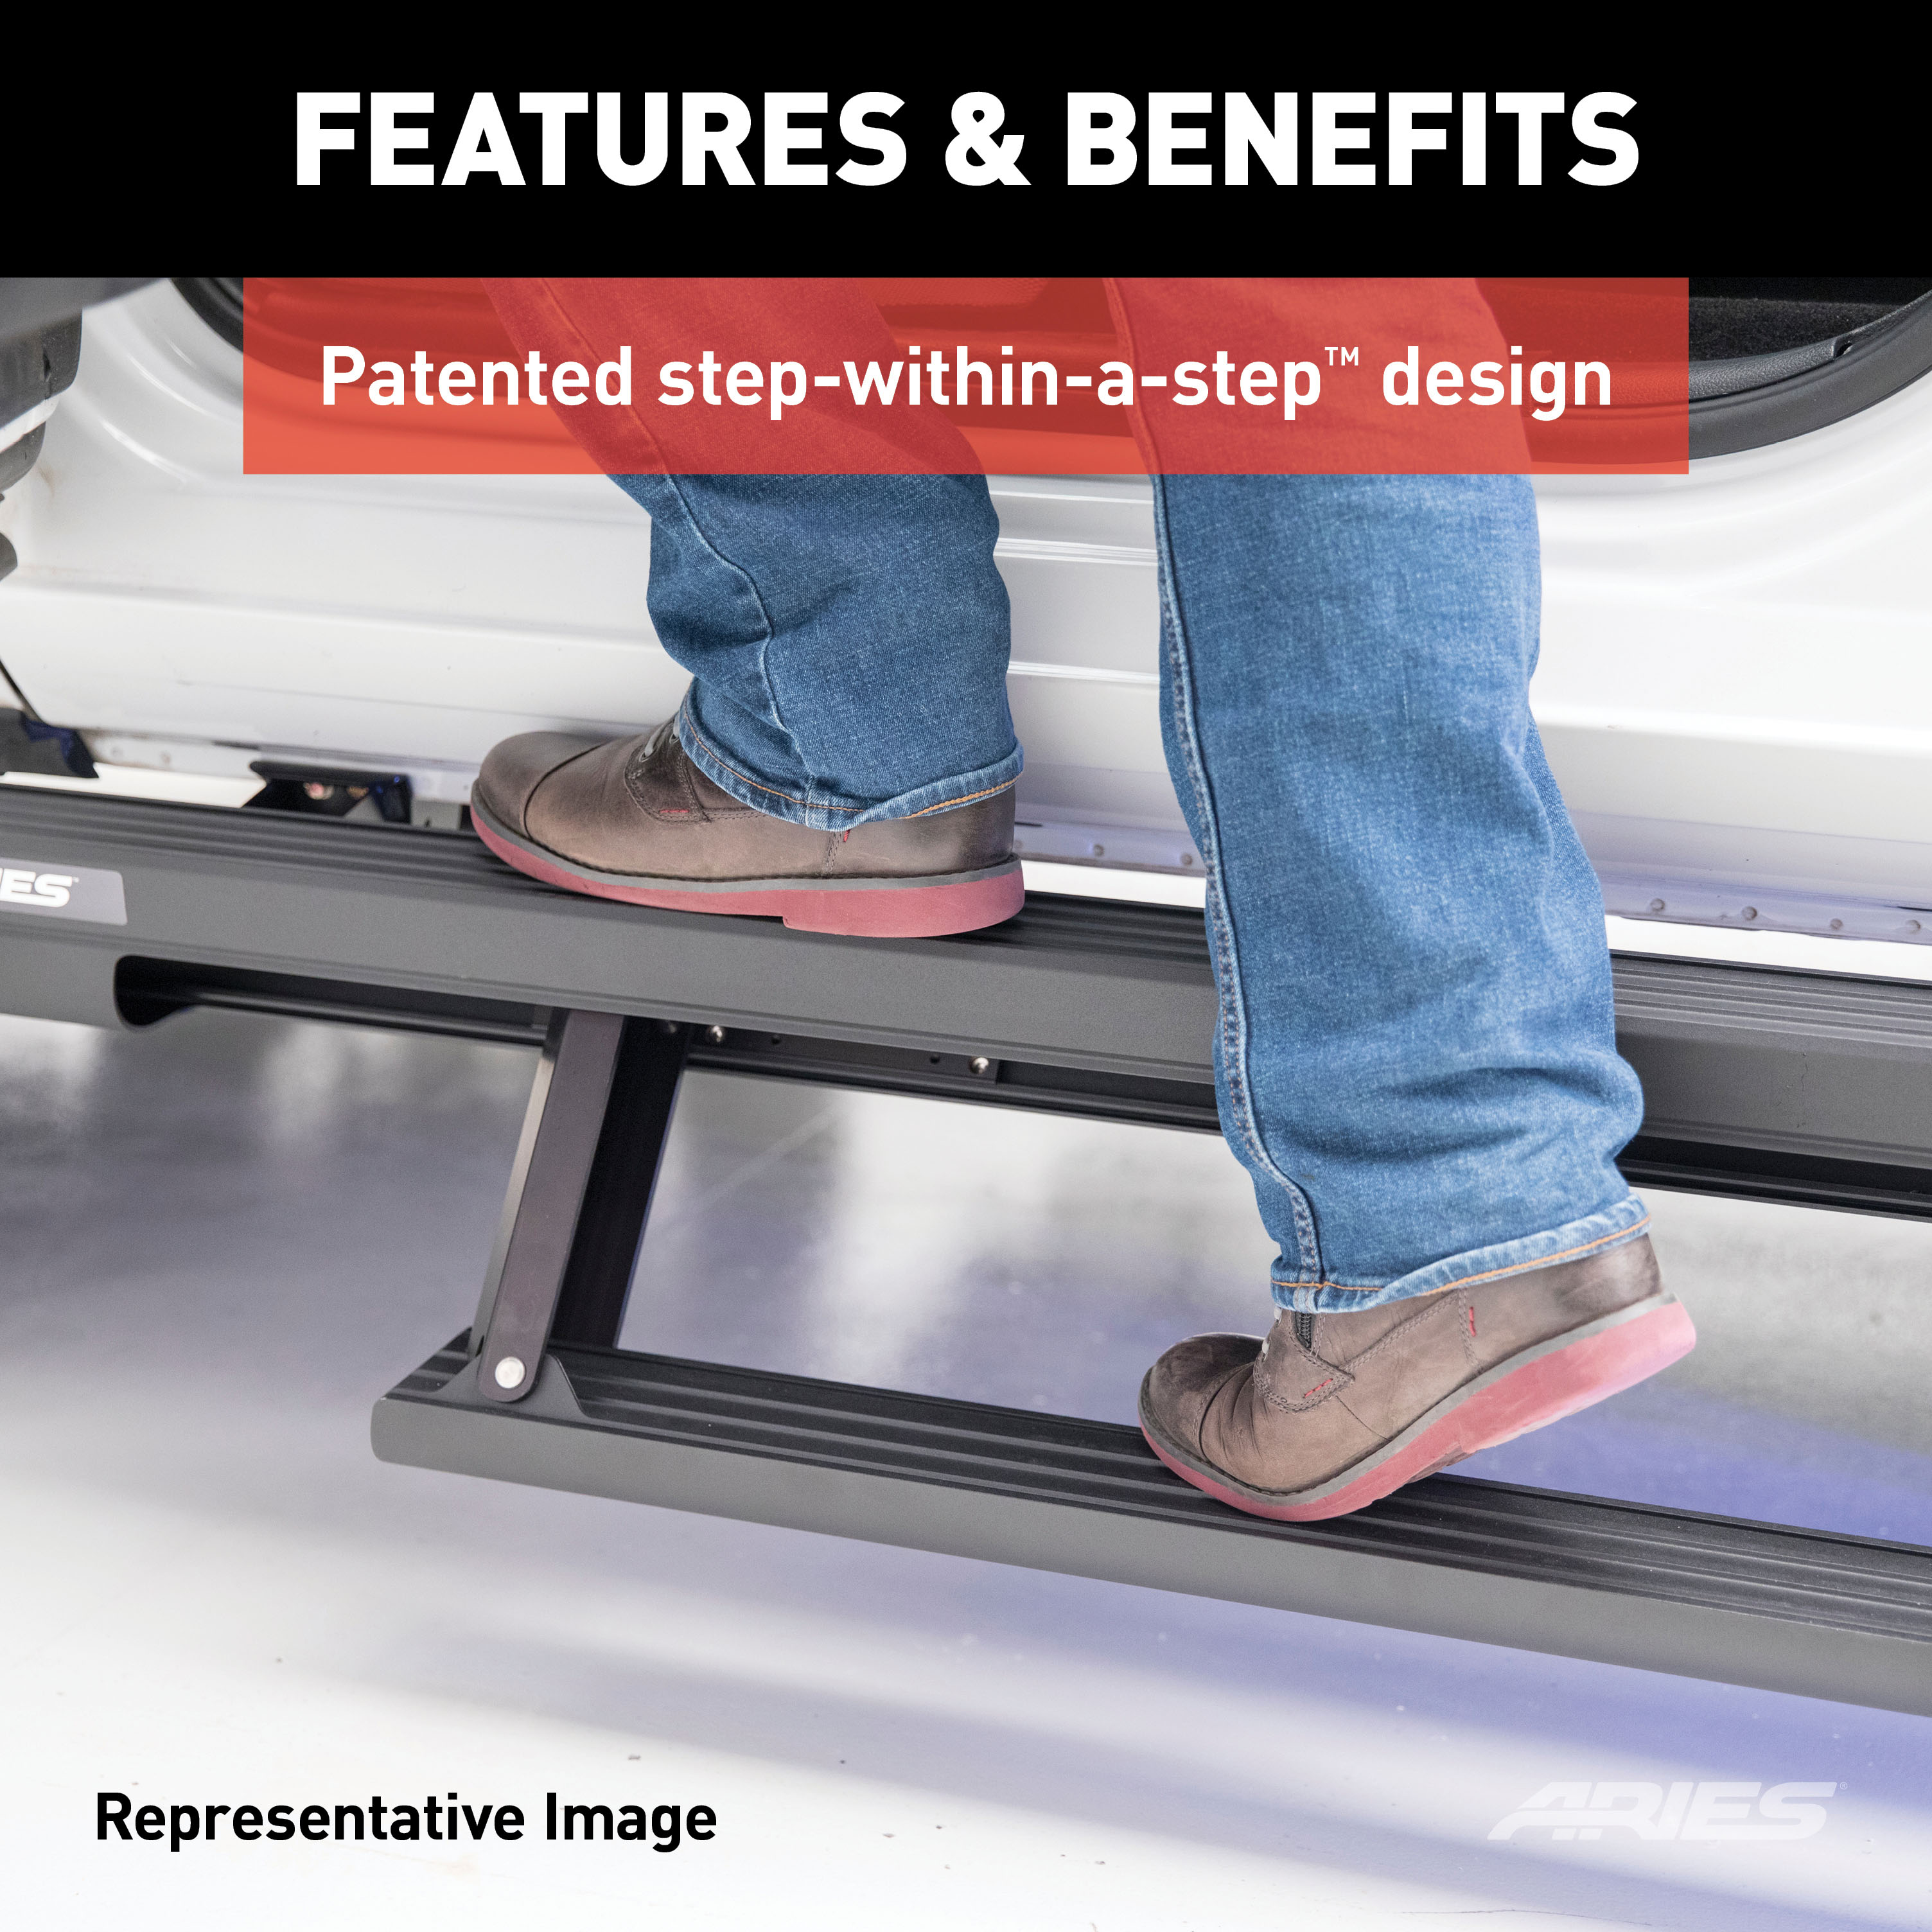
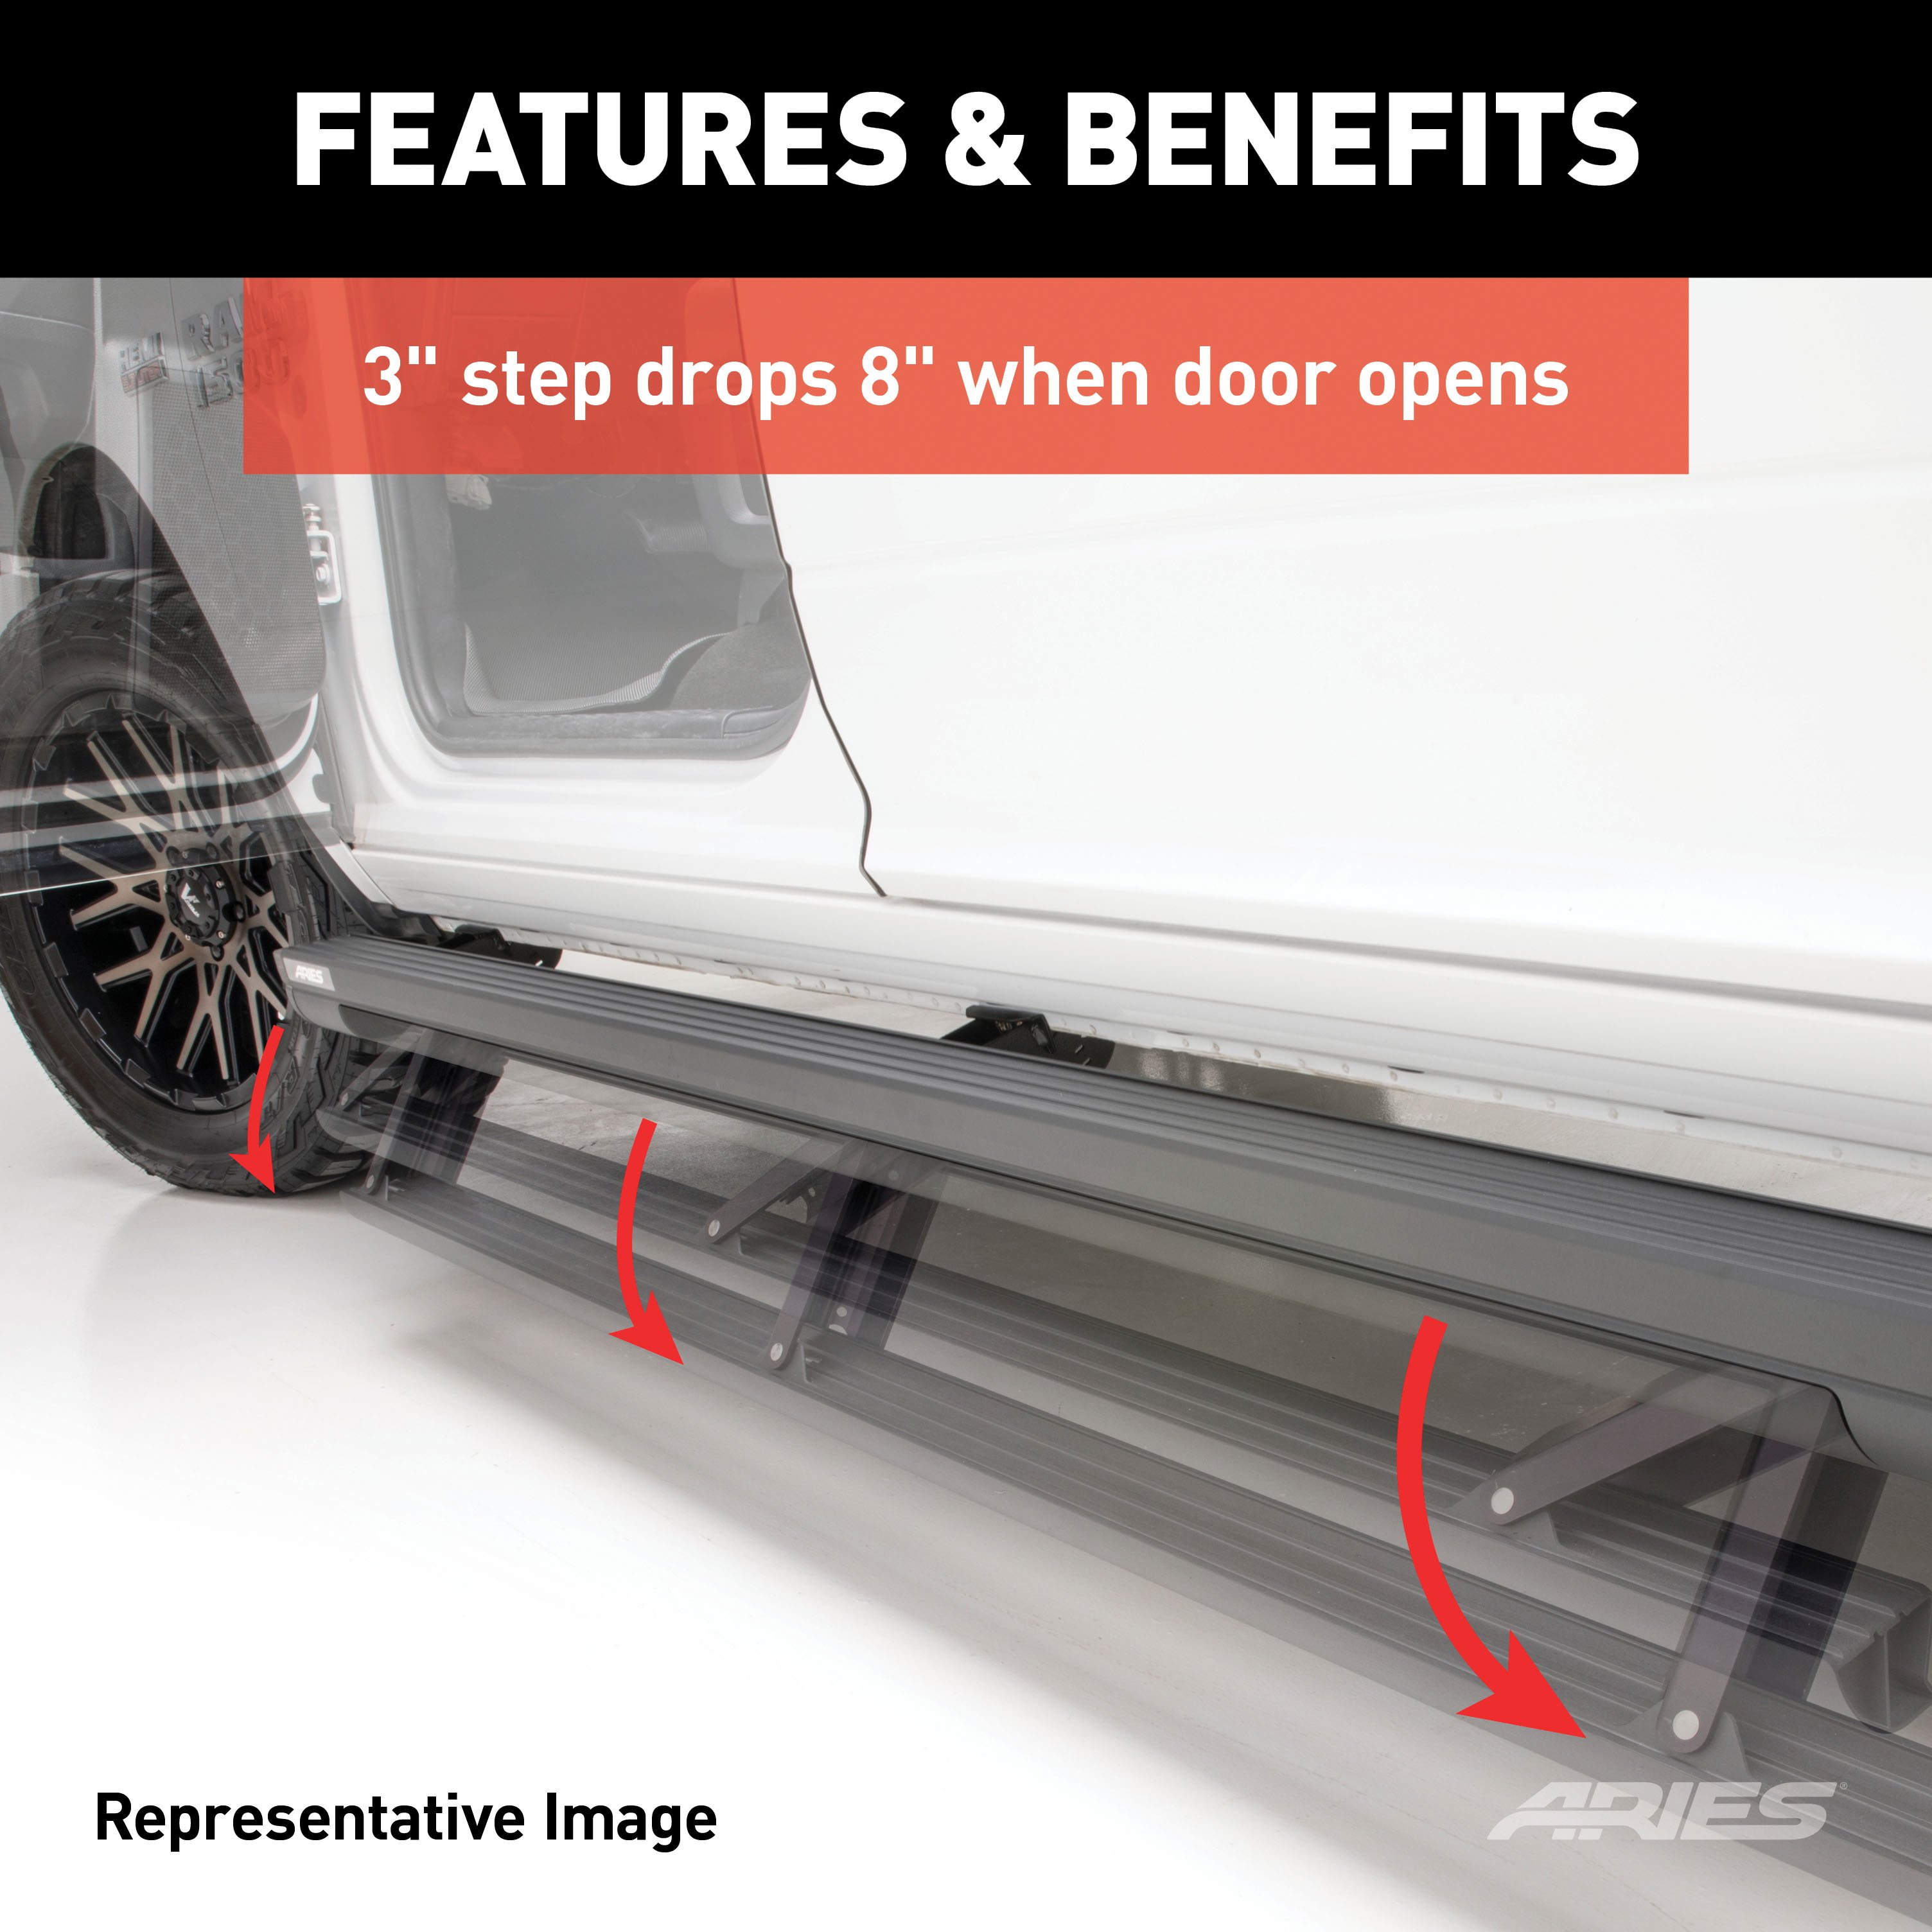
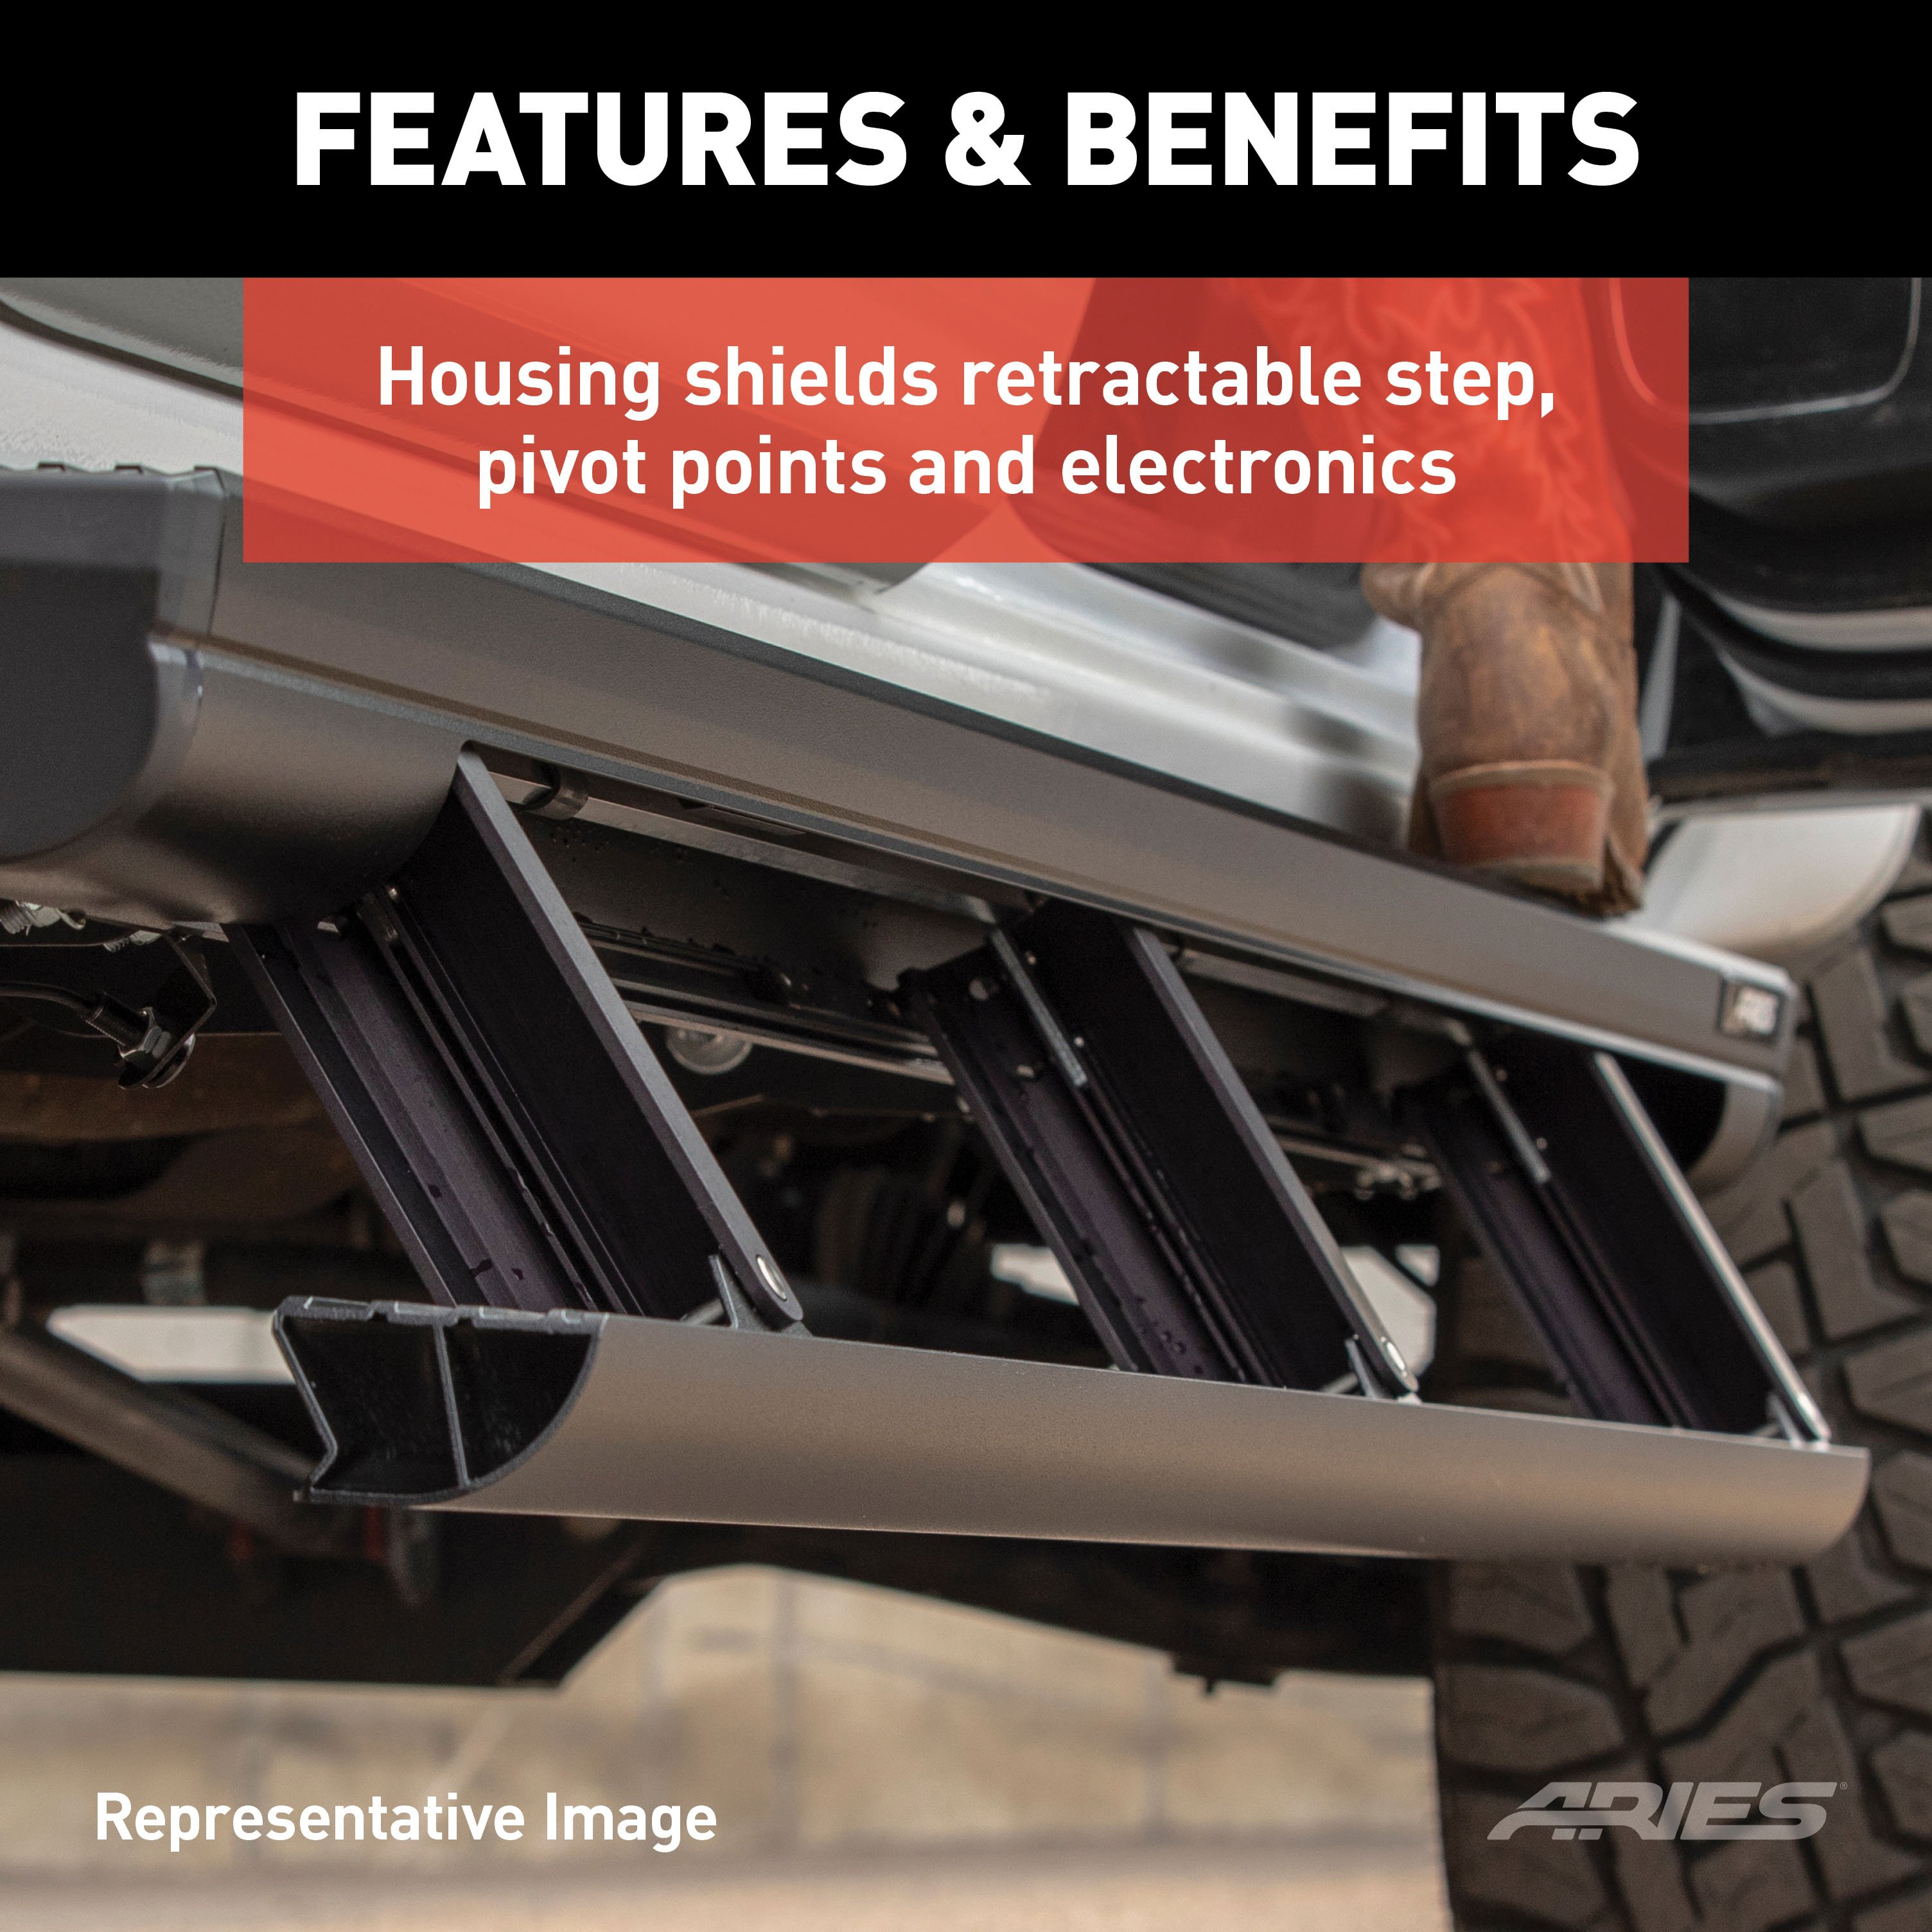
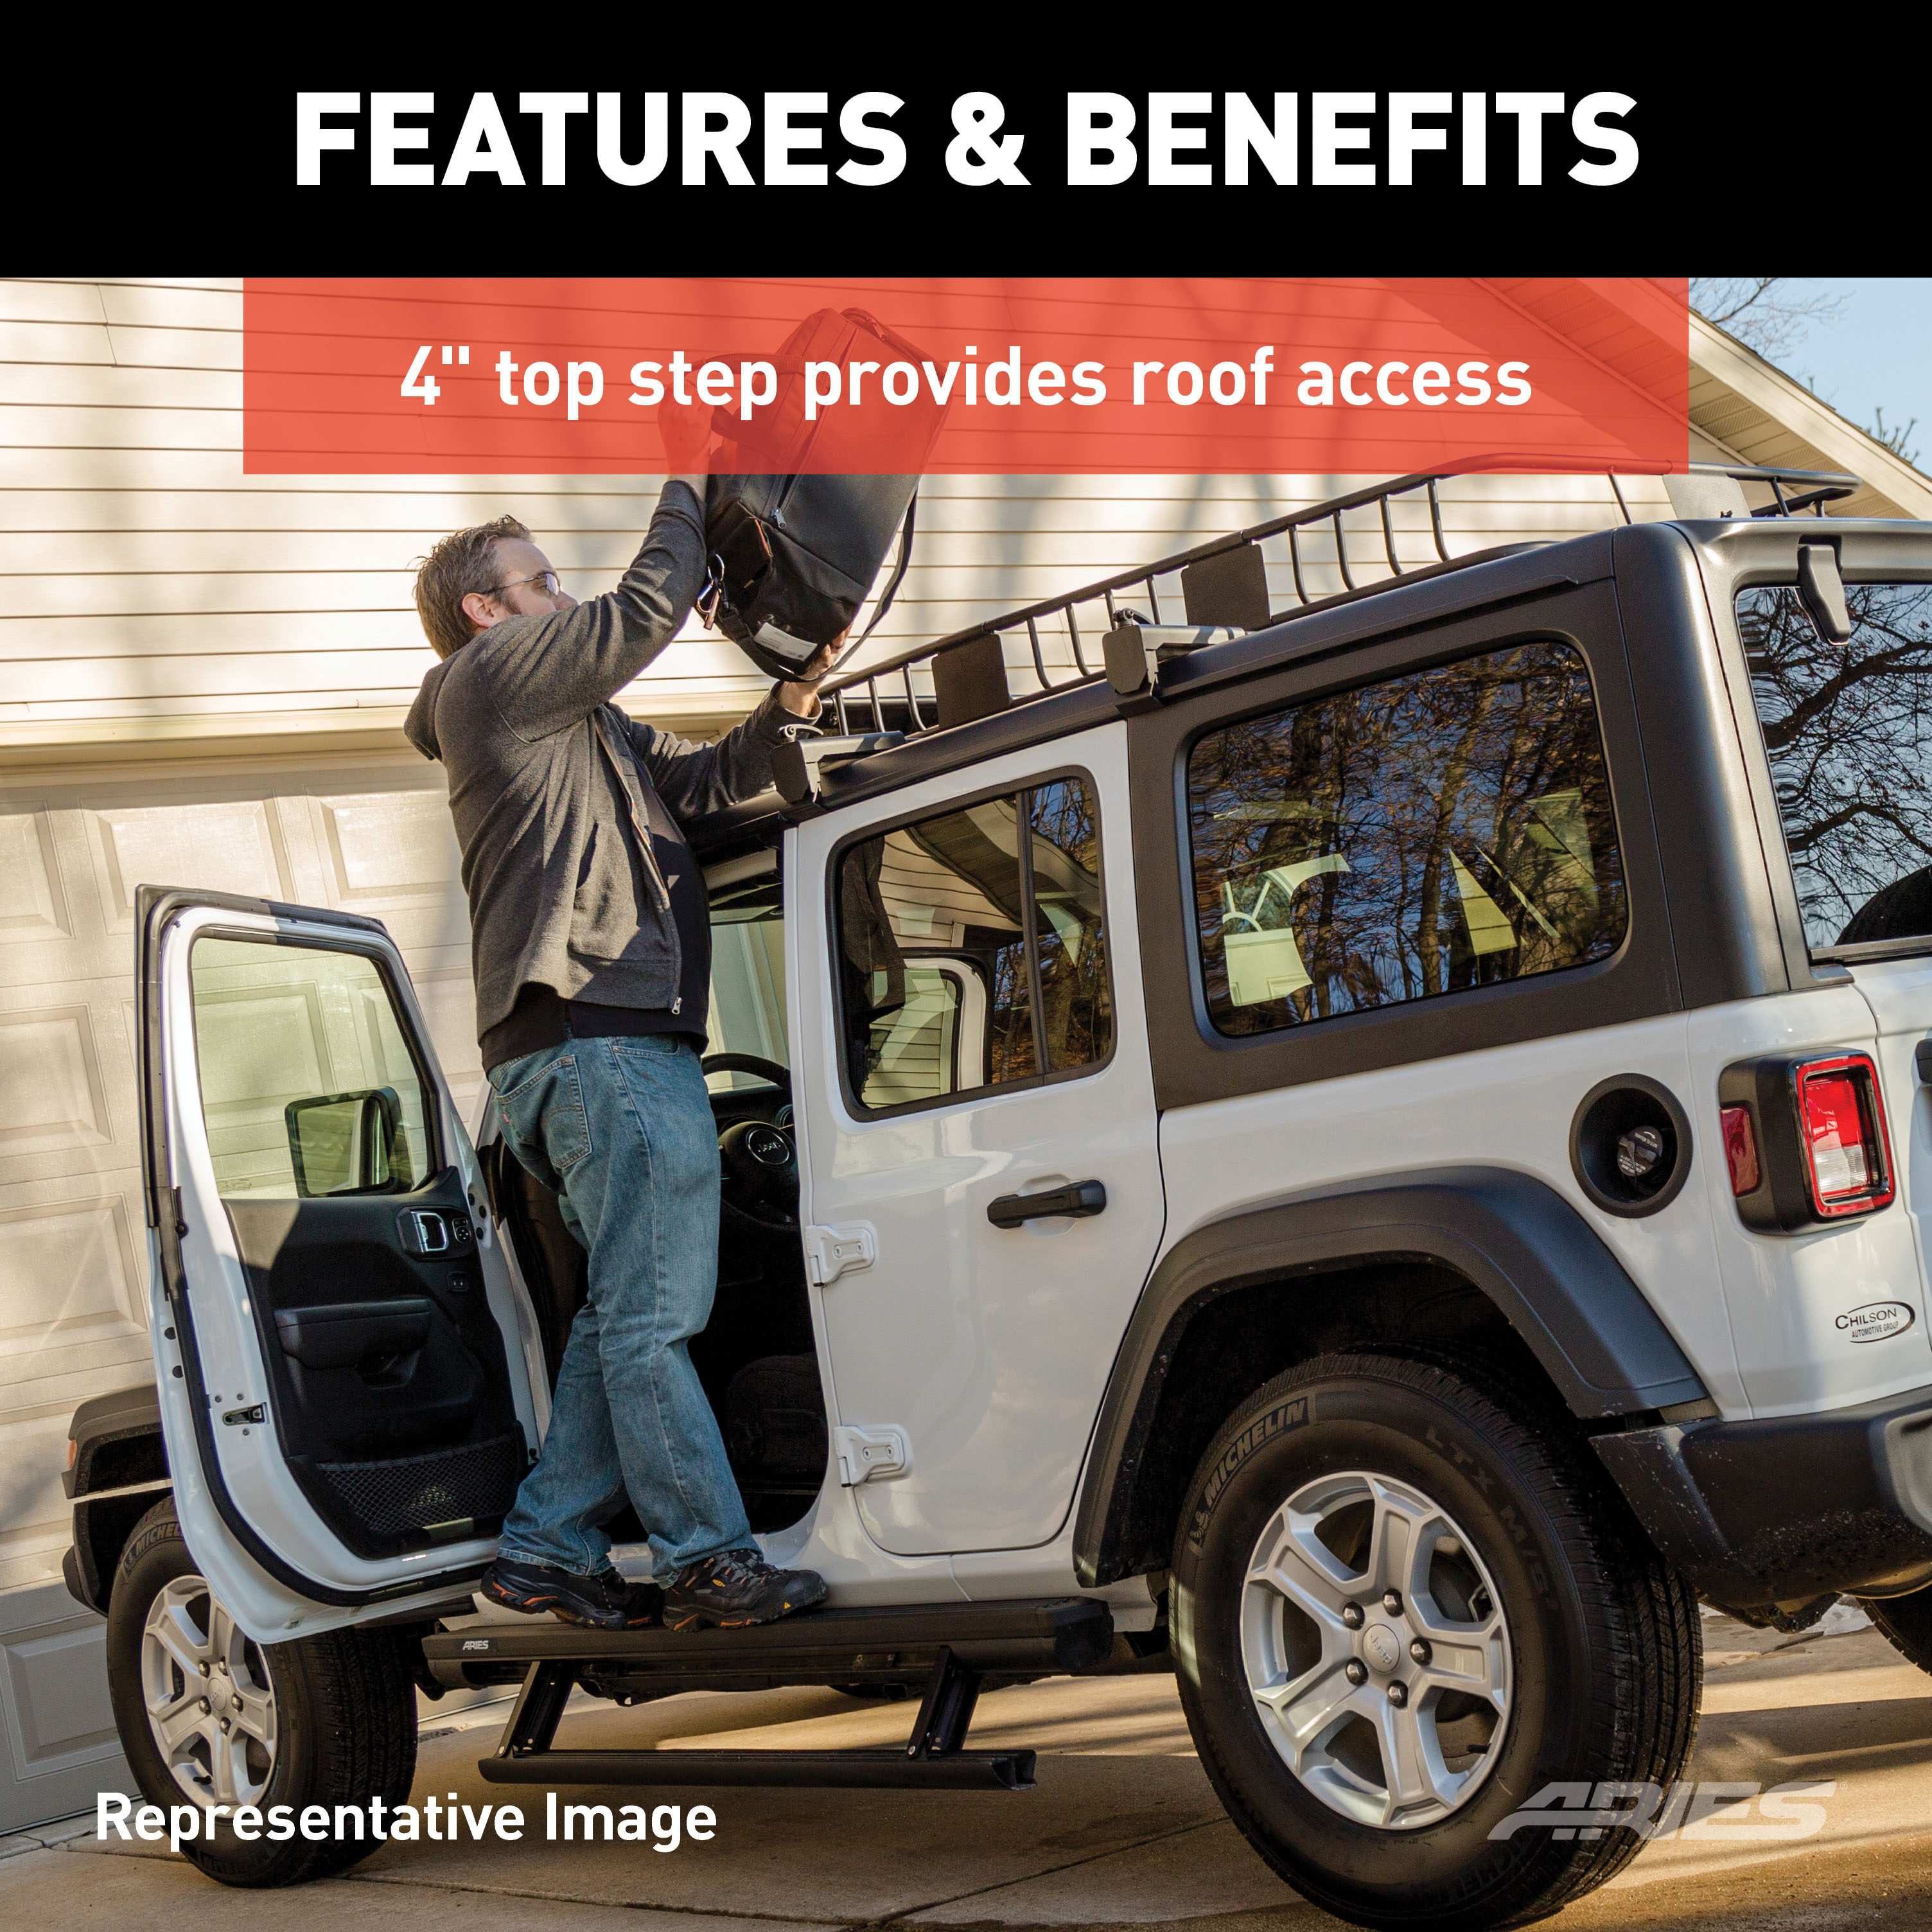
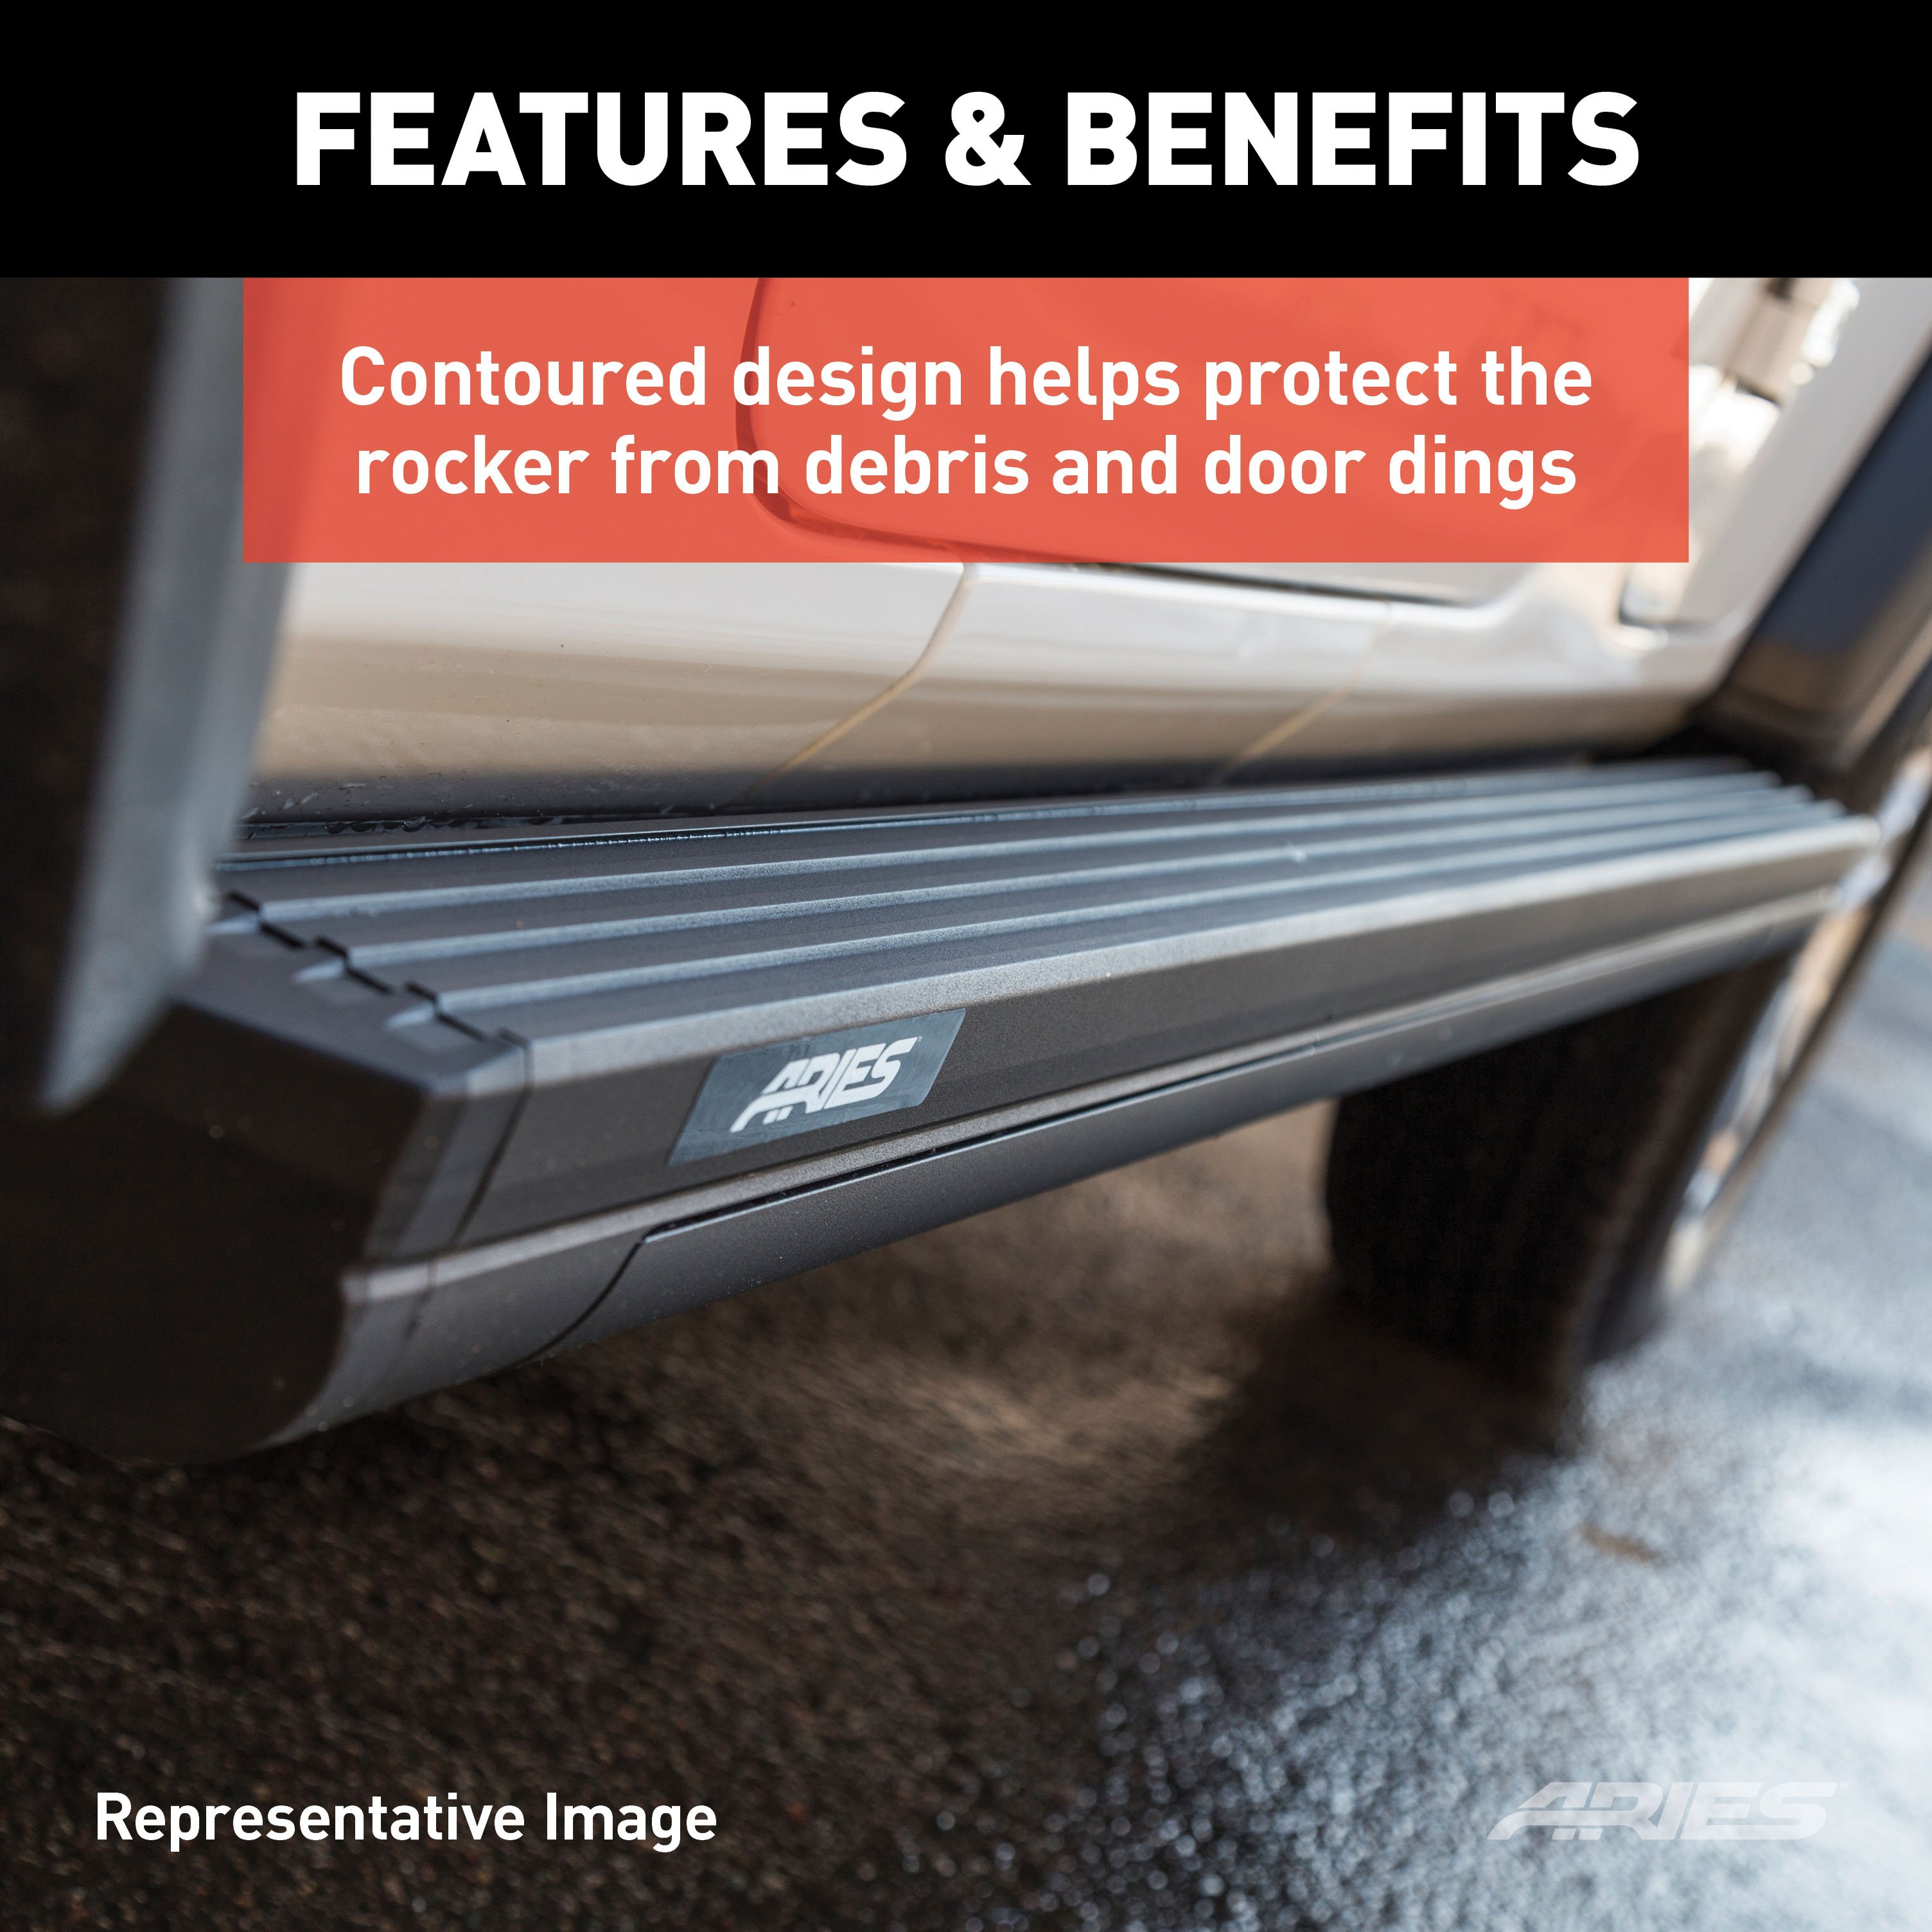
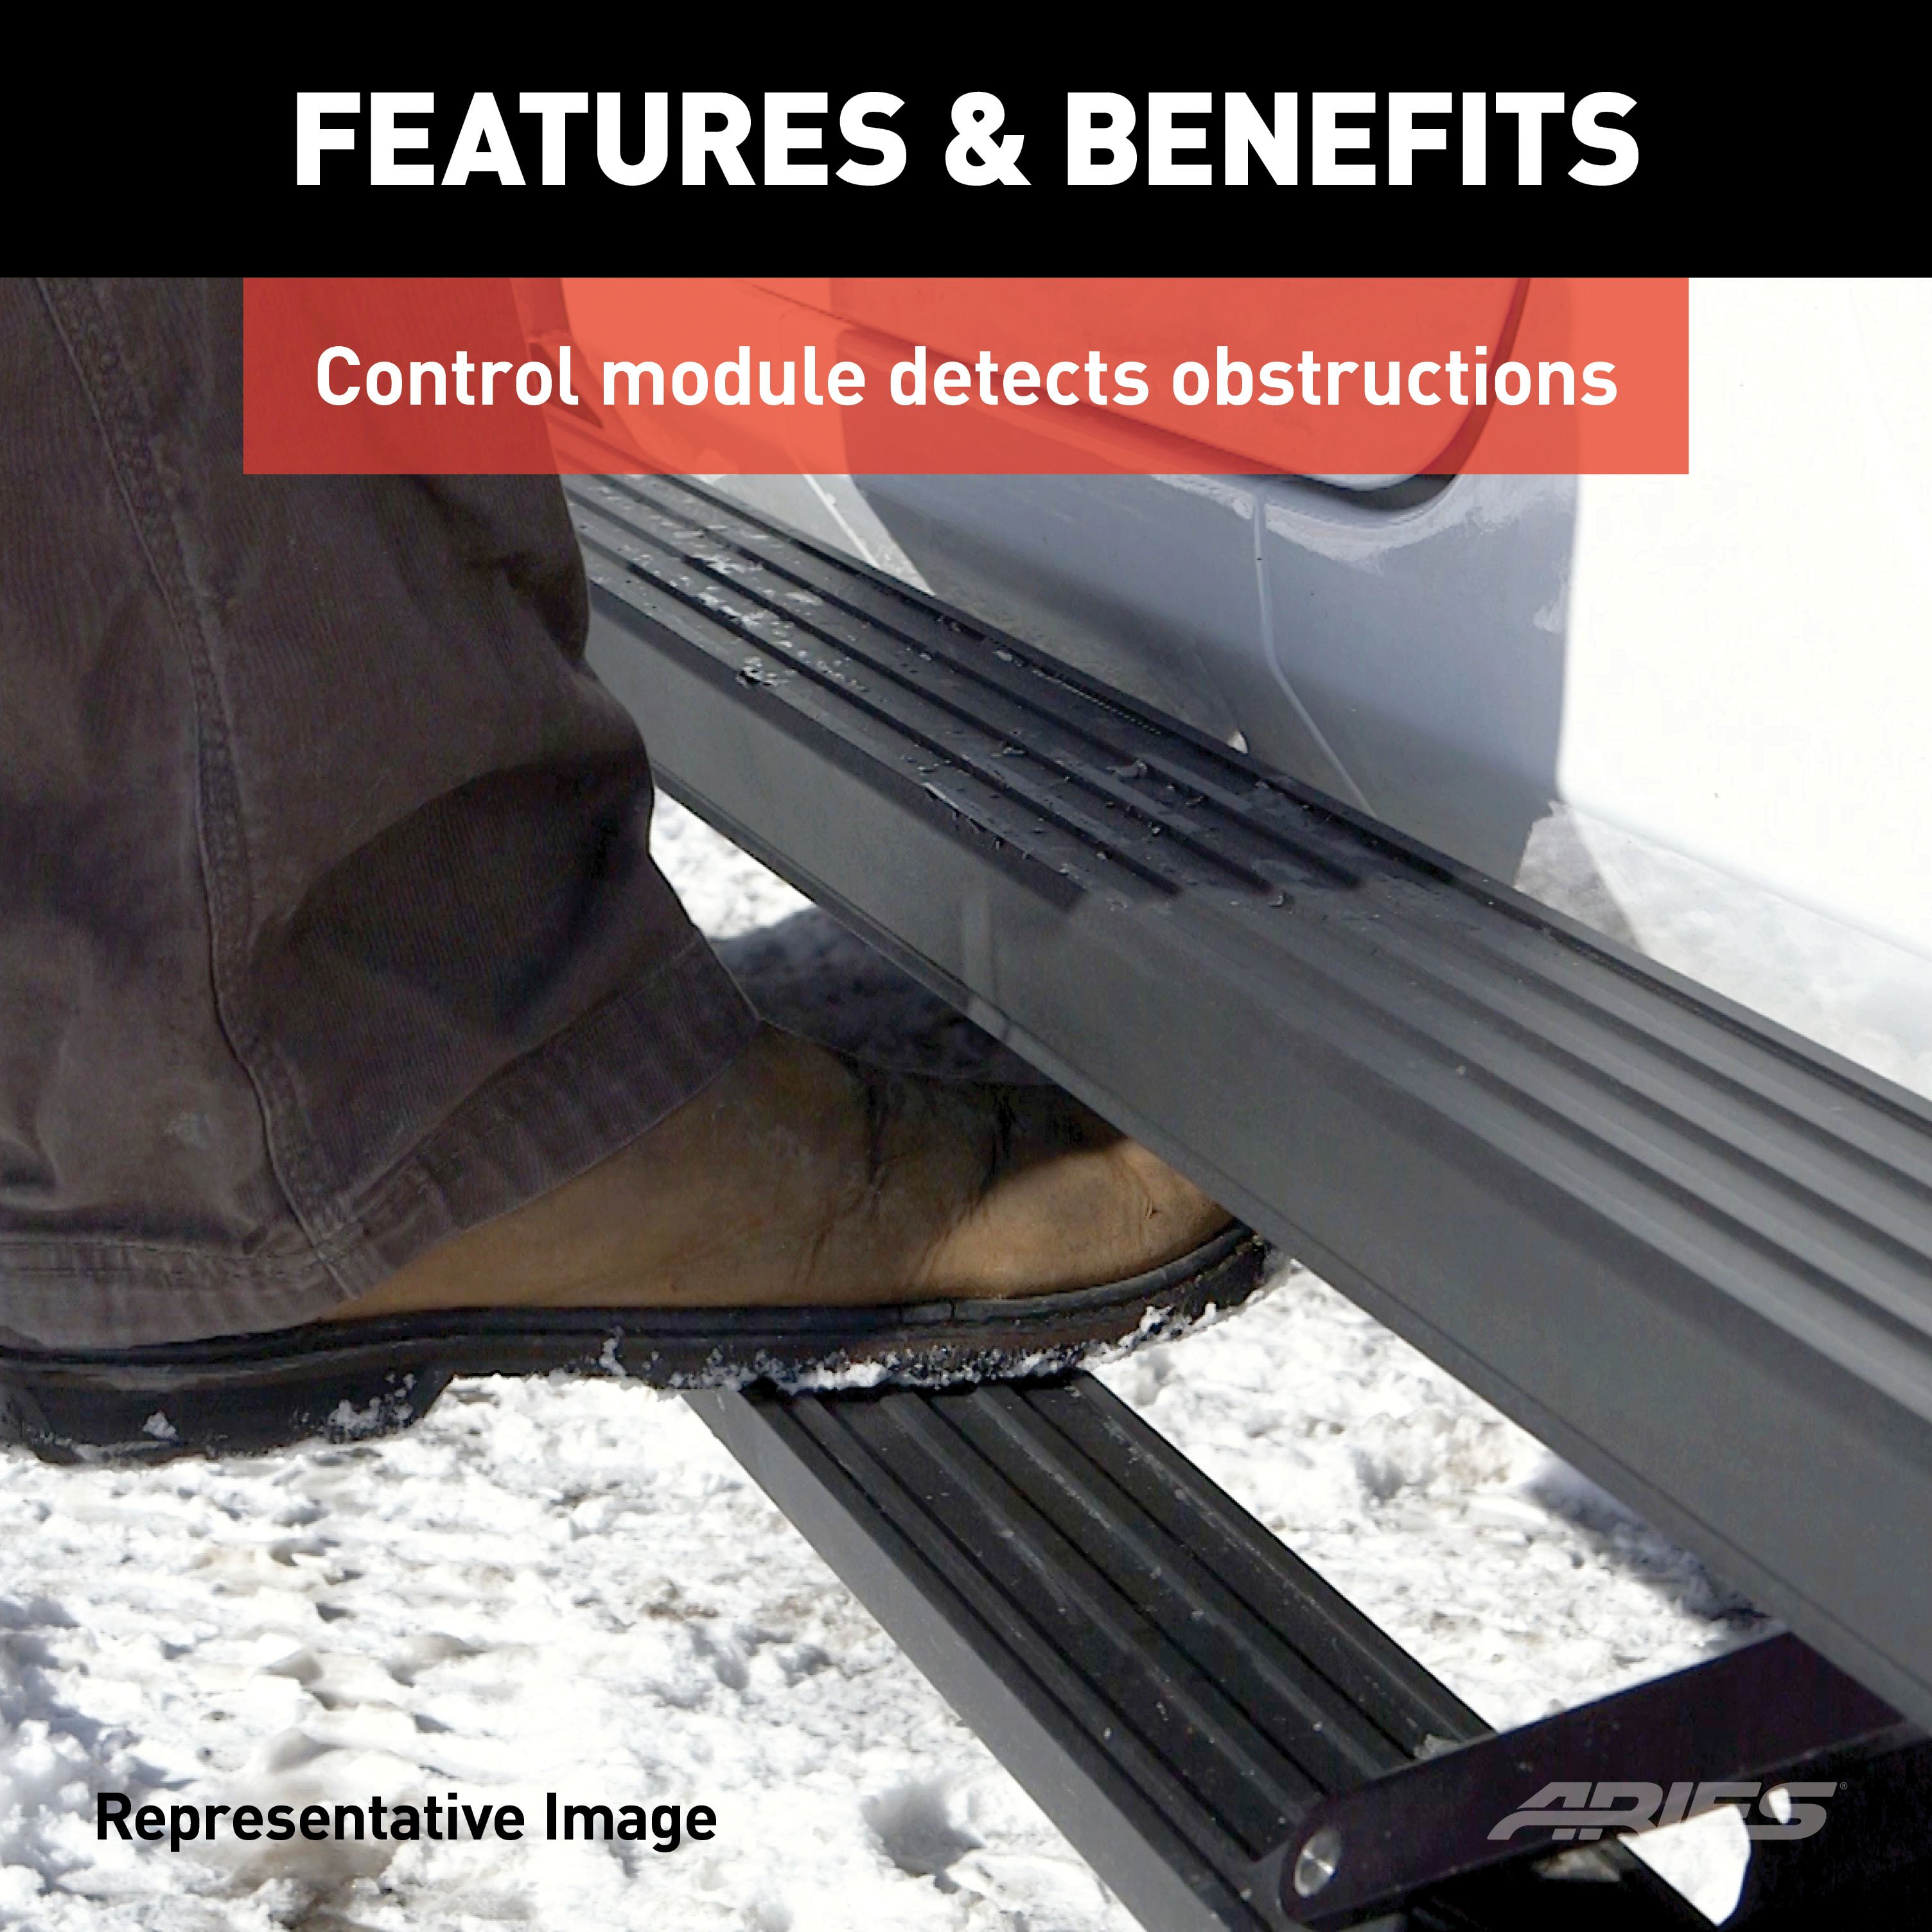
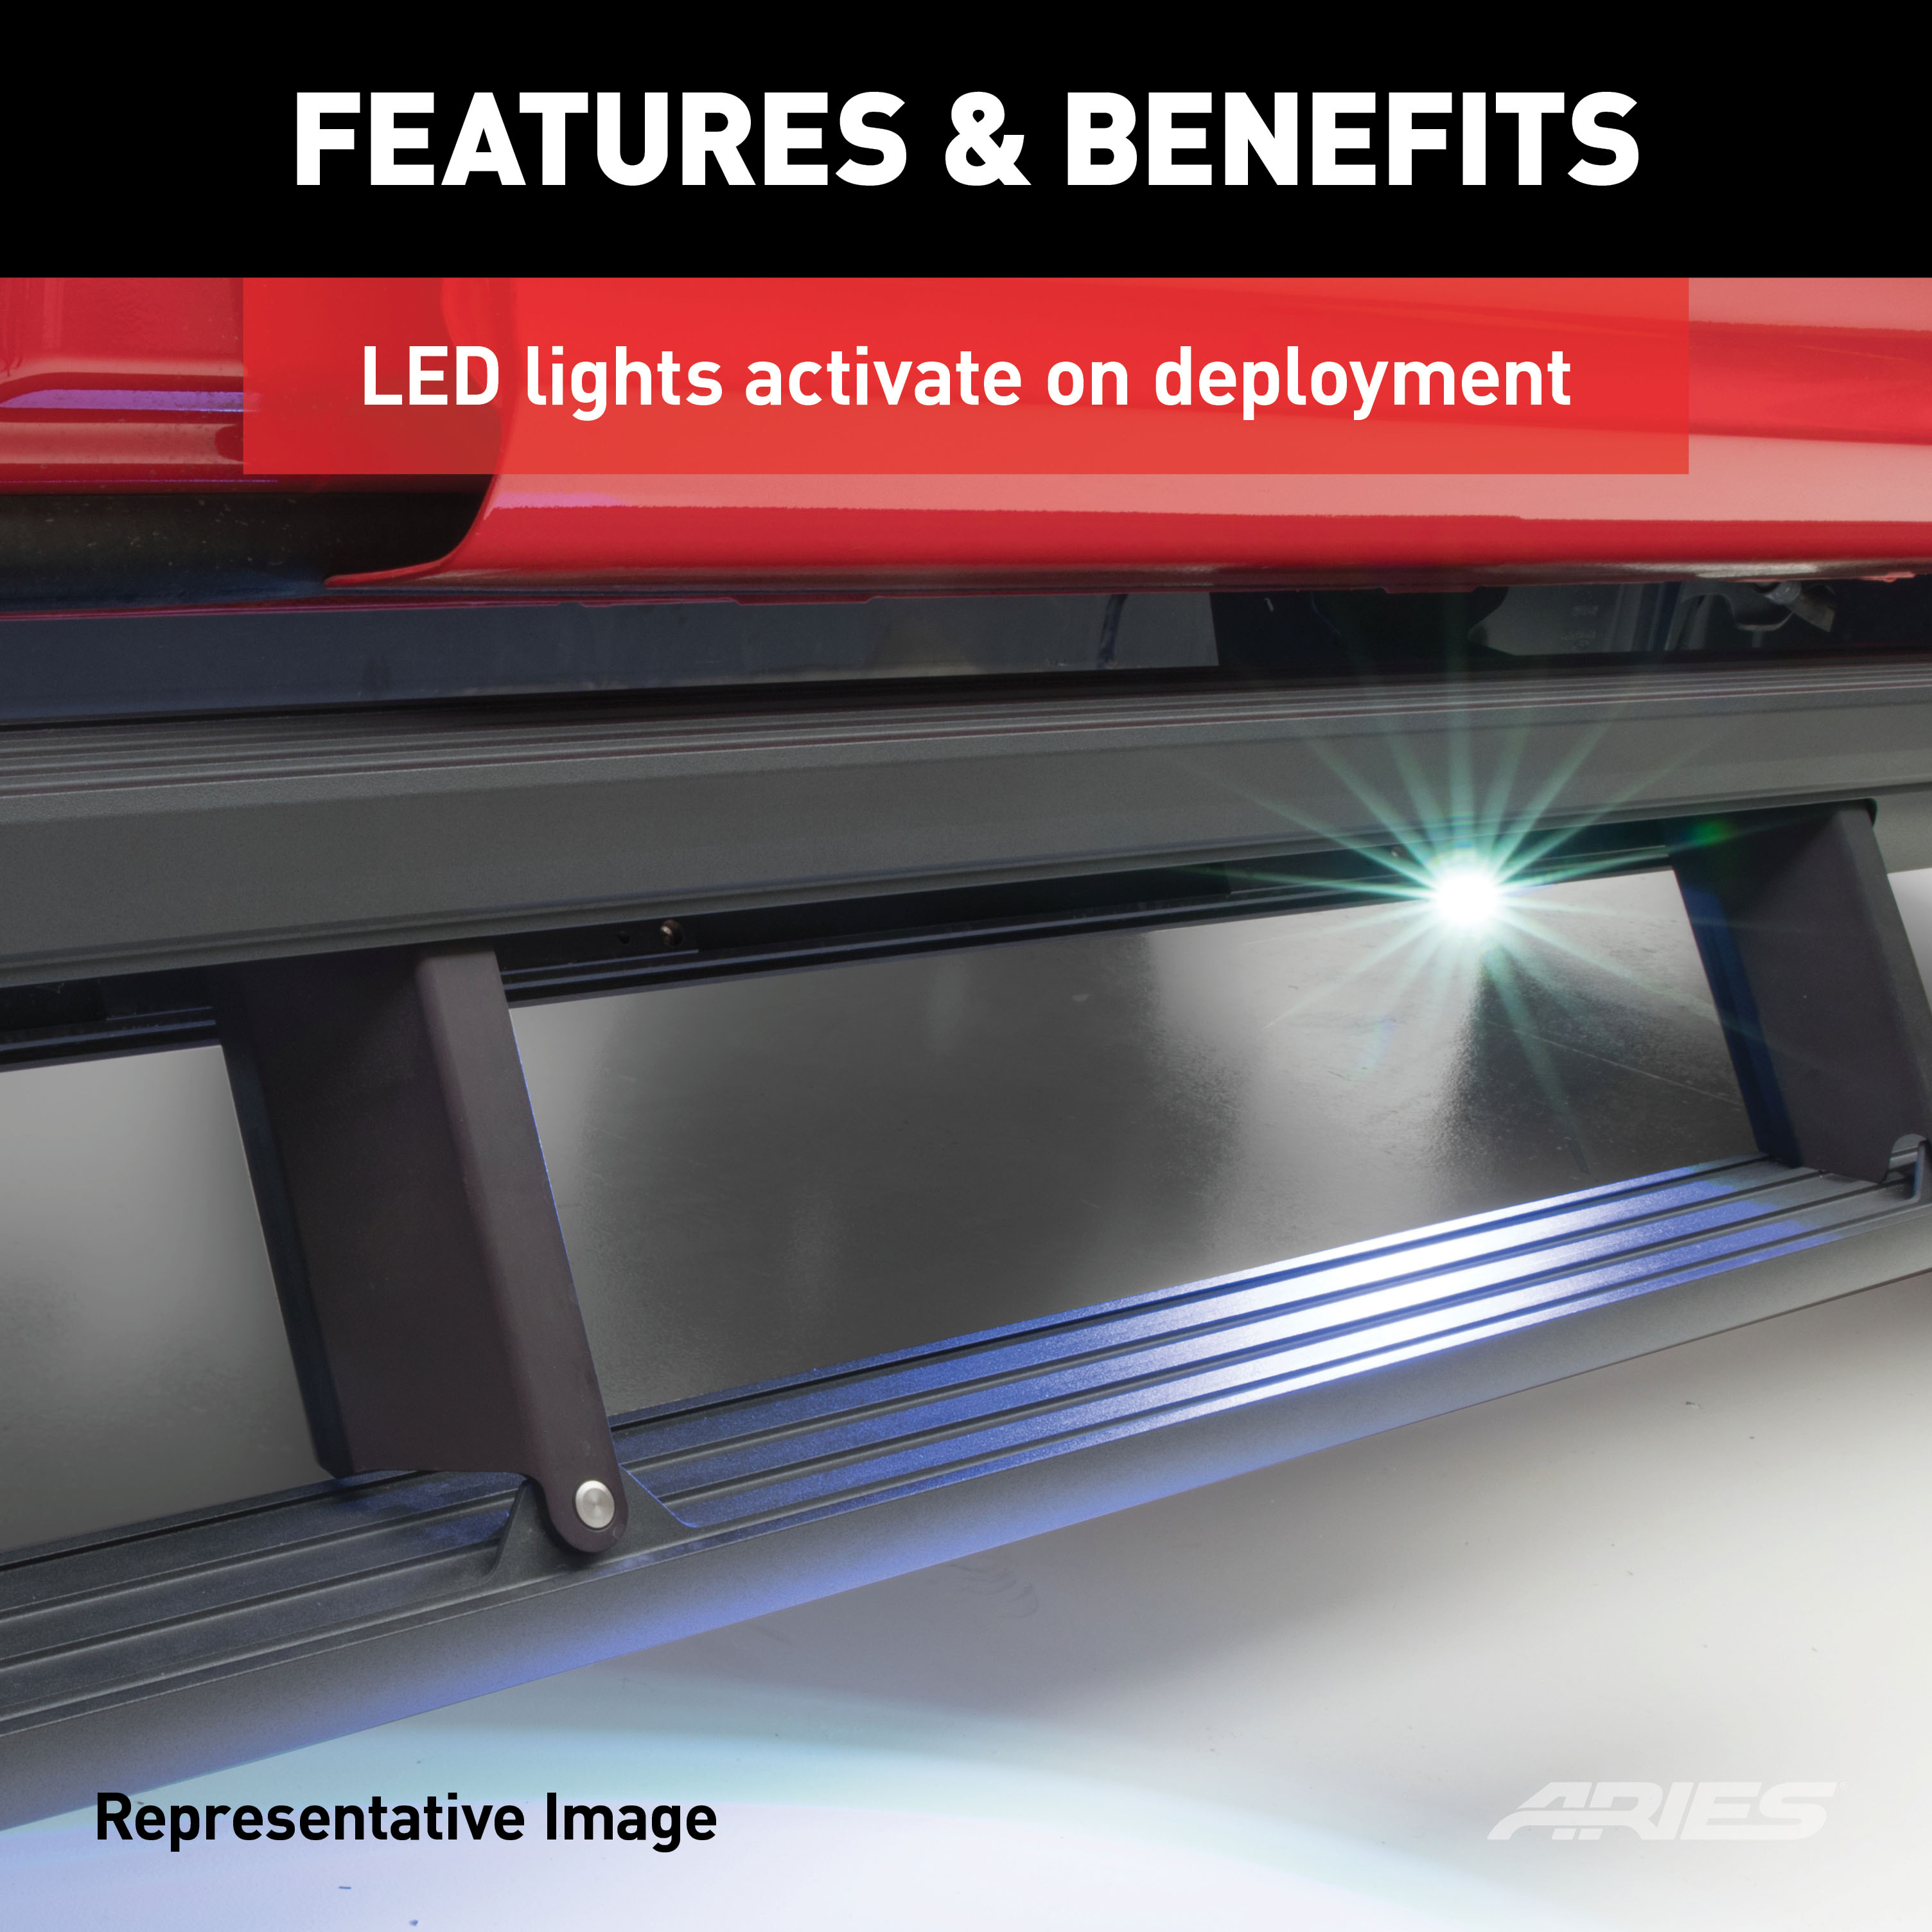
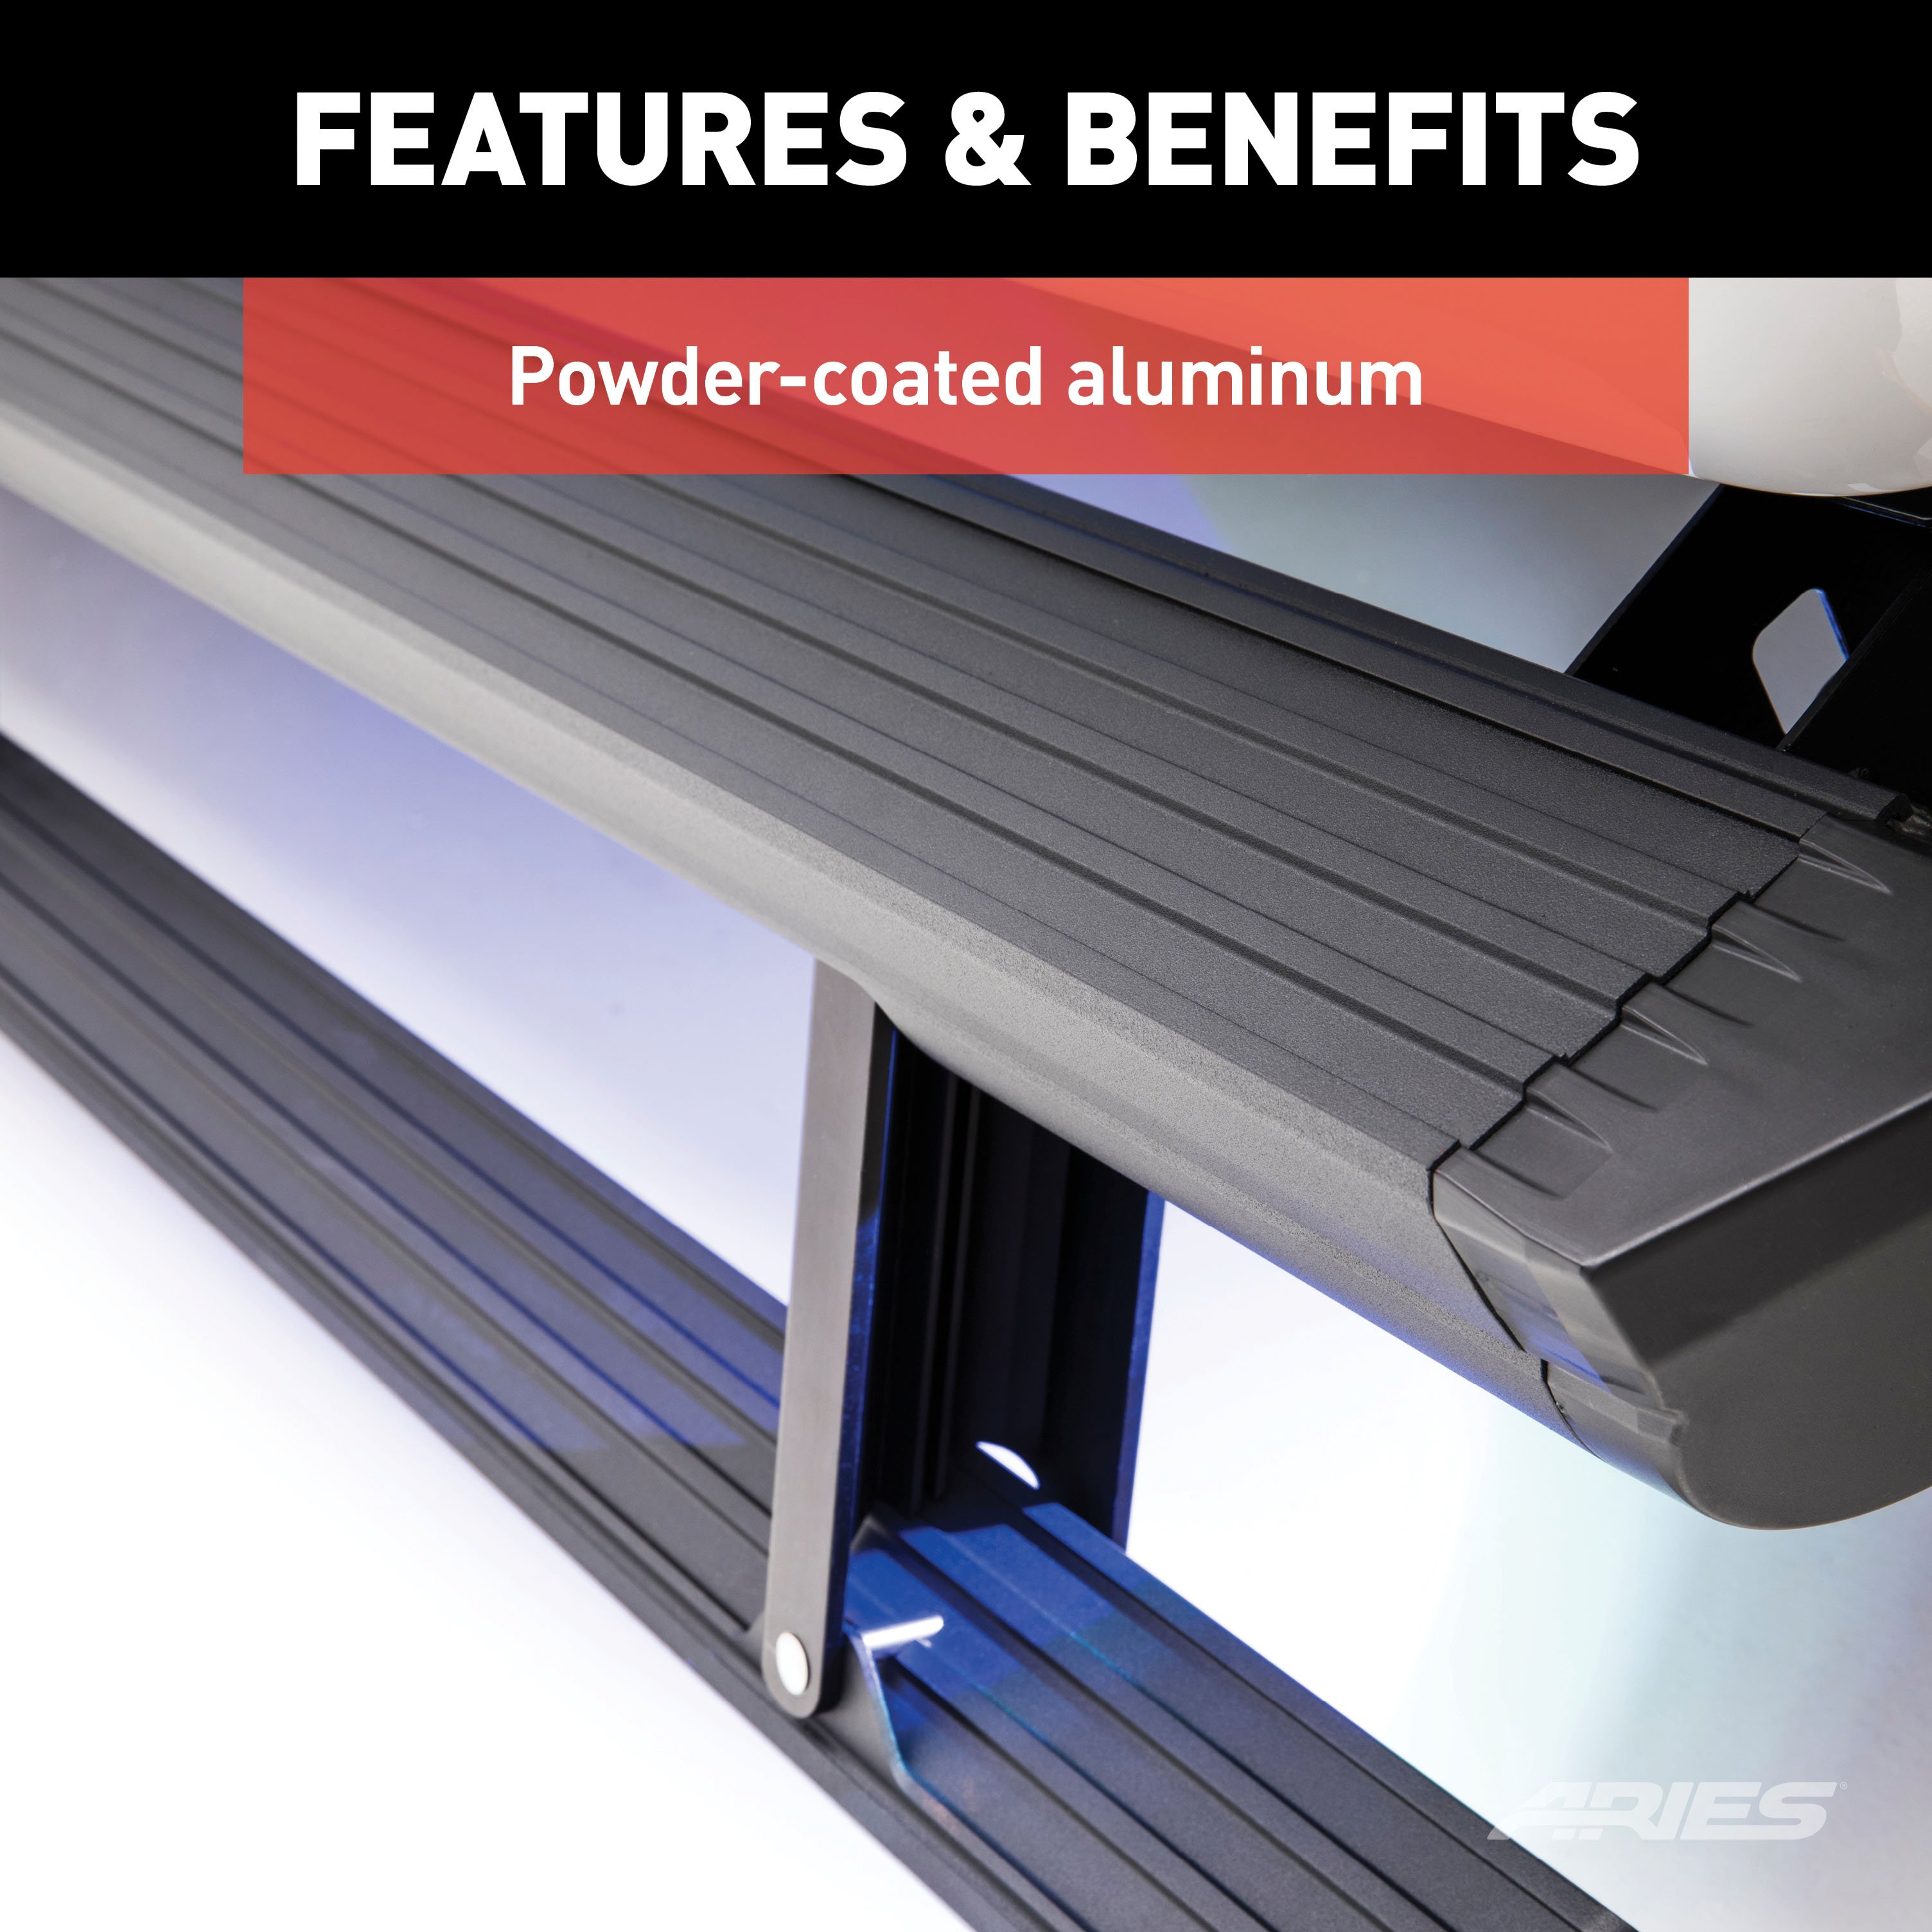
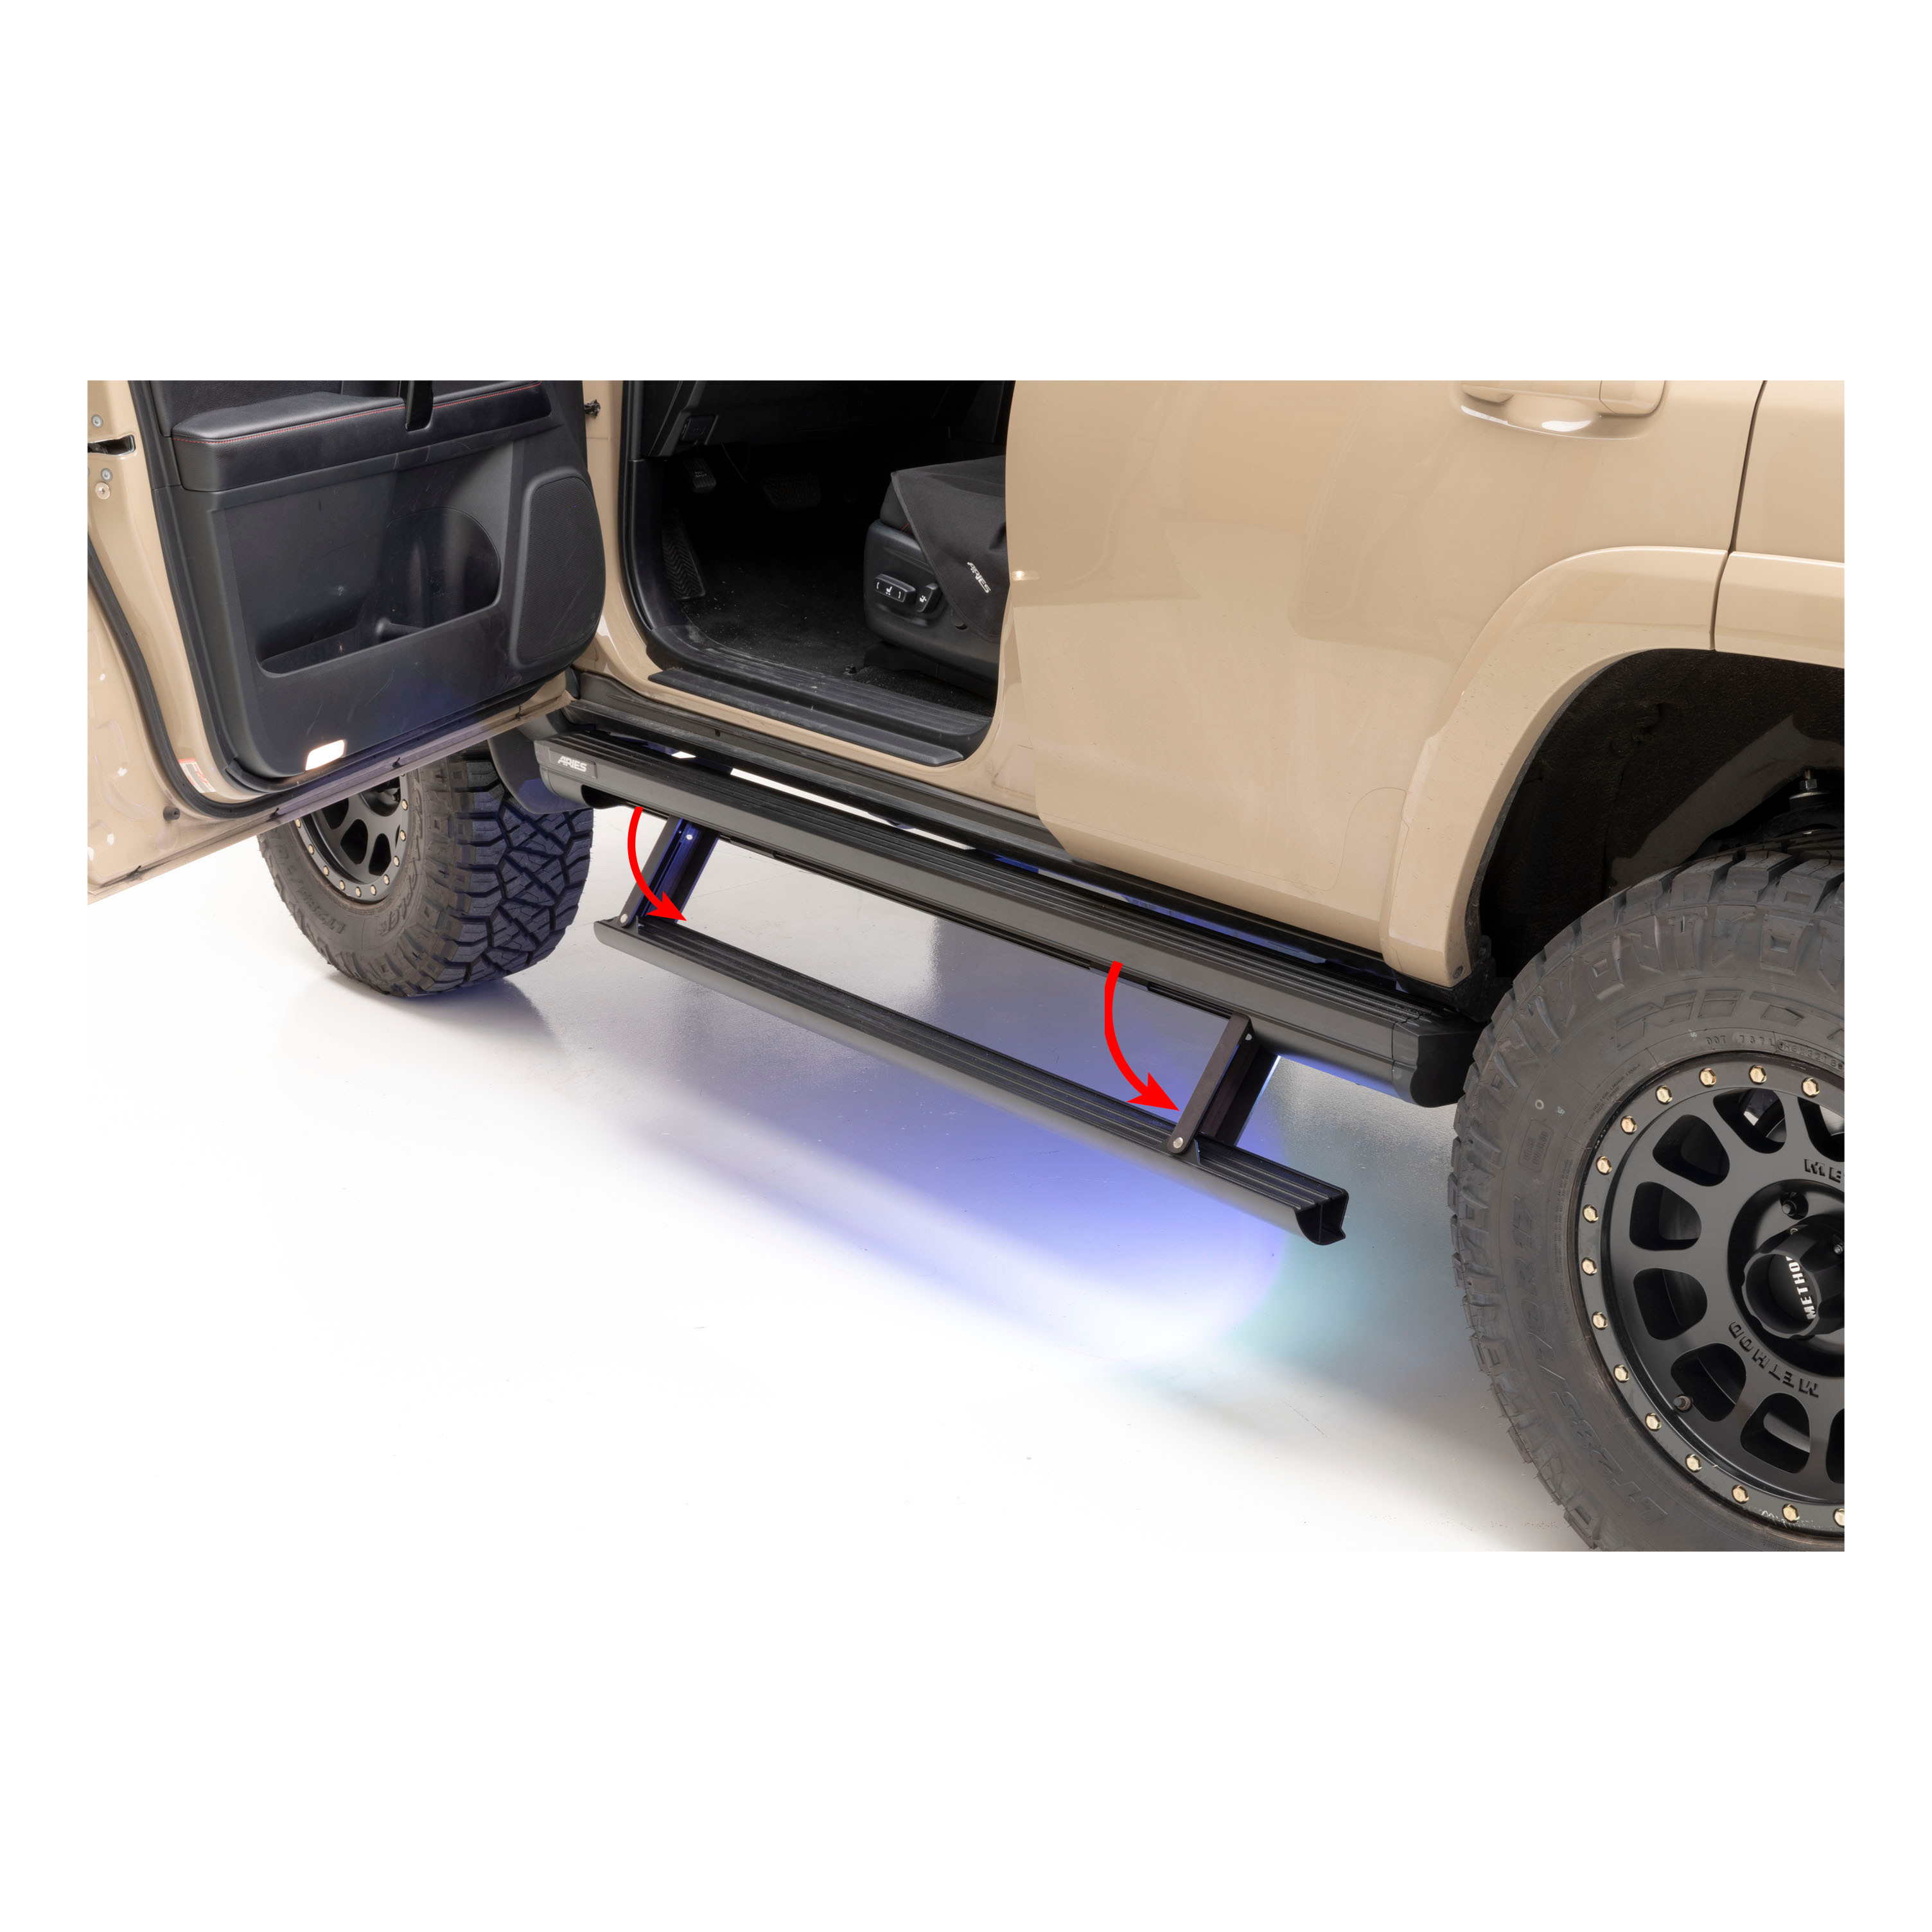
ARIES ActionTrac powered running boards are unique from other power side steps because they are actually two steps in one. This patented step-within-a-step design -- combined with a no-drill bracket installation, control module operation and powder-coated aluminum construction -- truly makes these retractable running boards an asset for the offroad truck or Jeep, particularly as lifted truck steps. ActionTrac powered running boards have one 4" wide step on top of the main housing and one 3" wide that automatically deploys as needed. When the door opens, the control module deploys the power step 8" below the main step, 15" below the doorsill, depending on the model. This two-step design offers enhanced safety and easier vehicle entry and exit, especially on large, lifted vehicles. It's also very helpful for families with young children and for elderly passengers. The boards contour to the vehicle and offer extra protection for the rocker panels from small road debris. For additional safety, the module is able to detect any obstructions during operation to avoid pinch hazards. LED lights are also built into the housing to illuminate the steps when deployed. ARIES ActionTrac powered running boards are made for vehicle-specific installation for a custom fit. They use pre-existing factory holes for the brackets to eliminate drilling. They also do not require any splicing into factory wiring. These particular running boards fit specific years of the Jeep Wrangler (see application info to verify fitment). Each set is constructed from powder-coated aluminum to be strong, lightweight and non-corrosive. The quiet, maintenance-free rotary motor is shielded within the main housing, along with the power step pivot points and all electrical components, protecting them from the harsh elements. NOTE: Boards, brackets and wiring are included.

Explore ARIES products at TowUniverse for top-tier grille guards, side bars, nerf bars, headache racks, and more. Upgrade your vehicle with ARIES today!
ARIES is a fast-paced marketer and innovator of truck, Jeep, SUV and CUV accessories. From automotive enthusiasts to professional builders, our products are built for the champions of individualism, innovation and attitude.
We offer the perfect combination of unique style and durable construction, specializing in custom-fit grille guards, bull bars, side bars and running boards, as well as Jeep Wrangler and Jeep Gladiator accessories.
ARIES products are made vehicle-specific for a custom fit, and they are available for a wide variety of makes and models sold in North America.
Experts available to answer your questions
Call 888-634-9494Limited Lifetime Warranty (Five-Year Finish, Three-Year Parts)
2 compatible vehicles
| Year | Make & Model | Style | Notes |
|---|---|---|---|
| 2007 - 2017 | Jeep Wrangler | Sport Utility · 4-Door | — |
| 2018 | Jeep Wrangler JK | Sport Utility · 4-Door | — |
The ARIES ActionTrac 69.6" Powered Running Boards, Select Jeep Wrangler JK Step Nerf Bar Kit (Part #BBDR3036570) fits the following vehicles: 2007-2017 Jeep Wrangler; 2018 Jeep Wrangler JK. Always verify your specific year, make, and model before ordering.
The ARIES ActionTrac 69.6" Powered Running Boards, Select Jeep Wrangler JK Step Nerf Bar Kit (Part #BBDR3036570) fits 2007-2017 Jeep Wrangler models. The 2018 model year is the last year covered by this part number. For newer models, check for an updated version.
Yes, the ARIES ActionTrac 69.6" Powered Running Boards, Select Jeep Wrangler JK Step Nerf Bar Kit (Part #BBDR3036570) is designed to fit the 2007-2017 Jeep Wrangler.
The ARIES ActionTrac 69.6" Powered Running Boards, Select Jeep Wrangler JK Step Nerf Bar Kit (Part #BBDR3036570) Refer to the included instructions for installation details. Basic hand tools are typically all you need.
No. The parts list notes that the driver and passenger running boards are sold separately. Part number 3036570 includes the mounting brackets, T-rails, fasteners, wiring harness, door sensors, LED lights, power switch, and circuit board. You must purchase the running boards separately.
You will need: a ratchet, drill, socket set, drill bit set, zip ties, and a level. A 3/4" drill bit is specifically required for the power switch hole. The installation is rated as moderate difficulty.
Yes. Step 5 explicitly states 'With help, carefully place the running board onto the mounting brackets.' At least one additional person is required to position the running board during installation.
The manual does not specify whether battery disconnection is required. However, because electrical work is involved, consult the vehicle manufacturer's service manual or have the electrical portion performed by someone familiar with electrical systems, as warned on page 1.
Start on the passenger side. Install the front, middle, and rear brackets in that order. Each bracket is specific to its mounting location. Refer to the product image on page 1 for correct locations. After completing the passenger side, repeat the process on the driver side.
Insert three T-rails into the slot on the running board. Position each T-rail as close as possible to the mounting bracket location. The T-rails align with the mounting brackets on the vehicle, with the top mounting track on the board sliding over the top flange on each bracket and the studs dropping into the slots on the bottom of each mounting bracket.
Do not fully tighten hardware during initial installation. Snug it only. After adjusting the running board to the desired location (Step 7), tighten all brackets to the vehicle first, followed by the running board connections. This allows for proper alignment before final tightening.
1/4" bolts should be torqued to 3 ft-lbs. This applies to the fasteners securing the mounting brackets to the vehicle rocker panel.
5/16" bolts should be torqued to 7 ft-lbs. This applies to the fasteners securing the running board to the mounting brackets.
M8 bolts should be torqued to 7 ft-lbs. These are used with lock washers and flat washers with anti-seize on the mounting brackets.
Yes. A 3/4" drill bit is required to drill a hole in the panel for the power switch installation (Step 17). Before drilling, you must confirm there are no wires behind the panel to avoid damage.
Yes. After inserting the rear wires (actuator and LED light) through the floor hole behind the driver seat, you must cut a slot in the floor plug and re-insert it into the hole (Step 13). This allows the wires to pass through while the plug remains in place.
Yes. You must remove the front and rear door trim panels on both sides of the vehicle. There are five clips on each side: three on the front trim panel and two on the rear. Moving the seats all the way back makes front panel removal easier, and moving them all the way forward makes rear panel removal easier.
The wiring harness uses a 20A fuse. Remove the fuse before installation (Step 8) and reinstall it after all wiring is complete (Step 18).
The wiring harness is two-piece. The first section connects to the battery with the fuse removed. Route the opposite end through the firewall into the cab and zip-tie it in place (Step 8). The second section routes under the carpet from the passenger-side rear to the desired location (Step 10). Driver-side wires route under the carpet to the front of the vehicle, and rear actuator and LED light wires route through the floor plug behind the driver seat (Steps 11-12).
Driver-side front door sensor: yellow and orange. Driver-side rear door sensor: purple and orange. These wires route under the carpet to the front of the vehicle.
Passenger-side front door sensor: grey and green. Passenger-side rear door sensor: white and blue. These wires route under the carpet to the front of the vehicle.
Driver-side LED light: brown and dark brown. Passenger-side LED light: pink and brown. Both route through the floor plug behind the driver seat and connect to the LED light bracket.
Both driver-side and passenger-side actuators use black and red wires. These route through the floor plug behind the driver seat and connect to the running board motor.
The power switch has blue female wires and a red female wire. Plug the blue female wires into the silver male ends and the red female wire into the bronze male end. This is critical for proper operation.
Plug the door sensor into the wiring harness and route it up the door frame under the carpet. Wipe both the sensor and door with the provided alcohol wipe. Place two pieces of 1/2" x 1/2" double-sided tape on the sensor and attach it to the vehicle. Repeat for all four doors. Then use 3/4" x 3/4" double-sided tape to place the magnet on the door so it lines up with the sensor.
Before securing the rear mounting bracket, place an LED light bracket over one of the T-rail studs. Secure it with a 5/16" flat washer and 5/16" nylock nut. After installation, plug the LED light wire (brown/tan for driver side, pink/tan for passenger side) into the LED light and secure it to the mounting bracket tab with the supplied jam nut. Cover wires with slit loom for protection.
Place the circuit board underneath the carpet under the rear passenger seat. Attach the two wiring harnesses to it and reinstall the fuse that was removed in Step 8.
Improper electrical installation may result in personal injury. Unless you are familiar with the installation and handling of electrical systems, have the electrical portion performed by someone who has that familiarity.
Use of a door delete switch requires manual operation of the boards. Failure to retract the boards when operating the vehicle could result in damage to the boards or vehicle. The door delete kit is part number 3020000.
Periodic inspection of all mounting hardware should be performed to ensure it remains tight. Additionally, periodic inspection of all wires and connections should be performed to ensure there is no visible damage or loose connections.
If mud or dirt is built up on the steps, spray them off and let them air dry. Mild automotive detergent may be used to clean the product. Do not use dish detergent, abrasive cleaners, abrasive pads, wire brushes or other similar products that may damage the finish.
No maintenance is required on the waterproof harness or water-resistant motors.
Check the following in order: (1) Double-check all connections. (2) Check the fuse to make sure it is plugged in. (3) Verify the on/off switch is getting power. (4) Confirm the circuit board is plugged in. (5) Verify the door sensors are plugged in. If all connections are secure and the fuse is installed, the issue may be with the motor or sensors.
The light should only be on when the system is turned on. If it is lit in both positions, switch the red wires on the back of the circuit board. This will not kill your battery unless you leave it lit for a month with no use.
Two things may be causing this: (1) Check the motor by unplugging it from the wiring harness and applying external 12V power to the leads. One position will make them deploy; switch the leads to make them retract. If this works, plug the motor back in. If you only hear a clicking sound with no movement, there is likely internal damage. (2) Check the sensors by unplugging both from the harness and plugging one back in. Manually test by putting a magnet close (not touching) to the sensor—it should make the step retract. When the magnet is away, the step should deploy. If magnets need alignment, do this one by one and mark the magnet position. If the motor works and sensors test individually but the system still won't work, the circuit board may be faulty—call 844-278-4357.
The system has built-in protection against quick cycling to prevent damage. To reset it, turn the on/off switch to off, wait 5 seconds, then turn it on again. This will reset the system and allow it to work normally.
Apply a dry, graphite powder lubricant on each pivot point to eliminate squeaking and rubbing sounds.
Yes. CURT Group sells a door delete kit (part number 3020000) that replaces door sensors. Each kit covers two doors. If you want to install a delete kit on all four doors, you will need to purchase two kits. However, the door delete switch requires manual operation of the boards—failure to retract them when operating the vehicle could result in damage.
No, the running boards are sold separately. Part 3036570 includes brackets, fasteners, wiring, sensors, lights, and controls only.
Ratchet, socket set, drill with bit set, 3/4" drill bit, zip ties, and level. Installation is rated moderate difficulty.
Yes, you need help to position the running board onto the mounting brackets.
1/4" bolts: 3 ft-lbs. 5/16" bolts: 7 ft-lbs. M8 bolts: 7 ft-lbs. Use these unless otherwise noted in the manual.
20A fuse. Remove before installation and reinstall after all wiring is complete.
Unless you are familiar with electrical system installation and handling, have the electrical portion performed by someone with that familiarity to avoid personal injury.
Periodic inspection of mounting hardware and wiring connections. Clean with mild automotive detergent only—avoid abrasive cleaners. No maintenance required on the waterproof harness or water-resistant motors.
On Sale Today
Original price was $2,410.95. Current price is $1,720.00.You save $690.95 (29%)
Free Shipping
Ships free on all orders
 Authorized Dealer


Quick Ship
In stock and ready to ship — order now!
Shipping from Fife, WAFREE SHIPPING
Estimated delivery Tue, Oct 13 - Thu, Oct 15
Order before 2 PM EST Monday–Friday for same-day processing
Guaranteed safe & secure checkout
No reviews have been added for this product.