
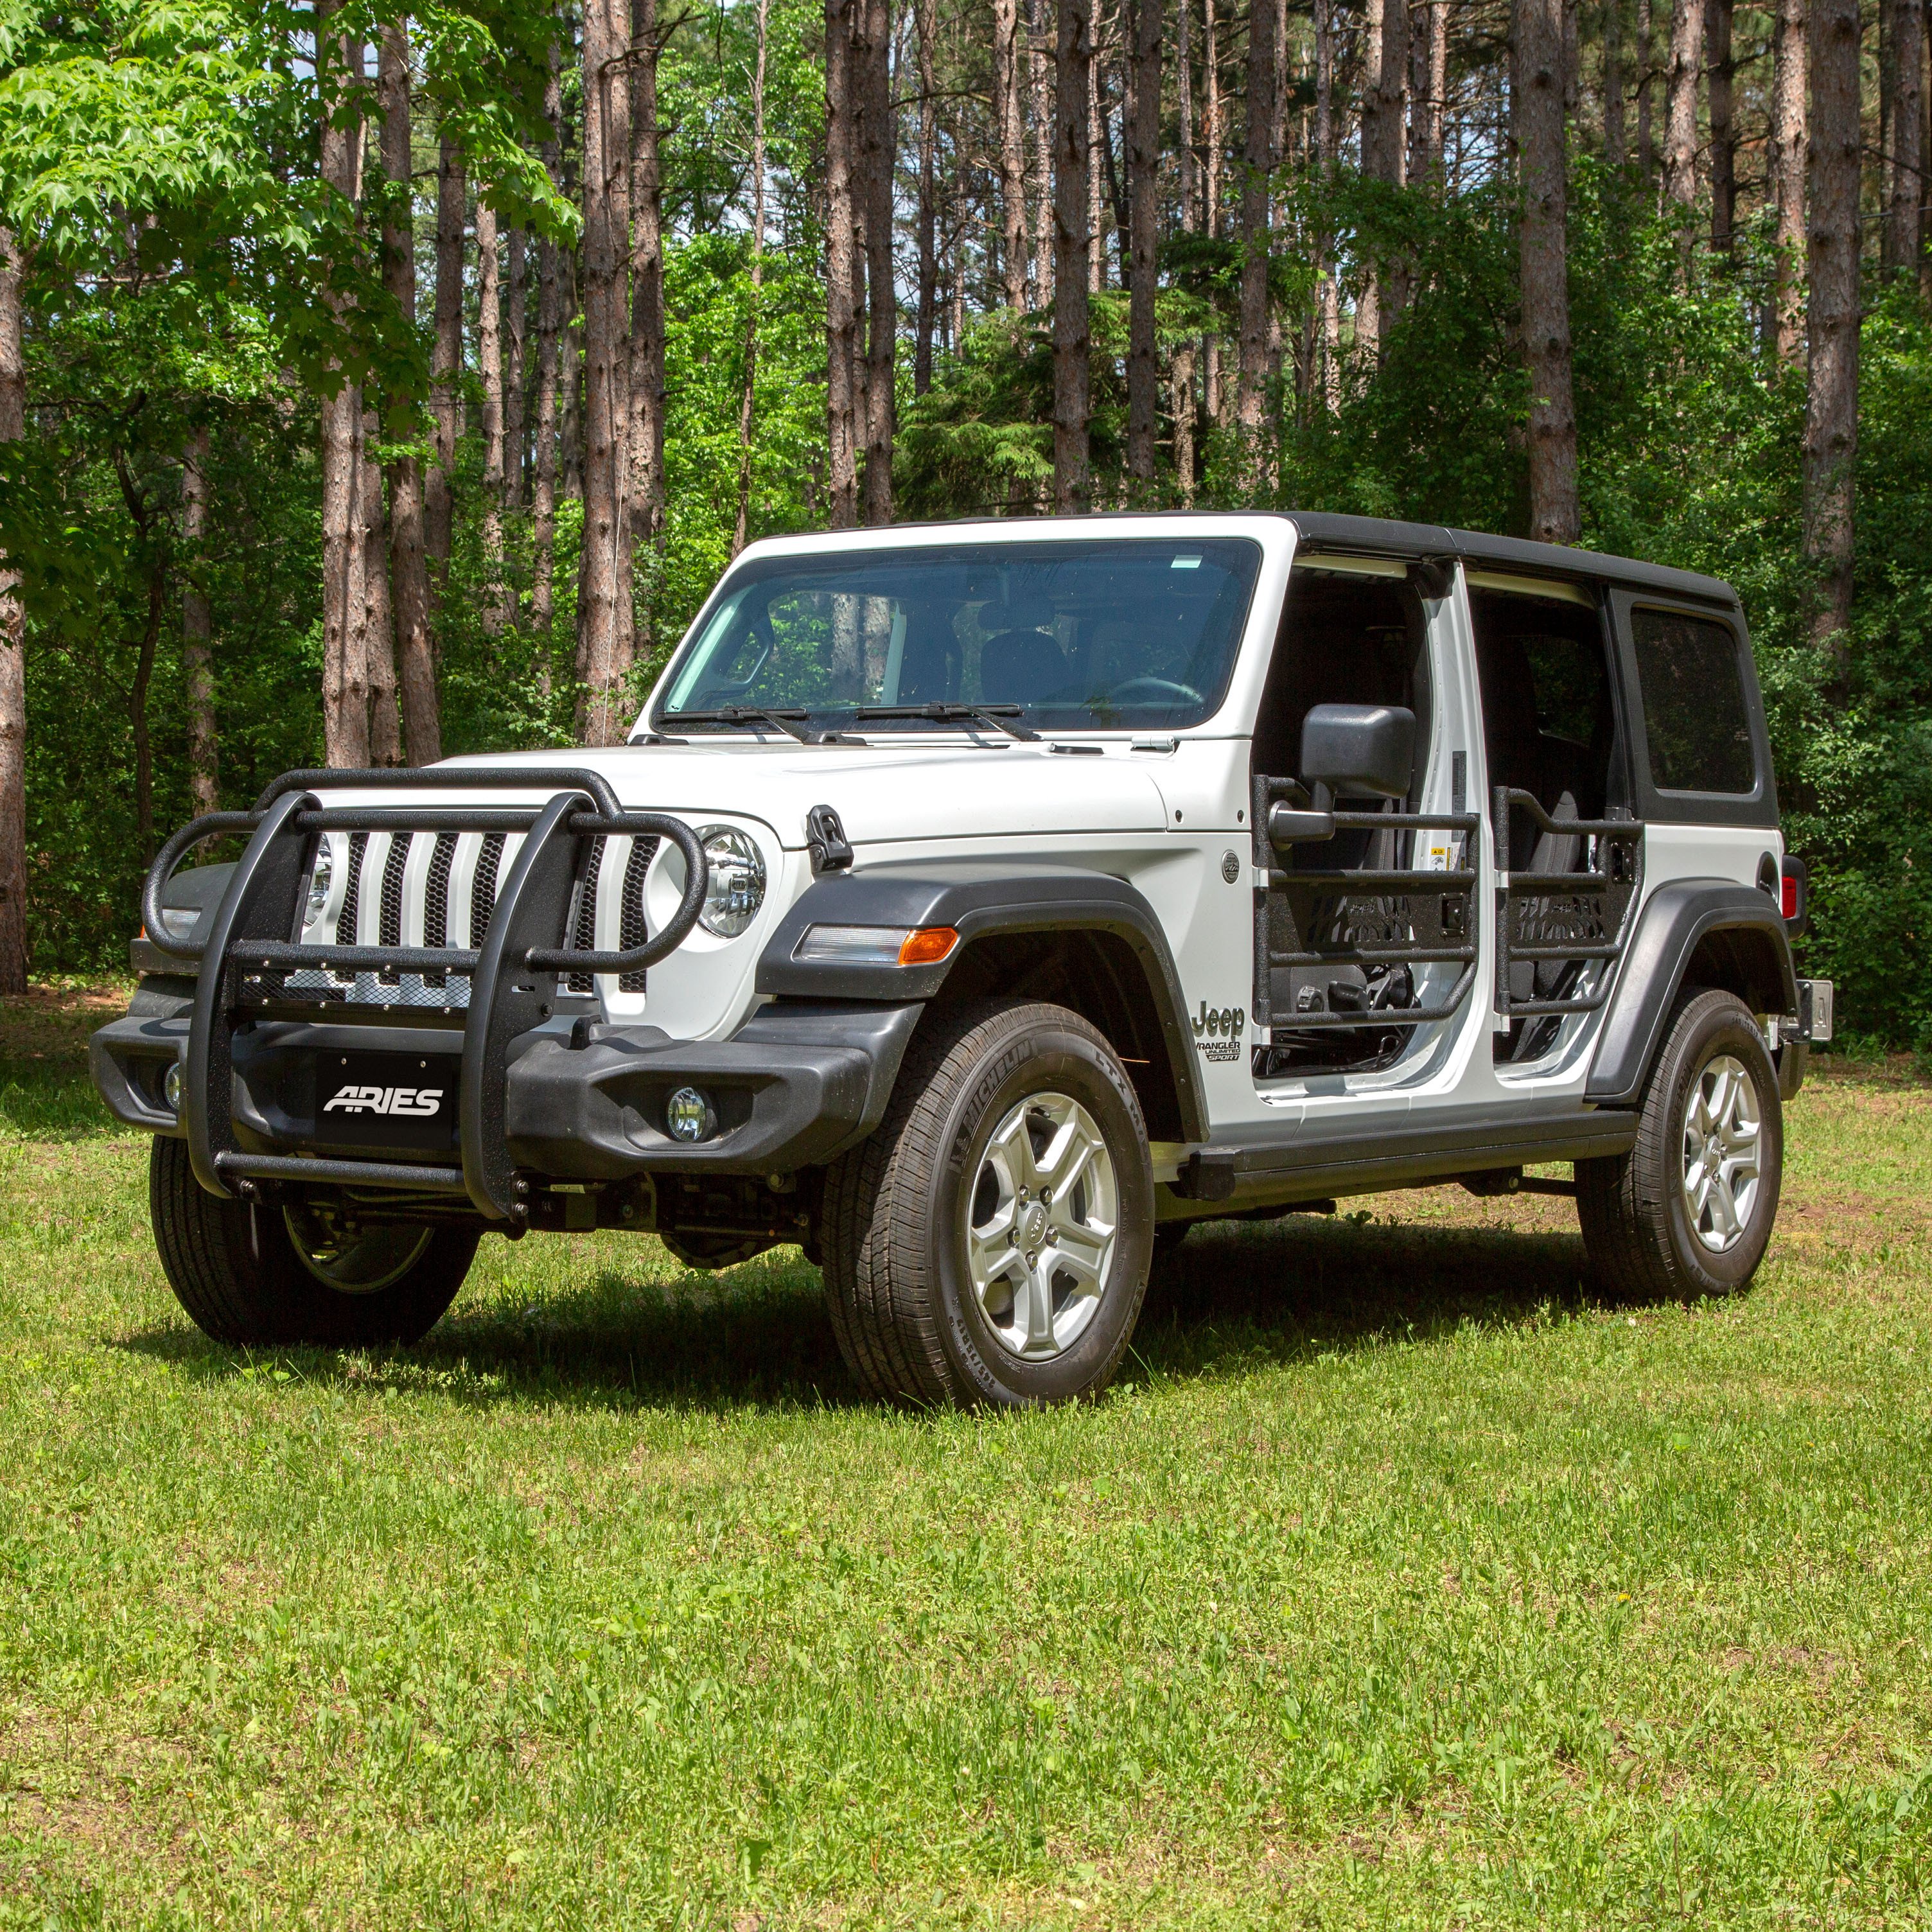
ARIES 2170032 Pro Series Black Steel Grille Guard with Light Bar, Select Jeep Wrangler JL, GladiatorARIESOriginal price was $1,550.95. Current price is $880.00.In Stock
View productOur in-house experts typically reply within one business day.

ARIES
Verify Fitment
Select your vehicle to confirm this part fits.
2020 - 2026 Jeep Gladiator
Confirmed to Fit
2018 - 2026 Jeep Wrangler
Confirmed to Fit




Always the correct part
We know our products
Quality Products
Free Shipping!
Always the correct part
We know our products
Quality Products
Free Shipping!
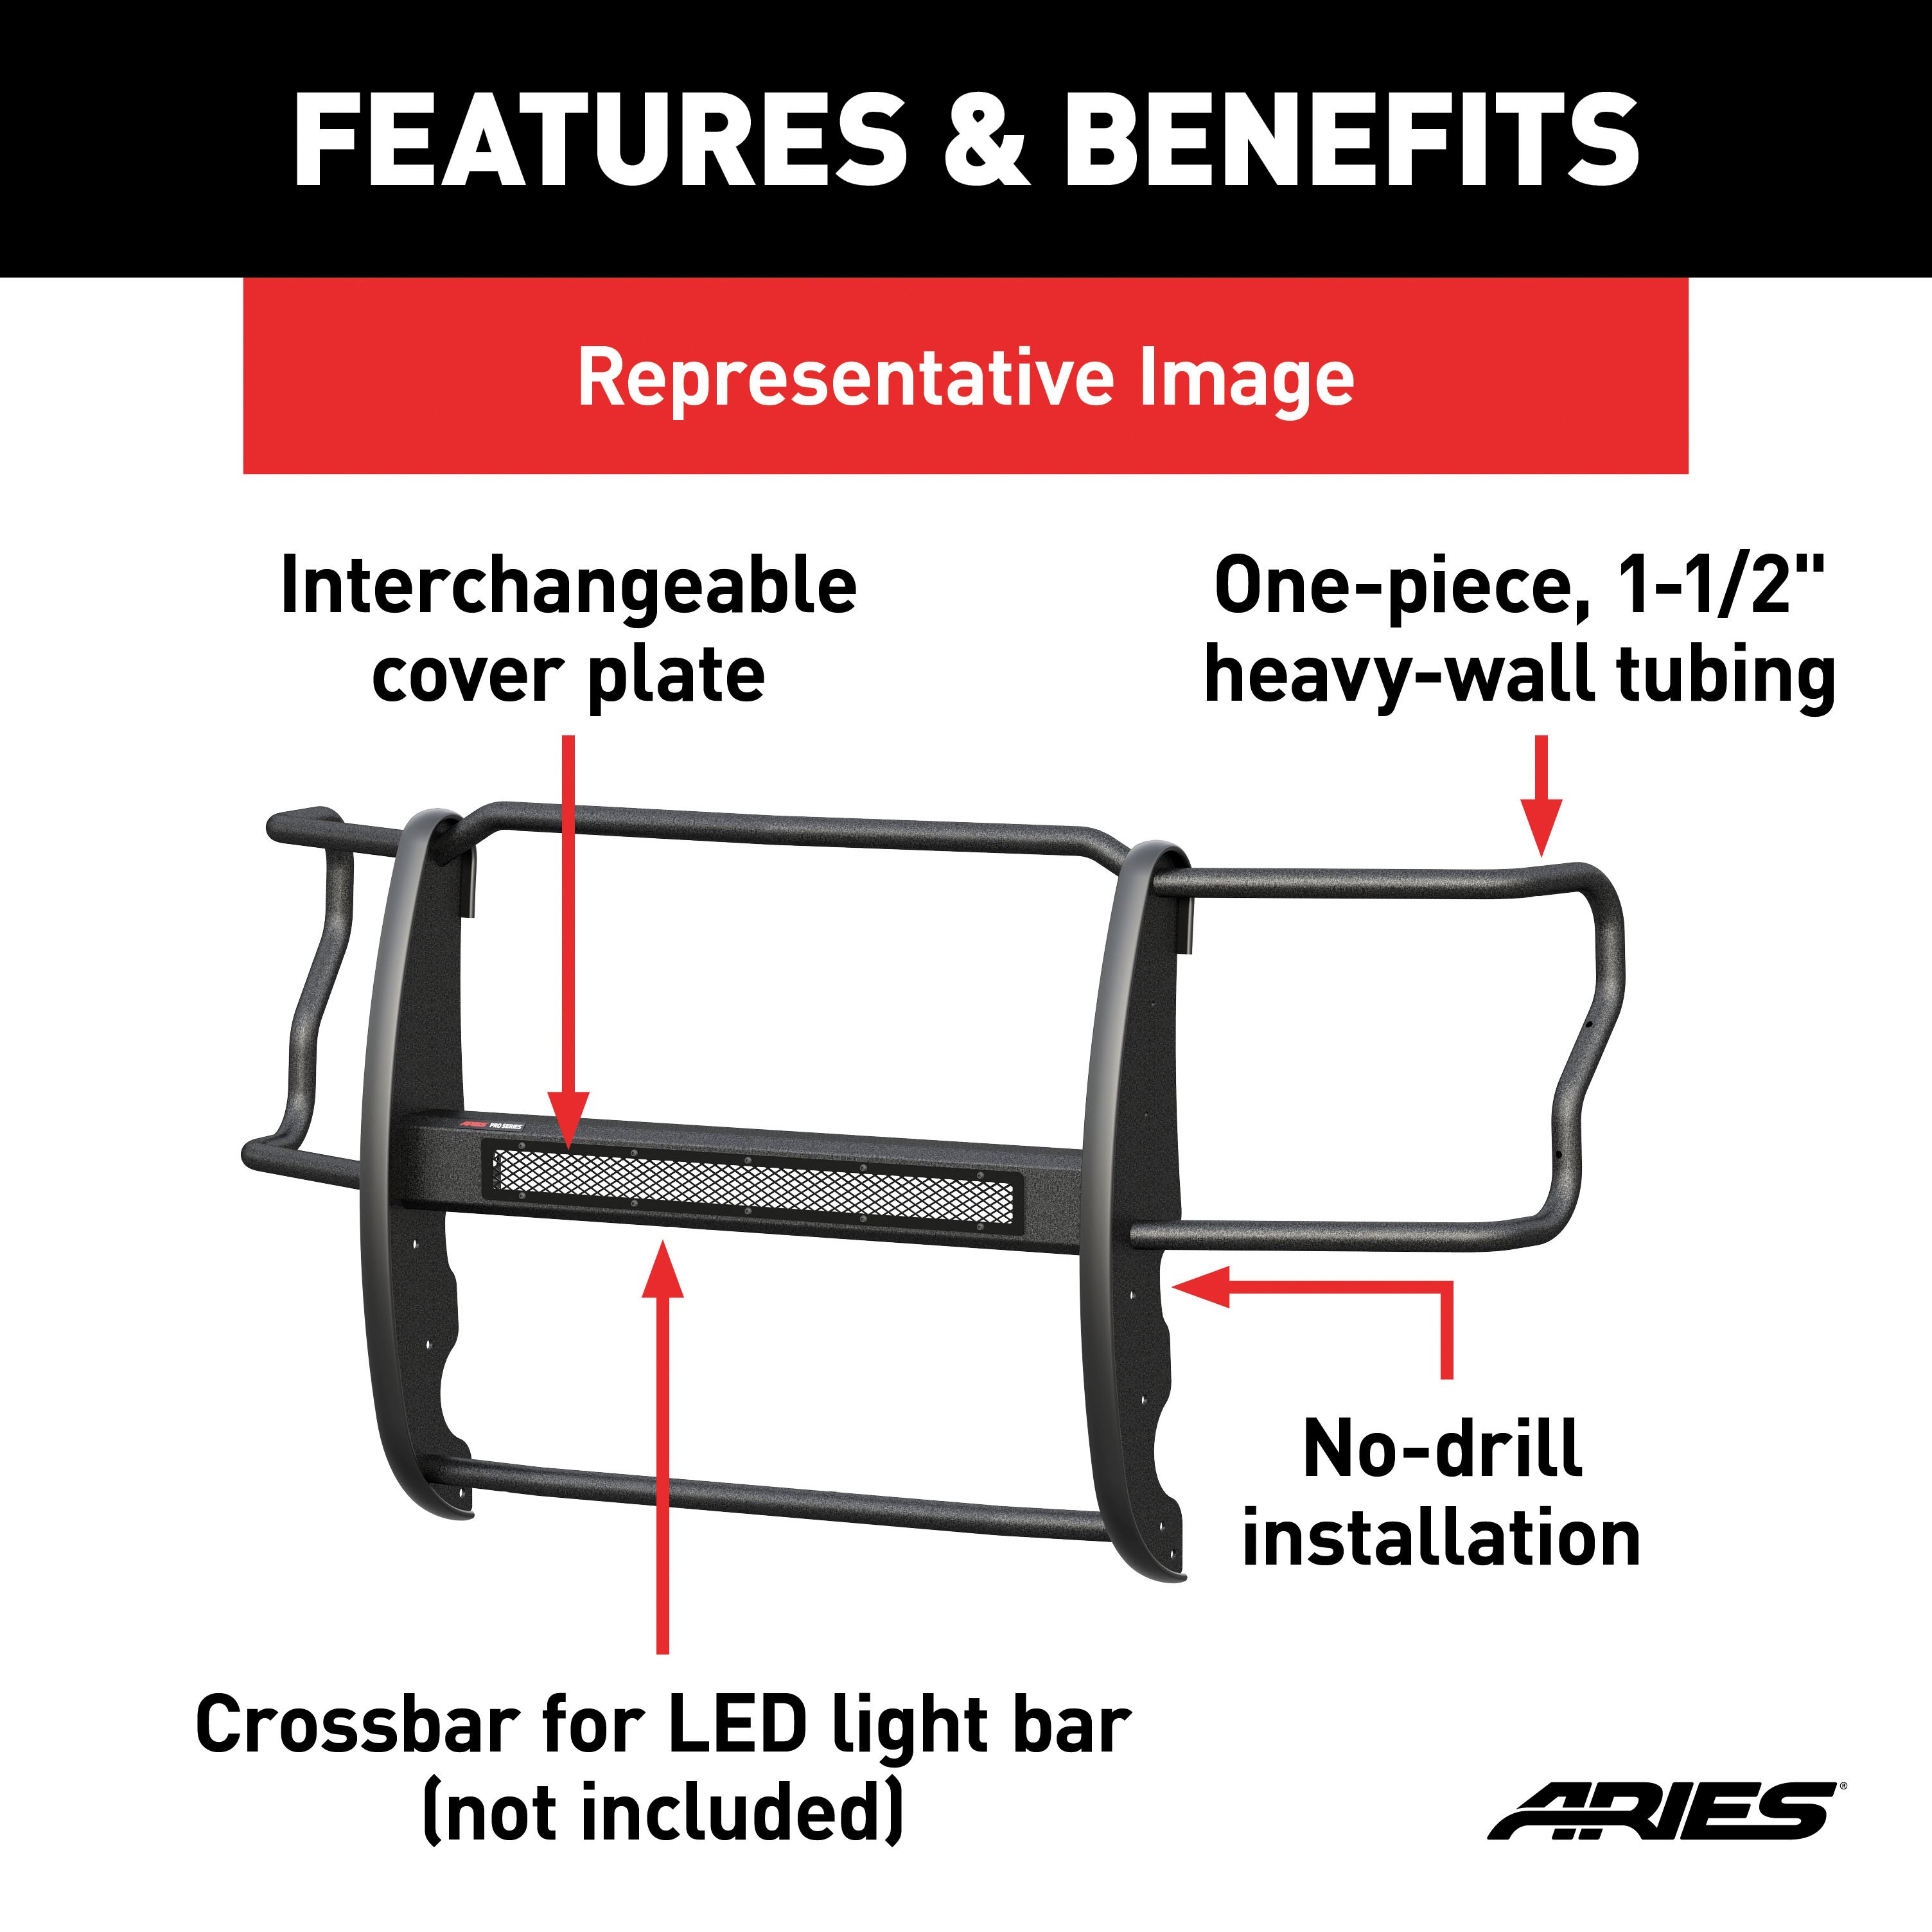
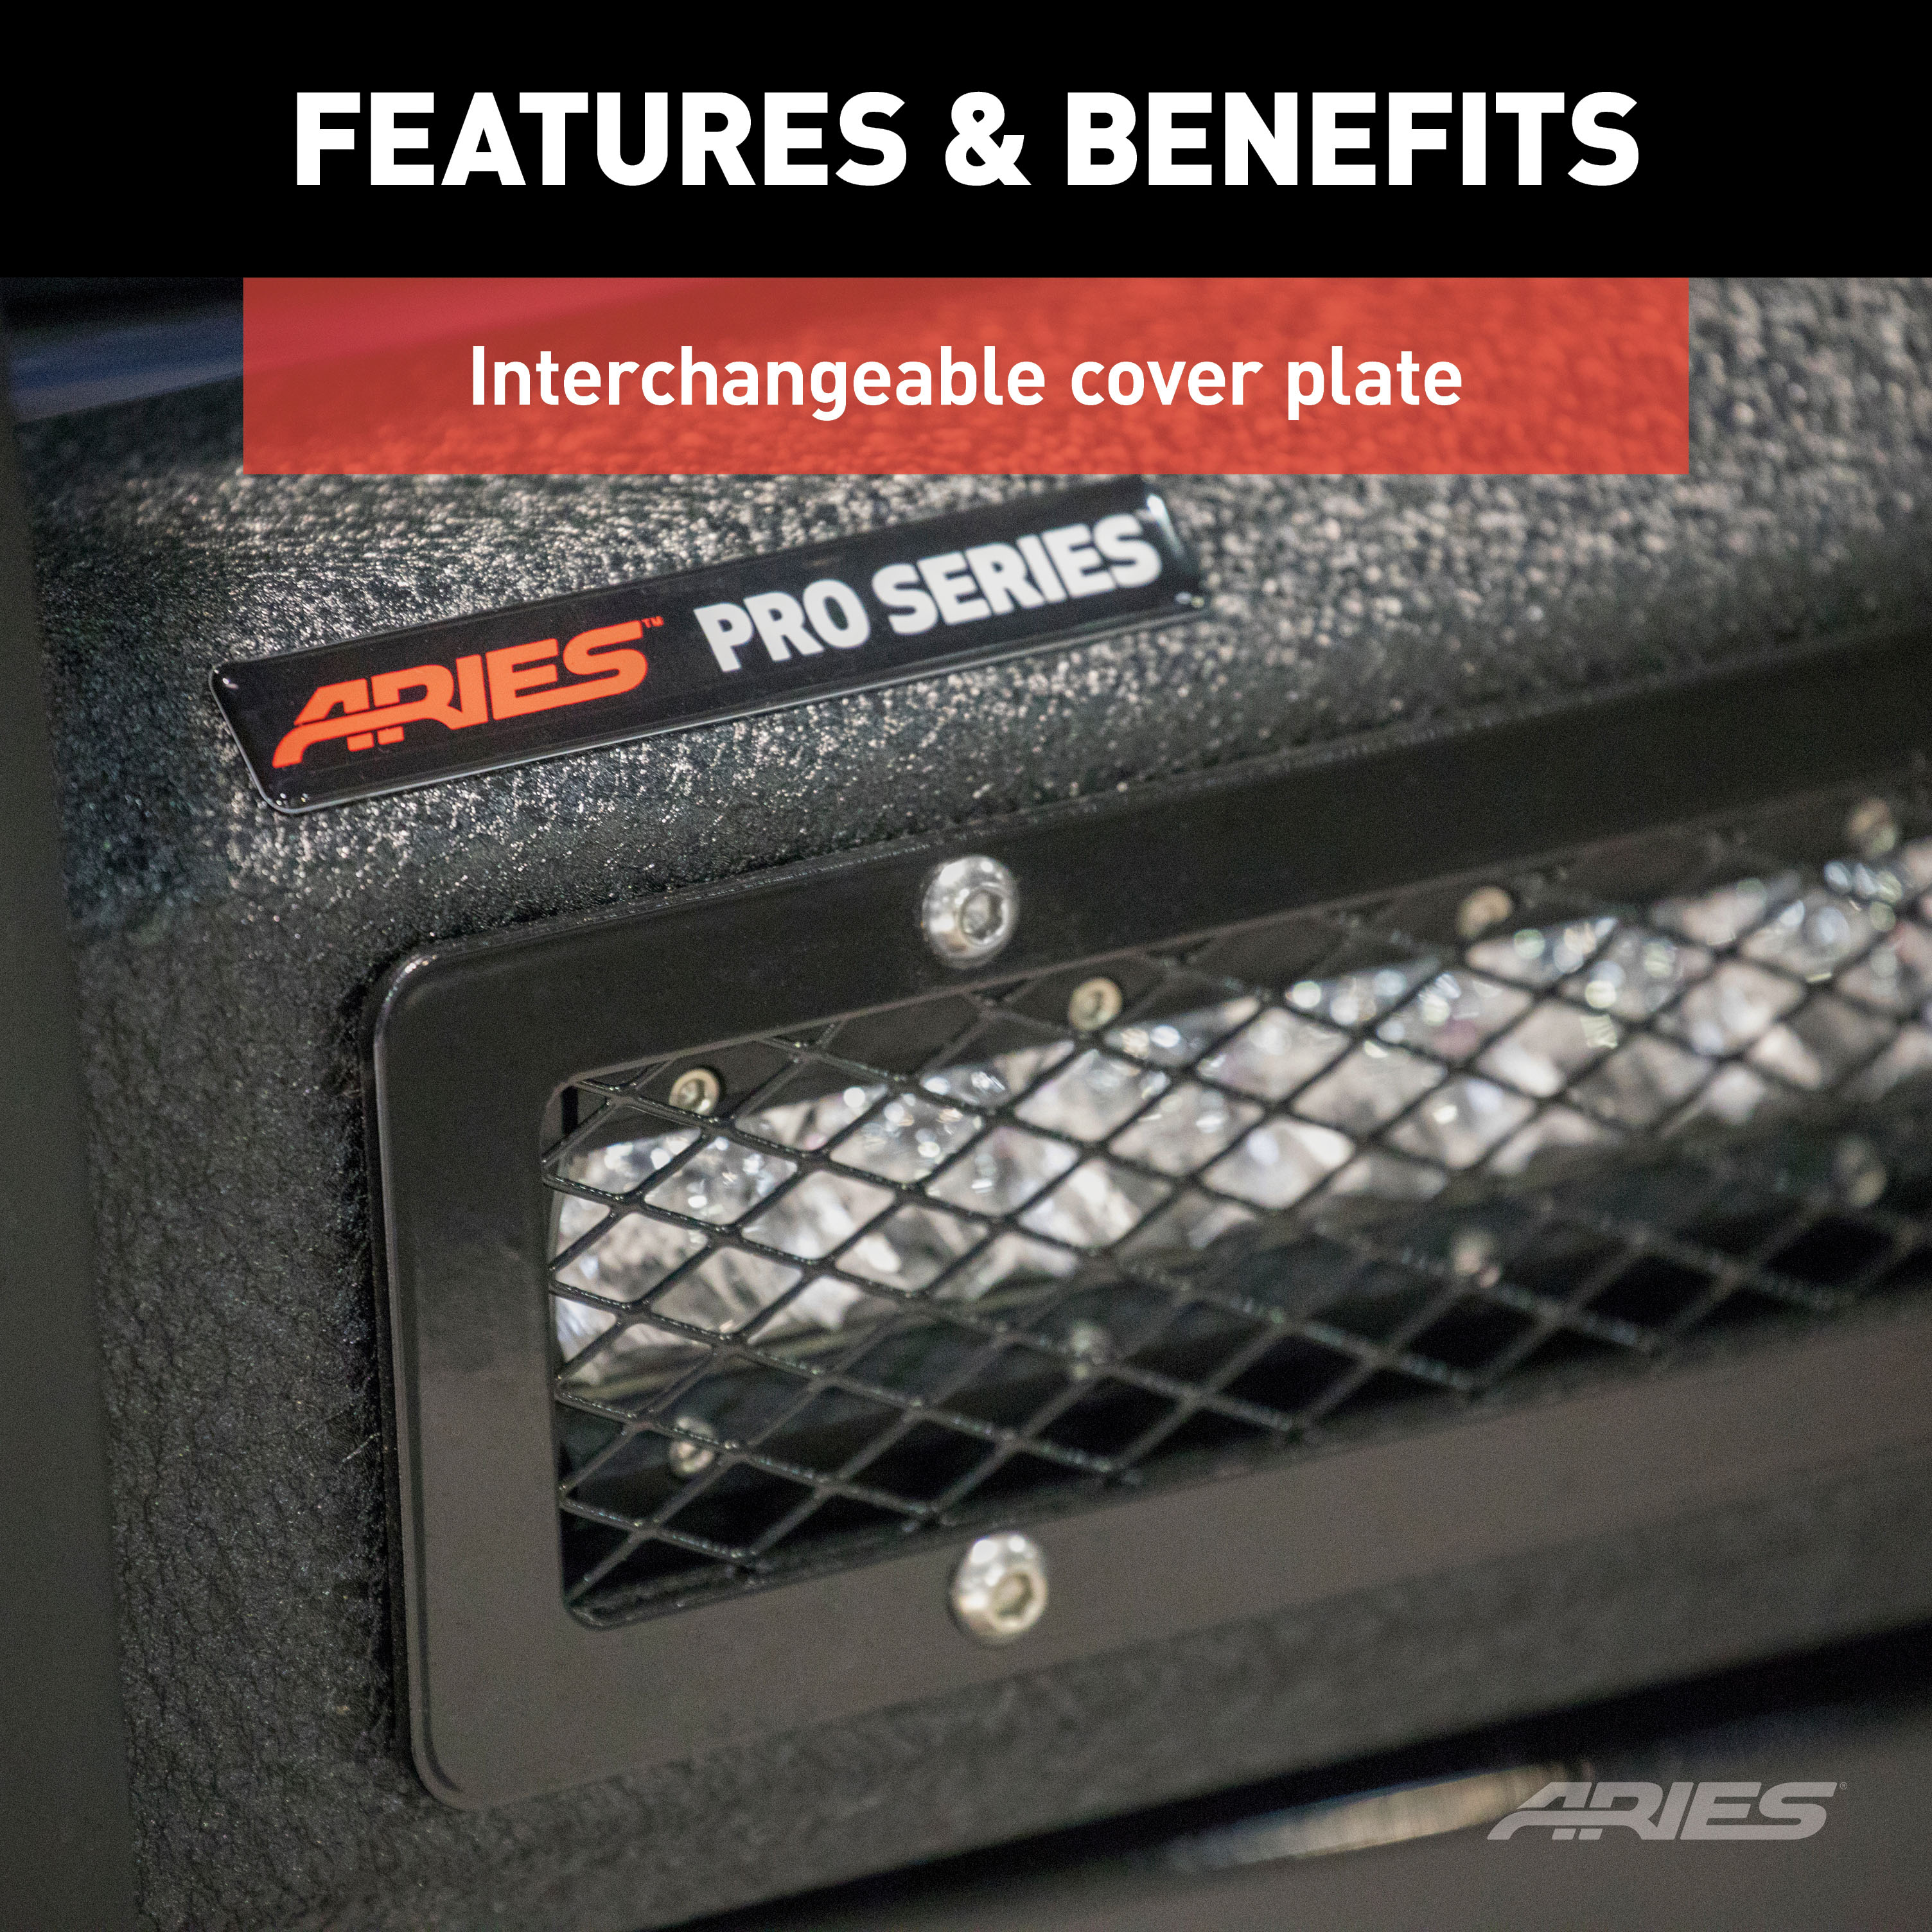
Includes grille guard, mounting hardware and black mesh cover plate #PJ20MB
Patent# US9108581B2
Grille guard may interfere with forward-facing cameras or sensors

Warranty: Limited Lifetime Warranty (Three-Year Finish, One-Year Parts)
Finish: TEXTURED BLACK POWDER COAT
Material: Carbon Steel
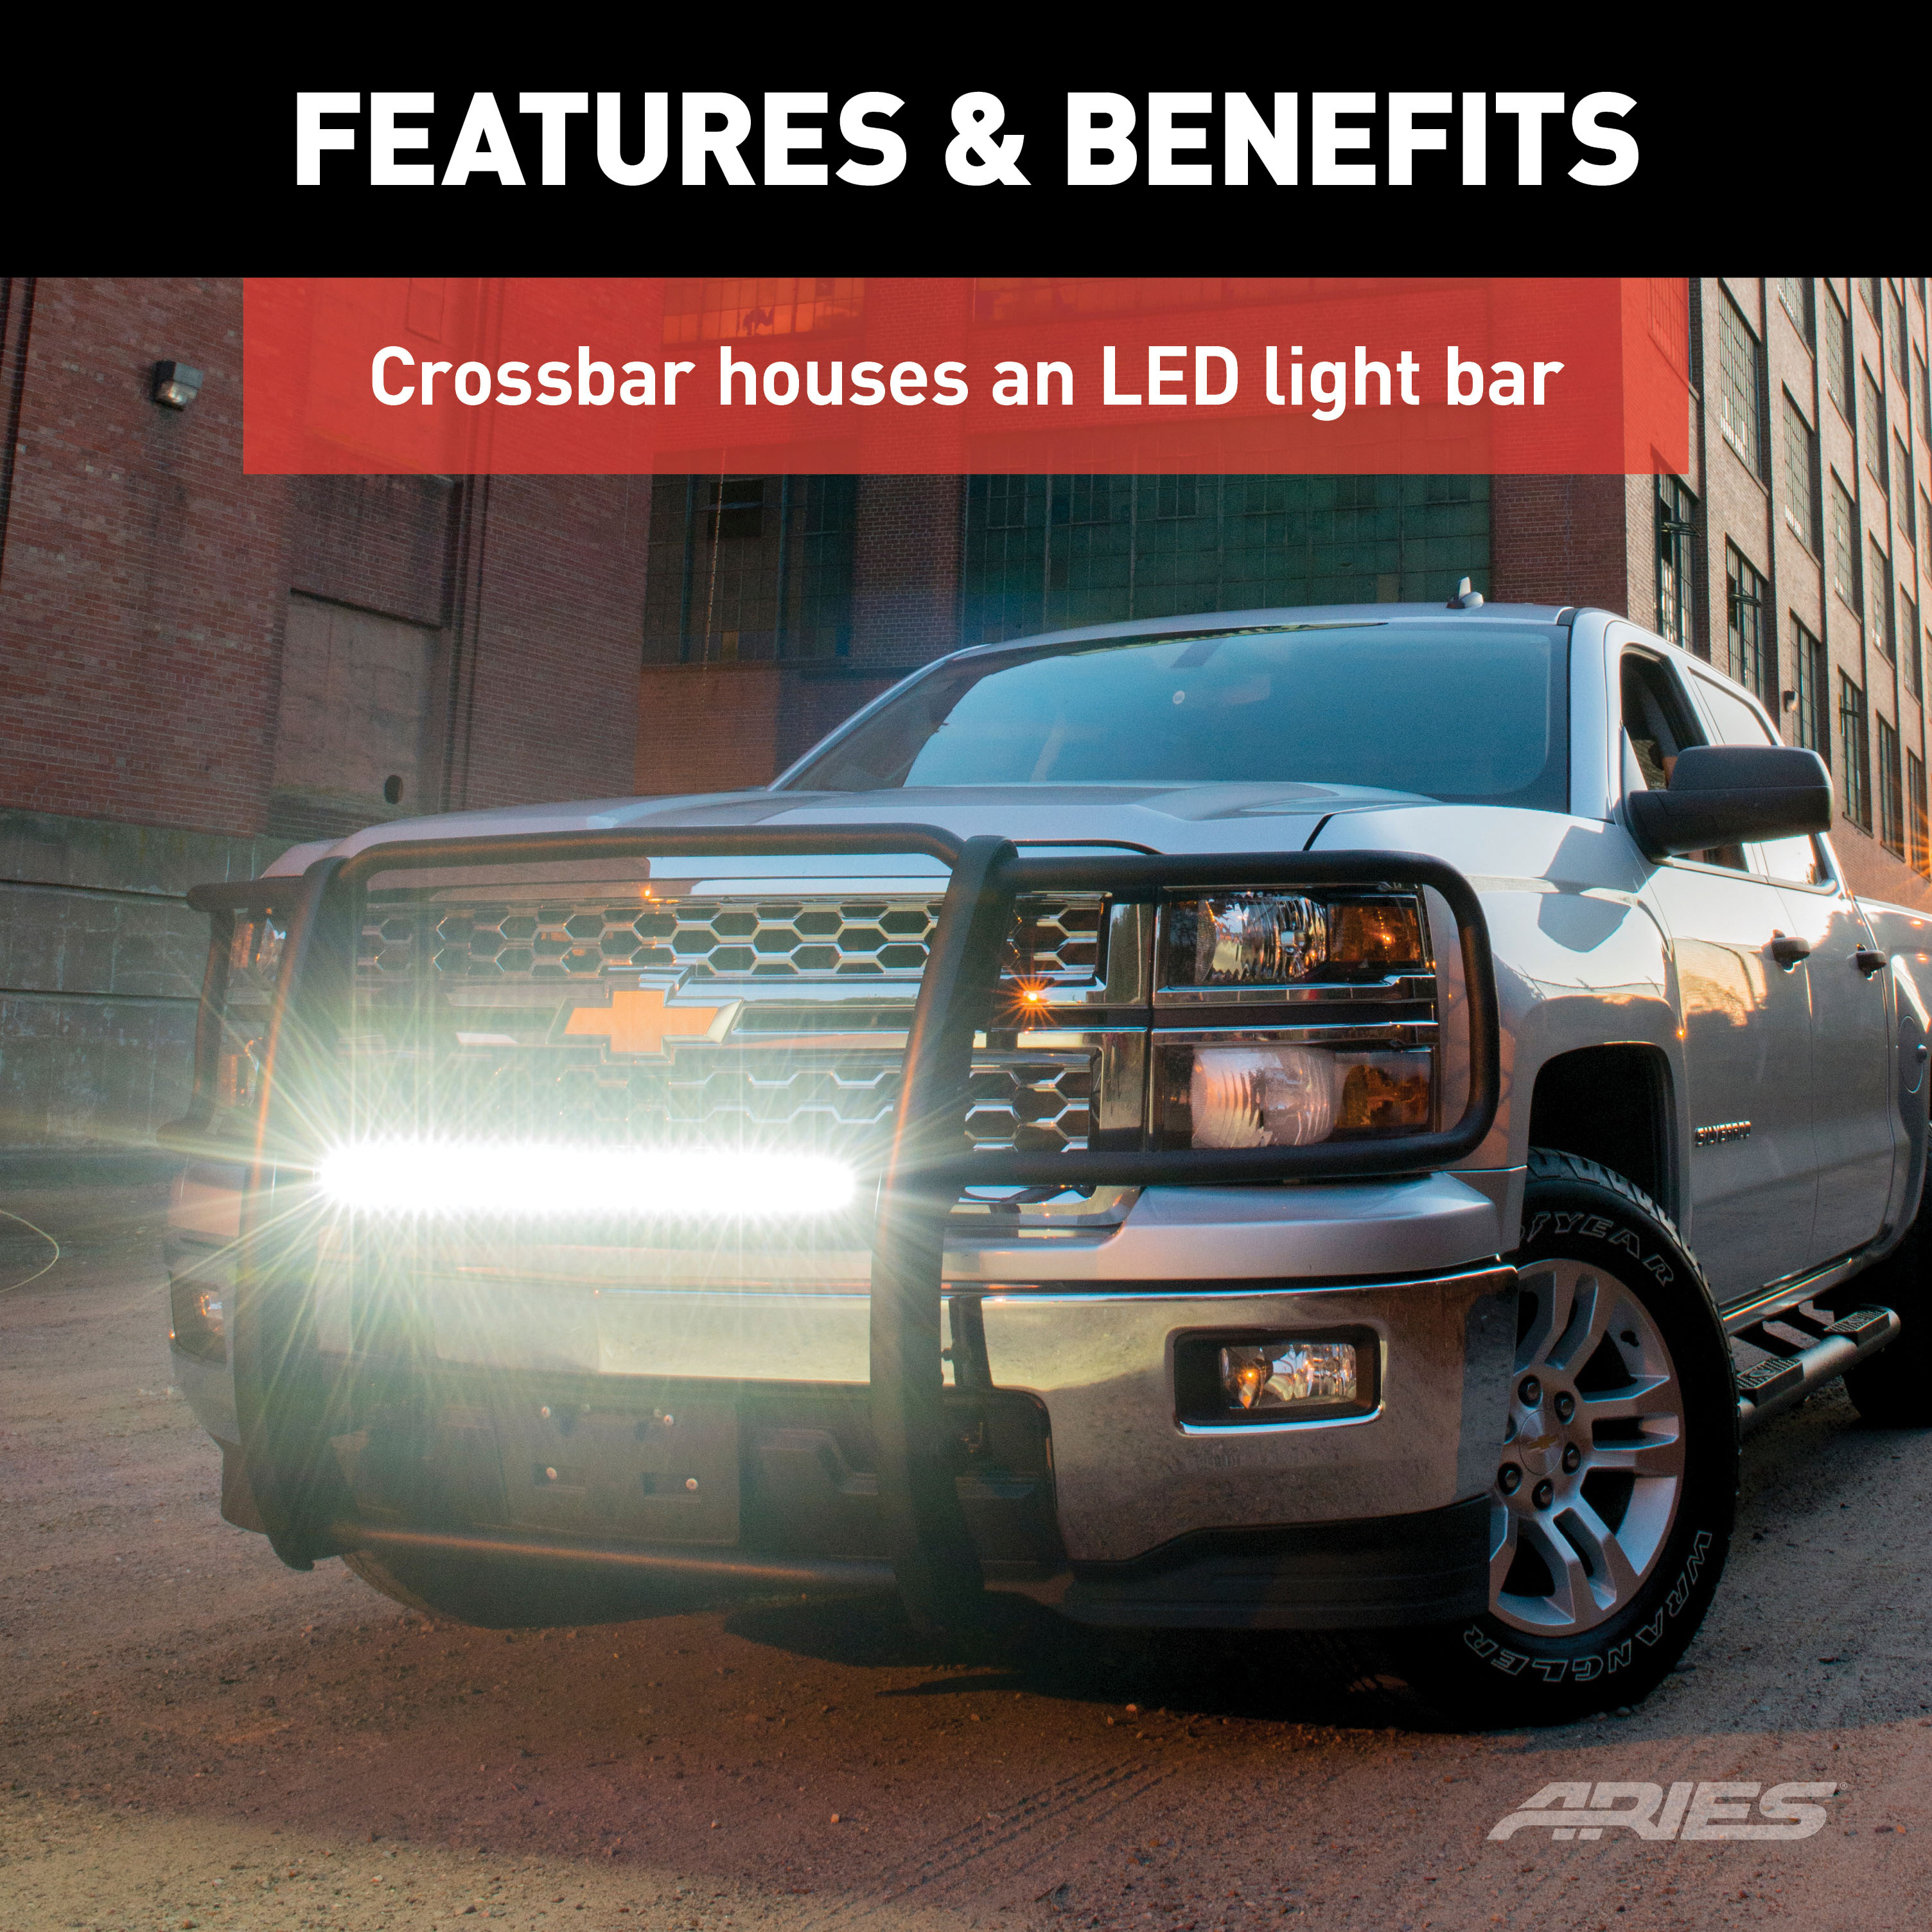
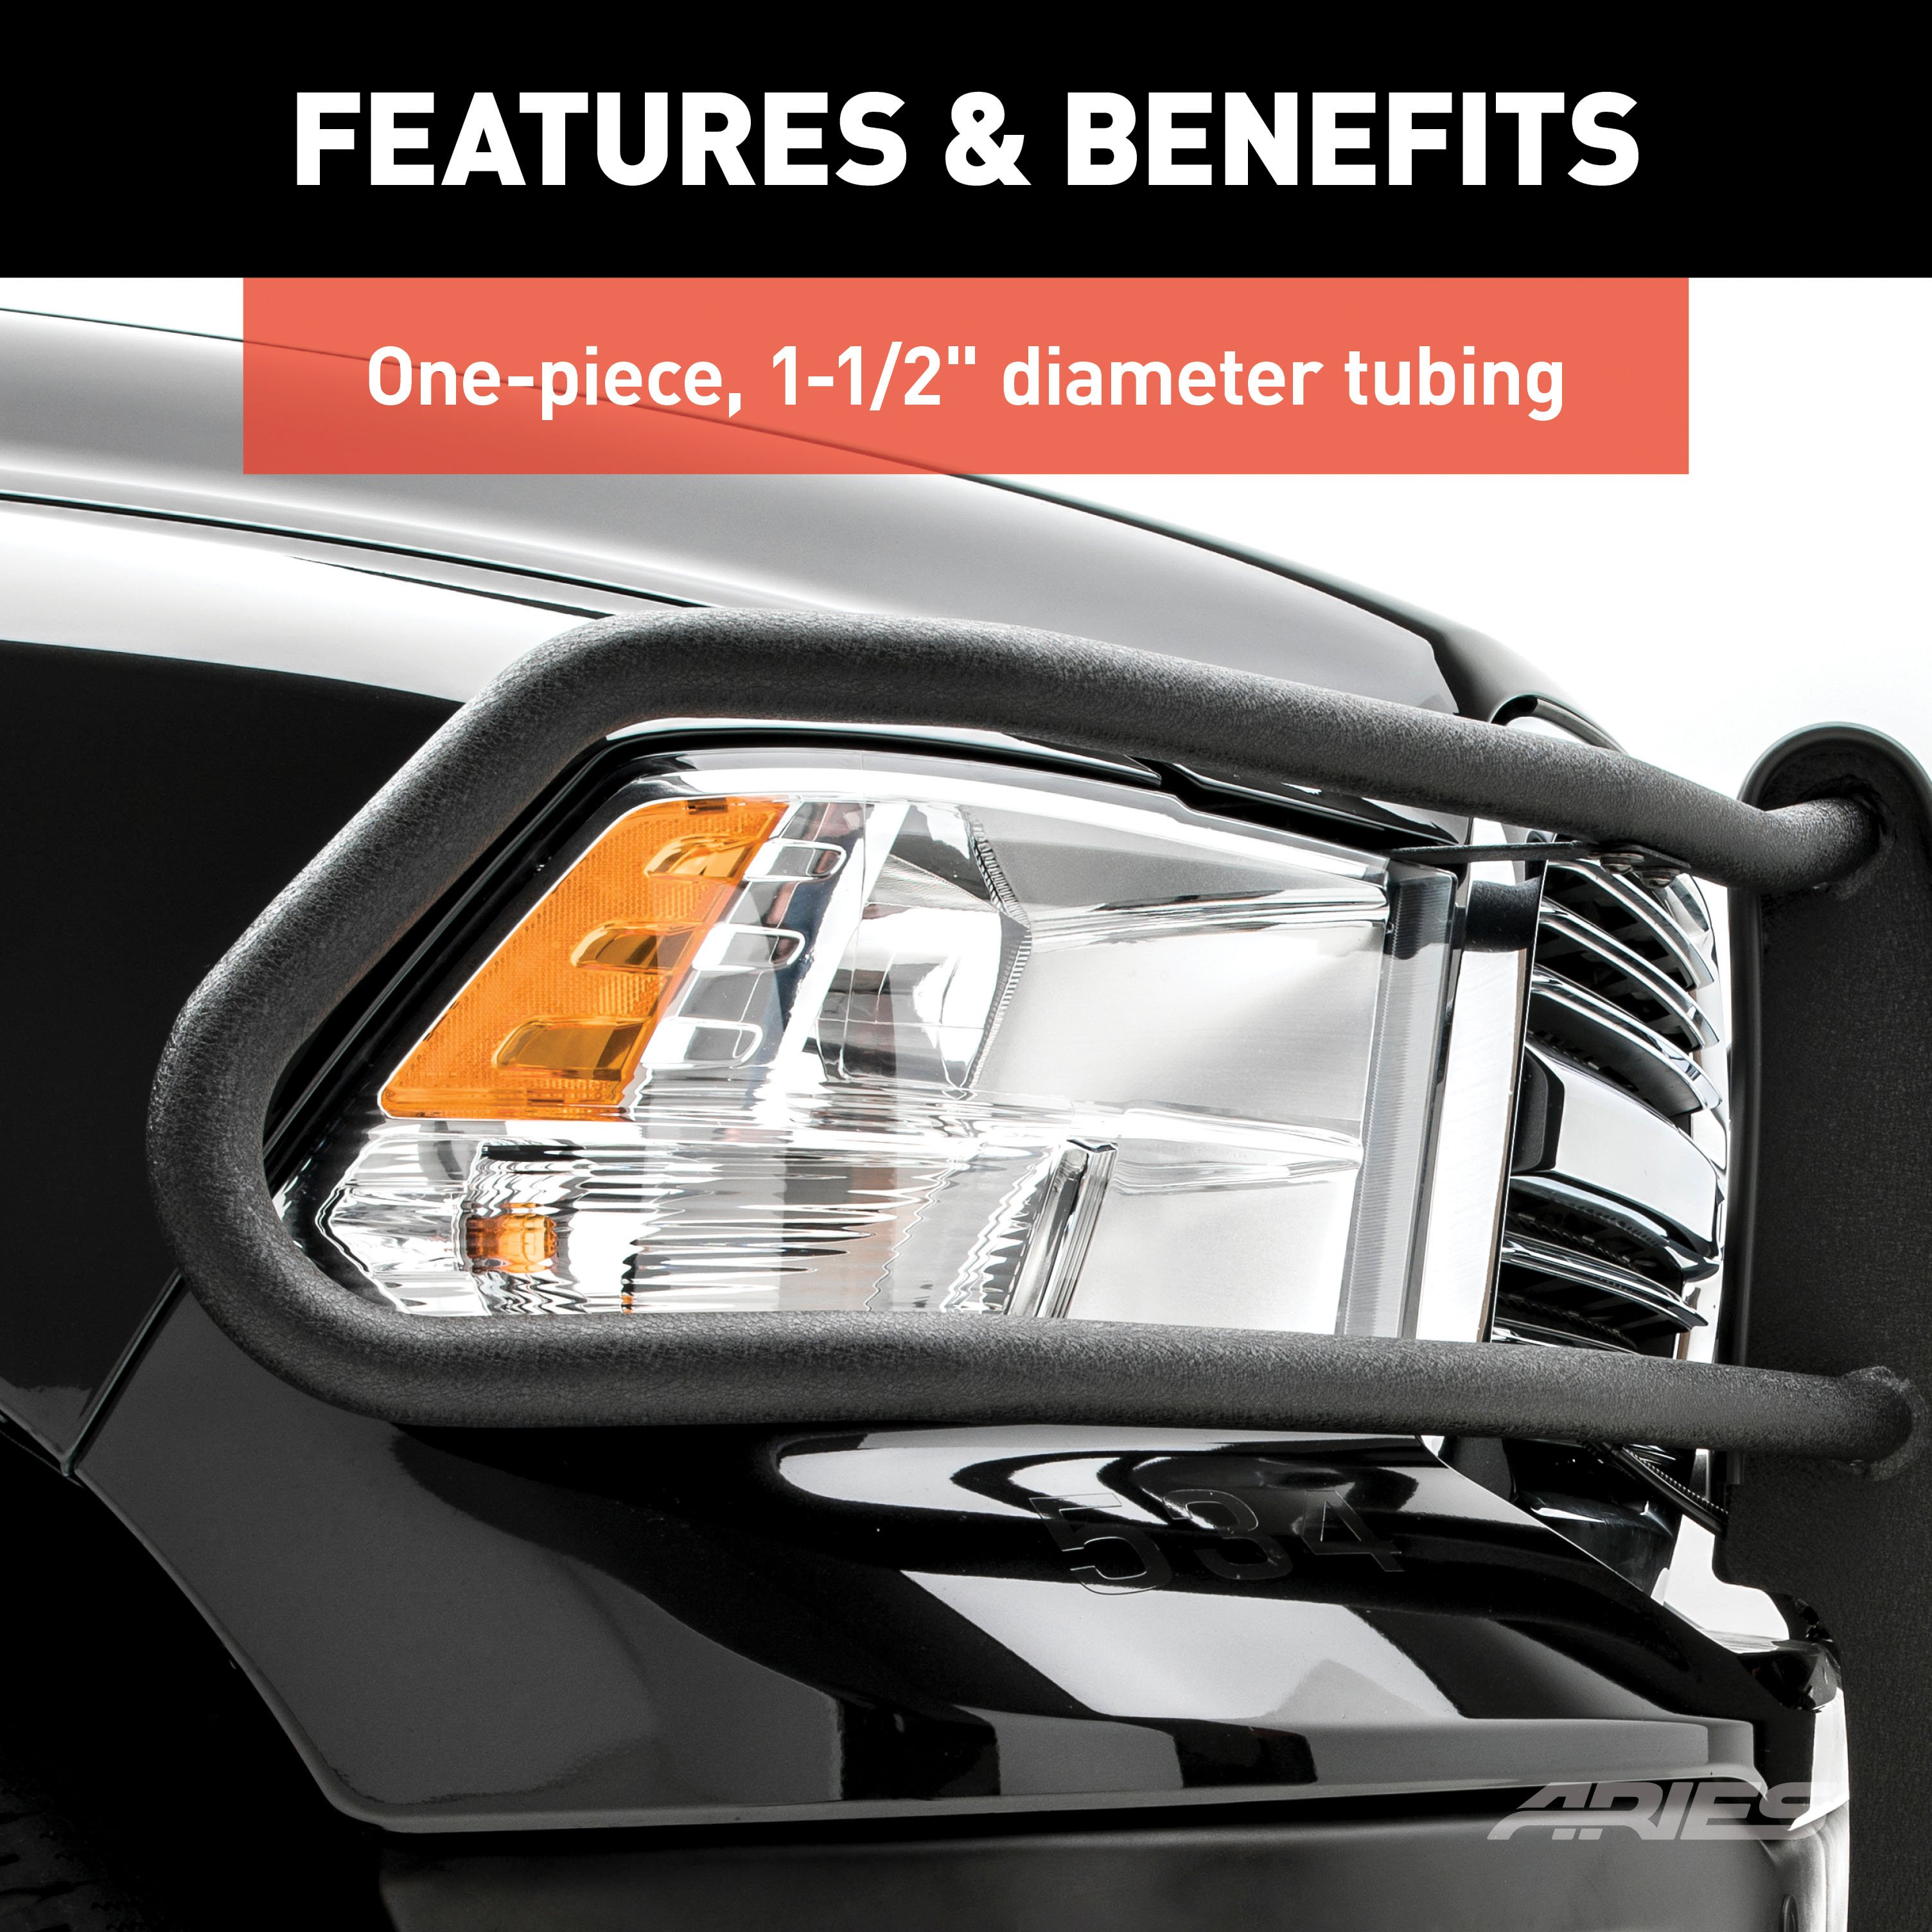
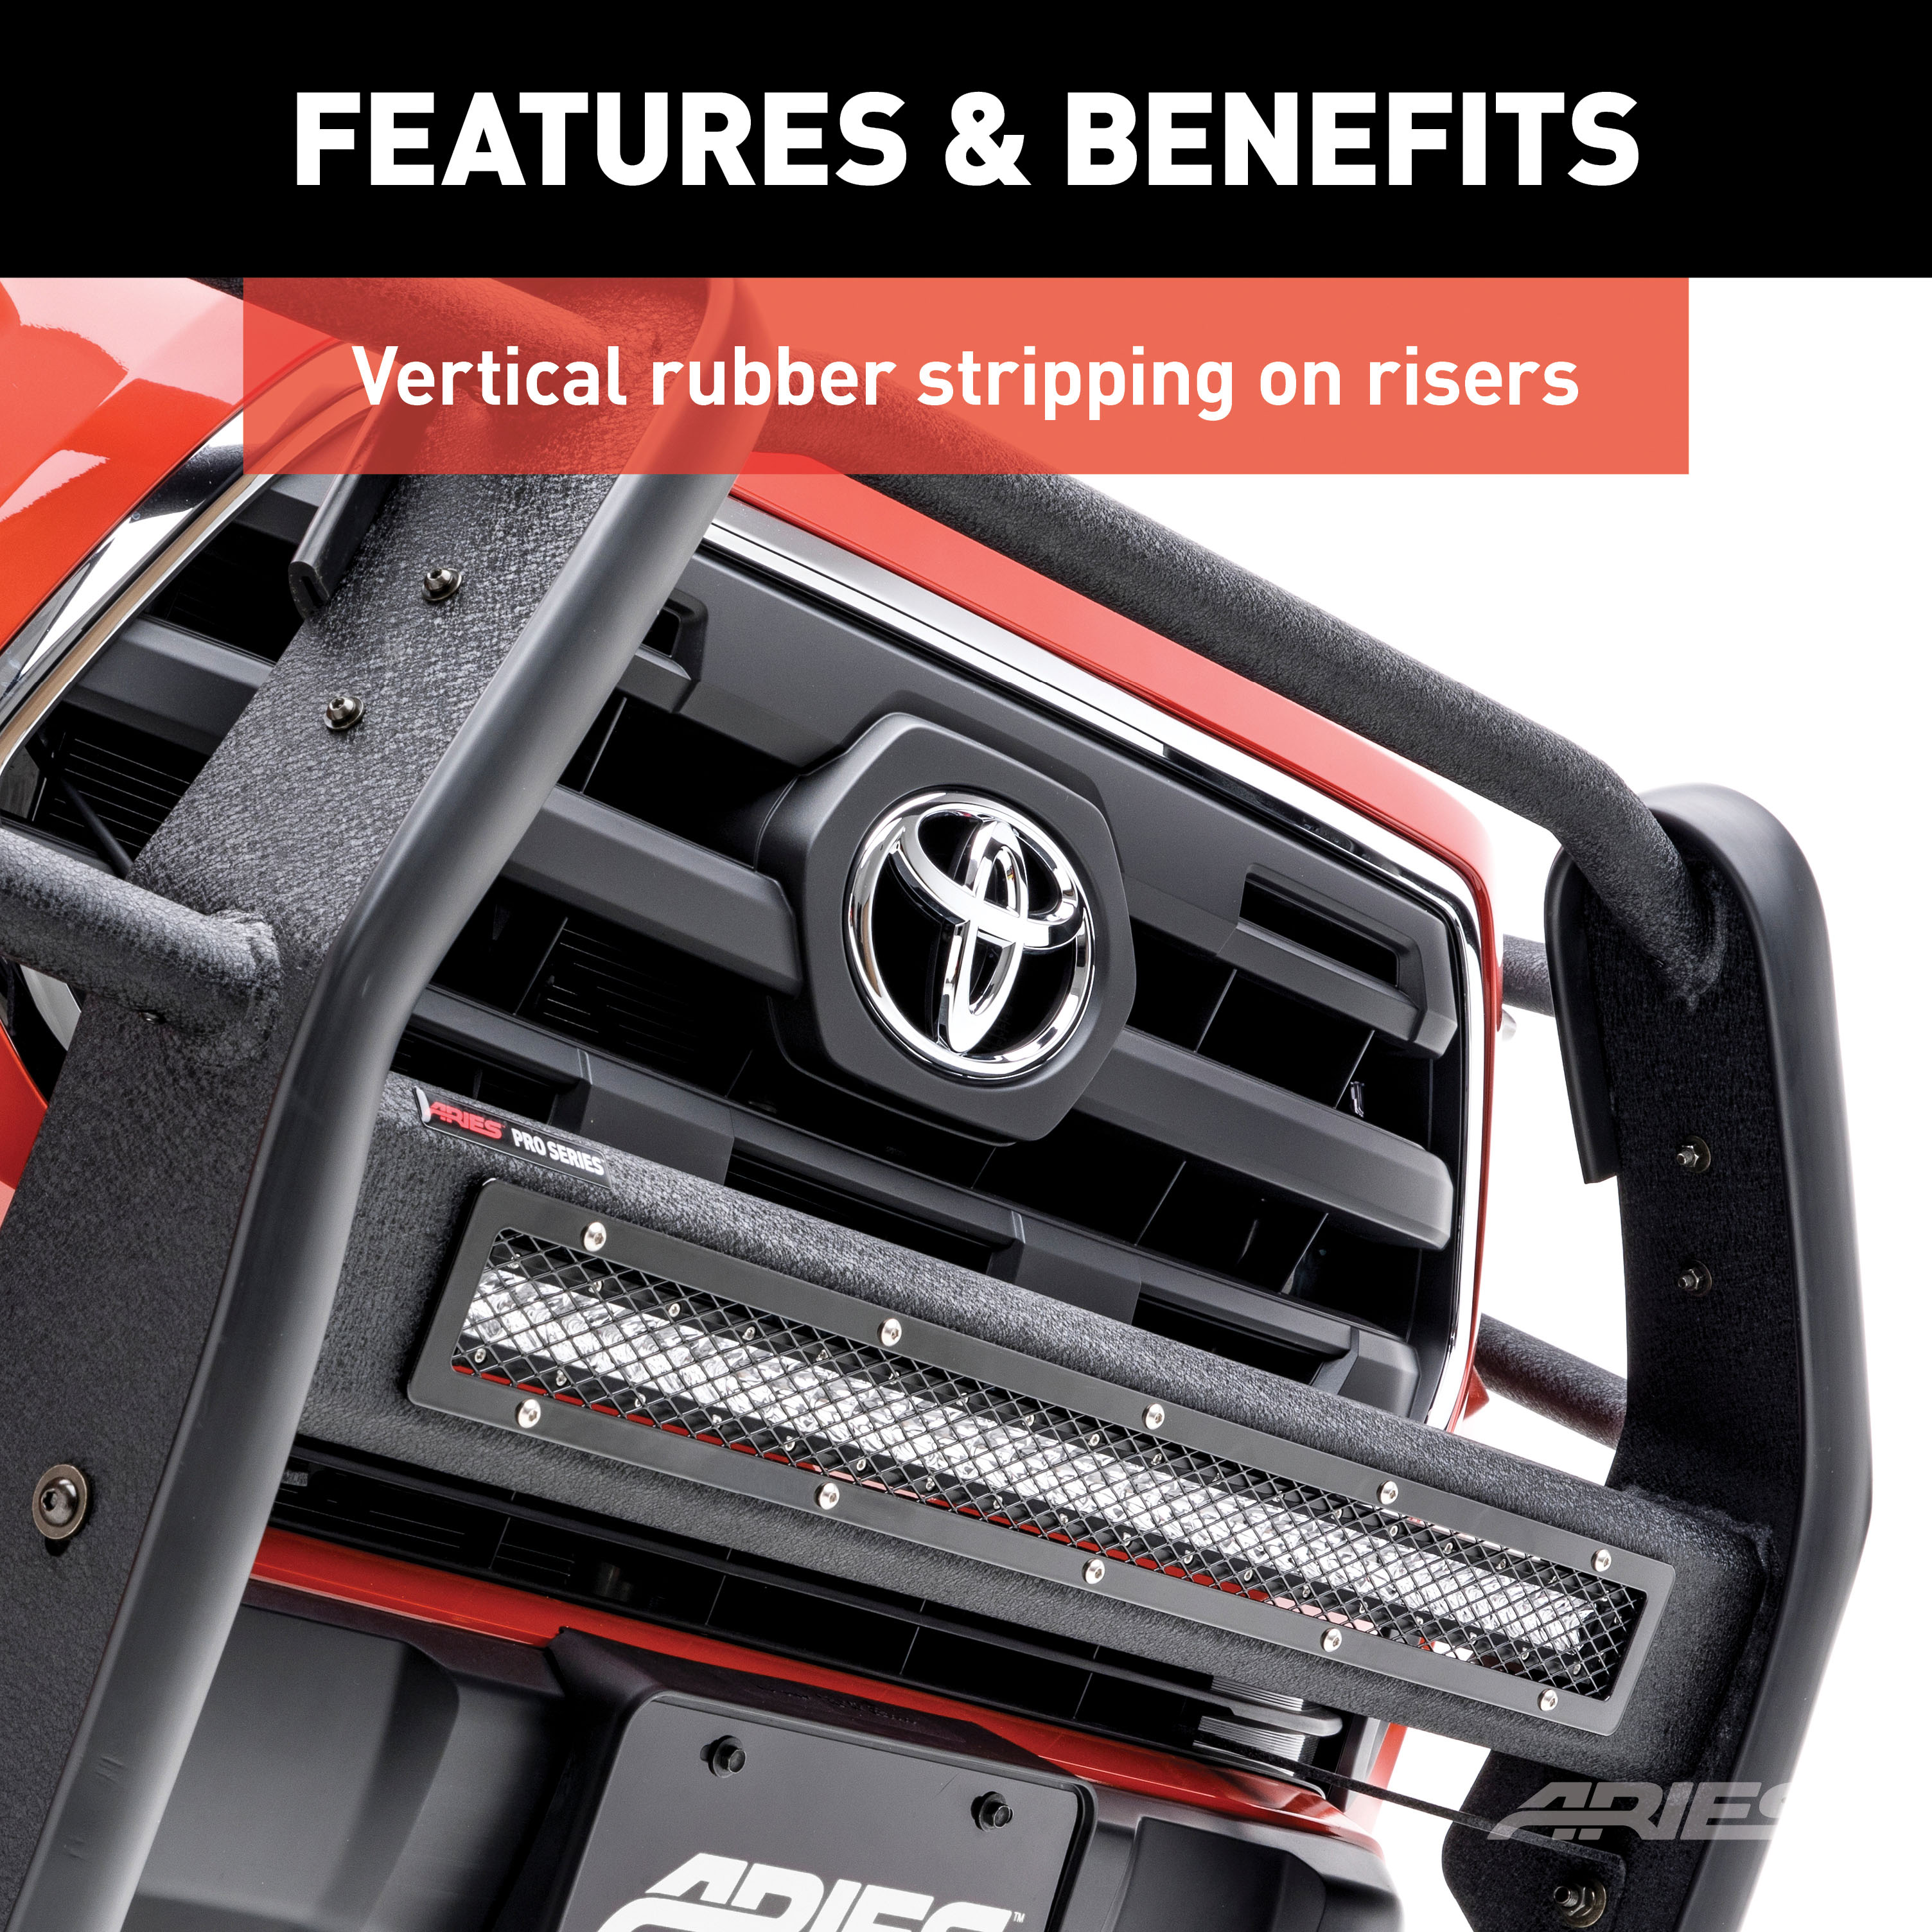
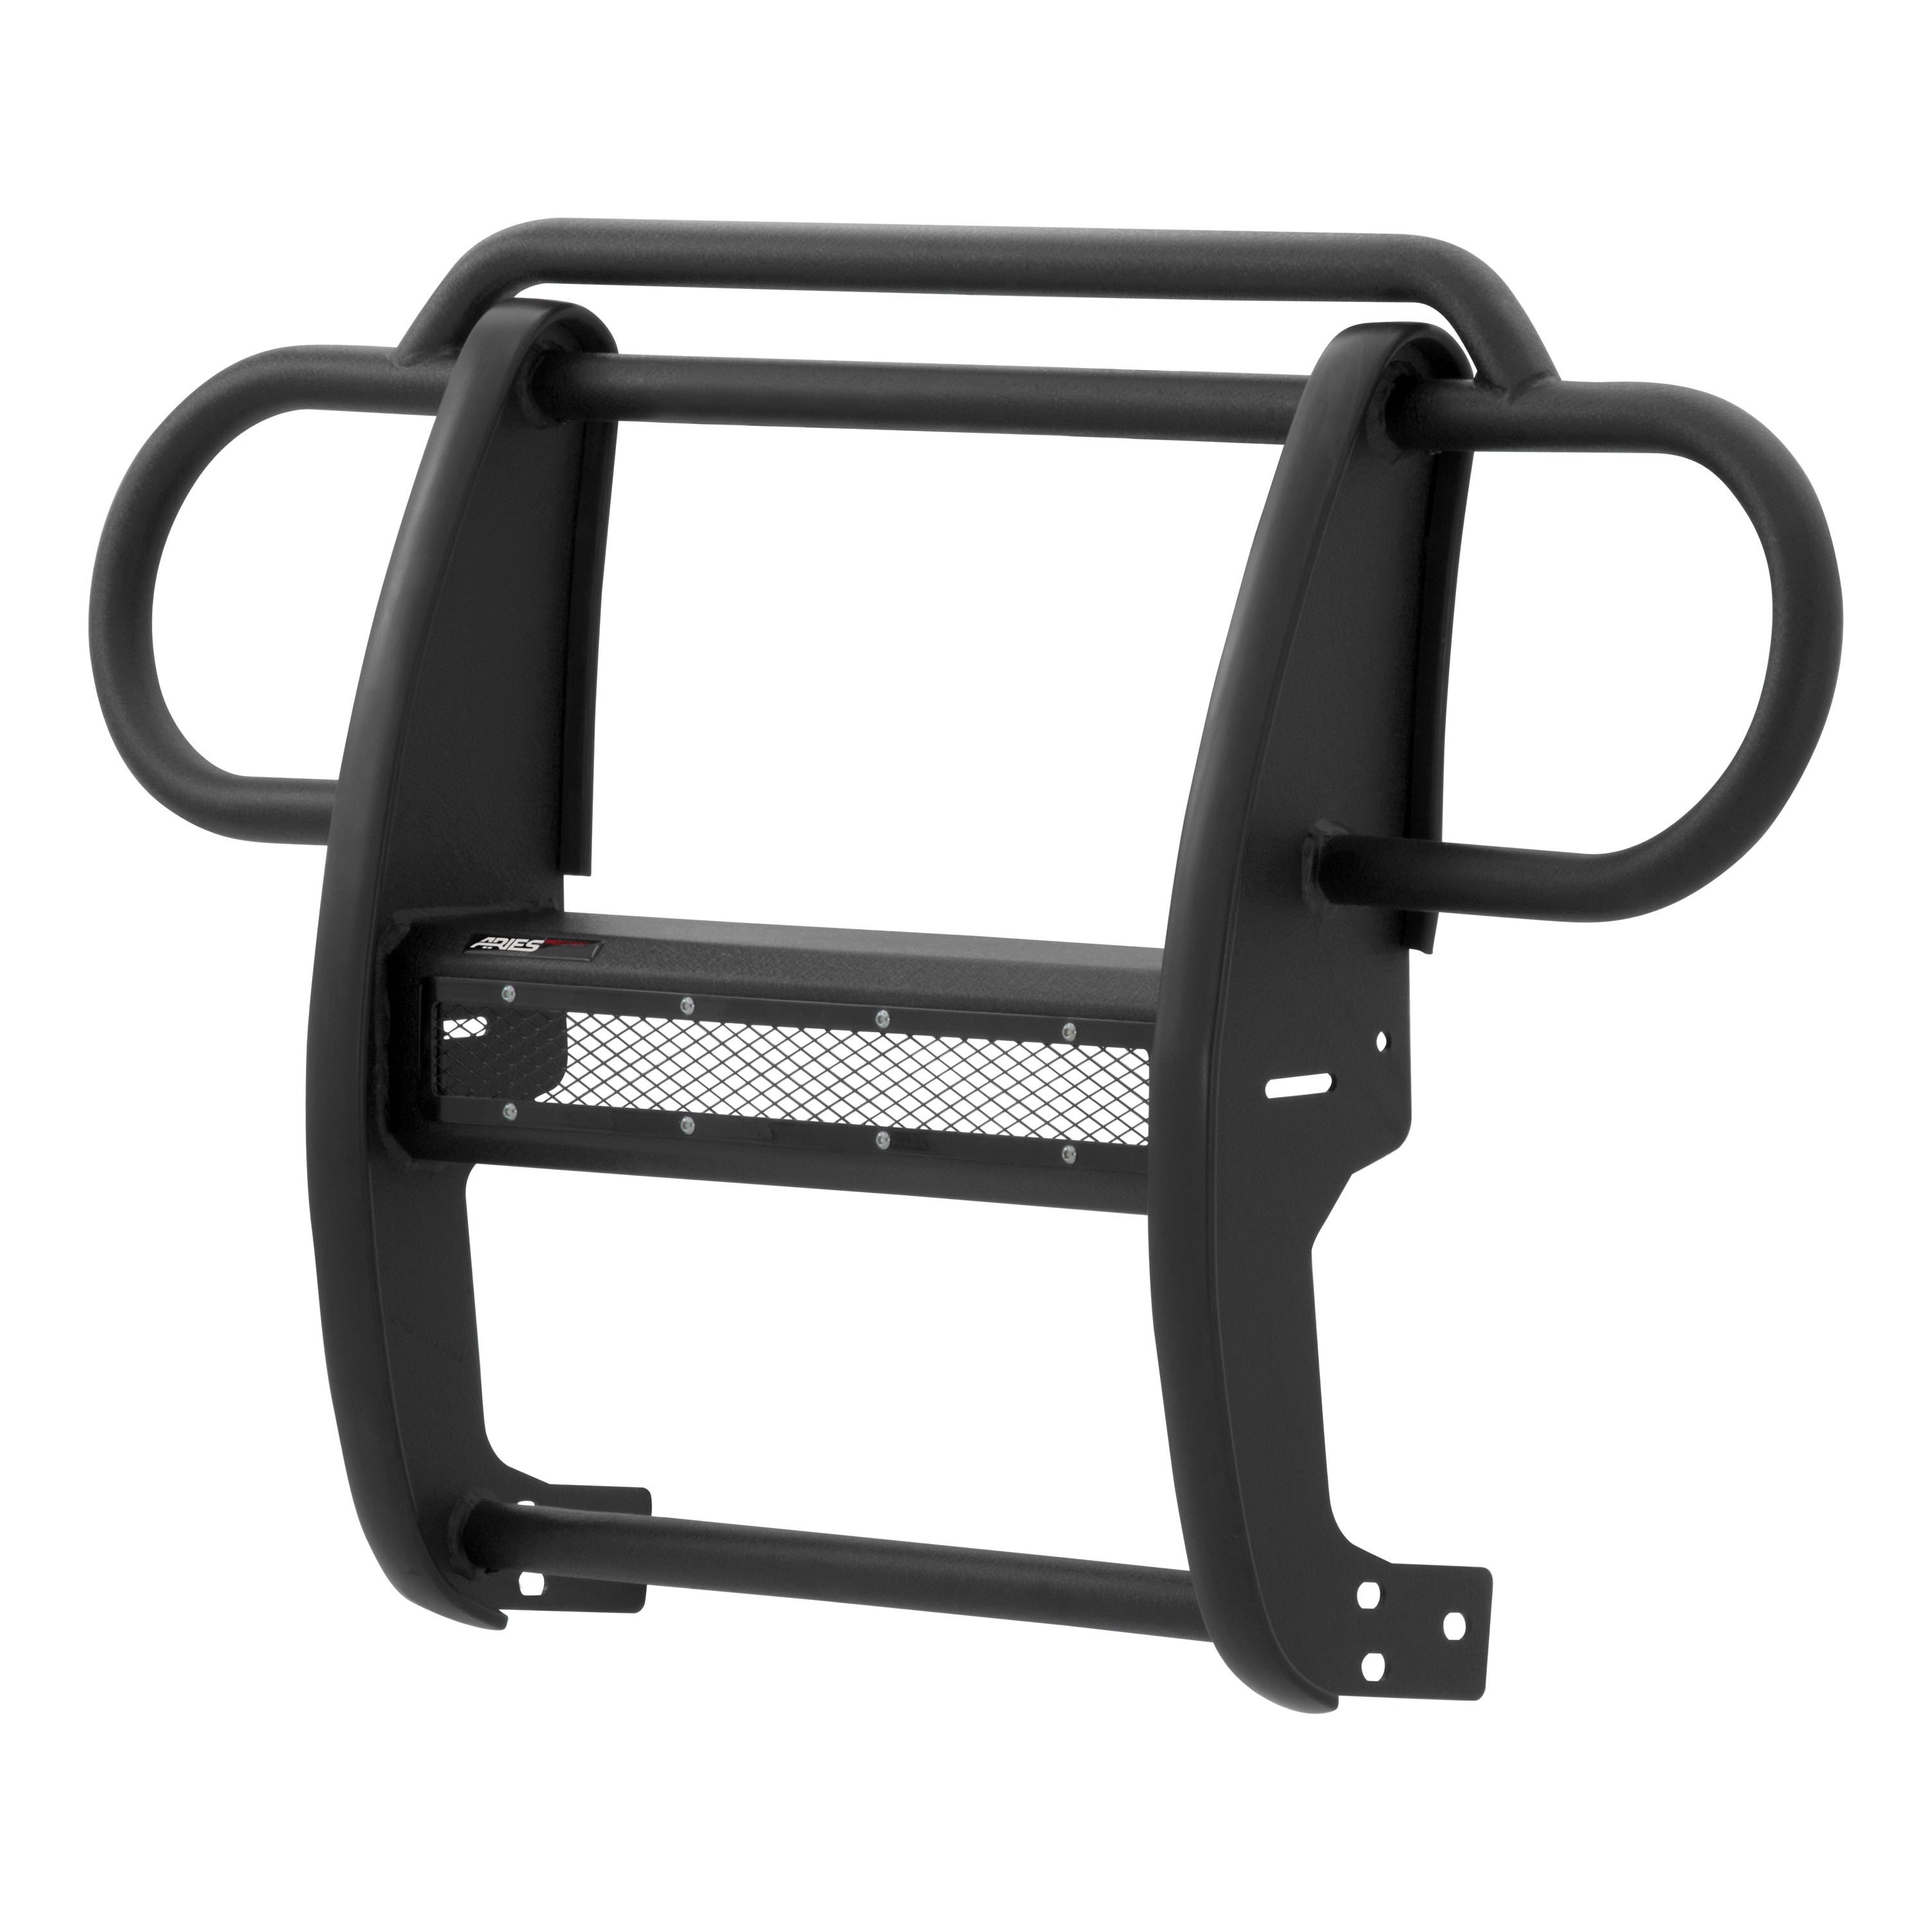
The ARIES Pro Series grille guard is unlike any other grille guard or brush guard on the road today because of its patented center crossbar. The ARIES Pro Series grille guard has a unique center crossbar that is able to house an LED light bar, allowing you to truly set your truck apart from all others. Rather than using a set of light clips or forcing you to drill holes into the frame, the aerodynamic crossbar of the Pro Series grille guard is the light bar housing itself. It uses a 20" slotted channel bracket to accept one or more single-row light bars (light bars not included; some 20" light bars may not fit the channel bracket). The crossbar mount can also articulate, allowing you to position the light beam at any angle you prefer. Integrating the channel mount into the crossbar housing also keeps the light bar protected from the elements. To further stylize your truck, the Pro Series grille guard also comes with an interchangeable grille guard cover plate. Included with each grille guard is a black mesh cover plate that easily bolts on and provides added security for your aftermarket lights. The mesh cover plate can be swapped out with other cover plate options, including five different styles and two finishes. Solid construction should be an essential feature of any grille guard, and the Pro Series grille guard is more than qualified. It has a one-piece design of 1/4" thick welded plates and 1-1/2" mandrel-bent carbon steel tubing. We also finish each Pro Series grille guard in a highly durable, dual-layer E-coat and textured black powder coat, giving it resilience to rust and sc ratches. This unique finish also helps hide minor scratches and grime to maintain a clean look. ARIES Pro Series grille guards are made vehicle-specific for seamless integration with the factory bumper and an easy, no-drill installation. This grille guard fits select model years of the Jeep Wrangler JL and Jeep Gladiator (see application info to verify fitment).

Explore ARIES products at TowUniverse for top-tier grille guards, side bars, nerf bars, headache racks, and more. Upgrade your vehicle with ARIES today!
ARIES is a fast-paced marketer and innovator of truck, Jeep, SUV and CUV accessories. From automotive enthusiasts to professional builders, our products are built for the champions of individualism, innovation and attitude.
We offer the perfect combination of unique style and durable construction, specializing in custom-fit grille guards, bull bars, side bars and running boards, as well as Jeep Wrangler and Jeep Gladiator accessories.
ARIES products are made vehicle-specific for a custom fit, and they are available for a wide variety of makes and models sold in North America.
Experts available to answer your questions
Call 888-634-9494Limited Lifetime Warranty (Three-Year Finish, One-Year Parts)
2 compatible vehicles
| Year | Make & Model | Notes |
|---|---|---|
| 2020 - 2026 | Jeep Gladiator | — |
| 2018 - 2026 | Jeep Wrangler | — |
The ARIES P1053 Pro Series Black Steel Grille Guard, No-Drill, Select Jeep Wrangler JL, Gladiator (Part #BBDRP1053) fits 2020-2026 Jeep Gladiator models. The 2026 model year is the last year covered by this part number. For newer models, check for an updated version.
Yes, the ARIES P1053 Pro Series Black Steel Grille Guard, No-Drill, Select Jeep Wrangler JL, Gladiator (Part #BBDRP1053) is designed to fit the 2020-2026 Jeep Gladiator.
The ARIES P1053 Pro Series Black Steel Grille Guard, No-Drill, Select Jeep Wrangler JL, Gladiator (Part #BBDRP1053) fits the following vehicles: 2020-2026 Jeep Gladiator; 2018-2026 Jeep Wrangler. Always verify your specific year, make, and model before ordering.
The ARIES P1053 Pro Series Black Steel Grille Guard, No-Drill, Select Jeep Wrangler JL, Gladiator (Part #BBDRP1053) Refer to the included instructions for installation details. Basic hand tools are typically all you need.
The P1053 kit includes: 1 grille guard, 2 mounting brackets (driver/left and passenger/right), 2 support brackets, 2 splash guard brackets, 1 support flange, and hardware consisting of M8, M10, and M12 hex bolts, nuts, washers, lock washers, nylon lock nuts, clip nuts, button head bolts, and plastic retainers. An Allen wrench is also included.
The P1053 is designed to fit both types of frames. If your frame has 2 hexagonal holes, you will use 8mm Bolt-Nut Plates and plastic retainers. If your frame is equipped with threaded inserts, you will use 10mm hex bolts directly into the threaded holes. The installation procedure differs slightly between the two frame types, but the grille guard itself is compatible with both.
Required tools are: Allen wrench, socket set, wrench set, and ratchet. These are standard hand tools. The manual lists the difficulty level as Easy.
The manual does not require full bumper removal. However, you must remove the plastic lower splash guard from underneath the front bumper, the metal plate behind it, and the plastic fill panel between the front bumper and grille. The factory bolts that attach the bumper bracket to the frame are reused to mount the support brackets, so the bumper remains in place during installation.
Yes, assistance is recommended. Step 6 specifically states 'With assistance, lift the Grille Guard up to the outside of the Mounting Brackets.' Additionally, if you need to reinstall the fill panel or splash guard, the manual warns to use stands or blocks to hold the bumper up when removing factory bolts.
Cutting is required if you are reinstalling the plastic fill panel or plastic splash guard. You must cut the fill panel to clear the support brackets (Step 8) and cut the splash guard to clear the mounting brackets (Step 9). The manual emphasizes cutting only enough material to clear the brackets and not cutting completely through the front edge of the fill panel or bottom edge of the splash guard to maintain strength. No drilling of the vehicle frame is required.
M8 bolts should be torqued to 7 ft-lbs. This applies to all M8 fasteners used in the installation unless otherwise noted.
M10 bolts should be torqued to 16 ft-lbs. This applies to all M10 fasteners used in the installation unless otherwise noted.
M12 bolts should be torqued to 28 ft-lbs. This applies to all M12 fasteners used in the installation unless otherwise noted.
Install one side at a time, starting with the driver/left side, then the passenger/right side. For each side: (1) Install the mounting bracket to the frame using either 8mm Bolt-Nut Plates (if frame has hexagonal holes) or 10mm hex bolts (if frame has threaded inserts), but do not tighten. (2) Install the support bracket by reusing the long factory bolt that goes through the bumper bracket and frame, snug but do not tighten. (3) Attach the grille guard to both brackets with 12mm hex bolts and nylon lock nuts. (4) Snug all hardware but do not fully tighten until the grille guard is centered and level.
Do not fully tighten any hardware until the grille guard is centered and level on the vehicle. After checking alignment and making adjustments as needed, fully tighten all bracket-to-vehicle hardware only. If you are reinstalling the fill panel and/or plastic splash guard, temporarily remove the grille guard before tightening. Once the fill panel and splash guard are reinstalled and trimmed, reinstall the grille guard and fully tighten all hardware.
Locate and remove the long factory bolt that goes through the bumper bracket and frame on the top of each side of the frame. Select the corresponding support bracket (driver/left or passenger/right) and reuse the factory bolt to attach it to the inside of the frame. Snug but do not tighten the hardware at this time. Install one side at a time to avoid the bumper falling.
With assistance, lift the grille guard up to the outside of the mounting brackets. Line up the holes in the mounting brackets with the holes in the grille guard. Attach the grille guard using 6 M12 hex bolts, 12 M12 flat washers, and 6 M12 nylon lock nuts (3 bolts per side). Push the grille guard back into an upright position. Snug but do not fully tighten until the grille guard is centered and level.
After cutting the plastic splash guard to clear the mounting brackets, locate the mounting location for each splash guard bracket (driver/left and passenger/right are unique—refer to Figure 17 to identify the correct bracket). Reuse the metal plate factory bolt to attach each bracket to the front of the frame. Leave hardware loose at this time. Align the splash guard brackets with the bottom of the splash guard and secure using 2 M8 hex bolts, 4 M8 flat washers, and 2 M8 nylon lock nuts. Tighten all splash guard hardware.
After the grille guard is attached to the mounting brackets, secure the support brackets to the inside of the grille guard using 2 M10 button head bolts, 4 M10 flat washers, and 2 M10 nylon lock nuts. Snug but do not fully tighten until the grille guard is centered and level.
For frames with hexagonal holes, insert an 8mm Bolt-Nut Plate through the bottom opening of the frame and push the bolt out through the hexagonal hole on the inside. Thread an 8mm plastic retainer onto the bolt to keep the plate in place. Attach the mounting bracket to the bolt using 1 M8 flat washer, 1 M8 lock washer, and 1 M8 hex nut. Attach the bracket to the nut on the plate using 1 M8 hex bolt, 1 M8 lock washer, and 1 M8 flat washer. Do not tighten at this time.
For frames with threaded inserts, select the mounting bracket and attach it directly to the threaded holes on the inside of the frame using 2 M10 hex bolts, 2 M10 lock washers, and 2 M10 flat washers. Do not tighten hardware at this time.
Hold the fill panel up to the support brackets and cut along the approximate area indicated on the fill panel to clear the support brackets. Cut only enough to clear the brackets and do not cut completely through the front edge of the fill panel. After cutting, temporarily remove the support brackets, reinstall the fill panel, slide the support brackets through the cut outs, trim as required, and reinstall the support brackets.
Hold the plastic splash guard up in its original position against the mounting brackets and mark the location of the brackets onto the inside of the splash guard. Cut out the sections to clear the mounting brackets, removing as little material as possible to maintain strength. Do not cut completely through the bottom edge of the splash guard. After cutting, temporarily remove the mounting brackets, reattach the top of the splash guard using factory hardware, slide the mounting brackets through the cut outs, trim as required, and reinstall the mounting brackets.
Wax the product after installing. Regular waxing is recommended to add a protective layer over the finish. Do not use any type of polish or wax that may contain abrasives that could damage the finish. For polished, gloss and other smooth finishes, polish may be used to clear small scratches and scuffs. Clean the product with mild automotive detergent only. Do not use dish detergent, abrasive cleaners, abrasive pads, wire brushes or other similar products that may damage the finish.
Stand back from the vehicle and check that the grille guard is centered and level on the vehicle. Adjust as required by slightly loosening the mounting brackets if necessary. After alignment is confirmed, fully tighten all bracket-to-vehicle hardware. Perform periodic inspections of the installation to make sure that all hardware is secure and tight.
Yes. The P1053 includes a support flange designed for LED light bar mounting. Select an LED light (sold separately) and its mounting hardware and brackets. Attach the hardware to the support flange according to the LED manufacturer's instructions, as different manufacturers may have different mounting styles. Place the support flange in the center flange of the grille guard and attach each side to the inner brackets with 2 M8 hex bolts, flat washers, and lock washers. Snug but do not fully tighten. Place 2 M8 clip nuts into the slotted holes on either side of the support flange.
The manual does not specify which vehicle models the P1053 fits. Contact Aries Automotive at 877.287.8634 or check ariesautomotive.com for fitment information for your specific vehicle.
You need an Allen wrench, socket set, wrench set, and ratchet. Assistance is recommended.
No drilling is required. However, cutting is required if you reinstall the plastic fill panel or splash guard to clear the brackets.
M8 bolts: 7 ft-lbs. M10 bolts: 16 ft-lbs. M12 bolts: 28 ft-lbs.
No full bumper removal is required. You must remove the plastic splash guard, metal plate behind it, and plastic fill panel between the bumper and grille.
After the grille guard is centered and level on the vehicle, fully tighten all bracket-to-vehicle hardware. If reinstalling the fill panel or splash guard, do this after those components are reinstalled and trimmed.
Wax after installation and regularly thereafter. Use only mild automotive detergent for cleaning. Do not use abrasive cleaners, polishes with abrasives, wire brushes, or dish detergent.
On Sale Today
Original price was $1,127.95. Current price is $670.00.You save $457.95 (41%)
Free Shipping
Ships free on all orders
 Authorized Dealer


Quick Ship
In stock and ready to ship — order now!
Shipping from Lancaster, TXFREE SHIPPING
Estimated delivery Tue, Sep 29 - Thu, Oct 1
Order before 2 PM EST Monday–Friday for same-day processing
Guaranteed safe & secure checkout
No reviews have been added for this product.