
BAK Revolver Roll-Up Hard Cover X4ts 15-20 F150 8'2" 80328RKBak Industries$1,699.99Out of Stock
View productOur in-house experts typically reply within one business day.

Bak Industries
Verify Fitment
Select your vehicle to confirm this part fits.


Always the correct part
We know our products
Quality Products
Free Shipping!
Always the correct part
We know our products
Quality Products
Free Shipping!
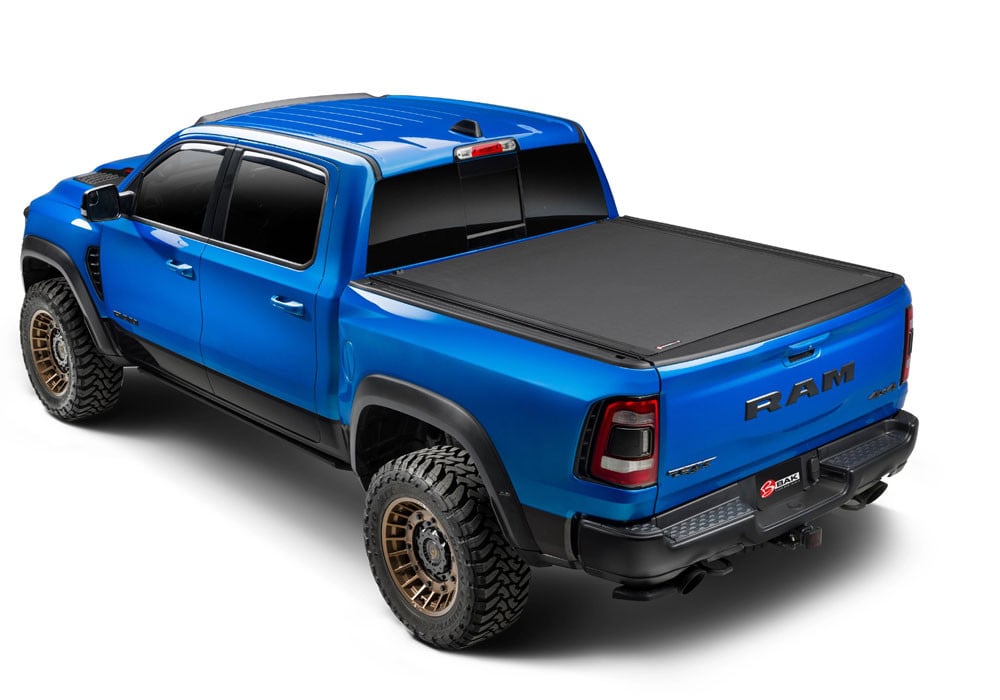
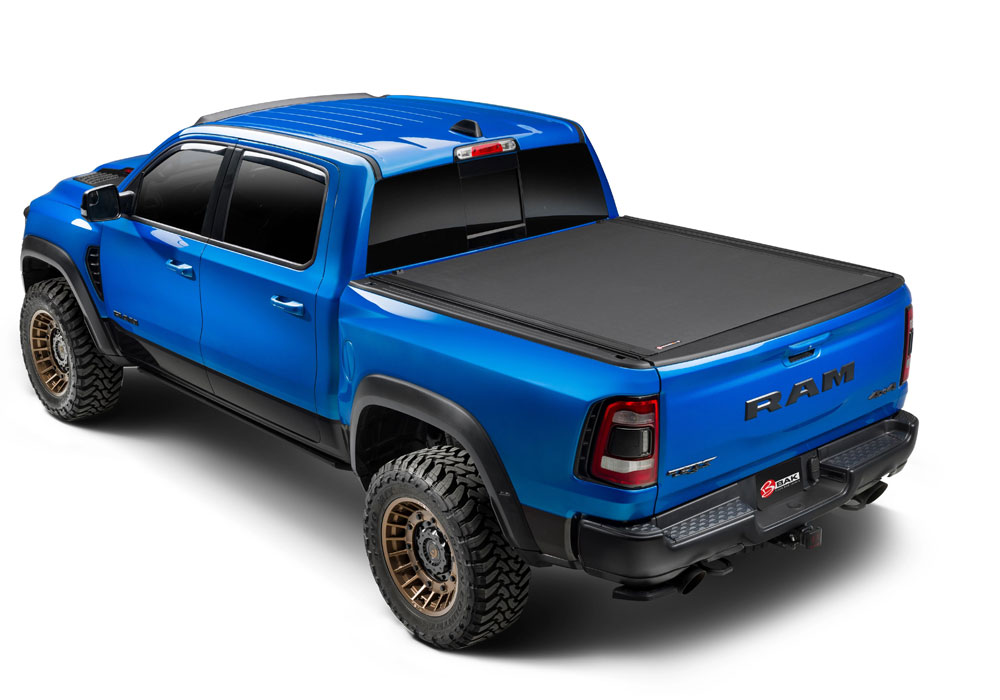
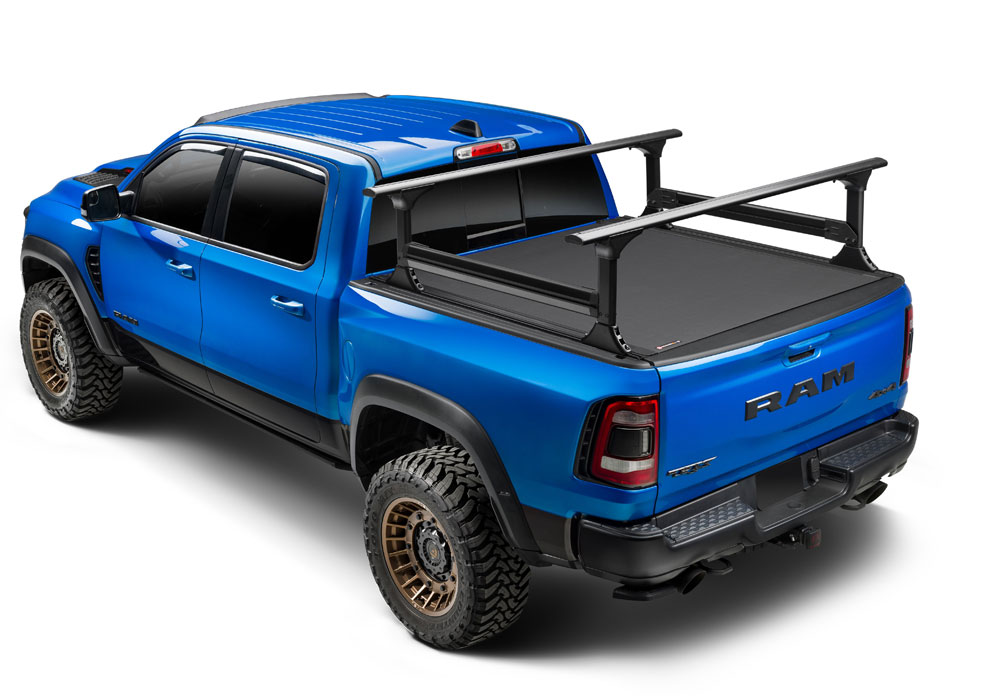
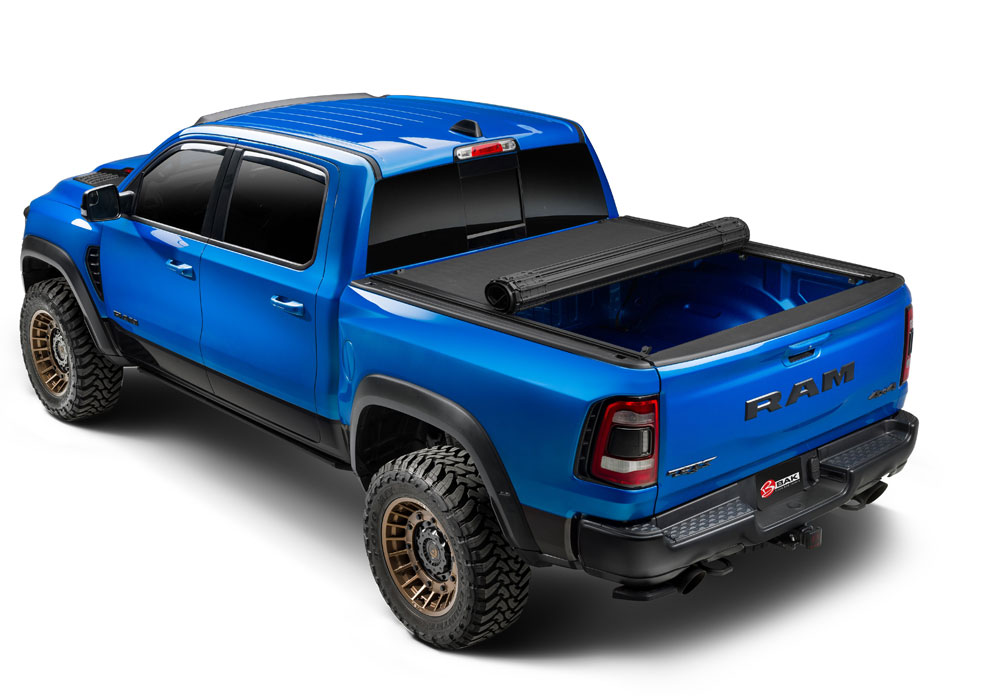
Experience the next generation of protection and cargo management with the BAK Revolver X4ts from RealTruck. The highly popular Revolver's latest iteration improves upon an already highly functional design. Constructed from durable marine-grade vinyl atop heavy-duty, cut-resistant aluminum slats, the new BAK Revolver X4ts features full matte-black styling that extends to every component so that, open or closed, the cover looks its stealthy best! But the Revolver X4ts isn't just about what you haul inside the bed. The bed rails are fitted with integrated T-slot channels that enable you to mount various over-the-bed racks and cargo management accessories, giving your truck a level of capability that goes beyond the average tonneau cover. And with the cover rolled fully forward, the Revolver X4ts provides access to the full bed so you can have your rack and easily access your cargo too. The NEW Revolver X4ts benefits from full-perimeter weather seals to relentlessly protect your gear. From a heavy-duty bulkhead seal to durable flat side seals and redesigned rear corner caps, the entire cover assembly ensures you the sleekest, most weatherproof bed cover you can find! While superior weather resistance is great for keeping your cargo dry, BAK Revolver X4ts is also exceptionally secure with patented rotational locking rails and an easy-to-use locking mechanism, making for an intuitive experience, allowing simple one-handed operation from either side of the tailgate. So, if you're looking for a truck bed cover that's easy to install and even easier to live with, turn to the one that has it all. Treat your truck to the style, utility, and security of BAK Revolver X4ts.
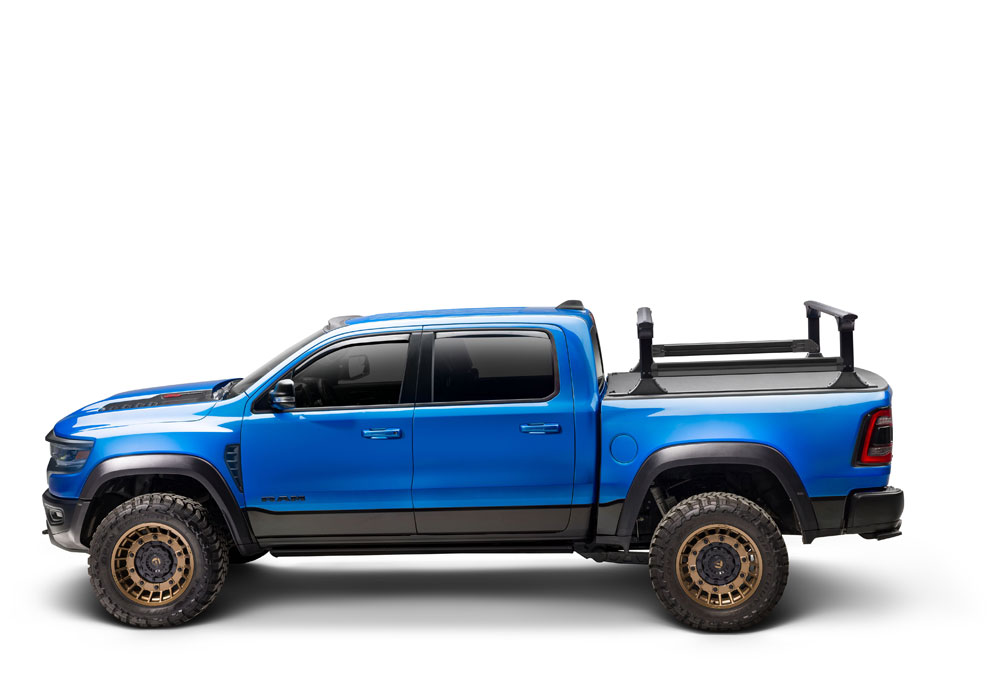
Actual Color: Black
Color: Black
Front Opening: No
Front Opening: Yes
Install Time: 30 Minutes
Key Lockable: No
Low Profile: Yes
Material: Vinyl Top w/ Aluminum Underside
Paintable: No
Rails To Install: Yes
Sits on Truck Rails: No
Style: Roll-Up Hard Cover
Title: BAK X4ts 21-25 F150 8'2 80338RK
Works w/Toolbox: No

BAK Industries is a leading manufacturer of premium hard-folding and hard-rolling truck bed covers. Known for popular products such as the BAKFlip and Revolver, BAK tonneau covers deliver secure cargo protection, convenient bed access, and a sleek, low-profile appearance.
BAK Industries is a trusted manufacturer of premium tonneau covers designed to improve truck bed security, protection, and versatility. The brand specializes in hard-folding and hard-rolling truck bed covers that combine durable construction with a clean, low-profile appearance.
BAK’s product lineup includes the popular BAKFlip series of hard-folding covers and the Revolver series of hard roll-up covers. Available models include the BAKFlip MX4, G2, F1, FiberMax, and BAK Revolver X4s and X2. Select models are also available with integrated T-slot rails for mounting compatible racks and cargo-management accessories.
BAK tonneau covers are manufactured from durable materials such as aluminum, fiberglass-reinforced polymer, and aluminum with a vinyl-grain surface. Many models provide convenient access to the truck bed while helping shield tools, equipment, luggage, and other cargo from weather and unauthorized access.
Designed for work trucks, daily drivers, and recreational vehicles, BAK truck bed covers offer practical functionality without sacrificing appearance. With vehicle-specific designs and straightforward installation, BAK Industries provides dependable cargo-management solutions for a wide variety of pickup trucks.
Experts available to answer your questions
Call 888-634-94945 Year Limited
1 compatible vehicles
| Year | Make & Model | Bed | Notes |
|---|---|---|---|
| 2021 - 2027 | Ford F-150 | 8'2" Bed | Revolver X4ts |
The BAK Revolver Roll-Up Hard Cover X4ts 21-25 F150 8'2" 80338RK (Part #BKDA80338RK) fits the following vehicles: 2021-2026 Ford F-150. Always verify your specific year, make, and model before ordering.
The BAK Revolver Roll-Up Hard Cover X4ts 21-25 F150 8'2" 80338RK (Part #BKDA80338RK) fits 2021-2026 Ford F-150 models. The 2026 model year is the last year covered by this part number. For newer models, check for an updated version.
Yes, the BAK Revolver Roll-Up Hard Cover X4ts 21-25 F150 8'2" 80338RK (Part #BKDA80338RK) is designed to fit the 2021-2026 Ford F-150.
The BAK Revolver Roll-Up Hard Cover X4ts 21-25 F150 8'2" 80338RK (Part #BKDA80338RK) is designed for 8'2" bed trucks. Check the fitment chart for your specific Ford F-150 configuration.
The BAK Revolver Roll-Up Hard Cover X4ts 21-25 F150 8'2" 80338RK (Part #BKDA80338RK) Refer to the included instructions for installation details. Basic hand tools are typically all you need.
The REVOLVER X4ts is a hard truck bed cover system for Toyota Tacoma 2016–2023 models. It features a rolled vinyl cover that rolls toward the cab for access, side rails with locking mechanisms, and strap clamp assemblies to secure the cover in the open position. The system includes a bulkhead seal to help prevent water intrusion and D-shaped bumpers to prevent contact with the cab when rolled open.
The REVOLVER X4ts is designed for Toyota Tacoma 2016–2023 models. The manual does not specify whether it fits both short-bed and long-bed variants or only one configuration. Contact BAK Industries at 818-365-9000 or support@bakindustries.com to confirm fitment for your specific truck bed length.
You will need a T-30 Torx socket, a drill or socket wrench, and a 1/8" Allen wrench. The 1/8" Allen wrench is provided with the cover. The T-30 Torx socket and drill/socket wrench are required tools you must supply.
For a complete new system: 1 passenger side cover rail, 1 driver side cover rail, 1 rolled cover, 2 strap clamp assemblies, 4 end caps, 1 bulkhead seal, 4 D-shaped bumpers, 10 S clamps (12 for 6' trucks), 10 screws (12 for 6' trucks), 4 lock knobs, 4 large flat washers, 4 rubber washers, and 4 mounting bolts. If installing rails to an existing Revolver system, you receive only the passenger and driver side cover rails. All hardware is included.
Yes. You must remove the current passenger side rail and driver side rail together with their S clamps using a drill/socket wrench (Step 6). You must also remove both cargo rails and their screws (Step 2). Keep all factory screws and hardware for later reinstallation, as you will reuse them to mount the new rails and cargo rails.
The manual does not mention disconnecting the battery. No electrical work is required for this installation.
1. Remove mounting hardware from the current passenger and driver side cover rails (Step 2). 2. Remove the rolled cover from the slotted bracket using four mounting bolts (Step 3). 3. Remove the rolled cover from the vehicle (Step 4). 4. Remove the current passenger and driver side rails with S clamps (Step 6). 5. Remove the S clamps from the old rails (Step 7). 6. Install end caps on the forward portion of the new passenger and driver side rails (Step 8). 7. Mount the new passenger side rail into the truck bed holes, reusing factory screws (Step 9). 8. Mount the cargo rail with strap clamp assembly using screws through the lower hole in the S clamp, torqued to 7.5 Nm (6 ft-lbs) (Step 10). 9. Align and insert S clamps into the new passenger side rail (Step 11). 10. Tighten S clamps to 7.5 Nm (6 ft-lbs) (Step 12). 11. Repeat Steps 9–12 on the driver side (Step 12). 12. Install bulkhead seal (Step 13). 13. Insert mounting bolts into the slotted bracket (Step 14). 14. Install mounting hardware loosely under the slotted bracket (Step 15). 15. Open and close the cover to verify free rolling (Step 16). 16. Align the front vinyl edge with the front edge of the side rails (Step 17). 17. Verify 1/8" (3.2 mm) gap on both sides and hand tighten knobs (Step 18). 18. Verify latch engagement at the tailgate (Step 20). 19. Tighten knobs on both sides (hand tighten only) and recheck operation (Step 21). 20. Install D-shaped bumpers to the cover slats (Step 23). 21. Install end caps on the rearward portion of the rails (Step 24).
Yes. You must keep the screws from the current passenger and driver side rails (Step 6) and reuse them to mount the new passenger side rail into the truck bed holes (Step 9). You must also keep the screws from the cargo rails (Step 2) and reuse them to mount the new cargo rail (Step 10).
1. Clean the top of the bulkhead where the seal will go with soap and water to remove dirt and debris. 2. Clean the same area with isopropyl alcohol to remove wax or grease and to evaporate any remaining water. 3. Allow the surface to dry completely. 4. Place the seal flush with the front edge of the bulkhead and ensure it is snug between the truck bed rails. 5. Peel the backing paper from the bulkhead seal and apply pressure to the entire seal to ensure good adhesion.
1. With the cover rolled open, clean the surface where each bumper will go with soap and water to remove dirt and debris. 2. Clean the same area with isopropyl alcohol to remove wax or grease and to evaporate any remaining water. 3. Allow the surface to dry completely. 4. Position the four D-shaped bumpers on the cover slats so that they prevent the cover from contacting the cab. 5. Peel the backing paper from each bumper seal and apply pressure to ensure good adhesion.
A gap of approximately 1/8" (3.2 mm) must remain on both sides of the rolled cover between the edge of the cover rail and the rolling cover. This spacing is necessary to ensure that the locking rail secures to the cover. If the side gaps are not even, align the cover side to side at the front and/or the back.
1. Align the front vinyl edge of the rolled cover with the front edge of the side rails (not the rubber seal) (Step 17). 2. Verify that a gap of approximately 1/8" (3.2 mm) remains on both sides of the rolled cover between the edge of the cover rail and the rolling cover (Step 18). 3. If the side gaps are not even, align the cover side to side at the front and/or the back. 4. Firmly hand tighten the knobs after the cover has been aligned. 5. When correctly installed, the vinyl edges of the rolled cover will align squarely with the side rails in all four corners, and the latch assembly will align with the side rail locking levers at the tailgate on both sides (Step 19).
The S clamps must be tightened to 7.5 Nm (6 ft-lbs) (Step 12). This applies to both the passenger side and driver side clamps.
The cargo rail mounting screws must be tightened to 7.5 Nm (6 ft-lbs) (Step 10). This applies to both the passenger side and driver side cargo rails.
Hand tighten the lock knobs only. Do not overtighten. After the cover has been aligned, firmly hand tighten the knobs (Step 18). When the cover is properly aligned and rolled open, tighten the knobs on both sides to secure the cover, but hand tighten only and do not overtighten (Step 21).
The slam latch must hit the locking levers squarely and on both sides (Step 14). When correctly installed, the latch assembly will align with the side rail locking levers at the tailgate on both sides (Step 19). After installation, check that the latches on both sides at the tailgate fully engage the cover rails. If they do not, loosening the lock knobs and making the side-to-side adjustment as in Step 18 could help with latch striker engagement (Step 20).
1. Pull down on the latch release cable located on either side of the cover. 2. Rotate the tail rail forward and into a rolling motion. 3. Roll the cover toward the cab. 4. When driving with the cover open, the cover must be rolled toward the cab and secured with both strap clamps. 5. To secure the cover in the open position, twist and insert the clips of the strap clamp assemblies into the cover clasps. Ensure that both strap clamps are fully inserted into the clasps. 6. Pull on the end of each strap to tighten.
1. Roll the cover toward the tailgate. 2. Rotate the tail rail downwards towards the rotating locking levers. 3. The cover will click into the closed position. 4. Verify that the locking levers are engaged and prevent the hard rolled cover from being lifted on both sides.
Do not place objects on or against the cover or framework. Do not tie cargo to the truck bed cover or framework. Do not operate the vehicle with objects on top of the cover. Never allow children or pets to occupy the truck bed with the cover in the fully closed position. The cover is not airtight, so special care is required to keep cargo clean and dry. The cover will not prevent theft of contents inside the truck bed. Before opening the cover, it must be free of all foreign materials including snow and ice. Do not tow your vehicle from the rear with the cover on the vehicle; if towing from the rear is required, the cover must be removed from the vehicle and properly stored.
Clean the truck bed cover with mild automotive soap and water only. Avoid using abrasive cleaners as they may dull the finish. Do not use chemicals and fluids such as insect repellents, oils, solvents, and lubricants, as they could potentially damage the rubber hinges and seals and void the warranty. Always read the ingredients of any product you are using to clean your truck bed cover and make sure that you use only products that are safe for use with rubber. Periodically check that your cover is securely attached to your truck bed and working as intended. Inspect all hardware such as clamps and cover retainer clamps to ensure they are properly installed and working as intended. Covers that are used at high frequency or subject to rough roadways and/or heavy vibration conditions may cause the cover to require adjustment. It is recommended that you regularly inspect and service each cover attachment and clean away any excess dirt or grime.
1. Open and close the rolled cover several times to verify that it rolls freely. The cover should be square with the cover rails and roll freely between the rails (Step 16). 2. Verify that the vinyl edges of the rolled cover align squarely with the side rails in all four corners and that the latch assembly aligns with the side rail locking levers at the tailgate on both sides (Step 19). 3. Verify that a gap of approximately 1/8" (3.2 mm) remains on both sides of the rolled cover between the edge of the cover rail and the rolling cover (Step 18). 4. Check that the latches on both sides at the tailgate fully engage the cover rails (Step 20). 5. Close the cover and check that the locking levers are engaged and prevent the hard rolled cover from being lifted on both sides (Step 21). 6. Check all clamps and retention mechanisms for tightness after a week of driving following installation and periodically thereafter.
Check all clamps and retention mechanisms for tightness after a week of driving following installation (or re-installation) of the cover and periodically thereafter. Covers that are used at high frequency or subject to rough roadways and/or heavy vibration conditions may cause the cover to require adjustment.
The REVOLVER X4ts carries a limited warranty for five (5) years from the original date of purchase. The warranty covers defects in materials or workmanship. The warranty is void if the product has been damaged in an accident, or due to neglect, unforeseeable use, improper installation, improper servicing, or other cause not arising out of defects in material or workmanship. The warranty is not transferable to a subsequent end user. Warranty registration must be on file and/or proof of original purchase (detailed and dated receipt) is required for the warranty to be effective. You can register your warranty online at https://realtruck.com/bak-warranty.
The warranty is void if the product has been damaged in an accident, or due to neglect, unforeseeable use, improper installation, improper servicing, or other cause not arising out of defects in material or workmanship. Failure to follow care and use instructions will void the warranty. Using abrasive cleaners or chemicals such as insect repellents, oils, solvents, and lubricants could potentially damage the rubber hinges and seals and void the warranty. Towing your vehicle from the rear with the cover on the vehicle will void the warranty.
Yes, the REVOLVER X4ts is designed for Toyota Tacoma 2016–2023 models. Contact BAK Industries at 818-365-9000 or support@bakindustries.com to confirm fitment for your specific truck bed length, as the manual does not specify short-bed vs. long-bed compatibility.
Both the S clamps and cargo rail mounting screws must be tightened to 7.5 Nm (6 ft-lbs). The lock knobs must be hand tightened only—do not overtighten.
Maintain a gap of approximately 1/8" (3.2 mm) on both sides of the rolled cover between the edge of the cover rail and the rolling cover. This spacing is necessary to ensure that the locking rail secures to the cover.
No. Do not tow your vehicle from the rear with the cover on the vehicle. If towing from the rear is required, the cover must be removed from the vehicle and properly stored.
Clean with mild automotive soap and water only. Avoid abrasive cleaners and chemicals such as insect repellents, oils, solvents, and lubricants, as they may damage rubber hinges and seals and void the warranty.
Check all clamps and retention mechanisms for tightness after a week of driving following installation and periodically thereafter. Covers used at high frequency or subject to rough roadways may require adjustment.
If the rails are leaning down, have one person stand on the outside of the bed and slightly roll the rails upward while another person slowly snugs the clamps up. If the clamps are tightened too quickly or overtightened, it will cause the rails to lean down. Do not overtighten.
1. Make sure the retaining clamps are tight and properly engaged to the side rails. 2. Check that the bulkhead seal is in place and the cover is resting on it. 3. Make sure that all latches are engaged to the side rails and adjust if needed. 4. Check that the side rails are installed flush with the top of the bed rail.
The cable could be pinched in or under the cable guide extrusion. 1. Loosen the three screws on the center cable cover (bar), located in the middle of the panel. 2. Slightly lift up on the cable guide extrusion. 3. Pull on both sides of the cable. This should free the cable and allow the latch to operate smoothly.
Yes, the seal may be wavy when removed from the box. This is normal. Allow ample sunlight for the seal to lay flat and relax. The seal will straighten out over time.
Check that the latches on both sides at the tailgate fully engage the cover rails. If they do not, loosen the lock knobs and make the side-to-side adjustment as described in Step 18 (align the cover side to side at the front and/or the back if the side gaps are not even). This could help with latch striker engagement. Ensure all latches move freely and properly engage the side rail to provide optimal performance and security.
Free Shipping
Ships free on all orders
 Authorized Dealer


Quick Ship
In stock and ready to ship — order now!
FREE ShippingFREE SHIPPING
Estimated delivery Wed, Oct 14 - Sat, Oct 17
Order before 2 PM EST Monday–Friday for same-day processing
Guaranteed safe & secure checkout
No reviews have been added for this product.