

Reese Elite Series Fifth Wheel Hitch Mounting System Rail Kit, GMReeseOriginal price was $1,125.00. Current price is $873.14.Out of Stock
View productOur in-house experts typically reply within one business day.

Reese

Always the correct part
We know our products
Quality Products
Free Shipping!

Reese has designed towing equipment since 1952 and remains a benchmark for heavy-duty towing. The line covers fifth wheel hitches such as the modular M5, gooseneck couplers including the Goose Box, air-ride and short-bed pin boxes, weight distribution systems with active sway control, and the accessories that connect them, all built to exceed published industry standards.
Reese has been pioneering towing performance since 1952, when Margaret Reese asked her husband TJ to stop travel trailers rocking every time somebody walked through them. His answer, the first pair of stabilising jacks, was simple and effective enough to change the RV industry. From that starting point Reese grew into a designer and manufacturer of complete towing systems, and today it anchors the heavy-duty end of the Horizon Global towing portfolio.
Fifth wheel towing is where the brand's engineering is most visible. The M5 fifth wheel hitch uses a modular design that breaks into manageable sections for assembly, with a wider stance, tighter tolerances and a shock absorption system aimed at the jolts that travel up through a truck bed. For owners who would rather tow from a gooseneck coupler and keep the bed clear, the Goose Box 20K replaces the trailer's king pin with a gooseneck connection carrying its own air-ride cushioning.
Pin boxes are a Reese speciality. The 5th Airborne uses air-ride technology to dampen road shock and reduce the chucking motion that makes fifth wheel towing tiring, while the Sidewinder was designed for short-bed pickups, pivoting the connection point so the trailer can turn sharply without the front cap meeting the cab.
For conventional towing, Reese weight distribution systems restore load to the tow vehicle's front axle and control sway. The Pro Round Bar distributes weight evenly while damping sway, and the Pro Dual Cam II uses active cam-based sway control that works harder the stronger the sway force becomes. Complete kits pair bars, head and shank to a rated tongue weight, and dedicated sway control kits can be added to existing setups. The products suit RV owners, horse and livestock haulers and anyone towing near the upper end of a vehicle's rating.
Experts available to answer your questions
Call 888-634-9494Lifetime
Yes, the 30852 mounting kit is designed for 2010-current Dodge 2500 and 3500 pickup trucks. It is compatible with both long bed (8') and short bed (6') configurations. However, if your truck has a bed shorter than 6', the kit cannot be installed unless your trailer is equipped with a Sidewinder pin box.
The 30852 can be installed on short bed trucks between 6' and 8', but Cequent Performance Products recommends using a long bed (8') truck for the best truck-trailer turning clearance. For short bed trucks, you should equip the trailer with an extended pin box to gain additional clearance. You may also add a REESE Elite Series Slider (Part #30070) for increased turning clearance during low-speed, non-highway maneuvering. Do not install on trucks with beds shorter than 6' unless the trailer has a Sidewinder pin box.
The REESE Elite Series fifth wheel hitch requires a SAE 2" kingpin. Use only a SAE 2" kingpin with your hitch.
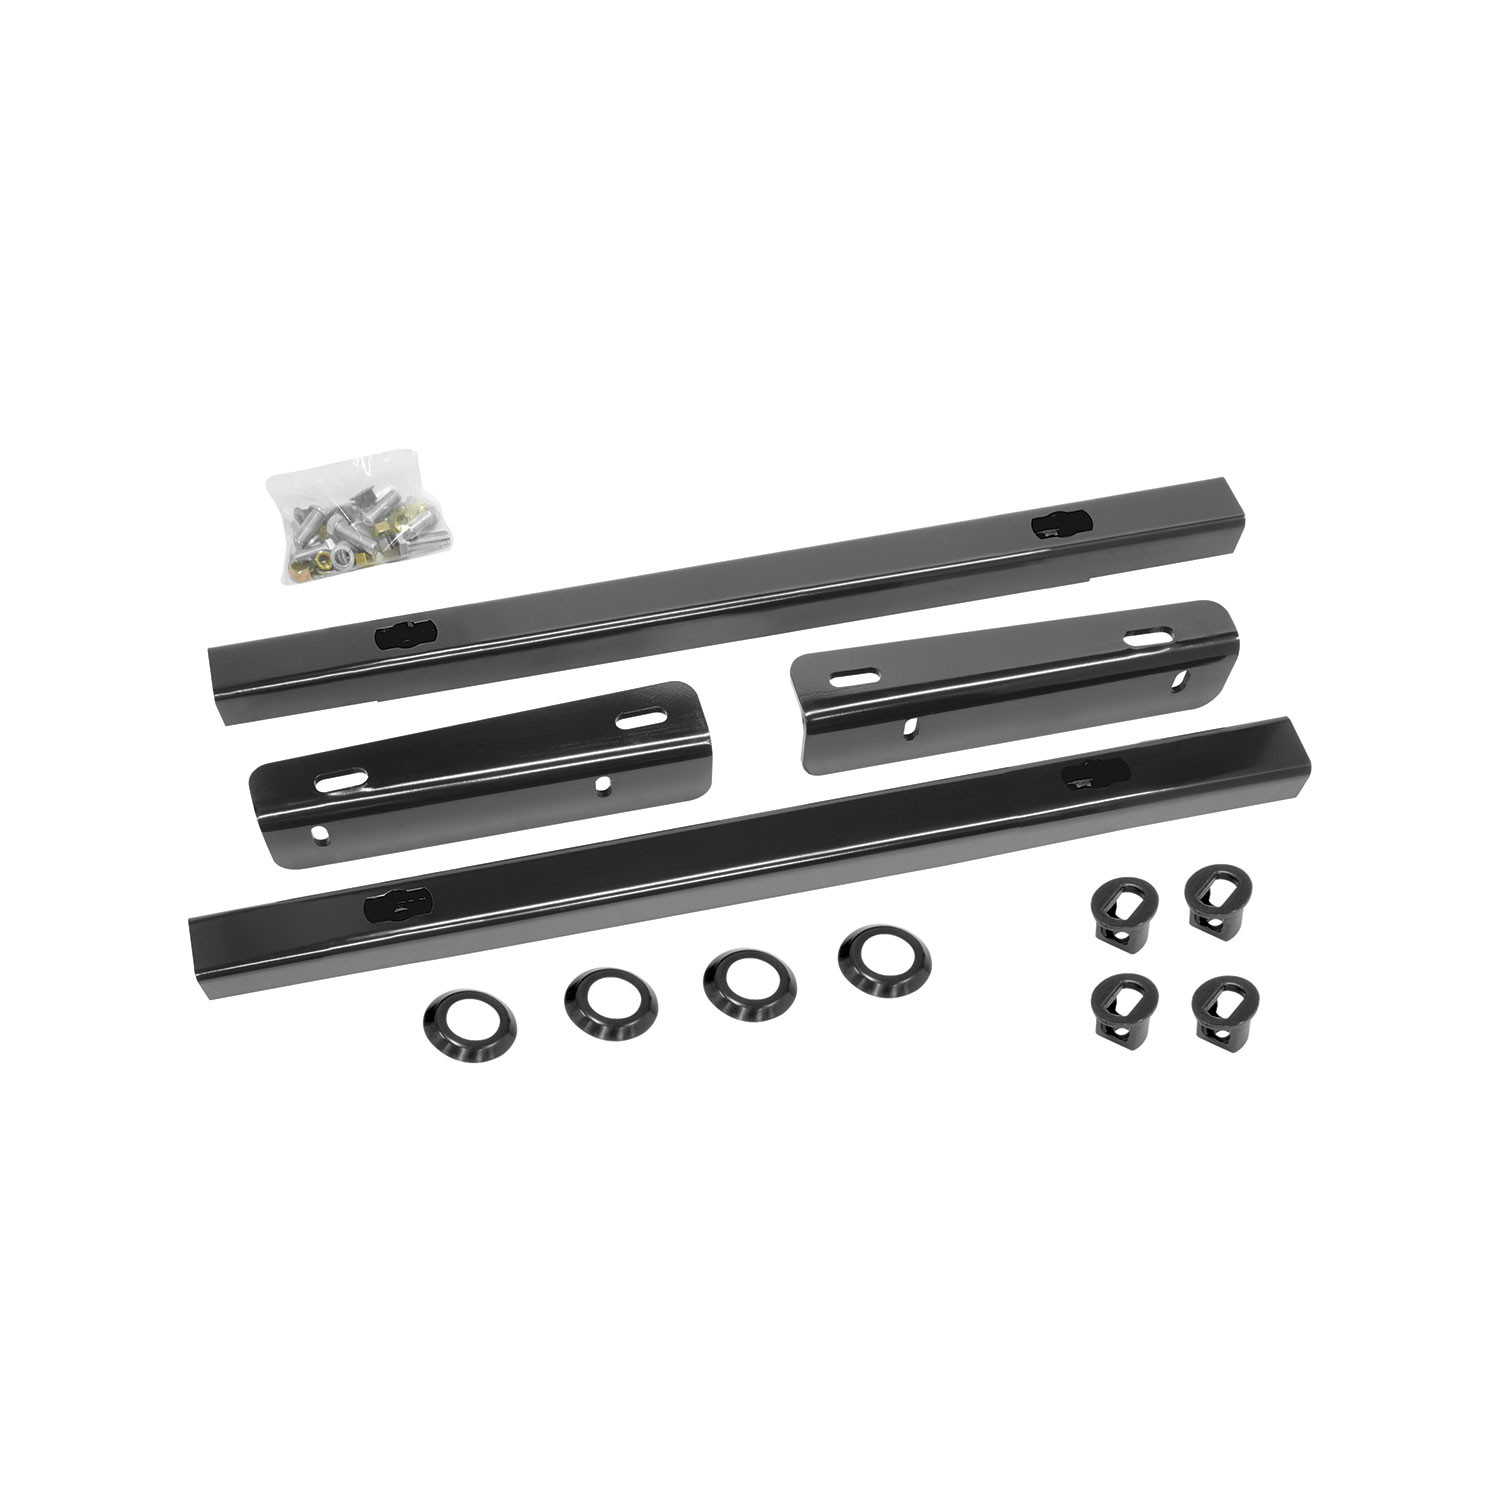
The kit includes: 1 base rail frame, 4 pucks, 4 trim rings, 4 puck plugs, 3 clamping brackets, 8 pieces of 1/2"-13 x 6 1/2" Grade 5 hex head bolts, 8 pieces of 1/2" lock washers, 4 pieces of 5/8"-11 x 1 3/4" button head screws, 4 pieces of 5/8" lock washers, and 1 passenger rear clamping bracket.
Required tools are: 3/8" Allen socket, ratchet, 18mm socket, 200 lb-ft torque wrench, 3/4" hex socket, and either a 3-1/4" hole saw or 3-1/4" knockout punch for drilling the truck bed.
The manual does not specify battery disconnection as a requirement for this installation.
Yes, drilling is required. You must drill 1/8" pilot holes in the truck bed at locations specified in Figure 8 (long bed) or Figure 9 (short bed), then enlarge them to 3-1/4" using a hole saw or knockout punch. Before drilling, check for obstructions such as fuel lines, brake lines, and structural members to prevent damage. If a plastic drop-in bed liner is used, cut 19" x 4" slots in the liner before drilling. Spray-in bed liners and bed mats less than 1/4" thick can work with normal installation; consult your installer for recommended curing time before cutting.
Drill 1/8" pilot holes first, then enlarge them to 3-1/4" using a hole saw or knockout punch. The exact locations are shown in Figure 8 for long bed (8') trucks or Figure 9 for short bed (6') trucks, measured from the center of the truck bed using the driver's side edge of the bed corrugation as a reference.
Yes, the truck bed must be raised and supported. First, remove the ground wire from the frame and use an 18mm socket to remove all bed bolts. Then raise and support the truck bed. After the base rails are inserted, refasten the truck bed bolts and torque them to 75 ft-lbs.
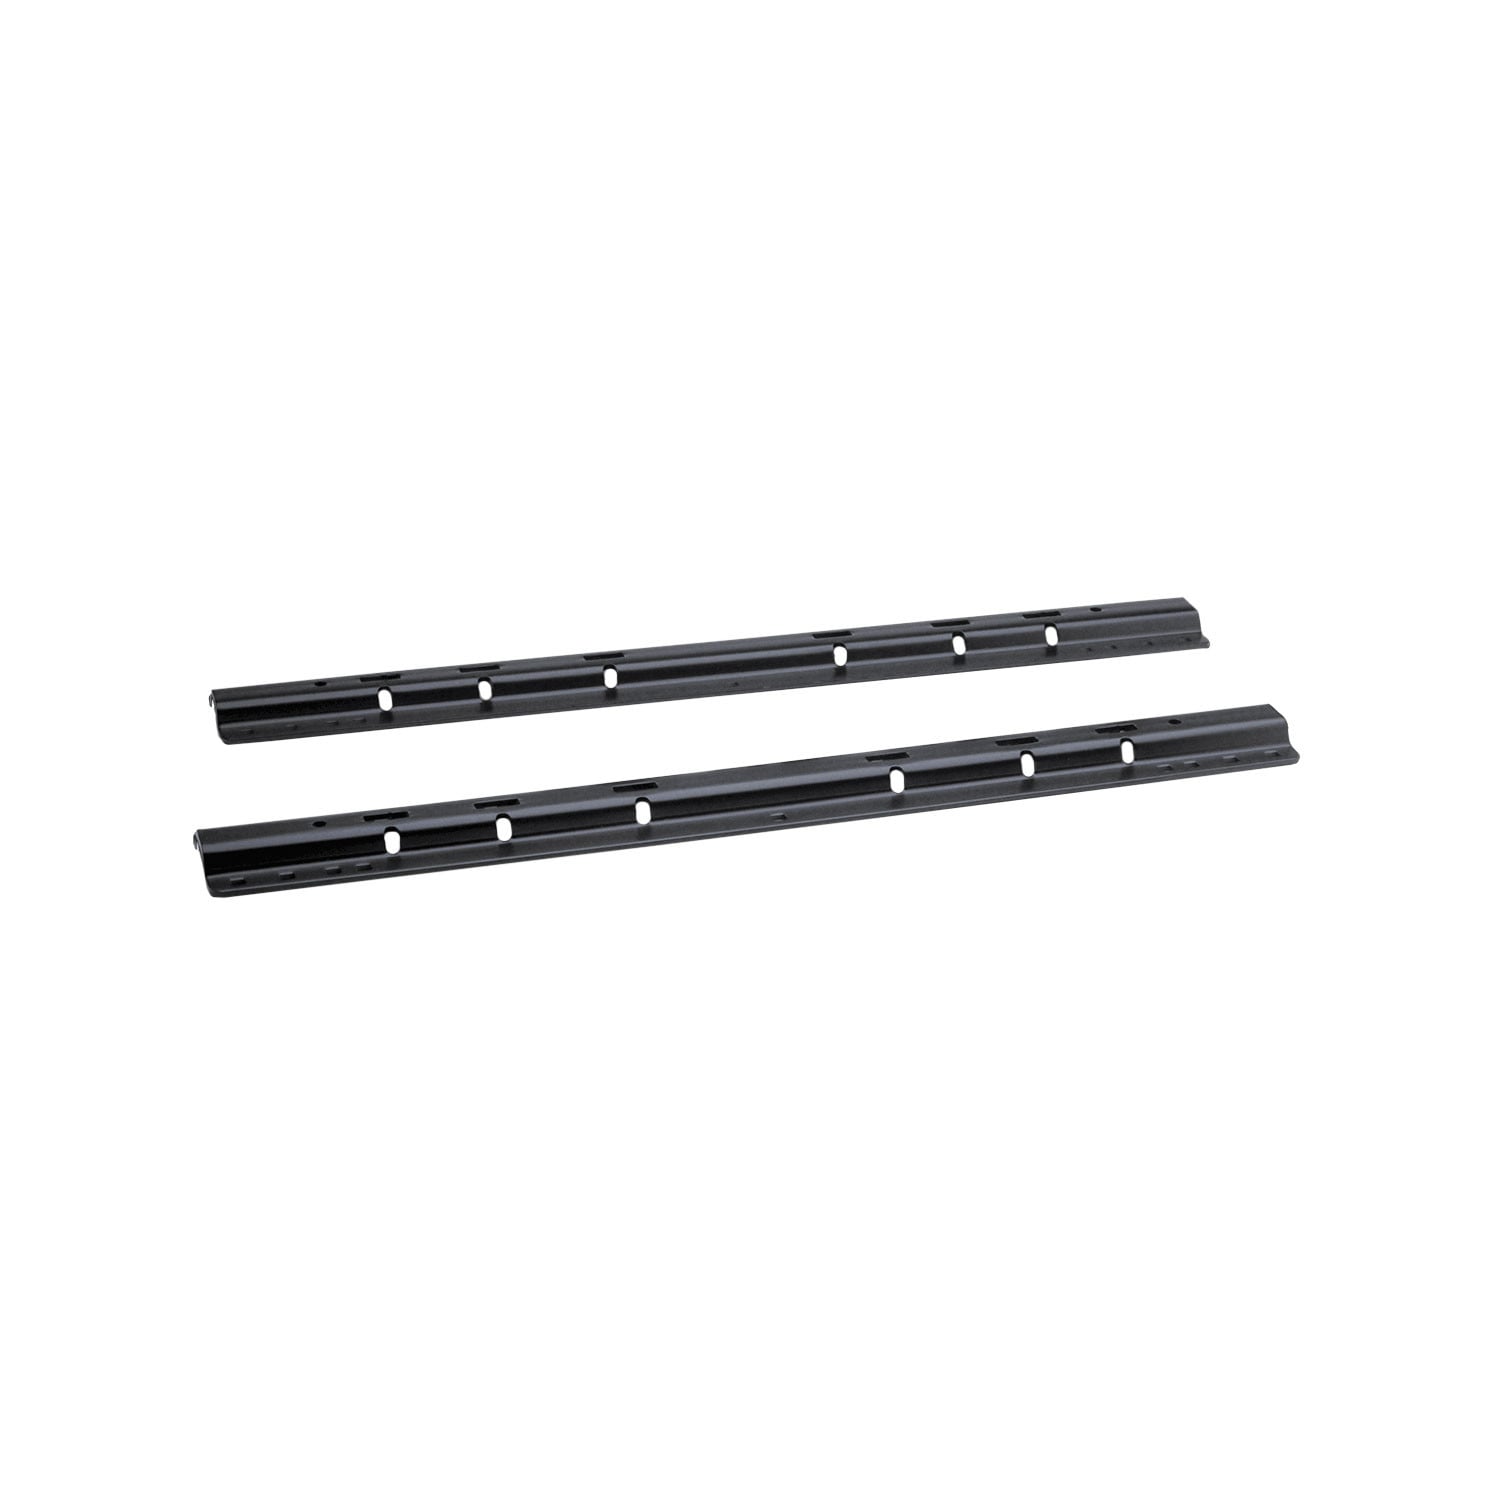
Slide the base rail system between the hat channels and lift it so it rests on the frame. Position it near the rear hat channel so it rests evenly on both sides of the frame. Ensure the rail holes align with holes in the bed. The base rail should be positioned between the front and rear hat channels, with the fuel cell and axles visible on either side.
All 1/2" bolts (1/2"-13 x 6 1/2" hex head bolts) must be torqued to 75 ft-lbs. This includes both the clamping bracket bolts and the truck bed bolts. Tighten both sides simultaneously to keep brackets even.
The 5/8"-11 x 1 3/4" button head screws that attach the pucks and trim rings to the rails must be torqued to 110 ft-lbs.
The truck bed bolts must be torqued to 75 ft-lbs after the base rails are inserted and refastened.
Loosely attach the clamping brackets (3 total) to the frame using 1/2" x 6.5" hex head bolts and 1/2" lock washers. Hand tighten while keeping the flat portion of the bracket even on the bottom of the frame. Ensure the rail holes align with holes in the bed. Then tighten both sides simultaneously to keep brackets even, torquing the bolts to 75 ft-lbs.
From inside the truck bed, attach the pucks (2) and trim rings (4) to the rails (1) using the button head screws (8) and lock washers (9). Tighten to 110 ft-lbs torque. After installation, insert puck plugs (2) whenever pucks are not in use.
The trailer and its contents must not exceed the truck's manufacturer-rated towing capacity, the hitch rating, or the trailer's tow rating—whichever is lowest. The gross weight of the trailer must not exceed the fifth wheel hitch rating. Approximately 15-25% of the trailer weight should be on the hitch (pin weight). The king pin weight must not exceed the fifth wheel rating; if in doubt, have it measured by a qualified technician. The tow vehicle must have a manufacturer's rated towing capacity equal to or greater than the gross trailer weight (dry weight plus payload).
Allow approximately 6" clearance between the top of the pickup walls and the underside of the front of the trailer for pitch and roll of the trailer. Allow more clearance for off-road use. The trailer should be approximately level as it is towed. Use the formula: Hitch Height = A – B + 2", where A is the height from ground to king pin box, B is the height of the inside of the truck bed, and the 2" accounts for estimated suspension compression (which could range 1-5" depending on truck and trailer).
The distance from the back of the truck cab to the center of the rear truck axle should be approximately 4" greater than one-half the trailer width. Always measure your truck and trailer before installing the hitch to ensure clearance at the cab and bumper for turns.
The connection for trailer wiring must be located at the side of the truck bed between the driver's seat and the rear wheel to prevent operators from working between the truck and trailer.
You must perform ALL of the following steps: (1) Check that the truck transmission is in park, (2) Check that the emergency brake is on, (3) Block in front of and behind all trailer tires, (4) Check that the trailer landing gear are resting on firm ground. Unexpected or accidental movement of the truck or trailer can cause serious injury or death.
If the truck is raised, be sure that the truck is properly blocked and restrained to prevent the truck from falling. Failure to do so may result in the truck suddenly falling, causing death or serious injury.
No. Do not lubricate threads. It may cause bolt failure.
After installation, verify that all 1/2" bolts are torqued to 75 ft-lbs, all 5/8" bolts are torqued to 110 ft-lbs, and all bed bolts are torqued to 75 ft-lbs. Re-attach the ground wire. Ensure the rail holes align with holes in the bed and that the base rail rests evenly on both sides of the frame.
No. Cequent Performance Products, Inc. hitches are designed for use with recreational fifth wheel trailers only. Hitch applications other than recreational fifth wheel trailers must be approved in writing by Cequent Performance Products, Inc. Engineering Department.
Yes. If a lube plate is to be used with a REESE Elite Series fifth wheel, it must be at least 12" in diameter. Cequent Performance Products, Inc. offers an optional lube plate as part #83001.
Yes. The REESE Elite Series Slider (Part #30070) can be added for increased turning clearance during low-speed, non-highway maneuvering. This is particularly helpful for short bed trucks. If using the slider, refer to the fifth wheel slider assembly instructions for slot cut dimensions.
Yes. An optional gooseneck kit (Part #30158) is available. Refer to the kit instructions for installation details. Figures 8 and 9 show the optional cutout locations for the gooseneck kit.
Yes, the 30852 is designed for 2010-current Dodge 2500 and 3500 trucks in both long bed (8') and short bed (6') configurations. Do not install on beds shorter than 6' unless the trailer has a Sidewinder pin box.
Yes. You must drill 1/8" pilot holes and enlarge them to 3-1/4" in the truck bed using a hole saw or knockout punch. Check for fuel lines and brake lines before drilling. Locations are shown in Figures 8 (long bed) and 9 (short bed).
You need: 3/8" Allen socket, ratchet, 18mm socket, 200 lb-ft torque wrench, 3/4" hex socket, and a 3-1/4" hole saw or knockout punch.
Torque all 1/2" bolts and bed bolts to 75 ft-lbs. Torque all 5/8" button head screws to 110 ft-lbs. Do not lubricate threads.
Approximately 15-25% of the trailer weight should be on the hitch (pin weight). The king pin weight must not exceed the fifth wheel rating. Have the king pin weight measured by a qualified technician if in doubt.
Loosen the bolts and reposition the brackets so the flat portion sits evenly on the bottom of the frame. Hand tighten the bolts while maintaining this position. Then tighten both sides simultaneously to keep the brackets even, torquing to 75 ft-lbs.
Reposition the base rail system so that it rests evenly on both sides of the frame and the rail holes align with the bed holes. The base rail should be positioned near the rear hat channel, between the front and rear hat channels. Ensure the fuel cell and axles are visible on either side.
Use the formula: Hitch Height = A – B + 2", where A is the height from ground to king pin box (measured with trailer level on level ground), B is the height of the inside of the truck bed, and 2" is an estimate of suspension compression (which could range 1-5" depending on truck and trailer). Measure these values and adjust the hitch height accordingly. Ensure approximately 6" clearance between the top of the pickup walls and the underside of the front of the trailer.
Verify that the trailer is level and on level ground. Recalculate the hitch height using the formula: Hitch Height = A – B + 2". If you have a short bed truck, consider adding a REESE Elite Series Slider (Part #30070) for increased turning clearance during low-speed, non-highway maneuvering, or equip the trailer with an extended pin box. Allow at least 6" clearance between the top of the pickup walls and the underside of the front of the trailer.
Free Shipping
Ships free on all orders
 Authorized Dealer

FREE ShippingFREE SHIPPING
Estimated delivery Tue, Sep 22 - Fri, Sep 25
Order before 2 PM EST Monday–Friday for same-day processing
Guaranteed safe & secure checkout
No reviews have been added for this product.