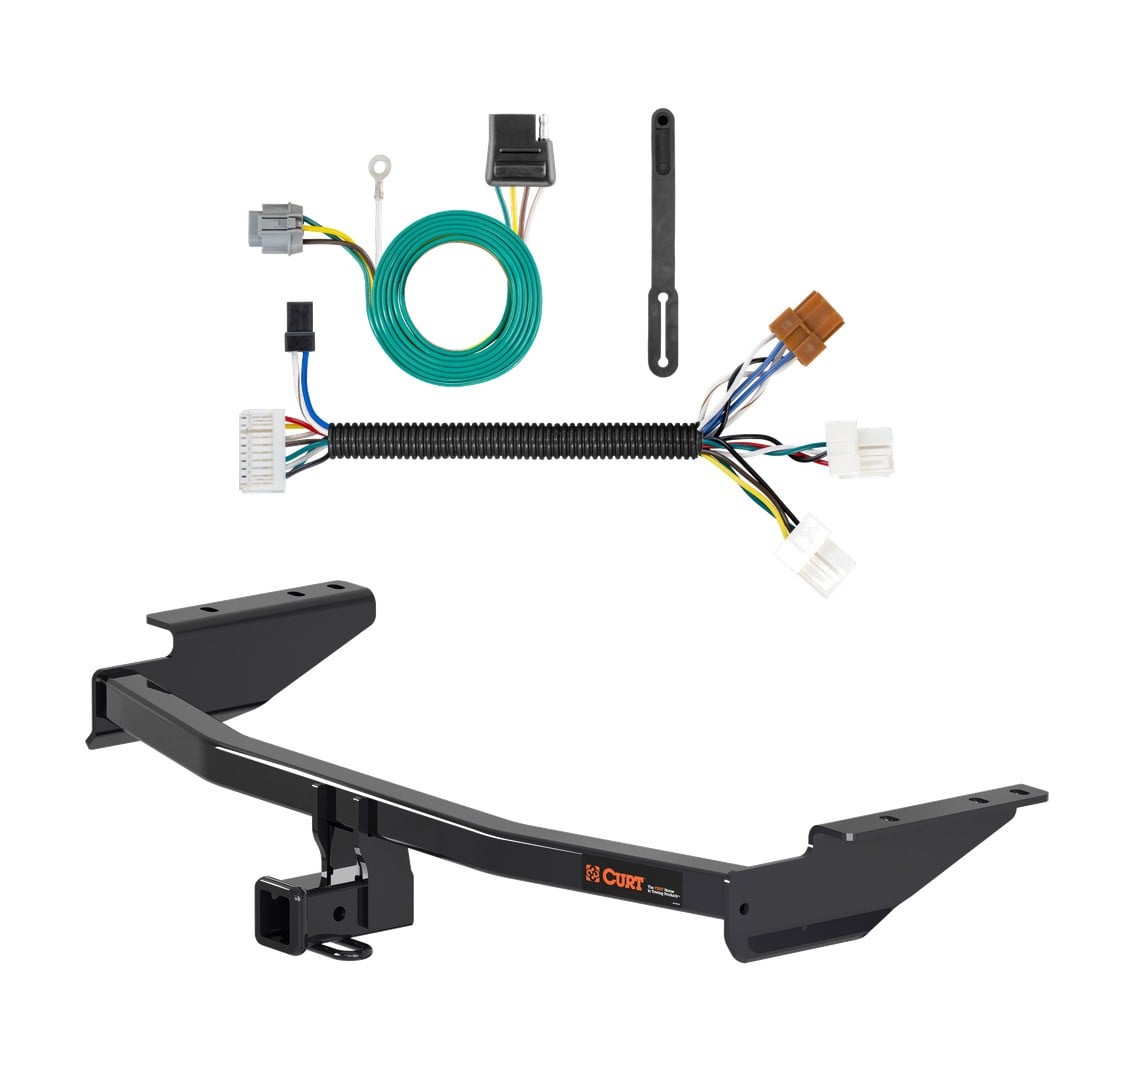
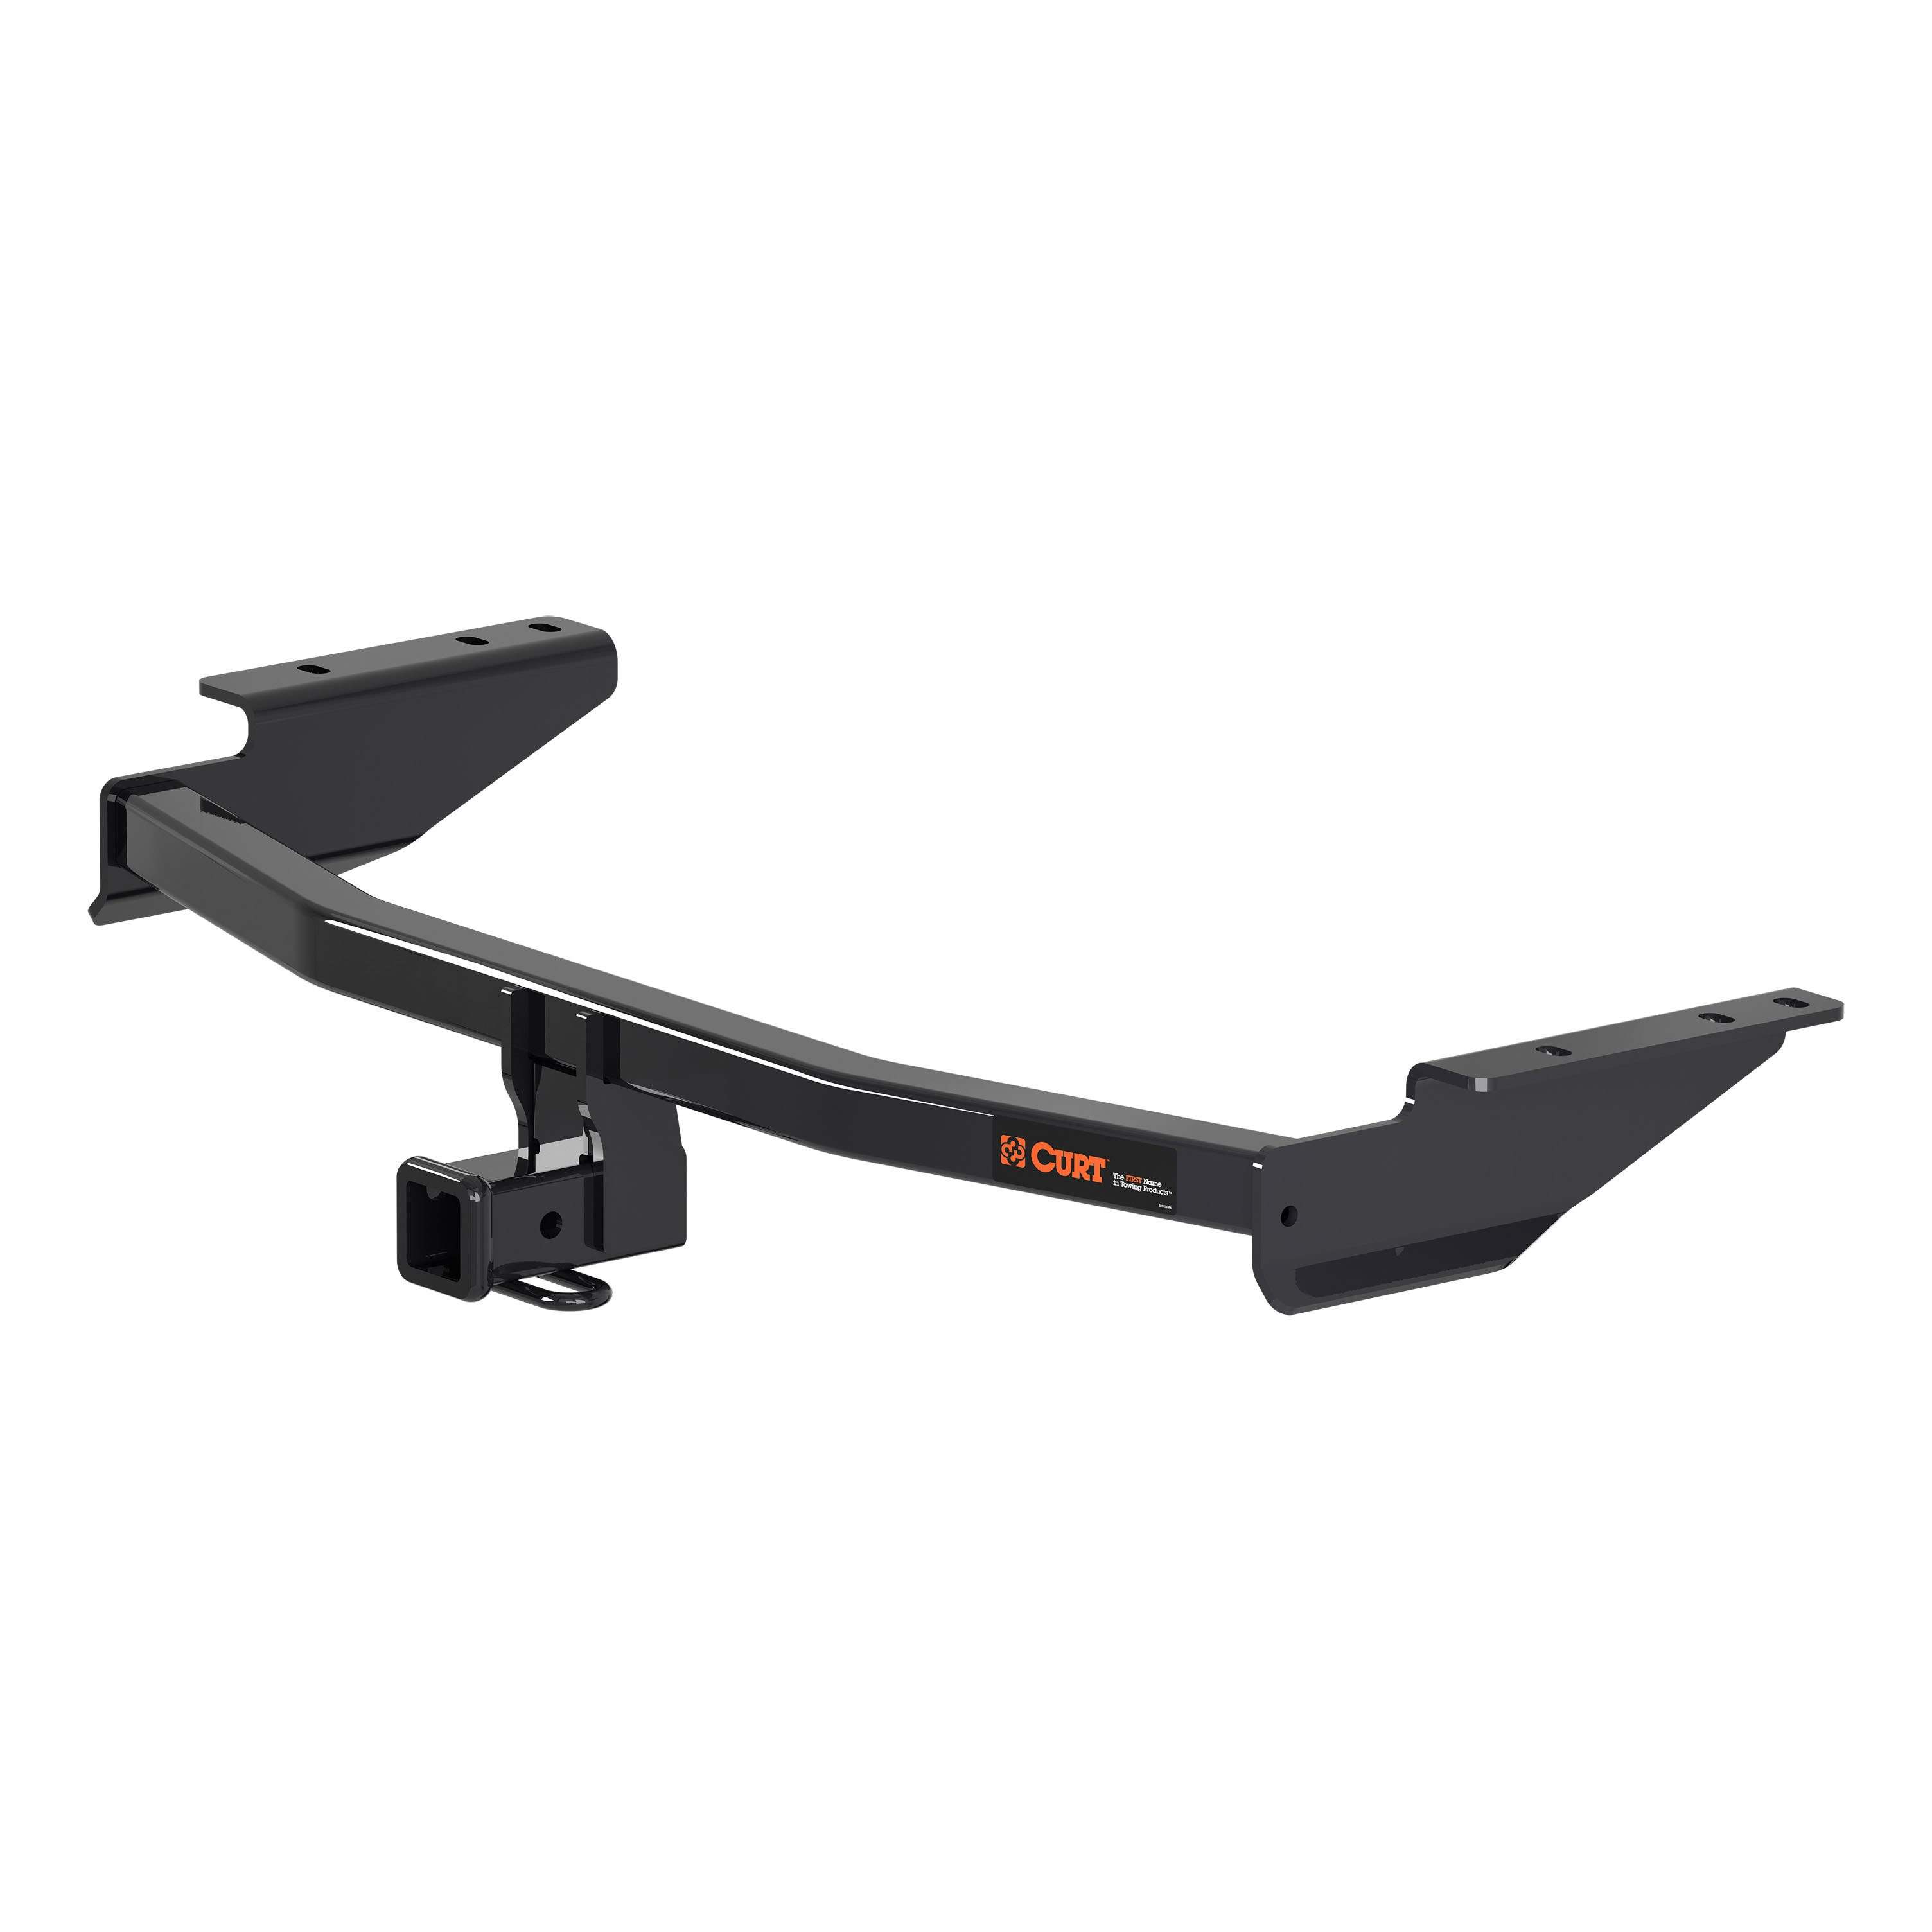
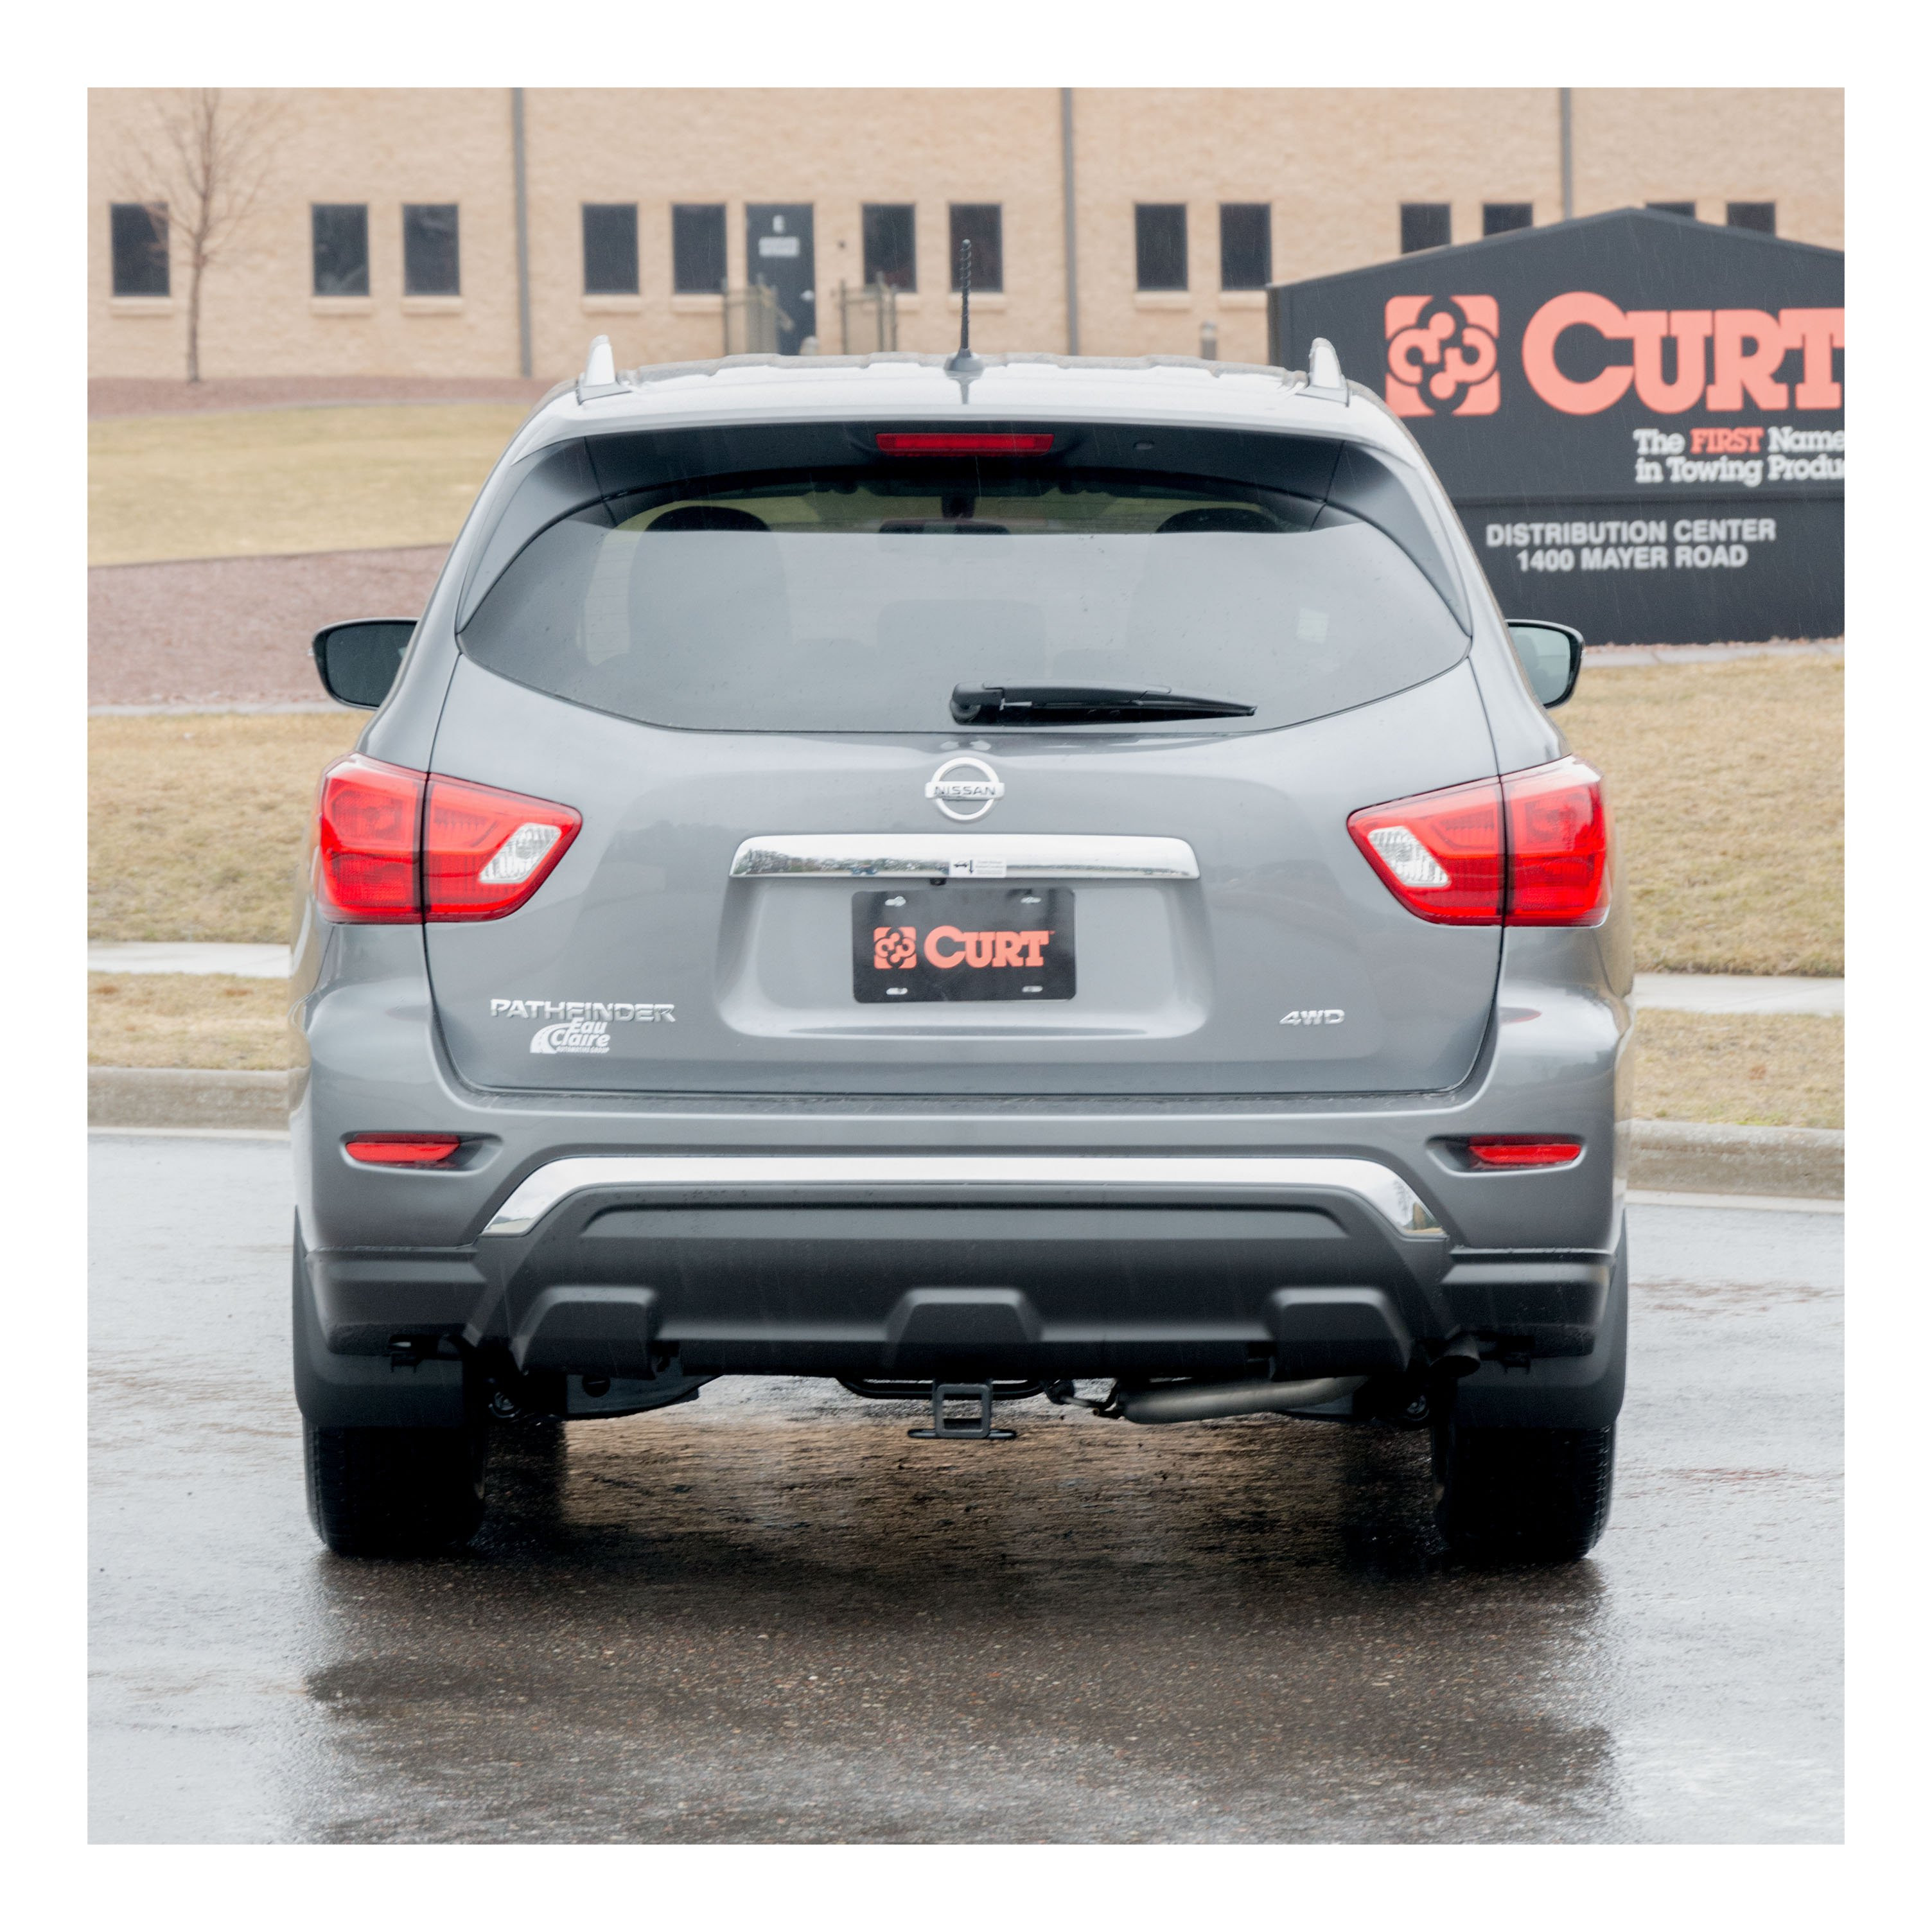
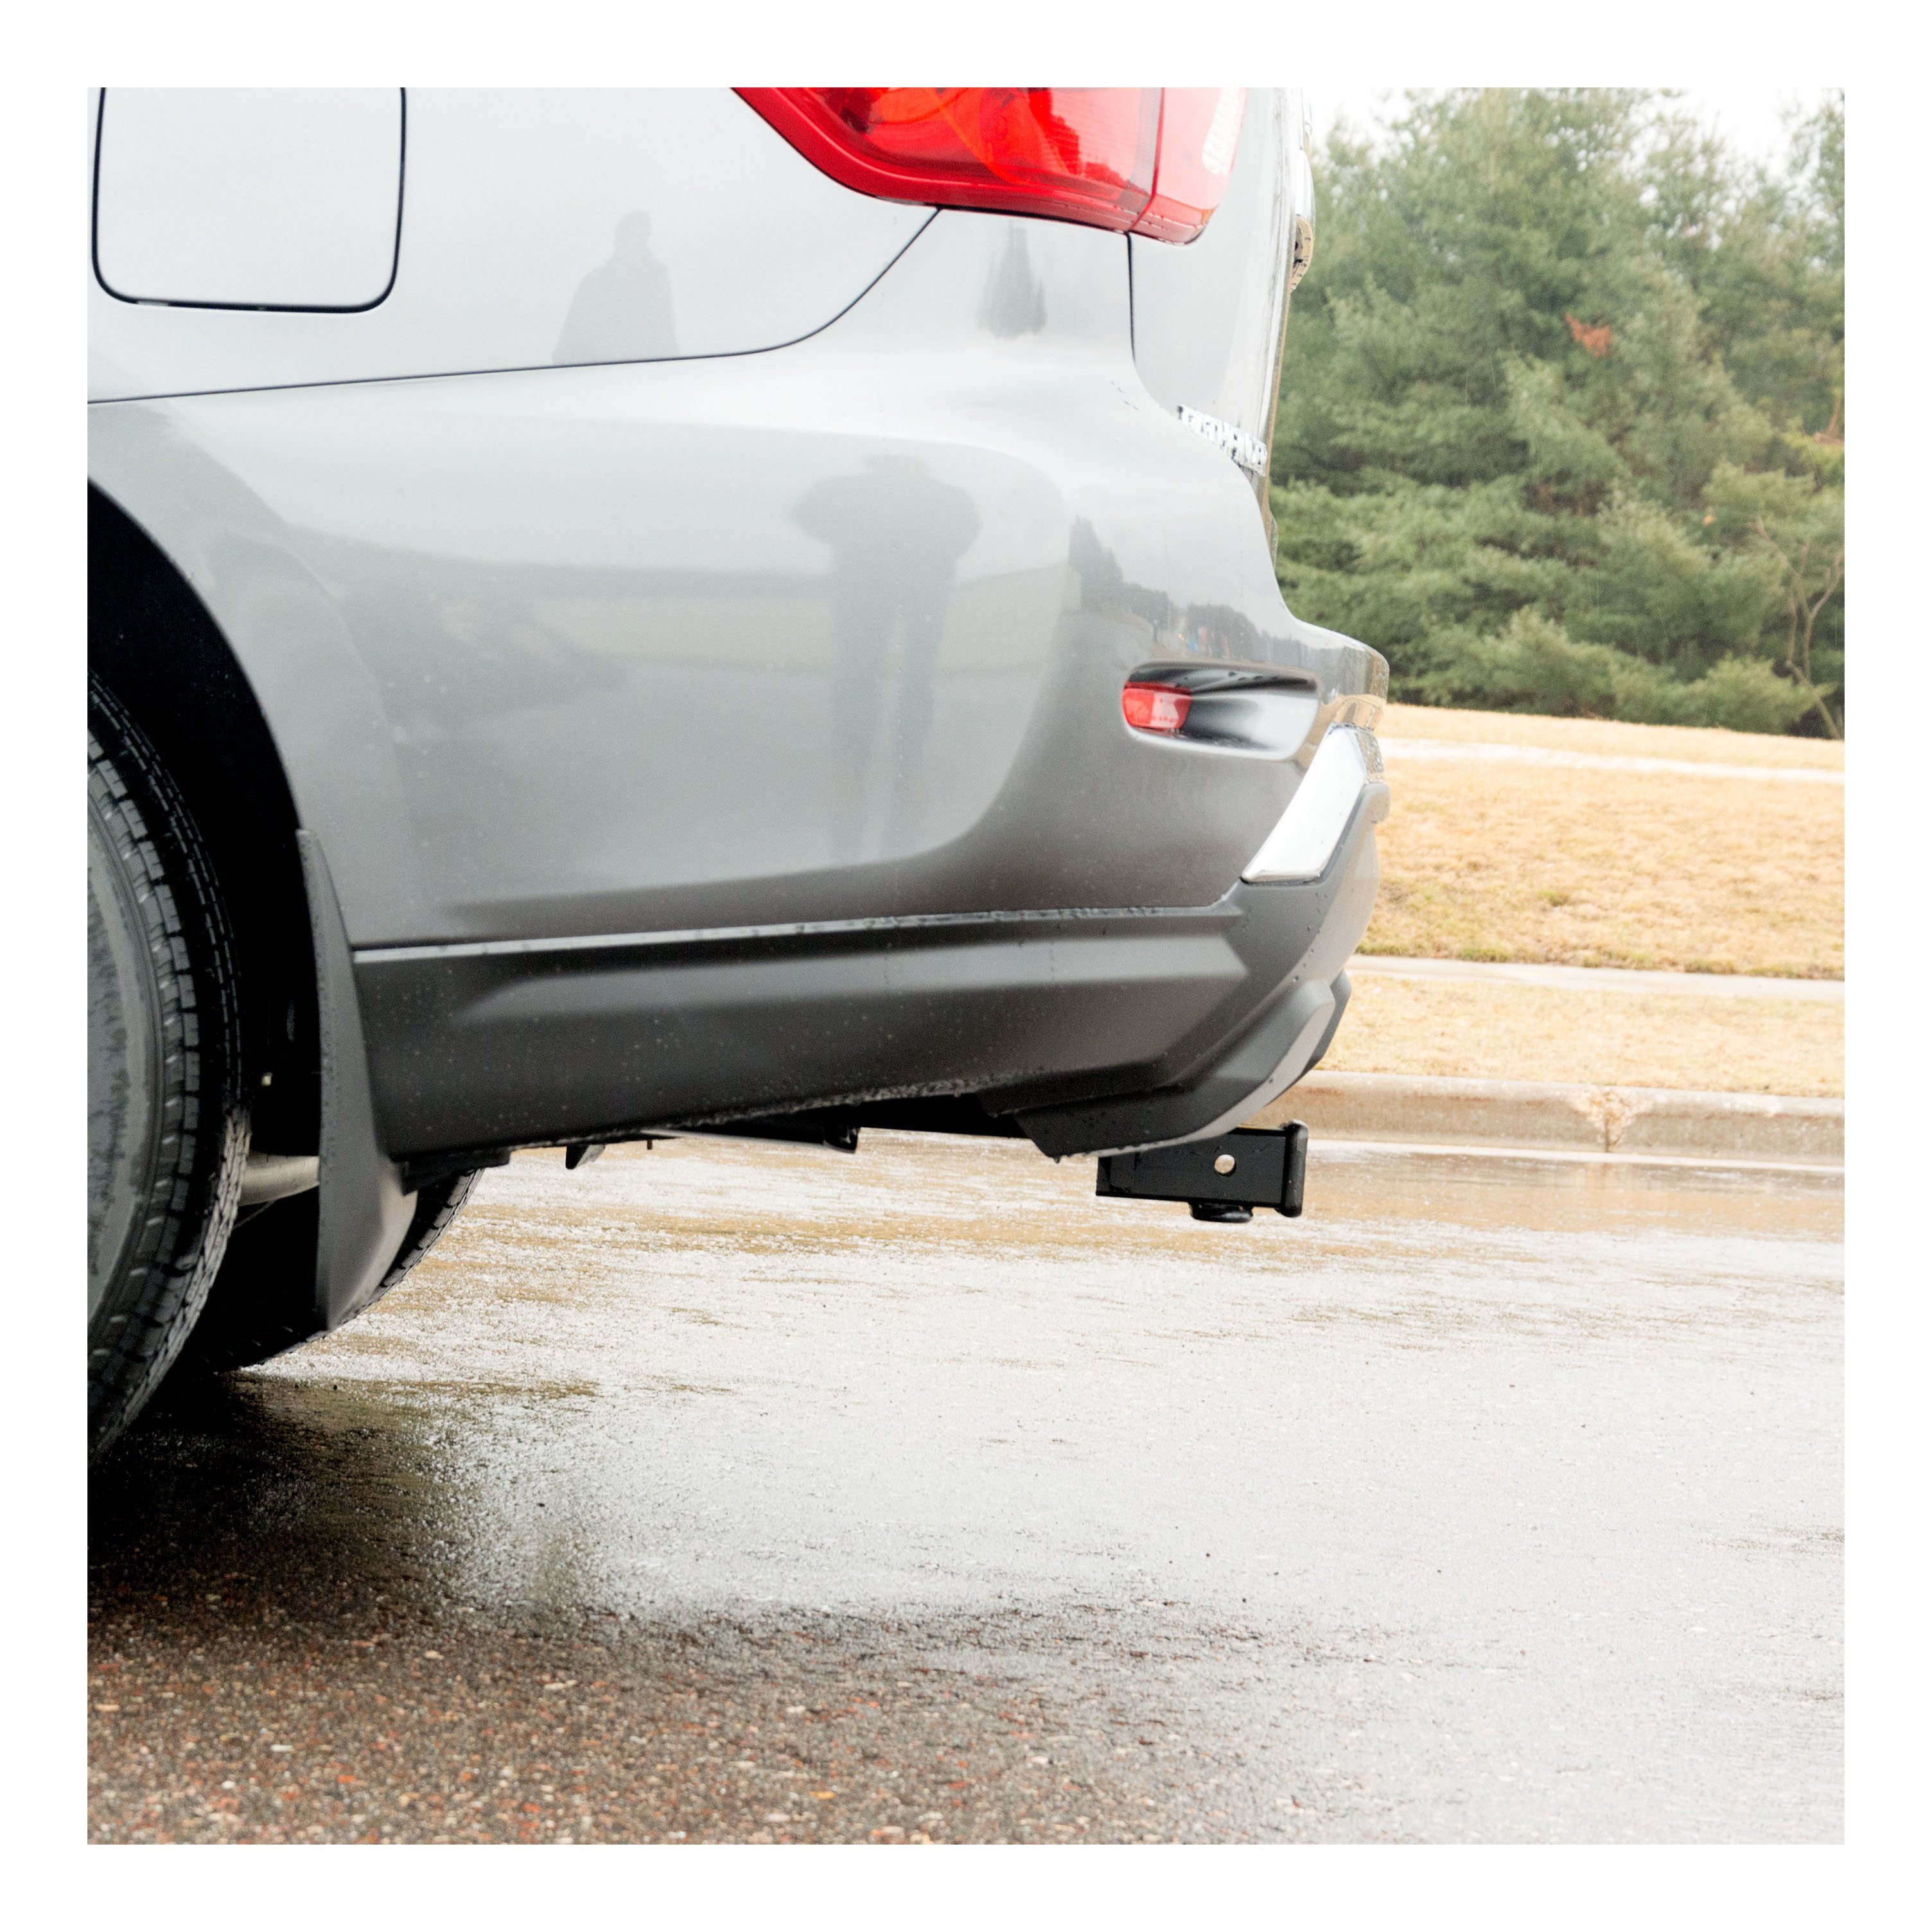
2017 - 2020 Nissan Pathfinder Curt 2", Class 3 Trailer Tow Hitch + 7-way Wiring Kit 13309CURTOriginal price was $470.90. Current price is $327.98.In Stock
View productOur in-house experts typically reply within one business day.









Always the correct part
We know our products
Quality Products
Free Shipping!
Always the correct part
We know our products
Quality Products
Free Shipping!
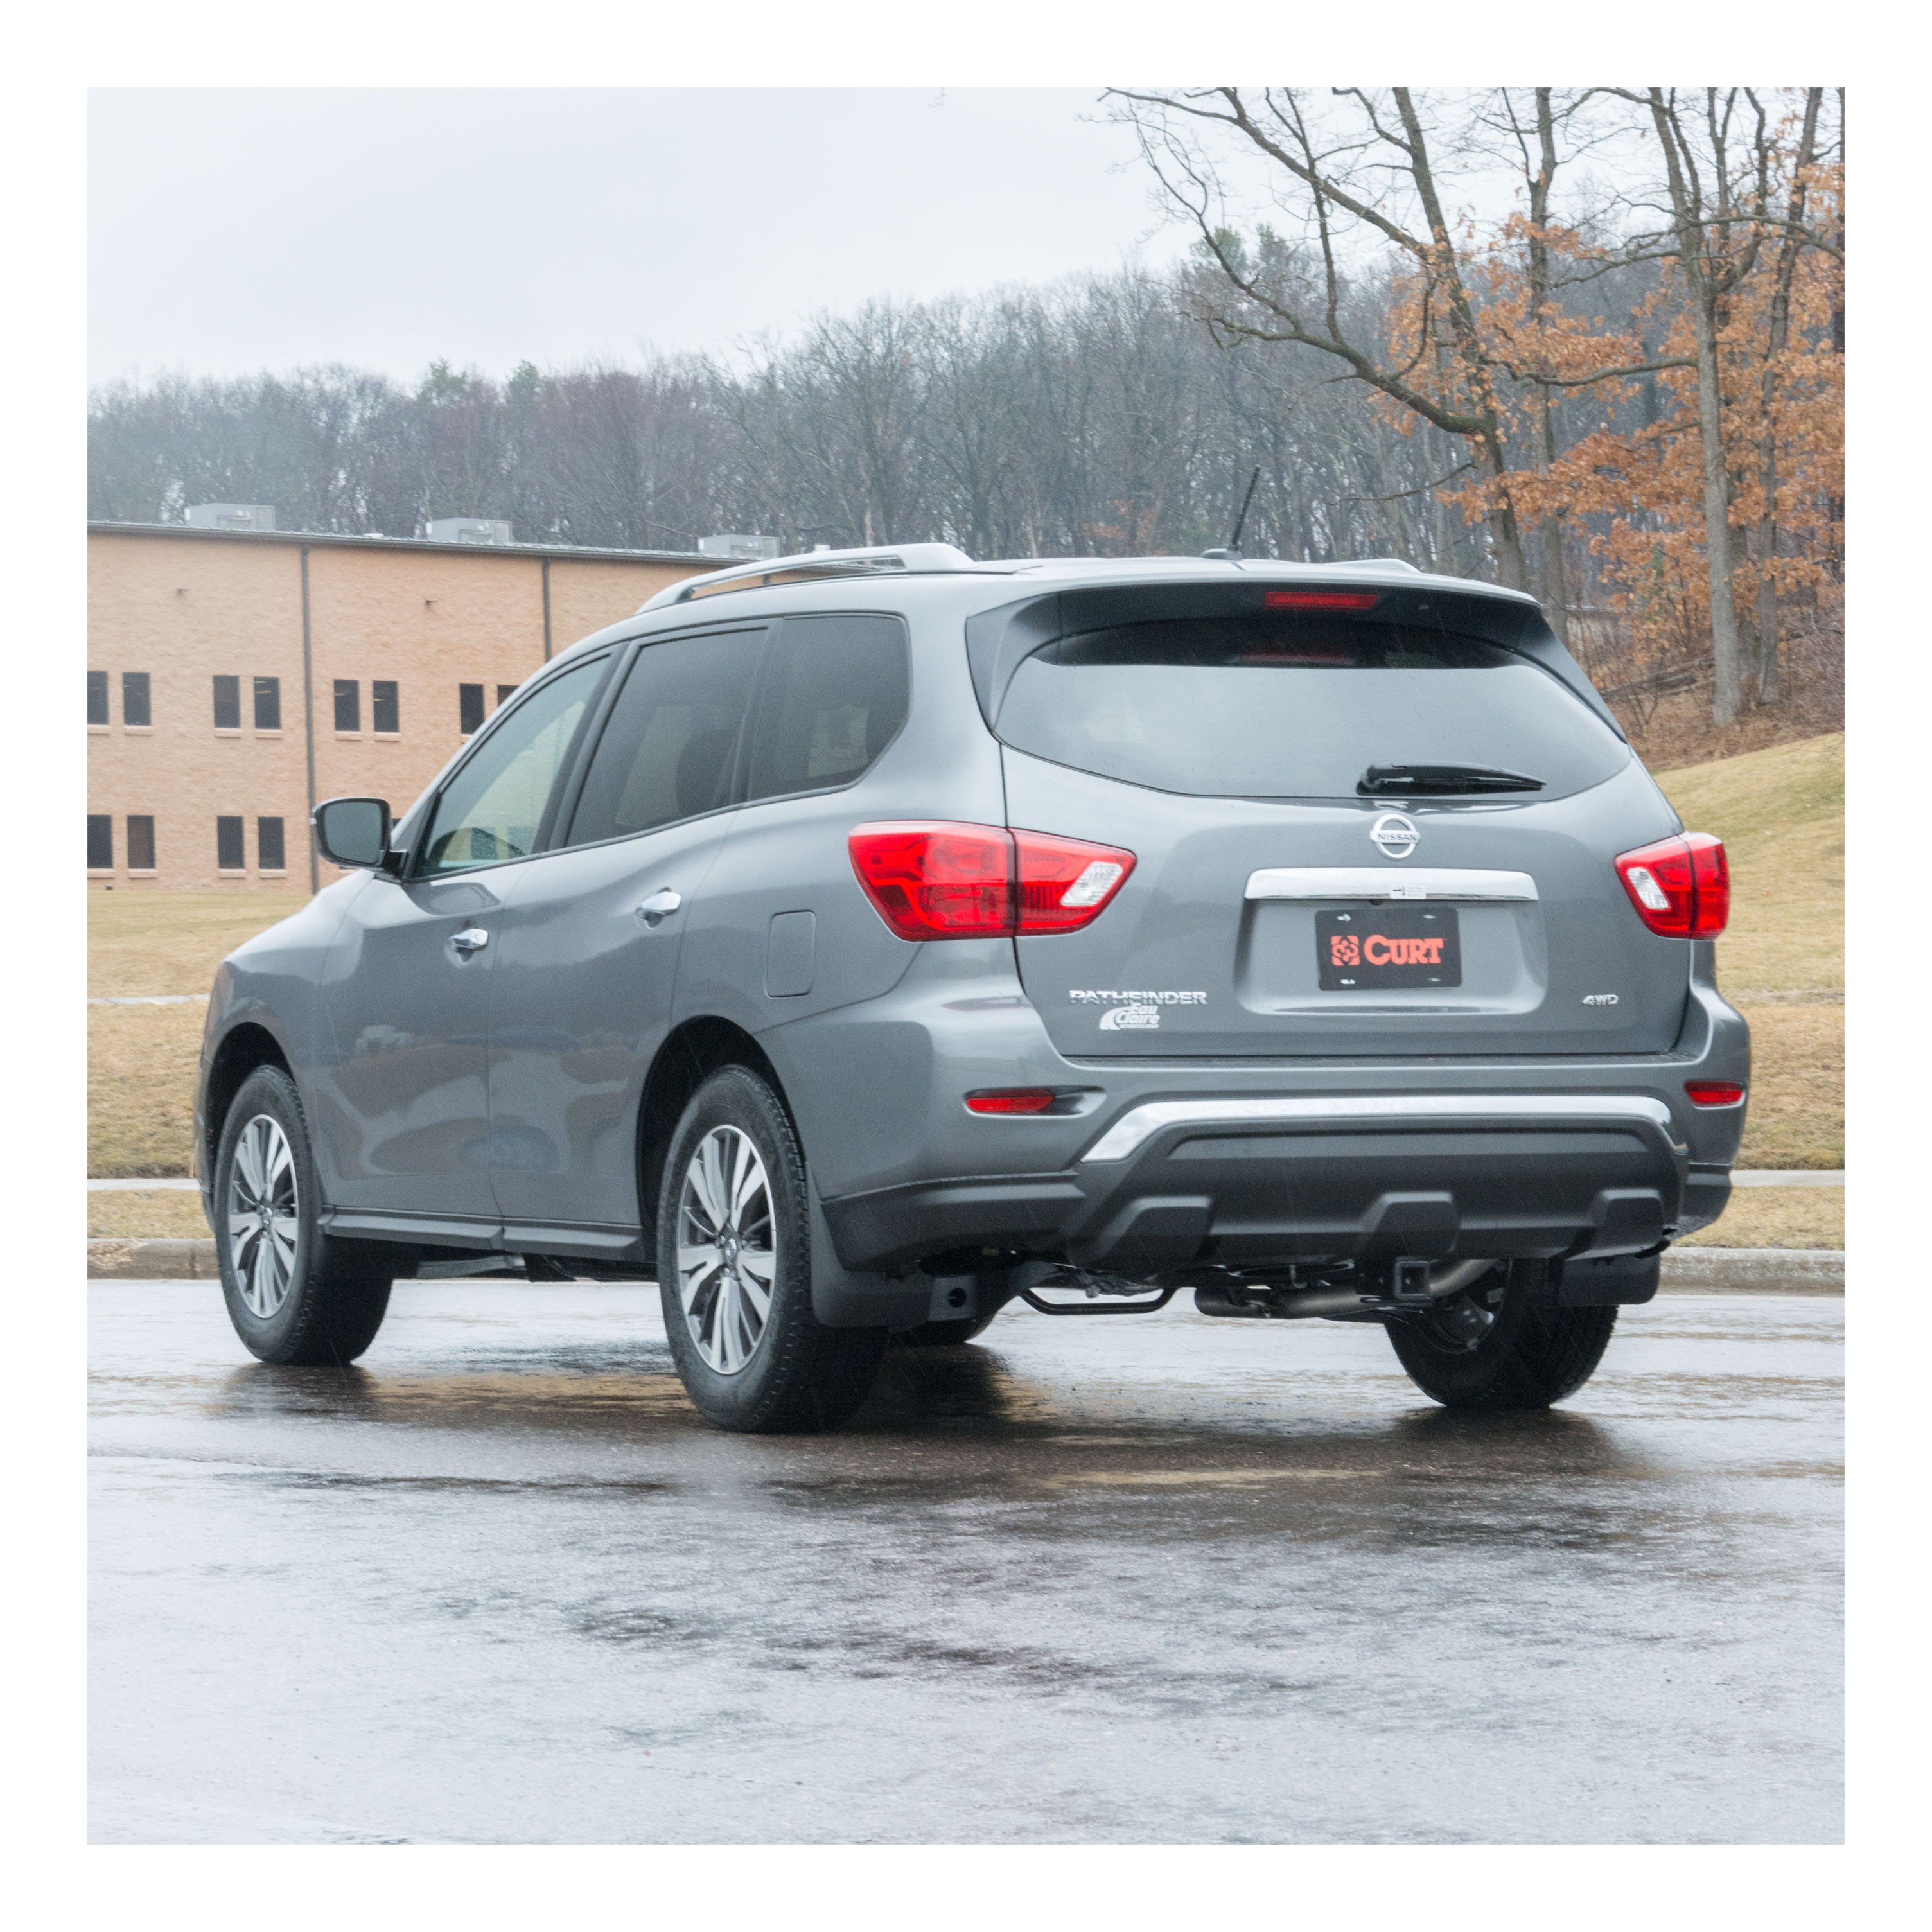
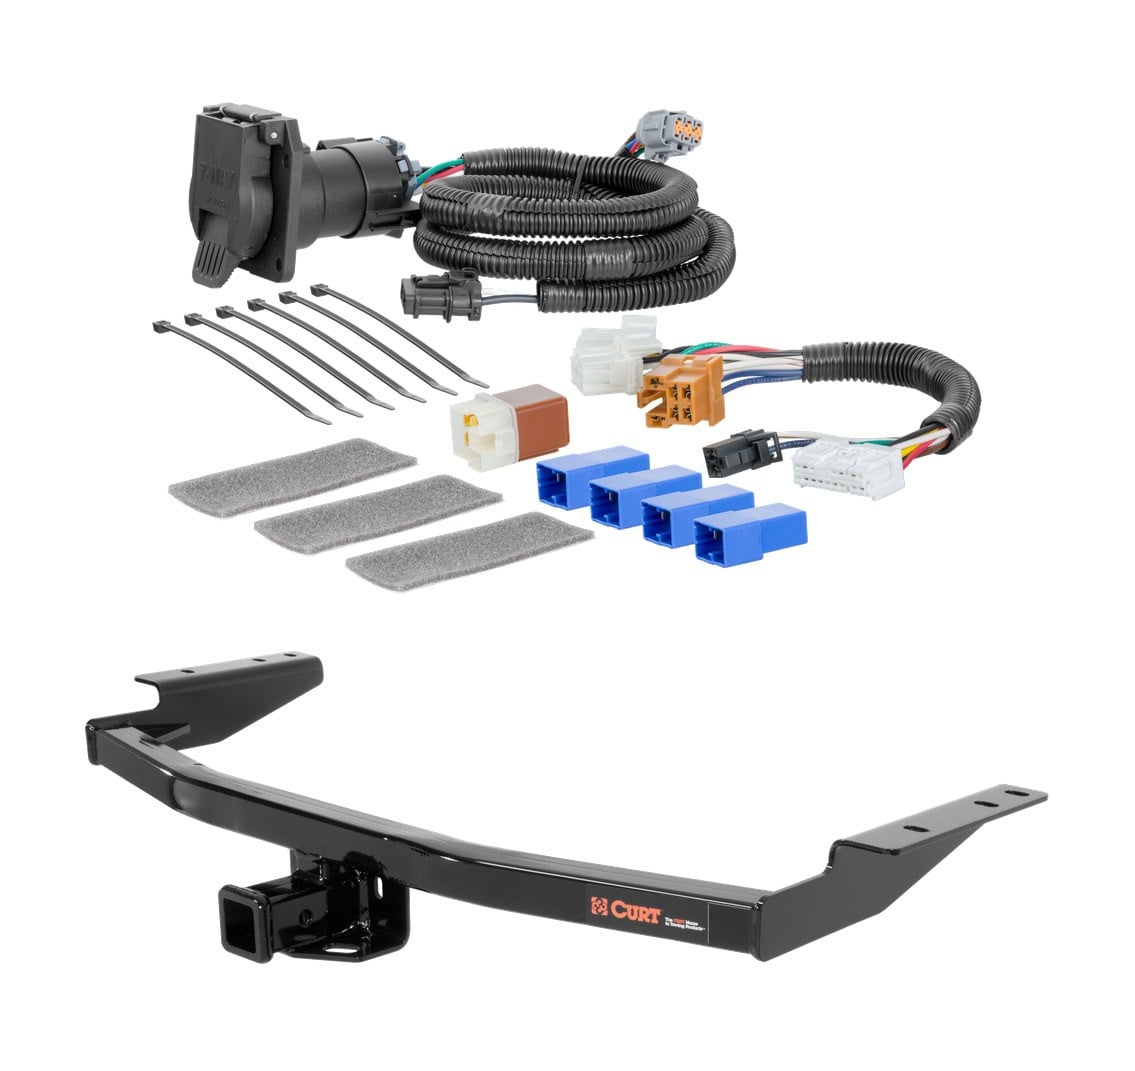
Complete CURT Class 3 2" trailer hitch and 7-way custom wiring kit engineered for the 2017 - 2020 Pathfinder. Vehicle-specific fit, plug-and-play installation, supports trailers with electric brakes, auxiliary 12V power and reverse lights.
This custom kit fits the following vehicles:
All Hardware and Installation Instructions Included!
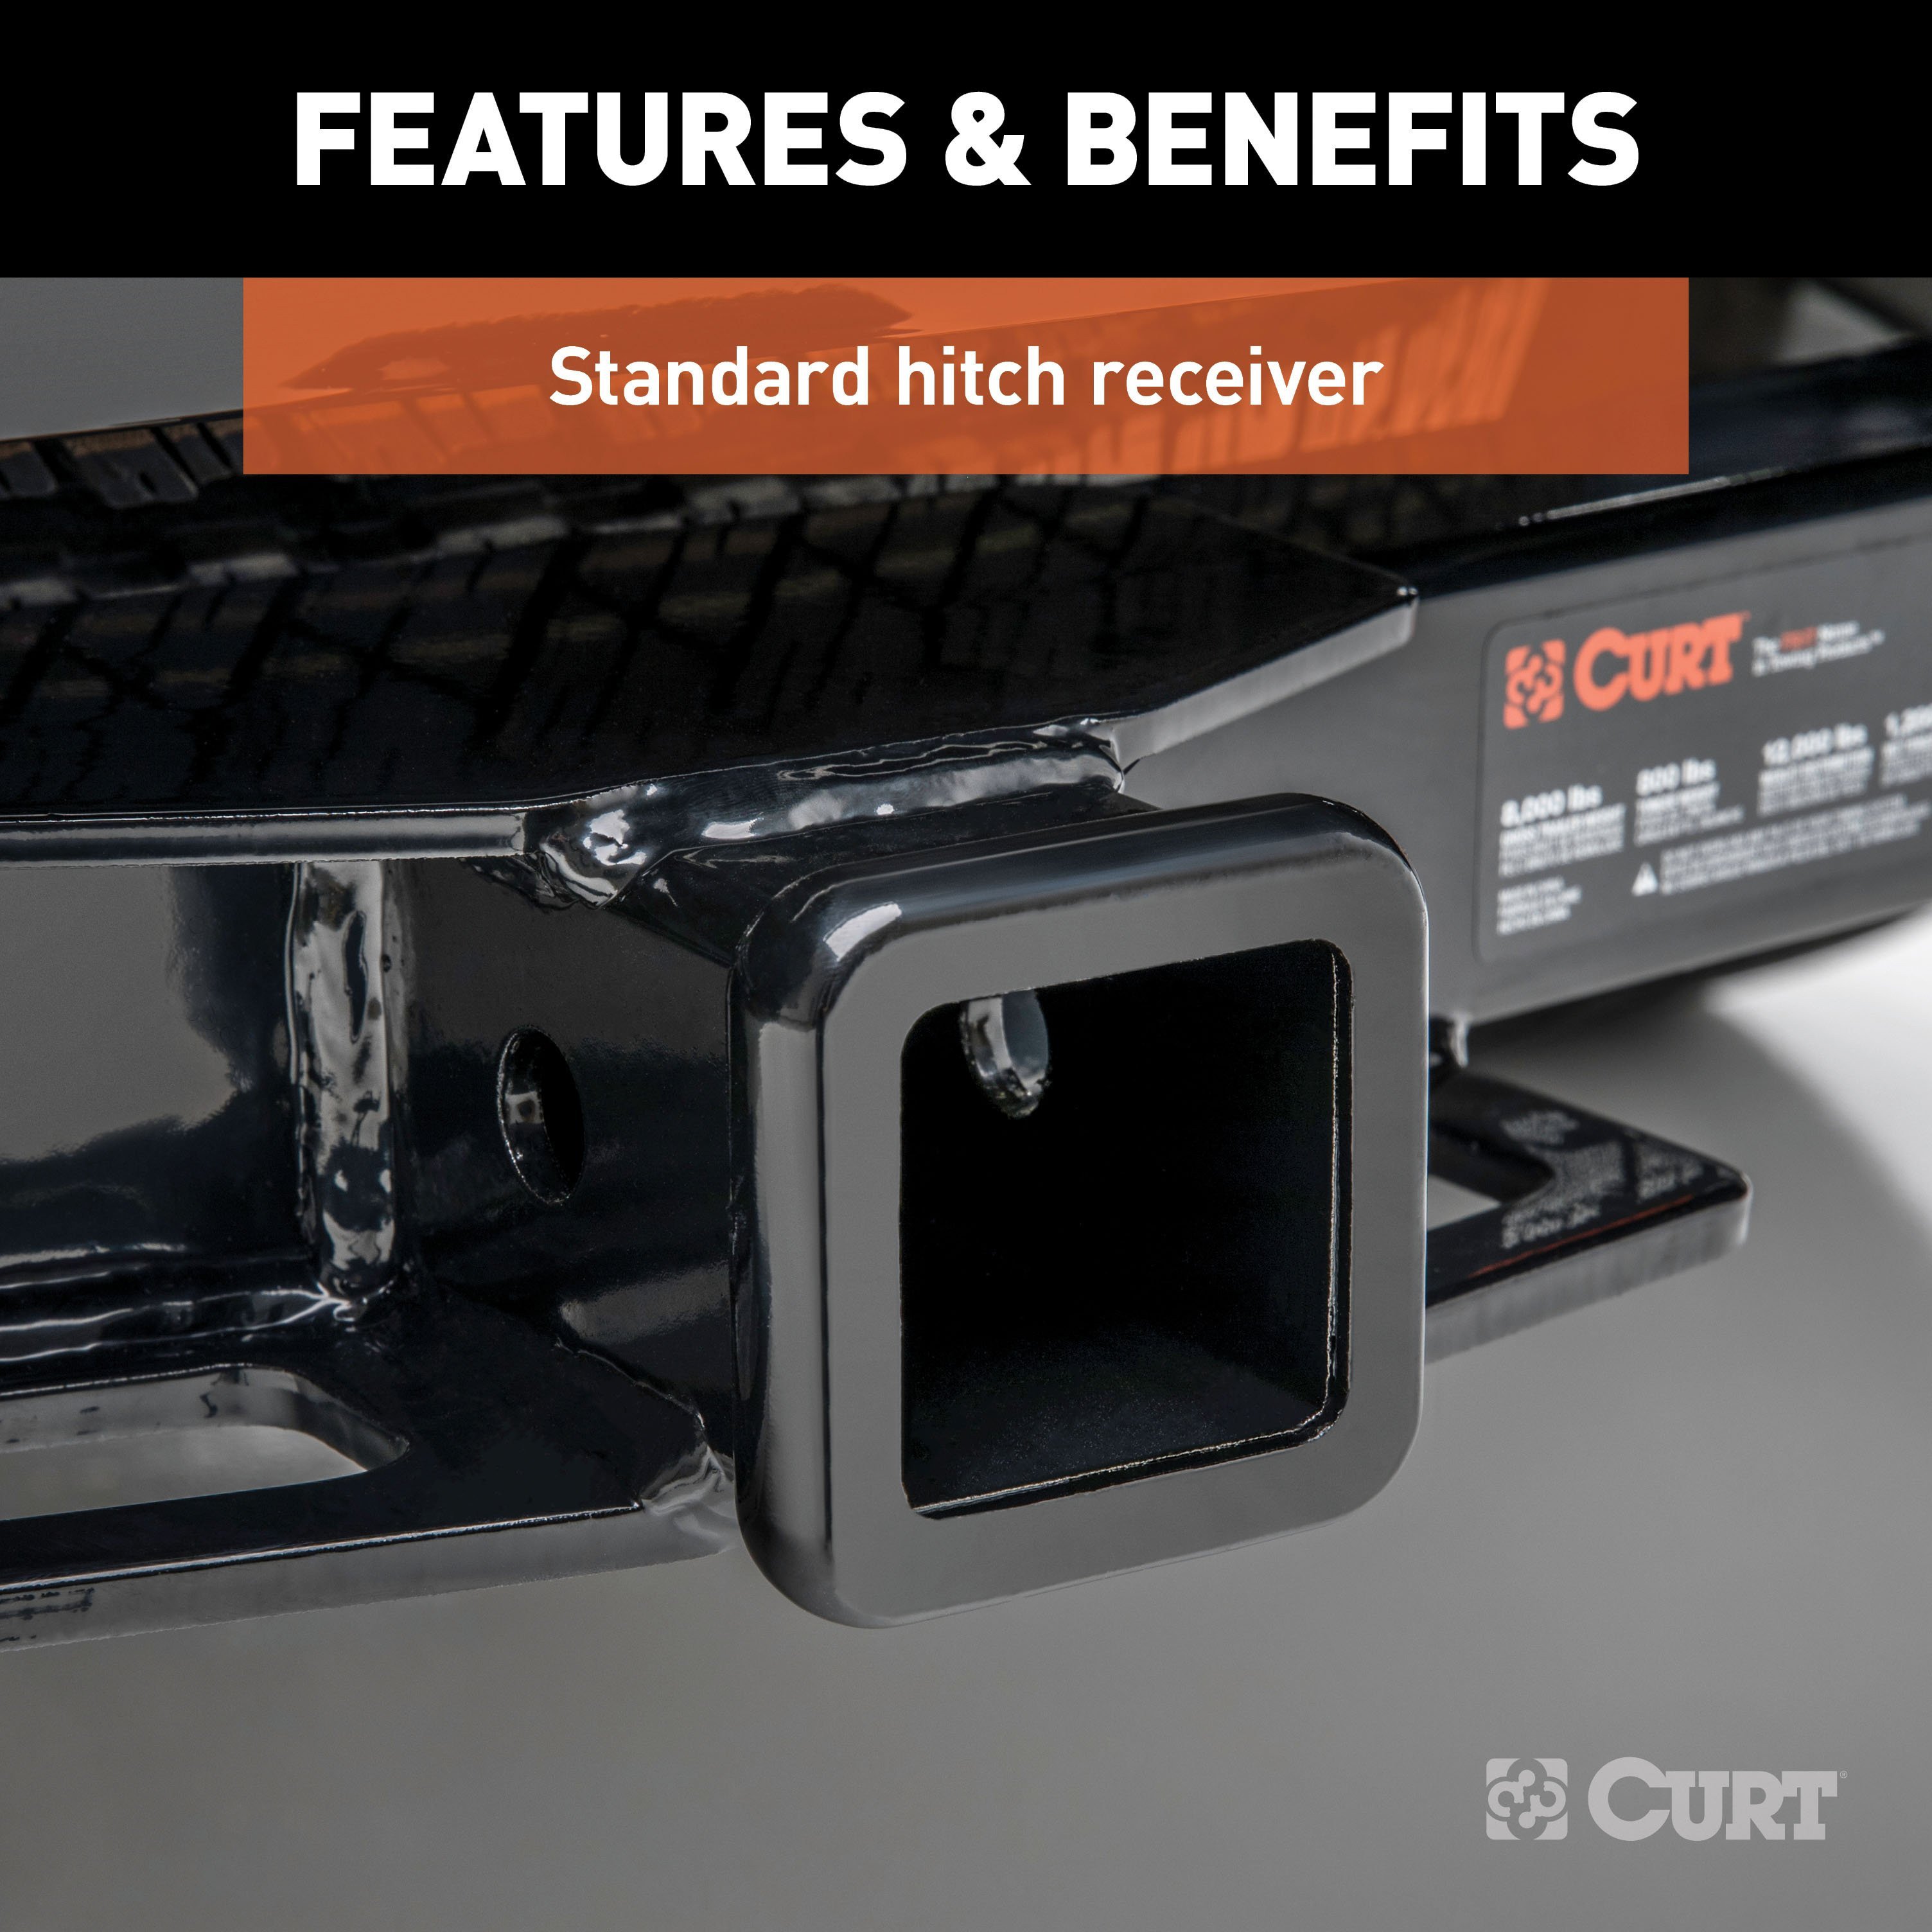
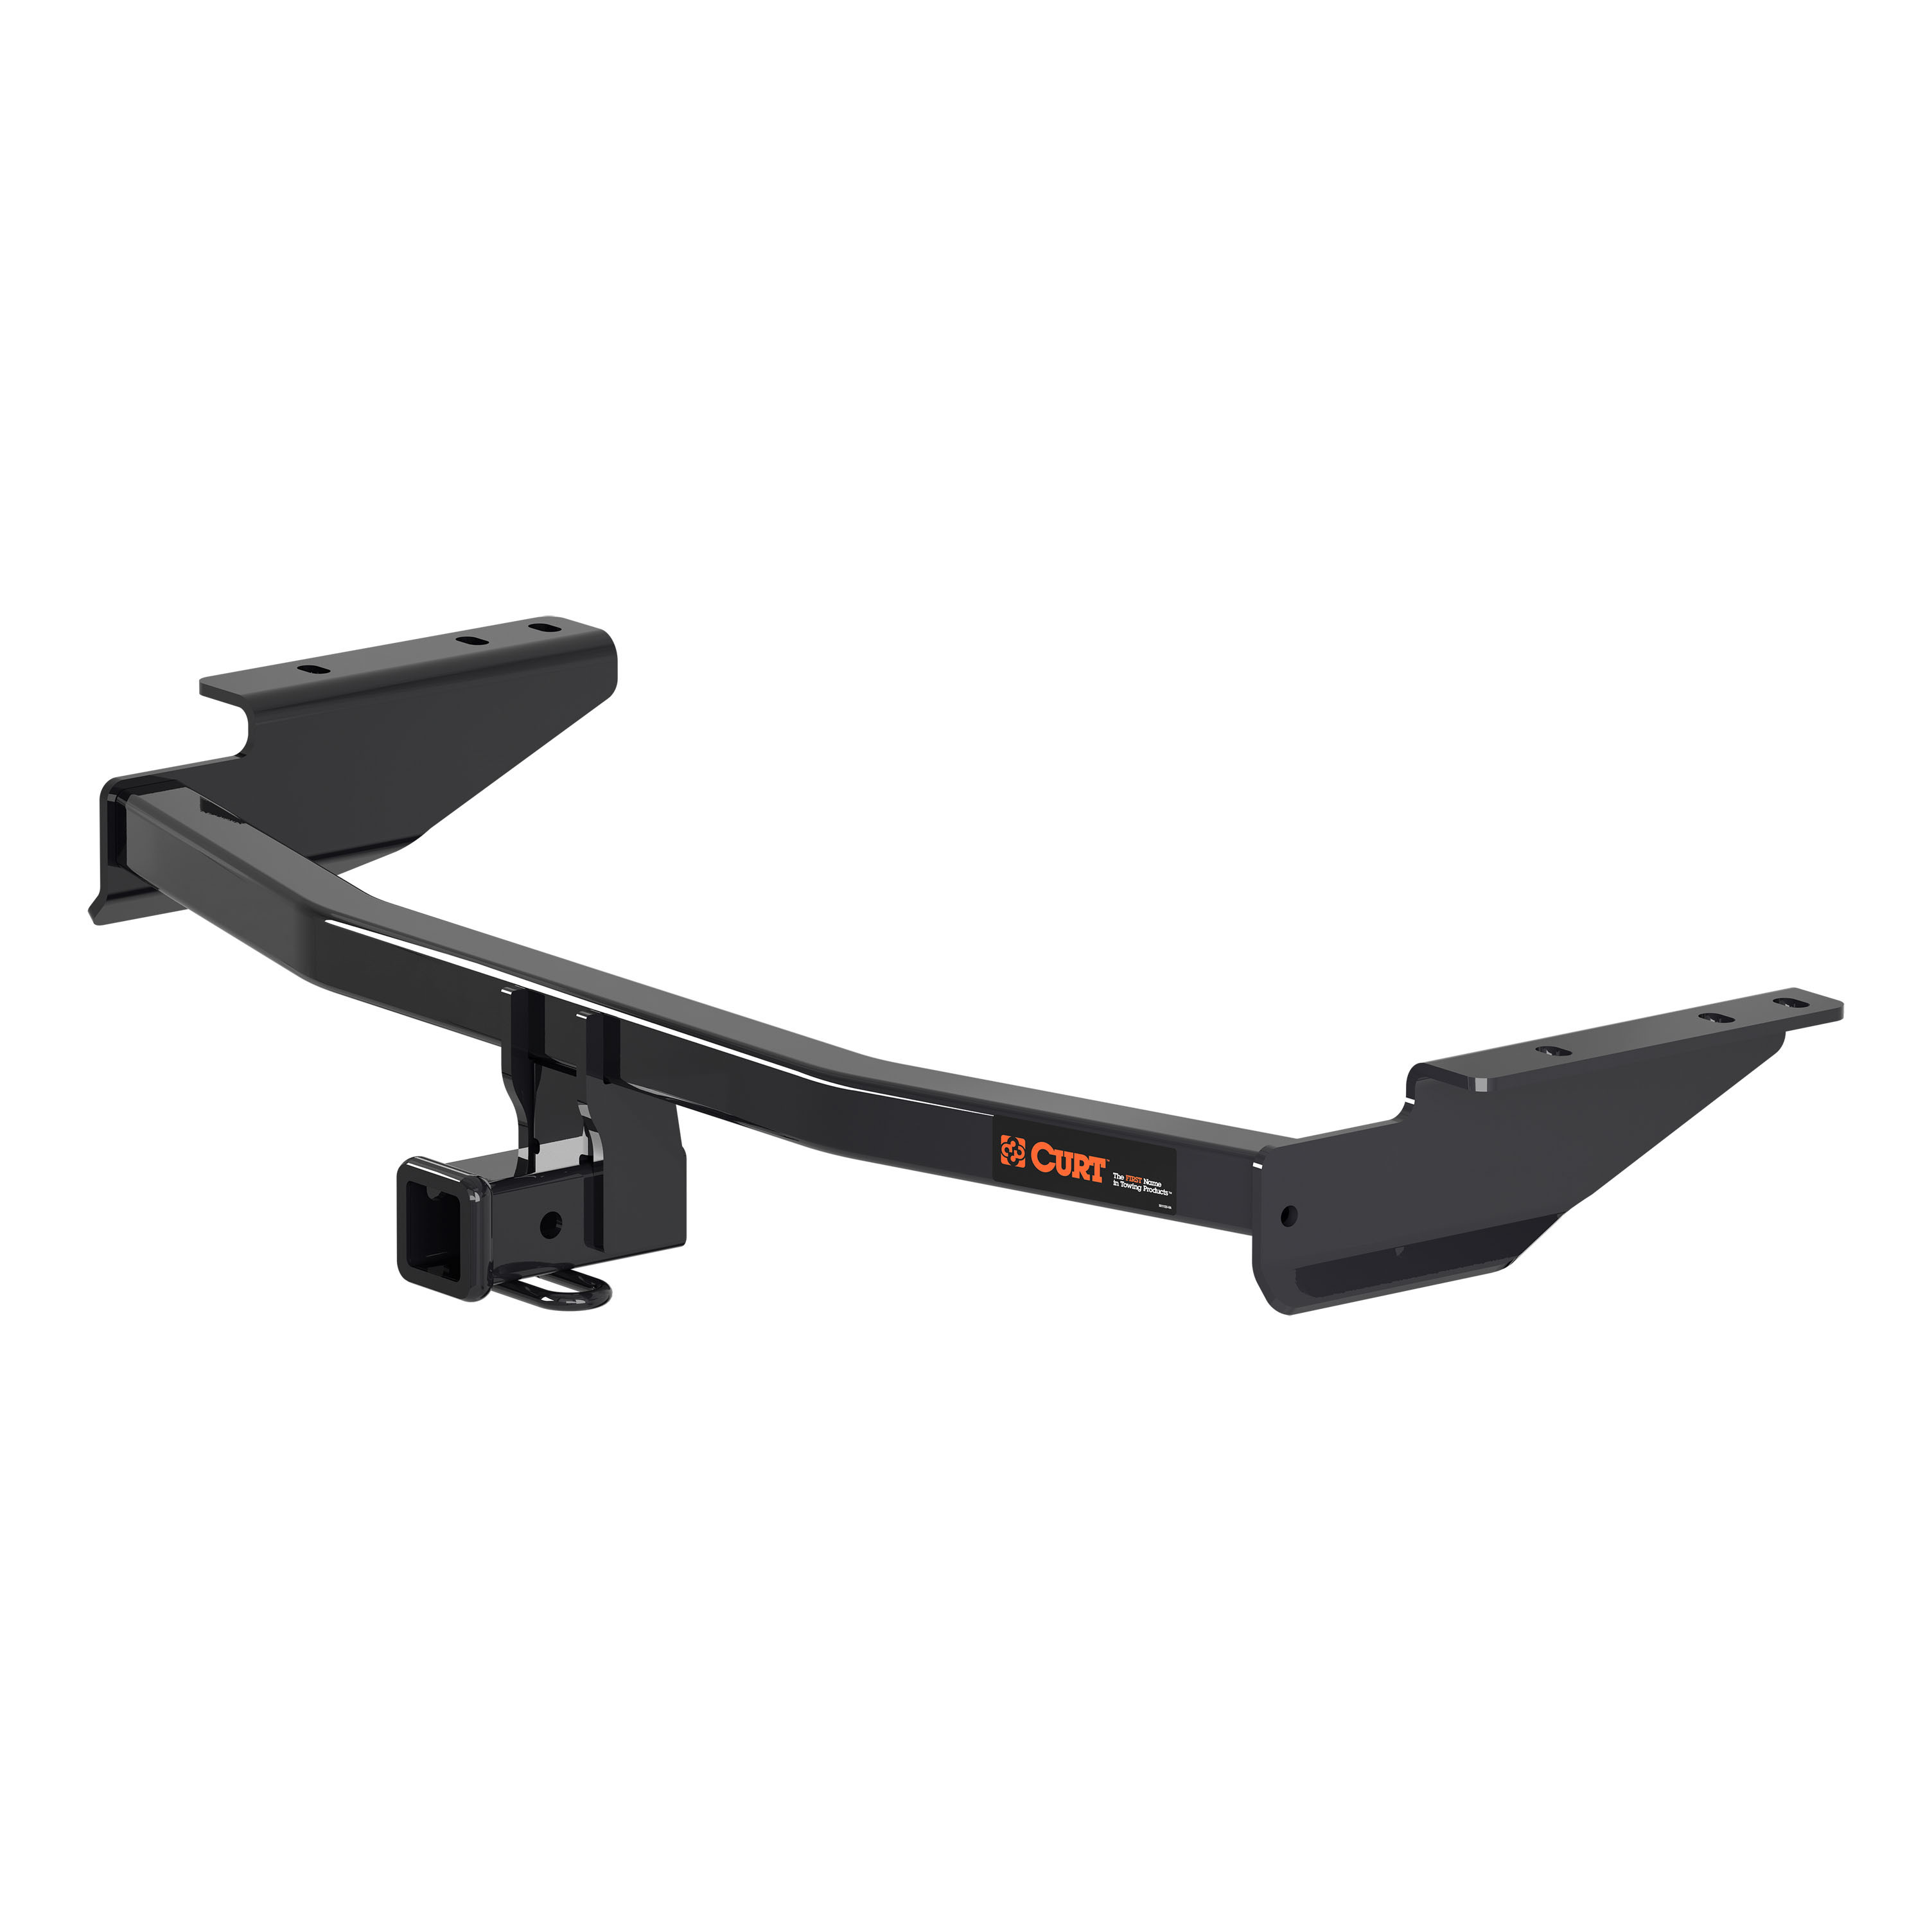
Whatever your task at hand -- whether it's launching that boat before daybreak, setting up your camper before the rush or getting a final load to the dump before close -- CURT class 3 trailer hitches offer the strength needed for serious towing. They make it easy to hitch up and Bring It, offering a vehicle-specific fit and the weight capacity to handle a variety of trailers. Custom class 3 hitches are the most common type of receiver hitch for pickup trucks and SUVs. Because of their weight range, they are also found on full-size cars, crossovers and minivans. Each custom-fit class 3 hitch package is made for vehicle-specific mounting. This particular kit fits certain years of the Nissan Pathfinder (see application info to verify vehicle compatibility). It provides a weight carrying capacity of 6,000 lbs. GTW and 900 lbs. TW. It is also compatible with a weight distribution hitch for level towing and a rating of 6,000 lbs. WD and 900 lbs. WDTW. CURT class 3 trailer hitches are typically used to attach and haul utility trailers, boat trailers, campers, snowmobile or ATV haulers and more (NOTE: Never exceed the lowest-rated towing component). Each class 3 hitch has a 2" receiver tube and is tested in accordance with SAE J684 for safety. To ensure that CURT class 3 receiver hitches have what it takes for serious trailering, they are designed using a hands-on approach and are constructed with rugged, high-strength steel and precise welding. We also protect our class 3 hitches in a co-cured finish of liquid A-coat and black powder coat for superior resistance to rust, chipping and UV damage.
CURT custom wiring connectors and harnesses are the easiest way to outfit your vehicle with a trailer wiring connection for towing. Each one is custom-fitted to work with a specific make and model. This particular 7-way RV blade socket is designed to be a custom wiring option for certain years of the Nissan Pathfinder and Infiniti QX60 (see application info to verify fitment). It provides a universal trailer connection for the tail lights, brake lights, reverse lights, turn signals, electronic trailer brakes and auxiliary power. 7prong taillight wiring can be used as a replacement or new wiring and is typically used for towing fifth wheel and gooseneck trailers. This 7 way female outlet comes with all necessary hardware to establish a solid connection, as well as a dust cover to keep the connector socket clean when not in use. All CURT custom wiring connectors are made vehicle-specific for the easiest possible installation and the best fit. Some automotive manufacturers install a special socket on the vehicle to be used for vehicle-to-trailer wiring. Although this factory tow package socket is not equipped on every vehicle, a CURT custom wiring connector (also called a T-connector) utilizes the socket for simple, stress-free installation. Instead of cutting, splicing and soldering into your vehicle's wiring system, the custom wiring connector uses a single OEM compatible plug and instantly provides a standard vehicle-to-trailer hitch wiring connection. To ensure long-lasting reliability, all CURT custom tconnector wiring is thoroughly tested for optimal functionality.
Experts available to answer your questions
Call 888-634-9494One-Year Limited Warranty
The part number is 13309. This hitch is designed for 2017-present Nissan Pathfinder SUVs.
Yes, part number 13309 is designed for 2017-present Nissan Pathfinder SUVs. Confirm your vehicle year and model match before purchasing.
2017-present models.
As a weight-carrying hitch, the 13309 supports 6,000 lbs trailer weight and 900 lbs tongue weight. As a weight-distribution hitch, it also supports 6,000 lbs trailer weight and 900 lbs tongue weight. Never exceed your vehicle manufacturer's recommended towing capacity.
900 lbs.
The hitch weight is 40 lbs.
Required tools are: ratchet, marker, masking tape, 12mm socket, 18mm socket, 19mm socket, 21mm socket, tape measure, torque wrench, rotary tool, and safety glasses. The manual notes that using proper tools will greatly improve the quality of the install and reduce the time required.
Yes. All M12 fasteners must be torqued to 86 ft-lbs, which requires a torque wrench.
The hitch includes 6 M12 x 1.25 x 30mm hex cap screws (part number 10-10419) and 6 1/2" conical toothed washers (part number 30-00149). These fasteners secure the hitch to the existing weldnuts on the frame rails.
Yes. The tow hook must be removed from the driver side frame rail using an 18mm socket to remove 4 bolts. Return the tow hook and fasteners to the vehicle owner after removal.
Yes. The spare tire must be lowered using a tire lug wrench or ratchet with a 21mm socket before installation. It is raised back into position after the hitch is installed.
You do not need to fully remove the fascia, but you must remove the fascia mounting brackets. First remove the plastic clips on the bottom of the fascia, then unbolt the brackets from the bumper using a 12mm socket. Retain the brackets for reinstallation after hitch installation.
No drilling is required. The hitch uses existing weldnuts on the frame rails.
Yes, minor fascia trimming is required. You must trim the center of the vehicle fascia to approximately 3 1/4" wide by 1 3/8" tall. The manual notes that dimensions are approximate and you should confirm fit prior to trimming. A rotary tool is recommended for this task.
The trim area is approximately 3 1/4" wide by 1 3/8" tall, centered on the vehicle fascia. The manual notes that dimensions are approximate and you should confirm fit prior to trimming.
All M12 fasteners must be torqued to 86 ft-lbs. These are M12 x 1.25 x 30mm hex cap screws secured with 1/2" conical toothed washers into the existing weldnuts on the frame rails.
86 ft-lbs for all M12 fasteners.
Two people may be required to ease installation. The manual recommends reading all instructions thoroughly before beginning and notes that the installation difficulty level is moderate.
Professional installation time is approximately 80 minutes. Novice (DIY) installation time is approximately 31 minutes. Actual time may vary based on experience and familiarity with the vehicle.
1. Remove the tow hook from the driver side frame rail using an 18mm socket (4 bolts). 2. Lower the spare tire using a 21mm socket. 3. Remove fascia mounting brackets by removing plastic clips and unbolting with a 12mm socket. 4. Mark and trim the fascia approximately 3 1/4" x 1 3/8" at the center. 5. Raise the hitch into position and secure with M12 x 1.25 x 30mm hex bolts and 1/2" conical toothed washers using a 19mm socket; torque to 86 ft-lbs. 6. Reinstall fascia mounting brackets. 7. Raise the spare tire back into position.
Safety glasses must be worn at all times while installing this product. If you are hesitant to undertake this task on your own, contact an authorized CURT installer for additional assistance. Never exceed your vehicle manufacturer's recommended towing capacity when using the hitch.
Safety glasses must be worn at all times during installation.
After installation, periodically check that all fasteners are tight and all structural components are sound. The manual recommends regular inspection to ensure the hitch remains in proper working condition.
The manual recommends periodically checking the receiver hitch to ensure all fasteners are tight and all structural components are sound. No specific interval is provided; inspect regularly based on usage frequency and towing conditions.
CURT Manufacturing warrants this product to be free of defects in material and/or workmanship at the time of retail purchase by the original purchaser. If the product is found to be defective, CURT may repair or replace the product at their option when returned prepaid with proof of purchase. Alteration to, misuse of, or improper installation voids the warranty. CURT's liability is limited to repair or replacement of defective products and excludes liability for incidental or consequential loss or damage.
Yes. This product complies with safety specifications and requirements for connecting devices and towing systems of the state of New York, V.E.S.C. Regulation V-5 and SAE J684.
Yes, the Curt 56357 is designed for the Infiniti QX60. It is also compatible with the Nissan Pathfinder. Both vehicles are in the SUVs, Mini & Full-Sized Vans category. The wiring location varies by model: on the QX60 and Pathfinder, the connector is located either behind the driver side rear access panel (S3) or behind the driver side rear bumper (S5), depending on your specific vehicle configuration.
Yes, the Curt 56357 custom wiring connector is compatible with the Nissan Pathfinder. The wiring location is either behind the driver side rear access panel (S3) or behind the driver side rear bumper (S5), depending on your vehicle's configuration.
The Curt 56357 has the following amperage ratings: Stop/Turn Light – 10.0 amps total; Taillights – 10.0 amps total; Backup – 10.0 amps total; Trailer Brakes (3 Axles/6 Brakes) – 20.0 amps total. Do not exceed the product rating or your tow vehicle's lamp load rating, whichever is lower. Exceeding the rating can cause loss of warranty, overheating and potential fire.
You will need: 10mm socket, ratchet, panel trim removal tool, Phillips screwdriver, wire stripper, and cutting tool.
Yes. Step 1 of the installation requires you to locate the vehicle battery on the driver side under the hood and disconnect the negative battery terminal before proceeding with any other steps.
The kit includes two blue relays and one brown relay. These relays must be inserted into the relay harness during installation. You must use only the relays provided in the kit; using other relays can cause the harness to malfunction or damage the vehicle and trailer.
The relays are inserted in two locations. First, during Step 7, insert the two blue relays and one brown relay into the relay harness that is part of the custom wiring kit. Later, during Step 13, open the fuse cover on the relay box located behind the driver-side headlight under the hood and insert the two blue relays into the open cavities. Ensure all relays are fully inserted with locking tabs in place.
Access depends on your vehicle's configuration. Open the vehicle trunk, fold down the rear seats, and remove the floor push fasteners. Lift the floor cargo storage lid to access the three 10mm bolts securing the cargo storage unit. If equipped with a rear subwoofer, carefully remove it by unscrewing the retainer bolt at the top and disconnecting the power wire. Remove the center cover and scuff panel, then use the trim panel removal tool to remove push fasteners and lift out the cargo storage unit. Remove the two 10mm bolts from cargo tie downs and use the trim panel removal tool to remove push fasteners from the side trim panel to access the vehicle wiring connectors.
Before inserting the custom wiring connector, ensure all connector surfaces are clean and free of dirt. Remove any protective covers from the vehicle connectors. The connectors on the custom wiring connector will be similar to those on the vehicle, making them easy to identify and match.
The custom wiring connector is fully inserted when the locking tabs are in place. The manual specifies this requirement in multiple steps: when inserting relays into the relay harness (Step 7), when inserting the custom wiring connector into vehicle wiring connectors (Steps 9 and 11), and when inserting relays into the relay box (Step 13). Ensure locking tabs are fully engaged before proceeding.
Do not exceed the product rating or your tow vehicle's lamp load rating, whichever is lower. The product ratings are: Stop/Turn Light – 10.0 amps total; Taillights – 10.0 amps total; Backup – 10.0 amps total; Trailer Brakes (3 Axles/6 Brakes) – 20.0 amps total. Exceeding these limits can cause loss of warranty, overheating and potential fire. Check your vehicle owner's manual or contact the vehicle manufacturer for your tow vehicle's lamp load rating.
After completing all installation steps and reconnecting the negative battery terminal, test for proper function by using a test light or by connecting a properly wired trailer. All steps must be followed to ensure the wiring connector functions properly before testing.
If your vehicle has a rear subwoofer, you must carefully remove it before accessing the cargo storage unit. Unscrew the retainer bolt located at the top of the speaker. Locate the power wire connected to the speaker and carefully disconnect it, taking care not to damage the locking tabs. Set the subwoofer aside. You can reinstall it after completing the wiring connector installation.
Step 14 is the final step: reinstall all items removed during installation (cargo storage unit, side trim panel, scuff panel, rear seats, and subwoofer if equipped), reinstall the fuse cover and close the hood, and reconnect the negative battery terminal.
Yes, the Curt 56357 is designed for both the Infiniti QX60 and Nissan Pathfinder. The wiring location is either behind the driver side rear access panel (S3) or behind the driver side rear bumper (S5), depending on your vehicle configuration.
Stop/Turn Light: 10.0 amps; Taillights: 10.0 amps; Backup: 10.0 amps; Trailer Brakes (3 Axles/6 Brakes): 20.0 amps. Do not exceed the product rating or your vehicle's lamp load rating, whichever is lower.
The kit includes two blue relays and one brown relay. You must use only these relays; other relays can damage the harness, vehicle and trailer.
On Sale Today
Original price was $476.90. Current price is $330.98.You save $145.92 (31%)
Free Shipping
Ships free on all orders


Quick Ship
In stock and ready to ship — order now!
FREE ShippingFREE SHIPPING
Estimated delivery Thu, Sep 17 - Sun, Sep 20
Order before 2 PM EST Monday–Friday for same-day processing
Guaranteed safe & secure checkout
No reviews have been added for this product.