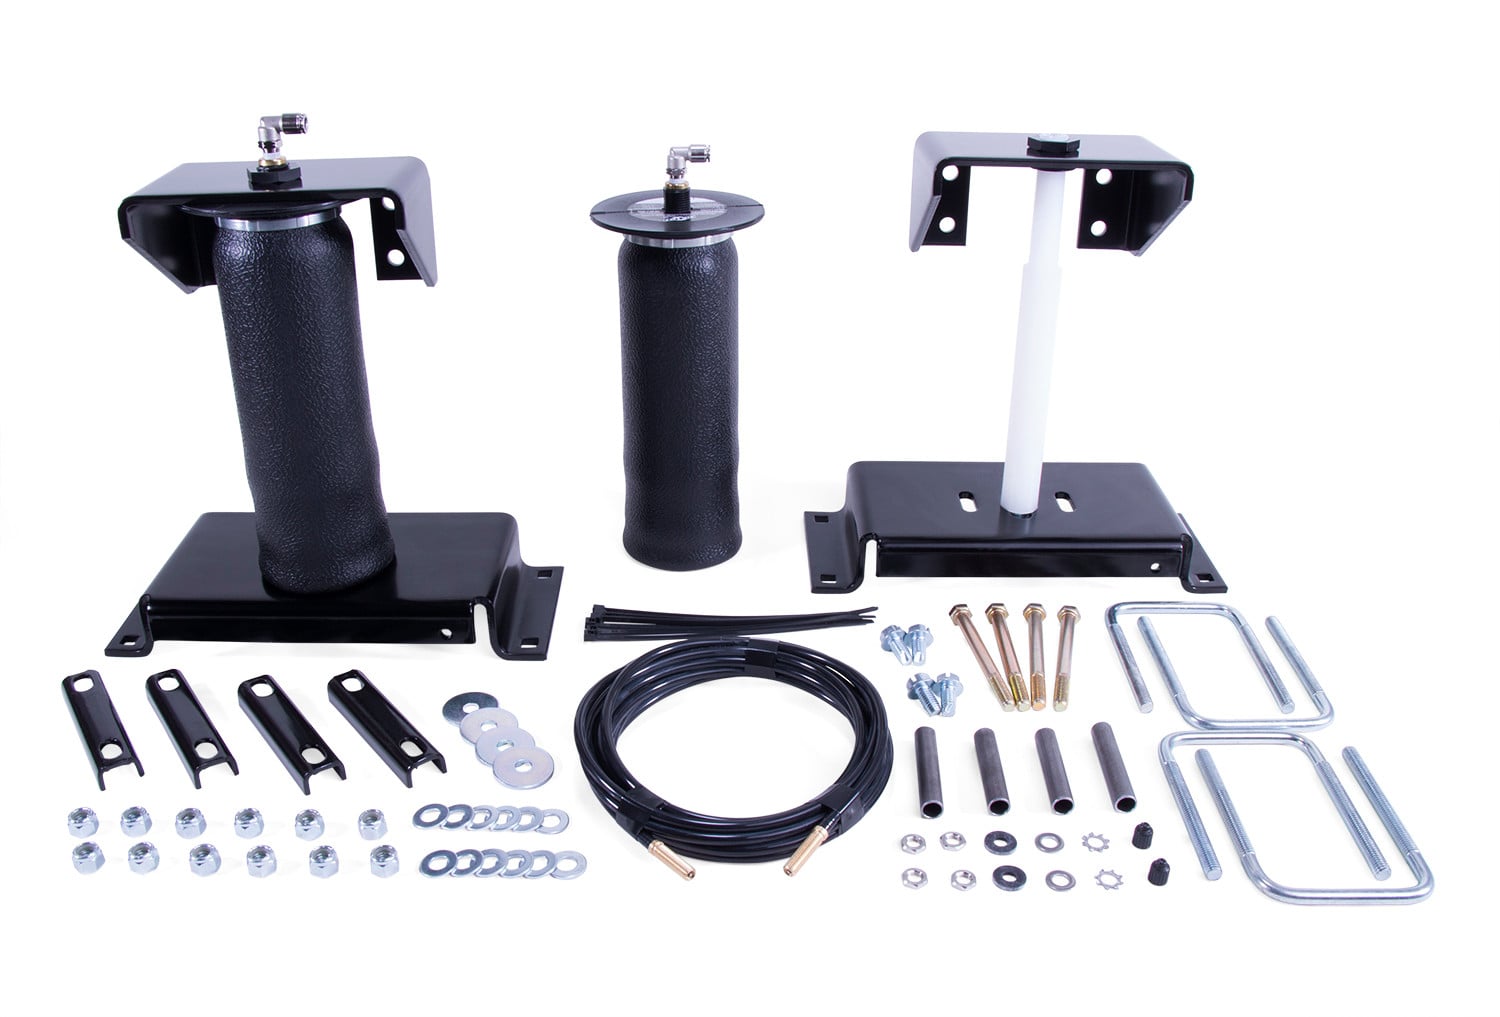
Air Lift RIDE CONTROL KIT 59555Air LiftOriginal price was $590.99. Current price is $428.99.Out of Stock
View productOur in-house experts typically reply within one business day.

Air Lift
Verify Fitment
Select your vehicle to confirm this part fits.

Always the correct part
We know our products
Quality Products
Free Shipping!
Always the correct part
We know our products
Quality Products
Free Shipping!
Air Lift RideControl air helper springs are air-adjustable from 5 to 100 PSI and have up to 2,000 pounds of leveling capacity, right up to the manufacturer's recommended Gross Vehicle Weight Rating.

RideControl provides more safety, stability and ride comfort. The kit fits many popular vehicles with leaf springs, including half-ton and mini pickups, full-size and mini vans, and SUVs. Both front and rear applications are available for these vehicles. Each kit includes everything you need, and is easily installed in two hours or less. End caps are made of an ultra-strong nylon composite that is as strong as steel, but weighs less and is corrosion-proof. Air Lift RideControl adjustable air springs work with your existing leaf spring suspension. Just add air when towing or hauling a heavy load, and reduce air pressure when unloaded, the air bags are fully adjustable for a great ride. Air Lift air springs eliminate sag, sway, and bottoming out. Each kit includes everything you need, and is easily installed in two hours or less. End caps are made of an ultra-strong nylon composite that is as strong as steel, but weighs less than steel and is also corrosion-proof. These rugged, durable components mean that you get reliable service from the springs for the lifetime of the vehicle. Air Lift RideControl air helper springs are air-adjustable from 5 to 100 PSI and have up to 2,000 pounds of leveling capacity, right up to the manufacturer's recommended Gross Vehicle Weight Rating. They also come with a limited lifetime warranty and an exclusive 60-day ride satisfaction guarantee.
Air Lift Company has developed dependable air spring suspension products since our inception in 1949. Our original product, a rubber air spring inserted into a car’s factory coil spring, was created and patented in 1950. We’ve come a long way since 1949 and are proud to be a dedicated suspension specialist company.
Today, Air Lift load support products are sold worldwide and are engineered to fit over 540 vehicles. Our extensive product line offers air helper springs for trucks, RVs, SUVs, CUVs, and vans, as well as the most technologically advanced on-board air compressor systems for on-the-go air spring control.
Air Lift leads the industry in no-drill applications – kits that bolt onto your vehicle’s frame, speeding the installation process. Our teams work constantly to bring innovative products to you and upgrade existing products with the latest technology.
All of our efforts are spent ensuring your safety and comfort by designing, engineering, and manufacturing the highest quality suspension products. We are a family-owned business based in Lansing, Michigan, and make your family and cargo’s safety our top priority.
Experts available to answer your questions
Call 888-634-9494Limited Lifetime
3 compatible vehicles
| Year | Make & Model | Notes |
|---|---|---|
| 2005 - 2006 | Chrysler Town & Country | Does not fit all wheel drive models |
| 2005 - 2006 | Dodge Caravan | Does not fit all wheel drive models |
| 2005 - 2006 | Dodge Grand Caravan | Does not fit all wheel drive models |
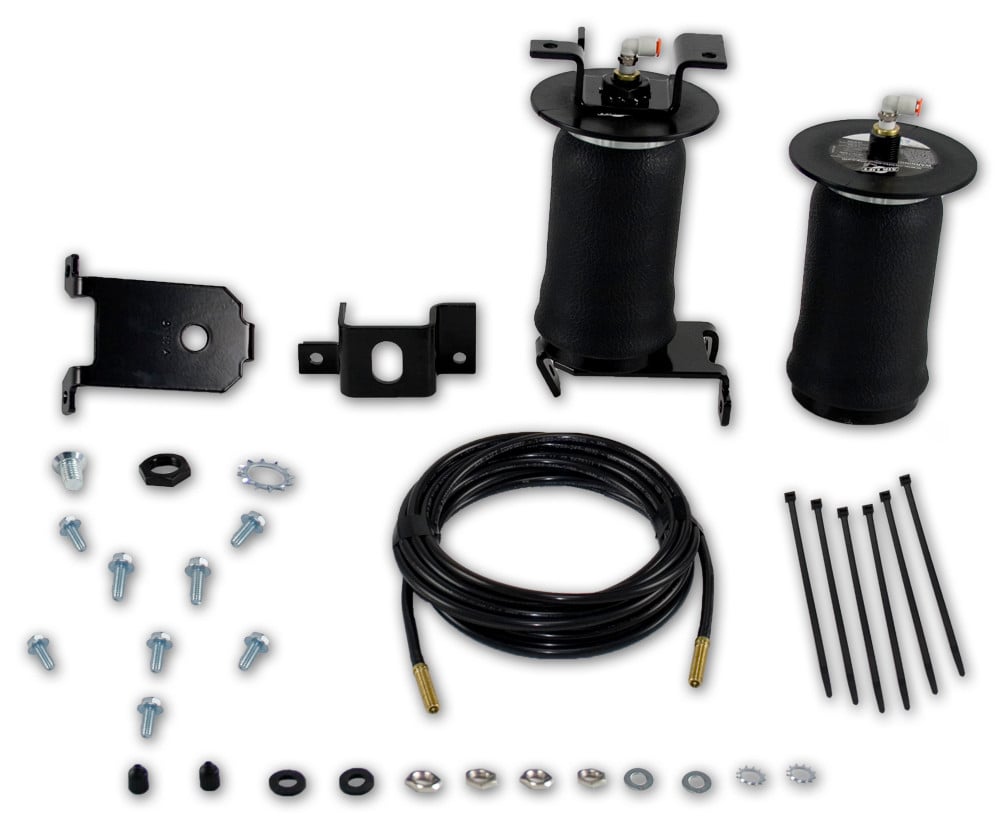
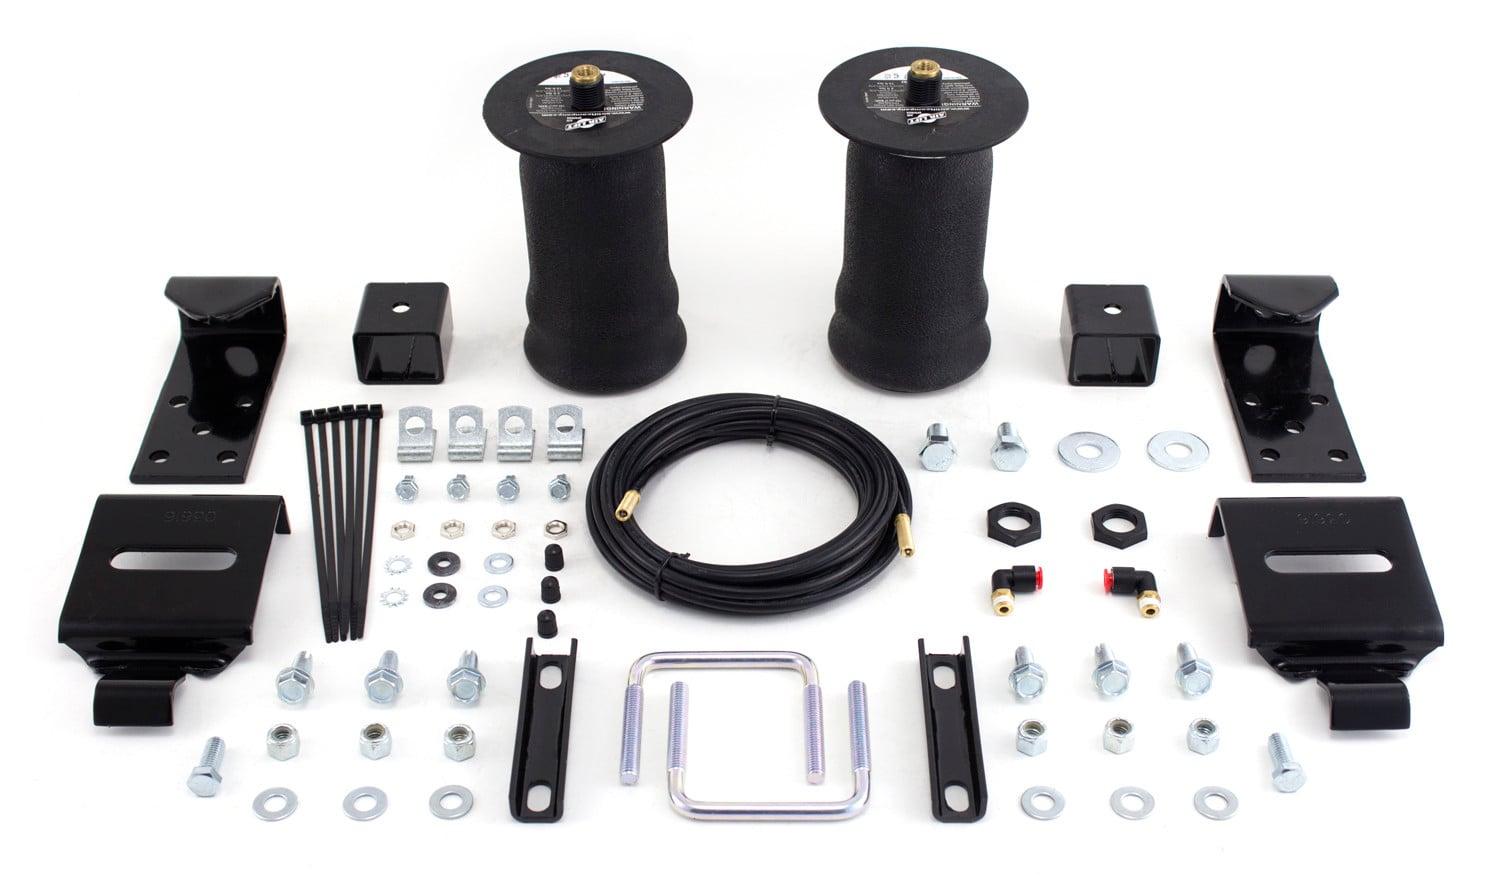
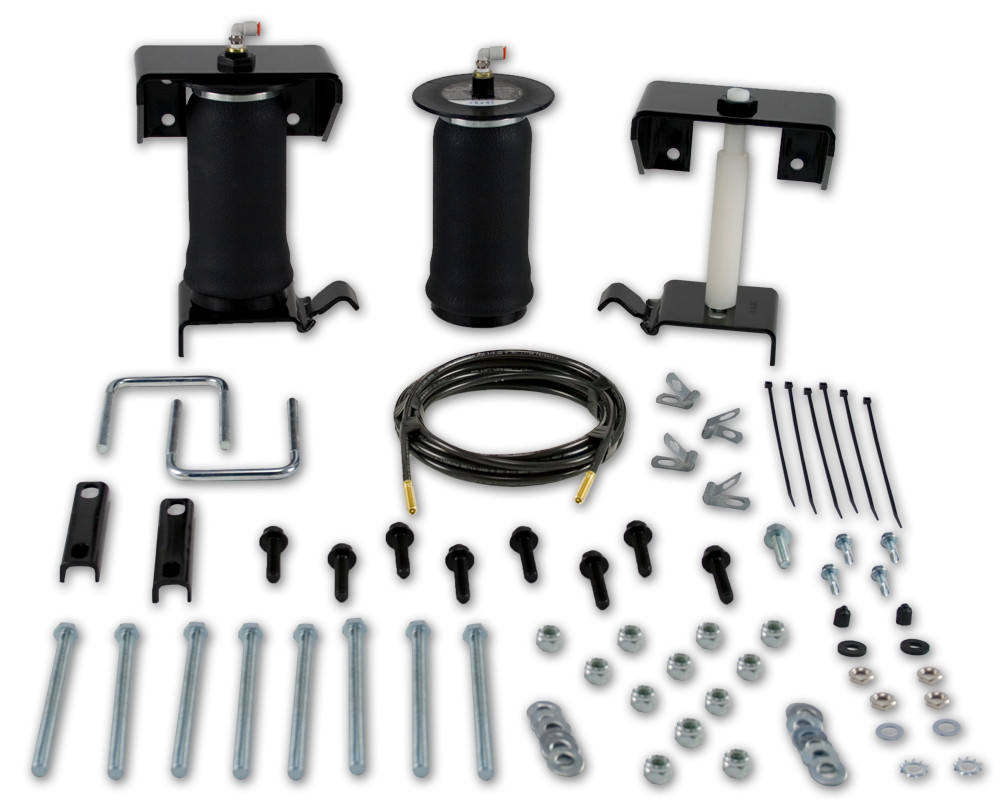
The kit includes 2 air sleeves, 2 upper brackets, 2 lower brackets, 2 elbow fittings, 2 nylon nuts, 2 star washers, 2 ½" flat head screws, 4 5/16" self-tapping screws, 4 5/16" long self-tapping screws, 16 feet of air line assembly, 6 tie straps, 2 valve caps, 2 5/16" flat washers, 2 rubber washers, 2 small star washers, and 4 5/16" hex nuts. All fasteners and fittings needed for installation are supplied.
The manual states that any load assist product could affect brake performance on vehicles with a rear brake proportioning valve. Air Lift recommends checking with your vehicle dealer before installing this kit if your vehicle has a rear brake proportioning valve. If your vehicle does not have a rear brake proportioning valve or is equipped with an anti-lock brake system, installation will have no effect on brake system performance.
Required tools include: 1/2" and 9/16" open-end or box wrenches, crescent wrench, ratchet with 9/16" and 1/2" deep well sockets, very sharp 5/16" drill bits, heavy-duty drill, torque wrench, hose cutter (or razor blade or sharp knife), hoist or floor jacks, safety stands, safety glasses, and air compressor or compressed air source. A spray bottle with dish soap and water solution is also needed for leak testing.
Jack up the vehicle and support the axle with jack stands. Then remove the jounce bumper and remove the bolt before the ABS/brake bracket, moving the bracket aside.
Install the elbow fitting (D) to the top of the air spring (A) finger tight plus 1½ turns. Be careful to only tighten on the metal hex nut only, not on the plastic or rubber components.
The two tabs on the lower bracket and the wide leg on the upper bracket should face forward. The narrow leg on the upper bracket points rearward. The upper brackets are driver-side and passenger-side specific. Index the upper bracket outboard with the threaded post facing inward.
Tighten the flat head screw (G) that attaches the lower bracket (C) to the assembly to 15 ft-lbs.
Install the 3/4" star washer (F) and nylon nut (E) onto the threaded post and tighten finger tight only at this stage. The nylon nut will be tightened to its final specification (4 ft-lbs) later after the assembly is aligned and the hose is installed.
Drill two ¼" holes where the upper bracket will mount to the frame rail. Use the bracket as a template to mark the hole locations, then center punch and drill the holes. The assembly is then attached with two long 5/16" self-tapping screws.
No. After attaching the upper bracket with the two long 5/16" self-tapping screws, the manual explicitly states: DO NOT OVERTIGHTEN.
Route the hose assembly away from heat sources. Keep at least 6" of clearance between the air line and heat sources such as exhaust pipes, muffler, or catalytic converter. Avoid sharp bends and edges. Use the plastic tie straps (BB) to secure the air line to fixed, non-moving points along the chassis. Tie straps should be tight but must not pinch the air line. Leave at least 2" of slack to allow for any movement that might pull on the air line.
Use a hose cutter (Air Lift P/N 10530), a razor blade, or a sharp knife to cut the air line. A clean, square cut will ensure against leaks. Do not use wire cutters or scissors, as these tools may flatten or crimp the air line, causing it to leak around the O-ring seal inside the elbow fitting.
Popular locations for the inflation valve are the wheel well flanges, license plate recess in bumper, under the gas cap access door, or through the license plate itself. Whatever location is chosen, make sure there is enough clearance around the inflation valves for an air chuck to be applied.
Drill a 5/16" hole to install the inflation valves.
There should be approximately 1/2" of the inflation valve exposed after installation to easily apply a pressure gauge or an air chuck. This allows room for the rubber washer (EE), flat washer (DD), and 5/16" nut (GG) and cap (CC) to be installed.
Insert the air line into the 90° swivel fitting until it bottoms out. Approximately 9/16" of air line should be in the fitting. Leave approximately 12" of extra air line before cutting it off to ensure a proper push-to-connect fit.
Inflate the assembly to 10 ft-lbs (p.s.i.) for alignment. At this pressure, align the assembly by using the slot in the upper air spring mount so the sleeve is vertical and perpendicular to both brackets.
After alignment, center punch and drill two ¼" holes in the forward holes of the lower bracket. Attach the lower bracket with two 5/16" self-tapping screws (the shorter set of screws supplied).
Tighten the nylon nuts on the sleeves to 4 ft-lbs. This is done after the assembly has been aligned and the hose installed.
Inflate the air spring to 30 p.s.i. Spray all connections and the inflation valves with a solution of 1/5 liquid dish soap and 4/5 water. Look for bubbles in the soapy water to spot leaks easily. After testing, deflate the springs to the minimum pressure required to restore normal ride height, but not less than 10 p.s.i.
Yes. A 2 to 4 p.s.i. loss after initial installation is normal. However, check the air pressure again after 24 hours. If the loss is more than 5 p.s.i., retest for leaks.
Check the air pressure weekly. Always maintain normal ride height. Never inflate beyond 100 p.s.i.
The minimum air pressure is 10 p.s.i. and the maximum is 100 p.s.i. However, the air pressure actually needed depends on your load and vehicle GVWR, which may be less than 100 p.s.i. Always maintain normal ride height and do not exceed the maximum load listed in your vehicle owner's manual.
Always add air to springs in small quantities, checking the pressure frequently. Sleeves require less air volume than a tire and inflate quickly.
If it becomes necessary to raise the vehicle by the frame, make sure the system is at minimum pressure (10 p.s.i.) to reduce the tension on the suspension and brake components. Use of on-board leveling systems does not require deflation or disconnection.
Failure to maintain correct minimum pressure (or pressure proportional to load), bottoming out, overextension, or rubbing against another component will void the warranty. Additionally, do not exceed the maximum Gross Vehicle Weight Rating (GVWR) as indicated by the vehicle manufacturer, as this could damage the vehicle and air springs.
When increasing load, always adjust the air pressure to maintain normal ride height. Increase or decrease pressure from the system as necessary to attain normal ride height for optimal ride and handling. Remember that loads carried behind the axle (including tongue loads) require more leveling force (pressure) than those carried directly over the axle.
Yes. If your vehicle is equipped with an anti-lock brake system, installation of the Air Lift MN-605 will have no effect on brake system performance. However, if your vehicle has a rear brake proportioning valve, check with your dealer before installing.
Yes. A heavy-duty drill with very sharp 5/16" drill bits is required. You will drill multiple ¼" holes for bracket mounting and a 5/16" hole for the inflation valve.
Yes. You must drill two ¼" holes for the upper bracket mounting, two ¼" holes for the lower bracket mounting, and one 5/16" hole for the inflation valve. A heavy-duty drill with sharp bits is required.
Tighten the flat head screw on the lower bracket to 15 ft-lbs. After alignment and inflation, tighten the nylon nuts on the sleeves to 4 ft-lbs. A torque wrench is required.
Never inflate beyond 100 p.s.i. However, the actual pressure needed depends on your load and vehicle GVWR, which may be less. Always maintain normal ride height and do not exceed your vehicle's maximum load rating.
Inflate to 30 p.s.i. and spray all connections and inflation valves with a 1/5 dish soap and 4/5 water solution. Look for bubbles. A 2 to 4 p.s.i. loss after 24 hours is normal; more than 5 p.s.i. loss requires retesting.
Check the air pressure weekly. Always maintain normal ride height and never exceed 100 p.s.i.
First, leak test the air line connections and the threaded connection of the elbow into the air spring using a soapy water solution. Look for bubbles to identify the leak location. If found, see the leak repair section for the specific connection type.
If the leak is at the air line connection to the swivel fitting: deflate the spring, remove the line by pulling the collar against the fitting and pulling firmly on the air line. Trim 1" off the end of the air line with a clean, square cut. Reinsert the air line into the push-to-connect fitting. If it still leaks at the threaded connection, tighten the swivel fitting another 1/2 turn. If still leaking, deflate, remove the fitting, re-coat the threads with thread sealant, reinstall by hand tightening as much as possible, then use a wrench for an additional two turns.
First, tighten the valve core with a valve core tool. If that does not fix it, check the air line connection by removing the air line from the barbed fitting. Do not cut it off, as this will nick the barb and render the fitting useless. Instead, cut the air line a few inches in front of the fitting and use pliers or vise-grips to pull and twist the air line off the fitting. Trim the end of the air line with a clean, square cut and reinsert it.
Inspect the air line to see if tie straps are too tight. Loosen or replace the strap. If the air line has a kink or fold, reroute it as needed. Ensure the air line is not pinched and has at least 2" of slack to allow for suspension movement.
Inspect the air line for holes and cracks. If found, the air line must be replaced. If the damage is near a connection, you may be able to cut off the damaged section and reinsert the line into the fitting with a clean, square cut.
On Sale Today
Original price was $590.99. Current price is $428.99.You save $162.00 (27%)
Free Shipping
Ships free on all orders
 Authorized Dealer

Quick Ship
In stock and ready to ship — order now!
FREE ShippingFREE SHIPPING
Estimated delivery Sun, Oct 11 - Wed, Oct 14
Order before 2 PM EST Monday–Friday for same-day processing
Guaranteed safe & secure checkout
No reviews have been added for this product.