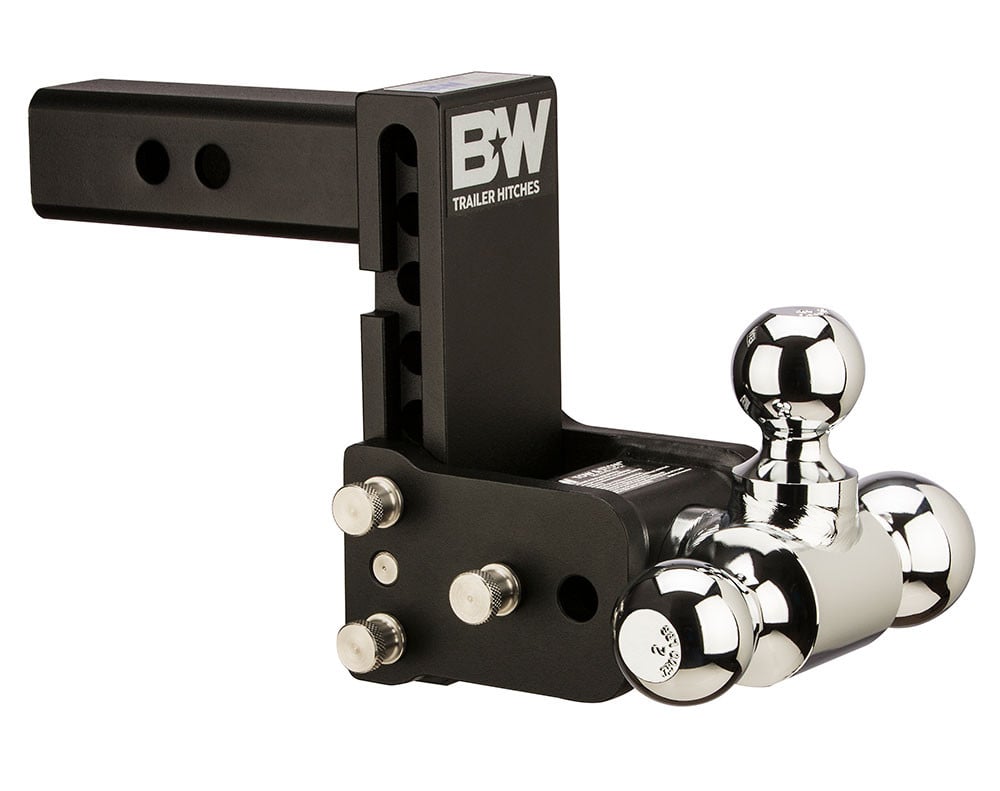
B&W 10K 5" Drop 5.5" Rise ( 1-7/8" , 2-5/16" Balls) Adjustable Ball Mount Hitch For 2" Recievers TS10048BB&W Trailer Hitches$279.00In Stock
View productOur in-house experts typically reply within one business day.

CURT
Verify Fitment
Select your vehicle to confirm this part fits.
2018 - 2024 Volvo XC60
Confirmed to Fit




Always the correct part
We know our products
Quality Products
Free Shipping!
Always the correct part
We know our products
Quality Products
Free Shipping!
Select your vehicle to find the exact plug-and-play parts that fit — no cutting or splicing.

| Finish | GLOSS BLACK POWDER COAT |
| Main Body Shape | Square |
| Material | Carbon Steel |
| Mount Type Description | Not Applicable |
| Receiver Tube Size | 2 IN |
| Side Application Type Description | Not Applicable |
| Tongue Weight (TW) | 400 LBS |
| Warranty | Limited Lifetime Warranty (One-Year Finish, One-Year Parts) |
| Weight Carrying Capacity (WC) | 4,000 LBS |
| Side Application Type Description | Blank |
| Tongue Weight (TW) | 350 LB |
| Warranty | Limited Lifetime Warranty (One-Year Finish, One-Year Parts) |
| Drop | 3-1/4 IN |
| Finish | GLOSS BLACK POWDER COAT |
| Gross Trailer Weight (GTW) | 3,500 LB |
| Material | Blank |
| Mount Type Description | Blank |

CURT offers a variety of high-quality trailer hitches and accessories for select vehicle models. Find the perfect fit for your towing needs at TowUniverse.
CURT, a Lippert brand, offers a complete line of towing products and is the leading manufacturer of custom-fit trailer hitches. We offer the broadest selection of custom-fit hitches, and each one is designed, welded, and coated in Wisconsin.
CURT is also a leader in flat towing products, as well as 5th wheel, gooseneck, and weight distribution hitches, ball mounts, electrical components, cargo solutions, and other towing accessories.
For everything from passenger cars and vans to full-size pickups and SUVs, CURT is 'The First Name in Towing Products®.'

Experts available to answer your questions
Call 888-634-94941 compatible vehicles
| Year | Make & Model | Notes |
|---|---|---|
| 2018 - 2024 | Volvo XC60 | — |
The 18 - 24 Volvo XC60 2in. CURT Trailer Hitch + Ball Mount + Cover + Lock Kit HWA2557 (Part #HWA2557) fits 2018-2024 Volvo XC60 models. The 2024 model year is the last year covered by this part number. For newer models, check for an updated version.
The 18 - 24 Volvo XC60 2in. CURT Trailer Hitch + Ball Mount + Cover + Lock Kit HWA2557 (Part #HWA2557) fits the following vehicles: 2018-2024 Volvo XC60. Always verify your specific year, make, and model before ordering.
Yes, the 18 - 24 Volvo XC60 2in. CURT Trailer Hitch + Ball Mount + Cover + Lock Kit HWA2557 (Part #HWA2557) is designed to fit the 2018-2024 Volvo XC60.
The 18 - 24 Volvo XC60 2in. CURT Trailer Hitch + Ball Mount + Cover + Lock Kit HWA2557 (Part #HWA2557) Refer to the included instructions for installation details. Basic hand tools are typically all you need.
The CURT 13484 has a gross trailer weight (GTW) capacity of 4,000 lbs and a tongue weight (TW) capacity of 400 lbs. Never exceed your vehicle manufacturer's recommended towing capacity.
The manual does not specify which vehicle makes, models, or years are compatible with the 13484. Fitment information should be verified through the CURT website (curtmfg.com), a fitment database, or by contacting CURT Product Support at 877.287.8634 before purchasing.
Required tools are: ratchet, torque wrench, 15mm socket, tape measure, 6" socket extension, paint marker, T-20 Torx bit, pry tool, and utility knife. For a full tools reference guide, visit curtmfg.com/trailer-hitch-installation.
The kit includes 2 hex bolts (M10-1.5 x 45mm, CL10.9) and 2 conical-toothed washers (7/16"). The installation also uses existing M10 weldnuts and M10 flange nuts already present in the vehicle frame and bumper beam.
Yes. Installation requires removal of the rear bumper fascia and bumper beam. The bumper beam is held by three or four M10 flange nuts on each side of the vehicle. The fascia is held by four screws at the bottom, seven screws in each wheel well, and three clips on each side, plus one or two electrical connectors.
Remove: (1) four screws from the bottom of the fascia, (2) seven screws from the wheel well on both sides, (3) two bump stops (one on each side) from inside the trunk, (4) the rear bumper fascia by pressing three clips on each side and unplugging one or two connectors, and (5) the bumper beam by unscrewing three or four M10 flange nuts on each side. Save all fasteners and components for reinstallation.
No drilling is required. The hitch uses existing M10 weldnuts in the vehicle frame. However, trimming is required: the rear bumper fascia must be trimmed by cutting a centered rectangle 2-1/2" from the frontmost edge at the bottom and 3-1/2" wide. Caulk around the bumper beam should also be trimmed if applicable.
Cut a centered rectangle at the bottom of the fascia that is 2-1/2" from the frontmost edge (depth) and 3-1/2" wide (width). Use a utility knife for this cut.
All M10 hardware must be torqued to 45 lb-ft. This includes the three or four M10 flange nuts on each side of the vehicle and the provided M10 hex bolts (if applicable). Use a torque wrench to ensure proper tightness.
Start with the lower nuts on the passenger side, pushing on the bumper beam and screwing the nut on just enough for thread engagement. Repeat on the lower nuts on the driver side. Loosely install the upper nuts on both sides. Then torque the upper nuts and lower nuts on the passenger side to 45 lb-ft, and repeat on the driver side. This sequence helps ensure proper alignment.
To remove debris from weldnuts in the frame, spray lubricant or compressed air into the hole. For heavy debris, use a wire brush. Take care not to damage the threads.
The conical-toothed washer should be placed with the toothed side facing the hitch side plate, as shown in the assembly diagram. The washer sits between the hex bolt and the hitch mounting surface.
Yes. The installation requires reuse of existing hardware. Save all four screws from the bottom of the fascia, all seven screws from each wheel well, the three or four M10 flange nuts from the bumper beam on each side, and the two bump stops. These are reinstalled in Steps 6-7 after the hitch is mounted.
Yes. The rear bumper fascia has one or two electrical connectors that must be unplugged before completely removing the fascia. Be sure to unplug these connectors first to avoid damage.
It is recommended to apply a bead of RTV silicone (not included) around the frame opening to prevent water intrusion prior to hitch installation. This is optional but helps protect the vehicle from moisture damage.
Reinstall the bumper stops, electrical connector(s), and fascia after trimming the fascia (Step 6). Then reinstall all fasteners removed in Step 1 (the four screws from the bottom of the fascia and the seven screws from each wheel well) in Step 7.
Safety glasses should be worn at all times while installing this product. Never exceed your vehicle manufacturer's recommended towing capacity. Read all instructions thoroughly before beginning installation.
Periodic inspection of the trailer hitch should be performed to ensure all mounting hardware remains tight and structural components are secure. Check that all M10 fasteners remain torqued to 45 lb-ft.
Fitment is not specified in the manual. Verify compatibility at curtmfg.com, through a fitment database, or by calling CURT Product Support at 877.287.8634.
You need a ratchet, torque wrench, 15mm socket, 6" socket extension, tape measure, paint marker, T-20 Torx bit, pry tool, and utility knife. See curtmfg.com/trailer-hitch-installation for a full tools reference guide.
All M10 hardware must be torqued to 45 lb-ft. Use a torque wrench to ensure proper tightness.
Gross trailer weight capacity is 4,000 lbs; tongue weight capacity is 400 lbs. Never exceed your vehicle manufacturer's recommended towing capacity.
Wear safety glasses at all times during installation. Never exceed your vehicle manufacturer's recommended towing capacity. Perform periodic inspections to ensure all mounting hardware remains tight.
On Sale Today
Original price was $444.80. Current price is $343.99.You save $100.81 (23%)
Free Shipping
Ships free on all orders
 Authorized Dealer
Quick Ship
In stock and ready to ship — order now!
FREE ShippingFREE SHIPPING
Estimated delivery Wed, Sep 30 - Sat, Oct 3
Order before 2 PM EST Monday–Friday for same-day processing
Guaranteed safe & secure checkout
No reviews have been added for this product.