
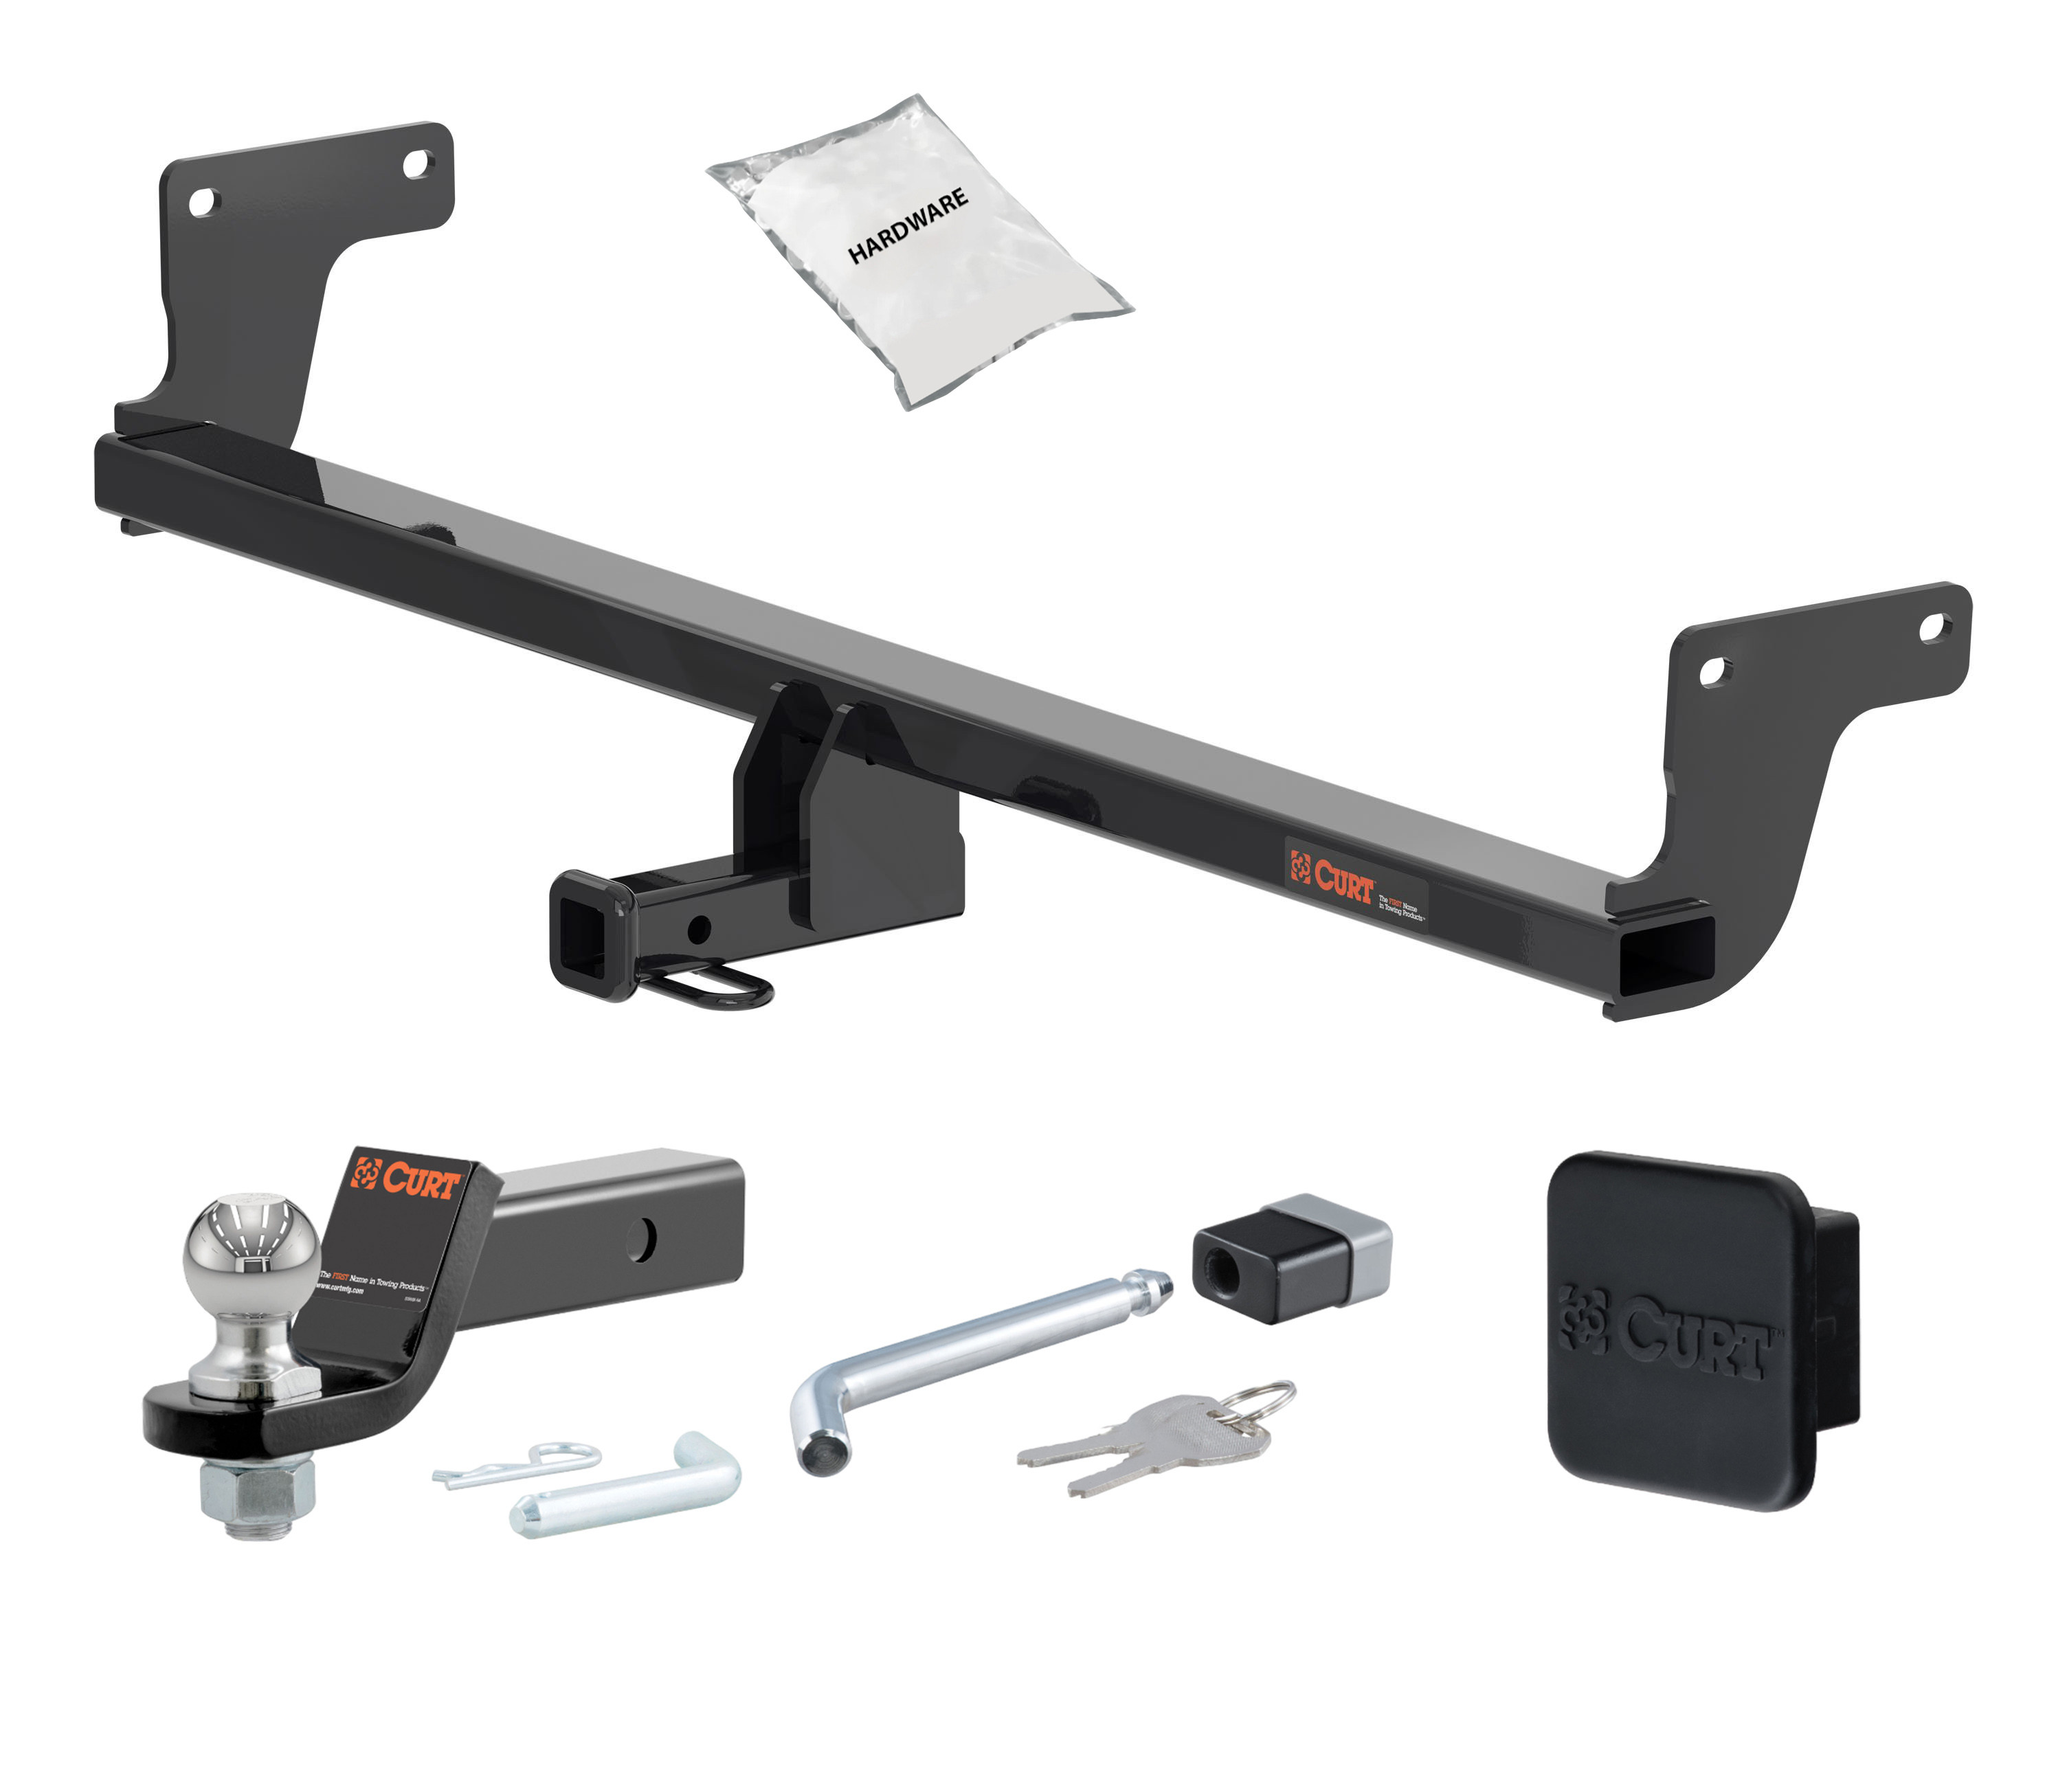
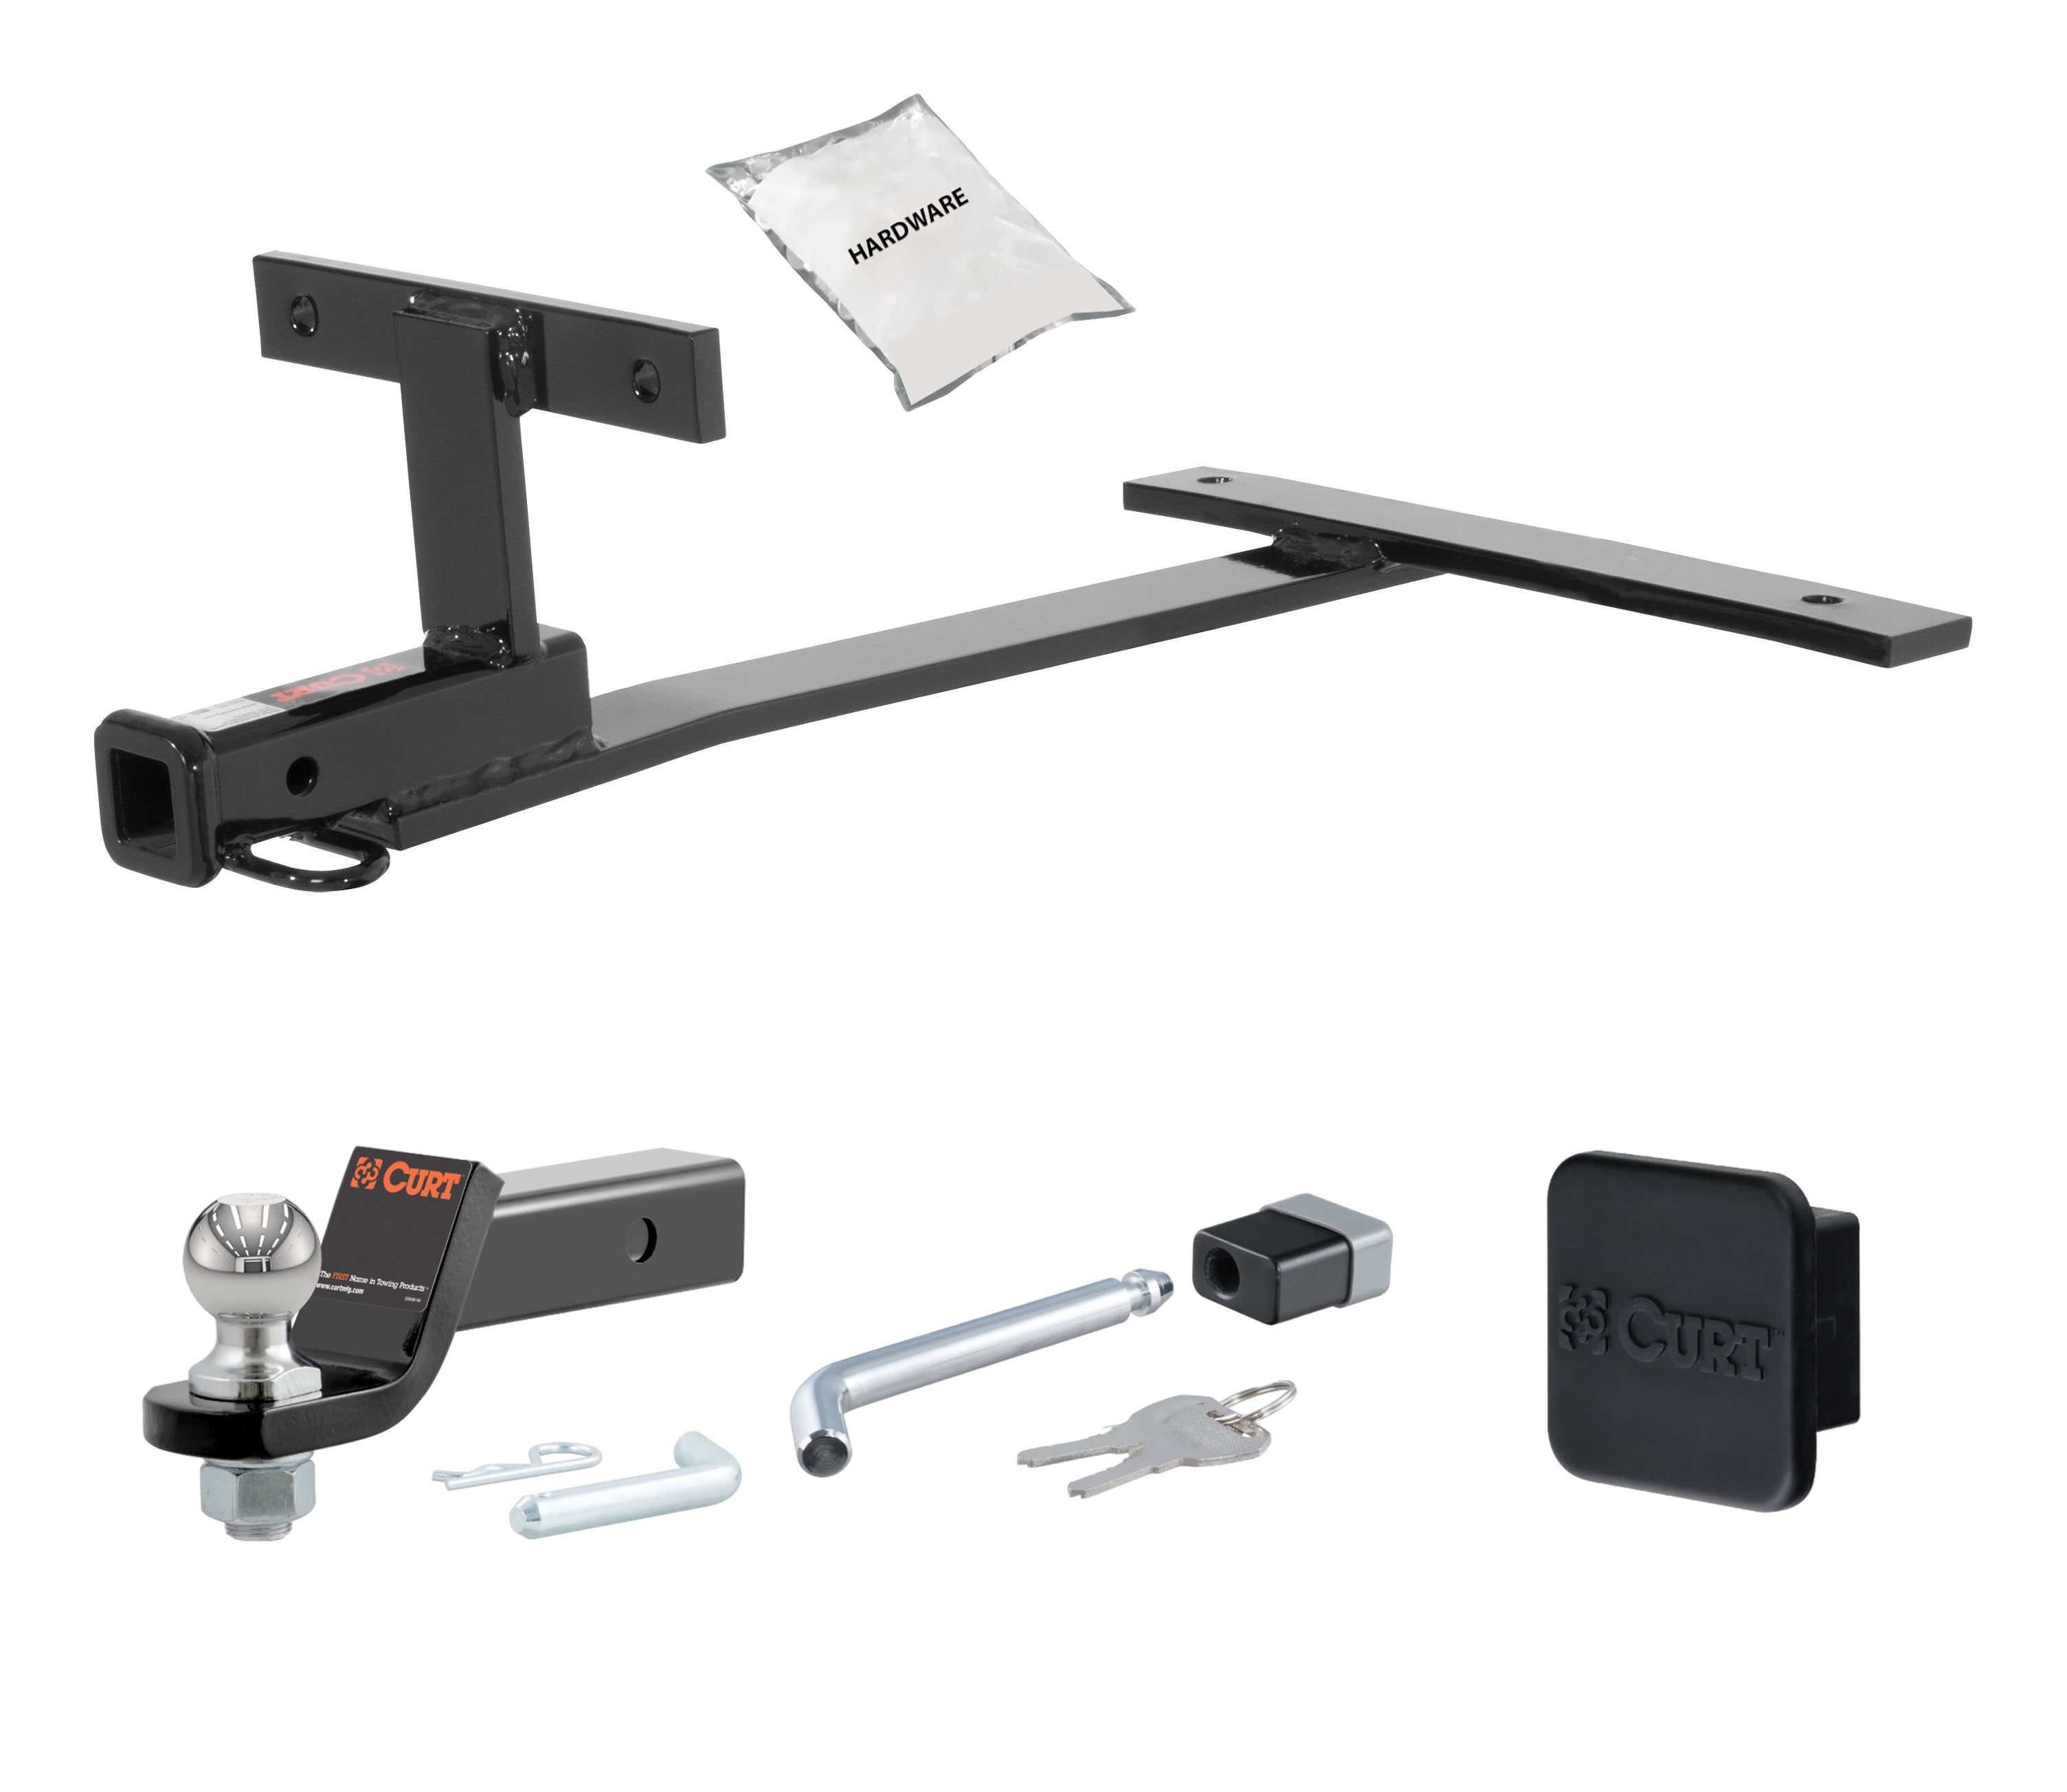
19 - 19 KIA Forte Sedan 1.25in. CURT Trailer Hitch + Ball Mount + Cover + Lock Kit by CURT HWA1590CURTOriginal price was $404.80. Current price is $332.72.In Stock
View productOur in-house experts typically reply within one business day.

CURT
Verify Fitment
Select your vehicle to confirm this part fits.




Always the correct part
We know our products
Quality Products
Free Shipping!
Always the correct part
We know our products
Quality Products
Free Shipping!
Select your vehicle to find the exact plug-and-play parts that fit — no cutting or splicing.

| Receiver Tube Size | 1-1/4 IN |
| Side Application Type Description | Not Applicable |
| Tongue Weight (TW) | 200 LBS |
| Warranty | Limited Lifetime Warranty (One-Year Finish, One-Year Parts) |
| Weight Carrying Capacity (WC) | 2,000 LBS |
| Finish | GLOSS BLACK POWDER COAT |
| Main Body Shape | Square |
| Material | Carbon Steel |
| Mount Type Description | Not Applicable |
| Side Application Type Description | Blank |
| Tongue Weight (TW) | 350 LB |
| Warranty | Limited Lifetime Warranty (One-Year Finish, One-Year Parts) |
| Drop | 3-1/4 IN |
| Finish | GLOSS BLACK POWDER COAT |
| Gross Trailer Weight (GTW) | 3,500 LB |
| Material | Blank |
| Mount Type Description | Blank |

CURT offers a variety of high-quality trailer hitches and accessories for select vehicle models. Find the perfect fit for your towing needs at TowUniverse.
CURT, a Lippert brand, offers a complete line of towing products and is the leading manufacturer of custom-fit trailer hitches. We offer the broadest selection of custom-fit hitches, and each one is designed, welded, and coated in Wisconsin.
CURT is also a leader in flat towing products, as well as 5th wheel, gooseneck, and weight distribution hitches, ball mounts, electrical components, cargo solutions, and other towing accessories.
For everything from passenger cars and vans to full-size pickups and SUVs, CURT is 'The First Name in Towing Products®.'

Experts available to answer your questions
Call 888-634-94941 compatible vehicles
| Year | Make & Model | Notes |
|---|---|---|
| 2020 - 2024 | Kia Forte | Sedan, excluding GT |
The 20 - 24 KIA Forte Sedan, excluding GT 1.25in. CURT Trailer Hitch + Ball Mount + Cover + Lock Kit by CURT HWA1589 (Part #HWA1589) fits 2020-2024 Kia Forte models. The 2024 model year is the last year covered by this part number. For newer models, check for an updated version.
Yes, the 20 - 24 KIA Forte Sedan, excluding GT 1.25in. CURT Trailer Hitch + Ball Mount + Cover + Lock Kit by CURT HWA1589 (Part #HWA1589) is designed to fit the 2020-2024 Kia Forte.
The 20 - 24 KIA Forte Sedan, excluding GT 1.25in. CURT Trailer Hitch + Ball Mount + Cover + Lock Kit by CURT HWA1589 (Part #HWA1589) fits the following vehicles: 2020-2024 Kia Forte. Always verify your specific year, make, and model before ordering.
The 20 - 24 KIA Forte Sedan, excluding GT 1.25in. CURT Trailer Hitch + Ball Mount + Cover + Lock Kit by CURT HWA1589 (Part #HWA1589) Refer to the included instructions for installation details. Basic hand tools are typically all you need.
The CURT 11620 has a gross trailer weight (GTW) capacity of 2,000 lbs and a tongue weight (TW) capacity of 200 lbs.
Yes. Installation requires drilling the rearward-most mounting holes in the bottom of the frame rails (Step 8), as well as enlarging existing access and mounting holes to allow carriage bolts and spacers to pass through (Step 6).
Yes. Step 2 requires lowering the exhaust by removing three rubber exhaust isolators. The manual notes that you must support the exhaust to prevent damage during this process.
Step 1 requires removing the driver-side underbody panel by removing three push fasteners and two nuts (using a 10mm socket) and one captured nut (using an 11mm socket). The lower rear fascia must also be removed in Step 3 by removing two screws and eight push fasteners, then pushing down on retaining fasteners while pulling the panel away from the vehicle.
Yes. Step 5 requires removing the heat shield and trimming it using the provided diagram for reference. The heat shield is then reinstalled without the rearmost nut on the bottom of the frame rail.
Yes. Step 11 requires trimming the bumper fascia using the provided diagram for reference. The trimmed fascia is then reinstalled using cable ties around the hitch where fascia supports were removed.
The kit includes: 4 carriage bolts (1/2"-13 x 1-1/2", grade 8), 4 square-hole spacers (1/4" x 1" x 3"), 4 serrated-flange nuts (1/2"-13), and 2 cable ties (3/16" x 8").
Required tools are: ratchet, aviation shears, torque wrench, die grinder, 10mm socket, 11mm socket, 3/4" socket, 9/16" drill bit, drill, tape, 1/2" fishwire (4 qty included), tape measure, and flathead screwdriver. A 5/8" open-end wrench and pry bar are also needed for exhaust isolator removal if exhaust hanger removal pliers are not available.
All 1/2" hardware must be torqued to 110 ft-lbs (Step 10).
The fishwire technique (Steps 7 and 9) is used to guide carriage bolts and square-hole spacers through the enlarged mounting holes in the frame rails without losing them inside the frame. The coiled end of the fishwire is inserted through the hitch mounting hole and out the access hole, passed through the spacer, and threaded with the bolt. The wire is kinked to keep the spacer separate from the bolt, then pulled to guide the hitch into position and secure it with serrated-flange nuts.
Step 2 requires removing three rubber exhaust isolators. If exhaust hanger removal pliers are not available, use a 5/8" open-end wrench and a pry bar: slide the wrench up to the rubber isolator, cradling the hanger rod, then place the flat edge of the pry bar between the wrench and the hanger stop or rod, and rotate the pry bar toward the wrench to remove the isolator. Using lubricant or soapy water on the hanger rod and isolator helps removal. Support the exhaust to prevent damage.
1. Remove driver-side underbody panel (Step 1). 2. Lower exhaust by removing three rubber isolators (Step 2). 3. Remove lower rear fascia (Step 3). 4. Remove plastic fascia support brackets (Step 4). 5. Remove and trim heat shield (Step 5). 6. Enlarge access and mounting holes (Step 6). 7. Fishwire first set of bolts and spacers, raise hitch into position, and secure with nuts (Step 7). 8. Drill rearward-most mounting holes (Step 8). 9. Fishwire remaining bolts and spacers and secure with nuts (Step 9). 10. Torque all 1/2" hardware to 110 ft-lbs (Step 10). 11. Trim bumper fascia and reinstall with cable ties (Step 11). 12. Reinstall exhaust isolators and underbody panel (Step 12).
Step 6 requires enlarging two holes: the access hole on the inside of the frame rail must be enlarged enough to allow a carriage bolt and spacer to pass through, and the mounting hole on the bottom of the frame rail must be enlarged enough to allow carriage bolt threads to pass through. The manual specifies using a die grinder and 9/16" drill bit as required tools, but does not specify exact final hole sizes.
Step 8 requires drilling the rearward-most mounting holes in the bottom of the frame rails using the hitch as a template. The manual does not specify exact hole locations or dimensions.
Safety glasses must be worn at all times during installation. When lowering the exhaust (Step 2), support it to prevent damage. Never exceed the vehicle manufacturer's recommended towing capacity when using the hitch.
Periodic inspection of the trailer hitch should be performed to ensure all mounting hardware remains tight and structural components are secure.
Yes. Installation requires drilling the rearward-most mounting holes in the frame rails and enlarging existing access and mounting holes.
Gross trailer weight capacity is 2,000 lbs with a tongue weight capacity of 200 lbs.
You will need a ratchet, torque wrench, die grinder, drill with 9/16" bit, 10mm and 11mm sockets, 3/4" socket, aviation shears, tape, tape measure, flathead screwdriver, and 1/2" fishwire (included).
All 1/2" hardware must be torqued to 110 ft-lbs.
Yes. Three rubber exhaust isolators must be removed to lower the exhaust. Support the exhaust to prevent damage.
Yes. Both the heat shield (Step 5) and bumper fascia (Step 11) must be trimmed using the provided diagrams.
On Sale Today
Original price was $404.80. Current price is $332.72.You save $72.08 (18%)
Free Shipping
Ships free on all orders
 Authorized Dealer


Quick Ship
In stock and ready to ship — order now!
FREE ShippingFREE SHIPPING
Estimated delivery Thu, Oct 22 - Sun, Oct 25
Order before 2 PM EST Monday–Friday for same-day processing
Guaranteed safe & secure checkout
No reviews have been added for this product.