
2020 - 2025 Cadillac XT6 Curt 2", Class 3 Trailer Tow Hitch + 7-way Wiring Kit 13482CURTOriginal price was $492.90. Current price is $341.98.In Stock
View productOur in-house experts typically reply within one business day.








Always the correct part
We know our products
Quality Products
Free Shipping!
Always the correct part
We know our products
Quality Products
Free Shipping!
On Sale Today
Original price was $492.90. Current price is $341.98.You save $150.92 (31%)
Free Shipping
Ships free on all orders



Quick Ship
In stock and ready to ship — order now!
FREE ShippingFREE SHIPPING
Estimated delivery Thu, Oct 22 - Sun, Oct 25
Order before 2 PM EST Monday–Friday for same-day processing
Guaranteed safe & secure checkout
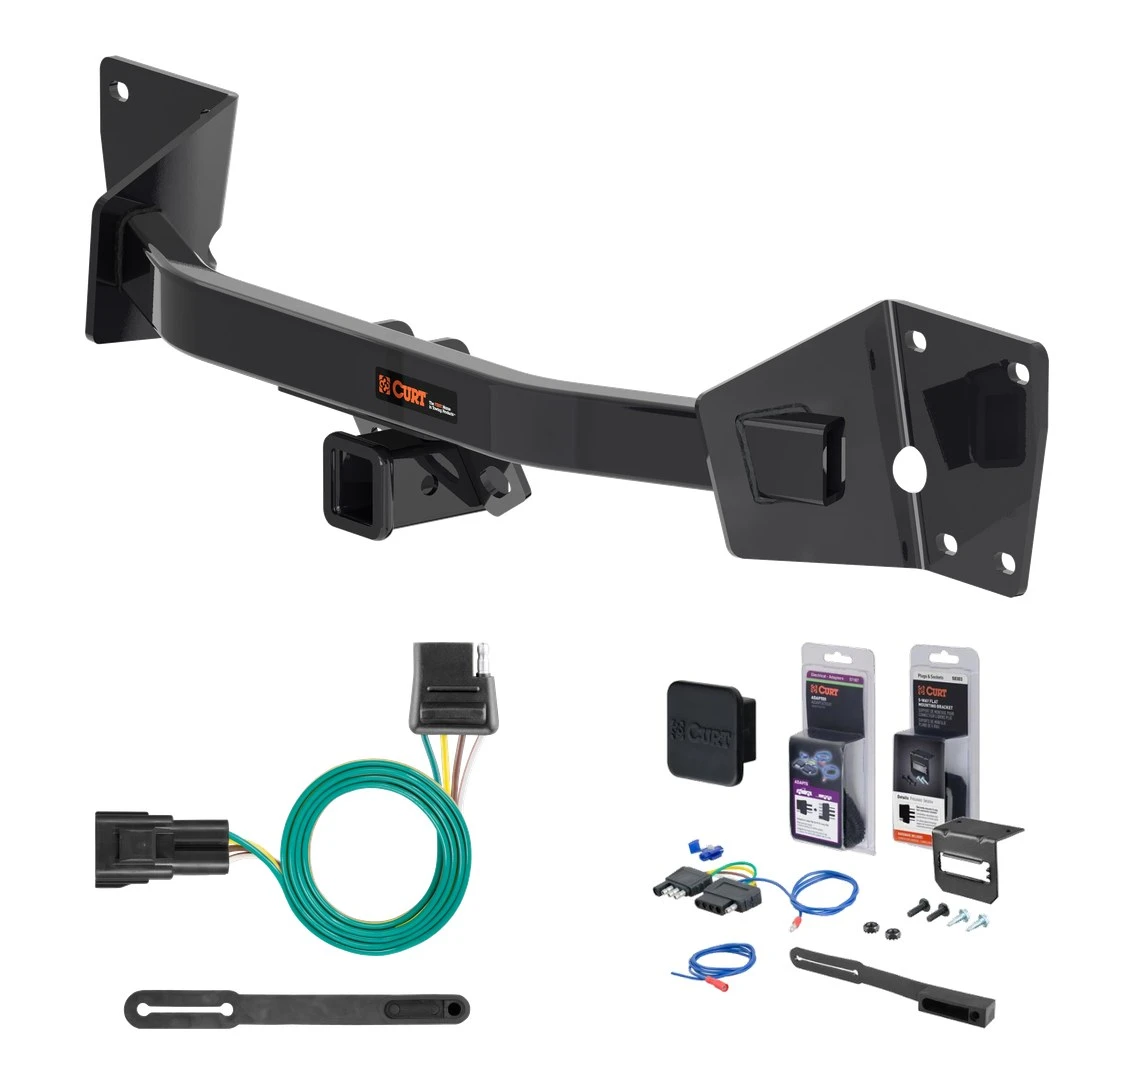
Complete CURT Class 3 2" trailer hitch and 7-way custom wiring kit engineered for the 2020 - 2025 XT6. Vehicle-specific fit, plug-and-play installation, supports trailers with electric brakes, auxiliary 12V power and reverse lights.
This custom kit fits the following vehicles:
All Hardware and Installation Instructions Included!
Whatever your task at hand -- whether it's launching that boat before daybreak, setting up your camper before the rush or getting a final load to the dump before close -- CURT class 3 trailer hitches offer the strength needed for serious towing. They make it easy to hitch up and Bring It, offering a vehicle-specific fit and the weight capacity to handle a variety of trailers. Custom class 3 hitches are the most common type of receiver hitch for pickup trucks and SUVs. Because of their weight range, they are also found on full-size cars, crossovers and minivans. Each custom-fit class 3 hitch package is made for vehicle-specific mounting. This particular kit fits certain years of the Cadillac XT6 (see application info to verify vehicle compatibility). It provides a weight carrying capacity of 4,500 lbs. GTW and 675 lbs. TW. CURT class 3 trailer hitches are typically used to attach and haul utility trailers, boat trailers, campers, snowmobile or ATV haulers and more (NOTE: Never exceed the lowest-rated towing component). Each class 3 hitch has a 2" receiver tube and is tested in accordance with SAE J684 for safety. To ensure that CURT class 3 receiver hitches have what it takes for serious trailering, they are designed using a hands-on approach and are constructed with rugged, high-strength steel and precise welding. We also protect our class 3 hitches in a co-cured finish of liquid A-coat and black powder coat for superior resistance to rust, chipping and UV damage.
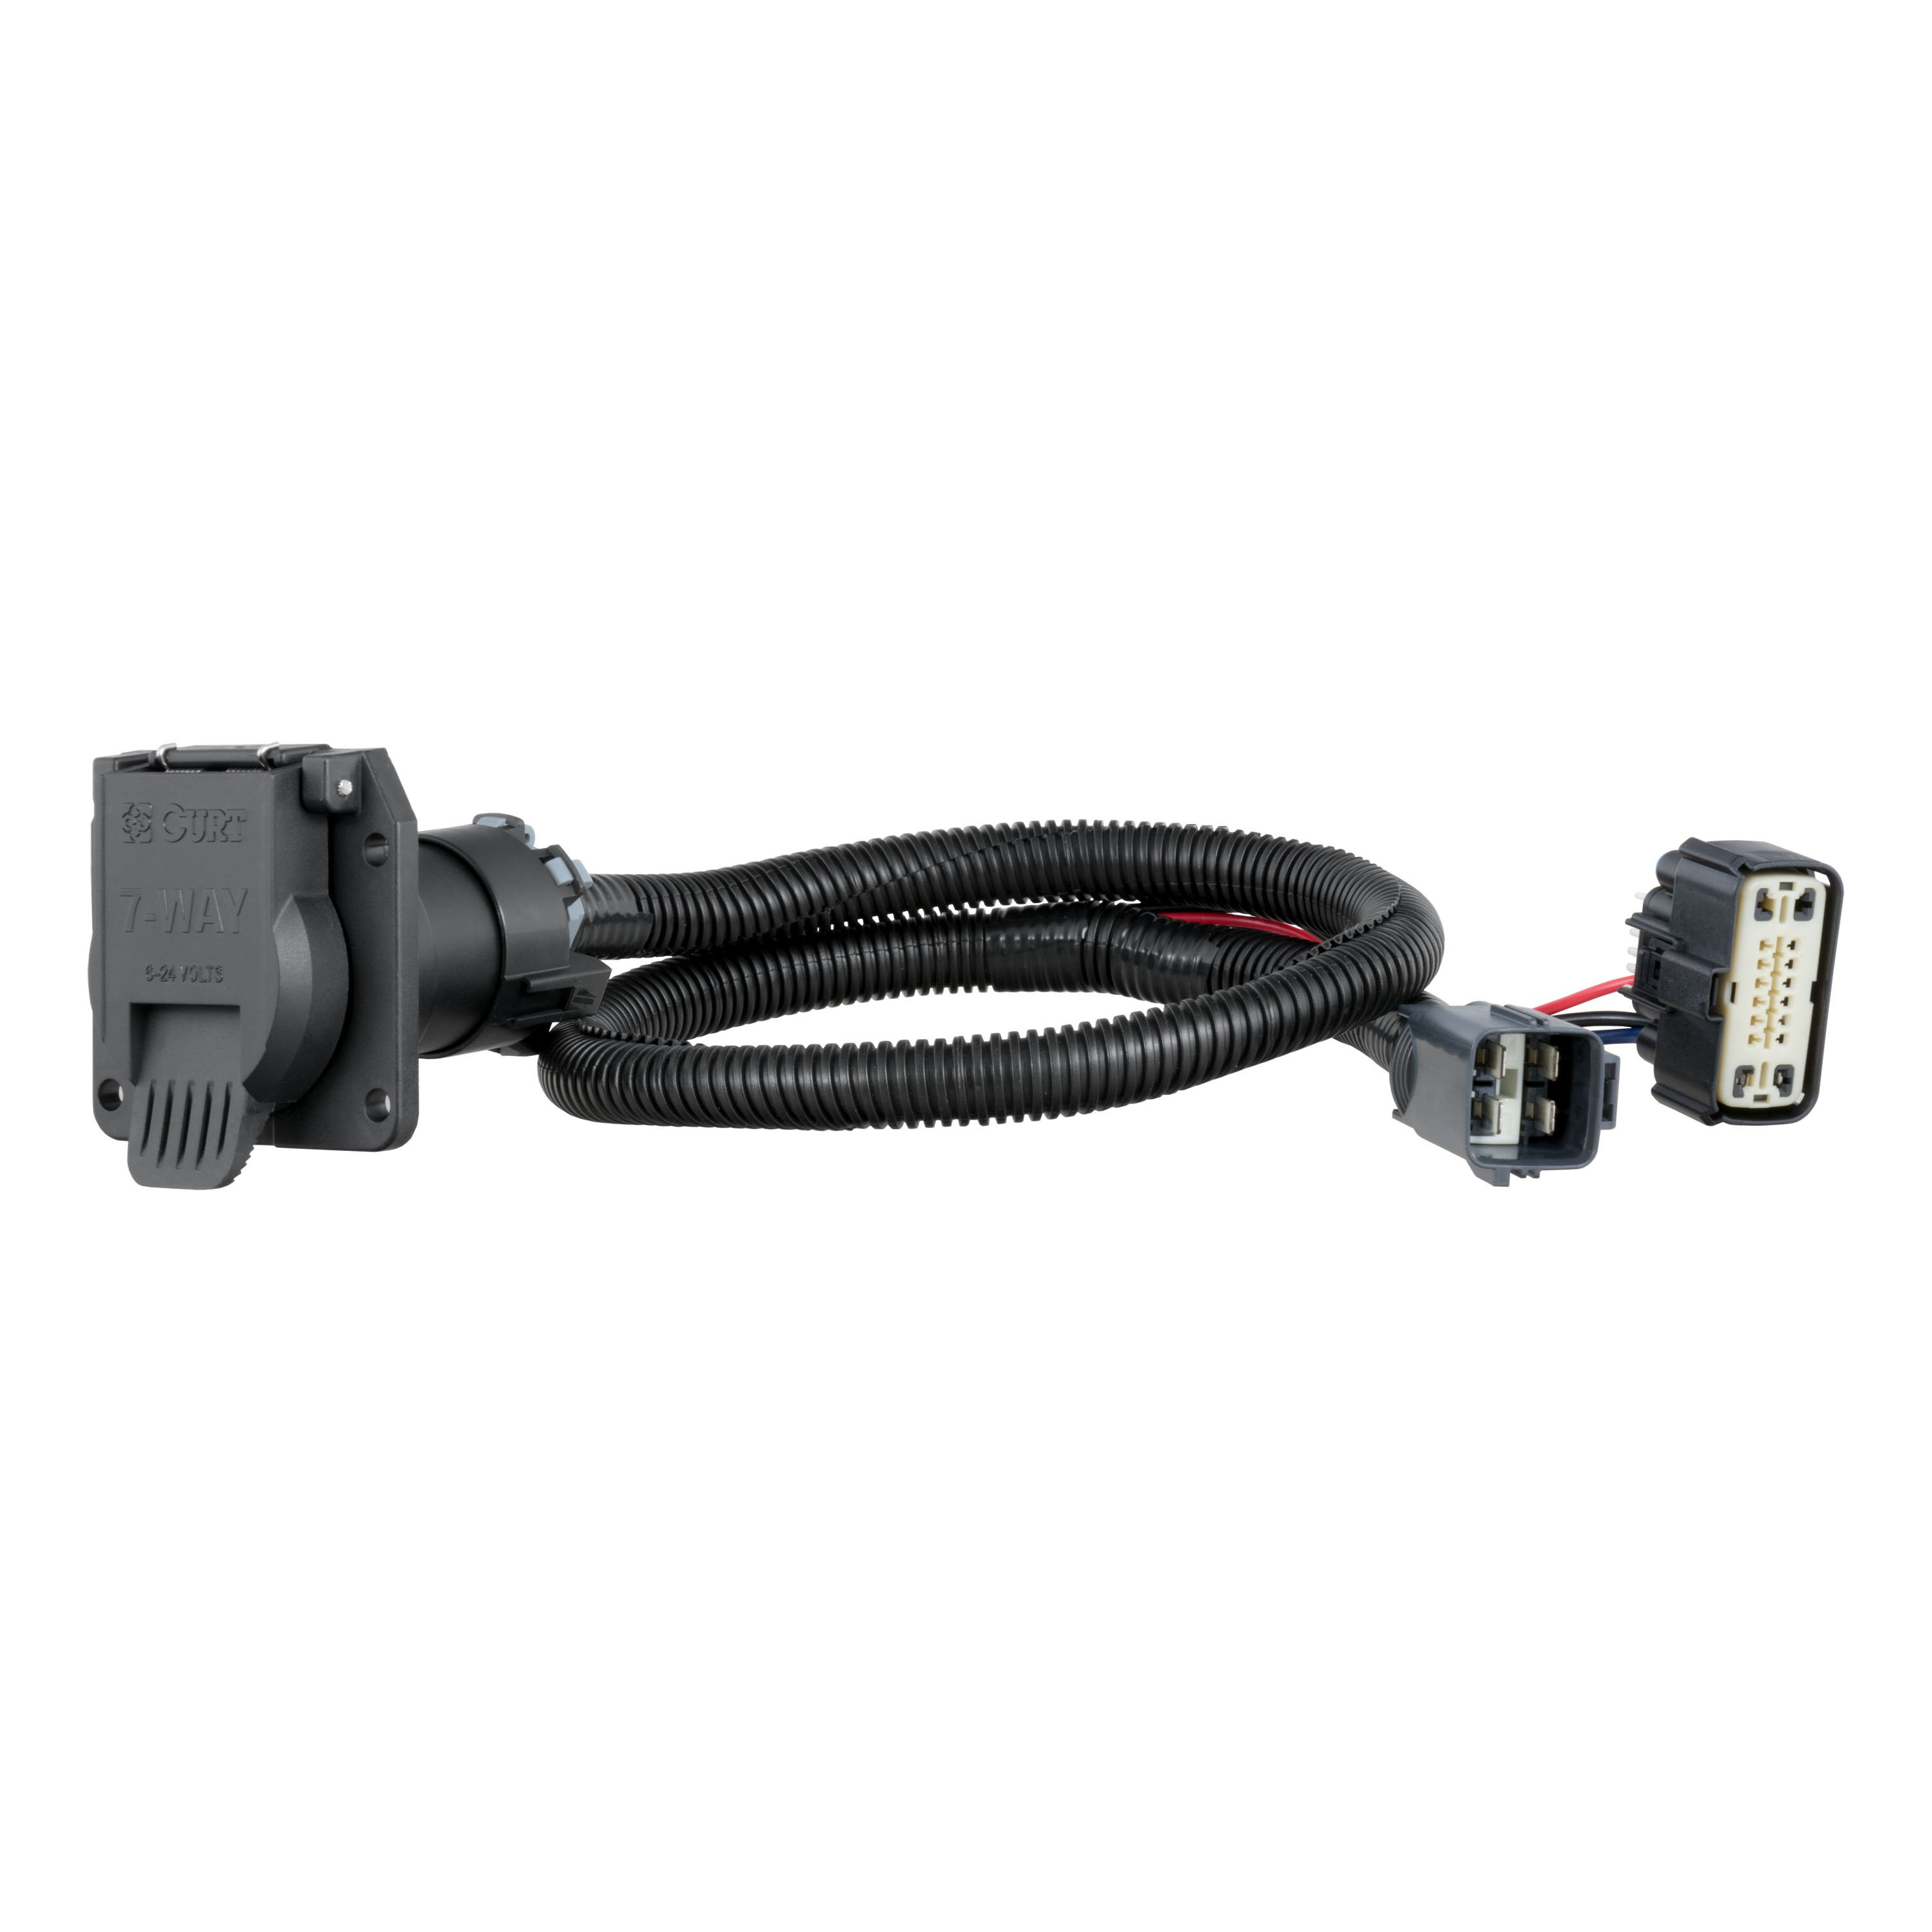
CURT custom wiring connectors and harnesses are the easiest way to outfit your vehicle with a trailer wiring connection for towing. Each one is custom-fitted to work with a specific make and model. This particular 7-way RV blade socket is designed to be a custom wiring option for certain years of the Chevy Blazer, Cadillac XT5, XT6 and GMC Acadia (see application info to verify fitment). It provides a universal trailer connection for the tail lights, brake lights, reverse lights, turn signals, electronic trailer brakes and auxiliary power. 7prong taillight wiring can be used as a replacement or new wiring and is typically used for towing fifth wheel and gooseneck trailers. This 7 way female outlet comes with all necessary hardware to establish a solid connection, as well as a dust cover to keep the connector socket clean when not in use. All CURT custom wiring connectors are made vehicle-specific for the easiest possible installation and the best fit. Some automotive manufacturers install a special socket on the vehicle to be used for vehicle-to-trailer wiring. Although this factory tow package socket is not equipped on every vehicle, a CURT custom wiring connector (also called a T-connector) utilizes the socket for simple, stress-free installation. Instead of cutting, splicing and soldering into your vehicle's wiring system, the custom wiring connector uses a single OEM compatible plug and instantly provides a standard vehicle-to-trailer hitch wiring connection. To ensure long-lasting reliability, all CURT custom tconnector wiring is thoroughly tested for optimal functionality.
Experts available to answer your questions
Call 888-634-9494Yes, CURT part 56326 is designed for the Cadillac XT5. The wiring connector is installed behind the rear bumper in the center of the vehicle.
CURT part 56326 is compatible with GMC Acadia models, with one exception: it does not fit the Acadia Limited trim. Check your vehicle's trim level before purchasing.
The manual does not specify a maximum towing capacity. The product has a rating that must not be exceeded. Do not exceed the product rating or your tow vehicle's lamp load rating, whichever is lower. Refer to your vehicle owner's manual or contact the vehicle manufacturer for your specific tow vehicle lamp load rating.
You will need a wire cutter. This is the only tool listed as required for installation.
Yes, you must disconnect the negative battery terminal before beginning installation. The battery is located on the driver side under the hood. Reconnect the negative battery terminal after all installation steps are complete.
The vehicle connector is located behind the rear bumper in the center of the vehicle. It will be similar in appearance to the CURT wiring connector you are installing.
1. Separate the vehicle connectors from the weather seal connectors, taking care not to damage the locking tabs. 2. Insert the CURT wiring connector end into the vehicle connector. 3. Make sure the connectors are fully inserted with locking tabs in place. 4. Route the other end of the wiring connector along the inside of the bumper towards the center of the vehicle to the 7-way mounting location. 5. Insert the 7-way connector end between the separated 7-way connectors. 6. Ensure the connectors are fully inserted with locking tabs in place.
The fuse ratings are: Stop/Turn Light - 10 amps; Taillights - 10 amps; Backup - 10 amps; Power Circuit - 30 amps; Trailer Brakes (3 Axles / 6 Brakes) - 20 amps.
Exceeding the product rating can cause loss of warranty, overheating, and potential fire. Do not exceed the product rating or your tow vehicle's lamp load rating, whichever is lower.
Test for proper function by using a test light or connecting a properly wired trailer. For the initial test, reset the electrical system of the vehicle by temporarily removing the vehicle's key from the ignition. All connections must be complete for the wiring harness to function. Test and verify installation after completing all steps.
After all connections are complete, reinstall all items removed during installation and reconnect the negative battery terminal. Then test the installation using a test light or by connecting a properly wired trailer.
CURT 56326 fits Cadillac XT5 and GMC Acadia (excluding Limited trim).
Only a wire cutter is required.
Yes, disconnect the negative battery terminal before starting installation and reconnect it after all steps are complete.
Stop/Turn Light and Taillights: 10 amps each; Backup: 10 amps; Power Circuit: 30 amps; Trailer Brakes (3 Axles/6 Brakes): 20 amps.
Do not exceed the product rating or tow vehicle lamp load rating, whichever is lower. Exceeding the rating can cause loss of warranty, overheating, and potential fire.
Use a test light or connect a properly wired trailer. Reset the electrical system by temporarily removing the vehicle key from the ignition before testing.
The CURT 13482 trailer hitch has a gross trailer weight (GTW) capacity of 4,500 lbs and a tongue weight (TW) capacity of 675 lbs. Never exceed your vehicle manufacturer's recommended towing capacity.
The manual does not specify vehicle make, model, or year compatibility. Contact CURT product support at 877.287.8634 or visit curtmfg.com to confirm fitment for your specific vehicle.
You will need: torque wrench, Torx bit T15, 7mm socket, 15mm socket, flathead screwdriver, and wrench. For a full tools reference guide, visit curtmfg.com/trailer-hitch-installation.
The installation is rated as moderate difficulty. It requires fascia removal and involves multiple steps including sensor disconnection and muffler hanger manipulation. While not explicitly requiring professional installation, the complexity and need for proper tools suggest many customers may prefer professional help. Proper tools will improve installation quality and reduce time required.
Yes, fascia removal is required. The installation involves opening the trunk, removing six bolts from the bottom of the fascia with a 7mm socket, removing plastic inserts, and pulling out the fascia lower mold. The fascia must be fully removed to access the impact bar mounting points and install the hitch.
1. Open the trunk and remove six bolts from the bottom of the fascia using a 7mm socket. 2. Use a flathead screwdriver to remove the plastic insert closest to the rear wheel from inside the fascia. 3. Gently pull out the fascia lower mold. 4. Remove three bolts with a T15 Torx bit from the rear wheel trim on both sides and gently pull out the trim. 5. Pull the fascia up from the rear wheel trim panel, work up to the taillights, and continue removing along the bottom of the taillights to the trunk bottom. 6. Slowly pull back the fascia and unplug the two rear bumper sensor harnesses on the driver side.
After loosening the fascia all around, slowly pull back the fascia and unplug the two rear bumper sensor harnesses on the driver side. These must be disconnected before the fascia can be fully removed to access the hitch mounting area.
The hitch is secured using two flange bolts and two flange nuts on each side (four fasteners total). These are the same fasteners removed from the impact bar mounting points in Step 5. They are installed in Step 6 and torqued to 45 ft-lbs (61 Nm).
The impact bar is removed to make way for the hitch installation. The hitch replaces the impact bar in the same mounting position. Once removed, the impact bar should be returned to the vehicle owner.
Yes. In Step 5, rotate the muffler hanger out of the way to remove the impact bar. In Step 6, after raising the hitch into position, rotate the muffler hanger back into its original position before securing the hitch fasteners.
All four flange nuts and four flange bolts must be torqued to 45 ft-lbs (61 Nm). Use a torque wrench to ensure proper tightness and prevent damage to the product or vehicle.
After the fascia is raised back into position and the sensor harness is plugged in, use a T15 Torx bit to remove two fasteners from the bottom of the fascia to remove the hitch cover and gain access to the hitch.
Safety glasses should be worn at all times while installing this product. Additionally, never exceed your vehicle manufacturer's recommended towing capacity when using the hitch.
Periodic inspection of the trailer hitch should be performed to ensure all mounting hardware remains tight and structural components are secure. To help prevent damage to the product or vehicle, refer to the specified torque specifications (45 ft-lbs / 61 Nm for the mounting fasteners) when checking hardware.
The manual does not specify vehicle compatibility. Contact CURT at 877.287.8634 or visit curtmfg.com to confirm fitment for your specific make, model, and year.
Torque wrench, Torx bit T15, 7mm socket, 15mm socket, flathead screwdriver, and wrench. See curtmfg.com/trailer-hitch-installation for a full tools reference guide.
Yes, fascia removal is required. The installation involves removing the rear fascia, rear wheel trim, and disconnecting rear bumper sensors to access the hitch mounting points.
All four flange nuts and four flange bolts must be torqued to 45 ft-lbs (61 Nm).
Gross trailer weight capacity is 4,500 lbs; tongue weight capacity is 675 lbs. Never exceed your vehicle manufacturer's recommended towing capacity.
Safety glasses should be worn at all times during installation.
No reviews have been added for this product.