
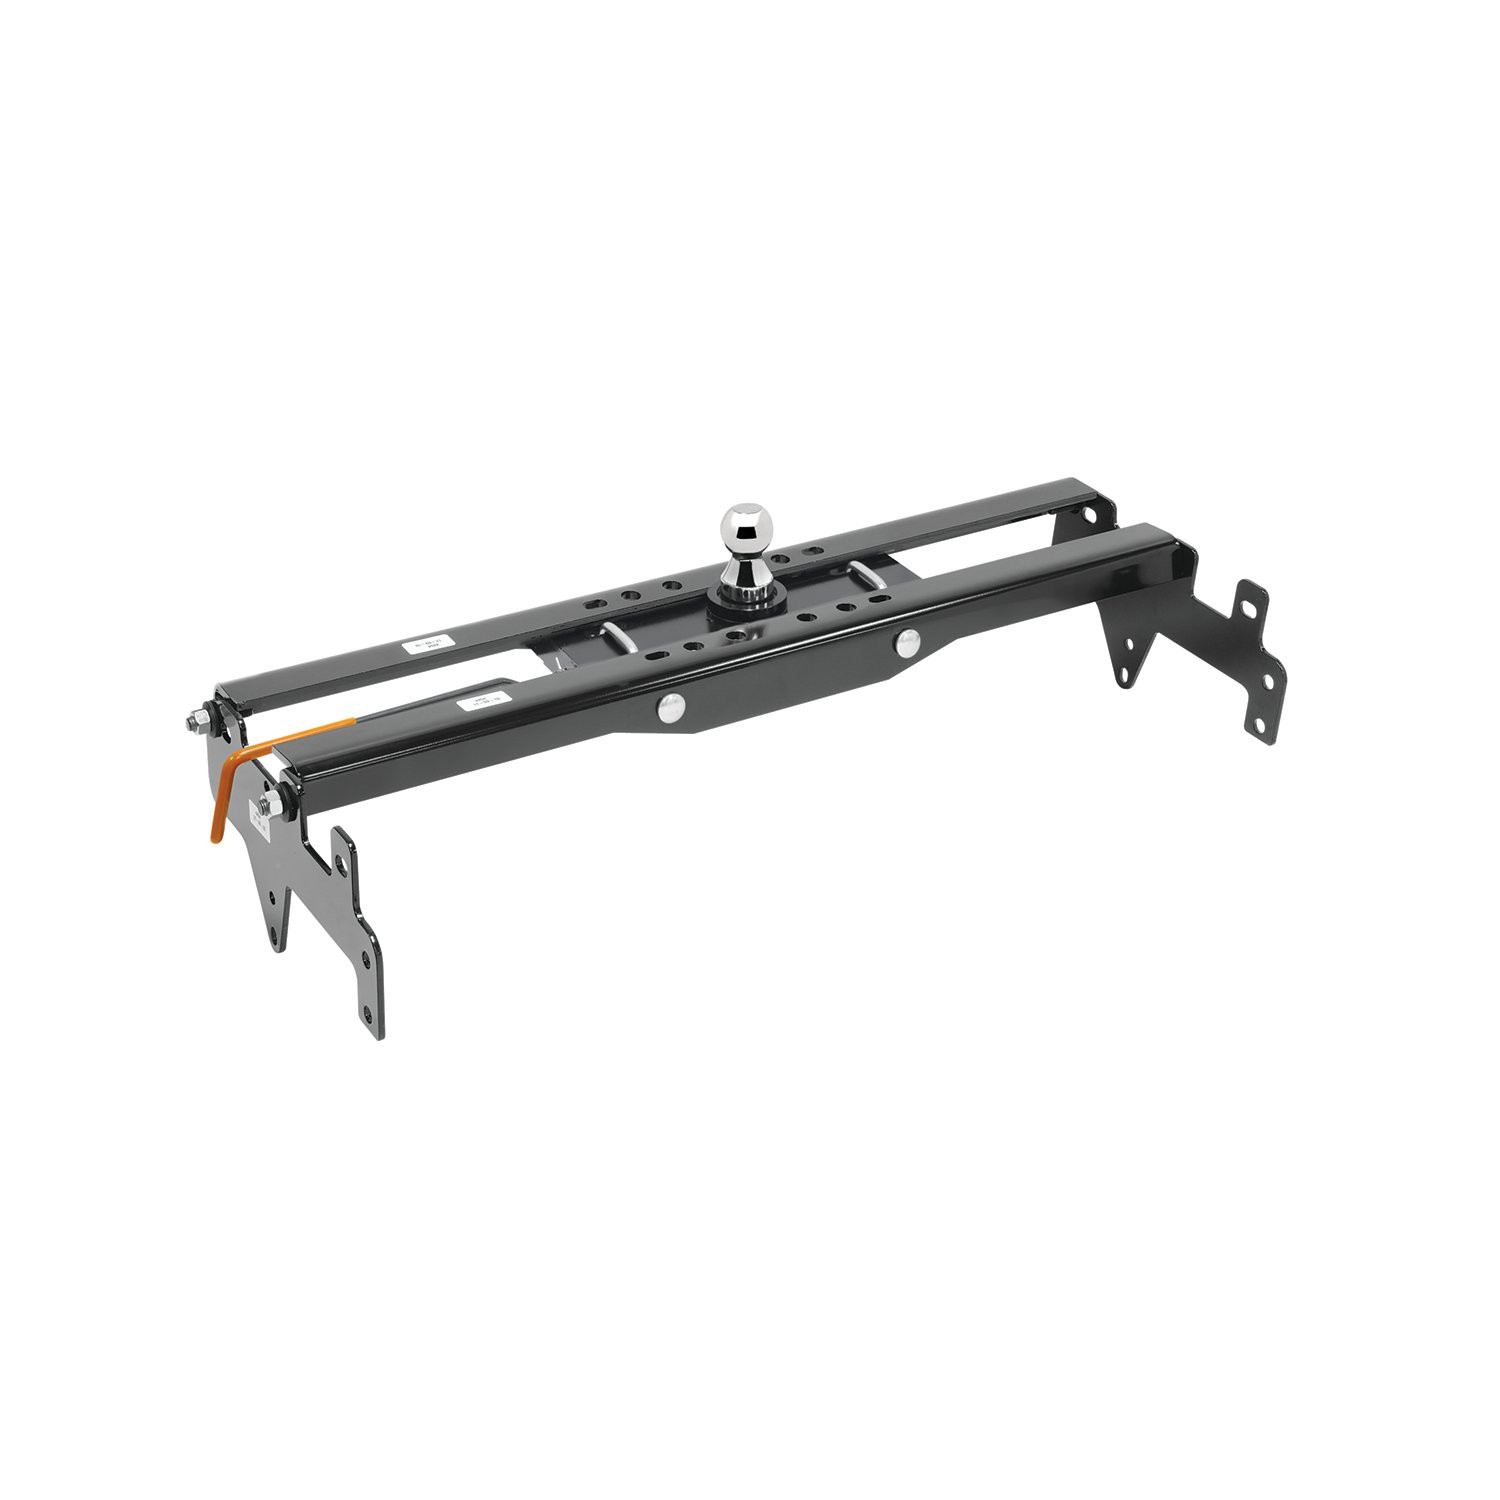
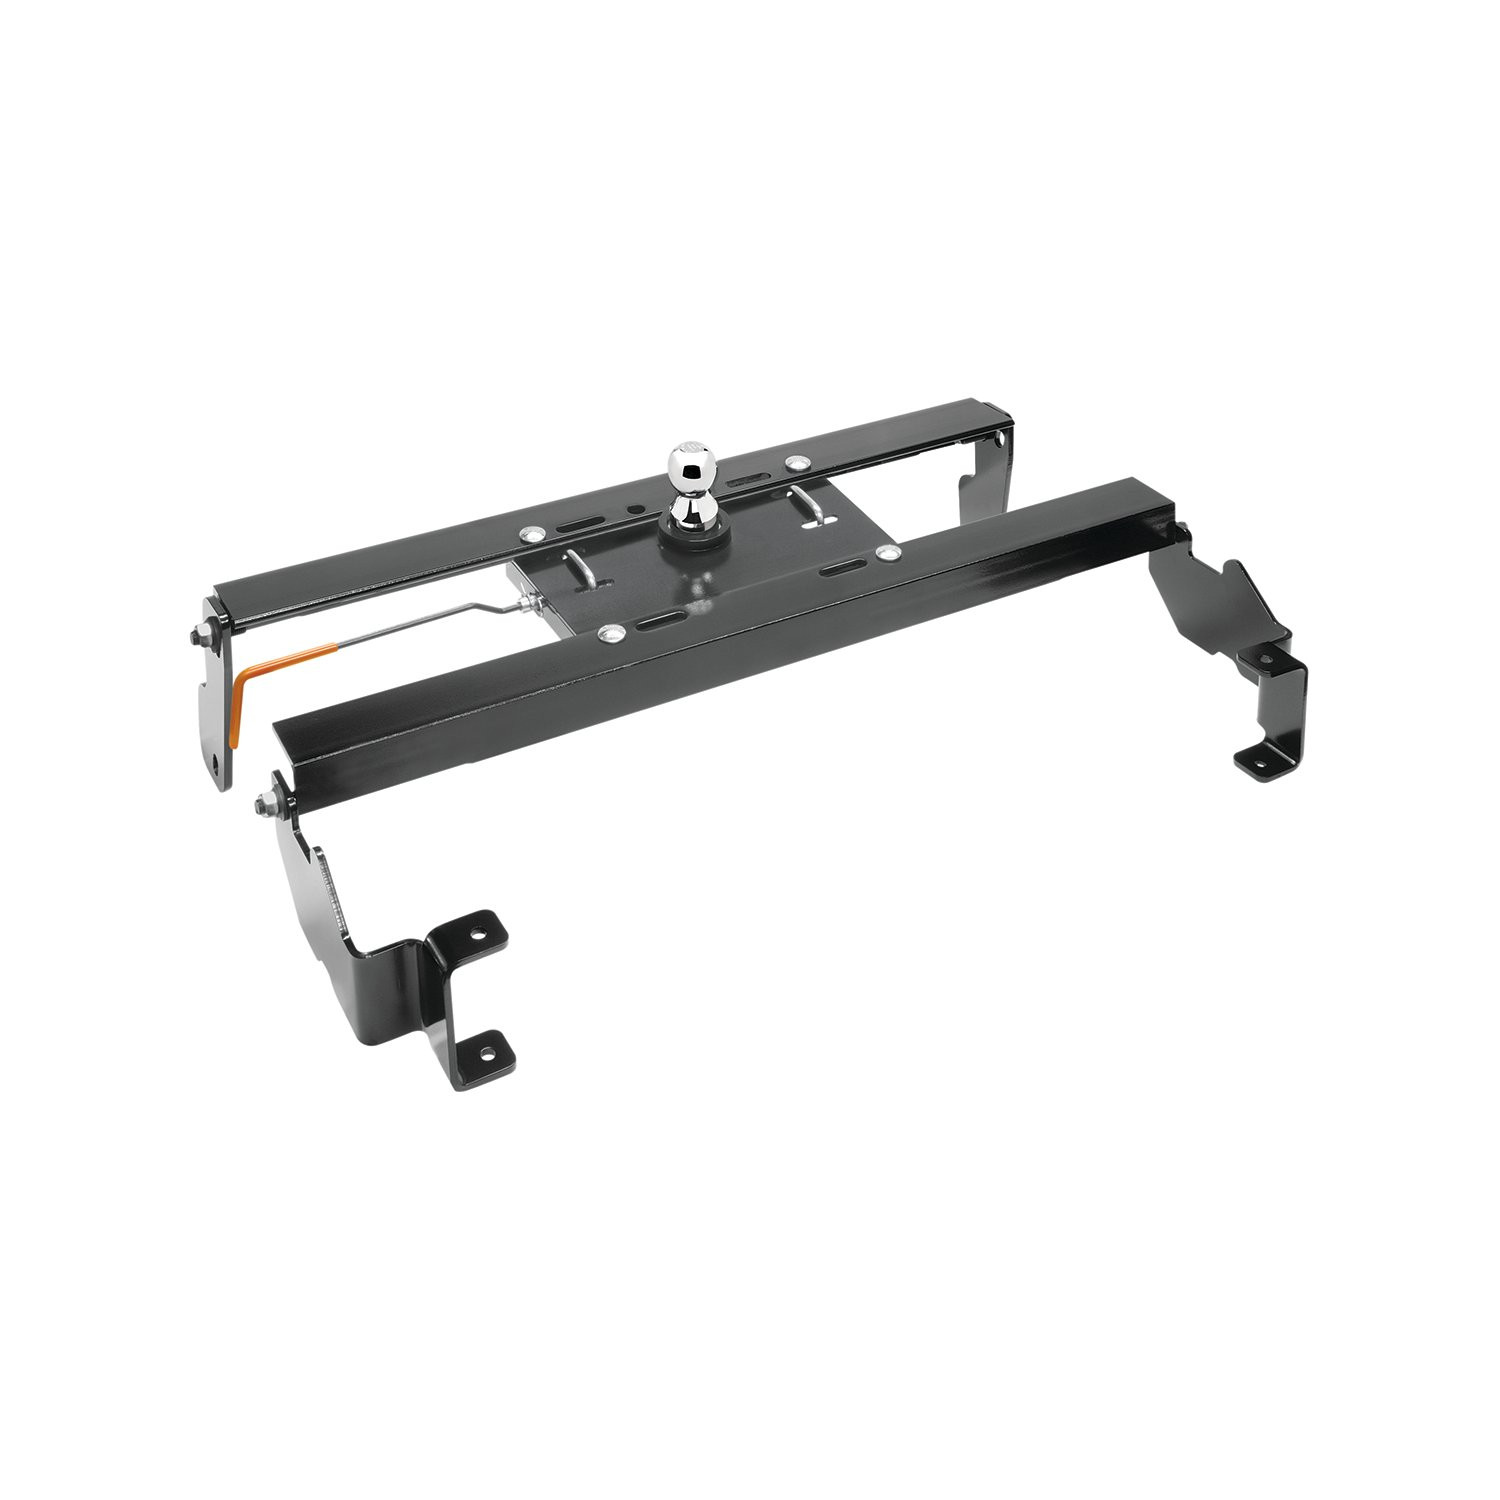
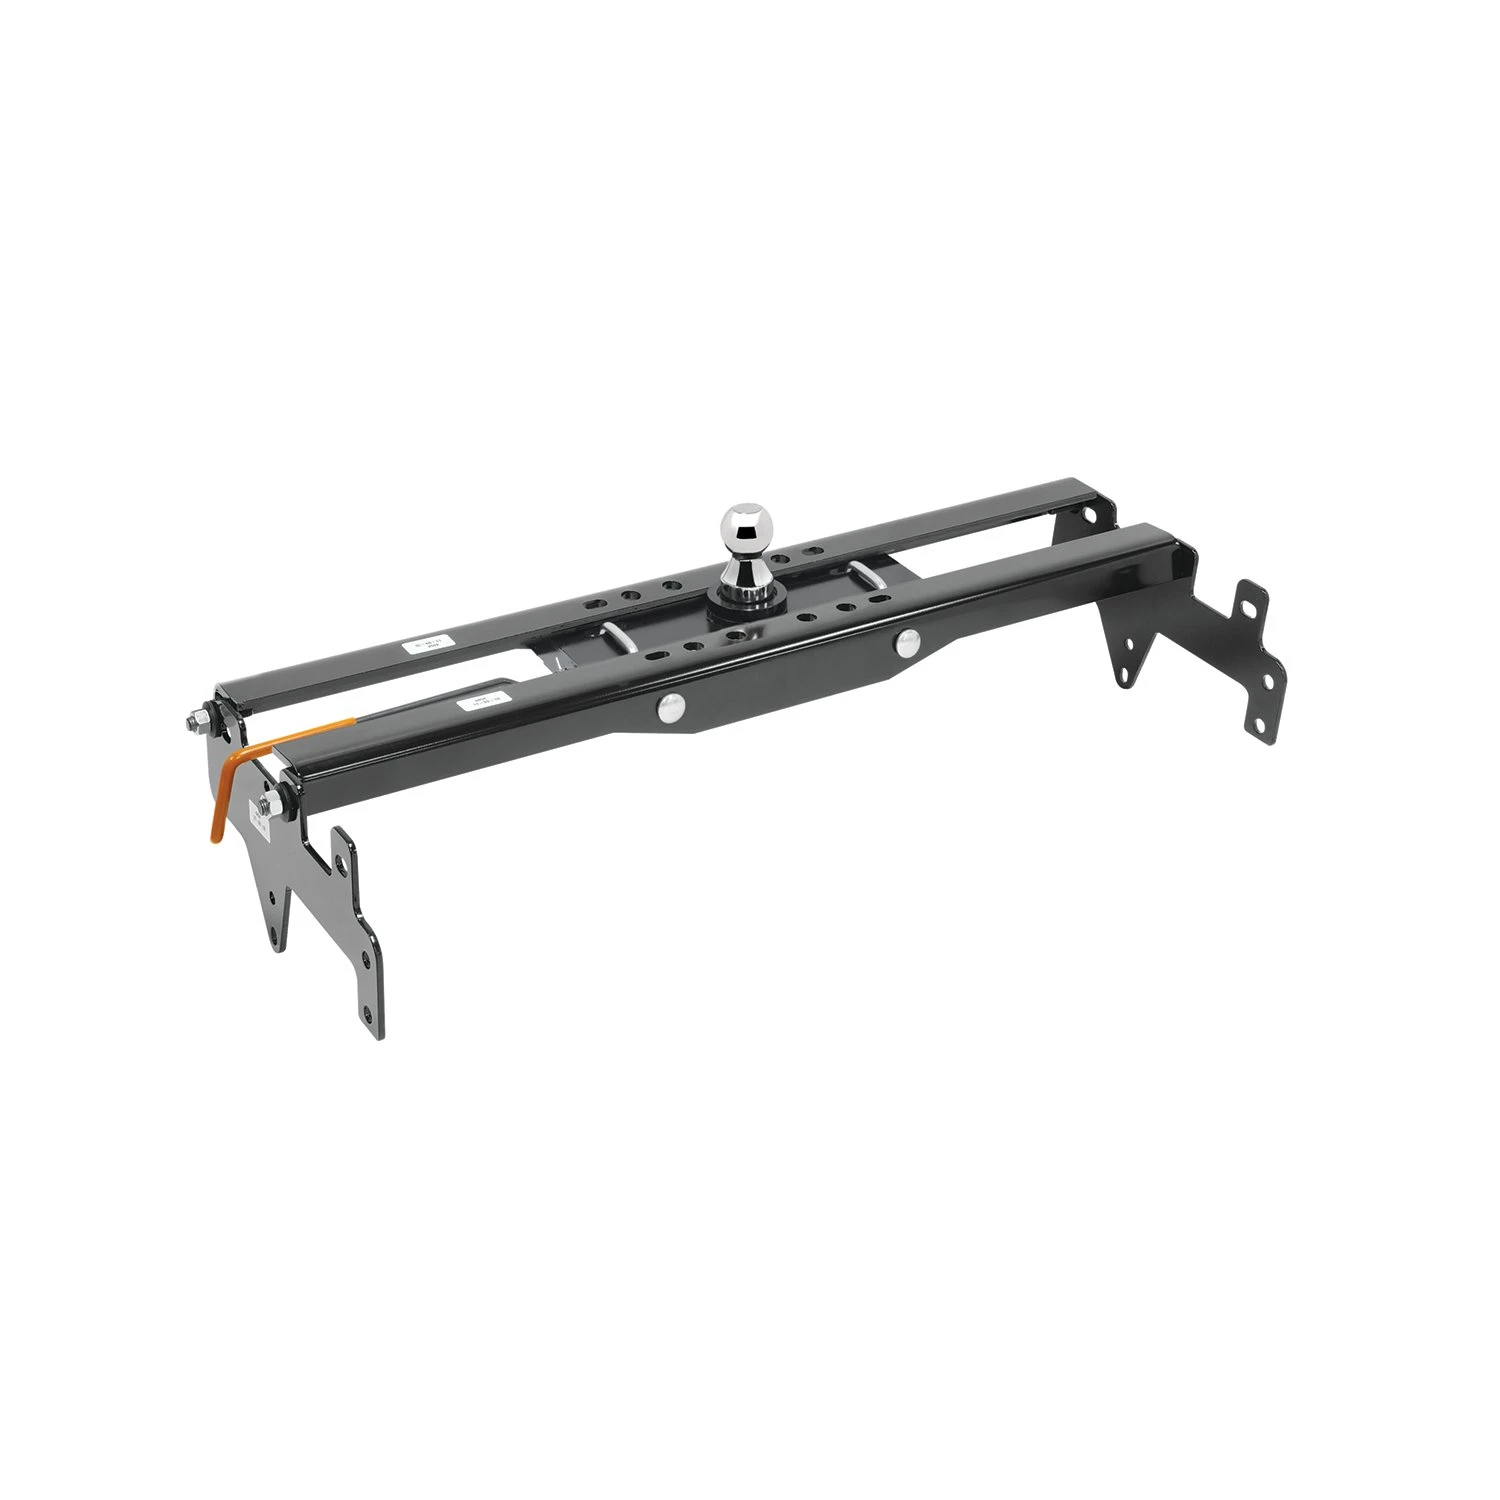
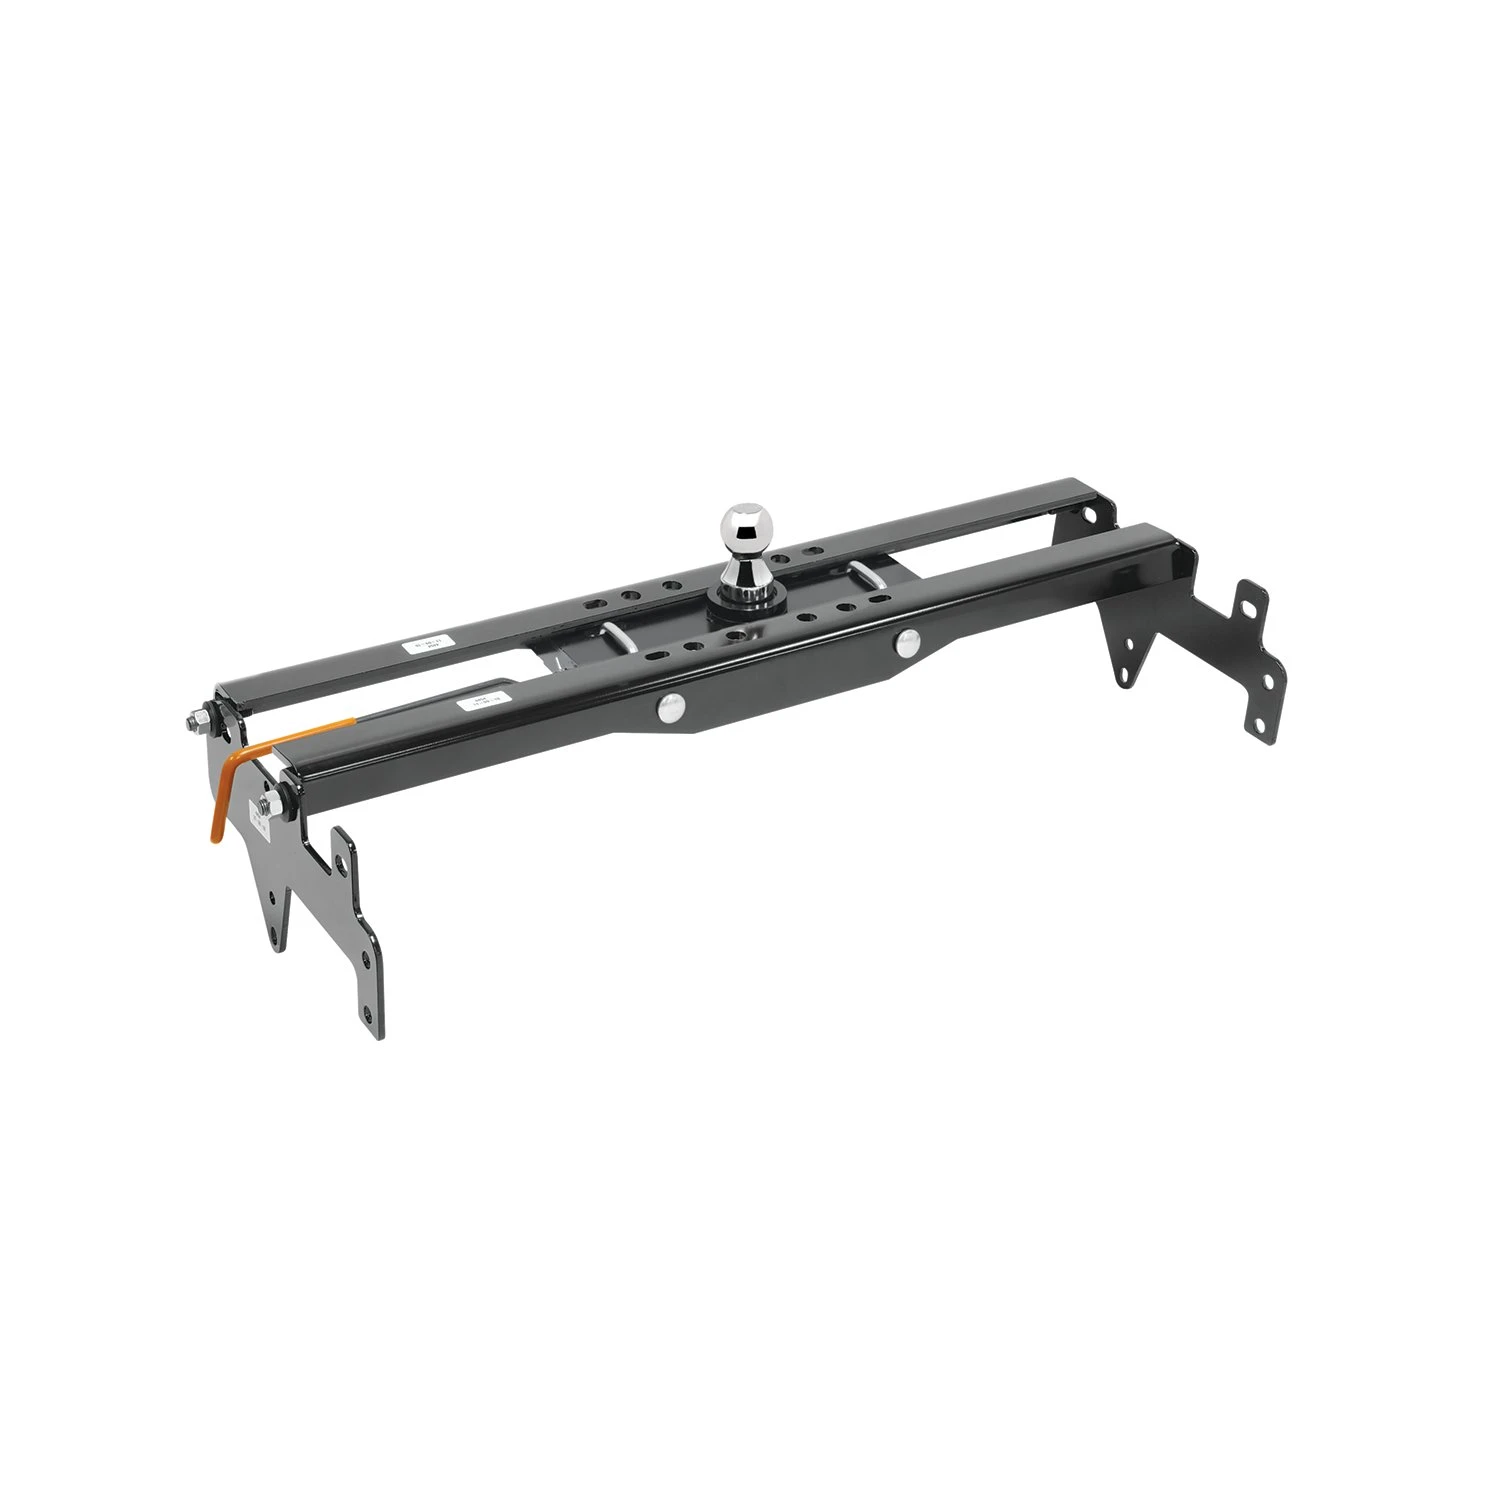
30K 2003-2006 Chevrolet Silverado 1500 Draw-tite Hide-A-Goose Underbed Gooseneck Hitch KitDraw-titeOriginal price was $675.00. Current price is $546.18.Out of Stock
View productOur in-house experts typically reply within one business day.

Draw-tite

Always the correct part
We know our products
Quality Products
Free Shipping!
Always the correct part
We know our products
Quality Products
Free Shipping!

Draw-Tite has designed custom-fit trailer hitches since 1946 and is one of North America's most widely fitted hitch brands. Receiver hitches use solid all-welded construction and low-profile designs that follow modern vehicle contours, install with minimal bumper cutting or drilling, meet or exceed V5 CSA and SAE J684 standards, and carry a limited lifetime warranty.
Draw-Tite has been leading custom-fit trailer hitch design and engineering since its founding in 1946, and it remains one of the most widely fitted hitch brands in North America. The company's stated approach is straightforward: every hitch is tested rigorously so that it performs well beyond published industry standards, a philosophy it markets as Tested Tough. It sits within the Horizon Global towing group alongside Reese, Fulton, Bulldog, Tekonsha, Bargman and Wesbar.
Custom fit is the defining characteristic. Rather than adapting a universal design, Draw-Tite engineers a trailer hitch for a specific make, model and model year, so it bolts to existing frame locations with minimal bumper cutting or drilling. Low-profile designs follow the rear contours and aerodynamic styling of modern vehicles, which matters more than it once did now that rear fascias are shaped and sensor-equipped. Construction is solid all-welded steel for maximum strength, and every hitch meets or exceeds V5 CSA and SAE J684 standards and is backed by a nationwide limited lifetime warranty.
The range spans receiver sizes and classes to suit different loads, from 1-1/4 inch receivers for bike racks, cargo carriers and light trailers up through 2 inch receivers for heavier towing. Front mount hitches add a receiver at the front of the vehicle for winch mounts, snow plows, spare carriers and precise trailer positioning.
The Hidden Hitch series takes concealment further by mounting behind the vehicle's rear fascia, so the vehicle keeps its factory appearance until a removable receiver is fitted. Each is custom designed per make and model for a no-drill installation that does not compromise ground clearance, rated for up to 3,500 pounds gross trailer weight and 350 pounds tongue weight. Matching plug-and-play wiring completes the towing system.
Experts available to answer your questions
Call 888-634-9494Lifetime
Yes, the 4446 kit is designed for Dodge Ram 1500 trucks with both short bed (6' 4") and long bed (8'). However, the hole location in the truck bed differs by bed length: 44-1/8 inches from the rear for short bed, and 46-1/8 inches from the rear for long bed. The kit is compatible with either the 9464/9474 Hide-A-Goose hitch or the 6300/8339 gooseneck hitch, but not both simultaneously.
Yes, the 4446 kit is compatible with both the 9464 and 9474 Hide-A-Goose hitch models. The kit includes a custom handle designed specifically for Dodge Ram 1500 applications. You will need to cut 1-1/2" to 2" from the original plastic tube supplied with the 9464 or 9474 hitch and insert it over the end of the new custom handle.
Yes, the 4446 kit is compatible with both the 6300 and 8339 gooseneck hitch models. Installation procedures for these hitches differ from the 9464/9474 Hide-A-Goose, particularly in bed hole drilling and U-bolt installation. Templates are available for each hitch model to assist with accurate hole positioning.
The kit can be installed on dual exhaust trucks, but the exhaust hanger mounted to the top of the rear cross member must be removed before installation. Remove the bolt and slide the hanger out of the rubber isolator to allow the rear cross rail to slide into position.
The 4446F fastener kit includes: (4) hex nuts 5/8-11, (4) carriage bolts 1/2-13 X 1.75, (2) conical toothed washers 5/8", (4) blocks 1/4 X 1.00 X 3.00, (8) hex nuts 1/2-13, (4) lock washers 1/2", (4) conical toothed washers 1/2", (4) shims 1/4 X 1.00 X 2.00, (4) carriage bolts 1/2-13 X 5.50, and (2) lock washers 5/8". For 6300/8339 installations, additional items include (4) shims 1/4 X 1.00 X 2.00, (4) carriage bolts 5/8 X 2.50, (2) U-bolts 5/8" X 5-1/2" length, large flat washers, springs, and 5/8" jam nuts.
Required wrenches: 8mm, 13mm, 3/4", and 15/16". Required drill bits: 1/4", 1/8", and 5/8". Additional tools needed: drill, reciprocating saw (saber saw), and file.
Yes, the plastic inner fender liners on both sides of the truck must be removed to access the frame. After installation, the liners can either be left off or modified and reassembled. Consult with the truck owner about their preference before beginning work.
Remove the clips on the vapor tube and wiring harness attached to the vehicle's rearward cross member. On dual exhaust trucks, remove the exhaust hanger mounted to the top of the cross member by removing the bolt and sliding the hanger out of the rubber isolator. These components must be removed to allow the rearward rail to slide into position between the vehicle bed and frame rails.
Yes, this is critical. All trucks have fuel lines, brake lines, and electrical wiring located along the vehicle frame where the rail kit installs. Carefully examine the location of these systems before installation and be certain not to damage them when positioning hitch components. Be careful when drilling holes, cutting sheet metal, and tightening fasteners to avoid limiting the integrity of these systems.
Mark and drill a 1/4" pilot hole centered between the wheel wells at 44-1/8 inches from the rear of the bed for short bed (6' 4") trucks, or 46-1/8 inches from the rear for long bed (8') trucks. Using a hole saw, enlarge the pilot hole to the final diameter specified in the 9464/9474 Hide-A-Goose instruction sheet.
Yes, a notch must be cut in the bed seam on the passenger's side of the vehicle, between the vehicle frame and the bed. Use a reciprocating saw (saber saw) to cut this notch, which allows the forward and rearward cross members to slide through and position above both frame rails.
For 6300 and 8339 hitches, use the outer edges of the long slots in the rearward cross member as a template to drill 5/8" diameter holes through the truck bed. Not all holes can be drilled from underneath the vehicle; some must be drilled later from inside the bed. A template (part numbers 5978 or 114234 for 6300; 6467 or 6425 for 8339) is provided with the gooseneck hitch to mark the final opening location. Drill 1/4" pilot holes first, then cut out the truck bed opening and file edges as needed.
Yes, if the vehicle is equipped with a bed liner, a section of the bed liner must be cut away so that the gooseneck hitch can contact the bed corrugations. This is necessary for proper hitch mounting and function.
Yes, the plastic inner fender liner can be trimmed to allow access to the custom handle. The kit includes a custom handle that extends beyond the truck shock mount and beyond the plastic inner fender liner. If the truck owner chooses to have the liner trimmed rather than removed, one option is to cut an opening 4-1/2" to 5" wide and cut the opening up to the transition line, about 5" from the bottom edge. Fender liners are removed by taking off 11 screws holding the liner to the wheel well. Consult with the truck owner about their preference before cutting.
Yes, a wood or metal shield must be placed between the frame and the fuel tank or other critical components to prevent damage when the drill breaks through the bed. The fuel tank and/or other vehicle components may be located below some of the holes.
Torque all 5/8-11 GR5 fasteners on the brackets to 150 ft.-lb. (203 N-m), 1/2-13 GR5 fasteners to 75 ft.-lb. (102 N-m), and 5/8-11 GR8 fasteners on the hitch to 212 ft.-lb. (287 N-m). Use the following torque sequence: (a) torque frame brackets to the frame of the vehicle, (b) torque rails to the frame brackets, (c) torque hitch to rails.
For the rearward cross member: torque 5/8-11 GR5 fasteners to 150 ft.-lb. (203 N-m) and 1/2-13 GR5 fasteners to 75 ft.-lb. (102 N-m). For the forward cross member and clamp brackets: torque 5/8-11 GR5 fasteners to 150 ft.-lb. (203 N-m) and 1/2-13 GR5 fasteners to 75 ft.-lb. (102 N-m). For the 5/8 X 2.50" carriage bolts through the hitch: torque nuts to 150 ft.-lb. (203 N-m). For the U-bolt jam nuts: tighten until 3 threads are visible past the bottom of the jam nut.
The 5/8" jam nuts on the U-bolts are tightened until 3 visible full bolt threads are visible past the bottom of the jam nut. This applies to both legs of both U-bolts (4 jam nuts total).
1. Remove plastic inner fender liners. 2. Remove clips on vapor tube and wiring harness from rearward cross member; remove exhaust hanger on dual exhaust trucks. 3. Cut notch in bed seam on passenger's side and slide forward and rearward cross members into position. 4. Mark and drill 1/4" pilot hole in bed (44-1/8" for short bed, 46-1/8" for long bed), then enlarge to final diameter. 5. Place 5/8" carriage bolts from hitch fastener kit into square holes on cross members. 6. Loosely install Hide-A-Goose hitch to cross members. 7-11. Install and loosely position all brackets and fasteners. 12. Align hitch ball sleeve with bed opening, then torque all fasteners in sequence. 13. Re-attach wiring harness and vapor tube. 14-15. Install or trim plastic inner fender liner as desired.
1. Remove plastic inner fender liners. 2. Remove clips on vapor tube and wiring harness from rearward cross member; remove exhaust hanger on dual exhaust trucks. 3. Cut notch in bed seam on passenger's side and slide cross members into position. 4-8. Install and loosely position rearward and forward brackets and clamp brackets. 9. Torque rearward cross member fasteners. 10. Drill 5/8" holes using outer edges of rearward cross member slots as template. 11. Align template with drilled holes and center punch final opening holes. 12-13. Drill 1/4" pilot holes and cut out bed opening; file edges. 14. Install hitch into opening. 15. Drill forward mounting holes and U-bolt holes using installed hitch as guide. 16-19. Install shims, carriage bolts, U-bolts, and torque all fasteners. 20. Re-attach wiring harness, vapor tube, and inner fender liners if desired.
Most fasteners should be loosely installed during the initial positioning steps. For the 9464/9474 Hide-A-Goose installation, all fasteners remain loose until step 12, when the hitch ball sleeve is carefully aligned with the bed opening and all fasteners are torqued in the specified sequence. For the 6300/8339 installation, the rearward cross member fasteners are torqued in step 9, but the forward cross member remains loose until step 19 after all holes are drilled and the hitch is installed.
After all brackets and fasteners are loosely installed, carefully align the hitch ball sleeve with the opening in the truck bed before final torquing. This alignment is critical for proper hitch function and must be completed before torquing all fasteners to their final specifications.
U-block shims (1" X 2") must be placed between the hitch and the bed and between the cross members and the bottom of the bed. These shims are necessary to prevent the bed corrugations from collapsing when the bolts are tightened. Four shims total are used in the installation.
Under no circumstances should the towing vehicle manufacturer's recommended towing capacity be exceeded. This is the primary safety requirement for all installations.
Check for adequate clearance between the gooseneck trailer and the rear of the cab and the rear of the truck box before installing the hitch. This ensures the trailer will not contact the vehicle during towing.
Before every tow, check the ball, hitch coupler, safety chains, and other connections for proper operation. Always ensure the ball is fully locked before towing.
Keep the ball and ball sleeve (for Hide-A-Goose) or ball pocket (for 6300/8339) well lubricated. Periodically re-torque all hitch fasteners. Check the ball, hitch coupler, safety chains, and other connections for proper operation every time you tow.
The 4446 kit includes the mounting rail system, brackets, and fastener kit 4446F. For Hide-A-Goose installations, a custom handle designed for Dodge Ram 1500 applications is included. The kit does not include the gooseneck hitch head itself (9464, 9474, 6300, or 8339); that must be purchased separately.
Yes, the 4446 fits both short bed (6' 4") and long bed (8') Dodge Ram 1500 trucks. Hole locations differ by bed length: 44-1/8" from rear for short bed, 46-1/8" for long bed.
The 4446 is compatible with 9464/9474 Hide-A-Goose hitch heads or 6300/8339 gooseneck hitch heads, but not both simultaneously. Installation procedures differ between these models.
Yes, drilling is required. For Hide-A-Goose: drill a 1/4" pilot hole in the bed at 44-1/8" (short bed) or 46-1/8" (long bed) from rear, then enlarge to final diameter. For 6300/8339: drill 5/8" holes in the bed and U-bolt holes. A notch must also be cut in the bed seam using a reciprocating saw.
Required: wrenches (8mm, 13mm, 3/4", 15/16"), drill with bits (1/4", 1/8", 5/8"), reciprocating saw, and file. Fastener Kit 4446F is required.
Yes, plastic inner fender liners on both sides must be removed for frame access. After installation, they can be left off or modified and reassembled per truck owner preference.
Hide-A-Goose: 5/8-11 GR5 fasteners 150 ft.-lb. (203 N-m), 1/2-13 GR5 fasteners 75 ft.-lb. (102 N-m), 5/8-11 GR8 hitch fasteners 212 ft.-lb. (287 N-m). 6300/8339: 5/8-11 GR5 fasteners 150 ft.-lb., 1/2-13 GR5 fasteners 75 ft.-lb., 5/8 X 2.50" carriage bolts 150 ft.-lb., U-bolt jam nuts tightened until 3 threads visible.
Never exceed the towing vehicle manufacturer's recommended towing capacity. Always ensure the ball is fully locked before towing. Check the ball, hitch coupler, safety chains, and connections for proper operation every time you tow.
Keep the ball and ball sleeve/pocket well lubricated. Periodically re-torque all hitch fasteners. Check ball, hitch coupler, safety chains, and connections for proper operation before every tow.
The manual requires that the hitch ball sleeve be carefully aligned with the opening in the truck bed before torquing fasteners. If alignment is not possible, verify that the cross members are positioned correctly above both frame rails and that all brackets are properly seated. Loosen fasteners and reposition as needed before final torquing. Do not force alignment by over-tightening fasteners.
Bed corrugation collapse indicates that shims were not properly installed. The manual requires U-block shims (1" X 2") to be placed between the hitch and the bed and between the cross members and the bottom of the bed before installing the 5/8 X 2.50" carriage bolts. These shims are necessary to prevent bed corrugation collapse. Loosen fasteners, install shims correctly, and re-torque.
The manual requires that the ball be fully locked before towing and kept well lubricated. If the ball does not lock properly, check that the ball sleeve (Hide-A-Goose) or ball pocket (6300/8339) is clean and well lubricated. Verify that all fasteners are torqued to specification and that the hitch is properly installed. If the problem persists, refer to the specific hitch head instruction sheet (9464/9474 or 6300/8339).
The manual notes that fasteners should be periodically re-torqued. If fasteners become loose, re-torque all hitch fasteners to the specified values: 5/8-11 GR5 fasteners to 150 ft.-lb. (203 N-m), 1/2-13 GR5 fasteners to 75 ft.-lb. (102 N-m), and 5/8-11 GR8 fasteners to 212 ft.-lb. (287 N-m) for Hide-A-Goose installations. For 6300/8339 installations, re-torque 5/8-11 GR5 fasteners to 150 ft.-lb. and 1/2-13 GR5 fasteners to 75 ft.-lb.
The Hide-A-Goose is a gooseneck hitch head (part numbers 9486 and 9487) designed to couple gooseneck trailers to truck beds. It features a ball that can be stored inside the head when not in use, and includes a locking pin assembly to secure the ball in either the towing or stored position. The hitch is rated for a maximum gross trailer weight (GTW) of 30,000 LB and a maximum tongue weight (TW) of 7,500 LB.
Yes. The Hide-A-Goose is intended to be used with Horizon Global manufactured mounting kits. When installed with a Horizon Global mounting kit, the hitch installation instructions are included as part of the mounting kit instructions. If a Horizon Global mounting kit is not used, the hitch becomes a general application product and the installer is responsible for selecting structurally safe materials and locations for attachment.
Yes, but with important caveats. If you do not use a Horizon Global mounting kit, the hitch becomes a general application product and the installer is responsible for selecting structurally safe materials and locations for attachment. Additionally, to achieve the maximum head rating of 30,000 LB GTW and 7,500 LB TW, you must install four additional 5/8" Grade 8 bolts (not provided) inside the holes of the head along with the four vertical bolts. Without these extra bolts, the hitch rating will be lower.
Before installation, you must verify: (1) the hitch ball is located along the truck's fore/aft centerline; (2) the ball centerline is above and forward of the rear axle; (3) adequate clearance exists between the gooseneck trailer and the rear of the vehicle during turning so the trailer does not contact the truck; (4) adequate clearance exists between the forward corners of the gooseneck trailer and the cab; and (5) the ball position and under-vehicle supports do not interfere with vehicle cross members, brake lines, electrical wiring, cables, fuel lines, or vents.
The manual requires you to check for interference during installation. In step 1, you must determine that the ball position and under-vehicle supports do not interfere with any vehicle cross members, brake lines, electrical wiring, cables, fuel lines, or vents. Additionally, in step 10, after installation, you must check clearance between the ball (in stored position) and truck equipment such as the differential and brake lines by measuring from the axle to the rubber bumper stop and from the ball to the nearest item. If insufficient space is present, the manual advises not storing the ball in the head when carrying heavy loads.
You will need: a 15/16" wrench, a 3/16" drill bit, a 5/8" drill bit, and a 3 1/2" hole saw. A torque wrench is also required to tighten fasteners to 210 Lb.-Ft. (285 N·M). If you are installing a 4457 rail kit, you will also need a 5/8" drill bit (marked with an asterisk in the equipment list).
The hitch includes: (1) head, (1) 2-5/16" ball, (1) handle, (1) vinyl handle, (1) spring clip, (1) locking pin assembly, (2) 5/8" U-bolts, (4) 5/8"-11 × 2.00 Grade 8 carriage bolts (or 6 if using 4457 rail kit), (4) conical toothed washers for carriage bolts, (4) conical toothed washers for U-bolts, (4) 5/8"-11 hex nuts, (4) 5/8"-18 lock nuts, (4) U-bolt springs, and (1) magnetic cover. A Draw-Tite brand label is also supplied for application to the frame bracket after installation.
Yes. If you are not installing the head on a Horizon Global manufactured mounting kit, you must install four additional 5/8" Grade 8 bolts (not provided with the hitch) inside the holes of the head along with the four vertical bolts to obtain the maximum head rating of 30,000 LB GTW and 7,500 LB TW. These bolts are not included and must be sourced separately.
Yes. If you want to move the handle to the other side of the head, pull the locking pin spring away from the "C" clip and remove the clip. The locking pin assembly can then be removed and reassembled in the same order on the other side (see Figure 4). After reinstalling, check for proper movement and holding slot engagement with the ball in place (see Figure 3).
The installation sequence is: (1) Install under-bed supports with 4 vertical 5/8" bolts in rails; (2) Mark and center-punch the hitch ball center on the truck, drill a 3/16" pilot hole, recheck clearances, then open the hole with a 3 1/2" hole saw and file edges; (3) Lift the head into position and use 5/8" conical tooth washers and hex nuts to install it (do not tighten completely yet); (4) If using a 4457 rail kit only, drill 5/8" holes through the truck bed using the inner slots on the forward side of the head, then install 5/8" carriage bolts from the top of the bed down through the holes, hitch rail, and head slot with washers and nuts; (5) Align the ball sleeve with the 3 1/2" hole and tighten the 5/8" fasteners; (6) Using U-bolt slots as a guide, drill four 5/8" holes in the bed in lower corrugations; (7) Paint the drilled holes and install U-bolts from inside the bed; (8) From underneath, install conical toothed washers, U-bolt springs, and lock nuts, tightening so a minimum of 3 threads show past the nuts; (9) Check clearance between the stored ball and truck equipment.
You will drill at least 5 holes in the truck bed: (1) one 3 1/2" hole for the ball sleeve (step 4), and (2) four 5/8" holes for the U-bolts (step 7). If you are installing a 4457 rail kit, you will drill an additional 2 holes (5/8" diameter) using the inner slots on the forward side of the head (step 5A), for a total of 7 holes. The 5/8" holes for U-bolts must be drilled in lower bed corrugations to limit the amount of U-bolt showing above the bed.
No. The manual explicitly states: "Do not cut access or attachment holes with a torch." You must use the specified drill bits and hole saw to create the mounting holes.
The procedure is: (1) Mark the hitch ball center on the truck; (2) Center-punch the marked location; (3) Drill a 3/16" pilot hole; (4) Recheck all clearances; (5) Open the 3/16" hole with a 3 1/2" hole saw; (6) File the edges as needed. Do not tighten the head fasteners until after the ball sleeve is aligned with this hole.
The 5/8" U-bolt holes must be drilled in lower bed corrugations to limit the amount of U-bolt showing above the bed. Use the U-bolt slots as a guide to determine the location. The holes must be positioned so that the U-bolts operate smoothly when lifted up and down; if they do not move smoothly, the holes must be enlarged as necessary.
The 5/8" drill bit is required for all installations to drill the U-bolt holes. However, the equipment list notes with an asterisk that the 5/8" drill bit is specifically required for the 4457 rail kit only, indicating that this kit has additional 5/8" holes to drill beyond the standard U-bolt holes.
All 5/8" Grade 8 fasteners (excluding U-bolt fasteners) must be tightened with a torque wrench to 210 Lb.-Ft. (285 N·M). The U-bolt lock nuts should be tightened so that a minimum of 3 threads are showing past the nuts. The manual does not provide a specific torque value for U-bolt fasteners.
The Hide-A-Goose hitch is rated for a maximum gross trailer weight (GTW) of 30,000 LB (13,620 kg) and a maximum tongue weight (TW) of 7,500 LB (3,405 kg). You must not exceed the lower of the towing vehicle manufacturer's rating or these fastener kit ratings.
The hitch includes a 2-5/16" ball.
Observe safety precautions when working beneath a vehicle and wear eye protection. Do not cut access or attachment holes with a torch. Do not exceed the hitch's weight ratings (30,000 LB GTW, 7,500 LB TW) or the lower of the towing vehicle manufacturer's rating. If the hitch is removed, plug all holes in the trunk pan or other body panels to prevent entry of water and exhaust fumes.
Before towing, connect the trailer to the tow vehicle following the coupler manufacturer's operating instructions. Adjust the coupler to provide about 6" of clearance between the bottom of the trailer nose and the top of the pickup bed sides. Slowly back the trailer to a jackknifed position while checking for adequate clearance between the gooseneck trailer and the rear of the vehicle, and between the forward corners of the trailer and the cab. Slowly jackknife the truck and trailer in the opposite direction and check clearances to the end of the truck and the cab.
The manual advises checking clearance between the stored ball and truck equipment (such as the differential and brake lines) in step 10. If insufficient space is present, the manual states: "inform customer not to store ball in the head when carrying heavy loads." The decision depends on your specific truck's clearances.
After installation and before towing, verify trailer clearances by slowly backing and jackknifing the trailer to check for adequate clearance between the gooseneck trailer and the rear of the vehicle, and between the forward corners of the trailer and the cab. Check clearance between the stored ball and truck equipment (differential, brake lines, electrical lines) by measuring from the axle to the rubber bumper stop and from the ball to the nearest item. If the locking pin assembly was moved to the other side, verify proper movement and holding slot engagement with the ball in place.
Use the magnetic cover to keep the assembly free of dirt and debris. Lubricate the hitch ball monthly or as needed with heavy grease. Lubricate the ball sleeve with heavy grease when the ball is installed and/or removed. Lubricate the locking pin monthly or as needed with spray-on penetrating oil. Check bolt torque monthly. Check all equipment before towing for worn or damaged parts and replace worn or damaged parts immediately.
Check bolt torque monthly. The manual also states to check the hitch frequently, making sure all fasteners and the ball are properly tightened.
A hitch or ball which has been damaged should be removed and replaced immediately. The manual states: "REPLACE WORN OR DAMAGED PARTS IMMEDIATELY."
If the hitch is removed, plug all holes in the trunk pan or other body panels to prevent entry of water and exhaust fumes.
Yes, the Hide-A-Goose is designed for use with Horizon Global manufactured mounting kits. Installation instructions are included with the mounting kit. If not using a Horizon Global kit, the installer is responsible for selecting safe attachment materials and locations.
You need: 15/16" wrench, 3/16" and 5/8" drill bits, 3 1/2" hole saw, and a torque wrench. A 5/8" drill bit is also required for 4457 rail kit installations.
Yes. You must drill one 3 1/2" hole for the ball sleeve and four 5/8" holes for the U-bolts in the truck bed. If using a 4457 rail kit, you must also drill two additional 5/8" holes. Do not use a torch to cut holes.
All 5/8" Grade 8 fasteners (excluding U-bolt fasteners) must be tightened to 210 Lb.-Ft. (285 N·M) using a torque wrench.
Verify trailer clearances by slowly backing and jackknifing the trailer to check for adequate clearance between the gooseneck trailer and the rear of the vehicle, and between the forward corners of the trailer and the cab. Adjust the coupler to provide about 6" of clearance between the bottom of the trailer nose and the top of the pickup bed sides.
If U-bolts do not move smoothly when lifted up and down, enlarge the 5/8" holes as necessary (step 9). The holes may be slightly undersized or misaligned, preventing smooth operation. Enlarging them will allow the U-bolts to operate freely.
After moving the locking pin assembly to the other side of the head (step 2A), verify proper movement and holding slot engagement with the ball in place (step 2B). If engagement is not correct, ensure the locking pin assembly was reassembled in the same order on the other side and that the spring and "C" clip are properly installed.
If insufficient clearance exists between the stored ball and truck equipment (differential, brake lines, electrical lines), do not store the ball in the head when carrying heavy loads. The manual advises informing the customer of this restriction. Measure the distance from the axle to the rubber bumper stop and compare it to the distance from the ball to the nearest item to determine safe storage conditions.
Check bolt torque monthly and retighten as needed. The manual states to check the hitch frequently, making sure all fasteners and the ball are properly tightened. All 5/8" Grade 8 fasteners (excluding U-bolt fasteners) must be tightened to 210 Lb.-Ft. (285 N·M). U-bolt lock nuts should be tightened so a minimum of 3 threads are showing past the nuts.
On Sale Today
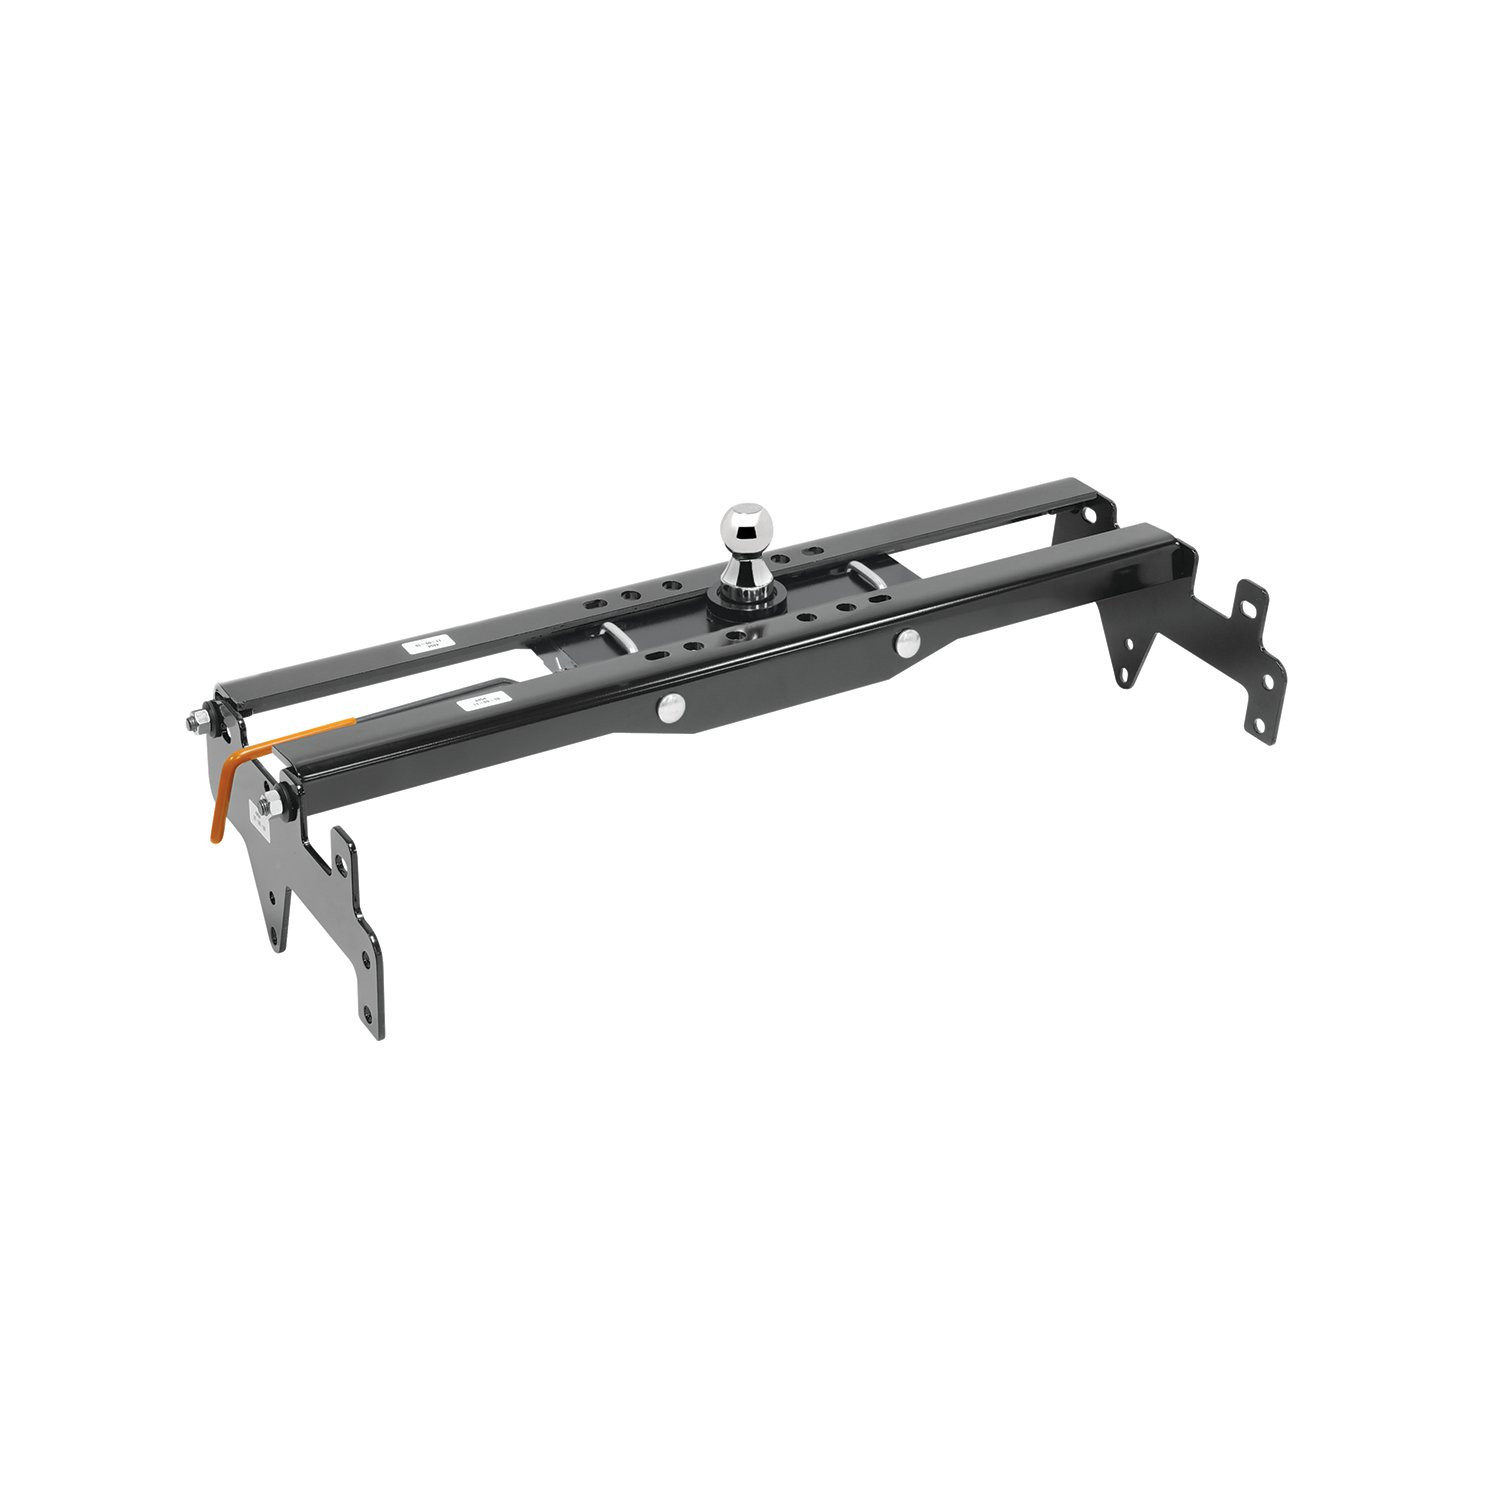
Original price was $1,018.75. Current price is $790.40.You save $228.35 (22%)
Free Shipping
Ships free on all orders
 Authorized Dealer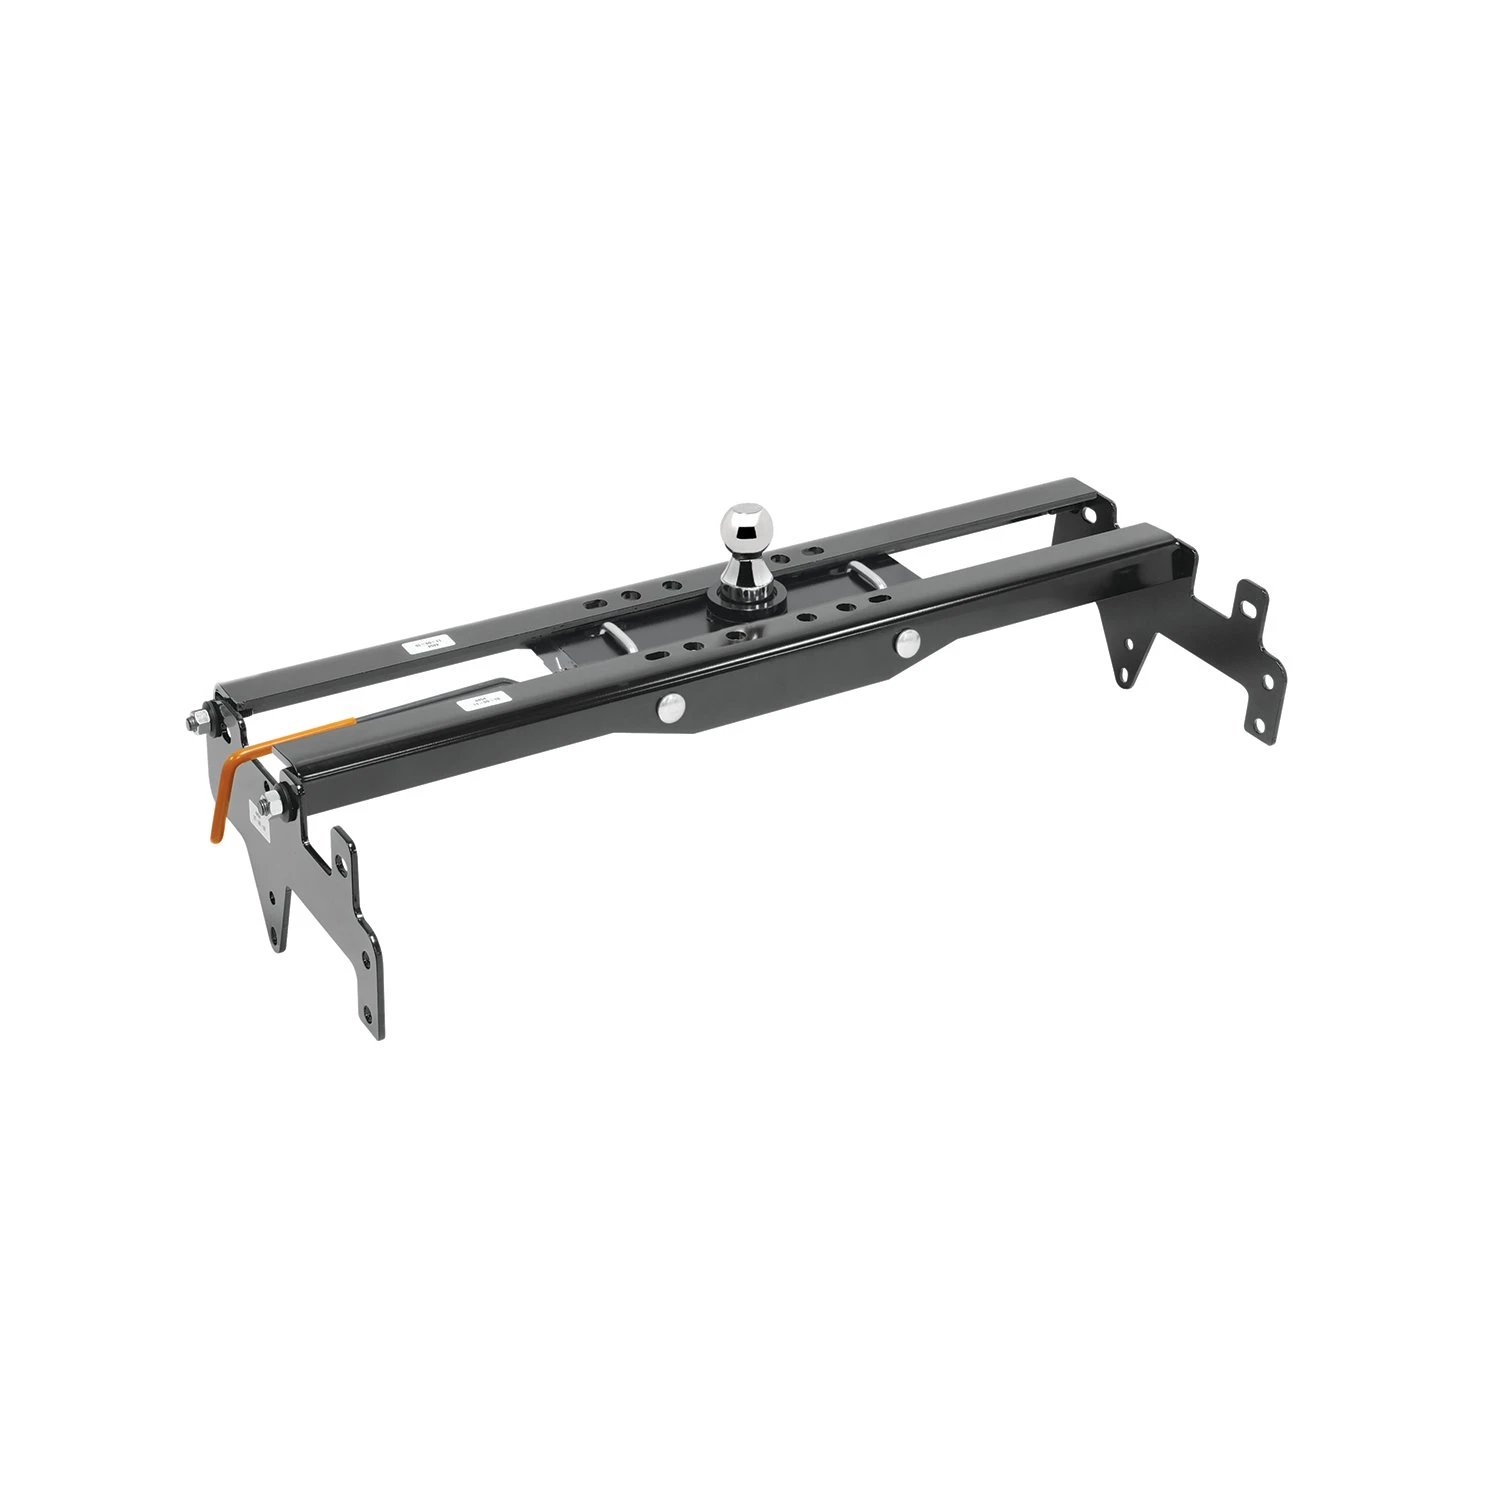
Quick Ship
In stock and ready to ship — order now!
FREE ShippingFREE SHIPPING
Estimated delivery Fri, Oct 16 - Mon, Oct 19
Order before 2 PM EST Monday–Friday for same-day processing
Guaranteed safe & secure checkout
No reviews have been added for this product.