
BlueOx 2" Receiver Adapter, Allure BX88249Blue OxOriginal price was $699.99. Current price is $500.00.Out of Stock
View productOur in-house experts typically reply within one business day.

Blue Ox



Always the correct part
We know our products
Quality Products
Free Shipping!
Always the correct part
We know our products
Quality Products
Free Shipping!

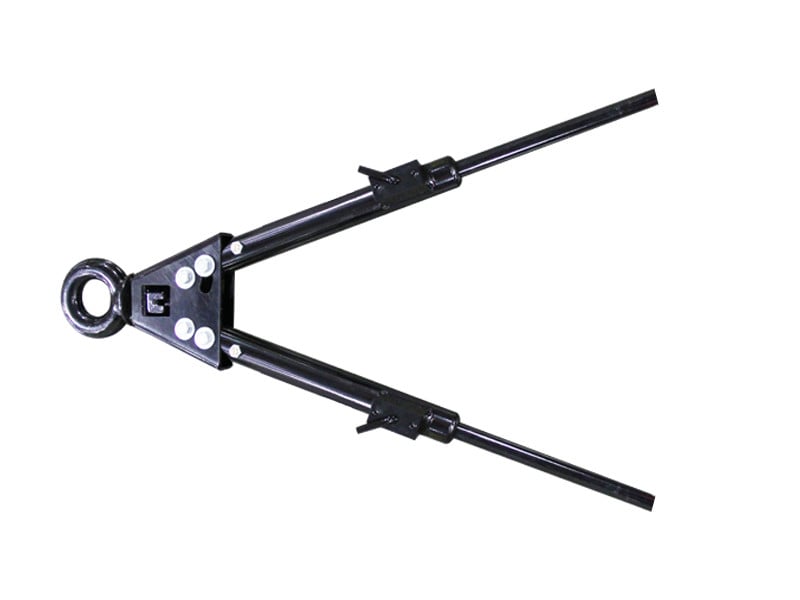
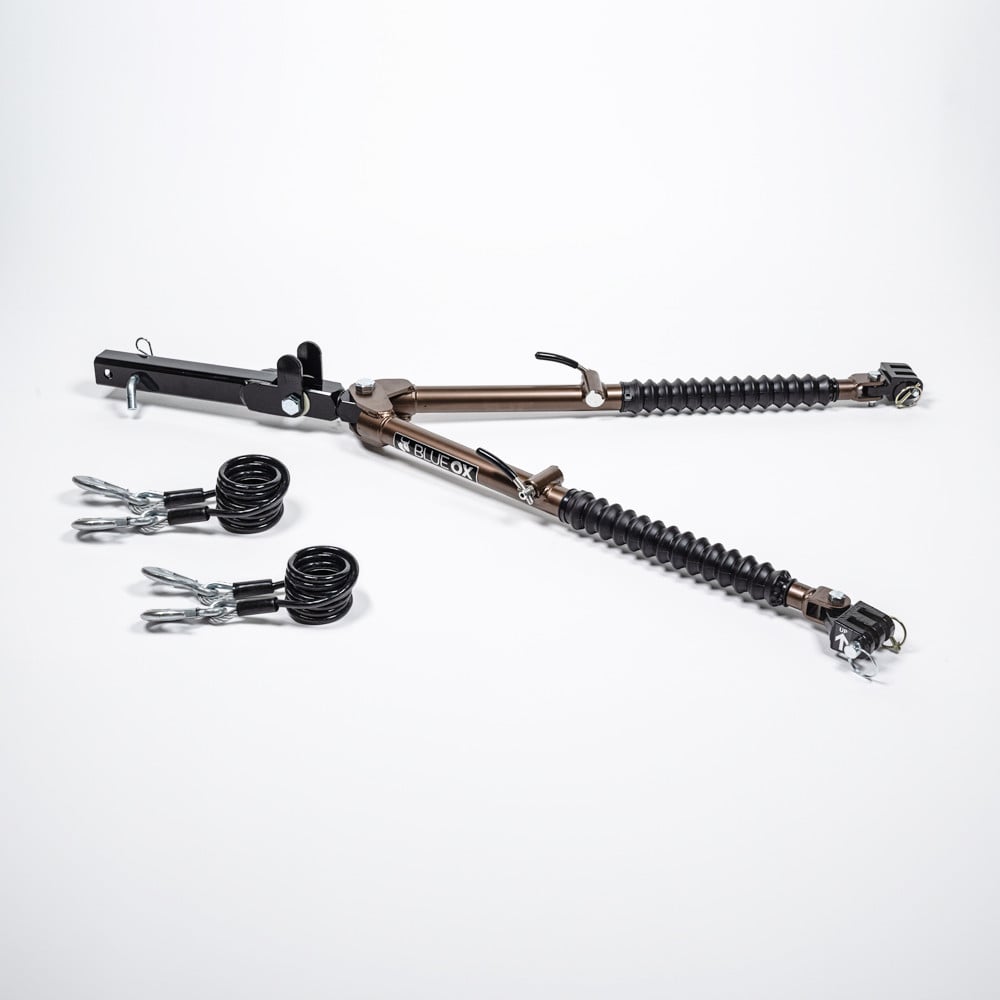
High-quality construction: The Blue Ox BX7460P Tow Bar is built to last, ensuring you get a reliable, long-lasting towing solution.
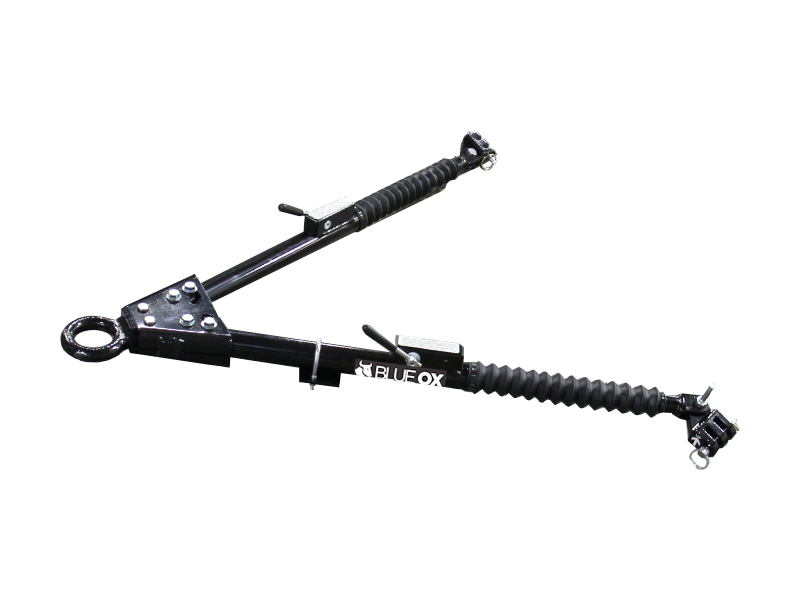
Finish: Powder Coat
1765: Yes
7340: Yes
1761: 10000
1764: 38
Take your towing to the next level with the Blue Ox BX7460P Tow Bar. Known worldwide for its high-quality towing products, Blue Ox delivers yet again with this exceptional tow bar. Coated in a durable powder finish, the BX7460P Tow Bar offers superior resistance to corrosion and wear. It's designed to safely tow vehicles up to 10,000 pounds, making it a reliable choice for both recreational and commercial purposes. The Blue Ox BX7460P Tow Bar is a versatile tool that will meet your towing needs with ease, safety, and durability.

Blue Ox is known internationally for recreational and commercial towing products, manufacturing in Pender, Nebraska since 1925. The line covers tow bars and vehicle-specific baseplates for flat towing behind a motorhome, sway control and weight distributing hitches, supplemental braking accessories and towing wiring, backed by patented designs and long-standing customer service.
Blue Ox has manufactured since 1925 and is recognised internationally for towing products and customer service. The company operates from Pender, Nebraska, where it grew out of Automatic Manufacturing Co., a business that started with cattle oilers and developed into agricultural equipment, tractor accessories and trailer towing hardware. That agricultural engineering heritage still shows in how the towing products are built, and the company holds patents across weight distribution, fifth wheel and tow bar designs.
Flat towing is the discipline Blue Ox is best known for. Towing a car with all four wheels on the ground behind a motorhome demands a system that stays rigid under braking, articulates properly over uneven ground, and connects to the towed vehicle at points strong enough to take the load. Blue Ox tow bars handle the first two, with self-aligning arms that latch under tension and release without a struggle when the load is off them. Vehicle-specific baseplates handle the third, engineered per make and model to tie into structural mounting points behind the fascia.
The wider flat towing range covers supplemental braking systems, safety cables and the accessories that make a complete legal setup, along with baseplate wiring and dinghy towing harnesses that pass lighting signals to the towed vehicle without back-feeding its electrical system.
For conventional trailer towing, Blue Ox weight distributing hitches with integrated sway control transfer tongue load onto the tow vehicle's front axle and resist the yaw that crosswinds and passing trucks induce.
The company describes its foundation as customer service, designing around what owners actually ask for, and it runs an RV park adjacent to the factory where customers can stay. Sister operations at the same Nebraska site include Automatic grain roller mills and MAD-RAMPS pivoting ramp systems.
Experts available to answer your questions
Call 888-634-94943 Years
The BX7460P Allure Tow Bar is rated for 10,000 lb towing capacity. However, you must ensure that your towing vehicle, hitch, ball, motorhome chassis, and safety cables are each individually rated for at least the weight of the vehicle being towed. Do not use the tow bar if the towed vehicle's weight, including any cargo, exceeds 10,000 lb.
The BX7460P will work on baseplates with a tab width of 38.5" or smaller for towing. For storage, the tow bar will only store on baseplates with a tab width of 33" or smaller. If you use the tow bar on a baseplate with a different tab width than the initial setup, the leg positions will need to be re-adjusted accordingly.
No. The BX7460P should only be used with vehicles that are towable or have been equipped to be towed. You must follow the towing procedures in your vehicle's owner manual and ensure your towing vehicle is of adequate size with sufficient weight and braking capacity to properly control the towed vehicle in an emergency situation. Check your towing vehicle manufacturer's recommendations for towing, hitch load, and braking capacities.
Yes. The steering wheel on the towed vehicle must be unlocked at all times while being towed. Failure to unlock the steering wheel will create hazardous driving conditions. You must also disengage the parking brake and set up the transmission for towing on the towed vehicle before pulling forward.
Yes. Safety cables or chains are required by law in most states of the United States as well as Canadian territories and provinces. Blue Ox strongly recommends using safety cables (BX88196 Class III, BX88197 Class IV) or permanent safety cables (BX88207 Class III, BX88208 Class IV) with all towing applications. You must verify that the load capacity of the cables or chains meets the needs of your towing setup.
You must disconnect the towed vehicle from the towing vehicle before backing up. Do not back up while vehicles are connected. Backing up while connected can cause damage to both vehicles and the towing system. The towed vehicle may jackknife, causing abnormal stress to the tow bar, car chassis, baseplate, and pintle hitch, which may result in undetected damage.
If the tow bar is in an accident, it must be replaced and must not be used again. An accident can cause unseen damage, and using a damaged tow bar could result in more damage or serious injury. Do not use the tow bar if it is damaged or missing parts.
1. Position both vehicles on a level surface with the towing vehicle's parking brake engaged. 2. Place the pintle ring onto the pintle hitch of the towing vehicle, close the lever, and secure with clip or lock. 3. Loosen the two leg bolts on the driver side and remove the locking washer from the rear bolt. 4. Partially extend one leg by pulling out to disengage the internal latch. Place the triple lug between the attachment tabs on the baseplate and secure with the 1/2" pin and quick pin, ensuring the pin nose points toward the middle of the baseplate. Repeat for both legs. 5. On the towed vehicle, disengage the parking brake, set transmission for towing, and unlock the steering wheel. 6. Pull forward until one or both locking handles engage and lock (they will "pop" up). If only one locks, turn the towed vehicle's steering wheel toward the unlocked leg approximately 1/2 to 3/4 turn before continuing forward. 7. Once both legs are locked, ensure they are equal distance from the centerline of the pintle coupler. 8. On the driver side leg only, reinstall the locking washer and fully tighten the two serrated bolt/nut assemblies.
1. Using the hooks, attach the cables to a solid part of the chassis on the towed vehicle or the convenience links of the baseplate in a crossing pattern underneath the tow bar. 2. Verify the safety snap clicks back against the hook to prevent disconnection. 3. Adjust slack as needed. Cables must not contact the ground, pintle coupler, or locking handles, as damage could occur. Route cables away from the locking handles. Do not wrap safety cables around the legs, as safety cable contact with a locking handle could cause the leg to become unlatched and collapse, leading to major damage. 4. Verify the load capacity of cables or chains used meets the needs of your towing setup.
1. Park the towing vehicle with the towed vehicle in tow in a straight line on a flat, level surface. Engage the towing vehicle parking brake. Place the towed vehicle in park (automatic) or first gear (manual). Unhook lighting and safety cables. 2. Disengage the leg latches by pushing down on the locking handles. Remove the quick pin and 1/2" pin from the passenger side. You may need to tap the 1/2" pin out if there is still pressure on it. 3. Unhook the pintle ring from the pintle hitch. Bring the passenger side leg over to the driver side and seat the triple lug onto the support pin of the driver side leg. Pin both legs together with the hair pin provided. 4. Swing the tow bar toward the passenger side. Attach the pintle ring holding bracket to the passenger side attachment tab using the 1/2" pin and quick pin removed earlier.
Prior to usage, inspect all towing equipment for cracked welds, missing or worn parts, and loose bolts. Check to ensure both legs are latched properly and pins are secured properly before towing. When properly installed, the quick pin ring will snap back onto itself with the chamfered side facing outward. Check clearance between vehicles in all turning situations and check the height difference in your towing setup. The attachment points at the center of the attachment tabs and the center of the coach's hitch receiver should be of equal distance; if a deviation must occur, the hitch receiver should be no more than 3" above or below the attachment tabs.
Once the initial hook up is complete, the tow bar legs should be an equal distance from the centerline of the pintle coupler. If the legs are not equal, adjust accordingly. Periodically check the driver side leg to ensure the bolts are tight and the leg does not move. Check towing setup after any emergency situation and periodically on a long trip.
Keep the tow bar covered when not in use, on or off the towing vehicle, to reduce dust and dirt buildup. Periodically clean the entire surface with a mild soap and water solution and wipe dry with a clean cloth. Check and replace any loose, worn, or damaged bolts, rubber boots, or cap plugs. Check for cracked welds and loose bolts on the baseplate of the towed vehicle and the hitch on the towing vehicle. Approximately once per year, or if it is difficult to move the legs in and out, remove the small cable ties holding the rubber boots on the legs and slide the boots back. Wipe clean each inside leg and apply a light coat of multipurpose grease to ensure smooth operation. Secure each boot back in place with an 8" nylon cable tie.
Approximately once per year, or if it is difficult to move the legs in and out, you should remove the small cable ties holding the rubber boots on the legs and slide the boots back. Wipe clean each inside leg and apply a light coat of multipurpose grease to ensure smooth operation. Secure each boot back in place with an 8" nylon cable tie.
Replacement parts include: Leg Assembly Driver Side (84-0201), Leg Assembly Passenger Side (84-0200), Offset Triple Lug (100-1176, qty 2), 1/2" Pin (229-0520, qty 2), Quick Pin (62-3213, qty 2), 1/2"-13 x 2" Hex Head Bolt (201-0645, qty 2), and 1/2"-13 Essna Jam Nut ZP (202-0143, qty 2). Use only genuine factory replacement parts. If a bolt is lost or needs replacement, use a replacement bolt of the same grade (typically Grade 5). Replacement parts may be ordered through your nearest Blue Ox Dealer or Distributor.
Blue Ox provides a three-year limited warranty to the original retail purchaser. The warranty covers defects in material and workmanship under normal use and service. To activate coverage, the customer warranty card must be returned within 30 days of purchase, and a copy of the original invoice showing date and place of purchase must accompany any warranty claim. The warranty is non-transferable and does not cover incorrect or improper installation, improper use, modification, neglect, failure to properly service and maintain, misuse, accident, normal wear and tear, paint, or rust. Blue Ox assumes no responsibility for loss of use, loss of time, inconvenience, or consequential damages.
You should register your product online at www.blueox.com. Registration is crucial so you may be alerted of product offerings, updates, upgrades, maintenance and safety bulletins, and recalls. You can also register your warranty at http://blueox.com/warranty/.
Be sure the front end of the towed vehicle is properly aligned. Misaligned vehicles may cause poor tracking or abnormal wear on the tires. Check clearance between vehicles in all turning situations to ensure safe operation.
The pintle ring must be parallel to the ground when towing. If the pintle ring is at an angle, damage or an accident may occur. You should check the height difference in your towing setup and make appropriate adjustments by following the recommendations of the tow bar instruction manual.
The attachment points at the center of the attachment tabs and the center of the coach's hitch receiver should be of equal distance. If a deviation must occur, it is recommended that the hitch receiver be no more than 3" above or below the attachment tabs of the baseplate.
Rear lighting is required on the towed vehicle. Blue Ox offers lighting kits to cover all of your lighting needs. Contact your Blue Ox representative for more information.
Do not use tools when hooking up or unhooking that are not recommended by Blue Ox. Using non-recommended tools may damage the tow bar or create unsafe conditions.
No. The BX7460P will only work on baseplates with a tab width of 38.5" or smaller for towing, and 33" or smaller for storage.
Yes. The steering wheel on the towed vehicle must be unlocked at all times while being towed. Failure to unlock it will create hazardous driving conditions.
No. You must disconnect the towed vehicle from the towing vehicle before backing up. Backing up while connected can cause damage to both vehicles and the towing system, and the towed vehicle may jackknife.
Yes. Safety cables or chains are required by law in most US states and Canadian territories/provinces. Blue Ox recommends BX88196 (Class III) or BX88197 (Class IV) safety cables, or BX88207 (Class III) or BX88208 (Class IV) permanent safety cables.
The BX7460P is rated for 10,000 lb towing capacity. Your towing vehicle, hitch, ball, motorhome chassis, and each safety cable must be individually rated for at least the weight of the towed vehicle.
Approximately once per year, or if legs are difficult to move, remove the rubber boots, wipe clean each inside leg, apply a light coat of multipurpose grease, and secure the boots back with an 8" nylon cable tie.
Inspect all towing equipment for cracked welds, missing or worn parts, and loose bolts. Ensure both legs are latched properly and pins are secured. Check that the quick pin ring snaps back with the chamfered side facing outward.
If only one locking handle is locked during the initial hook-up, turn the towed vehicle's steering wheel toward the unlocked tow bar leg approximately 1/2 to 3/4 turn before continuing forward. Drive the towing vehicle forward until the second leg locks into place.
If there is still pressure on the 1/2" pin when unhooking, you may need to tap the pin out. Ensure the towing vehicle and towed vehicle are parked in a straight line on a flat, level surface to minimize pressure on the tow bar legs, which will aid in the removal of the pins.
If it is difficult to move the legs in and out, you should lubricate the tow bar. Remove the small cable ties holding the rubber boots on the legs and slide the boots back. Wipe clean each inside leg and apply a light coat of multipurpose grease to ensure smooth operation. Secure each boot back in place with an 8" nylon cable tie.
Free Shipping
Ships free on all orders
 Authorized Dealer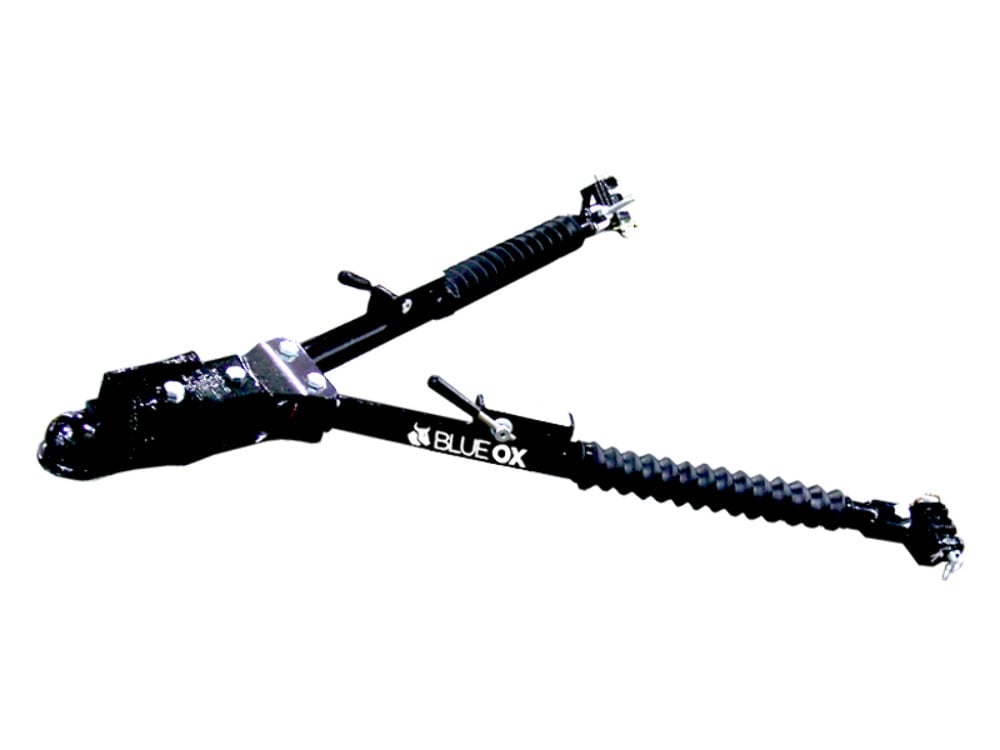
FREE ShippingFREE SHIPPING
Estimated delivery Fri, Oct 9 - Mon, Oct 12
Order before 2 PM EST Monday–Friday for same-day processing
Guaranteed safe & secure checkout
Total for 0 items:
$0.00
No reviews have been added for this product.