
CURT 60723 Double Lock Gooseneck Hitch, 2-5/16-Inch Flip-Over Ball 30K, Fits Select Ford F-150, F-250, F-350CURTOriginal price was $840.95. Current price is $520.99.In Stock
View productOur in-house experts typically reply within one business day.

CURT




Always the correct part
We know our products
Quality Products
Free Shipping!
Always the correct part
We know our products
Quality Products
Free Shipping!
On Sale Today
Original price was $793.95. Current price is $651.95.You save $142.00 (18%)
Free Shipping
Ships free on all orders
 Authorized Dealer


Quick Ship
In stock and ready to ship — order now!
Shipping from Eau Claire, WIFREE SHIPPING
Estimated delivery Sun, Oct 25 - Tue, Oct 27
Order before 2 PM EST Monday–Friday for same-day processing
Guaranteed safe & secure checkout
Includes gooseneck hitch #60619 and installation brackets #60647
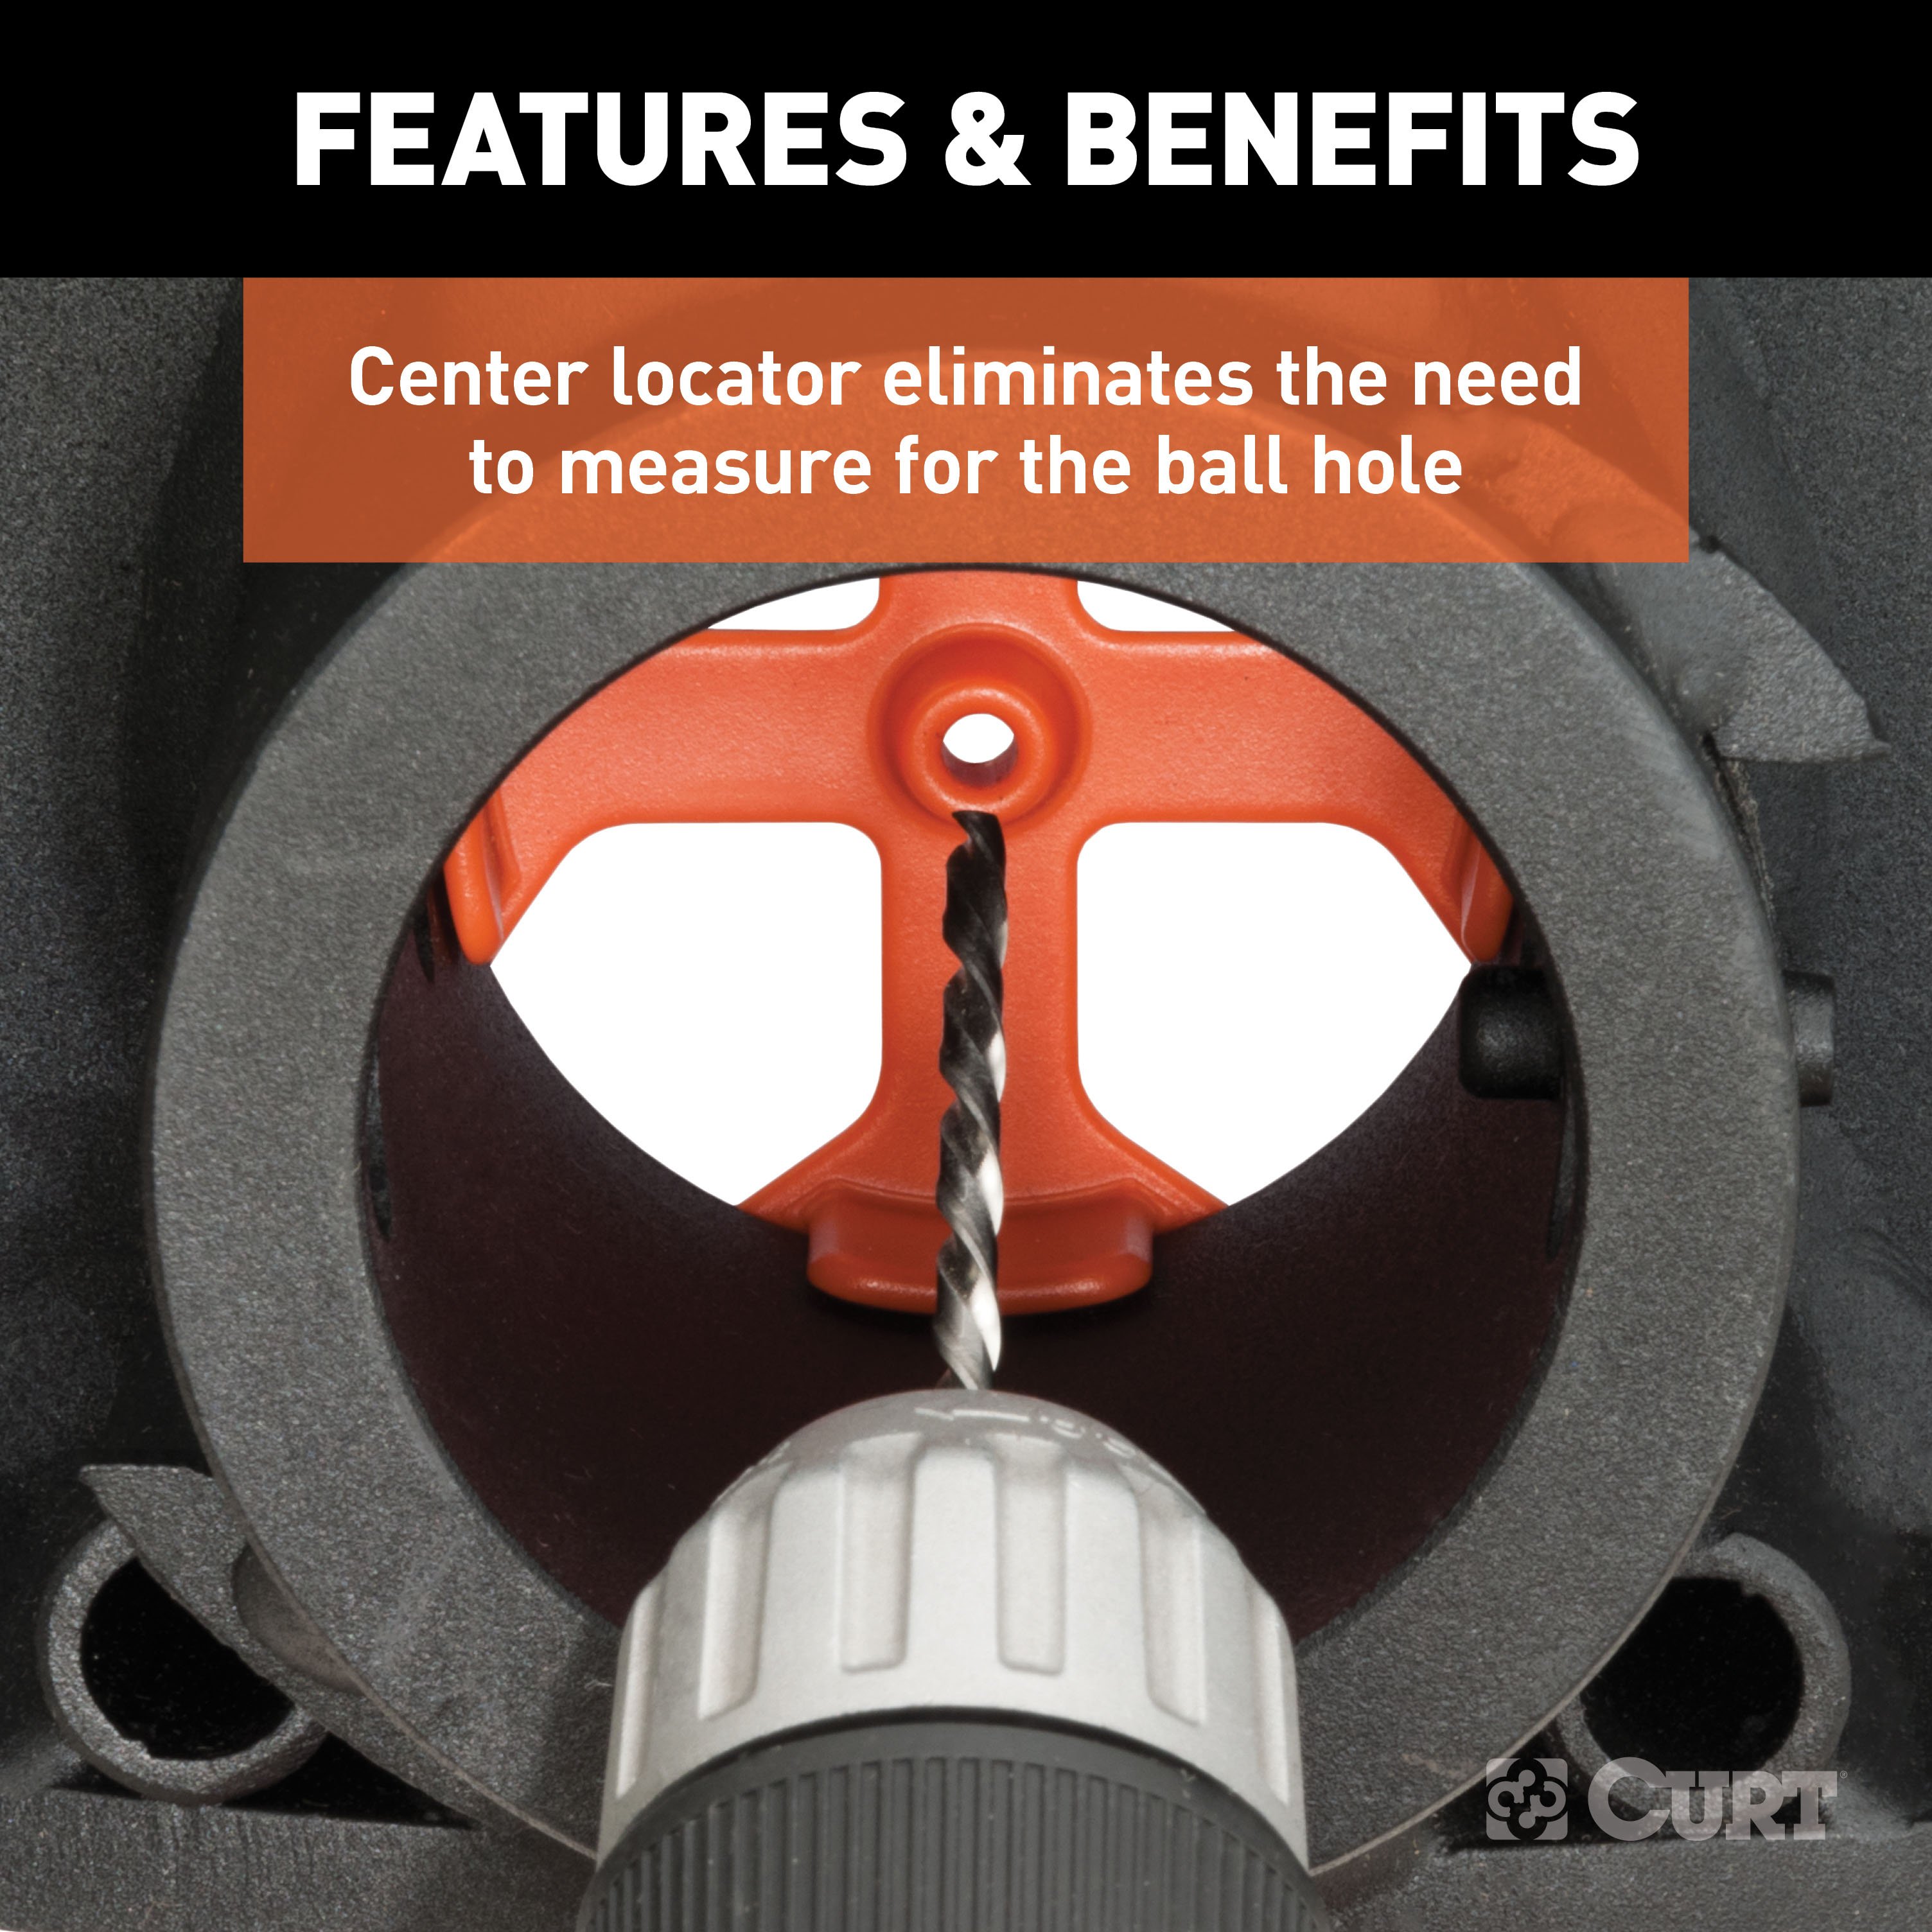
Center locator patent# D685,299 S
Capacity limited to lowest-rated towing component

Includes gooseneck hitch #60619 and installation brackets #60647
Warranty: Limited Lifetime Warranty (One-Year Finish, One-Year Parts)
Color: Black
Finish: A-COAT
Gross Trailer Weight (Pounds): 30,000 LB
Ball Diameter (Inches): 2-5/16 IN
Installation Time Exact (Minutes): 0
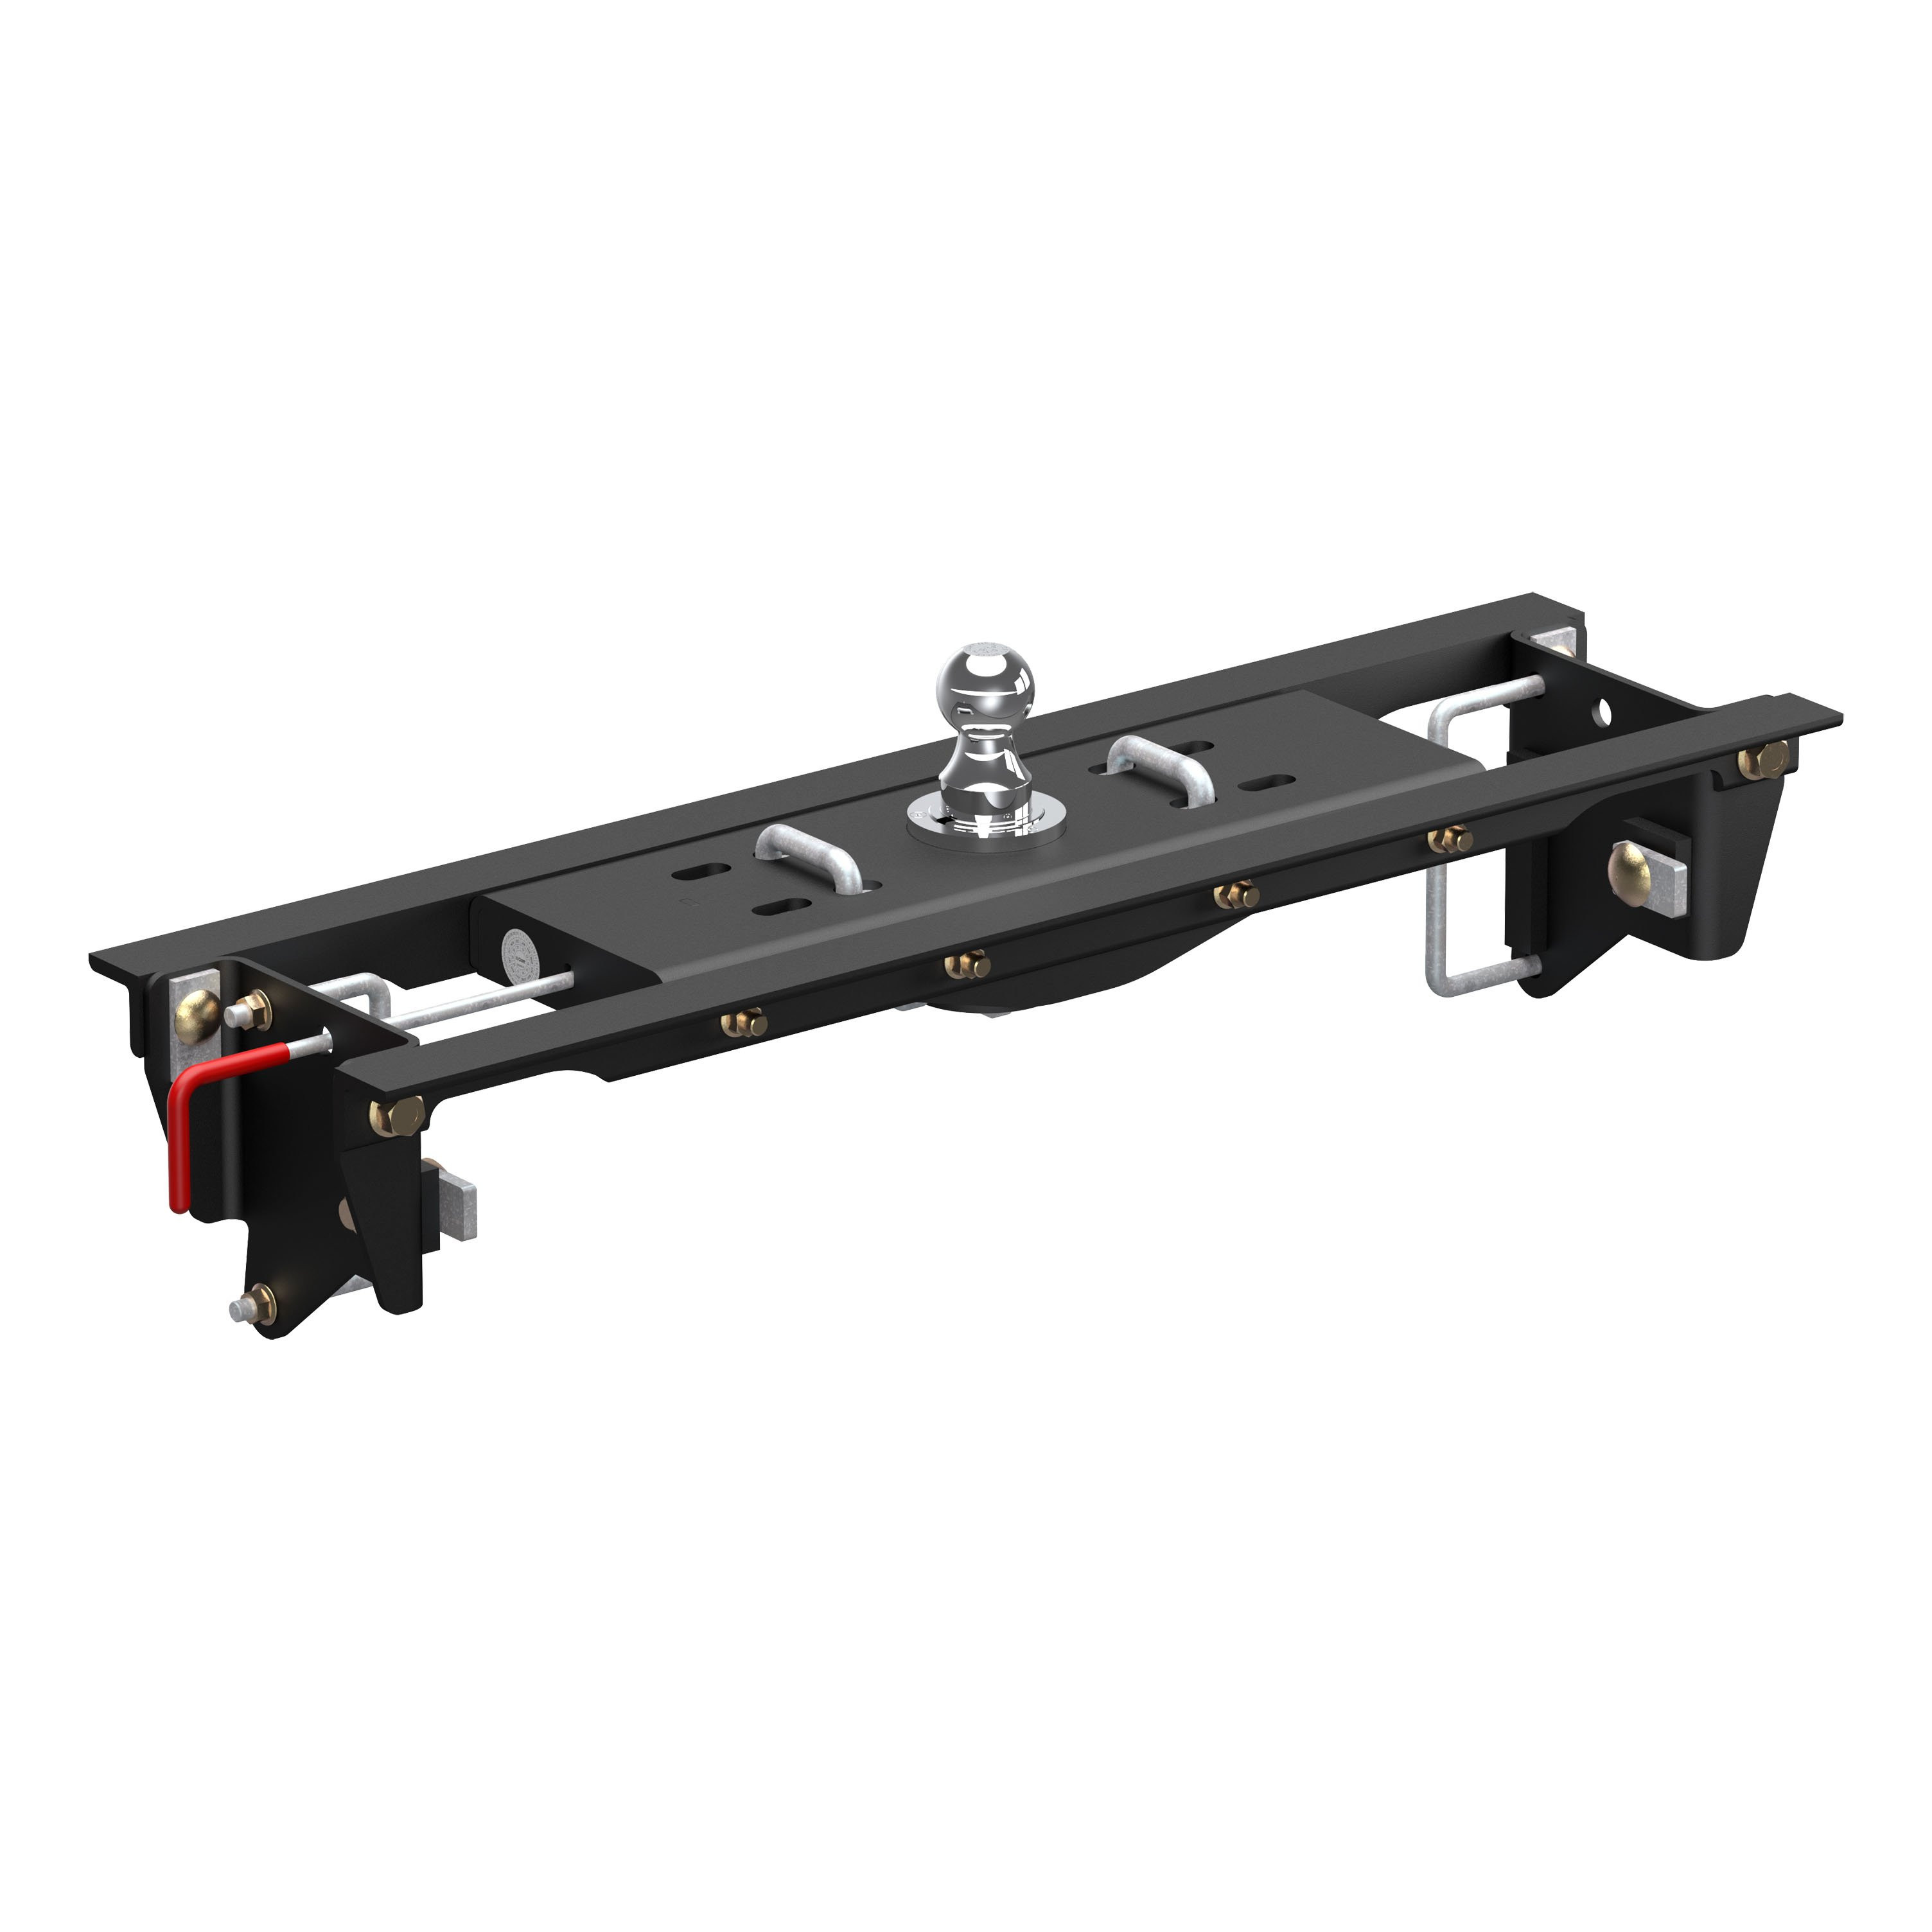
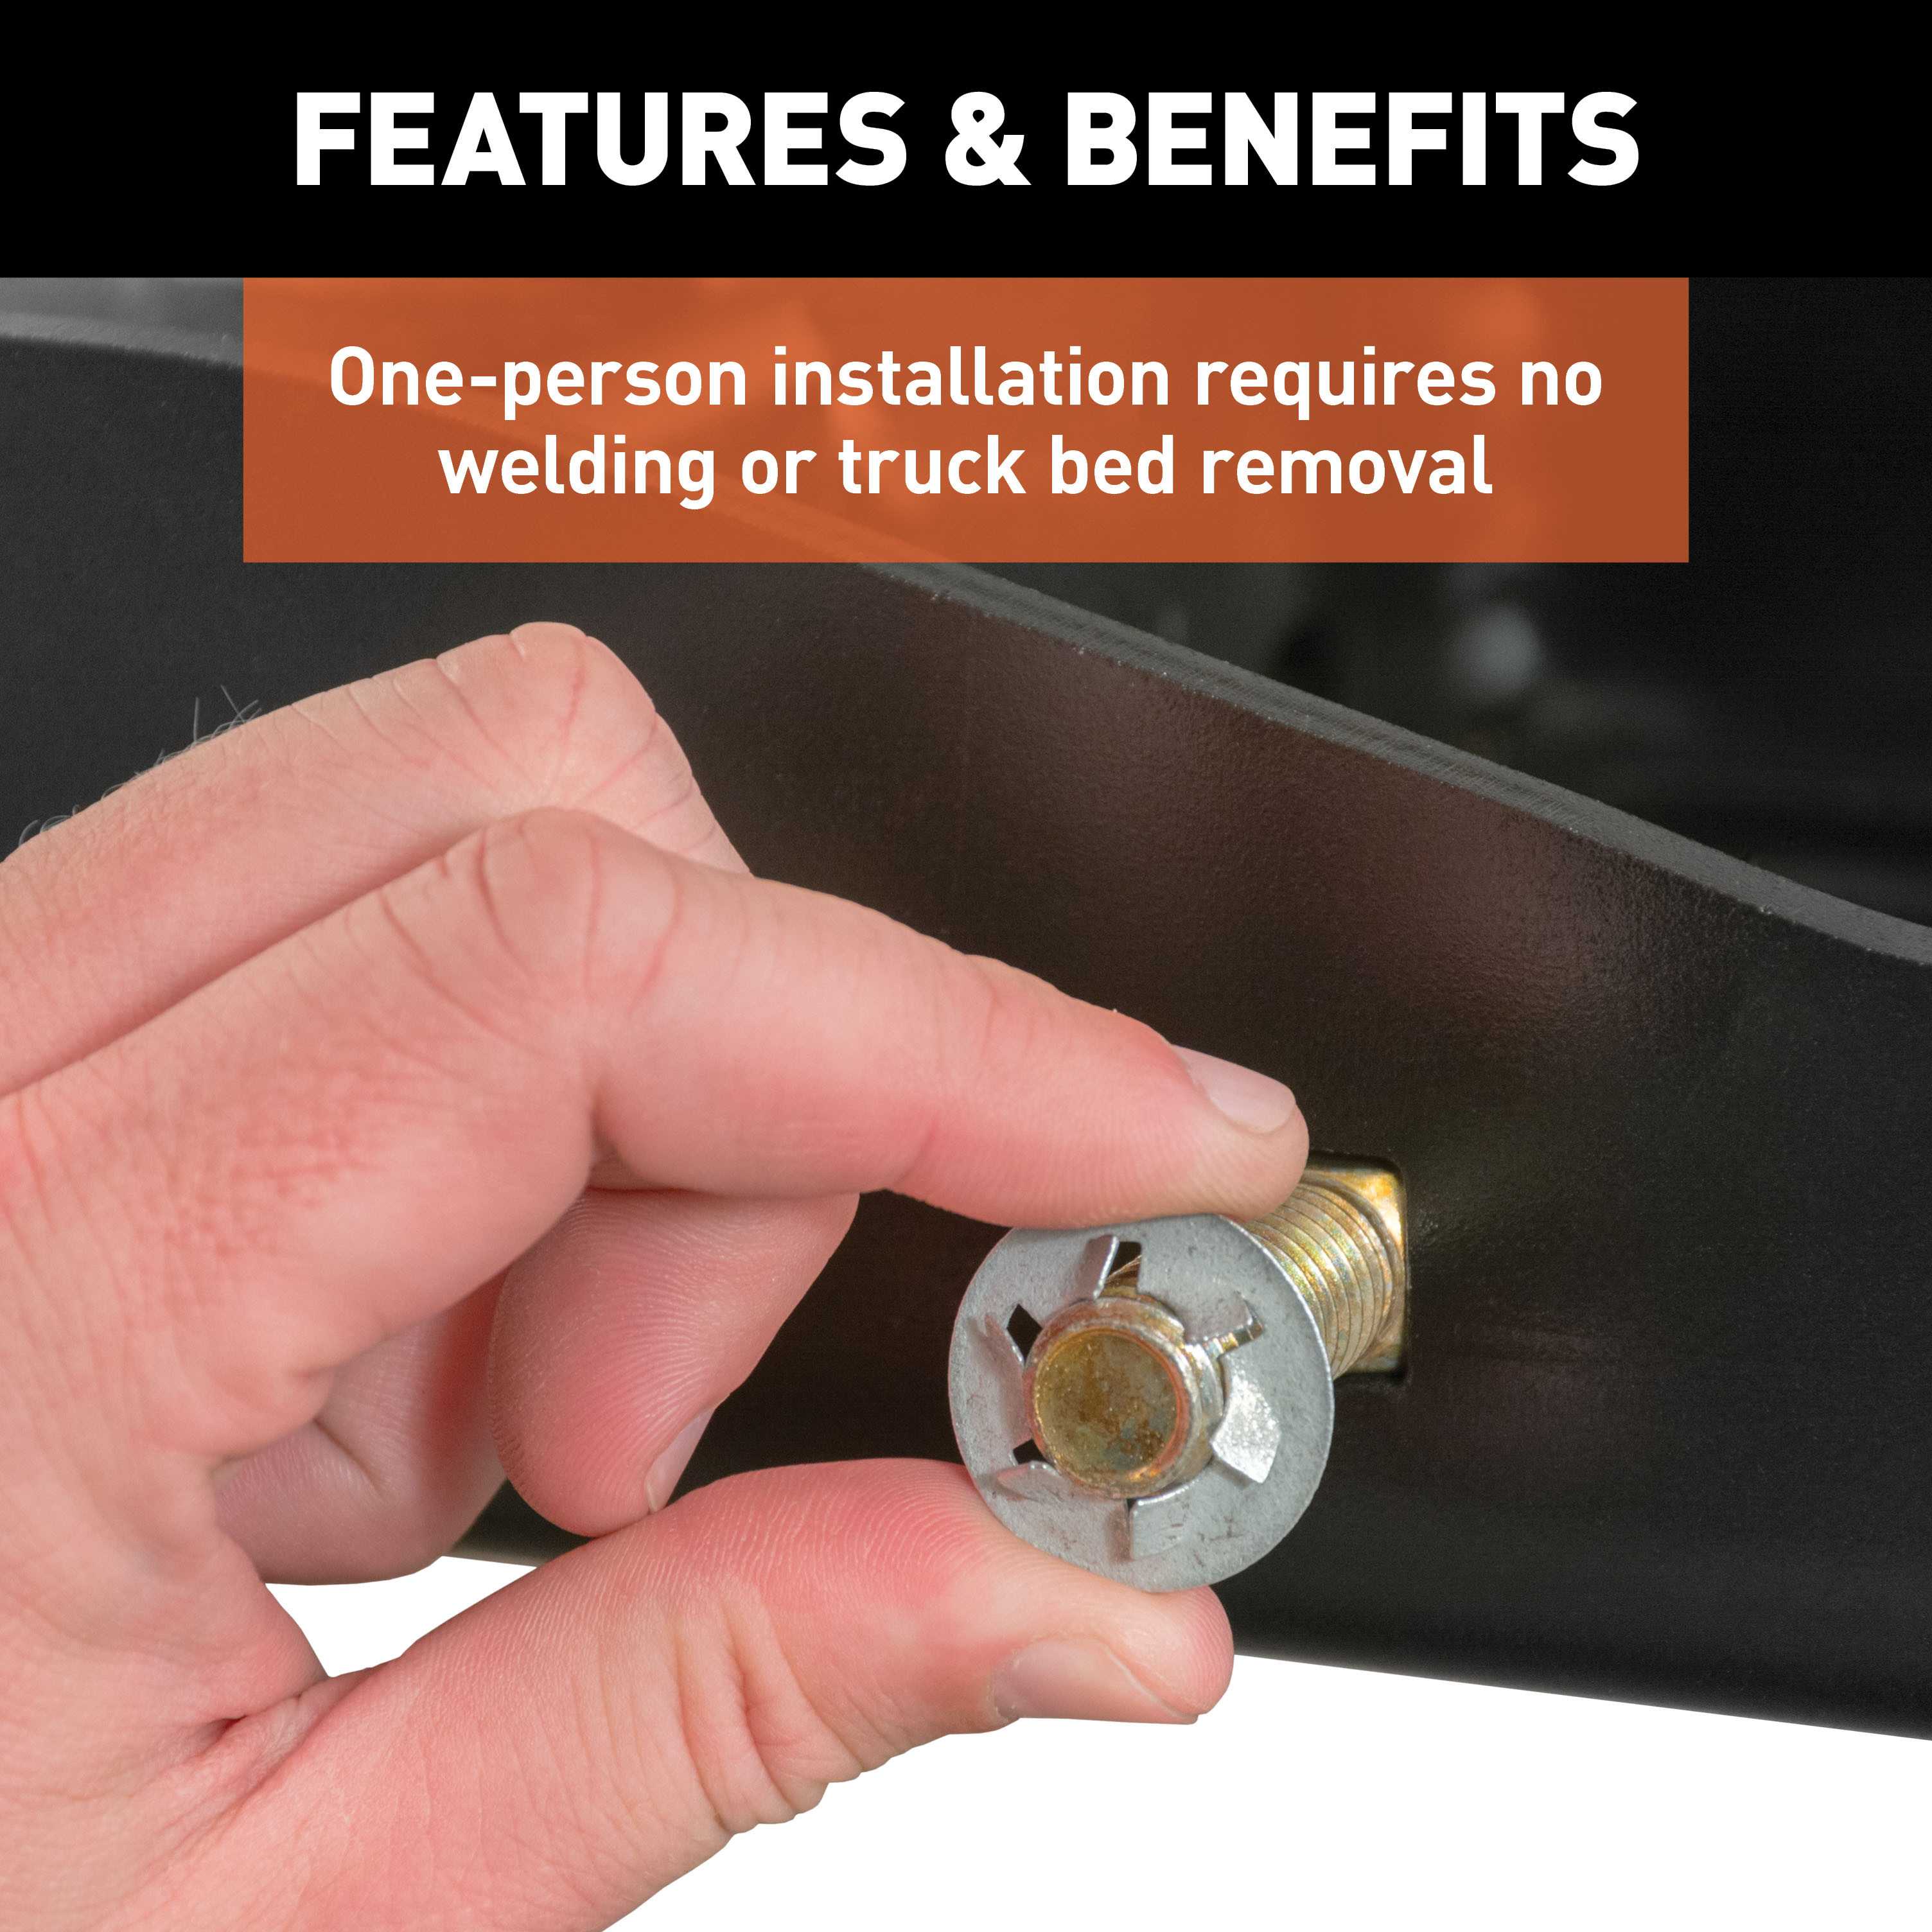
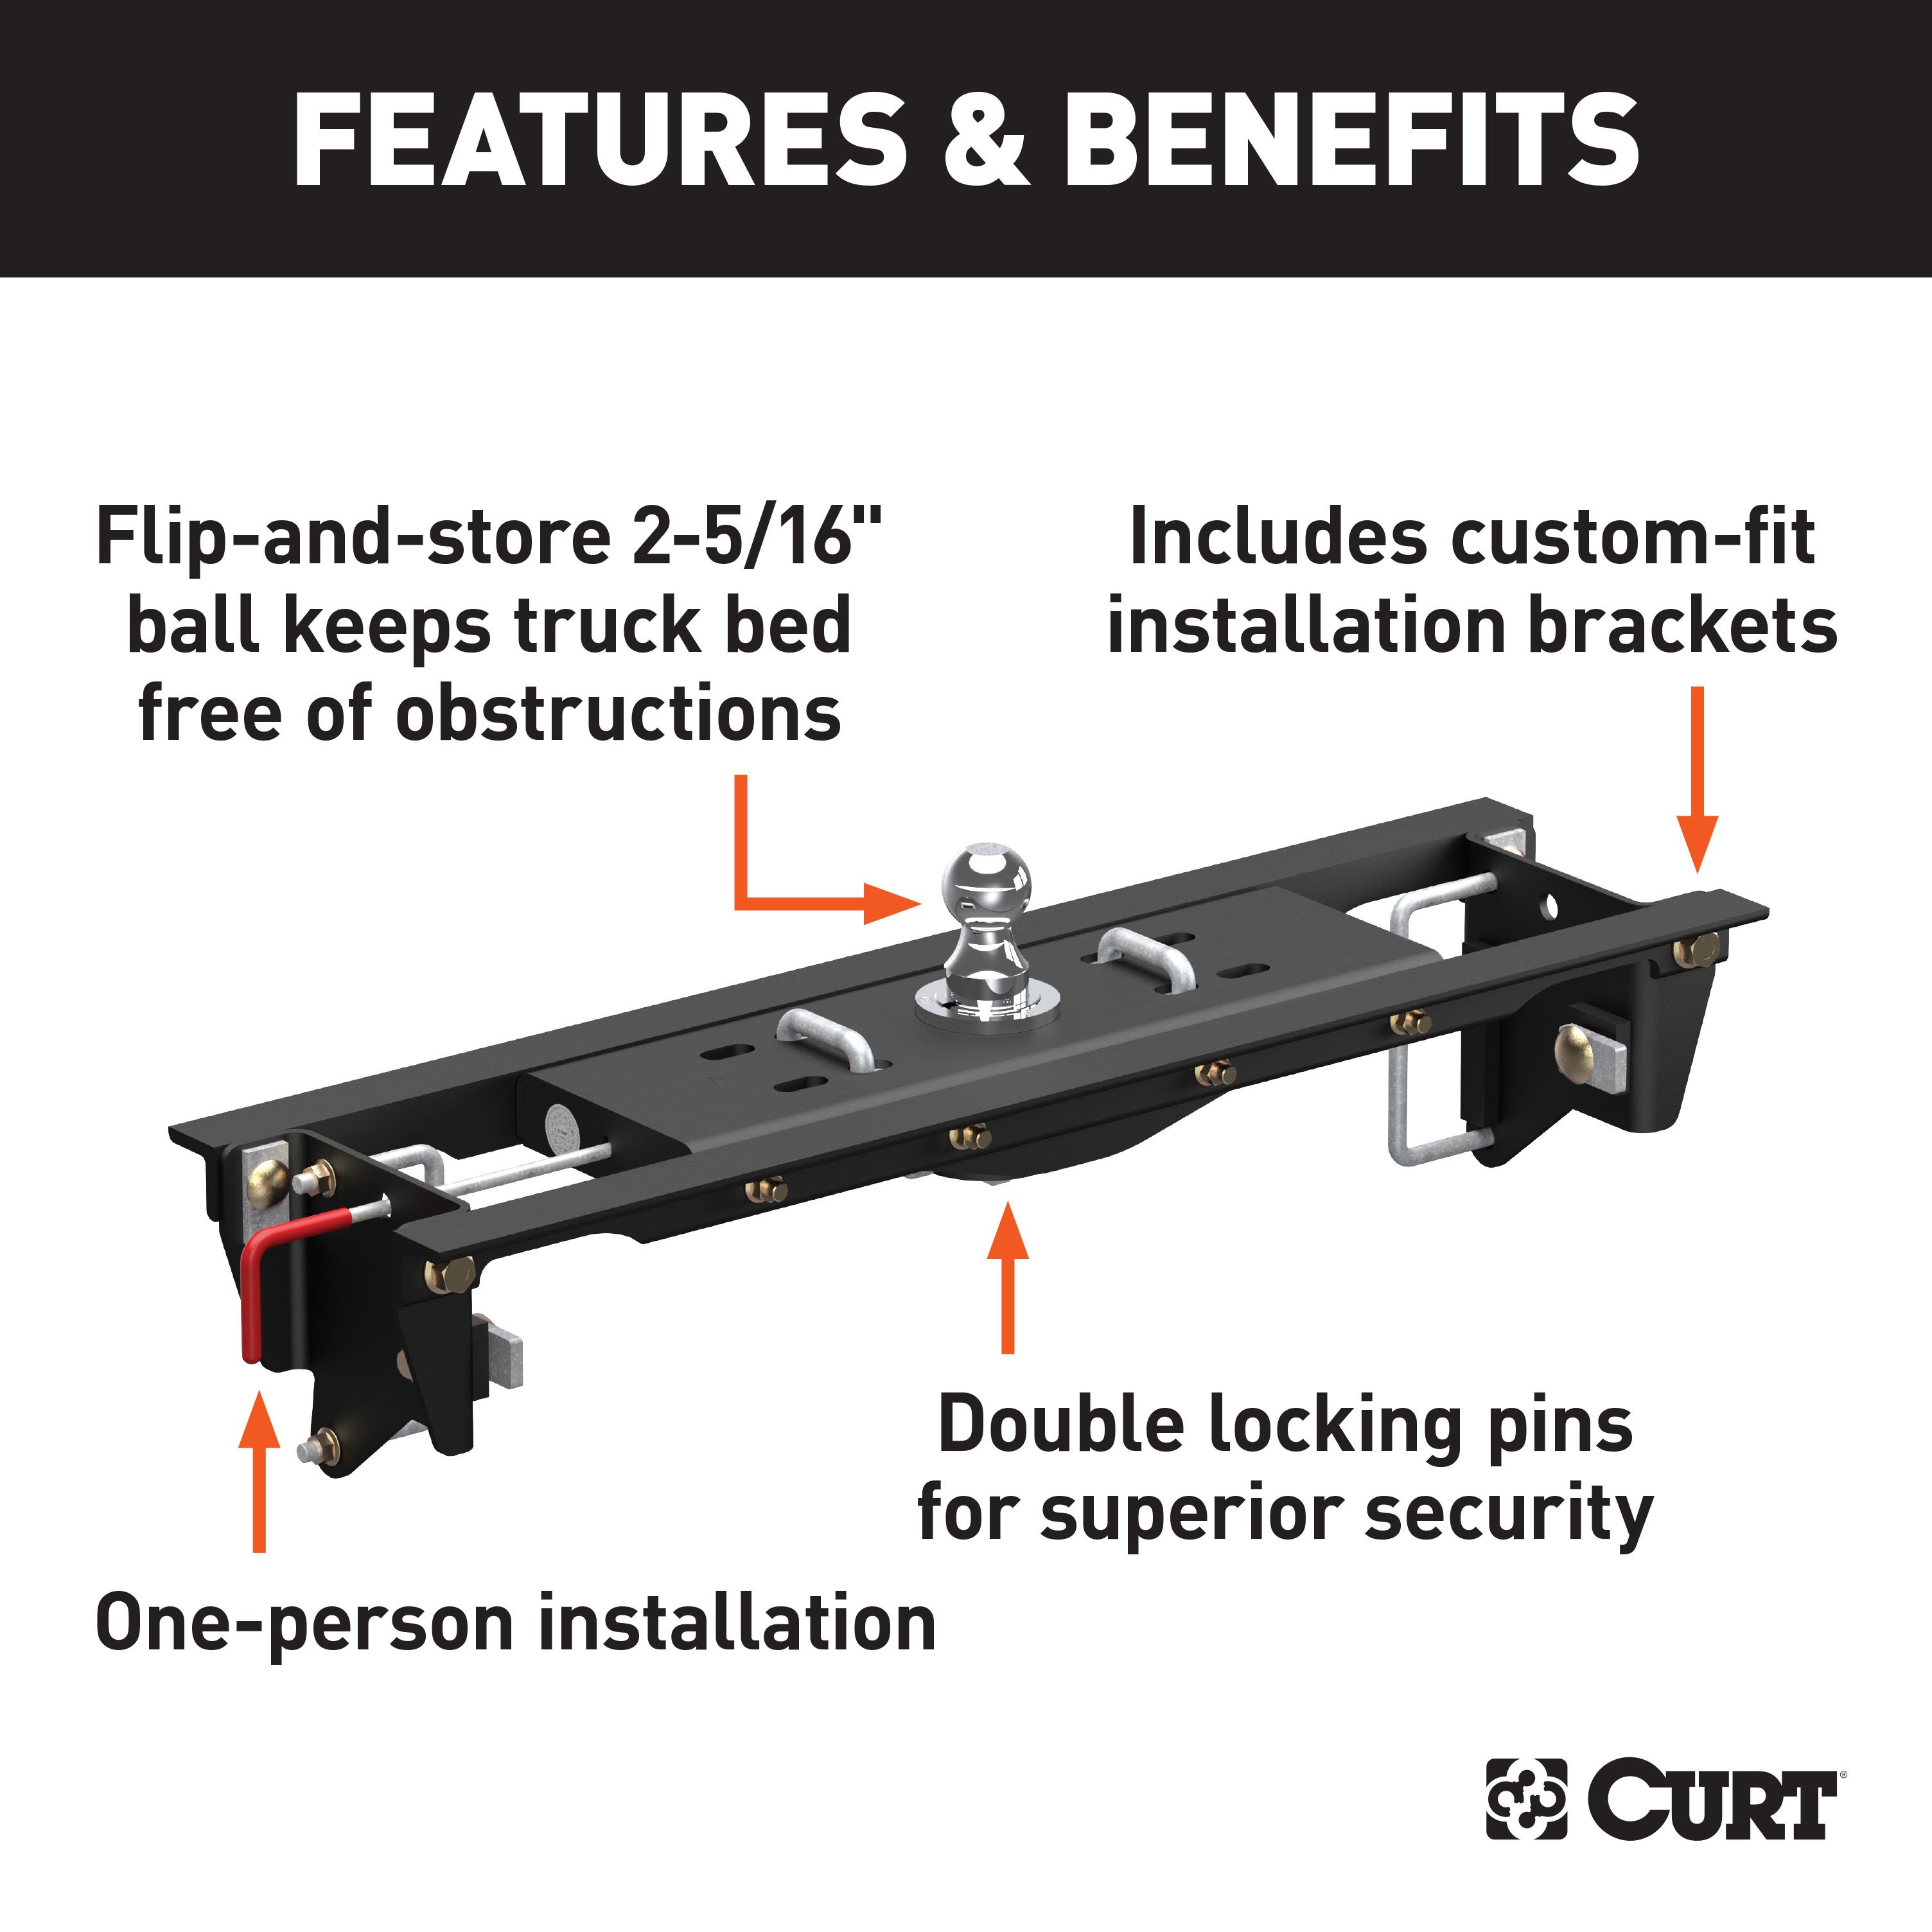
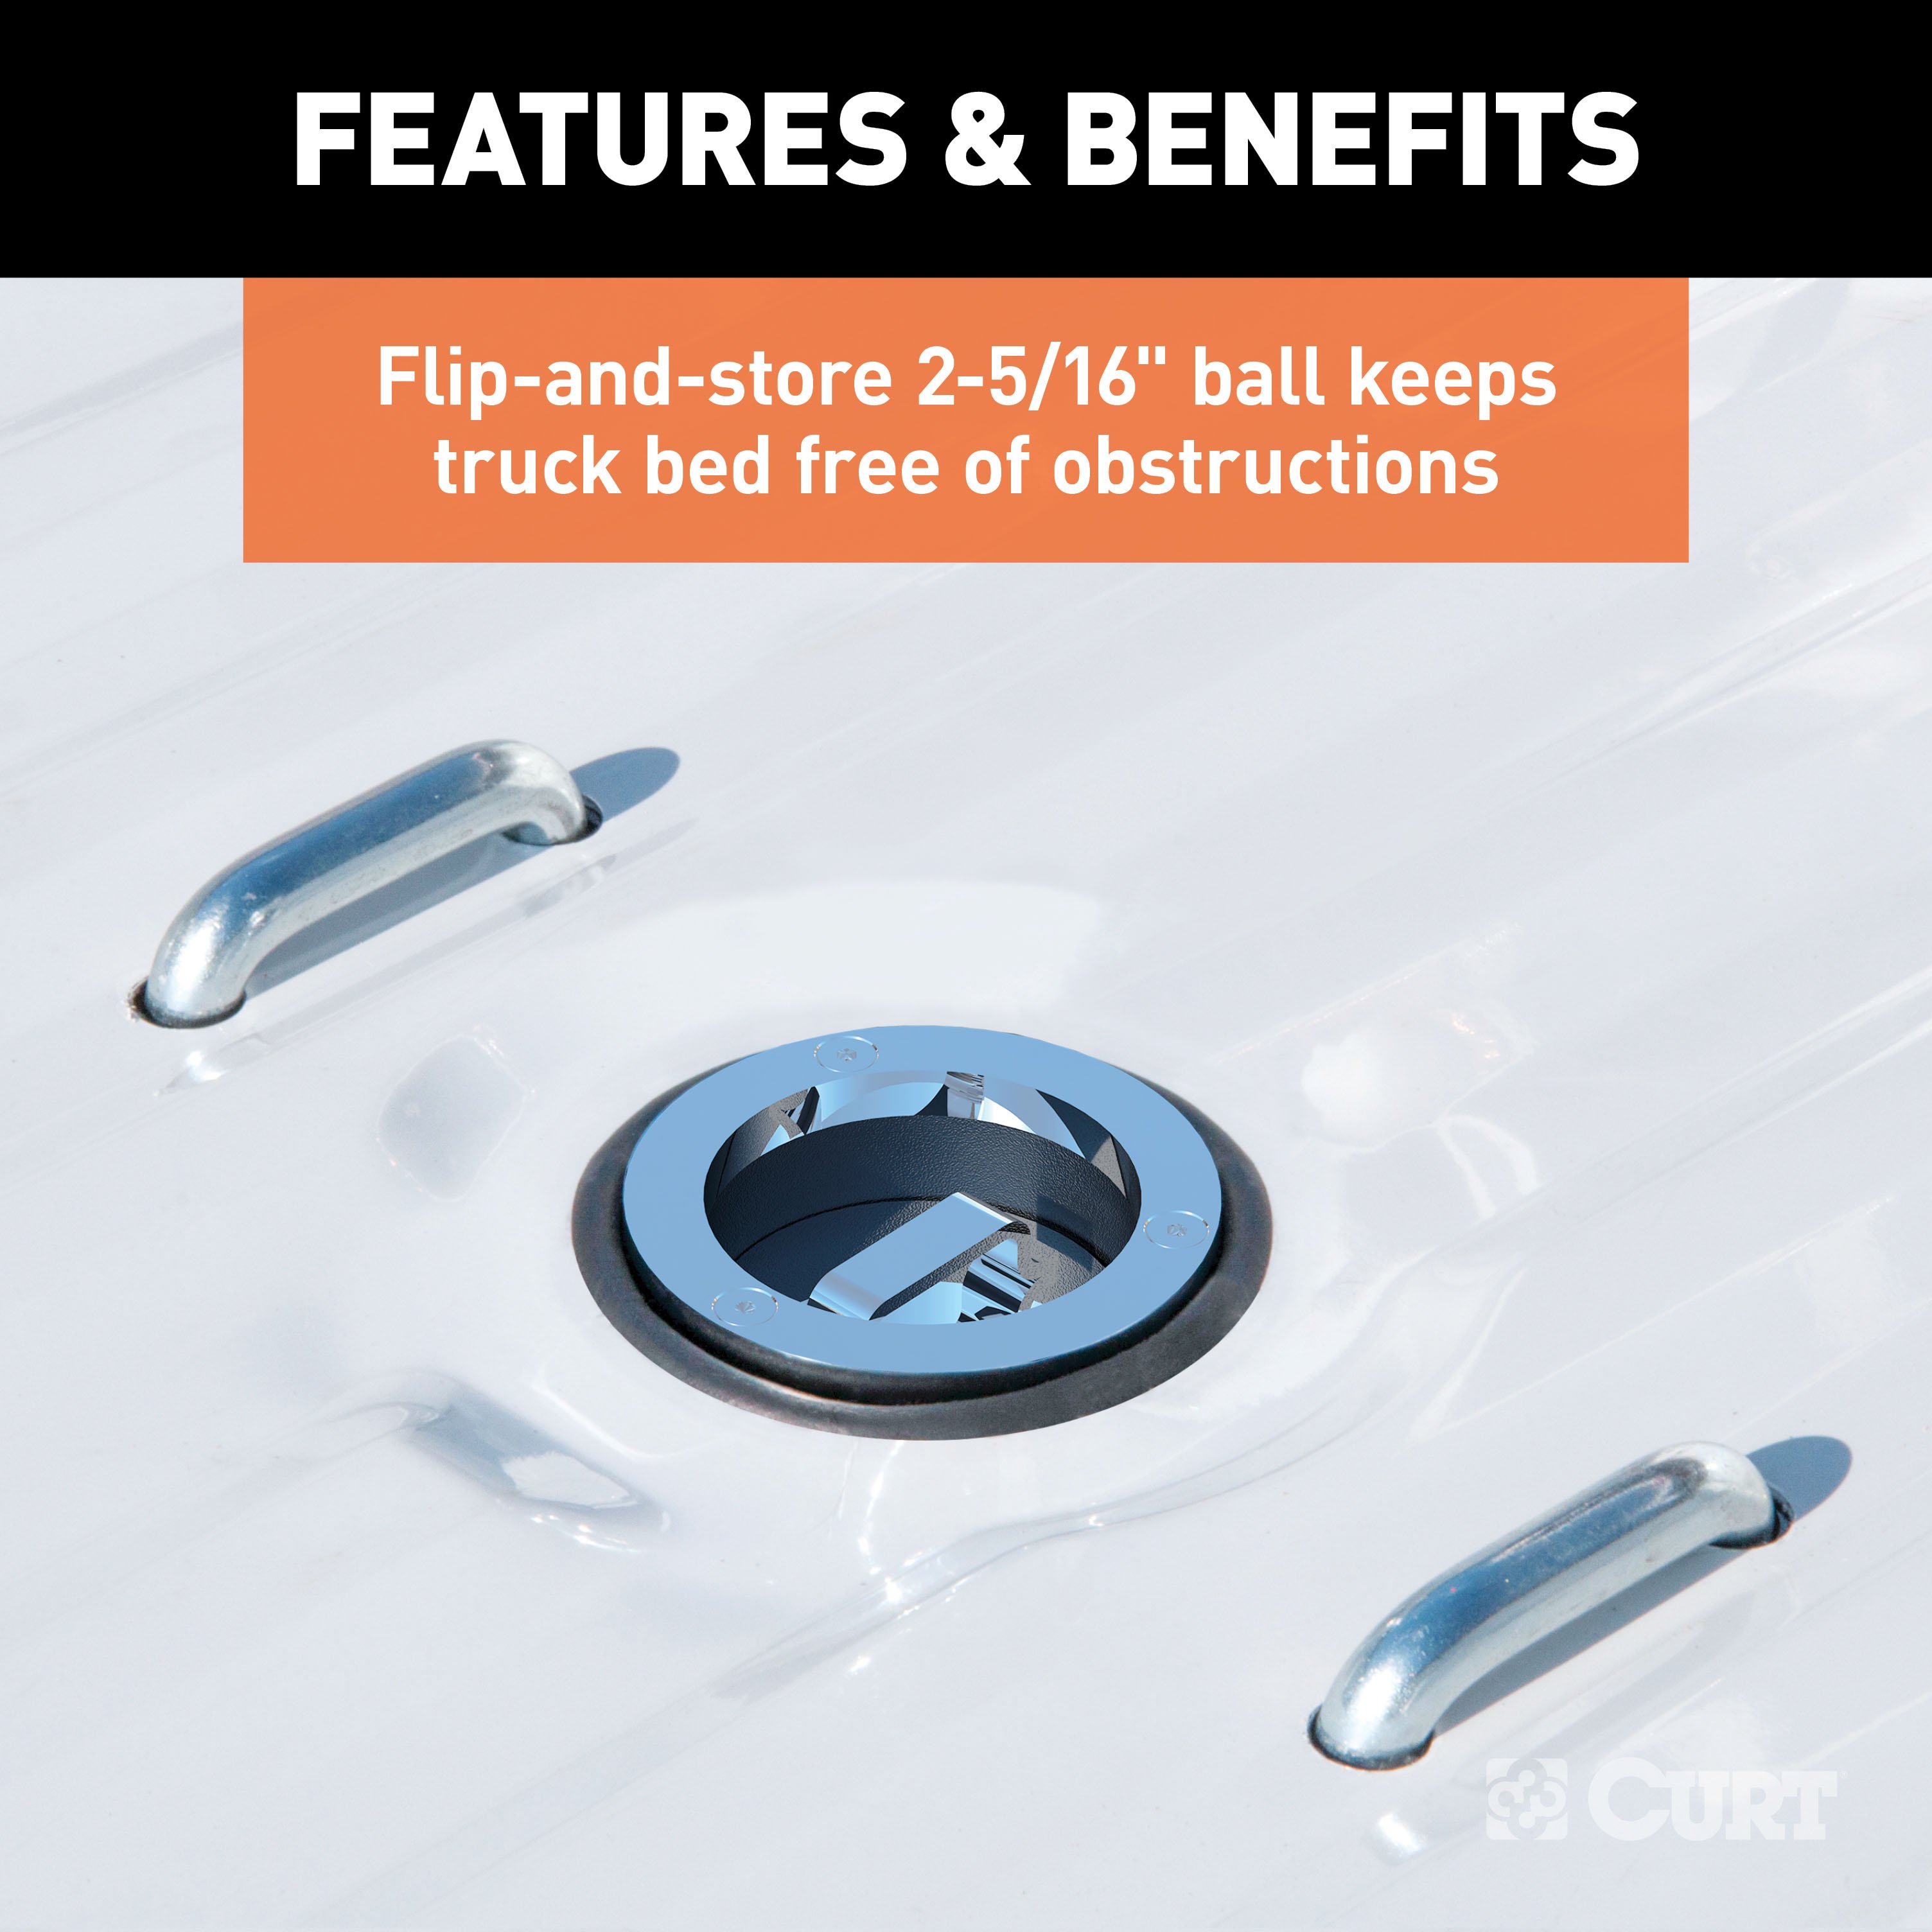
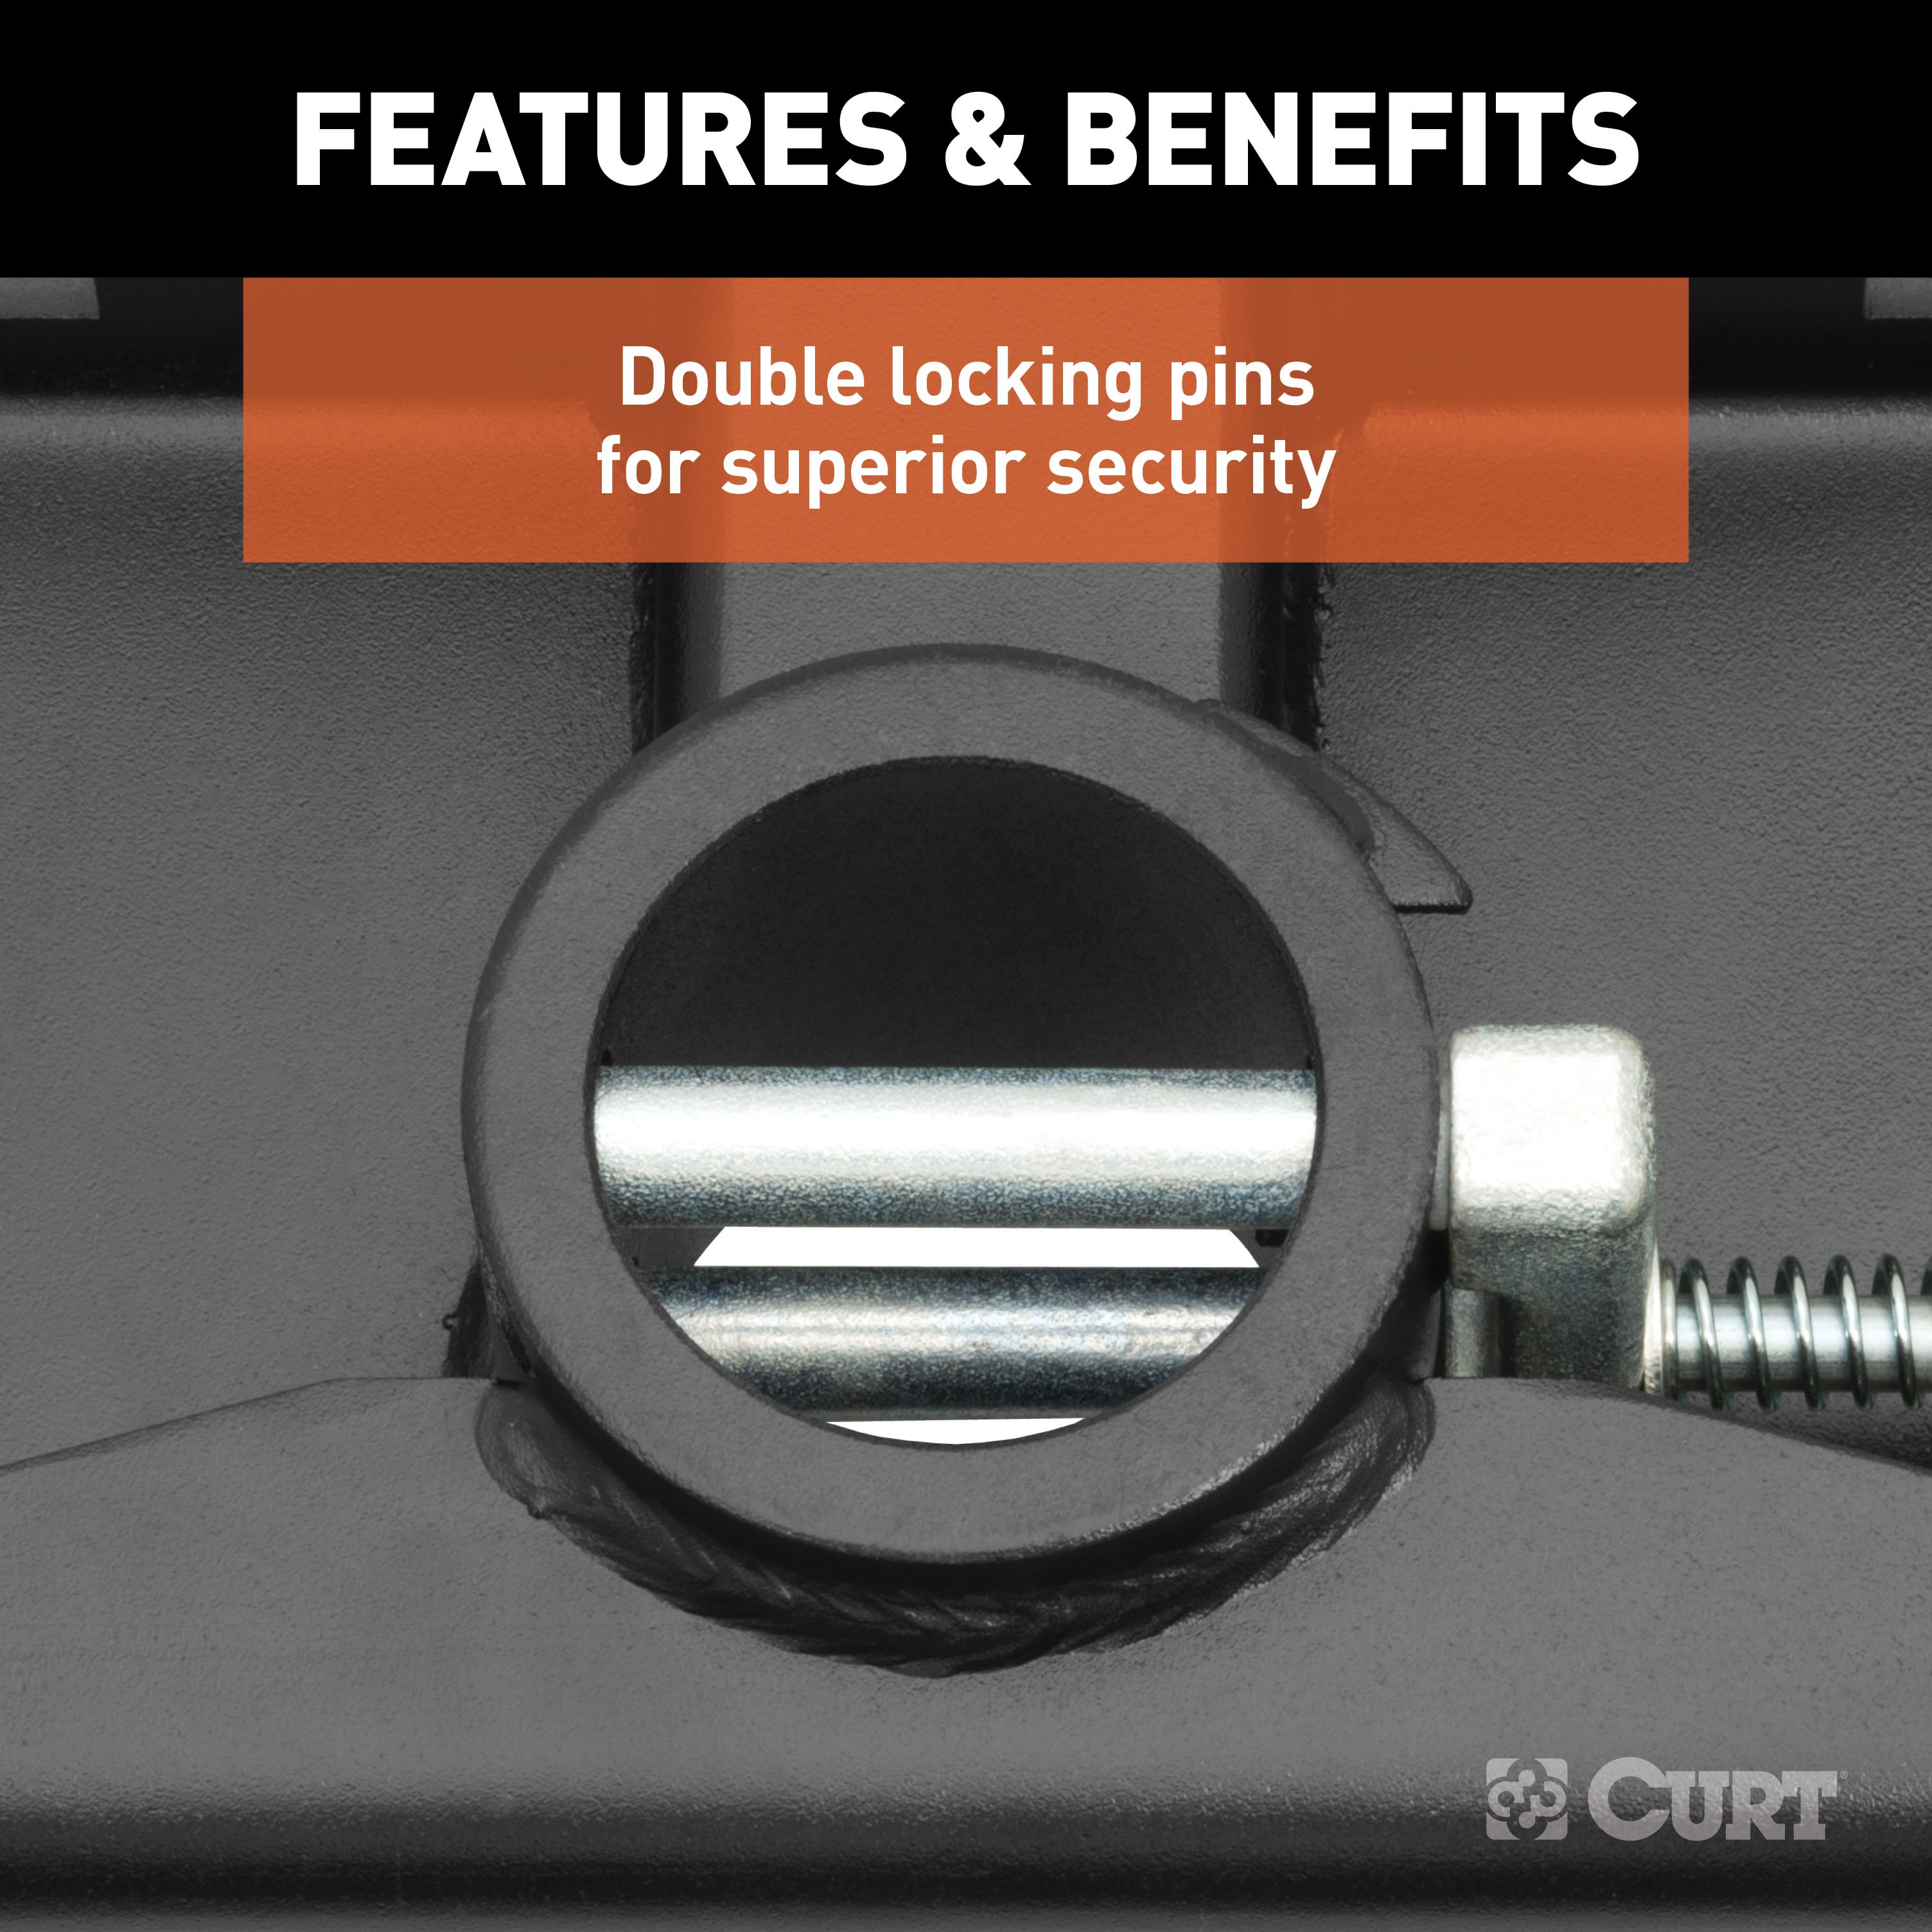
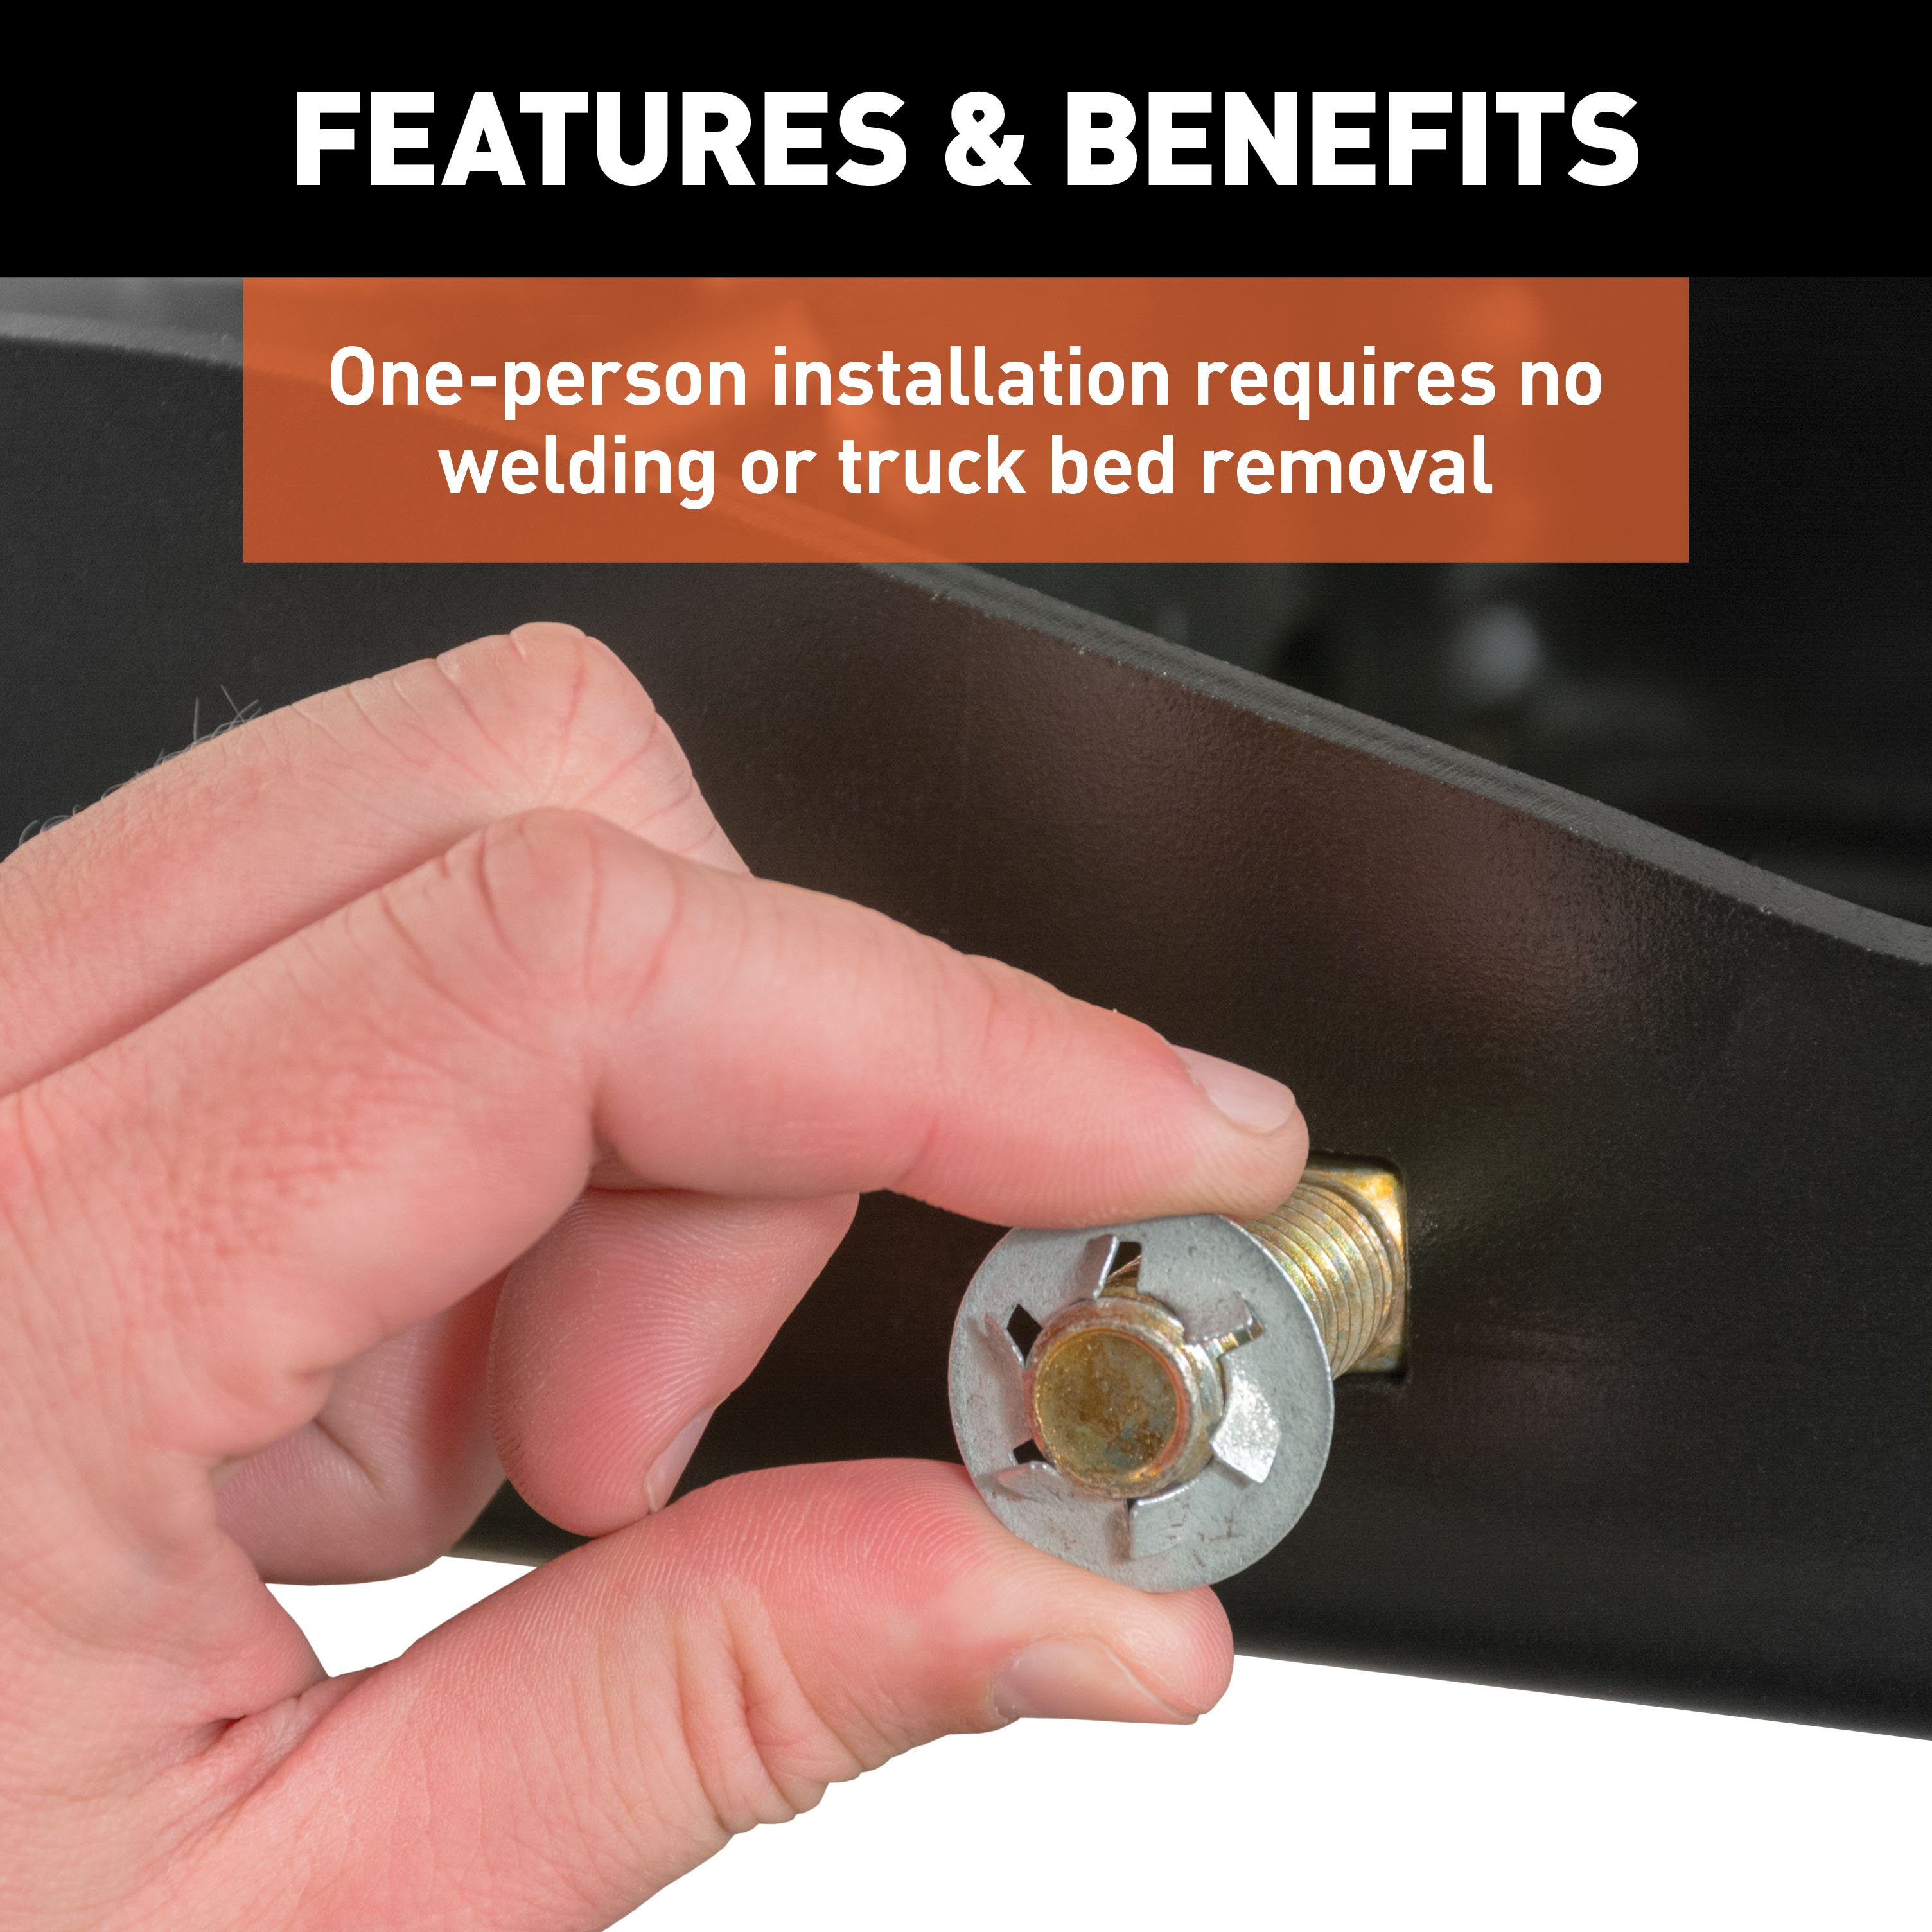
They've made the truck said to turn the world under its tires and the trailer that moves mountains in a day. But what about the hitch powerful enough to connect the two? The CURT Double Lock EZr gooseneck hitch boasts easier installation, easier operation and 30,000 lbs. of towing capacity to make towing that oversize gooseneck trailer look easy. To make things even easier, this gooseneck hitch kit includes both the under-bed gooseneck hitch and the vehicle-specific installation brackets. The combined kit makes it simple to get your truck ready for towing by eliminating the need to purchase two different parts. It includes the #60619 gooseneck hitch and the #60647 installation brackets to fit certain years of the Ford F250 or F350 Super Duty (for a complete listing of compatibility, see the CURT application guide). Installation of the Double Lock EZr requires only one person, using retainer clips to keep bolts secure and the center section fully supported while mounting it into place. It also uses our patented center locator to eliminate meticulous measuring and ensure error-free drilling. The EZr also uses carriage bolts whenever possible for one-wrench tightening. Operation of the Double Lock EZr is simple and safe. It uses two locking pins and a 3/8" diameter handle to keep the gooseneck ball locked into the center section. The ball features a flip-over design that allows you to store it inside the receiver hole when not in use, keeping your truck bed completely free of obstructions. With a fortified center section, this hitch offers a gross trailer weight capacity up to 30,000 lbs. and a vertical load limit of 7,500 lbs., giving you the power you need to get the job done right. This CURT Double Lock EZr gooseneck hitch kit features a durable A-coat finish and includes a limited lifetime warranty. For safe, reliable towing you can count on, it is tested in accordance with SAE J2638 for safety.

CURT offers a variety of high-quality trailer hitches and accessories for select vehicle models. Find the perfect fit for your towing needs at TowUniverse.
CURT, a Lippert brand, offers a complete line of towing products and is the leading manufacturer of custom-fit trailer hitches. We offer the broadest selection of custom-fit hitches, and each one is designed, welded, and coated in Wisconsin.
CURT is also a leader in flat towing products, as well as 5th wheel, gooseneck, and weight distribution hitches, ball mounts, electrical components, cargo solutions, and other towing accessories.
For everything from passenger cars and vans to full-size pickups and SUVs, CURT is 'The First Name in Towing Products®.'

Experts available to answer your questions
Call 888-634-9494The CURT 60685 Double Lock EZr Gooseneck Hitch, 2-5/16-In. Flip-Over Ball 30K, Fits Select Ford F-250, F-350 Super Duty (Part #BKDK60685) fits 1999 Ford F-250 models. The 2010 model year is the last year covered by this part number. For newer models, check for an updated version.
The CURT 60685 Double Lock EZr Gooseneck Hitch, 2-5/16-In. Flip-Over Ball 30K, Fits Select Ford F-250, F-350 Super Duty (Part #BKDK60685) fits the following vehicles: 1999 Ford F-250; 1999-2010 Ford F-250 Super Duty; 1999-2010 Ford F-350 Super Duty. Always verify your specific year, make, and model before ordering.
Yes, the CURT 60685 Double Lock EZr Gooseneck Hitch, 2-5/16-In. Flip-Over Ball 30K, Fits Select Ford F-250, F-350 Super Duty (Part #BKDK60685) is designed to fit the 1999 Ford F-250.
The CURT 60685 Double Lock EZr Gooseneck Hitch, 2-5/16-In. Flip-Over Ball 30K, Fits Select Ford F-250, F-350 Super Duty (Part #BKDK60685) Drilling is not required for installation. Typical installation time is . Basic hand tools are typically all you need.
Yes, the 60647 subkit is designed for Ford F-250 and F-350 trucks. However, the subkit is only the mounting frame and requires the 60612 center section (sold separately) to complete the installation. The manual does not specify model years, so contact Curt Manufacturing at 1-877-287-8634 to confirm compatibility with your specific truck year and configuration.
Yes, the 60647 subkit can be installed on short bed models. However, short bed models require a critical turning clearance check. You must verify adequate clearance between the front of all trailers and the truck cab before towing. The manual provides a clearance calculation formula on page 4 to determine if your trailer will interfere with the cab. If clearance is inadequate, you cannot safely use that trailer configuration.
On two-wheel drive trucks, the inverted gooseneck ball may interfere with the top of the differential, especially when the truck is loaded. You must perform a clearance check both when the truck is loaded and unloaded to verify the ball will not interfere. This is a critical safety check that must be completed before towing. If interference is found, the hitch cannot be safely used in that configuration.
No. The 60647 subkit does not include the 60612 center section. The subkit contains only the mounting frame components (cross arms and side plates). You must purchase the 60612 center section separately to complete the gooseneck hitch installation.
Yes. The first installation step is to temporarily remove the spare tire. The spare tire must be removed to access the area where the cross arms are inserted between the truck bed and frame.
Yes. The heat shield located under the truck bed above the rear axle must be peeled off and removed. The manual states that all models require modification or removal of heat shields. This is the second installation step.
Possibly. The manual warns that brake, fuel, and electrical lines may need to be loosened or repositioned to provide clearance for new hardware. Additionally, if the emergency brake cable is attached to the outside of the frame rail, you must remove the bracket and reverse the bolt so the head faces outward. Check these lines during installation and reposition as needed to avoid interference.
The manual does not specify tools required for the 60647 subkit installation. However, the 60619 center section instructions list these tools: safety glasses, ear protection, ratchet, socket (8mm, 15/16"), end wrench (8mm), drill, drill bit (3/16"), hole saw (4" and 5/8"), cutting fluid, Allen wrench (#3), and rust inhibitor. Contact Curt Manufacturing at 1-877-287-8634 to confirm which tools are needed for the 60647 subkit specifically.
The 60647 subkit includes: 4 hex flange nuts (5/8-11), 4 square hole spacers (CM-SP9), 4 carriage bolts (5/8-11 x 1.5", Grade 8), 12 hex flange nuts (HFN 1213, Grade 8), 2 hex flange nuts (3/4-10, Grade 8), 2 U-bolts (1/2-13 x 4 x 7.25 x 1.75" square, CM-1209-UBS), 8 carriage bolts (1/2-13 x 1.5", Grade 8), 2 carriage bolts (3/4-10 x 2.5", Grade 8), 2 pushnut bolt retainers (1/2"), 2 carriage spacers (60647-CBS), 2 cross arms (60647-CA), and 2 weldment assemblies (60647-DSWA and 60647-PSWA).
Insert the cross arms between the truck bed and frame from the outside of the truck in front of the rear tire, over the low point on the frame. Insert the first cross arm with the holes facing the front of the truck. Once partially inserted, guide it from underneath the truck. It should span both frame rails and be positioned behind the shock mount bracket on the passenger side. Slide it as far rearward as possible. Insert the second cross arm the same way, but position it with holes facing the rear of the truck. Do not slide the second cross arm rearward yet.
The two pushnut bolt retainers (item 11) are optional "helping hand" tools to assist during installation. If you choose to use them, insert two 1/2" x 1.5" carriage bolts through the centermost slots on the same side of the center section, ensure the serrations in the bolt retainers are angled away from the center section, and push a bolt retainer onto the two carriage bolts. Use one of the included spacers as a tool to push the bolt retainers into position. This helps hold the center section in place while you complete the assembly.
Slide the cross arms to the center section and rotate them into position so the legs with holes are against the center section. Attach using eight 1/2" x 1.5" carriage bolts (item 7) and eight 1/2" flange nuts (item 4). Insert the carriage bolts through the center and out the cross arms. Finger tighten only at this stage; final torquing comes later.
First, if the emergency brake cable is attached to the outside of the frame rail, remove the bracket and reverse the bolt so the head faces outward. Loosely attach the driver side plate (B) to the frame. Hold the side plates against the frame and adjust cross arm placement as needed. Attach the driver side plate by inserting a 3/4" x 2.5" carriage bolt (item 8) with a spacer (item 9) through the frame and out the plate, then attach with a 3/4" flange nut (item 5). Install the square U-bolt (item 6) onto the frame rail, through the side plate, and attach with 1/2" flange nuts (item 4). Keep these fasteners loose until final torquing.
Loosely attach the passenger side plate (C) by placing the square U-bolt (item 6) over the frame, through the plate, and attach with 1/2" flange nuts (item 2). Insert a 3/4" carriage bolt (item 8) with a spacer (item 9) through the inside of the frame and out the side plate, then attach with a 3/4" flange nut (item 5). Keep these fasteners loose until final torquing.
Loosely attach the side plates to the cross arms by inserting two 5/8" x 1.5" carriage bolts (item 3) with spacers (item 2) through the plate and out the cross arms. Attach with two 5/8" flange nuts (item 1). Repeat this process on the other side. Keep these fasteners loose until final torquing.
Before final torquing, verify that the center section is centered on the vehicle by checking that the sides of the center section are in the same location on the bed ribs. Make any necessary adjustments to the cross arm and side plate positions before proceeding to torque all fasteners.
Torque all fasteners in this specific order: First, torque the center section to the front and rear cross arms. Second, torque the side plates to the truck frame on both sides. Third, torque the side plates to the front and rear cross arms. Torque specifications are: 3/4" fasteners to 380 ft-lbs, 5/8" fasteners to 210 ft-lbs, and 1/2" fasteners to 110 ft-lbs.
The manual lists installation times of 90 minutes for professional installation and 49 minutes for novice DIY installation. These times apply to the 60647 subkit only and do not include installation of the 60612 center section, which requires additional time.
The 60647 subkit weighs 90 lbs.
The 60619 center section installation involves 8 steps: (1) Drill a 3/16" pilot hole from underneath the truck bed through the center locator/trim shield; (2) Determine correct safety chain hole locations for your vehicle type (Toyota, Ford, Chevrolet/GMC, or RAM) and drill four 5/8" holes from underneath the truck bed, then enlarge slightly with a 3/4" step bit from above; (3) Drill a 4" hole from above the truck bed and remove the center locator; (4) Deburr holes, spray with rust inhibitor, insert rubber edging (optional), place chrome trim ring, and fasten with three head cap screws; (5) From underneath, place washers, springs, and nylock nuts on U-bolt legs and tighten until flush; (6) Insert cast lock pin and handle through the center section; (7) Slide washer and compression spring over handle, insert into lock pin, and secure with hex head flange screw and nylock nut; (8) Reinstall plastic wheel-well covers (trim if needed) and spare tire.
Yes. Installation requires drilling: a 3/16" pilot hole from underneath the truck bed, four 5/8" holes for safety chain loops (enlarged with a 3/4" step bit from above), and a 4" hole from above the truck bed. The manual recommends using cutting fluid to ease the drilling process. Deburr all cut holes and spray exposed metal with rust inhibitor after drilling.
Some models may require trimming of the plastic wheel-well cover. Trim as needed for reinstallation and access to the handle. The manual does not specify which models require trimming, so check during installation and trim only if necessary for proper fit and handle access.
Some models may require bending the metal flange below the bed outward to allow the handle to move without interference. Use pliers if needed. The manual does not specify which models require this modification, so check during installation and bend only if the handle encounters interference.
To lock the hitch: (1) Insert the gooseneck ball into the desired position in the cylinder by aligning the ball's groove with the cylinder pin. If not aligned, rotate the ball until it drops into place. (2) Place the handle in the lock position by rotating it counterclockwise until the locking pin snaps back into position. To unlock: Pull the handle out as far as possible and rotate it clockwise. Never operate the vehicle with the handle in the unlocked position.
No. Never operate the vehicle with the handle in the unlocked position. The handle must be in the locked position before driving.
Before towing for the first time, perform these checks: (1) Verify adequate turning clearance between the truck cab/box corners and trailer; (2) Check truck box clearance—minimum 6" between the bottom of the trailer overhang and the top of the box sides; (3) Verify the inverted gooseneck ball will not interfere with the top of the differential when hauling heavy loads (especially important on two-wheel drive models); (4) Verify all hardware is torqued to proper specification; (5) Verify safety chain length—leave only enough slack to allow full turning without interference; (6) Verify trailer attachments to safety chain loops are secure and cannot be shaken free; (7) Ensure all fasteners are tight and all structural components are sound; (8) Attach trailer securely to both safety chain loops; (9) Ensure the handle is in the lock position and the locking pin passes completely through the ball and both walls of the hitch cylinder; (10) Ensure trailer weight does not exceed any part of the towing system, load is heavier toward the front of the trailer, load is centered left to right, and load is secured to prevent shifting; (11) Check trailer tire inflation and verify trailer lights, electric brakes, and breakaway switches are working properly.
Before towing every time, perform these checks: (1) Verify adequate turning clearance between the truck cab/box corners and trailer; (2) Check truck box clearance—minimum 6" between the bottom of the trailer overhang and the top of the box sides; (3) Verify the inverted gooseneck ball will not interfere with the top of the differential when hauling heavy loads (especially important on two-wheel drive models); (4) Verify all hardware is torqued to proper specification; (5) Verify safety chain length—leave only enough slack to allow full turning without interference; (6) Verify trailer attachments to safety chain loops are secure and cannot be shaken free; (7) Ensure all fasteners are tight and all structural components are sound; (8) Attach trailer securely to both safety chain loops; (9) Ensure the handle is in the lock position and the locking pin passes completely through the ball and both walls of the hitch cylinder; (10) Ensure trailer weight does not exceed any part of the towing system, load is heavier toward the front of the trailer, load is centered left to right, and load is secured to prevent shifting; (11) Check trailer tire inflation and verify trailer lights, electric brakes, and breakaway switches are working properly.
Keep the gooseneck ball, cylinder, and trailer coupler lubricated regularly using silicone spray or equivalent to prevent wear and rust. Keep the hitch assembly and trailer coupler free of dirt and other foreign debris. When the gooseneck ball is in the inverted position, insert the supplied rubber hole cover to keep out dirt and debris. Periodically check the gooseneck hitch to ensure that all fasteners are tight and that all structural components are sound. Do not tow a trailer with worn or damaged parts.
Do not exceed your vehicle manufacturer's recommended towing capacity. The manual does not specify a maximum capacity for the hitch itself. Consult your Ford F-250 or F-350 owner's manual or contact Ford for your specific truck's towing capacity.
The manual does not specify a tongue weight limit. It states that you must ensure the trailer weight does not exceed any part of the towing system and that the load should be heavier toward the front of the trailer while not exceeding the hitch's tongue weight. Contact Curt Manufacturing at 1-877-287-8634 or consult your vehicle manufacturer for specific tongue weight limits.
The gooseneck ball is 2 5/16" in diameter.
There should be a minimum clearance of 6" between the bottom of the trailer overhang and the top of the box sides. This must be verified before towing.
Leave only enough slack in the safety chains to allow full turning without interference. Too much slack in the chain may cause loss of control in the event of trailer-vehicle separation.
The load should be heavier toward the front of the trailer while not exceeding the hitch's tongue weight. Never load the heaviest part of the trailer behind the axle(s). The trailer load should also be centered from left to right and secured to prevent shifting.
The manual provides a clearance calculation formula on page 4. Measure: (X) = cab to ball center distance, (Y) = 1/2 the trailer width, and (W) = coupler overhang (if applicable). For a standard trailer: (X) - (Y) = (Z). For a trailer with overhang: [(X) - (W)] - (Y) = (Z). If (Z) is positive, the trailer will not interfere with the cab. If (Z) is negative, the trailer will interfere with the cab and cannot be used safely. The manual provides example calculations and a worksheet to complete your own calculation.
The 60619 center section is compatible with Toyota, Ford, Chevrolet/GMC, and RAM vehicles. The installation instructions include vehicle-specific safety chain hole locations for each brand. However, the 60647 subkit is specifically designed for Ford F-250 and F-350 trucks. Contact Curt Manufacturing at 1-877-287-8634 to confirm compatibility of the 60619 center section with your specific vehicle.
Curt Manufacturing warrants its products to be free from defect under normal use and service, ordinary wear and tear excepted, from the date of original retail purchase. The warranty covers repair or replacement of defective products at Curt's option. The warranty does not cover loss of use of vehicles, loss or damage to personal property, expenses such as telephone, lodging, gasoline, towing, or tire damage. Alterations, misuse, improper installation, overloading, exceeding weight ratings, or failure to properly maintain and regularly inspect the product will void the warranty.
To return a defective product: (1) Obtain a Returned Goods Authorization (RGA) number from Curt Manufacturing by calling 1-877-287-8634 (toll-free). (2) Prepare proof of purchase. (3) Pay all handling charges and shipping costs to deliver the product to Curt. (4) Send the damaged product along with the RGA number and proof of purchase to Curt Manufacturing, LLC, 6208 Industrial Drive, Eau Claire, Wisconsin 54701. Upon receipt, Curt will determine if the product is covered under the limited warranty and will repair or replace it if covered. If not covered, Curt will notify you before taking any action, and repair or replacement would be at your cost.
Yes, the 60647 subkit is designed for Ford F-250 and F-350 trucks. It requires the separate 60612 center section to complete the installation. Short bed models require turning clearance verification; two-wheel drive models require differential clearance checks when loaded and unloaded.
Yes. The spare tire must be temporarily removed, and the heat shield under the truck bed above the rear axle must be peeled off and removed. Both are required first steps.
Yes. Installation requires drilling a 3/16" pilot hole, four 5/8" safety chain holes (enlarged with a 3/4" step bit), and a 4" hole from above the truck bed. Use cutting fluid and deburr all holes. Spray exposed metal with rust inhibitor.
Torque in this order: (1) center section to cross arms, (2) side plates to frame, (3) side plates to cross arms. Specifications: 3/4" fasteners to 380 ft-lbs, 5/8" fasteners to 210 ft-lbs, 1/2" fasteners to 110 ft-lbs.
The ball is 2 5/16" diameter. Never operate the vehicle with the handle in the unlocked position. The handle must be locked before driving.
Verify turning clearance (especially on short bed models), check 6" minimum clearance between trailer overhang and truck box, verify the inverted ball won't interfere with the differential (critical on two-wheel drive trucks), confirm all hardware is torqued correctly, verify safety chain length and attachment security, ensure the handle is locked with the locking pin fully engaged, and confirm trailer weight does not exceed the towing system capacity.
If the groove in the gooseneck ball and the cylinder pin are not aligned, the ball will not drop into place. Rotate the gooseneck ball until the groove aligns with the pin and the ball drops into position. This is a normal part of the operation procedure and does not indicate a defect.
Some models may require bending the metal flange below the truck bed outward to allow the handle to move without interference. Use pliers to bend the flange if needed. Additionally, some models may require trimming of the plastic wheel-well cover for handle access. Check for these interferences during installation and modify as necessary.
This is a critical safety issue. Do not tow the trailer. The manual requires that on two-wheel drive trucks, a clearance check must be performed when the truck is loaded and unloaded to verify the inverted ball will not interfere with the top of the differential. If interference occurs, the hitch cannot be safely used in that configuration. Contact Curt Manufacturing at 1-877-287-8634 for alternative solutions or fitment options.
Do not tow the trailer. On short bed models, you must verify adequate turning clearance between the front of all trailers and the truck cab before towing. Use the clearance calculation formula provided on page 4 of the manual to determine if your specific trailer configuration will clear the cab. If the calculation shows interference (negative result), that trailer cannot be safely used with your truck. You may need to use a different trailer or a longer bed truck.
No reviews have been added for this product.