
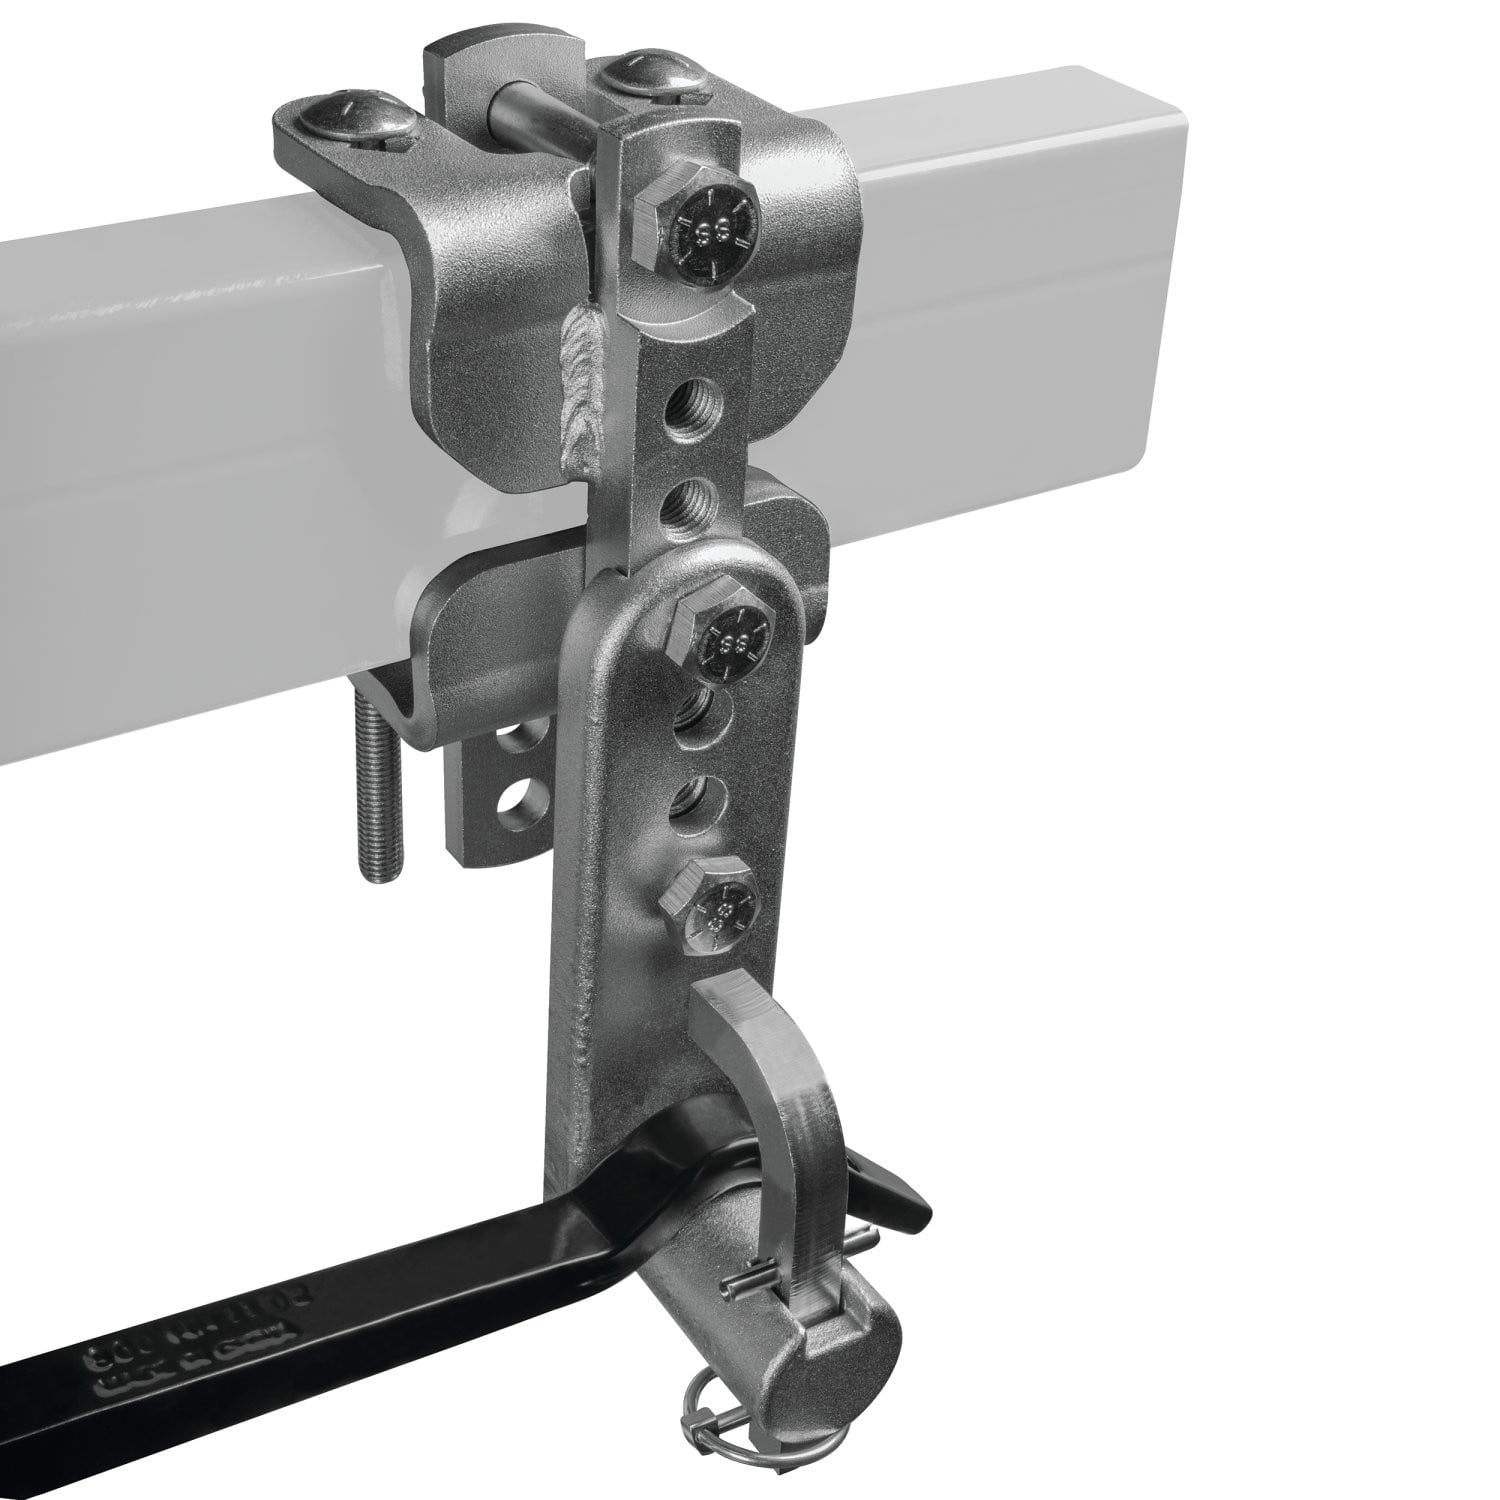
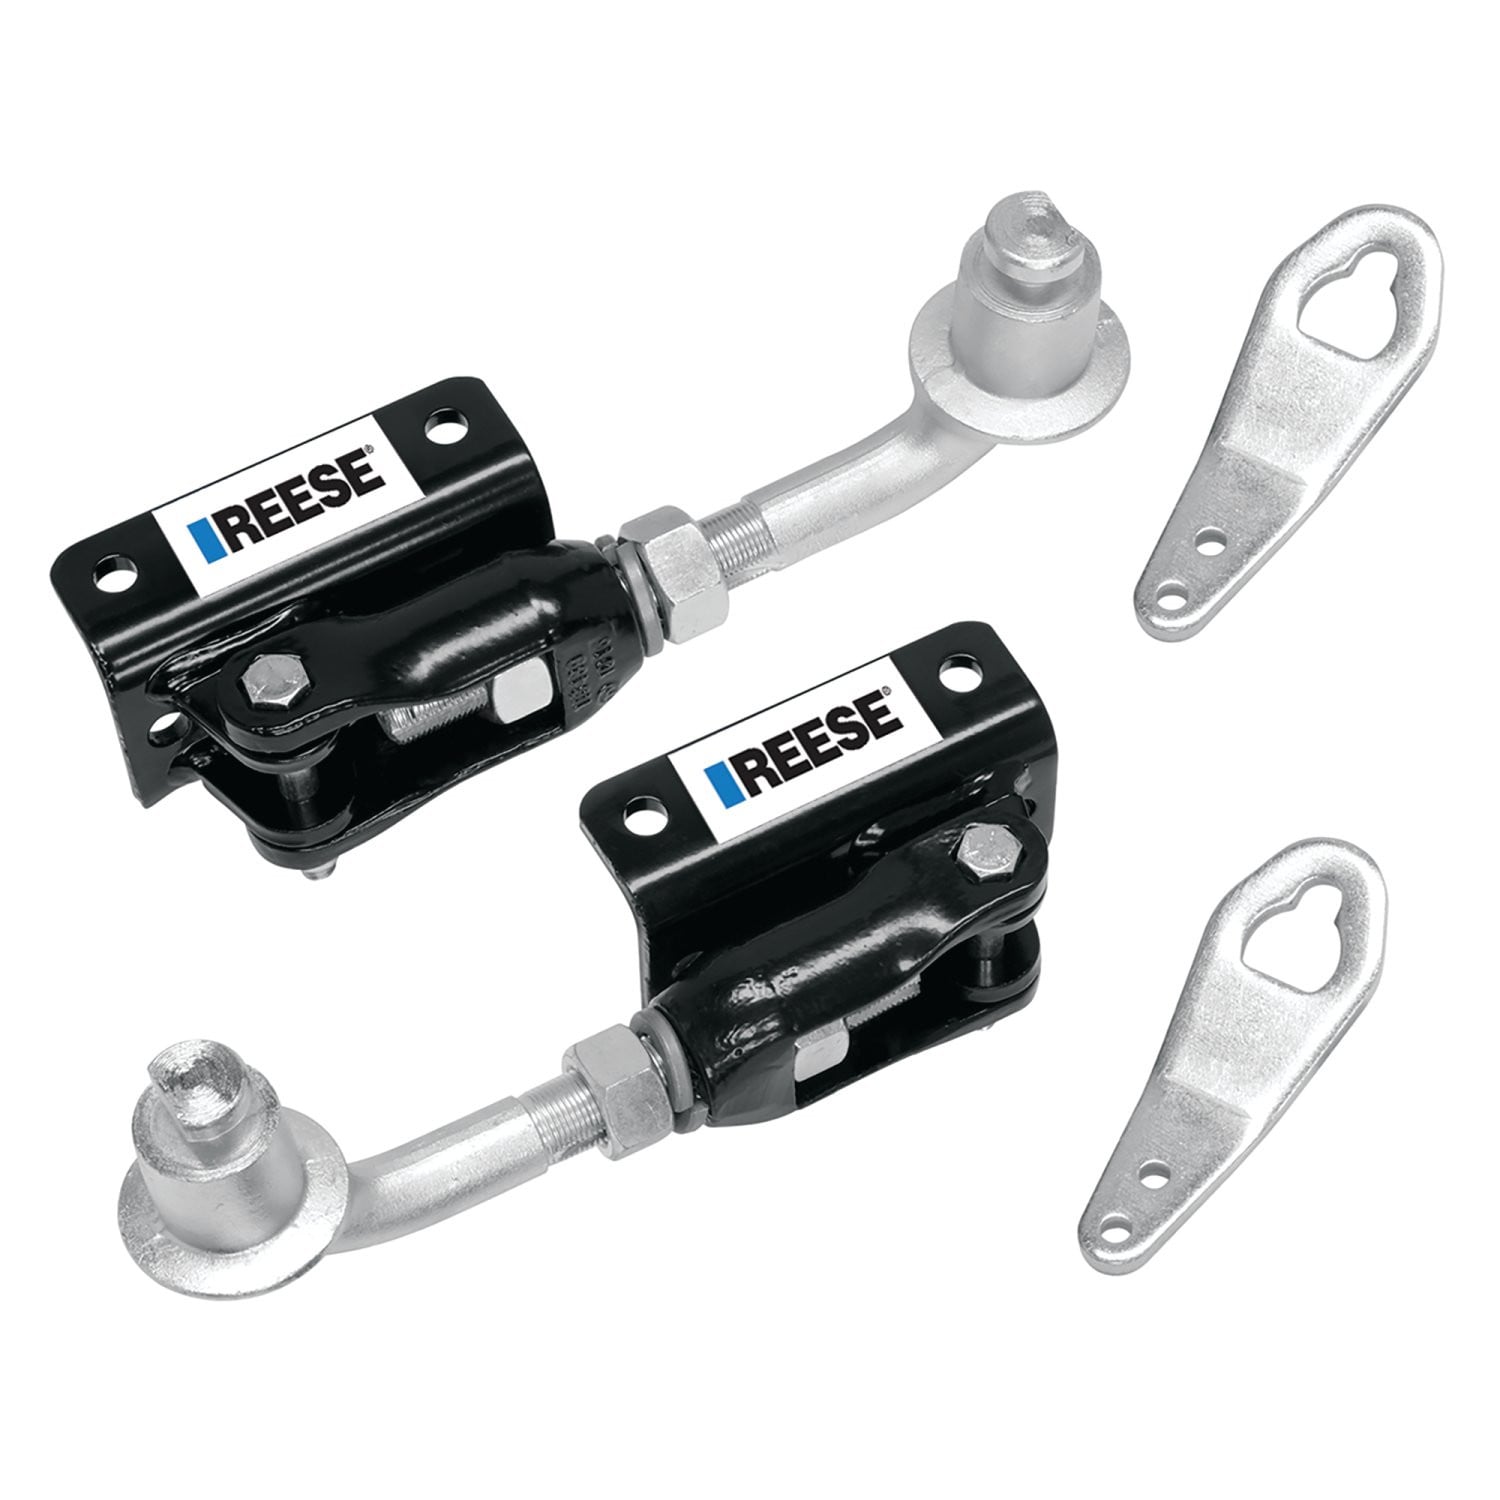
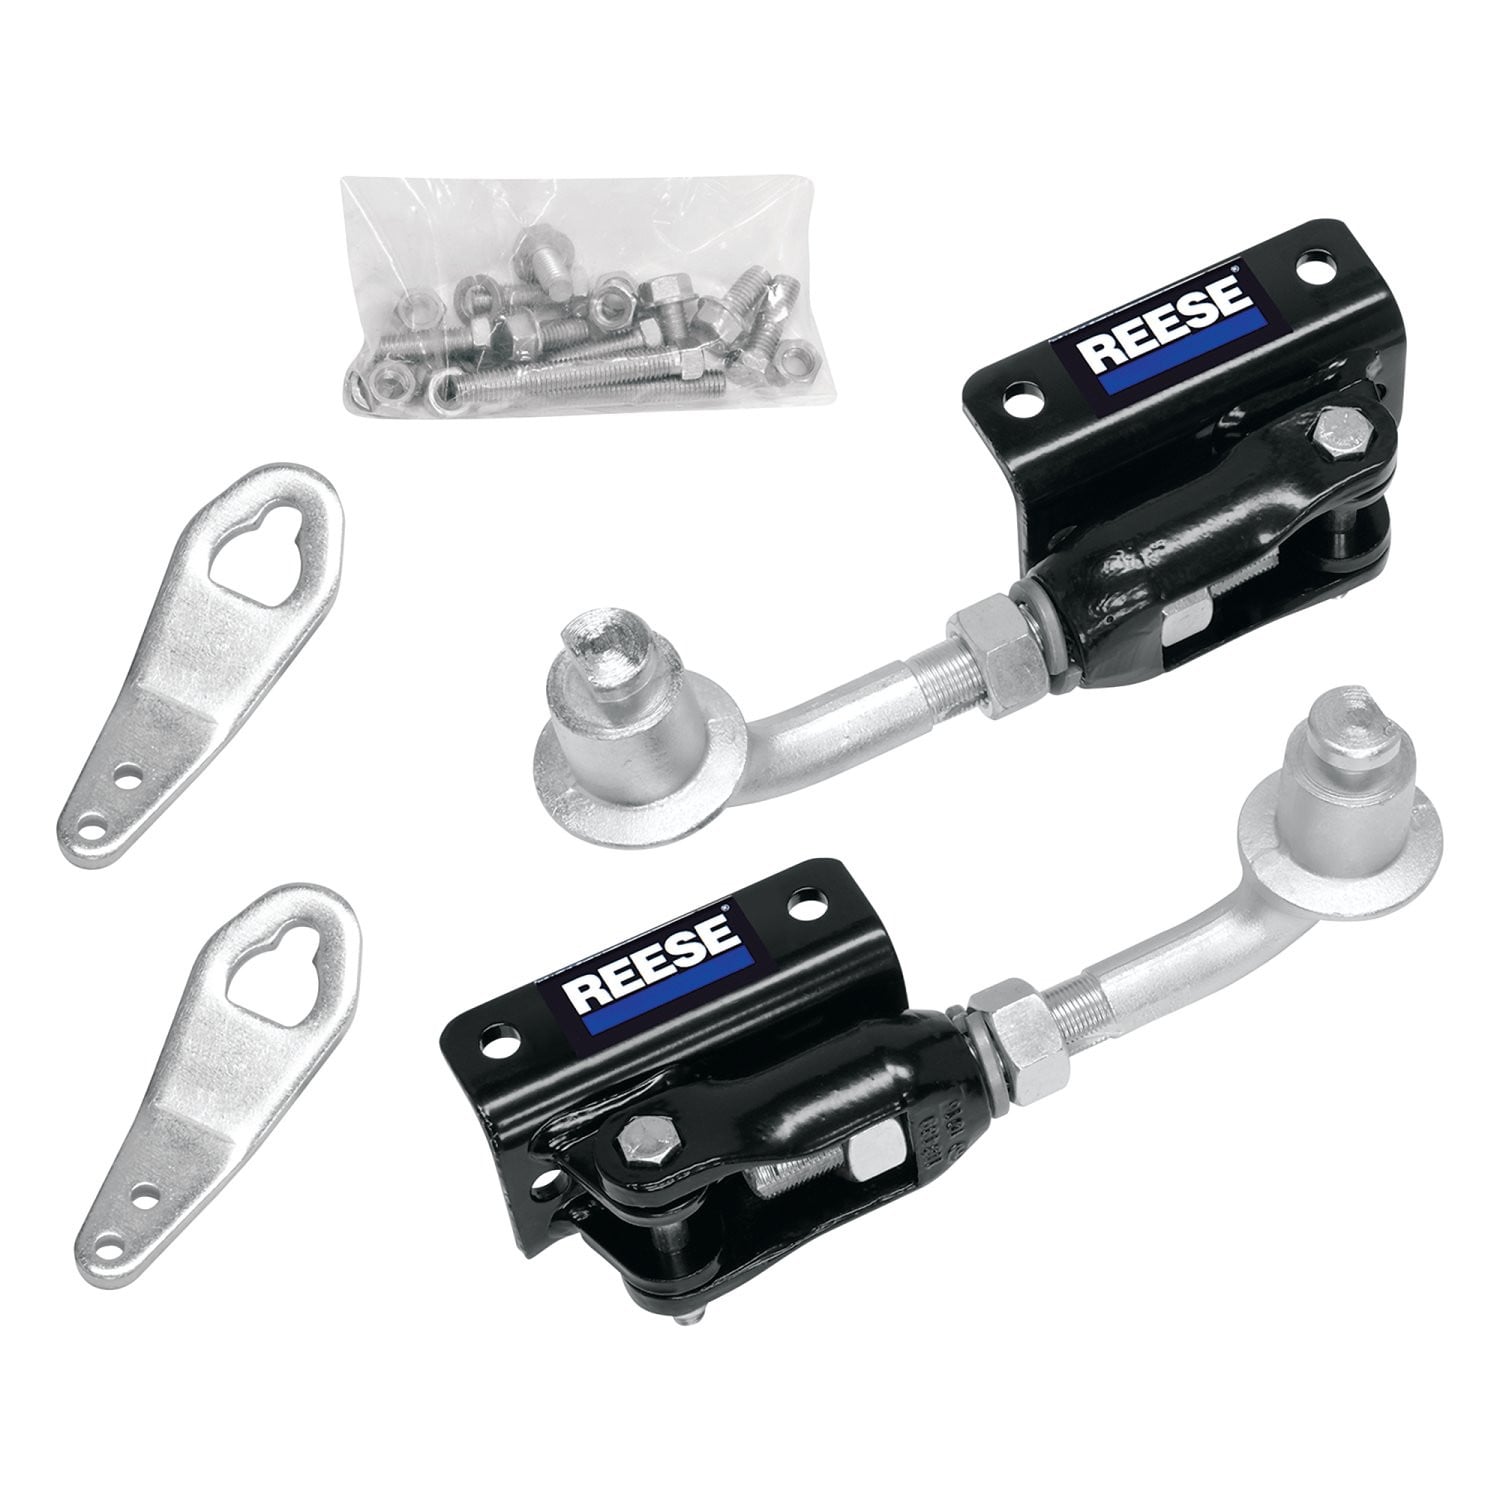
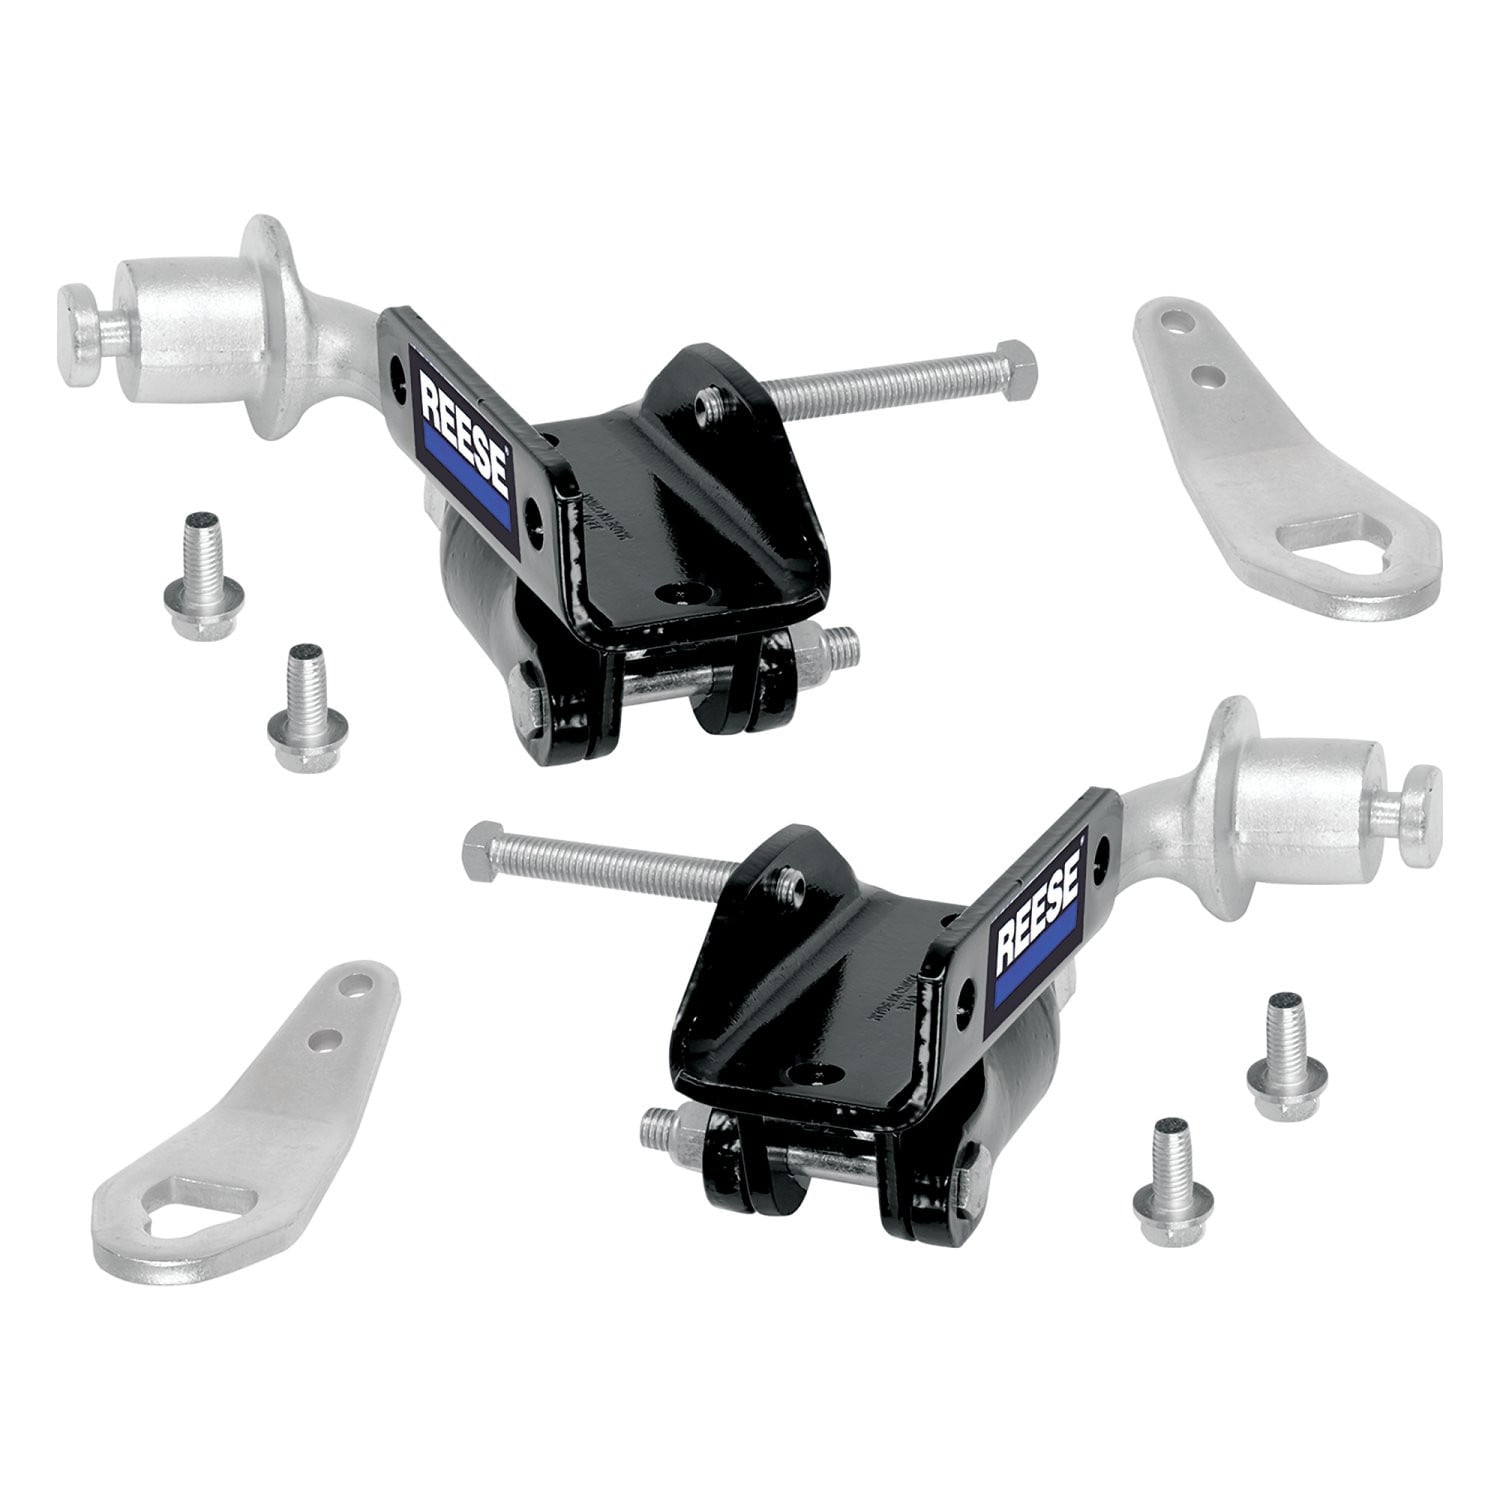
Reese Weight Distribution with Dual Cam II Active Sway Control, 12,000 lbs. CapacityReeseOriginal price was $1,070.00. Current price is $901.93.Out of Stock
View productOur in-house experts typically reply within one business day.

Reese



Always the correct part
We know our products
Quality Products
Free Shipping!
Always the correct part
We know our products
Quality Products
Free Shipping!

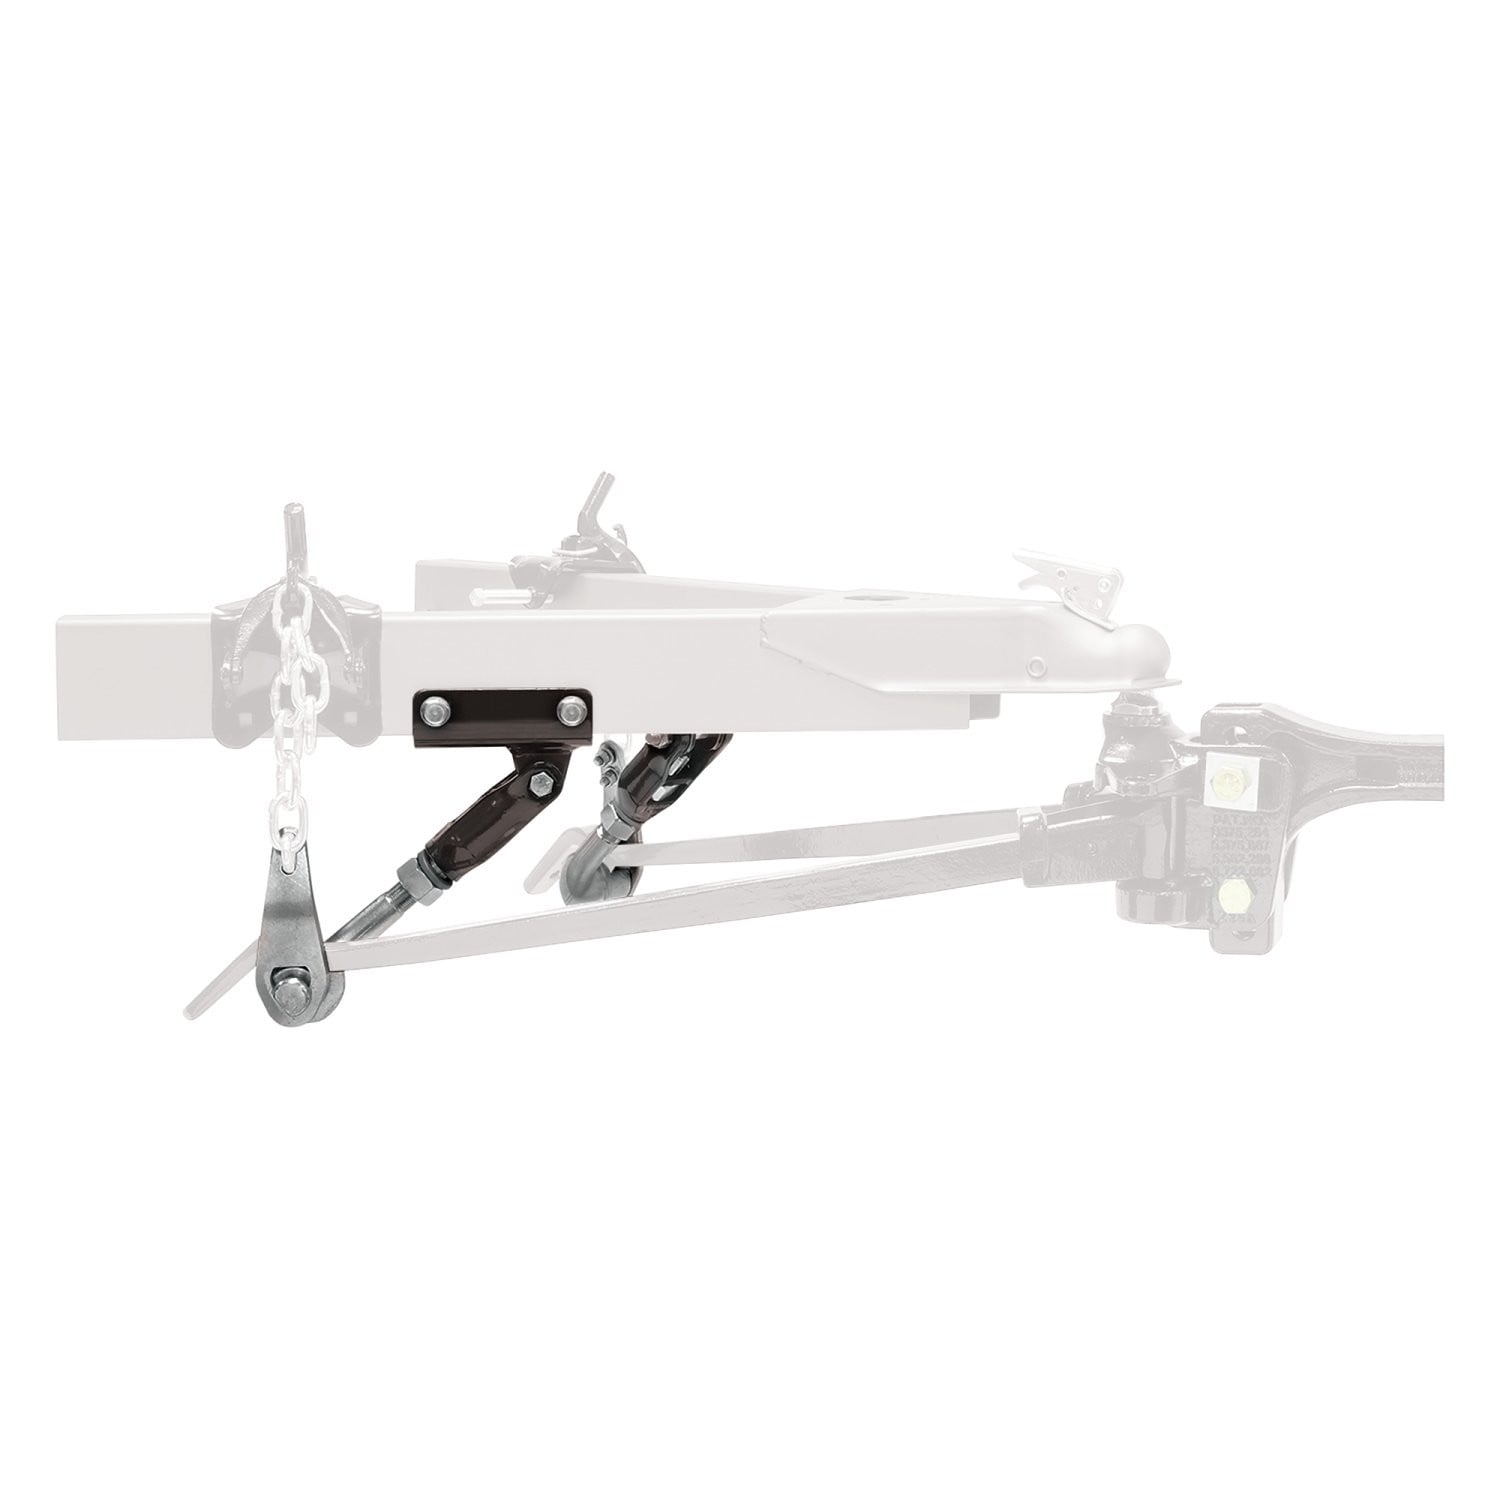
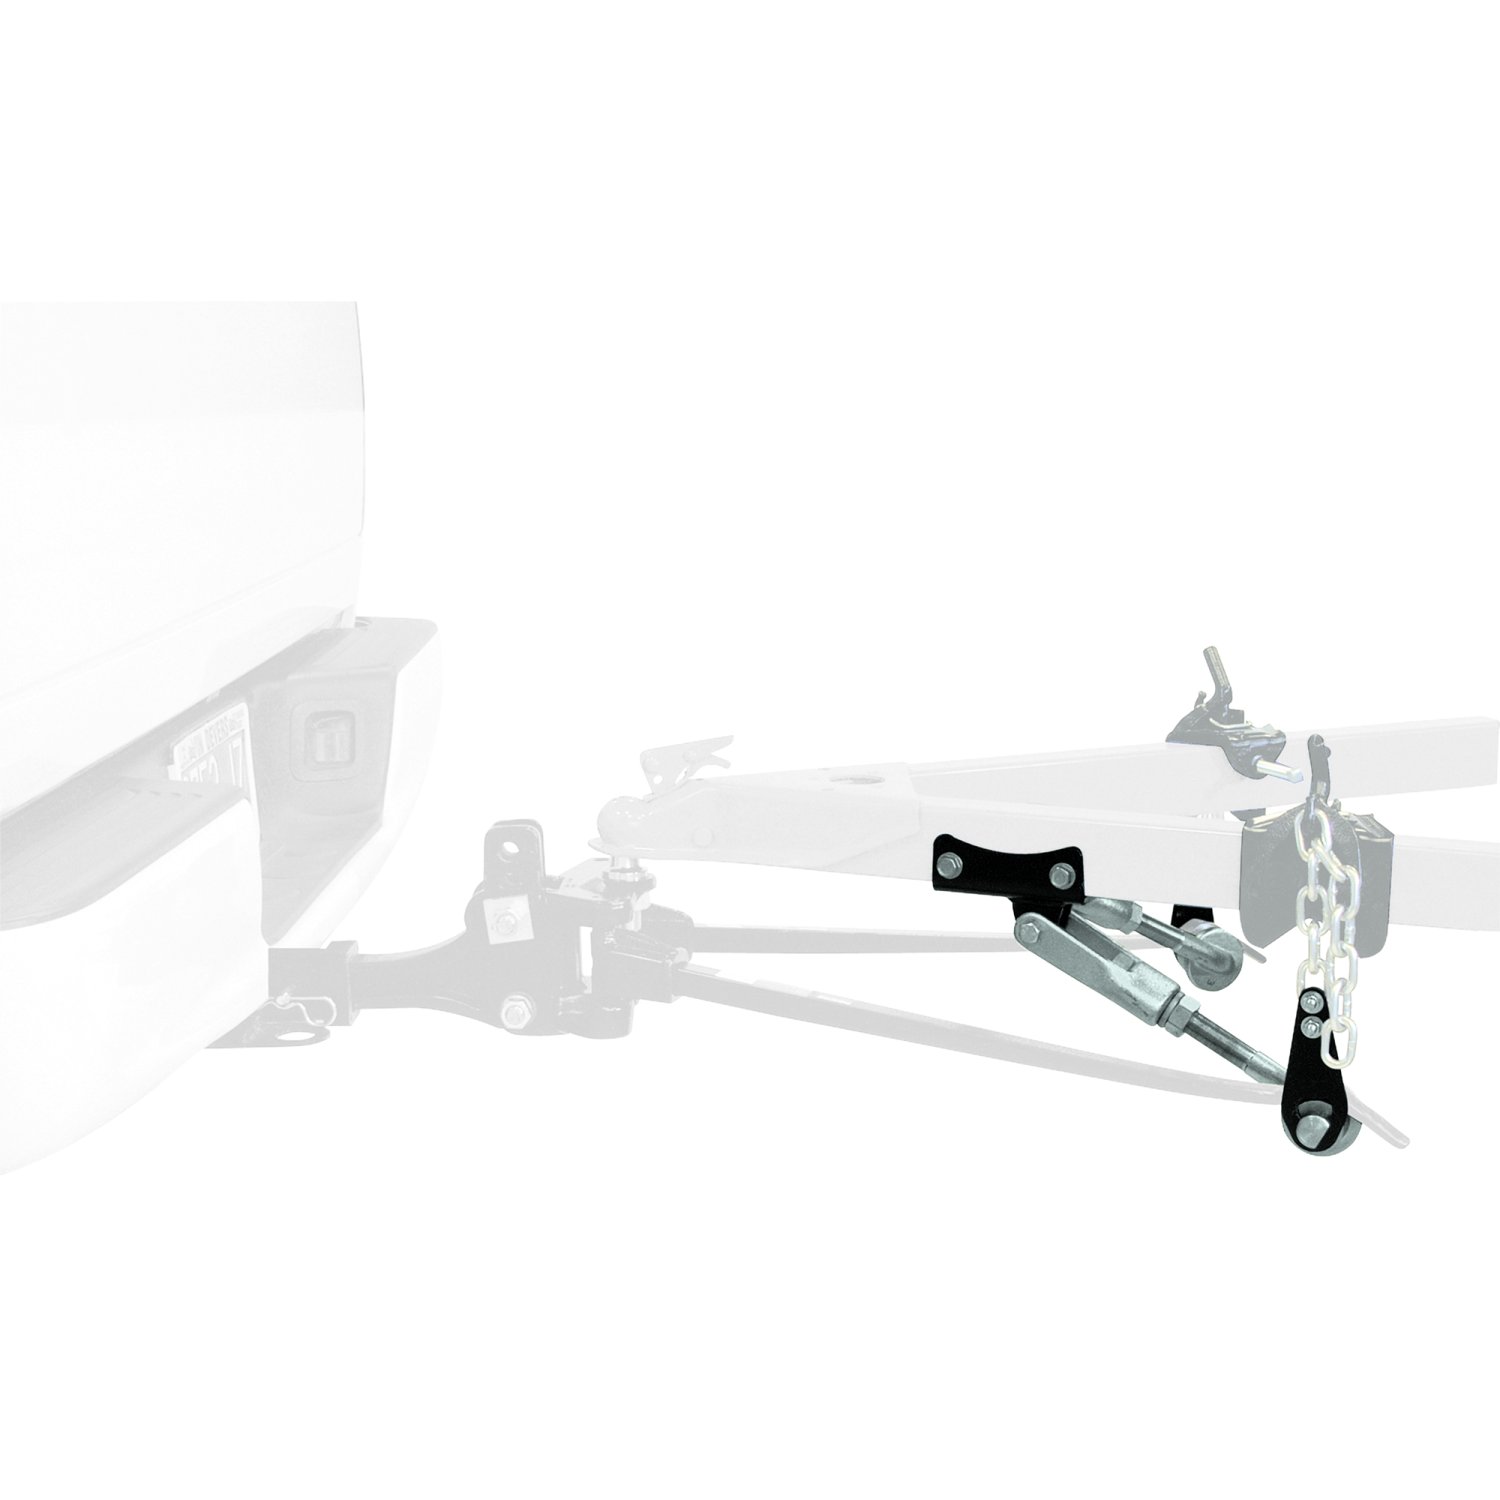
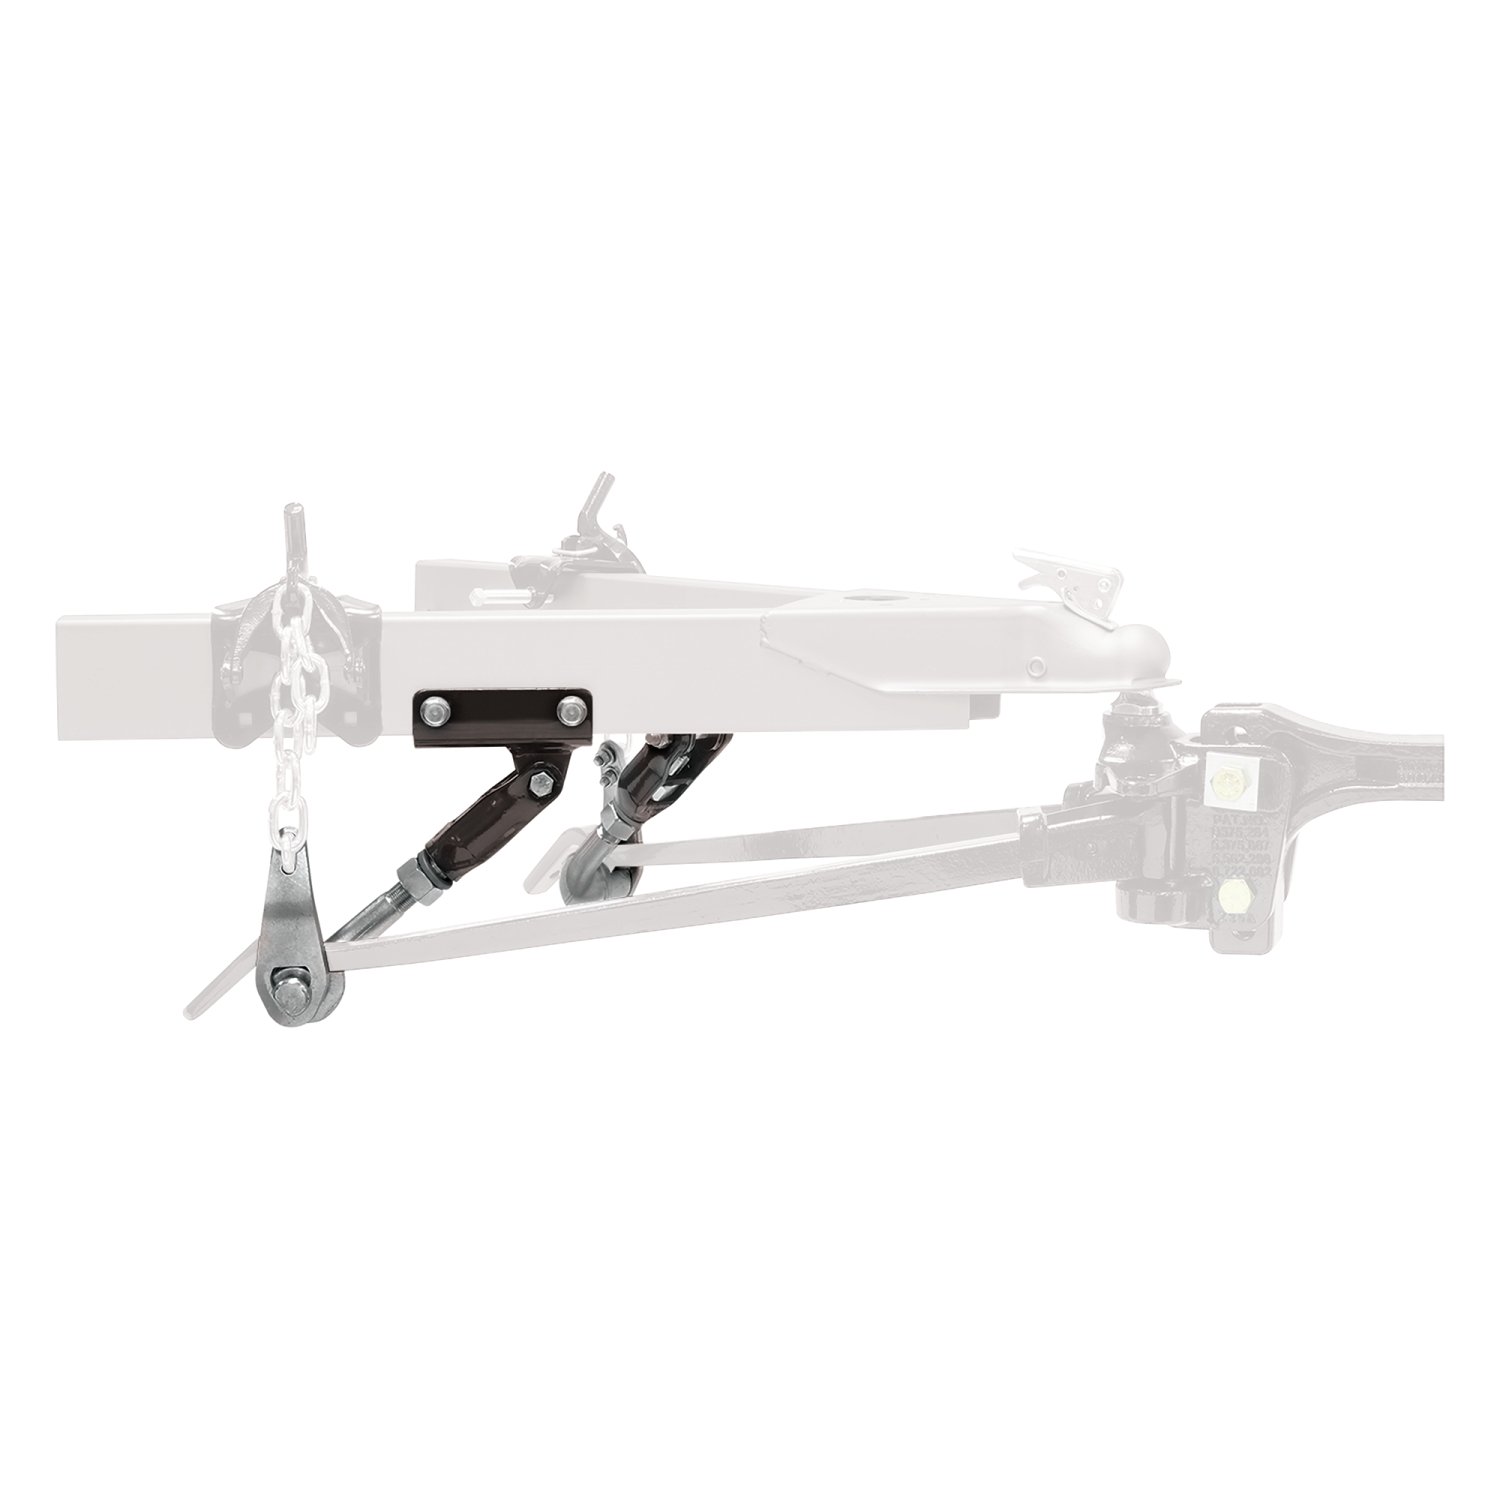
This patented product is Reese Products main technique for controlling trailer sway. Unlike Friction Sway Control, this approach works to control sway from the start rather than just resisting sway once it's begun. And it works only when needed. The advantage of the Dual Cam System is its ability to forestall sway in addition to sway resistance. It works to hold down the start of swaying activity while at the same time allowing free and easy vehicle and trailer interaction. Another advantage of the Dual Cam System is that it is installed on the trailer and thereofre does not require adjustment every time the towing vehicle and trailer are hooked up, unless hitch weight or tow vehicle loading are changed.
| BRAND: | REESE |
| PART NUMBER: | 26002 |
| WARRANTY: | LIMITED LIFETIME WARRANTY |
| WEIGHT: | 24.5 LBS |

Reese has designed towing equipment since 1952 and remains a benchmark for heavy-duty towing. The line covers fifth wheel hitches such as the modular M5, gooseneck couplers including the Goose Box, air-ride and short-bed pin boxes, weight distribution systems with active sway control, and the accessories that connect them, all built to exceed published industry standards.
Reese has been pioneering towing performance since 1952, when Margaret Reese asked her husband TJ to stop travel trailers rocking every time somebody walked through them. His answer, the first pair of stabilising jacks, was simple and effective enough to change the RV industry. From that starting point Reese grew into a designer and manufacturer of complete towing systems, and today it anchors the heavy-duty end of the Horizon Global towing portfolio.
Fifth wheel towing is where the brand's engineering is most visible. The M5 fifth wheel hitch uses a modular design that breaks into manageable sections for assembly, with a wider stance, tighter tolerances and a shock absorption system aimed at the jolts that travel up through a truck bed. For owners who would rather tow from a gooseneck coupler and keep the bed clear, the Goose Box 20K replaces the trailer's king pin with a gooseneck connection carrying its own air-ride cushioning.
Pin boxes are a Reese speciality. The 5th Airborne uses air-ride technology to dampen road shock and reduce the chucking motion that makes fifth wheel towing tiring, while the Sidewinder was designed for short-bed pickups, pivoting the connection point so the trailer can turn sharply without the front cap meeting the cab.
For conventional towing, Reese weight distribution systems restore load to the tow vehicle's front axle and control sway. The Pro Round Bar distributes weight evenly while damping sway, and the Pro Dual Cam II uses active cam-based sway control that works harder the stronger the sway force becomes. Complete kits pair bars, head and shank to a rated tongue weight, and dedicated sway control kits can be added to existing setups. The products suit RV owners, horse and livestock haulers and anyone towing near the upper end of a vehicle's rating.
Experts available to answer your questions
Call 888-634-9494Lifetime
The REESE Dual Cam HP (part number 26002) is a high-performance sway control system designed to reduce trailer sway and improve towing stability. It works with Weight Distribution Hitches by using dual cam arms that engage with the spring bars of the hitch. The system helps keep the trailer stable during towing by controlling lateral movement.
No. The Dual Cam HP is designed for steel trailer frames only and is not for use with aluminum frames.
The Dual Cam HP is compatible with both Trunnion-style and Round Bar-style Weight Distribution Hitches. It works with standard couplers and bottom-mounted couplers. The installation dimensions differ slightly depending on which type you have, as shown in the setup location figures.
Yes. The Dual Cam HP is designed to work with an existing Weight Distribution Hitch kit. The U-bolts and chains from your Weight Distribution Kit are installed on the hanger brackets included with the Dual Cam HP. If you are installing it on an existing weight distribution kit, the U-bolts and chains will need to be removed from each spring bar before they can be installed on the hanger brackets.
Required tools include: wrenches (1-1/2" open end, ¾" open end, ½" open end), drill bits (7/16", 17/32", and center drill/pilot drill), socket and ratchet (¾"), eight to ten 10" C-clamps, tape measure, and light penetrating oil (such as WD-40 or PB Blast). The fastener kit 100126 is also required.
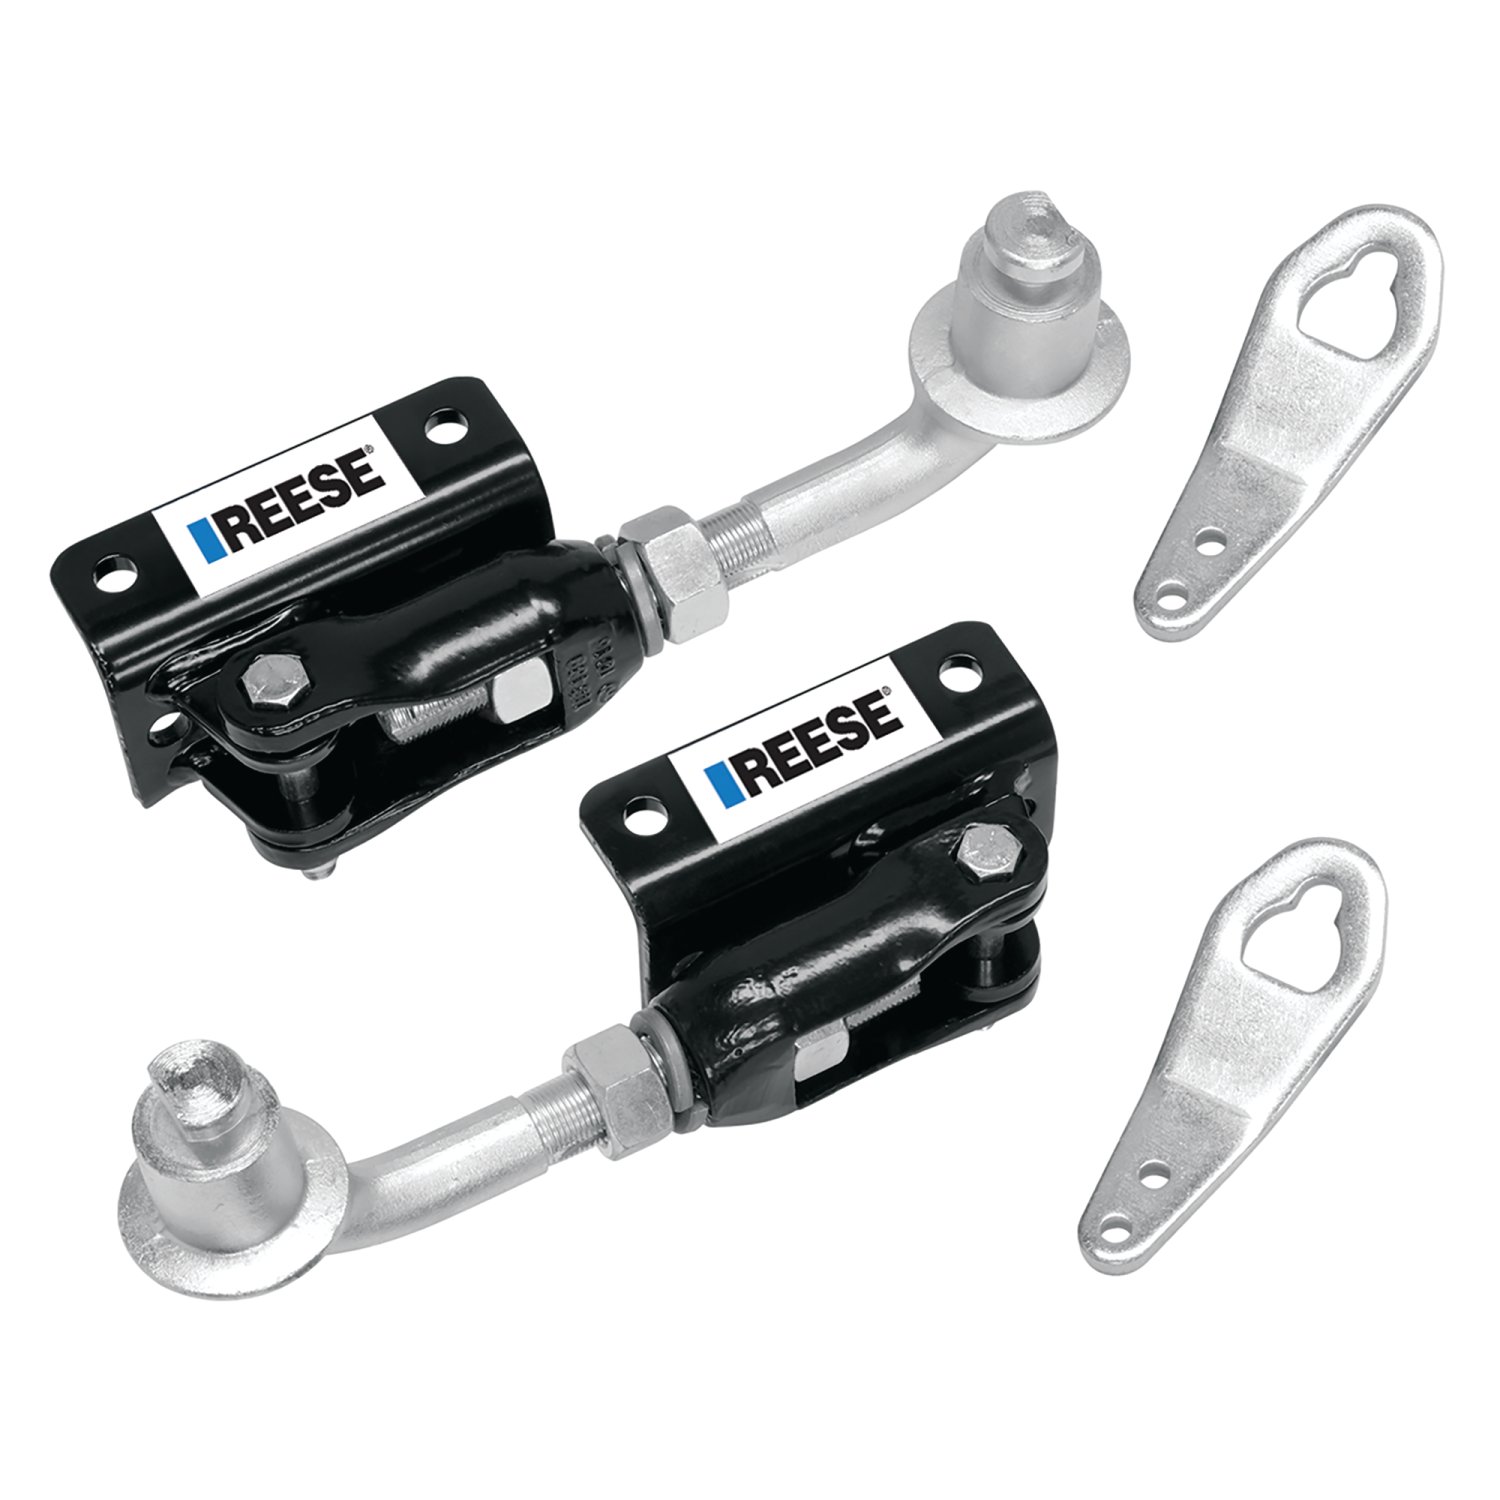
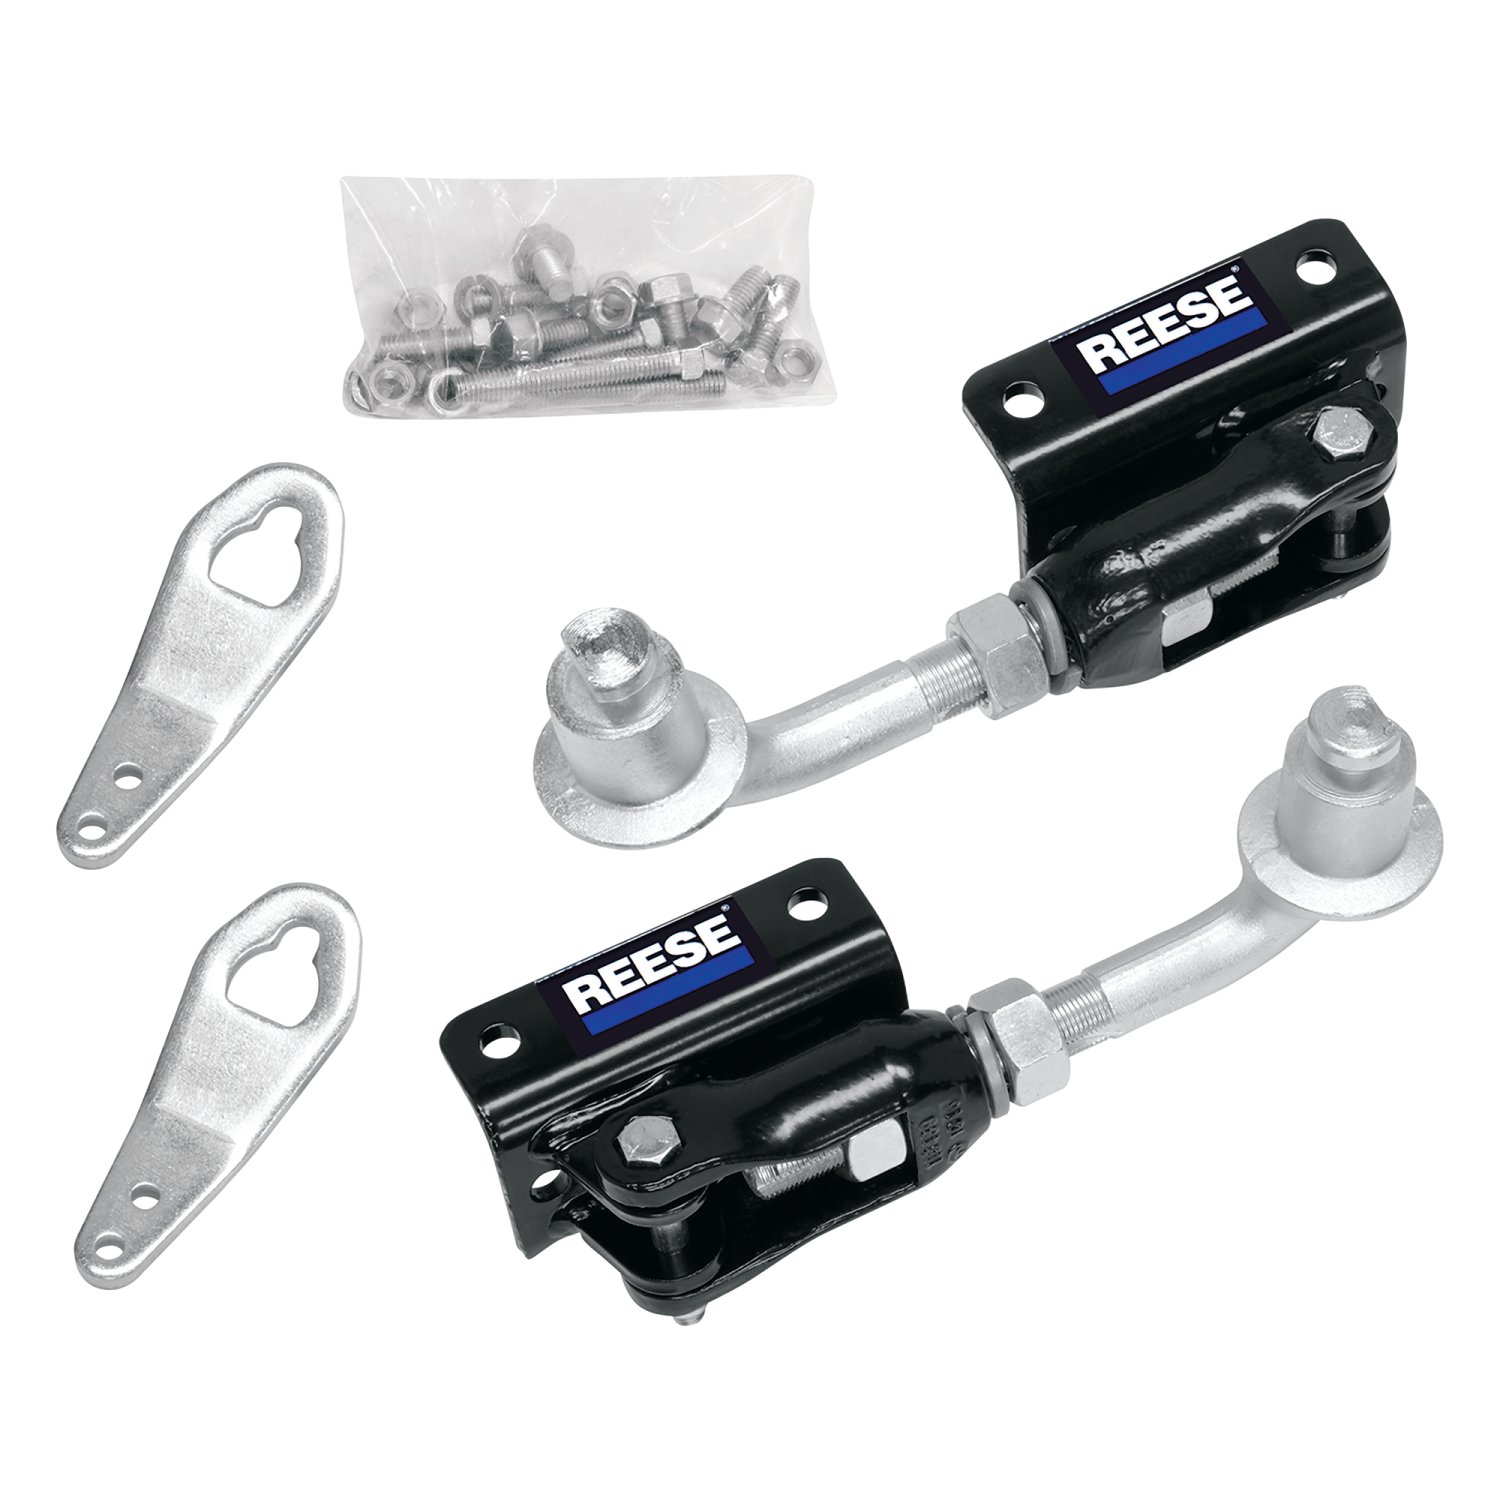
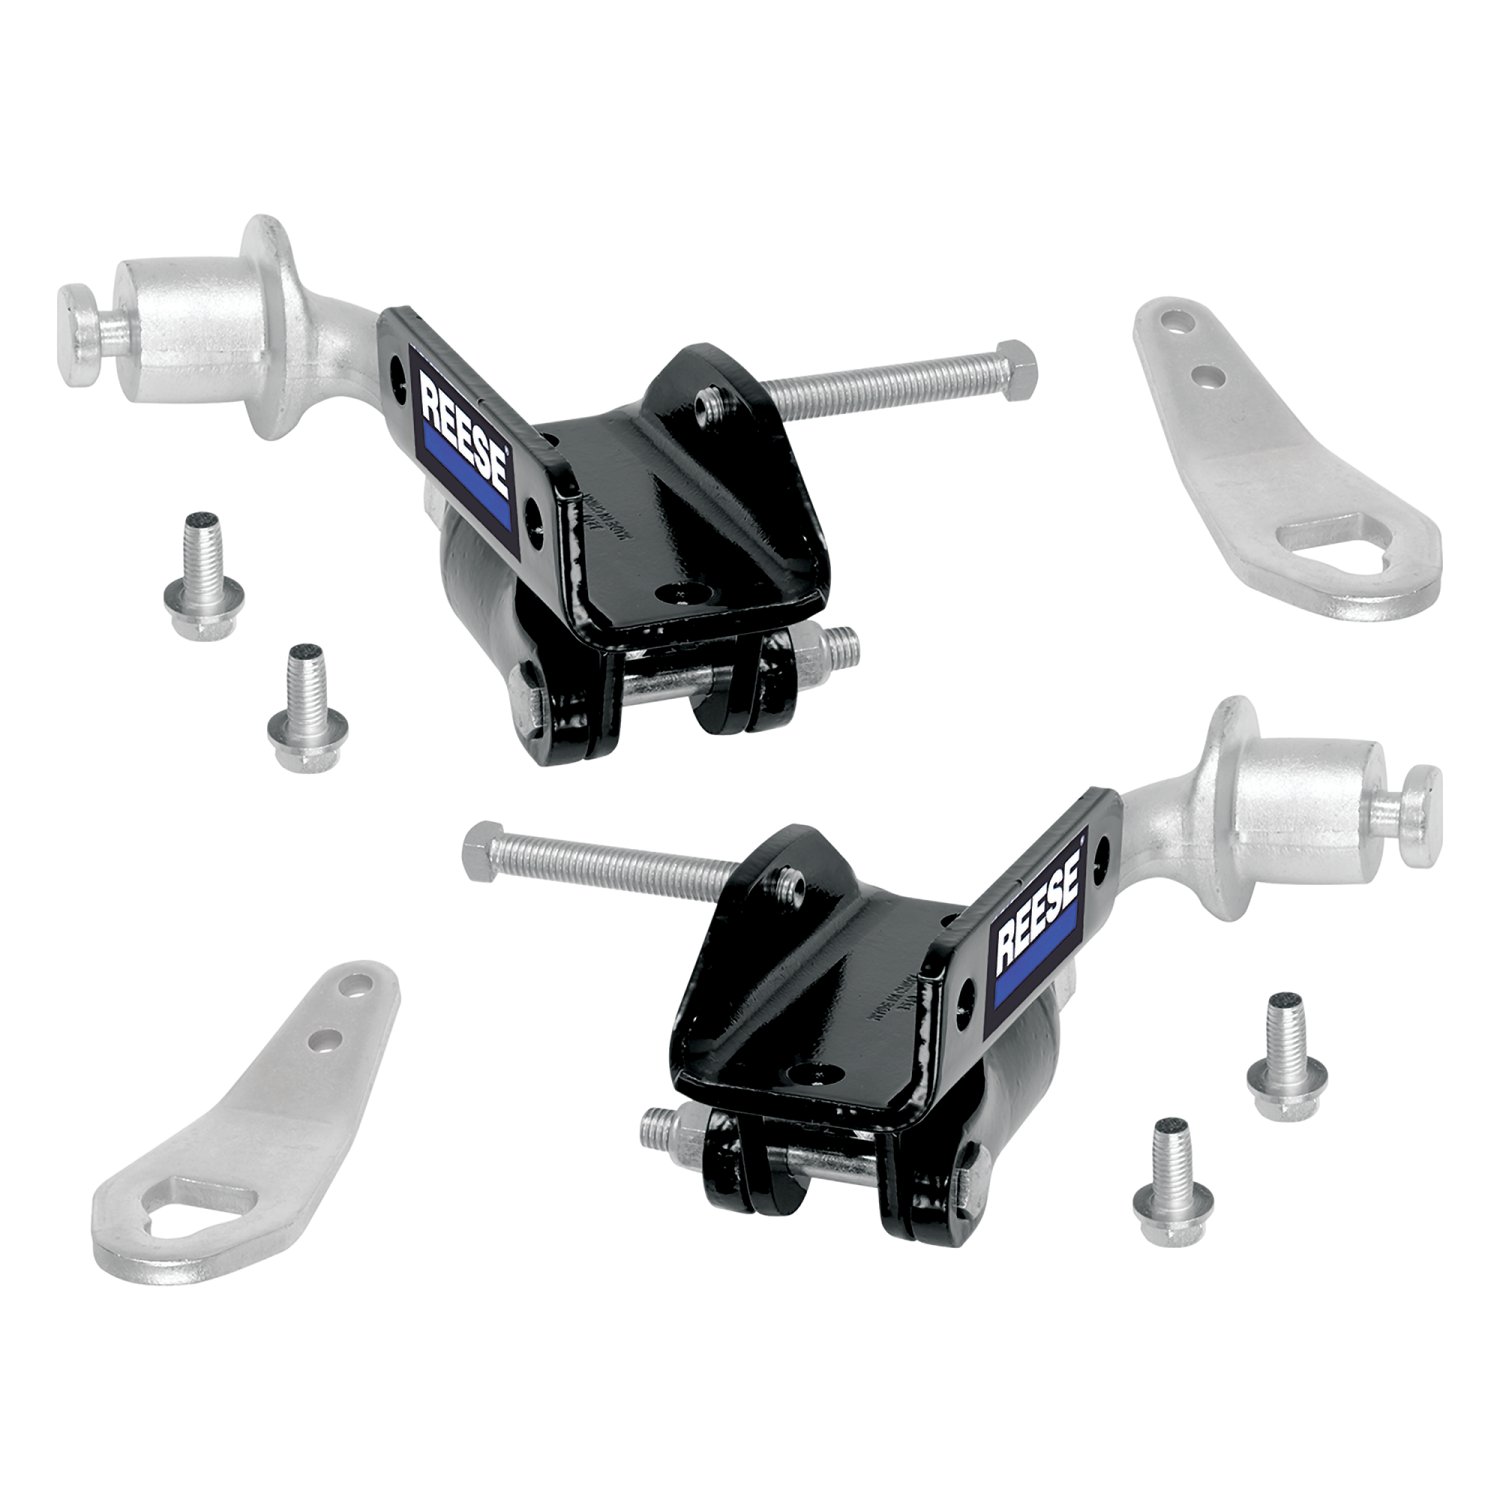
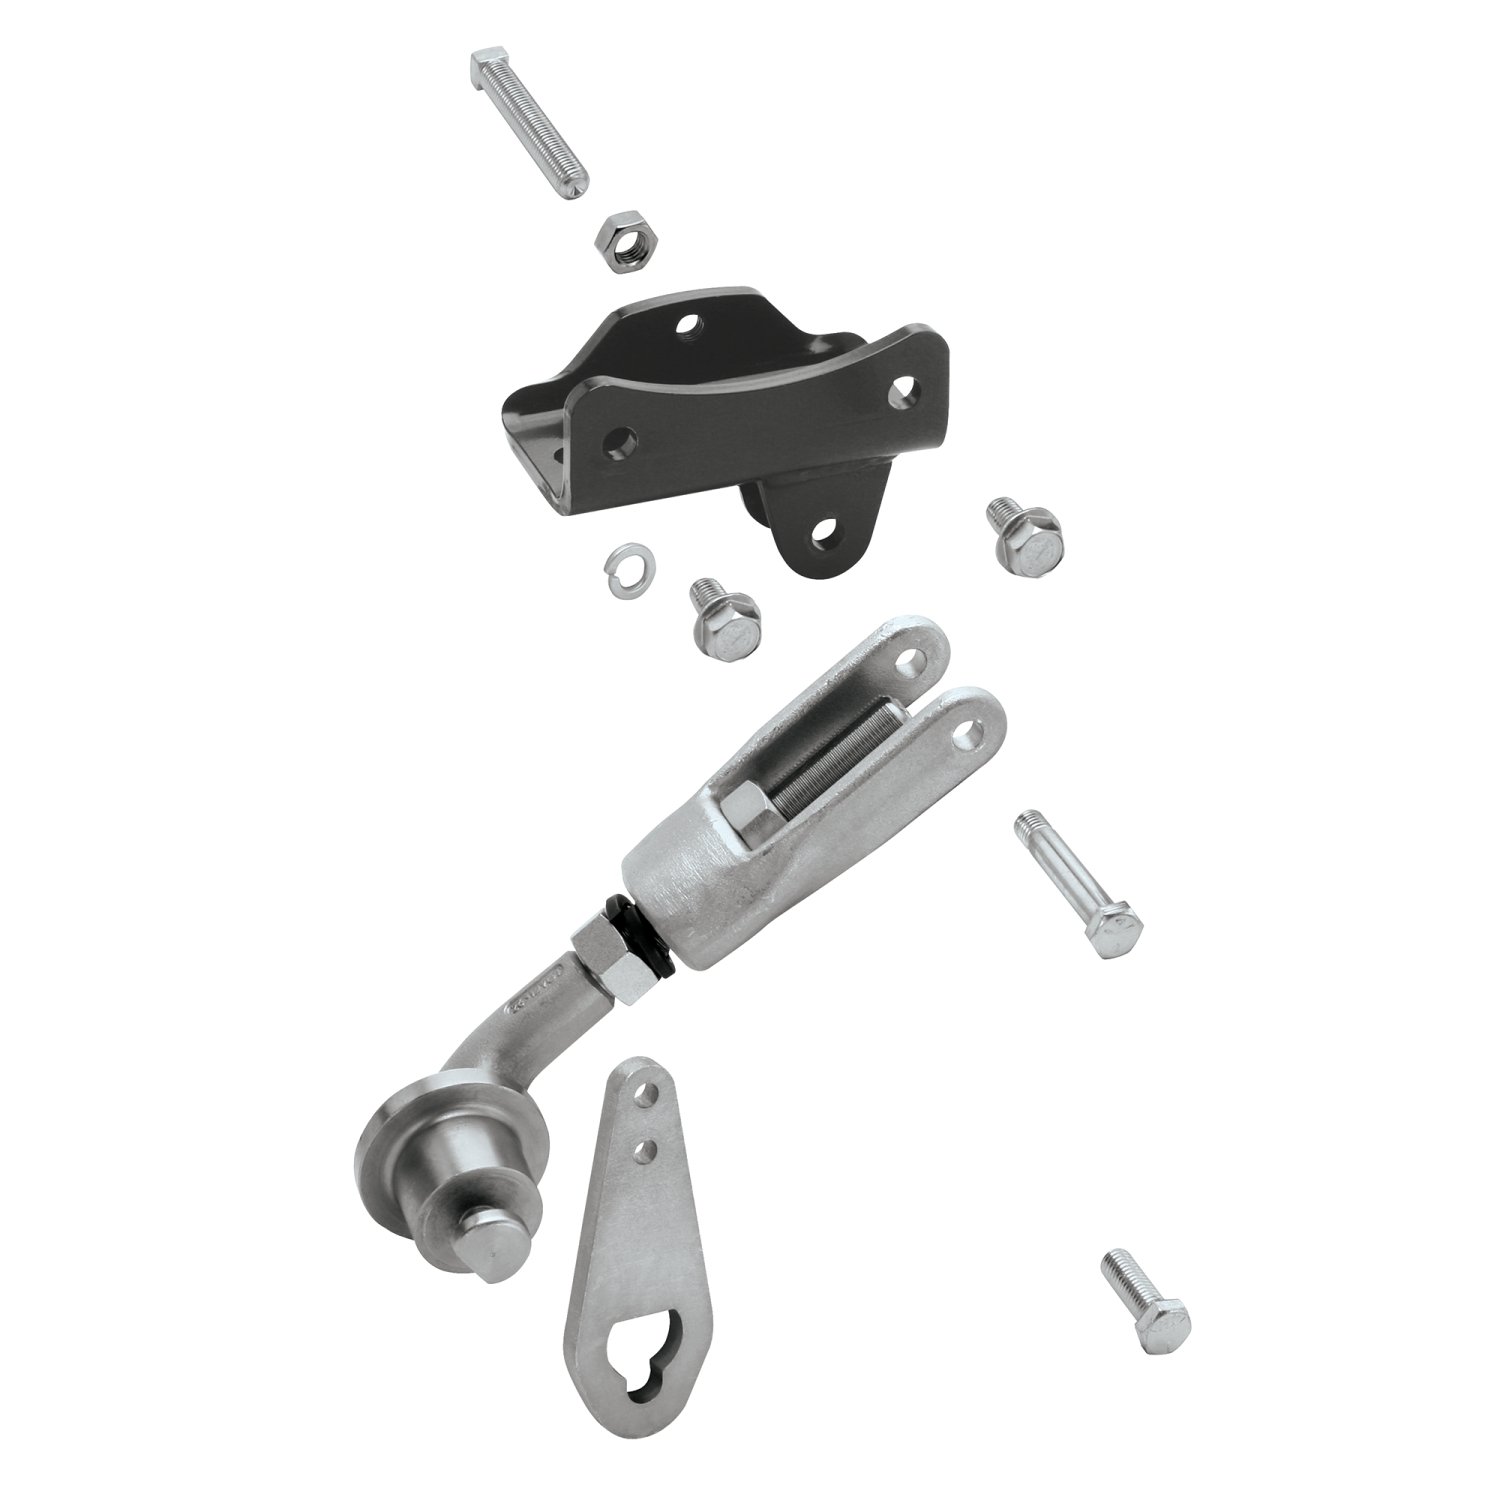
The kit includes: 2 Dual Cam HP Cam Arm Assemblies, 2 Hanger Brackets (snap-up brackets), 2 ½-13 thread-forming screws (optional, for use with snap-up bracket), 2 ½-13 X 3½" square head bolts, 6 ½-13 hex nuts, 4 ½" lock washers, 4 ½-13 X 1½" Grade 5 bolts, and 4 rivet nuts.
The manual does not specify that the battery must be disconnected. However, the manual does caution that before drilling, you must ensure there are no obstructions in the trailer frame such as trailer wiring or electric brake breakaway switches.
The first step is to locate both hanger brackets included in the kit and install the U-bolt and chain from your Weight Distribution Kit on each hanger bracket. The U-bolts must be installed in the ends of the chains (last link). If you are installing the Dual Cam HP on an existing weight distribution kit, you will need to remove the U-bolts and chains from each spring bar before installing them on the hanger brackets.
Using a grease pencil or marker and a straight edge, locate and mark the center of the hitch ball on the coupler both horizontally and vertically, creating a cross mark. This reference point is used to locate the cam arm assembly position. Mark both sides of the coupler.
If the adjustment nut is difficult to turn, apply a small amount of light penetrating oil such as WD-40 or PB Blast to the threads of the cam arm. Work the adjustment nut back and forth to get the penetrating oil into the threads until the adjustment nut moves freely to the desired position.
The measurement from the mark on the ball coupler to the center of the cam arm pivot bolt depends on your Weight Distribution Kit type: For Trunnion-style standard coupler, measure 20-1/2"; for Trunnion-style bottom-mounted coupler, measure 19-3/8". For Round Bar-style standard coupler, measure 19-1/8"; for Round Bar-style bottom-mounted coupler, measure 18". These are guidelines; adjustment via the adjustment nut may be required after hookup. The approximate desired working range on a 6" tall frame is 12"-13" for all types.
Yes. If the tow vehicle is not available at installation, position the yoke centered on the threads of the cam arm (approximately 2" from either end of the threaded portion). Run the adjustment nut down to meet the yoke and tighten the locking nut until the lock washer is fully compressed. Then proceed with frame plate installation. The customer will need to make minor adjustments to the cam arm length after hookup, depending on head tilt of the weight distribution system, number of chains used, tow vehicle variance, and tongue weight changes.
1. Connect the trailer to the tow vehicle on level ground in a straight line. 2. Raise the tongue and rear of the vehicle 6"-12" (or until the spring bar can be lifted with the supplied lifting handle with very little effort) using the trailer tongue jack. 3. Install the spring bars into the ball mount head and position the spring bar over the cam portion of the cam arm. 4. Install the hanger bracket by slipping the keyed slot over the button end of the cam arm, then rotate it to vertical position. 5. Pull the chain vertical to the chain attachment point on the snap-up bracket. 6. Raise the chains until they meet the hook of the snap-up bracket, using the chain link furthest down that allows you to close the snap-up bracket by hand (generally the 2nd or 3rd link from the free end). Use the same link number for both sides. 7. Lift both spring bars with the snap-up brackets and install the keeper pin.
After lowering the trailer tongue jack, check that the cam is properly seated in the detent of the spring bar. If the cam arm assembly does not automatically seat in the detent, rap the end of the cam arm with a mallet or hammer until it seats into the spring bar detent. The cam should be perfectly centered in the detent, as shown in the manual's Figure 13.
For tubular frame installation: 1. Using the bracket holes as a guide, drill two 7/16" holes into the frame. 2. Remove the bracket and drill the holes out to 11/16". Do not ream out the hole; it needs to be a snug fit. 3. Install rivet nuts into the holes. The manual cautions that before drilling, you must ensure there are no obstructions in the trailer frame such as trailer wiring or electric brake breakaway switches, and you must not drill through the opposite wall of the tubular frame.
For C-channel frame installation, drill two 17/32" holes in each side of the frame where the center punch marks were made. The use of a center drill or small pilot hole may be very helpful prior to final drilling. Note: Some C-channel frames may have square outside corners that do not allow the frame plate to contact the bottom of the frame. For these frames, a ½" flat washer (not supplied) is required between the outside of the trailer frame and the frame plate. The bottom of the frame plate must contact the bottom of the trailer frame.
For C-channel frame installation, torque the four ½-13 X 1½" bolts (with lock washers and nuts) to 85 ft-lbs.
For tubular frame installation using rivet nuts, torque the ½-13 X 1½" hex head bolts (with lock washers) to 75 ft-lbs.
Once the cam arm is in the proper position, the ½" pivot bolt must be torqued to 35 ft-lbs on both sides of the trailer A-frame.
Tighten the set screw until it contacts the trailer frame, then proceed to tighten ¼ to ½ turn (do not overtighten the set screw). Then tighten the jam nut to prevent the set screw from backing out while in use. Repeat for the other side of the trailer frame.
For the optional additional bolt installed into the snap-up bracket when using a Jayco RV with a coupler mounted to the bottom of the frame, install the ½" self-tapping screw and tighten it to 50 ft-lbs. After installation, re-tighten the ½" set screw on the inside of the frame by turning only ¼ to ½ of a turn after making contact with the frame.
Avoid putting any part of your body under the trailer or between the truck and trailer, as unexpected or accidental movement can cause serious injury or death. If you must place any part of your body under the trailer or between the truck and trailer, you must perform all of the following steps: (1) Check that the truck transmission is in park, (2) Check that the emergency brake is set, (3) Block in front of and behind all trailer tires, (4) Check that the trailer jack foot is resting on firm ground.
When lifting or lowering snap-up brackets, avoid putting any part of your body in the path of the lifting handle and under the cam arm and spring bars. Components of this system are loaded with substantial force and could shift position or drop suddenly, causing serious injury or death. Never raise or lower snap-up brackets without raising the trailer tongue jack to remove the load from the spring bars and cam arms, as failure to do so could cause serious injury.
Before each trip, you should: (1) Check the condition of all towing equipment and keep it in top condition, (2) Check that the torque of all fasteners is in accordance with the manual, (3) Re-check spring bar detent and cam alignment, and periodically check while towing for best performance, (4) Check for any excessive wear to any components of the system.
Do not use grease on the cams or cam arms. If noise of the system is offensive, a very light coating of lubricant such as Vaseline may be used on the portion of the cam where the spring bar rides on the cam. Tongue weights in excess of 1,200 lbs may require the use of such a lubricant to prevent excessive wear. Keep all painted parts painted to prevent rust and maintain a good appearance. Do not paint over labels.
To adjust the cam arm length: (1) Ensure the truck and trailer are adjusted properly per the weight distribution hitch instructions and pull forward far enough to be sure they are in a straight line (drive toward a point about 100 yards away keeping steering perfectly straight). (2) Go to each cam arm and check that the cam is perfectly centered in the detent of the spring bar. (3) Raise the trailer tongue jack and lower the snap-up brackets. Loosen the locking nut and move the adjustment nut until the cam is centered into the detent of the spring bar. (4) After making adjustments, lift both snap-up brackets and install retainer clips; lower the trailer tongue jack. (5) Repeat the check to verify proper positioning. The ½" pivot bolt must then be torqued to 35 ft-lbs on both sides.
The chain should be perfectly vertical while in use to avoid damage to the snap-up bracket itself. Adjust the position of the snap-up brackets as needed to ensure the chain is vertical. From time to time, with changing towing or loading conditions, it may be necessary to use a different chain link to properly level the tow vehicle. Anytime a different link is used, the cam arm must be readjusted.
The Dual Cam HP is covered by a Limited Lifetime Warranty. Cequent Performance Products warrants to the original consumer purchaser only that the product will be free from material defects in both material and workmanship for the lifetime of the product, ordinary wear and tear excepted, provided that installation and use of the product is in accordance with product instructions. The warranty does not cover normal wear and tear, damage through abuse, neglect, misuse, accident, misapplication, overloading, improper installation, improper maintenance and repair, or product alteration by anyone other than the manufacturer (except alterations made pursuant to product instructions in a workmanlike manner). If the product does not comply with this warranty, the sole remedy is replacement without charge or refund of the purchase price. This warranty is not transferable.
The Dual Cam HP works with steel trailer frames only (not aluminum) and requires an existing Weight Distribution Hitch. It is compatible with both Trunnion-style and Round Bar-style weight distribution kits, standard couplers, and bottom-mounted couplers. Verify your trailer frame material and hitch type before purchasing.
You will need: wrenches (1-1/2", ¾", and ½" open end), drill bits (7/16", 17/32", and center drill), socket and ratchet (¾"), eight to ten 10" C-clamps, tape measure, light penetrating oil, and fastener kit 100126.
Yes. For tubular frames, you drill 7/16" holes and enlarge to 11/16". For C-channel frames, you drill 17/32" holes. Before drilling, you must verify there are no obstructions such as wiring or brake switches in the frame.
Torque the ½-13 bolts to 85 ft-lbs (C-channel frame) or 75 ft-lbs (tubular frame with rivet nuts). Torque the cam arm pivot bolt to 35 ft-lbs. Tighten the set screw ¼ to ½ turn after contact (do not overtighten). For optional snap-up bracket bolt, torque to 50 ft-lbs.
Before each trip, check that all fastener torques are correct, verify the cam is properly seated in the spring bar detent, check for excessive wear on all components, and ensure the chain is vertical. Never raise or lower snap-up brackets without raising the trailer tongue jack.
Do not use grease on cams or cam arms. For tongue weights over 1,200 lbs or if noise is excessive, apply a light coating of Vaseline to the cam contact area only. Keep all painted parts painted to prevent rust. Do not paint over labels.
Yes. Position the yoke centered on the cam arm threads (approximately 2" from either end), run the adjustment nut down to meet it, and tighten the locking nut until the lock washer is fully compressed. The customer will need to make minor adjustments after hookup depending on head tilt, number of chains, tow vehicle variance, and tongue weight.
If the cam arm assembly does not automatically seat in the detent of the spring bar, rap the end of the cam arm with a mallet or hammer until it seats into the spring bar detent. The cam should be perfectly centered in the detent.
Apply a small amount of light penetrating oil such as WD-40 or PB Blast to the threads of the cam arm. Work the adjustment nut back and forth to get the penetrating oil into the threads until the adjustment nut moves freely to the desired position.
If noise of the system is offensive, a very light coating of lubricant such as Vaseline may be used on the portion of the cam where the spring bar rides on the cam. Tongue weights in excess of 1,200 lbs may require the use of such a lubricant to prevent excessive wear and noise.
Some C-channel frames may have square outside corners that do not allow the frame plate to contact the bottom of the frame. For these frames, a ½" flat washer (not supplied) is required between the outside of the trailer frame and the frame plate. The bottom of the frame plate must contact the bottom of the trailer frame.
Free Shipping
Ships free on all orders
 Authorized Dealer


FREE ShippingFREE SHIPPING
Estimated delivery Thu, Sep 17 - Sun, Sep 20
Order before 2 PM EST Monday–Friday for same-day processing
Guaranteed safe & secure checkout
Ann
Ordered online. Shipment arrived on time and with all the correct parts. Great customer service and friendly staff. Also, pricing was great!
May 22, 2023
