ARIES 2082060 TrailChaser Black Steel Rear Bumper with LED Lights, Select Jeep Wrangler JKARIESOriginal price was $662.95. Current price is $330.00.Out of Stock
View productOur in-house experts typically reply within one business day.

ARIES
Verify Fitment
Select your vehicle to confirm this part fits.
2007 - 2017 Jeep Wrangler
Confirmed to Fit
2018 Jeep Wrangler JK
Confirmed to Fit




Always the correct part
We know our products
Quality Products
Free Shipping!
Always the correct part
We know our products
Quality Products
Free Shipping!
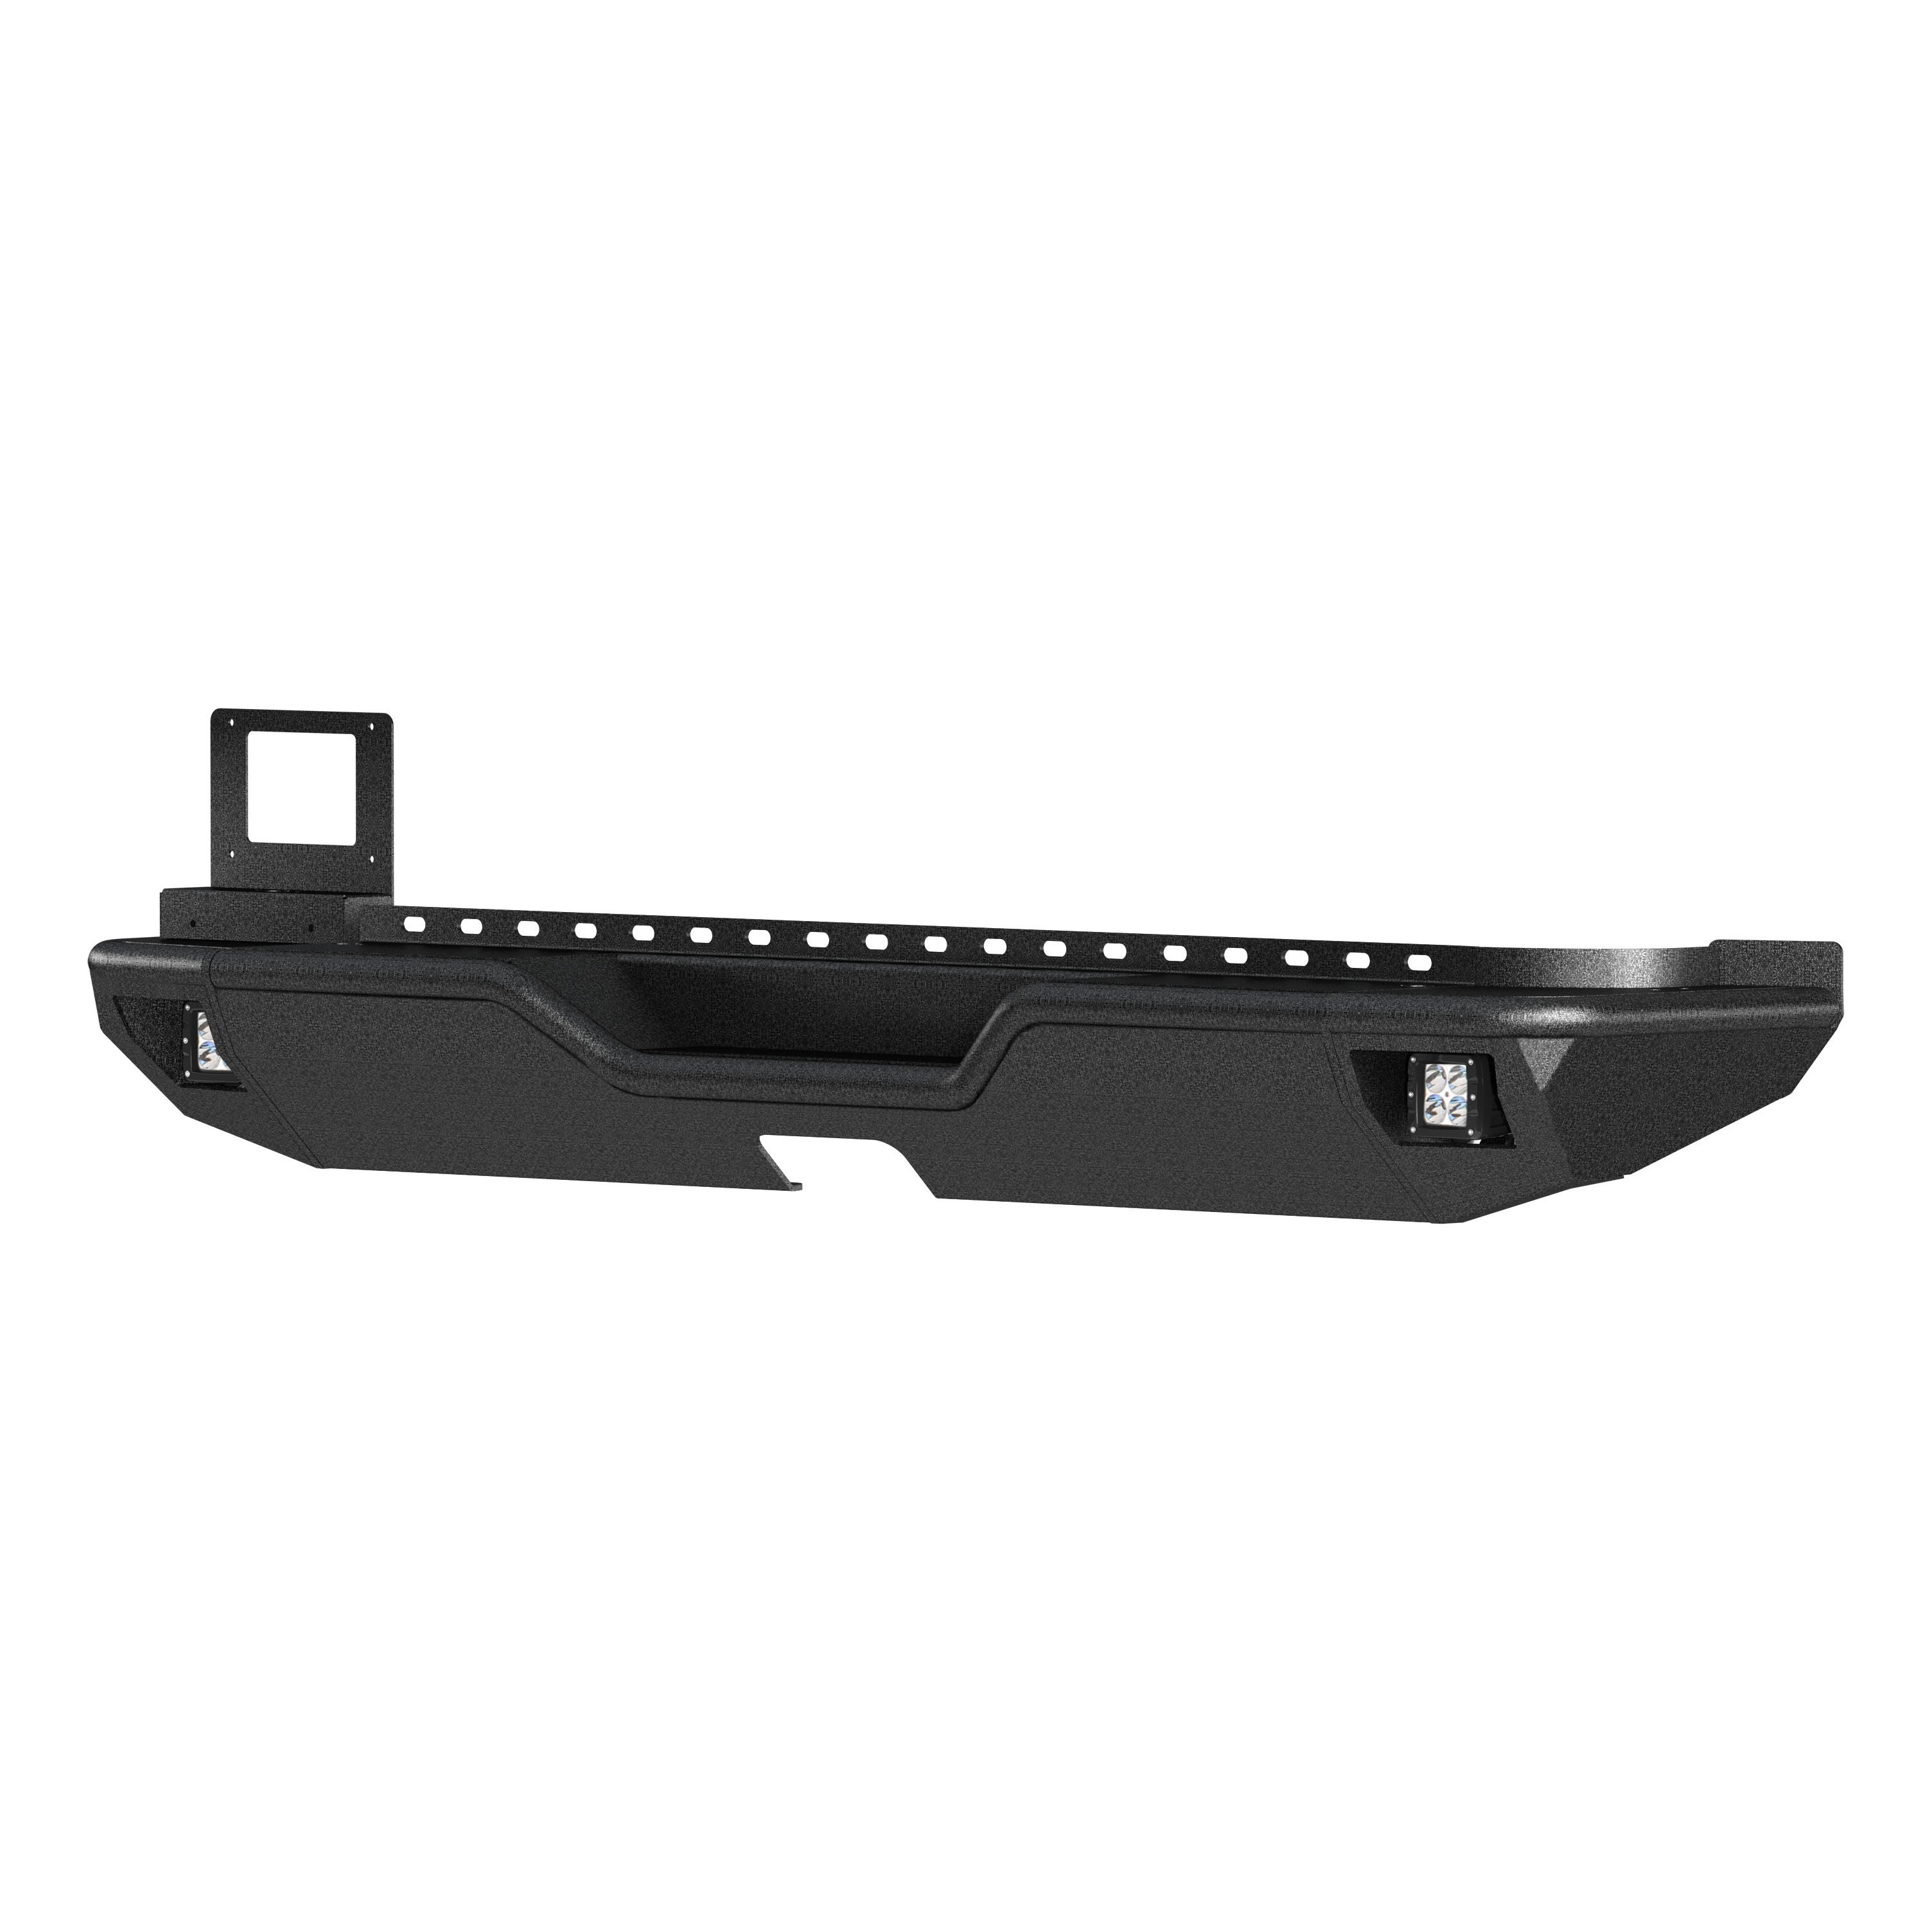
Includes rear center section #2081021, corners #2081223 and mounting hardware

Warranty: Limited Lifetime Warranty (Five-Year Finish, One-Year Parts)
Finish: TEXTURED BLACK POWDER COAT
Material: Aluminum
Bumper Location: Rear
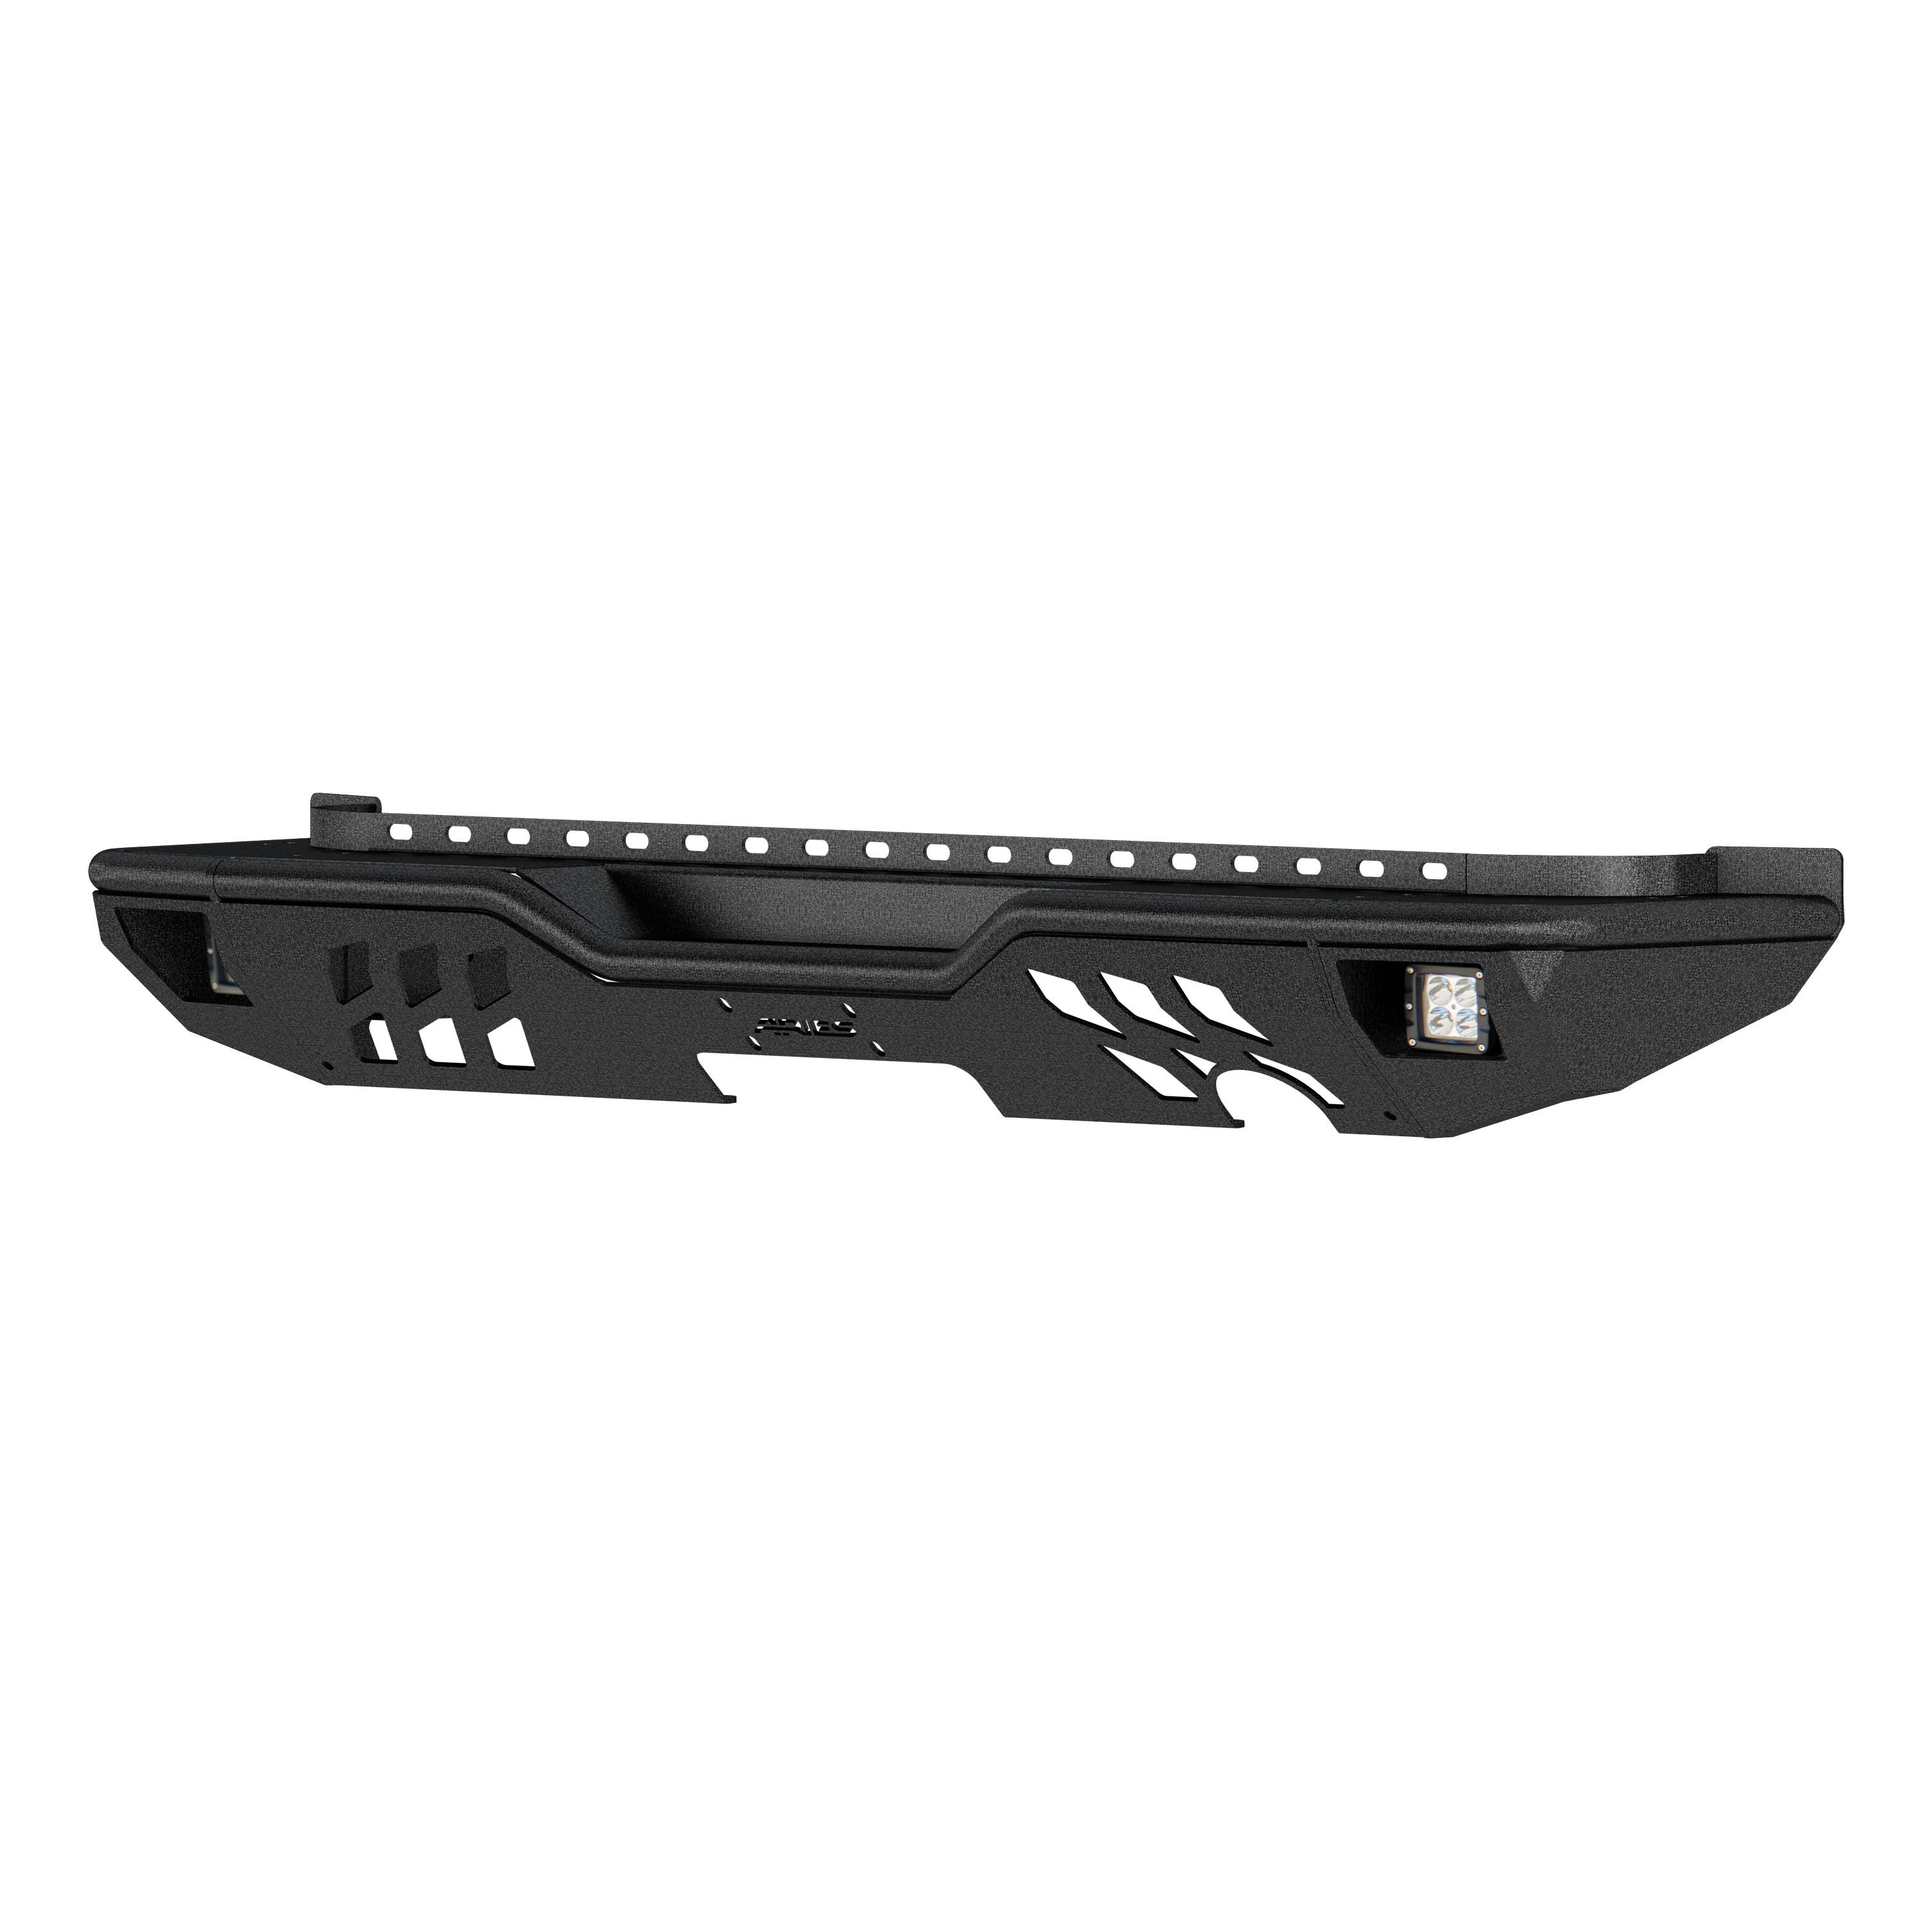
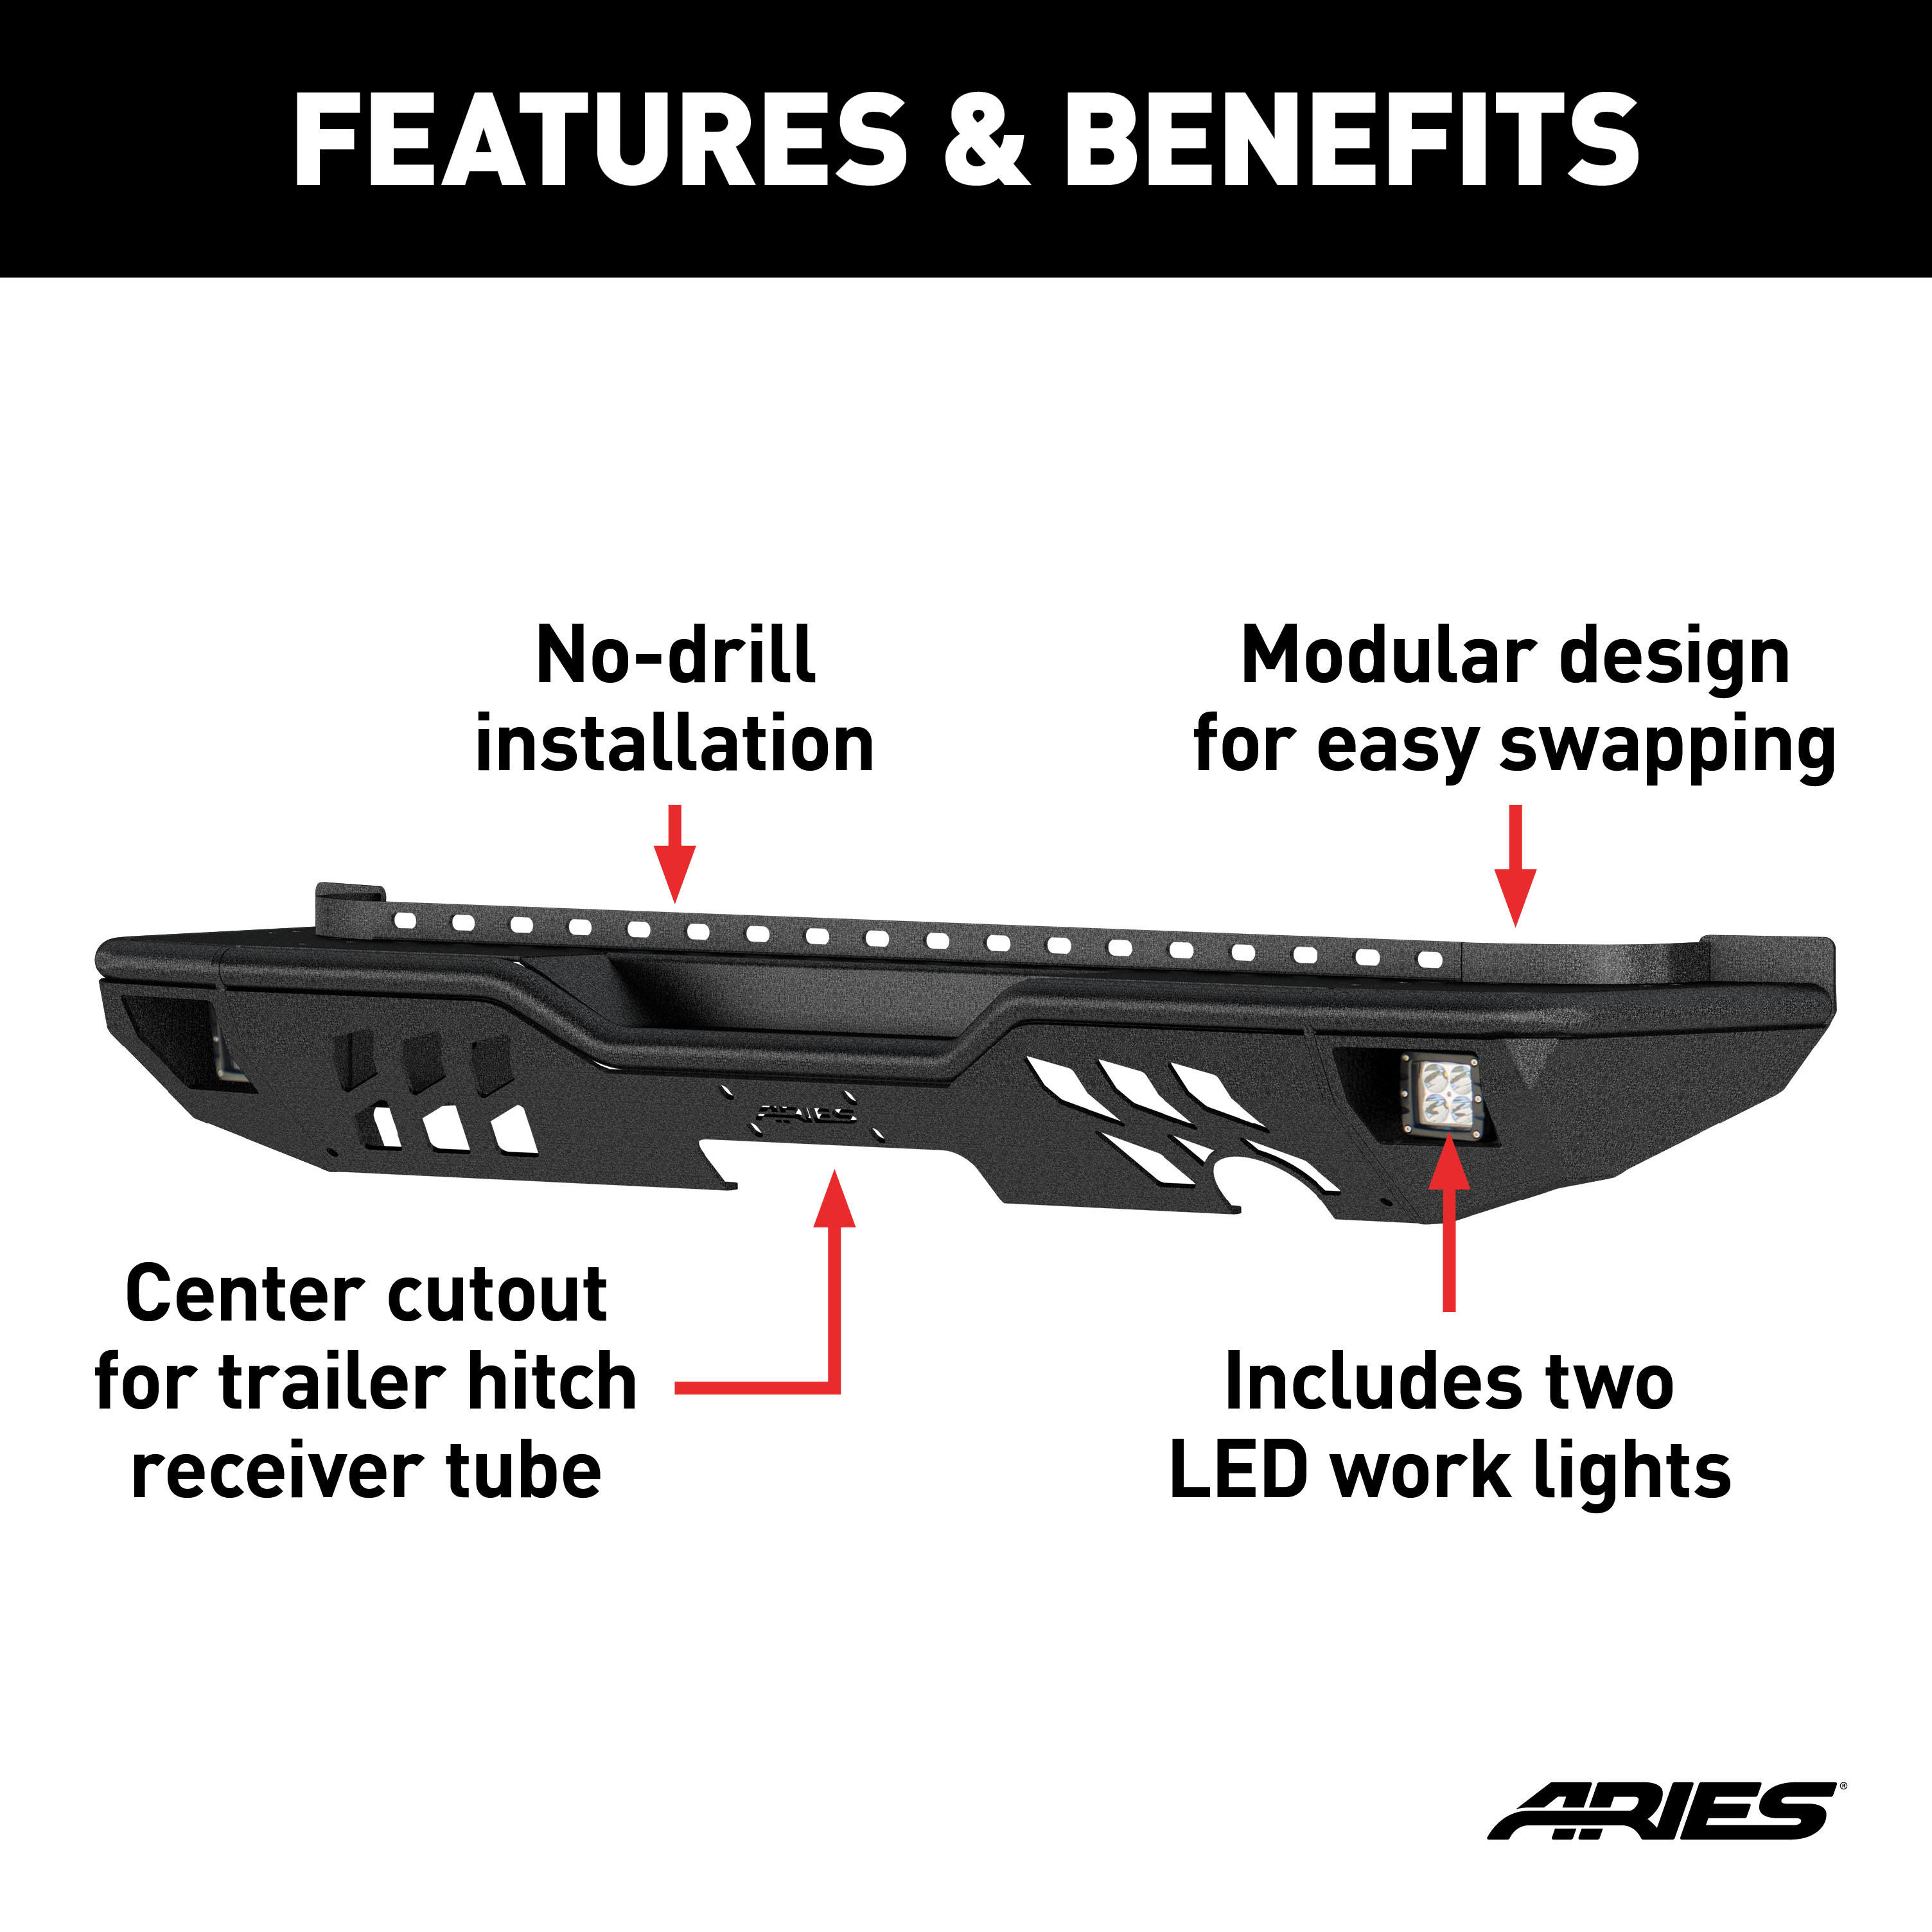
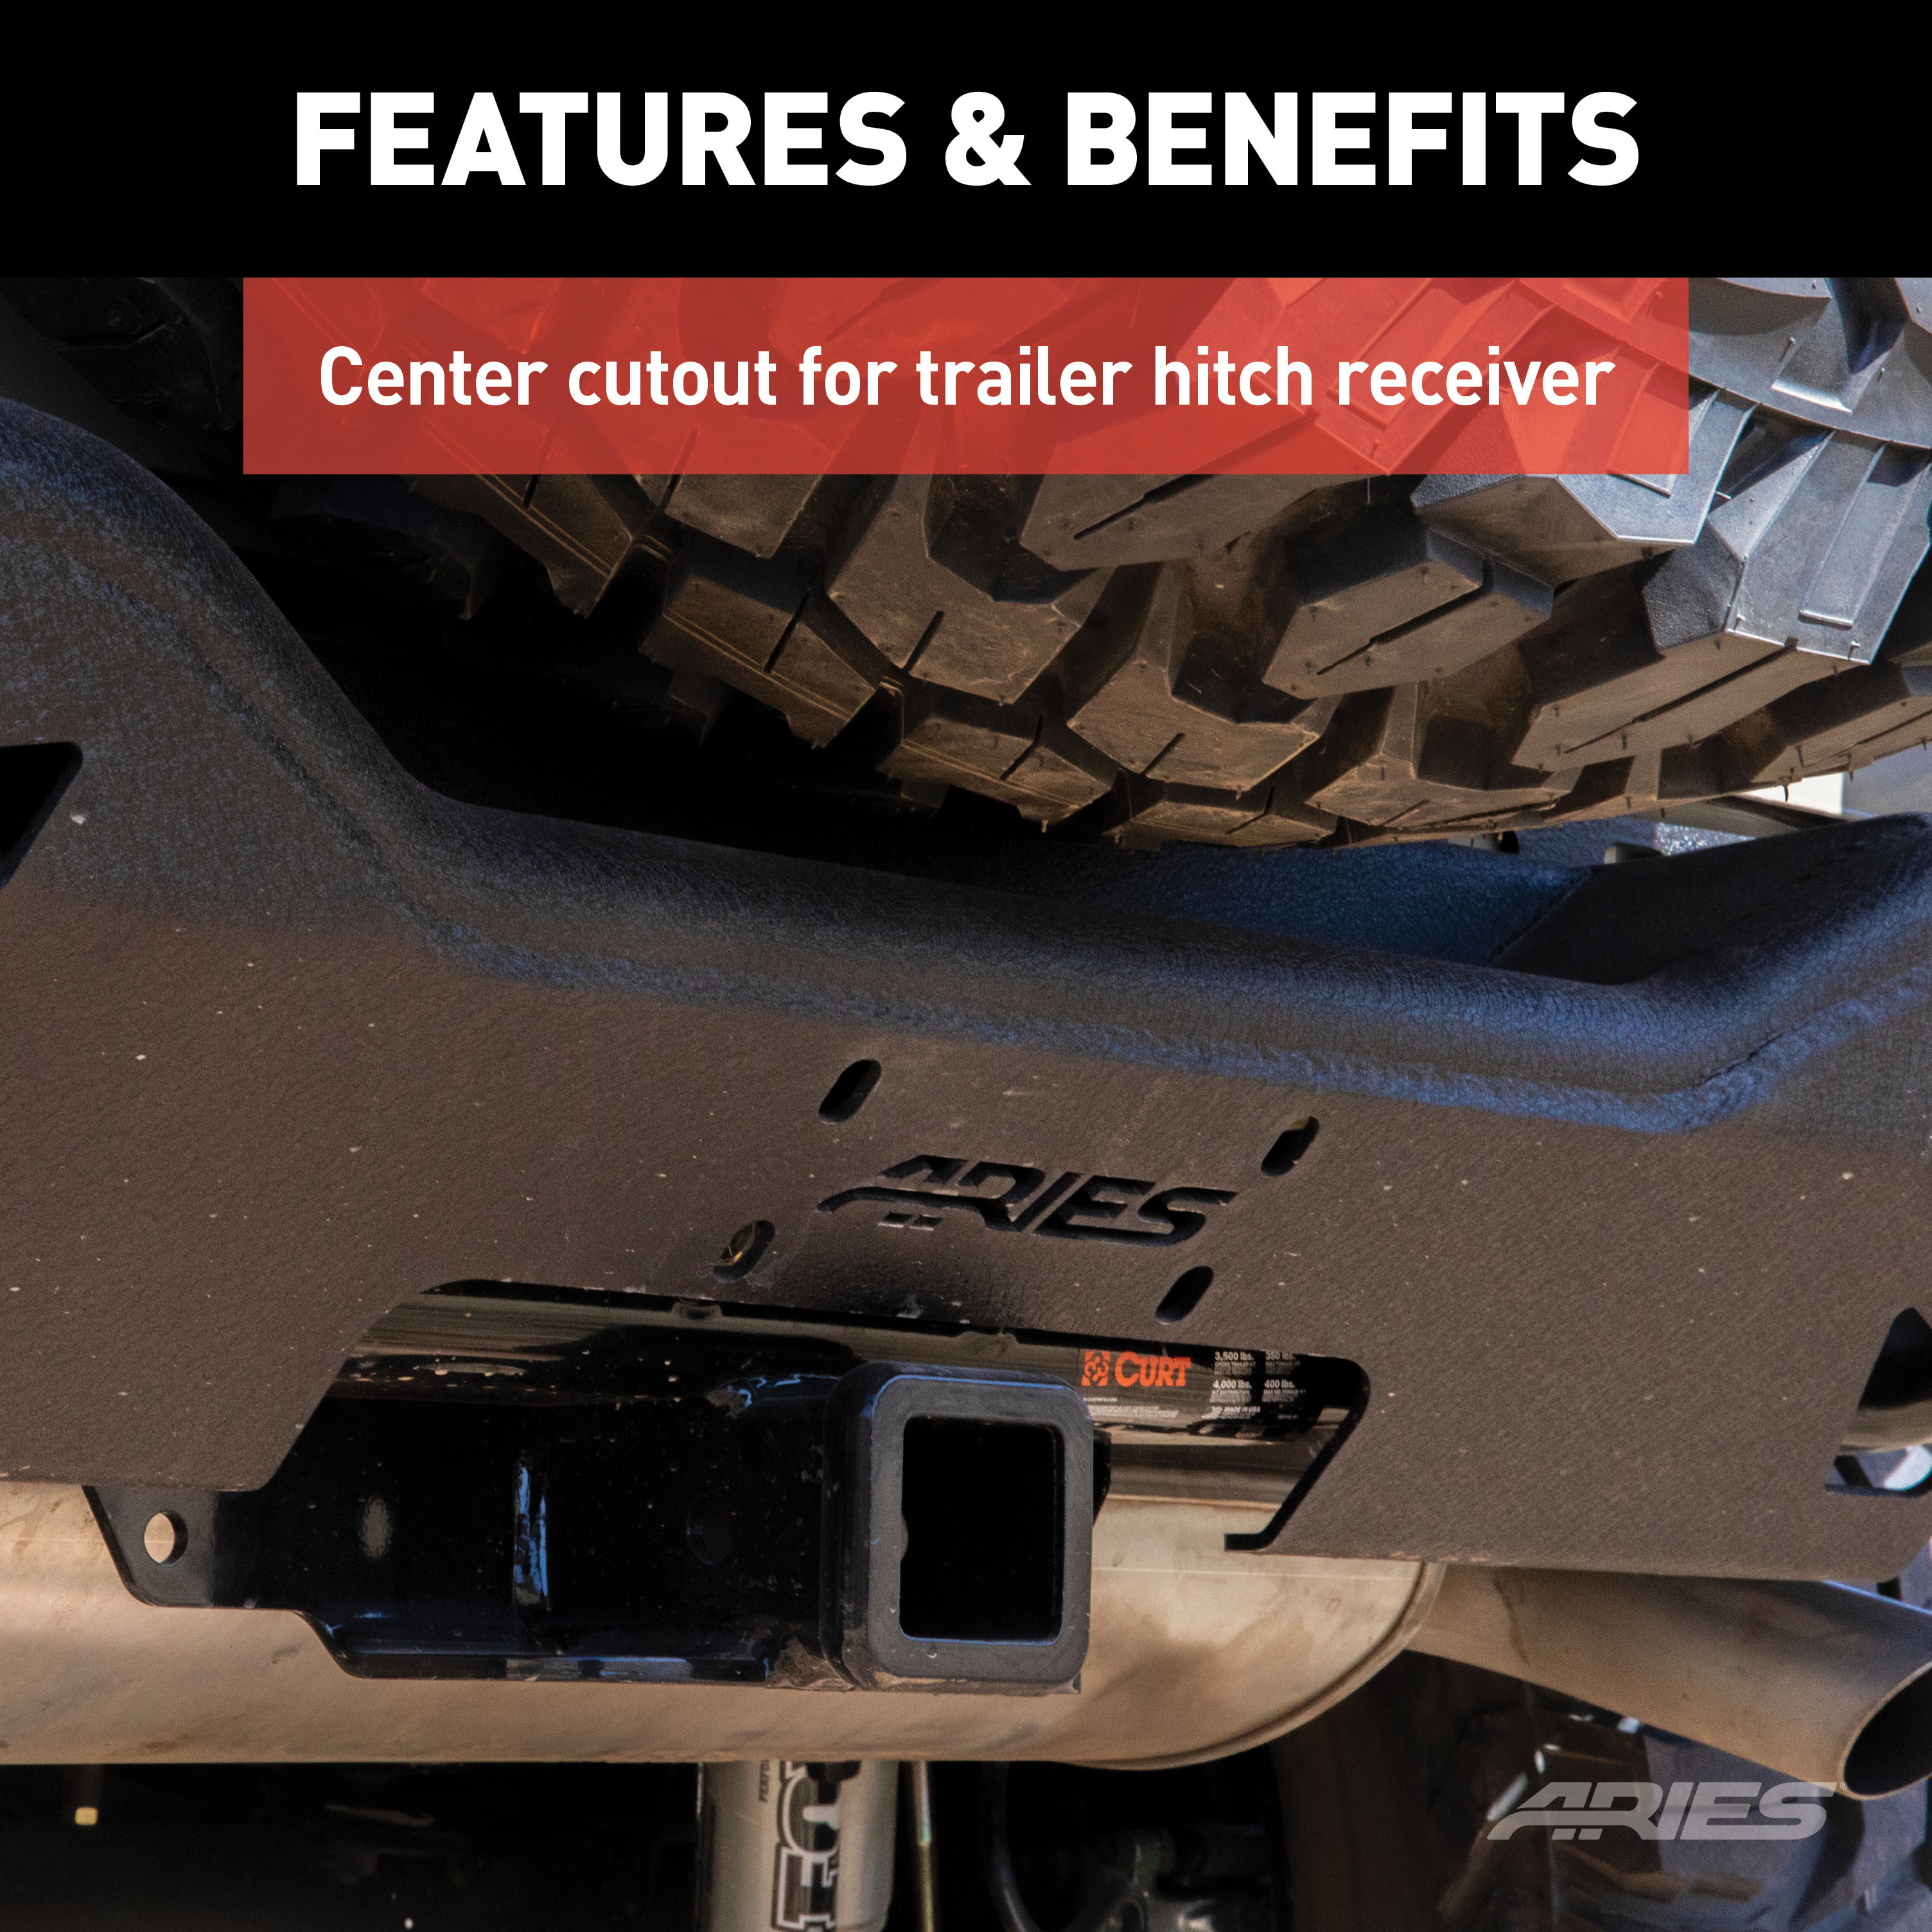
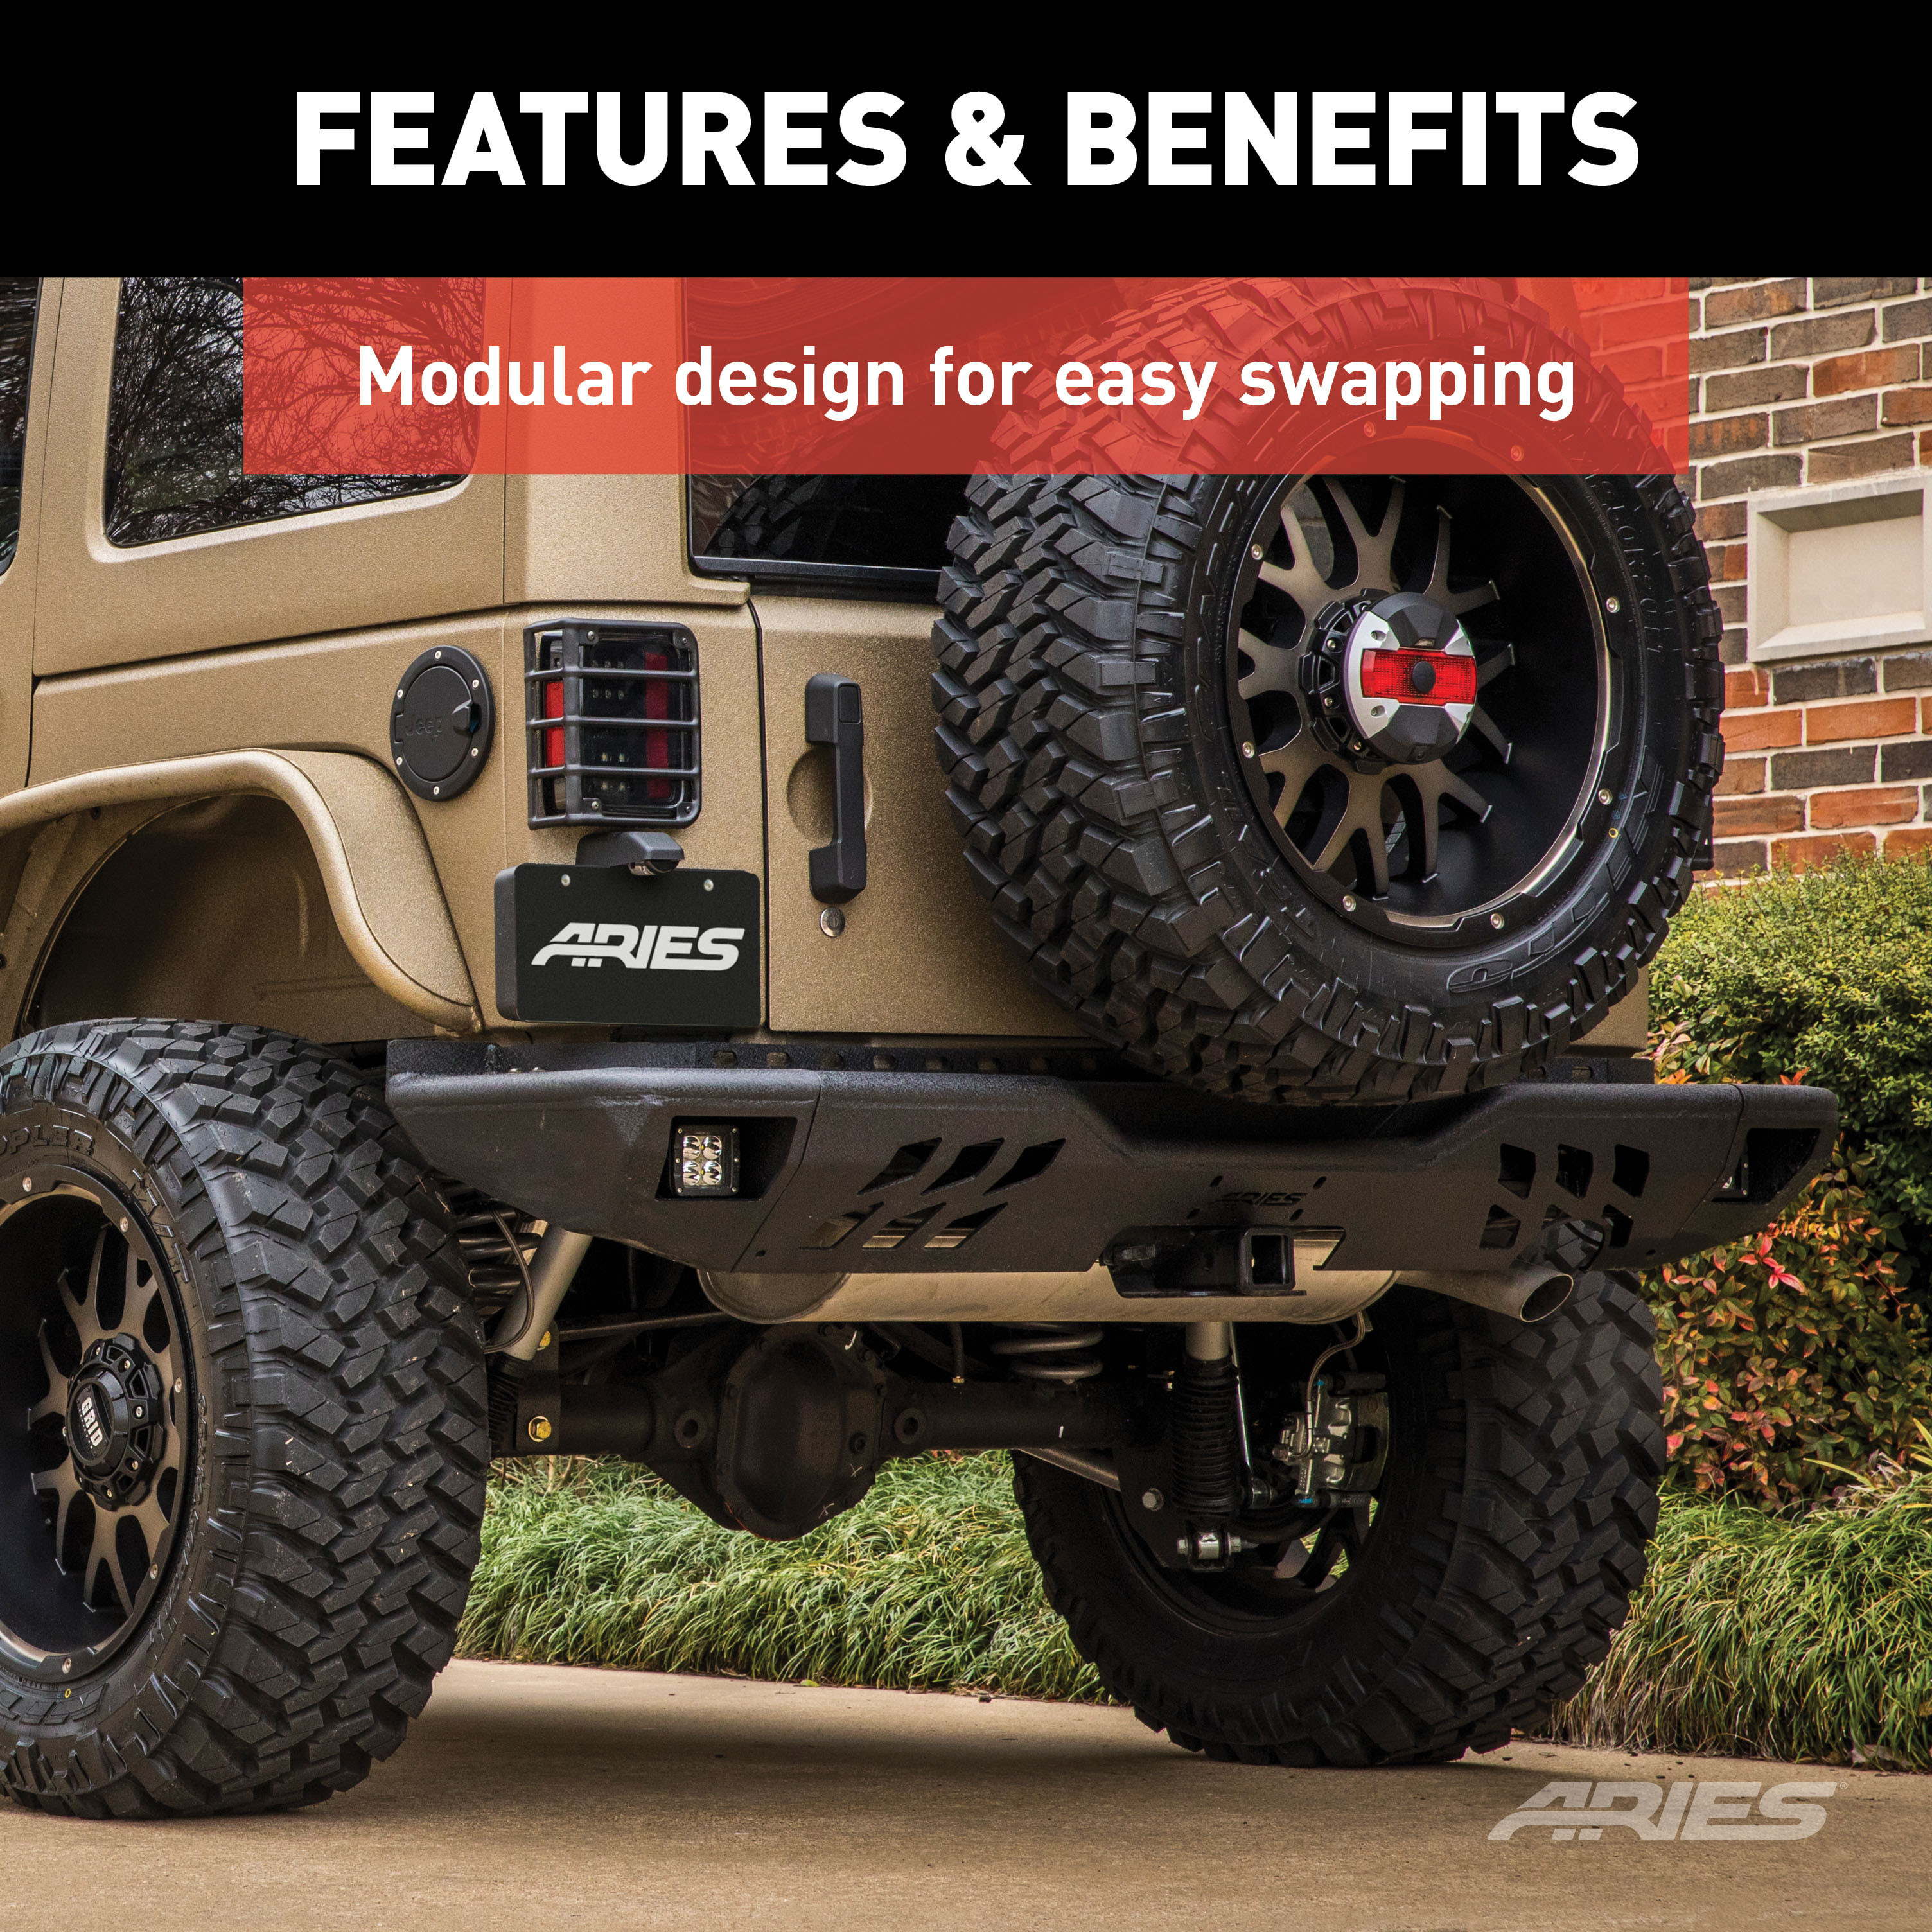
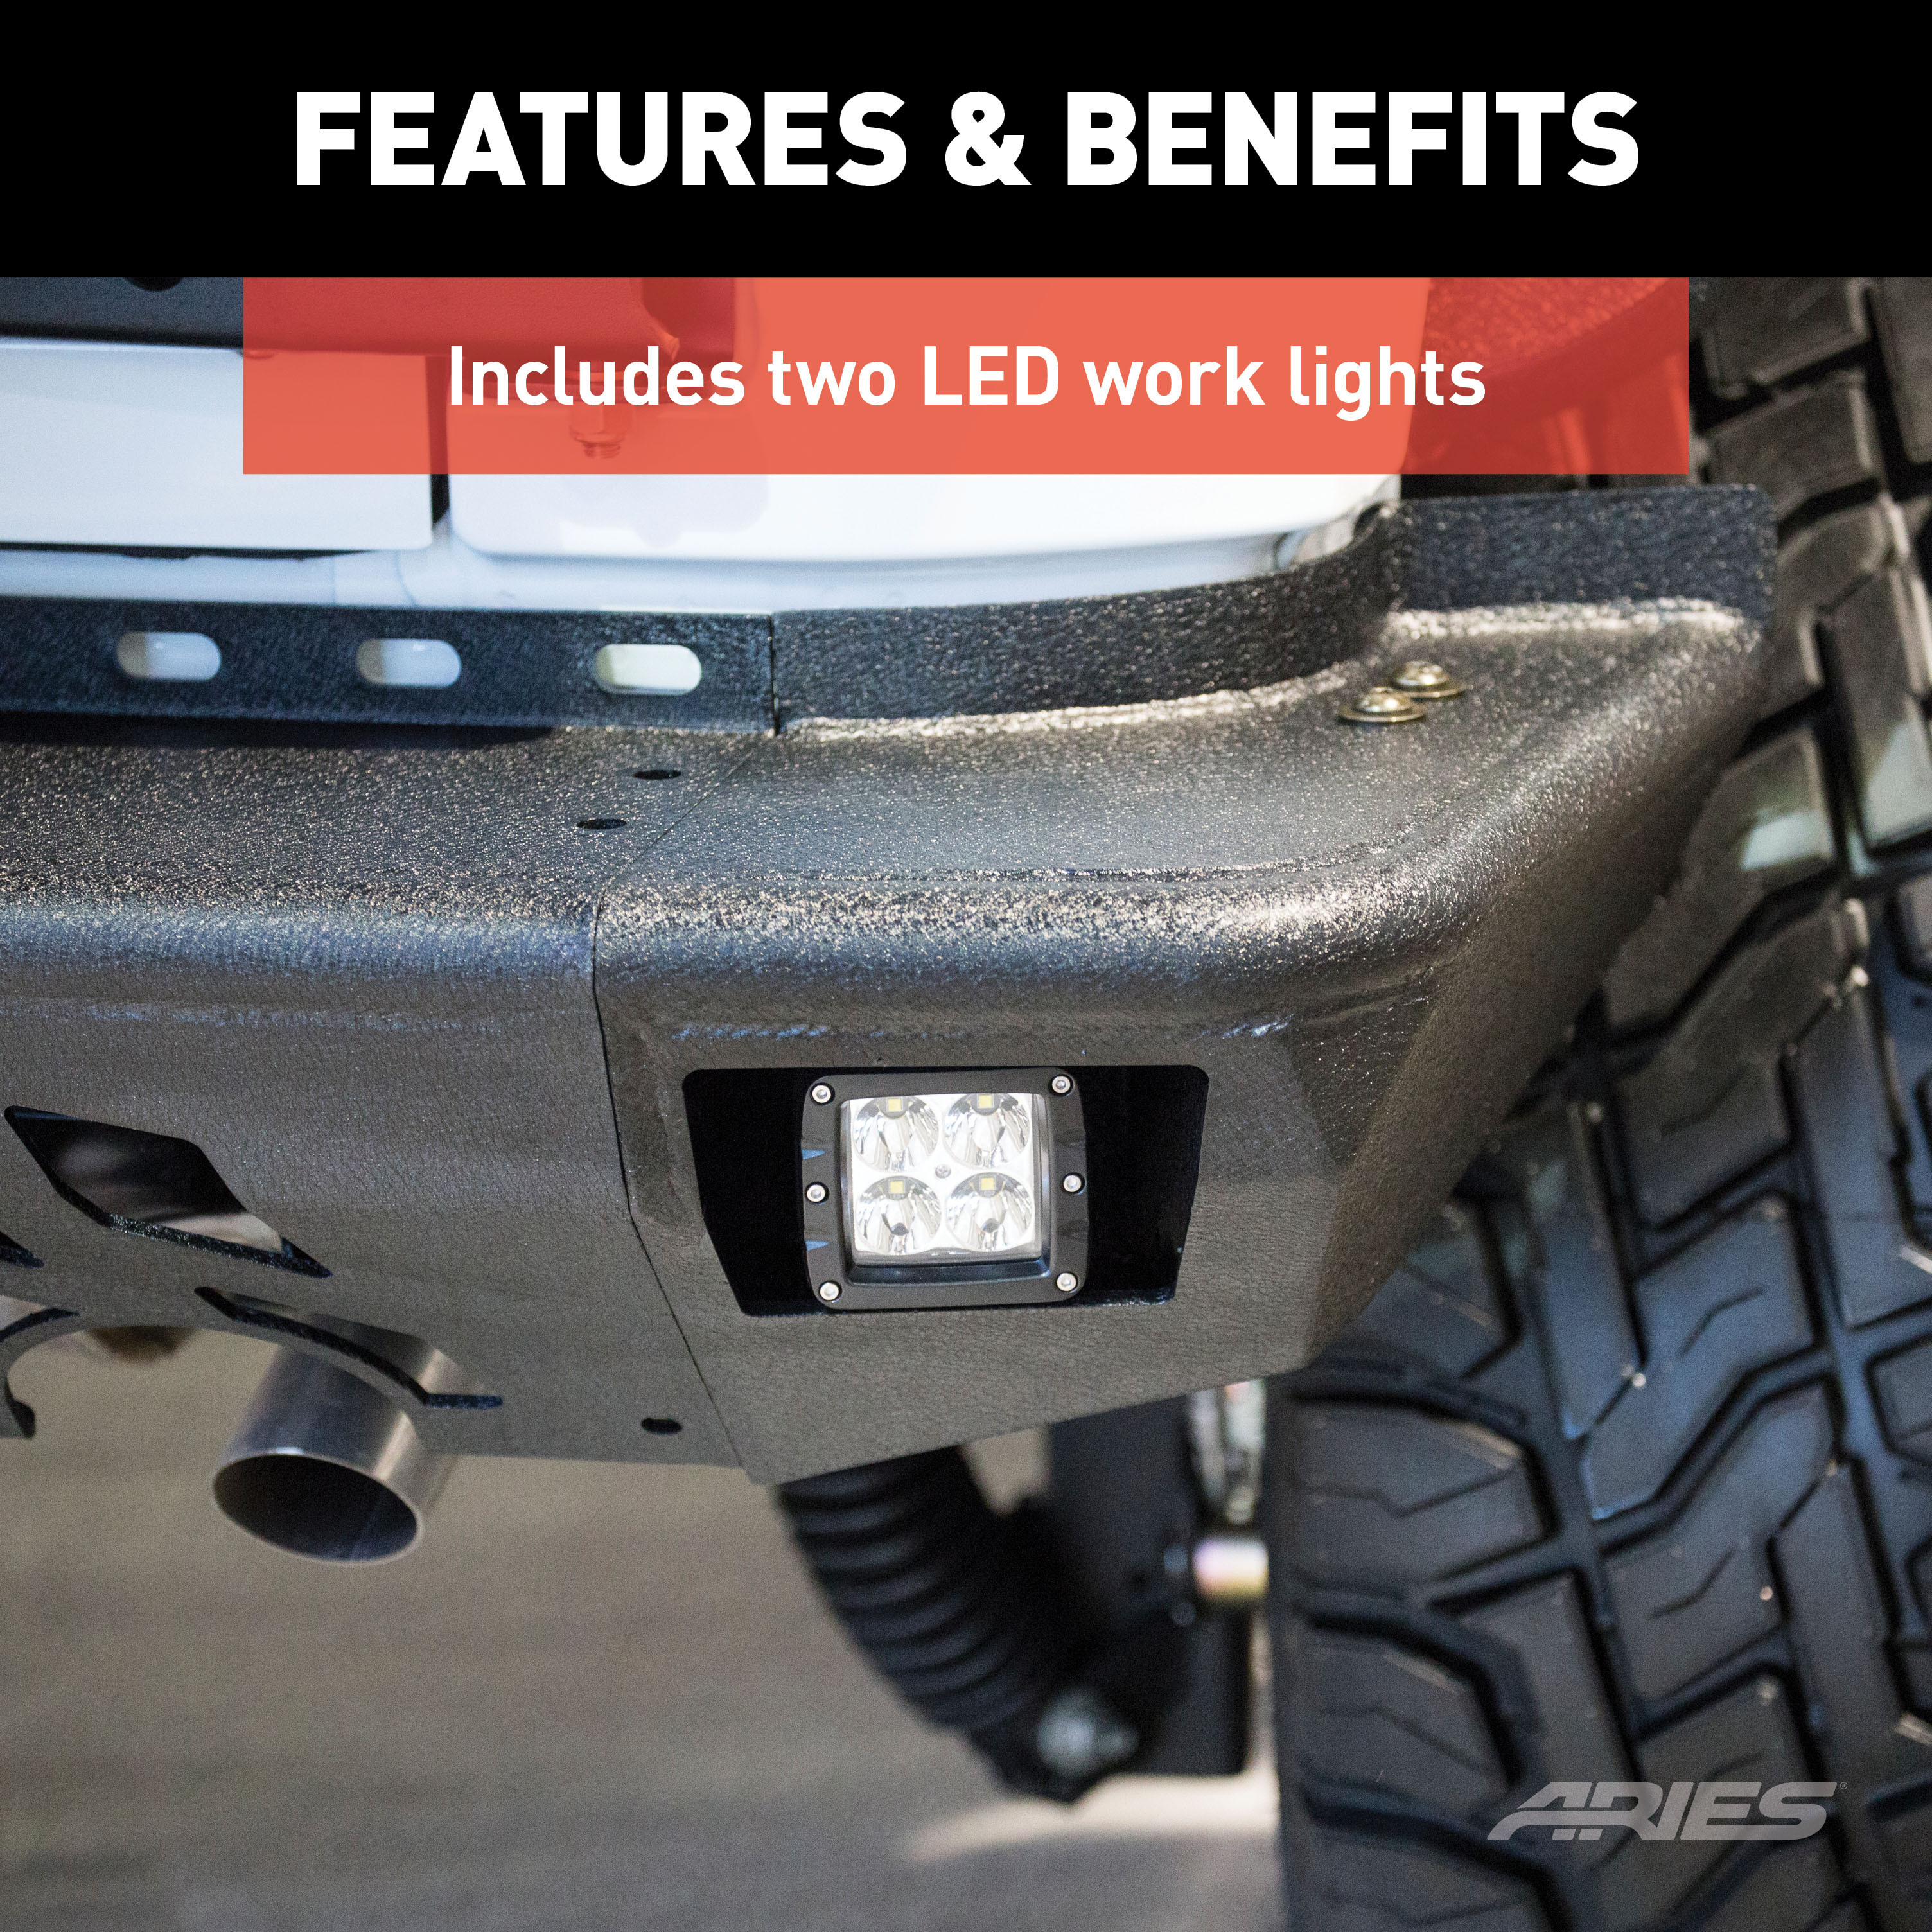
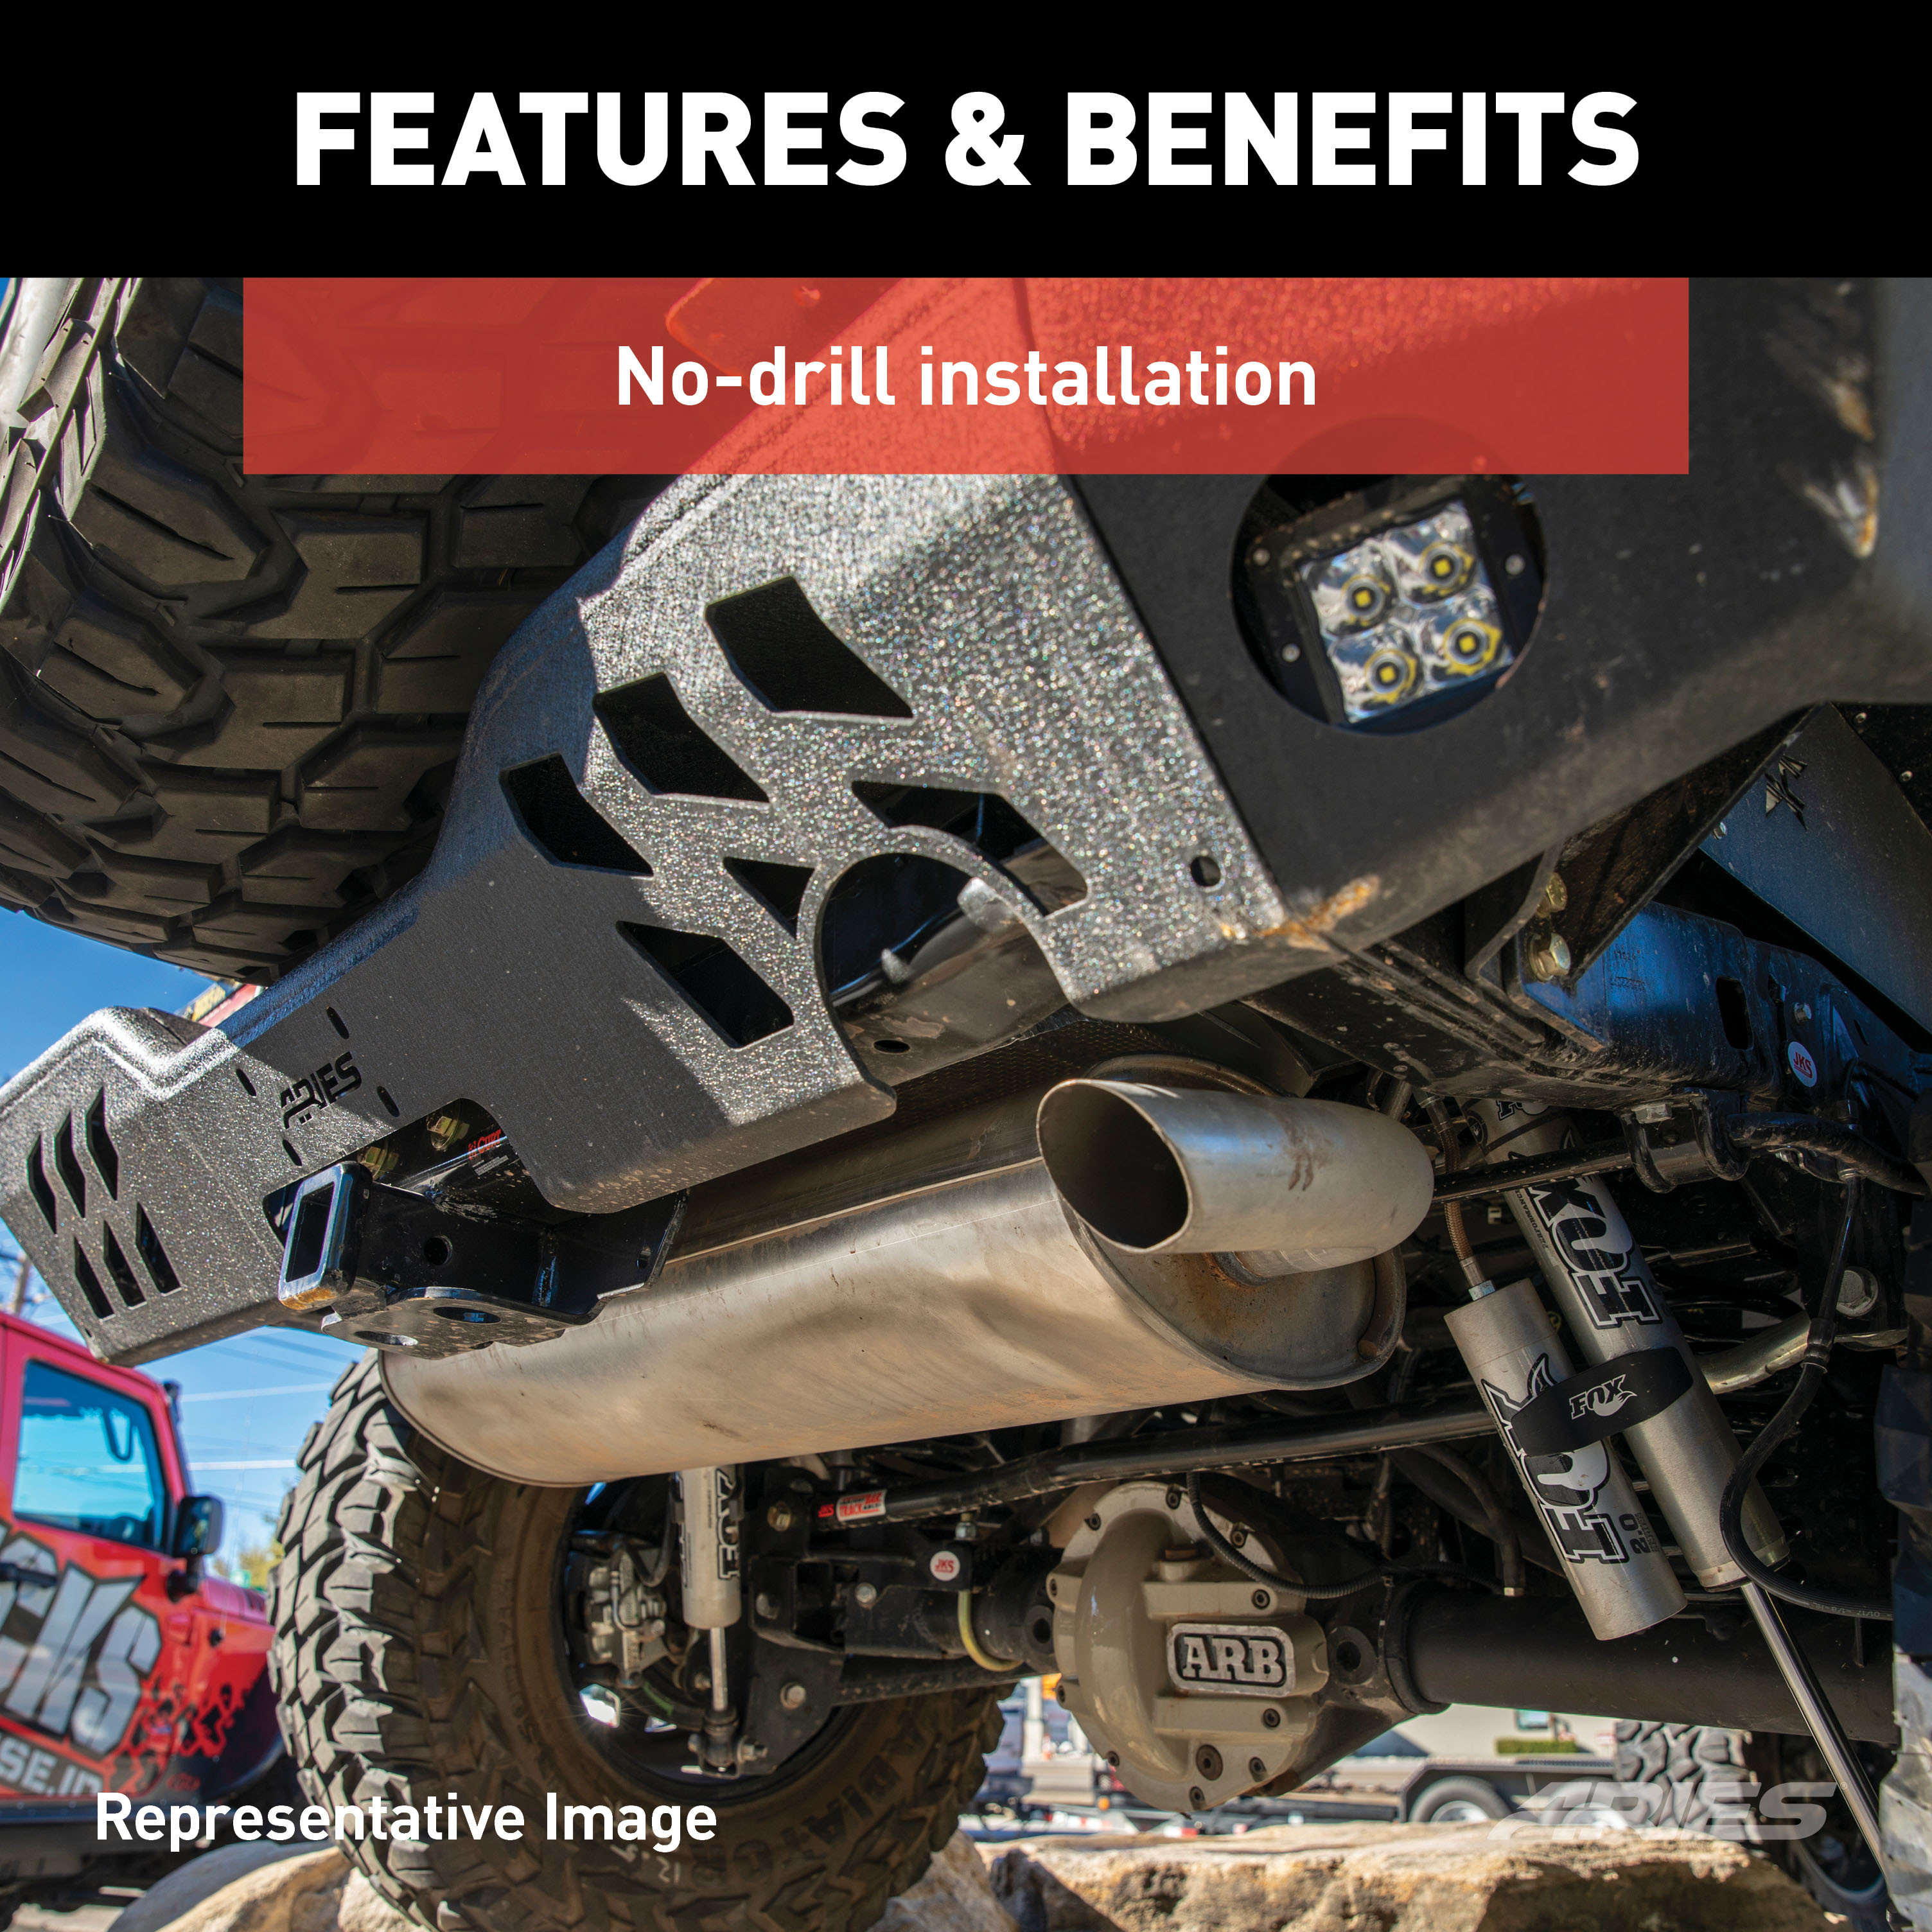
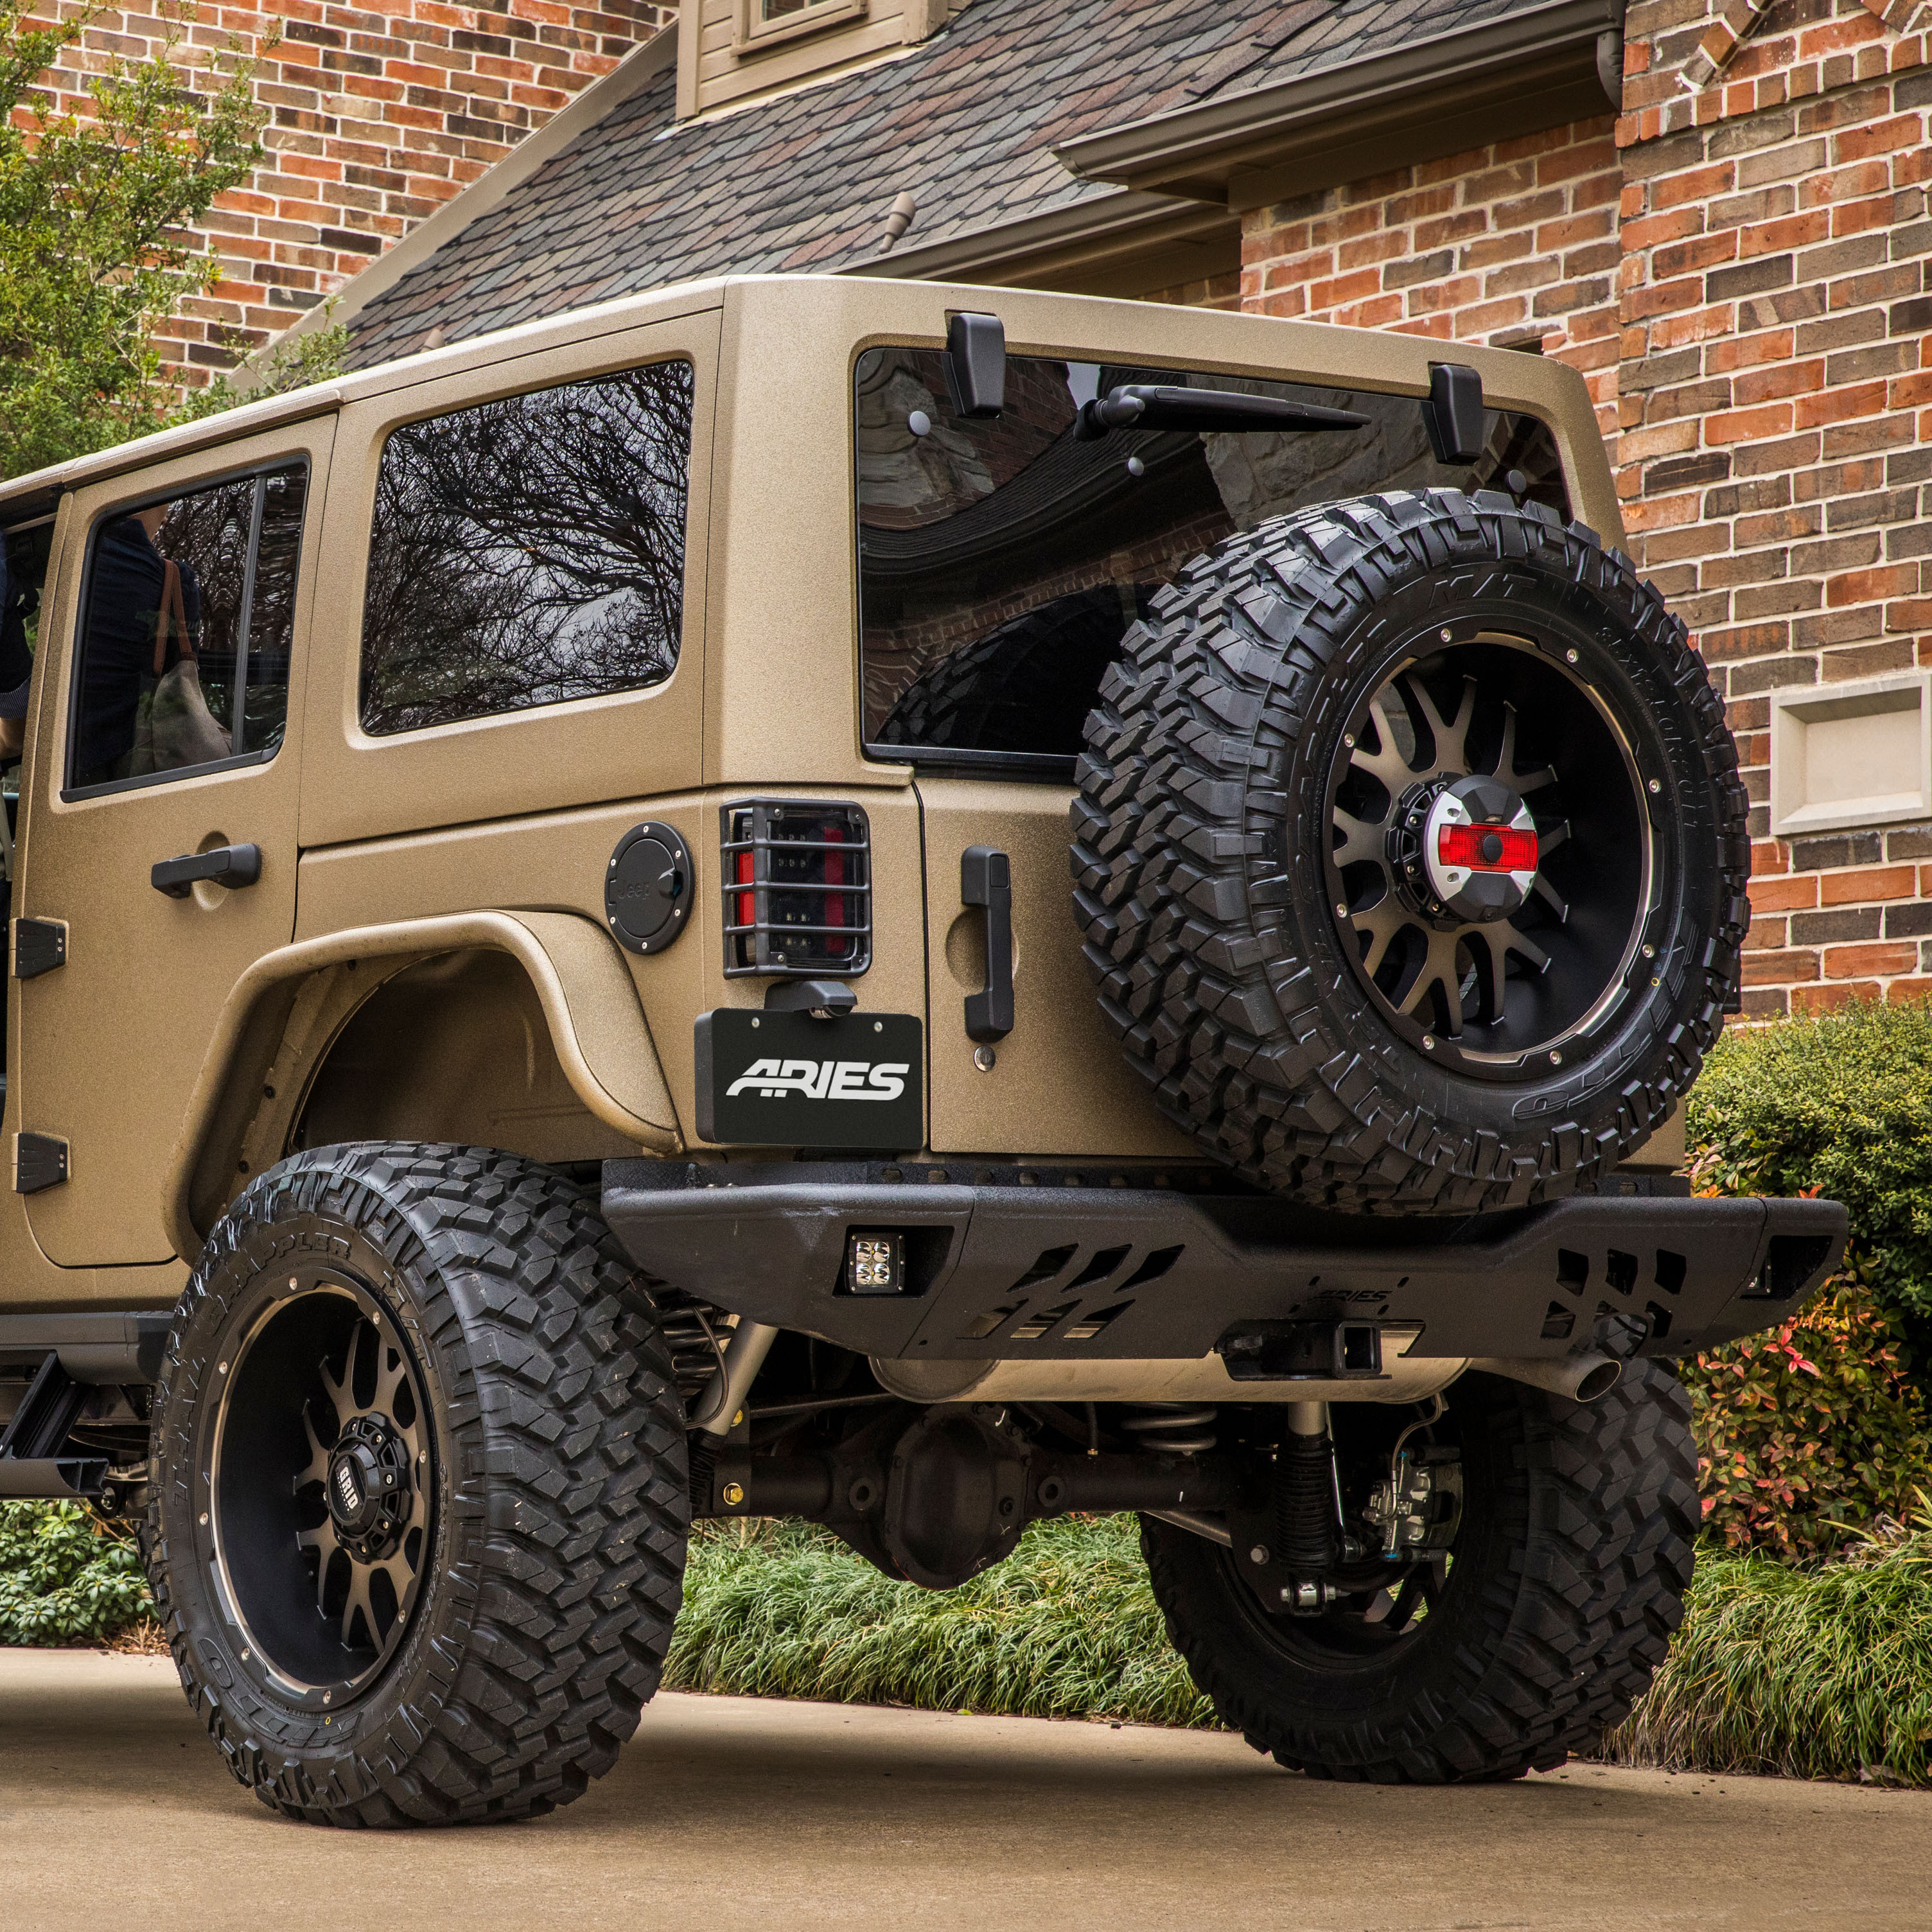
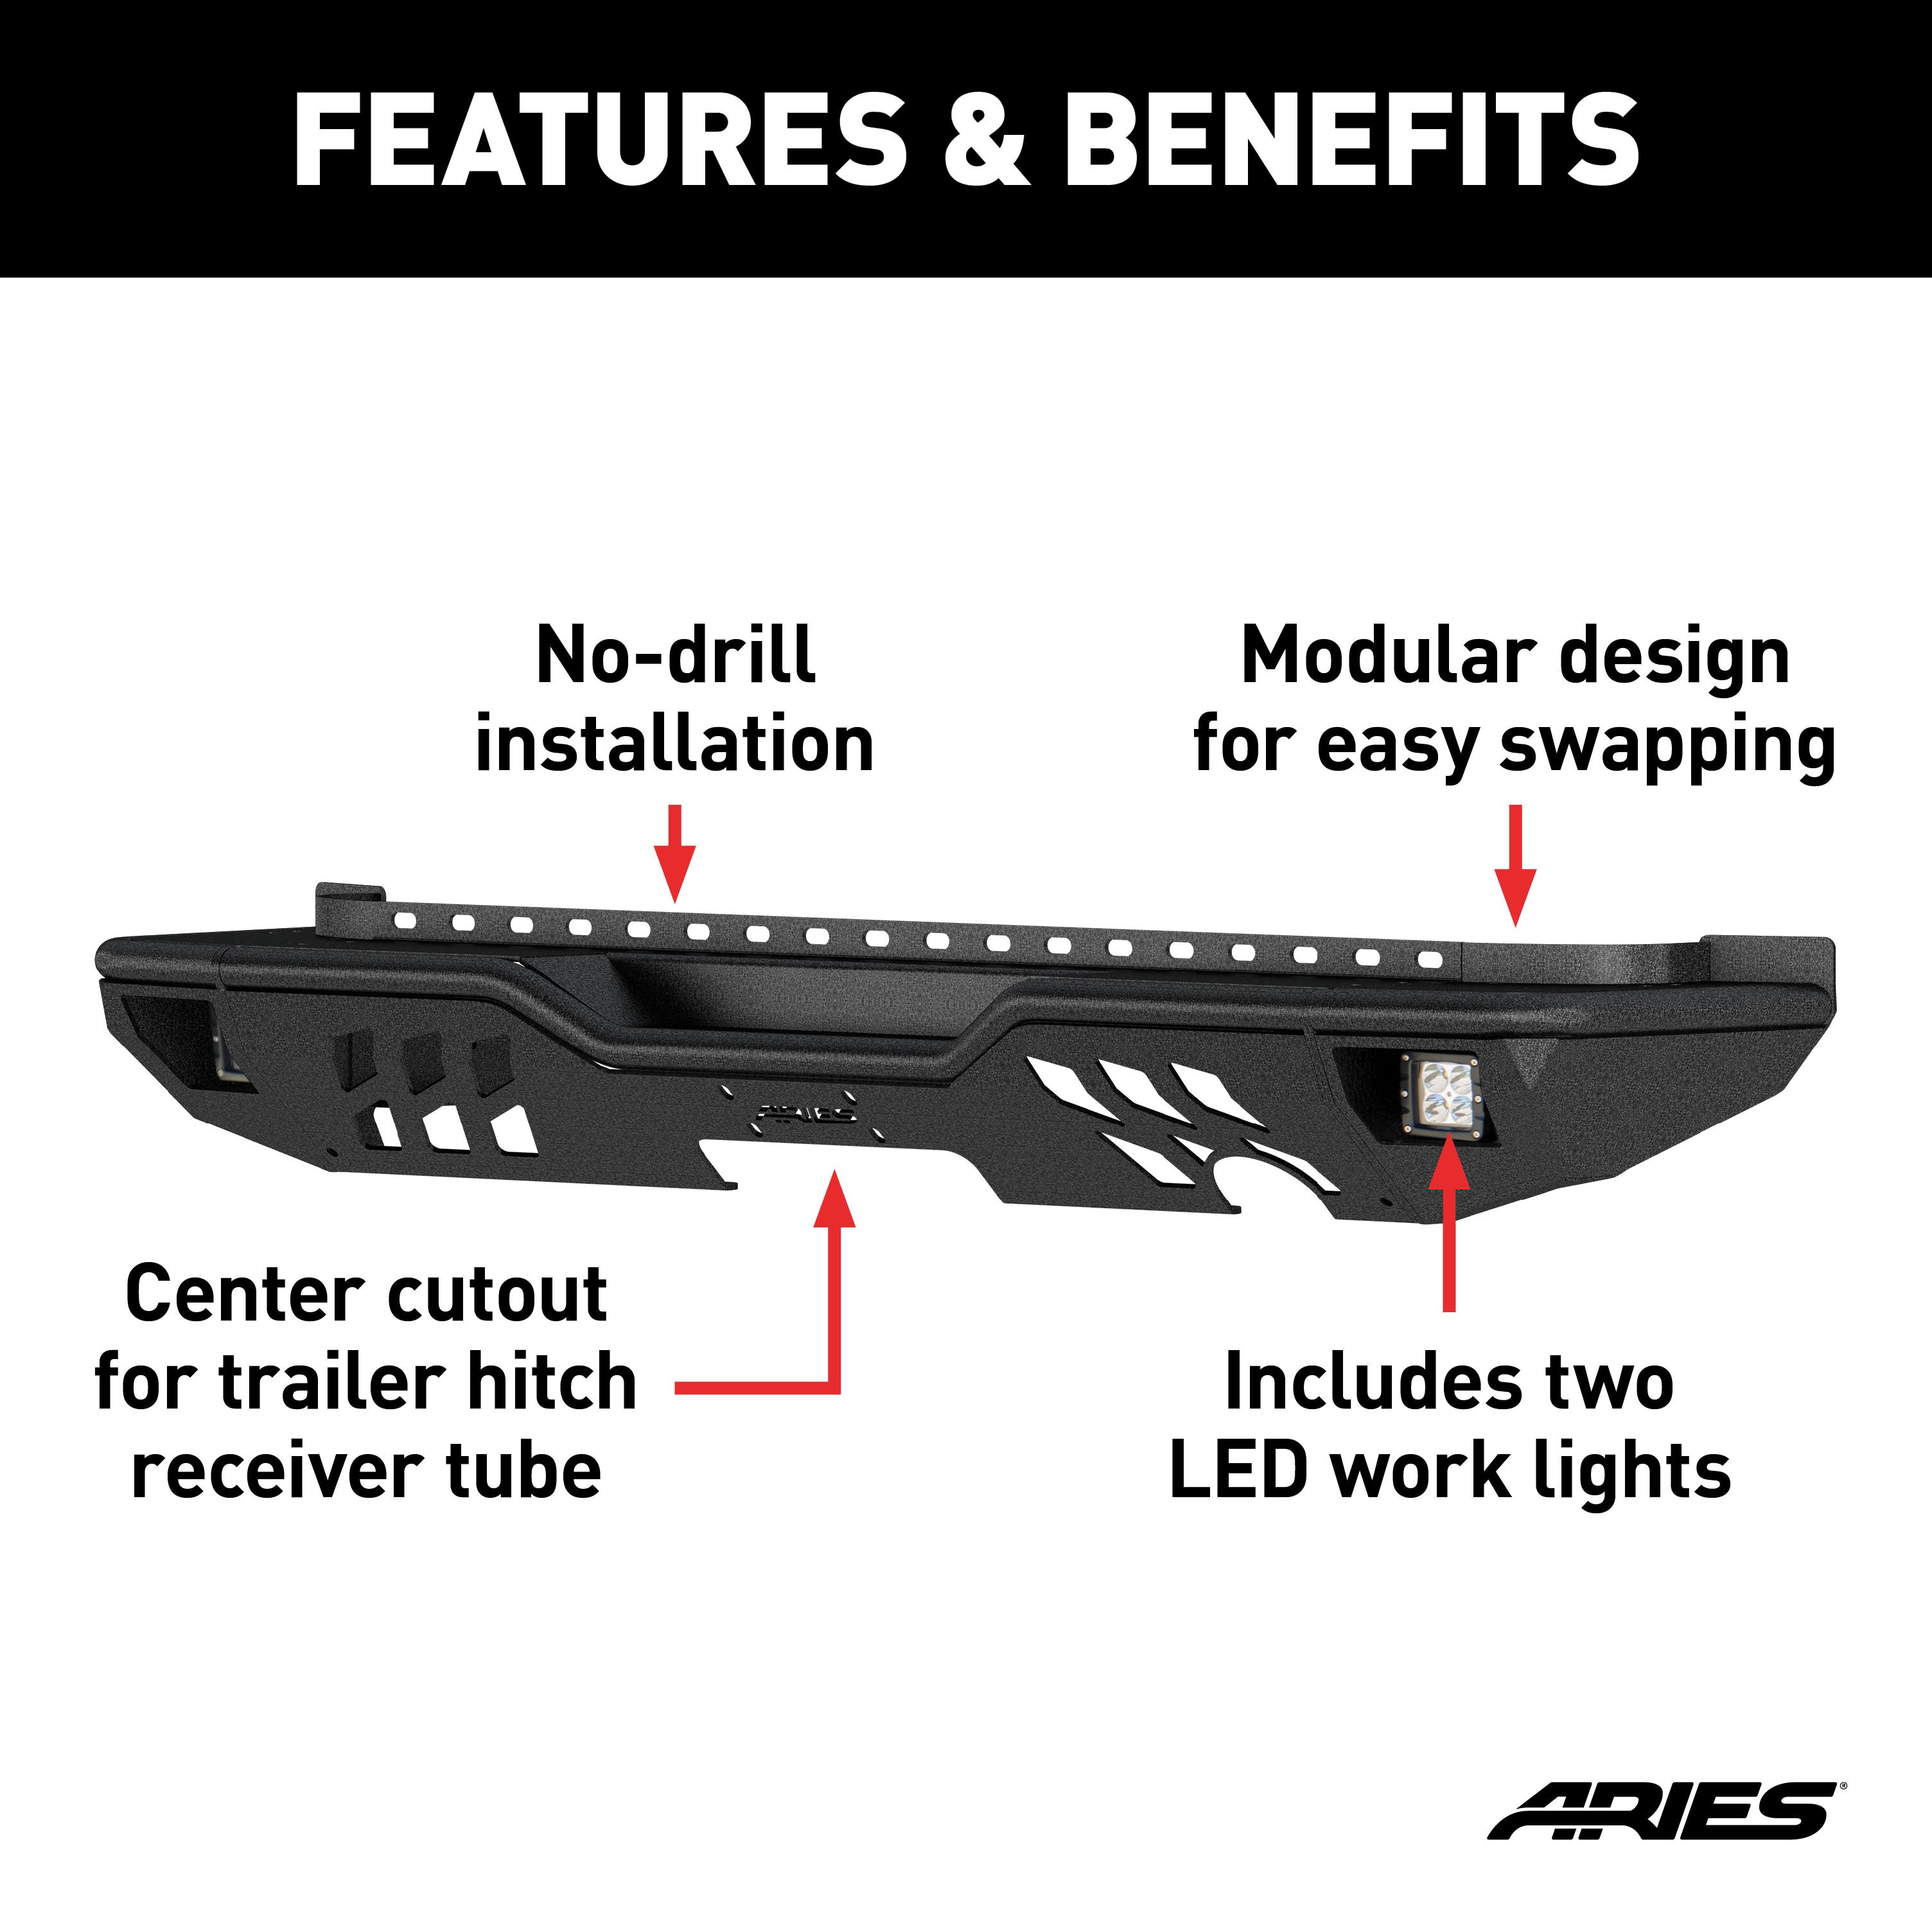
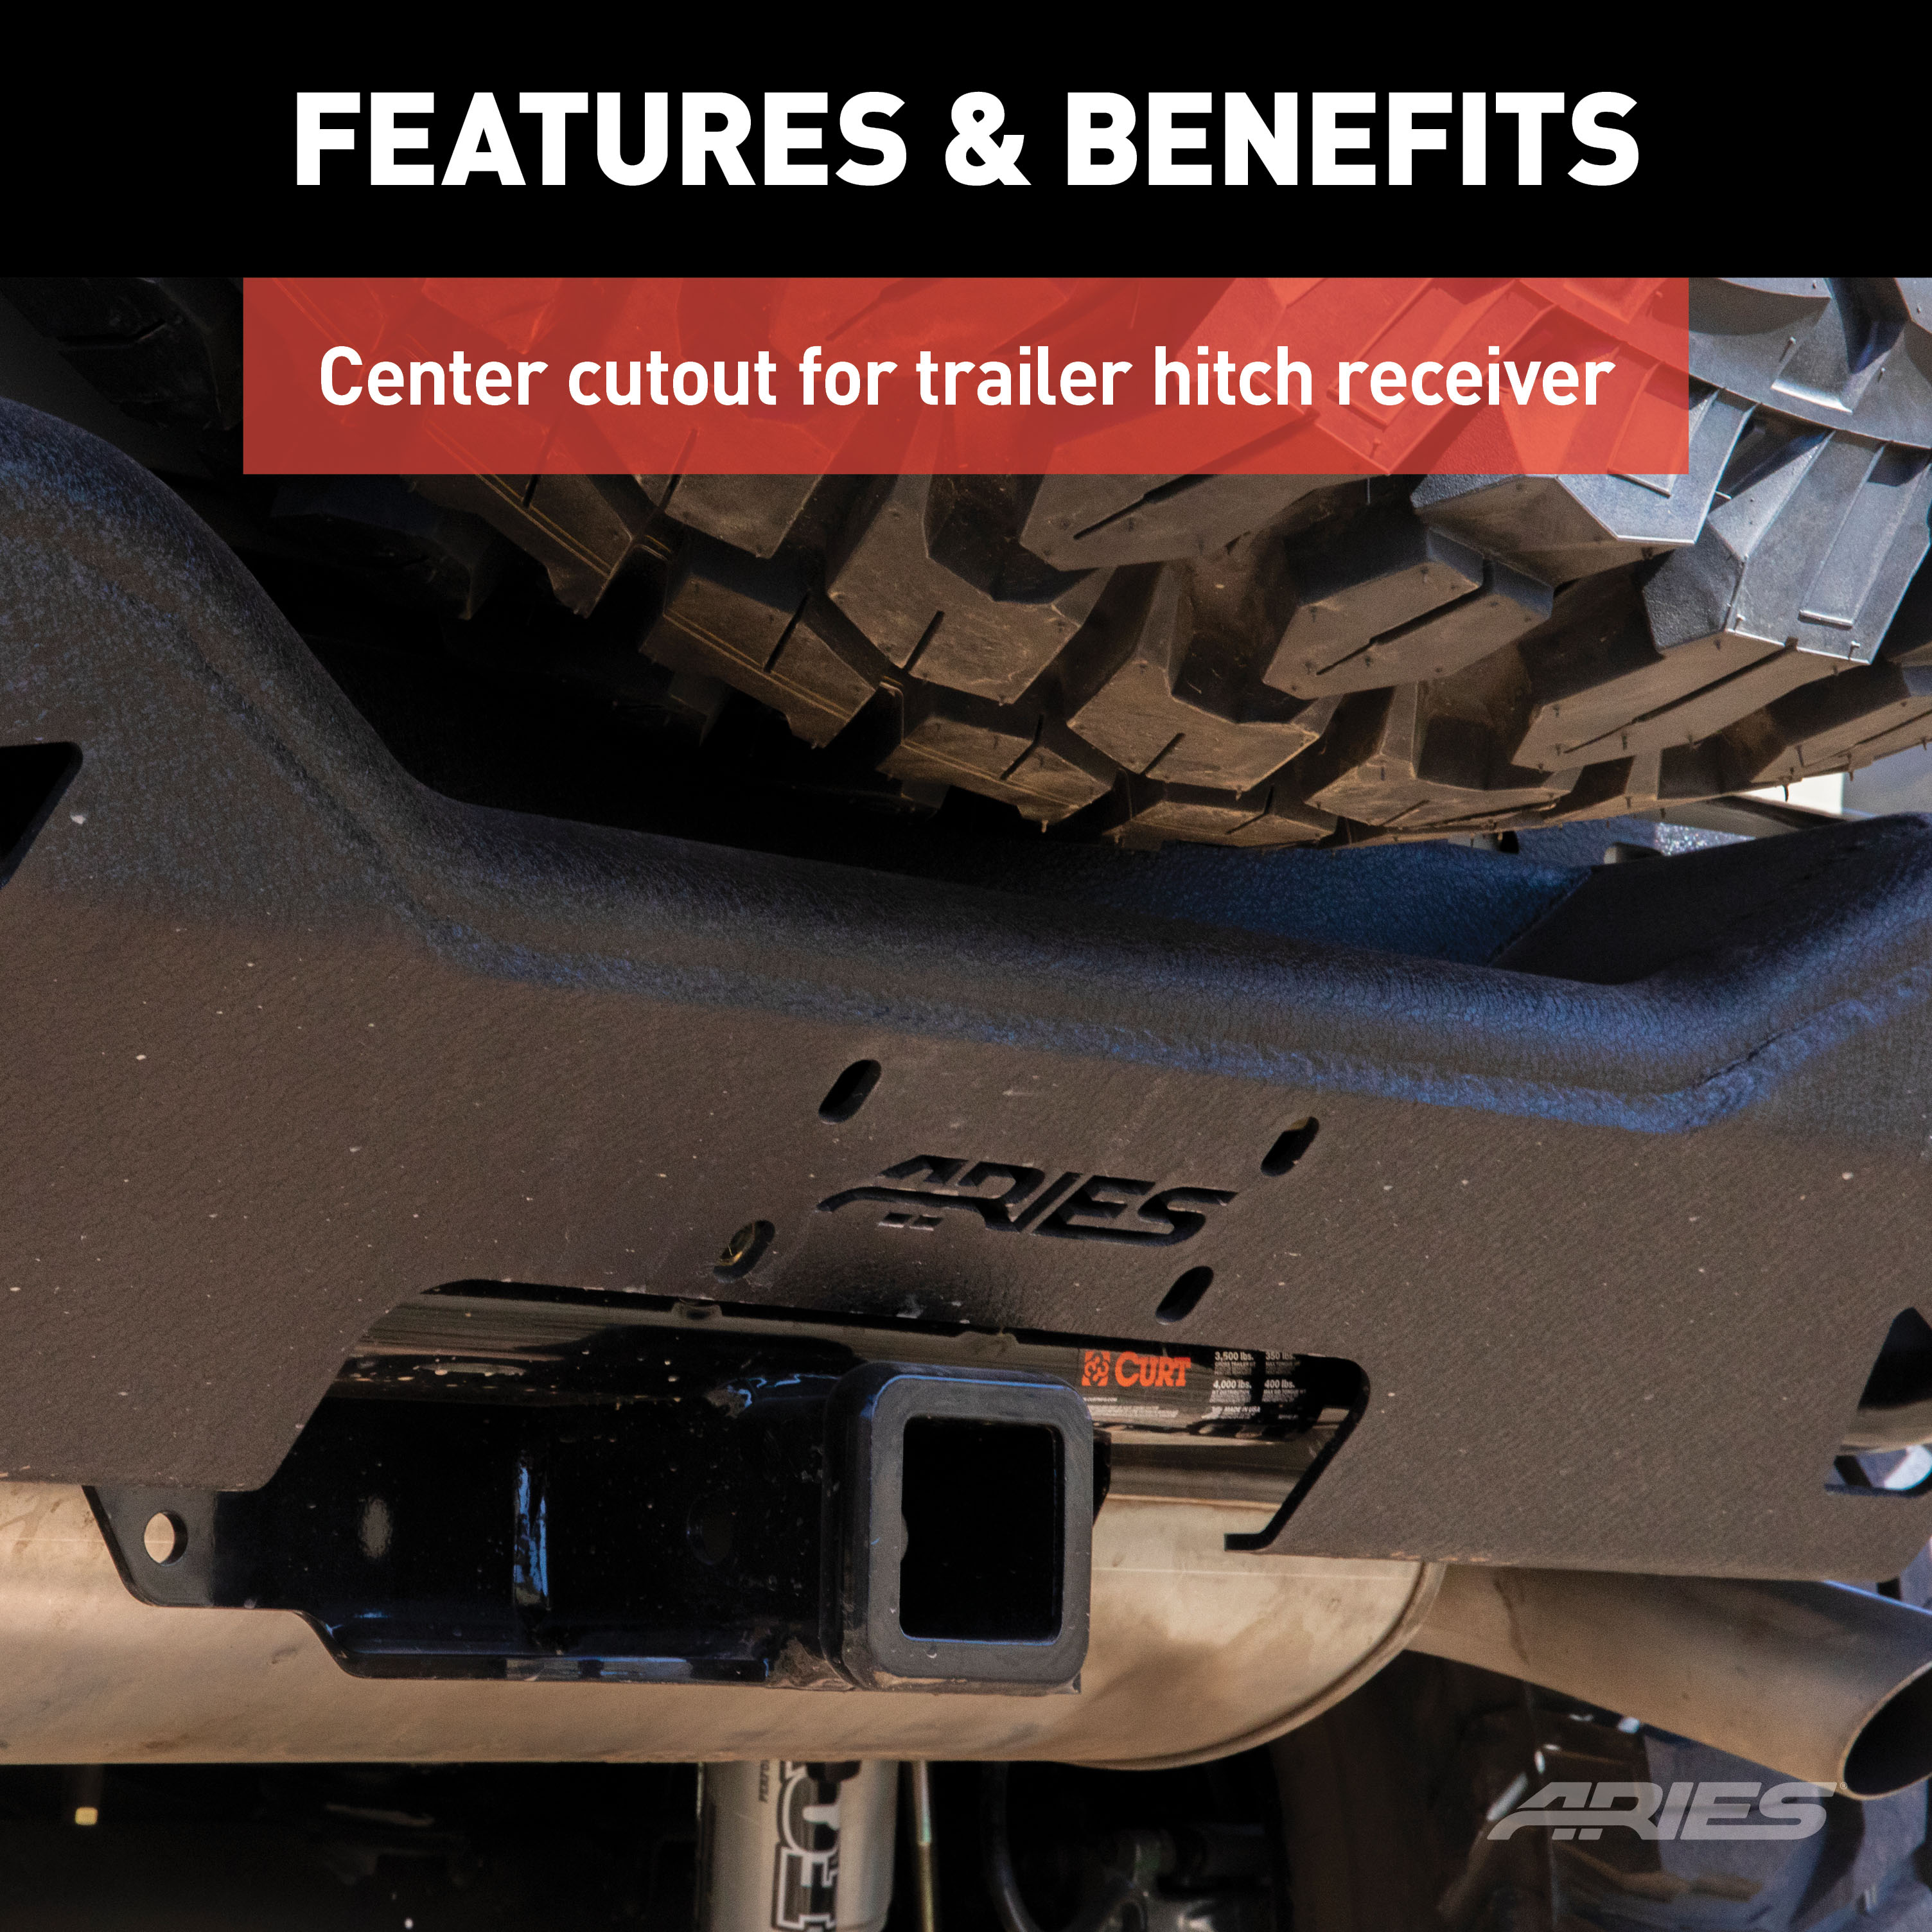
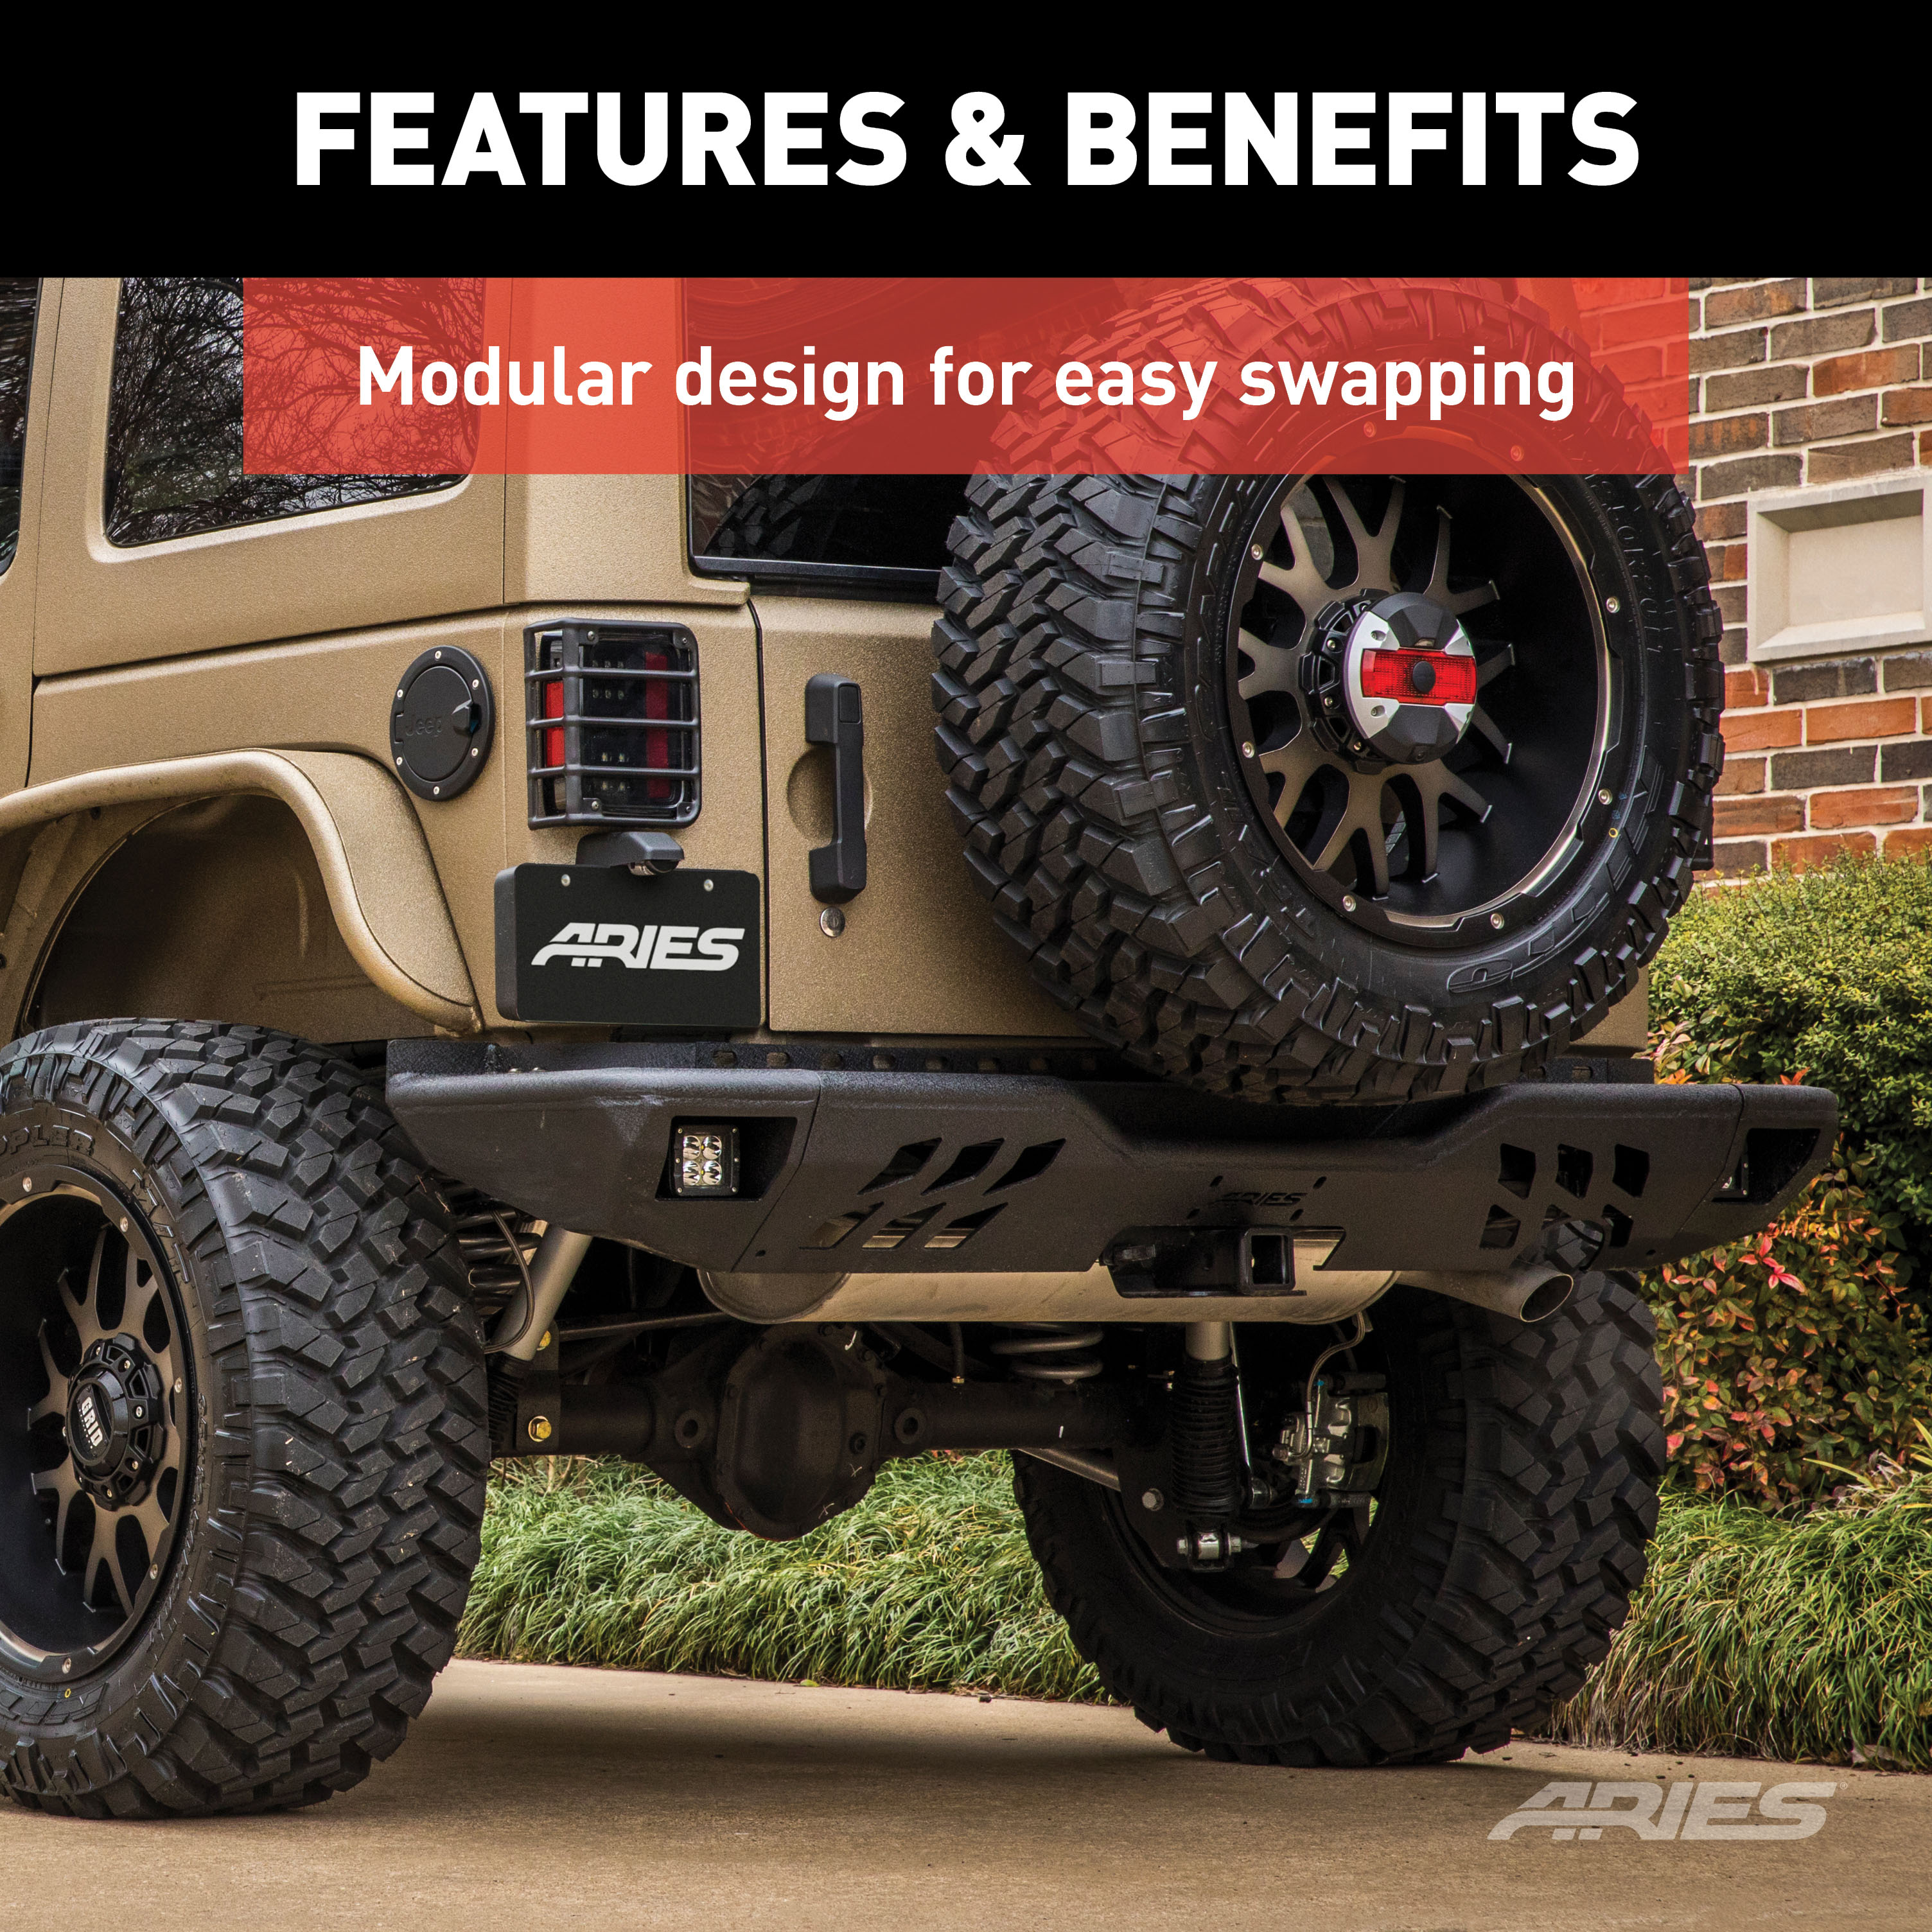
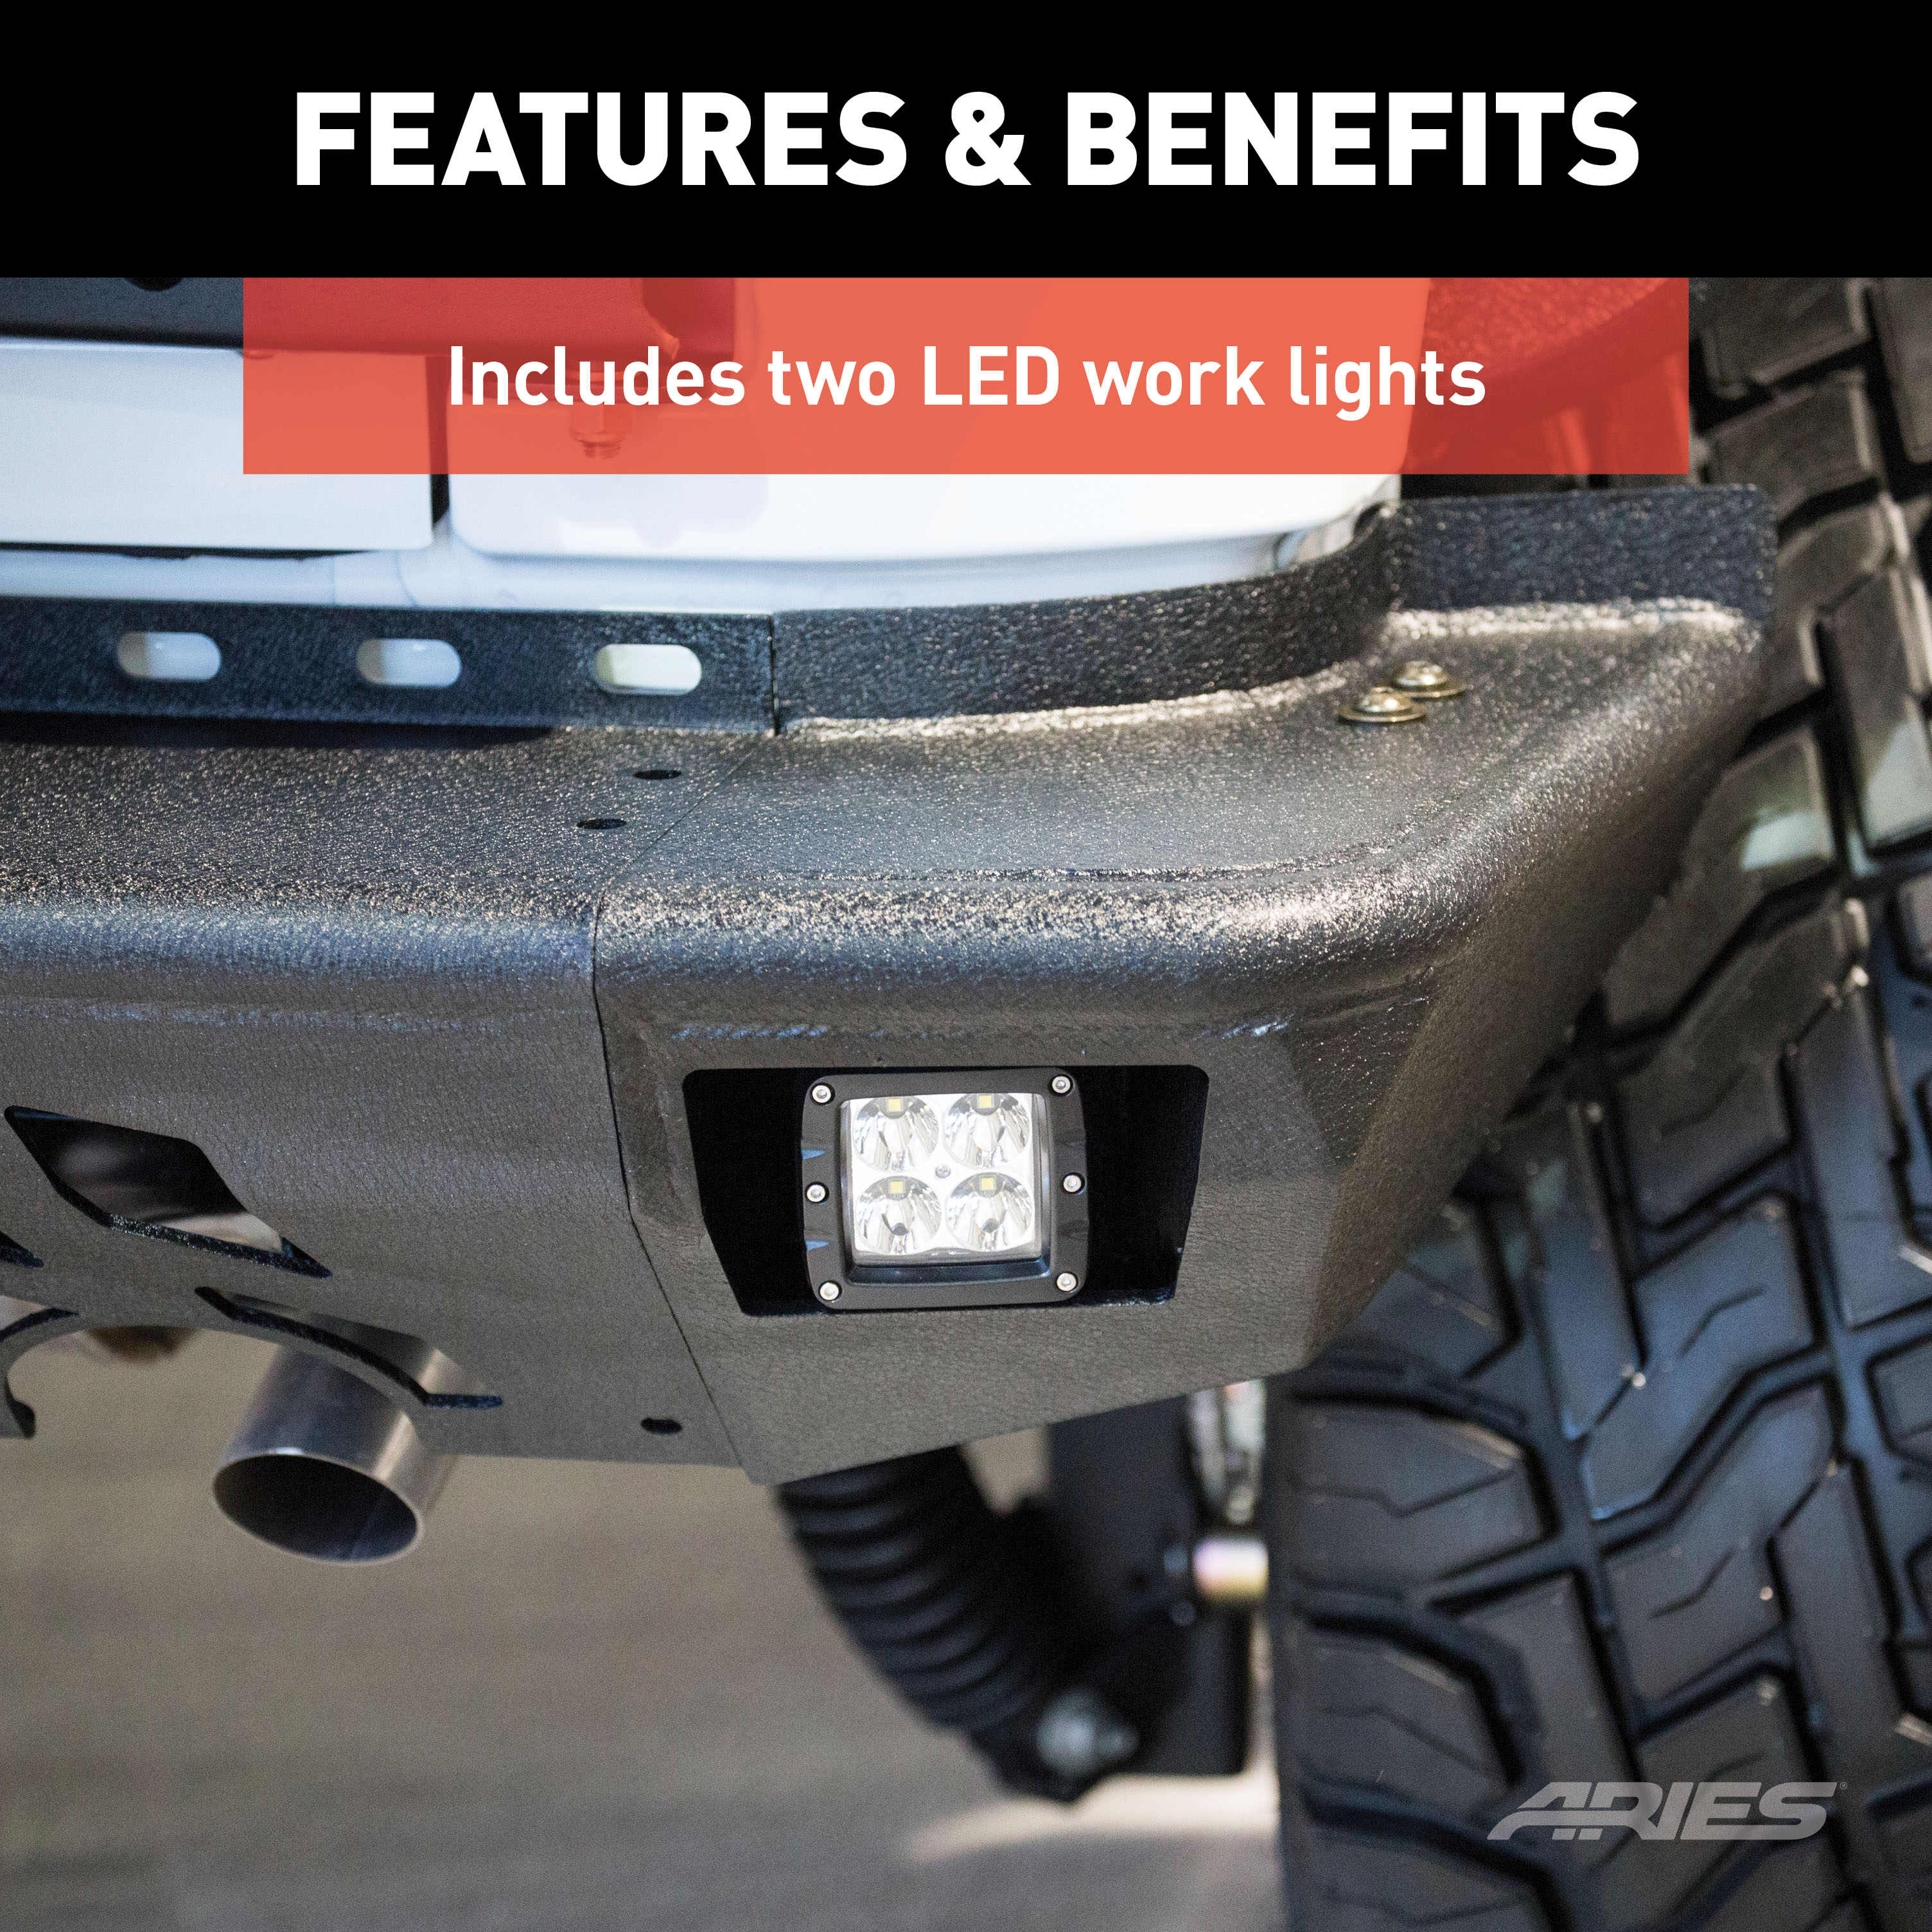
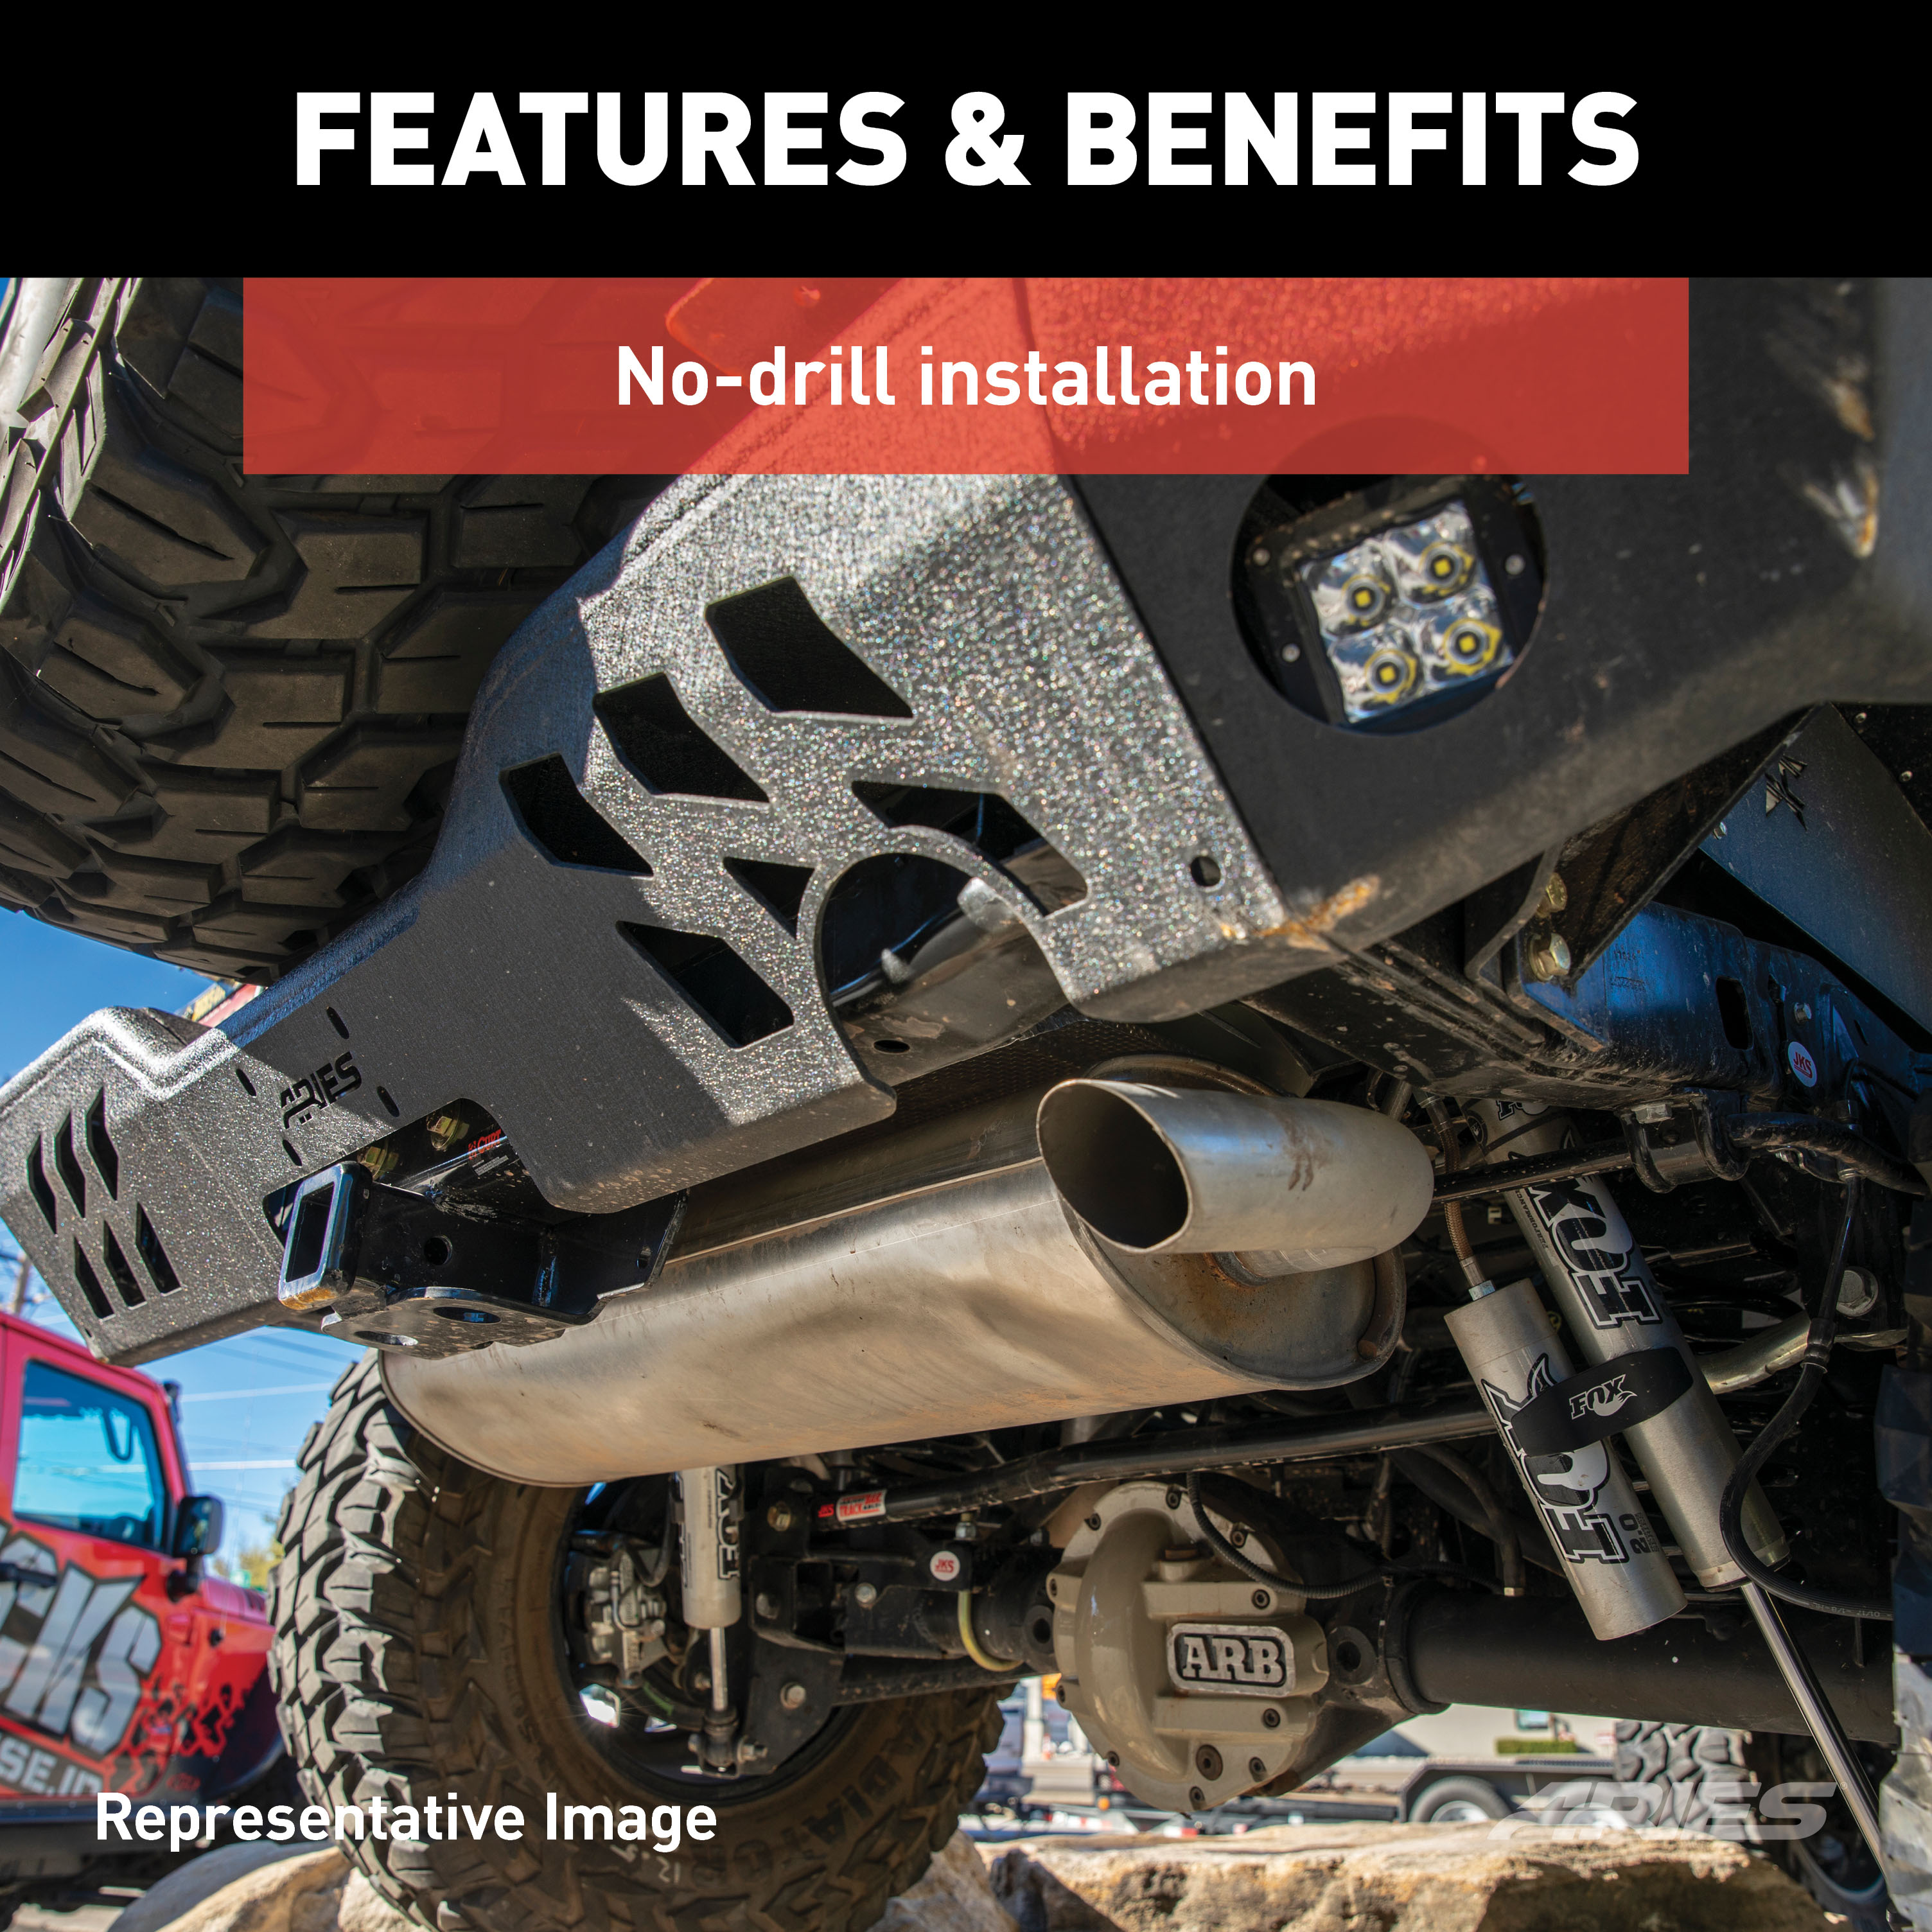
The ARIES TrailChaser Jeep bumper is unlike any other bumper for the Jeep Wrangler JK because it features a modular design. This particular bumper for the rear of the Jeep includes the center section and side extensions with integrated LED lights. It is constructed from T6 aluminum alloy to be strong, lightweight and rust-free, and has a unique, textured black powder coat finish for maximum corrosion resistance. It is also available in high-strength, powder-coated steel. The bumper corners offer a professional finishing touch with their integrated LED lights. The 2" square work lights put out 2,200 lumens each and feature a flood beam pattern. They are made with grade-A LED chips, rust-free aluminum construction, an IP68-standard breather and dual heat sinks. They are also thoroughly tested and come with a waterproof wiring harness for easy installation. All ARIES TrailChaser bumpers install using pre-existing factory mounting points for fast, easy installation with no drilling required.

Explore ARIES products at TowUniverse for top-tier grille guards, side bars, nerf bars, headache racks, and more. Upgrade your vehicle with ARIES today!
ARIES is a fast-paced marketer and innovator of truck, Jeep, SUV and CUV accessories. From automotive enthusiasts to professional builders, our products are built for the champions of individualism, innovation and attitude.
We offer the perfect combination of unique style and durable construction, specializing in custom-fit grille guards, bull bars, side bars and running boards, as well as Jeep Wrangler and Jeep Gladiator accessories.
ARIES products are made vehicle-specific for a custom fit, and they are available for a wide variety of makes and models sold in North America.
Experts available to answer your questions
Call 888-634-9494Limited Lifetime Warranty (Five-Year Finish, One-Year Parts)
2 compatible vehicles
| Year | Make & Model | Notes |
|---|---|---|
| 2007 - 2017 | Jeep Wrangler | — |
| 2018 | Jeep Wrangler JK | — |
Yes, the ARIES 2082061 TrailChaser Black Aluminum Rear Bumper with LED Lights, Select Jeep Wrangler JK (Part #BBDR2082061) is designed to fit the 2007-2017 Jeep Wrangler.
The ARIES 2082061 TrailChaser Black Aluminum Rear Bumper with LED Lights, Select Jeep Wrangler JK (Part #BBDR2082061) fits the following vehicles: 2007-2017 Jeep Wrangler; 2018 Jeep Wrangler JK. Always verify your specific year, make, and model before ordering.
The ARIES 2082061 TrailChaser Black Aluminum Rear Bumper with LED Lights, Select Jeep Wrangler JK (Part #BBDR2082061) fits 2007-2017 Jeep Wrangler models. The 2018 model year is the last year covered by this part number. For newer models, check for an updated version.
The ARIES 2082061 TrailChaser Black Aluminum Rear Bumper with LED Lights, Select Jeep Wrangler JK (Part #BBDR2082061) Refer to the included instructions for installation details. Basic hand tools are typically all you need.
The ARIES Rear TrailChaser™ is a frame-mounted rear bumper replacement available in aluminum or steel with a textured black powder coat finish. Kit 2082061 (aluminum with LED lights) and kit 2082060 (steel with LED lights) include two LED work lights (#1501252). Kits 2082036 (aluminum) and 2082038 (steel) do not include lights. All kits include a center section, two side extensions, and all required hardware (M12 and M10 bolts, washers, lock washers, and nuts).
Four kits are available: 2082036 (aluminum, no LEDs), 2082061 (aluminum with LEDs), 2082038 (steel, no LEDs), and 2082060 (steel with LEDs). Choose aluminum or steel based on your preference, and select with or without LED lights. The manual does not specify which vehicles these kits fit; contact ARIES Automotive at 877.287.8634 to confirm fitment for your specific vehicle.
Required tools are: torque wrench, socket set (including 16mm, 18mm, and appropriate sizes for M10 and M12 bolts), level, and Allen wrench set. A 16mm socket is used to remove factory bumper support bracket bolts, an 18mm socket is used for center bumper bolts and stock tow hook bolts, and an 18mm socket is used to snug M12 bolts during installation.
Yes. Step 6 explicitly states "With help, lift the new bumper center section over the frame rails," indicating that at least two people are required for installation.
The installation is rated as Moderate difficulty. The manual recommends reading all instructions thoroughly before beginning and notes that proper tools will improve installation quality and reduce time required.
1. Remove factory bumper support bracket bolts (driver side, then passenger side). 2. Remove center bumper bolts holding Z-shaped brackets. 3. Lift factory bumper off frame and remove stock tow hooks. 4. Attach side extensions to bumper on flat work surface (snug, do not fully tighten). 5. Place C-channel brackets into frame (both sides). 6. Lift new bumper center section over frame rails with help. 7. Secure center section with M12 bolts (snug, do not fully tighten). 8. Secure corner brackets to vehicle and bumper. 9. Check bumper is level, adjust if necessary, fully tighten all hardware. 10-11. If LED lights included, mount lights and connect wiring. 12. Perform final inspection.
Using a 16mm socket, remove the M10 bolts holding the corners of the factory bumper support bracket to the frame (driver side, then passenger side). Remove the center bumper bolts holding the Z-shaped brackets to the frame (both sides). Lift the bumper off the frame rails and set it aside. Using an 18mm socket, remove the bolts holding the stock tow hooks to the frame; these will not be reinstalled.
Lay the bumper on a flat work surface. Each side extension attachment point is fastened with an M10 hex bolt, lock washer, two M10 x 20mm flat washers, and a nut. For side extensions without LEDs, fasten all four mounting locations. For side extensions with LEDs, fasten all three mounting locations (the fourth location is used for the LED light). Snug the hardware but do not fully tighten at this stage.
The C-channel brackets are frame-mounting components that secure the bumper center section to the vehicle frame. Take each C-channel bracket and place it into the frame of the Jeep. If necessary, use a screwdriver to move the bracket into place. Repeat for both driver and passenger sides. These brackets are then used to secure the M12 bolts that hold the bumper center section.
With the C-channel brackets in place and the bumper lifted over the frame rails with help, secure the center section using M12 hex bolts, lock washers, and flat washers. Snug with an 18mm socket but do not fully tighten at this stage. Repeat for both driver and passenger sides. Final tightening occurs after the bumper is leveled.
Secure the corner bumper bracket to the vehicle with M10 hex bolts, lock washers, and M10 x 27mm flat washers. Secure the corner bumper bracket to the bumper with M10 button head bolts, lock washers, M10 x 20mm and M10 x 27mm flat washers, and nuts. Repeat for the passenger side. These fasteners should be snugged but not fully tightened until the bumper is leveled.
Use a level to check that the bumper is level. Adjust the bumper position if necessary. Once level, fully tighten all hardware (M12 bolts on the center section, M10 bolts on the side extensions, and M10 bolts on the corner brackets). If installing side extensions without LED lights, the installation is complete after this step.
M10 bolts: 33 ft-lbs. M12 bolts: 58 ft-lbs. These torque settings apply unless otherwise noted in the installation steps. Use a torque wrench to achieve proper fastener tension and prevent damage to the product or vehicle.
LED lights are included only with kits 2082061 (aluminum) and 2082060 (steel). If your kit includes LED work lights (#1501252), you must complete the LED installation steps. If your kit does not include lights, skip the LED installation steps and proceed to final inspection. The manual recommends professional installation if you are not familiar with electrical systems.
Mount the LED lights in the recessed pockets on the bumper corners using the provided hardware. Adjust each light to the desired angle and fully tighten all hardware. Connect the harness extension to each light by inserting the male plug on the harness extension into the female socket on each LED light. Route the harness extension to the front of the vehicle and connect to the main wiring harness by inserting the male plug on the wiring harness into the female socket of the harness extension.
Disconnect the supplied switch from the wiring harness and install it in your desired location. Reconnect the blue, red, and black spade connectors to the switch as shown in the Wiring Harness diagram. Connect the red fused wire with the ring terminal to the positive (+) battery post. Connect the black wire ring terminal to the negative (-) battery post or other suitable vehicle grounding point. Mount the provided relay to the vehicle and secure all wires with zip ties away from moving parts to avoid damage. Test the lights to ensure proper function.
If the LED lights are being used with a 24V system, the relay will need to be replaced with a 24V unit. The kit is supplied with a 12V relay by default.
Read all instructions thoroughly before beginning. Improper electrical installation may result in personal injury; unless you are familiar with electrical systems, have this step performed by someone with that familiarity. Secure all wires with zip ties away from moving parts to avoid damage. Use proper tools to prevent damage to the product or vehicle. Ensure the bumper is level before final tightening.
To protect the product, wax after installing. Regular waxing is recommended to add a protective layer over the finish. Do not use any type of polish or wax that may contain abrasives that could damage the finish. For polished, gloss, and other smooth finishes, polish may be used to clear small scratches and scuffs. Mild automotive detergent may be used to clean the product. Do not use dish detergent, abrasive cleaners, abrasive pads, wire brushes, or other similar products that may damage the finish.
After installation, check that the bumper is level using a level tool and adjust if necessary before final tightening. Periodic inspections should be performed to ensure all mounting hardware remains tight. Periodic inspection of all wires and connections should be performed to ensure there is no visible damage or loose connections. Test the LED lights to ensure proper function if lights are installed.
The manual does not specify vehicle year, model, or body style compatibility. Contact ARIES Automotive at 877.287.8634 to confirm fitment for your specific vehicle before purchasing.
You will need a torque wrench, socket set (16mm, 18mm, and M10/M12 sizes), level, and Allen wrench set. Two people are required to lift the bumper into place.
Two people are required to lift the bumper. Professional electrical installation is recommended unless you are familiar with electrical systems. The installation is rated as Moderate difficulty.
M10 bolts: 33 ft-lbs. M12 bolts: 58 ft-lbs. Use these settings unless otherwise noted in the installation steps.
LED lights are included with kits 2082061 (aluminum) and 2082060 (steel). Kits 2082036 (aluminum) and 2082038 (steel) do not include lights. If your system is 24V, the relay must be replaced with a 24V unit.
Wax the bumper after installation and regularly thereafter. Use only mild automotive detergent to clean. Do not use abrasive cleaners, wire brushes, dish detergent, or abrasive wax. Periodic inspection of all hardware and wiring is recommended.
Improper electrical installation may result in personal injury; use a professional if unfamiliar with electrical systems. Secure all wires with zip ties away from moving parts. Ensure the bumper is level before final tightening. Do not use abrasive products on the finish.
On Sale Today
Original price was $986.95. Current price is $560.00.You save $426.95 (43%)
Free Shipping
Ships free on all orders
 Authorized Dealer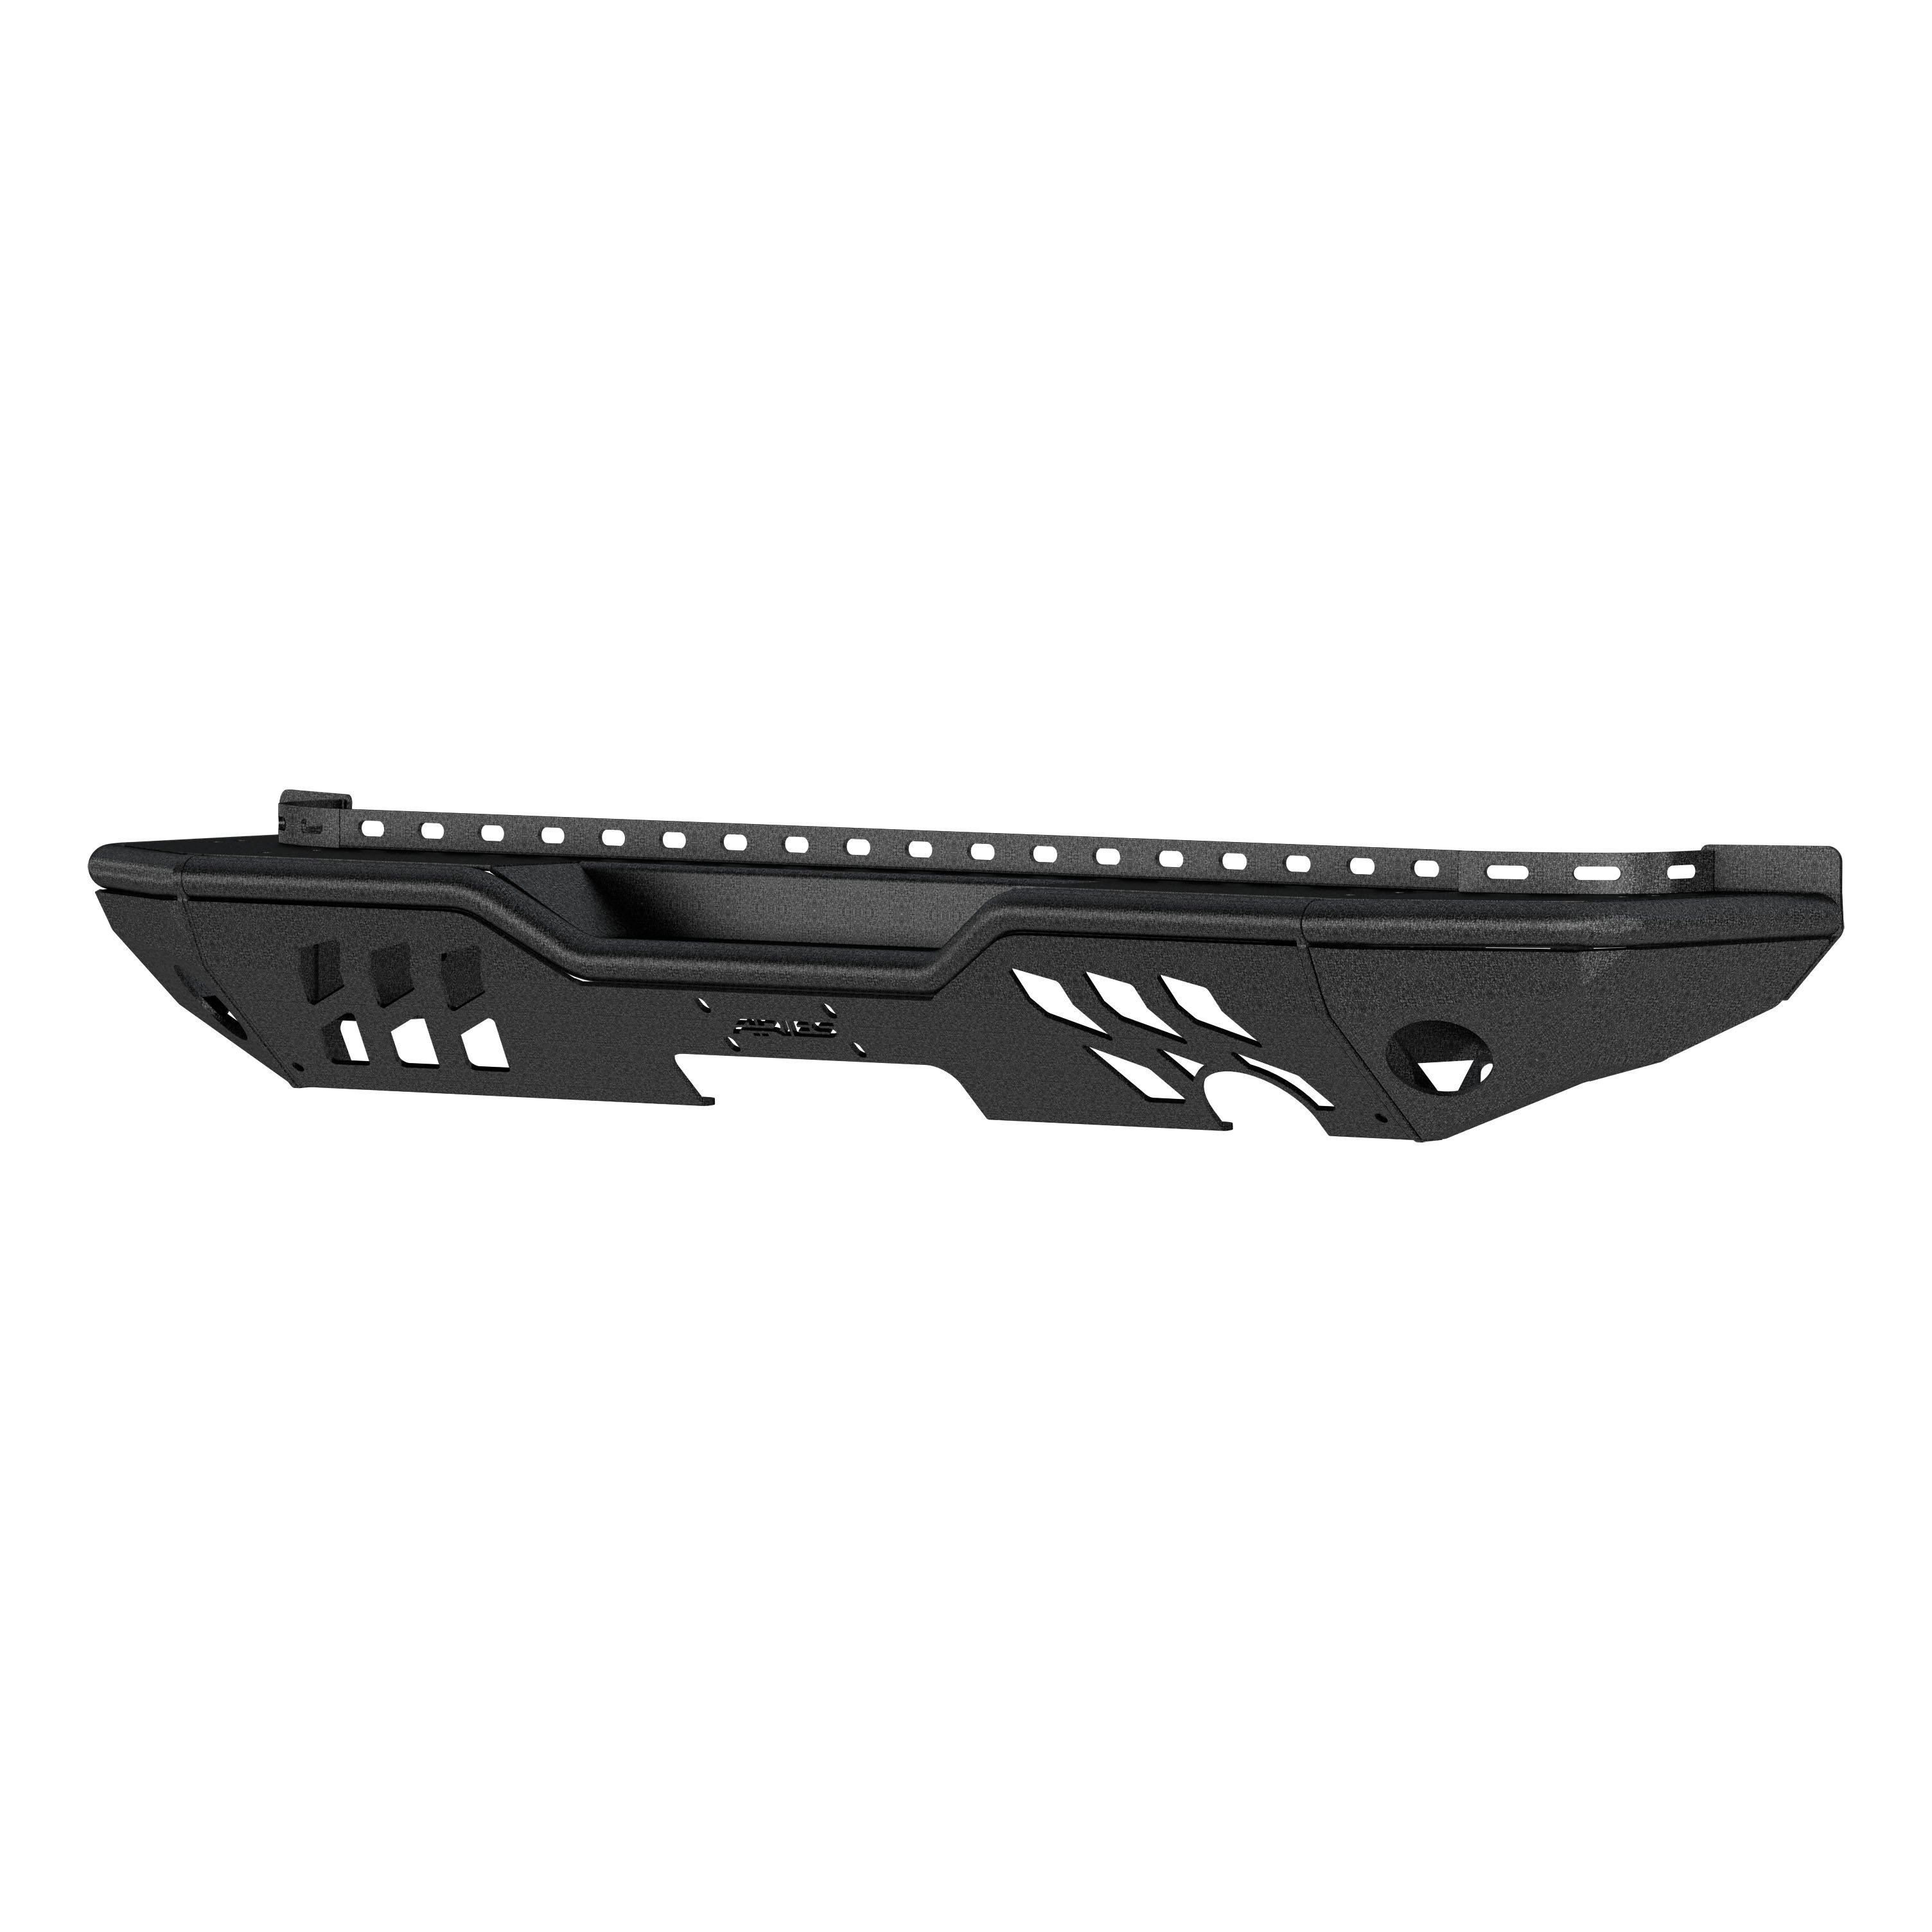


Quick Ship
In stock and ready to ship — order now!
Shipping from Lancaster, TXFREE SHIPPING
Estimated delivery Mon, Sep 28 - Wed, Sep 30
Order before 2 PM EST Monday–Friday for same-day processing
Guaranteed safe & secure checkout
No reviews have been added for this product.