

Blue Ox Gooseneck Hitch Gooseneck Trailer Hitch DH2201Blue OxOriginal price was $699.99. Current price is $505.50.Out of Stock
View productOur in-house experts typically reply within one business day.

Blue Ox
Verify Fitment
Select your vehicle to confirm this part fits.

Always the correct part
We know our products
Quality Products
Free Shipping!
Always the correct part
We know our products
Quality Products
Free Shipping!

Tested At Independent Laboratory
Gross Trailer Weight: 30000 lbs.
Tongue Weight: 7,500 lbs.
Finish: Powder Coat
1775: Yes
1768: 30000
726: No
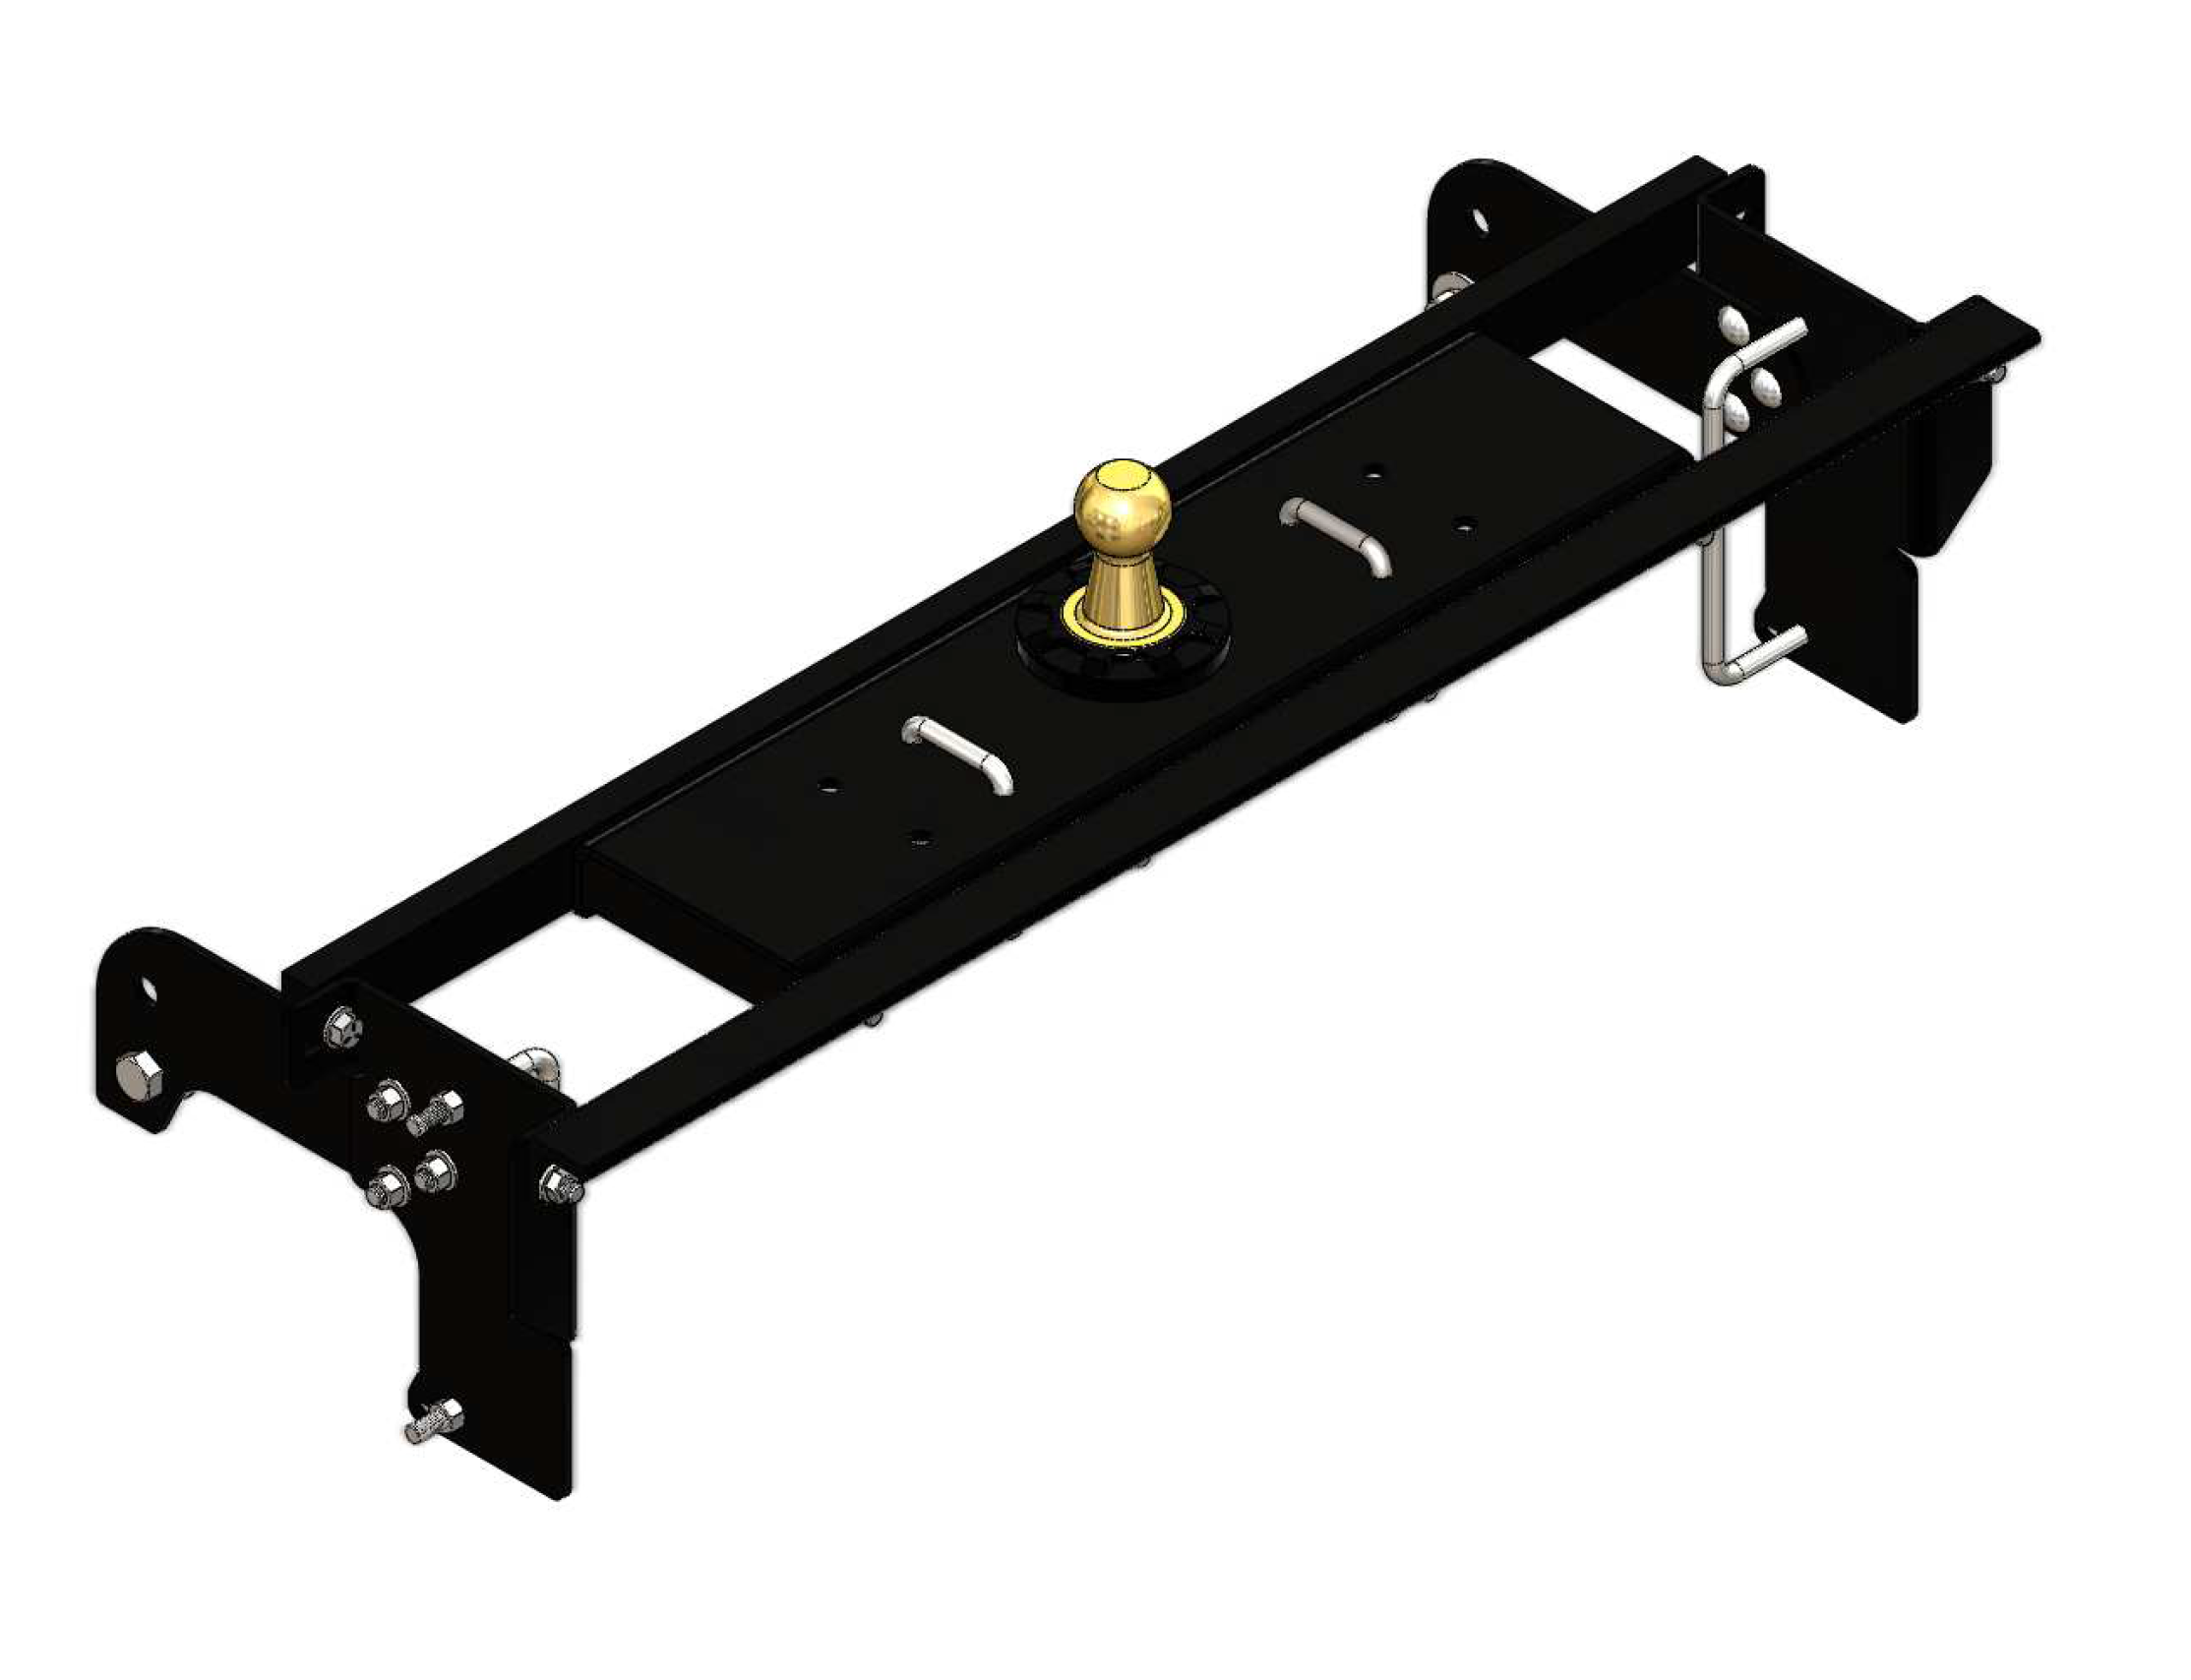
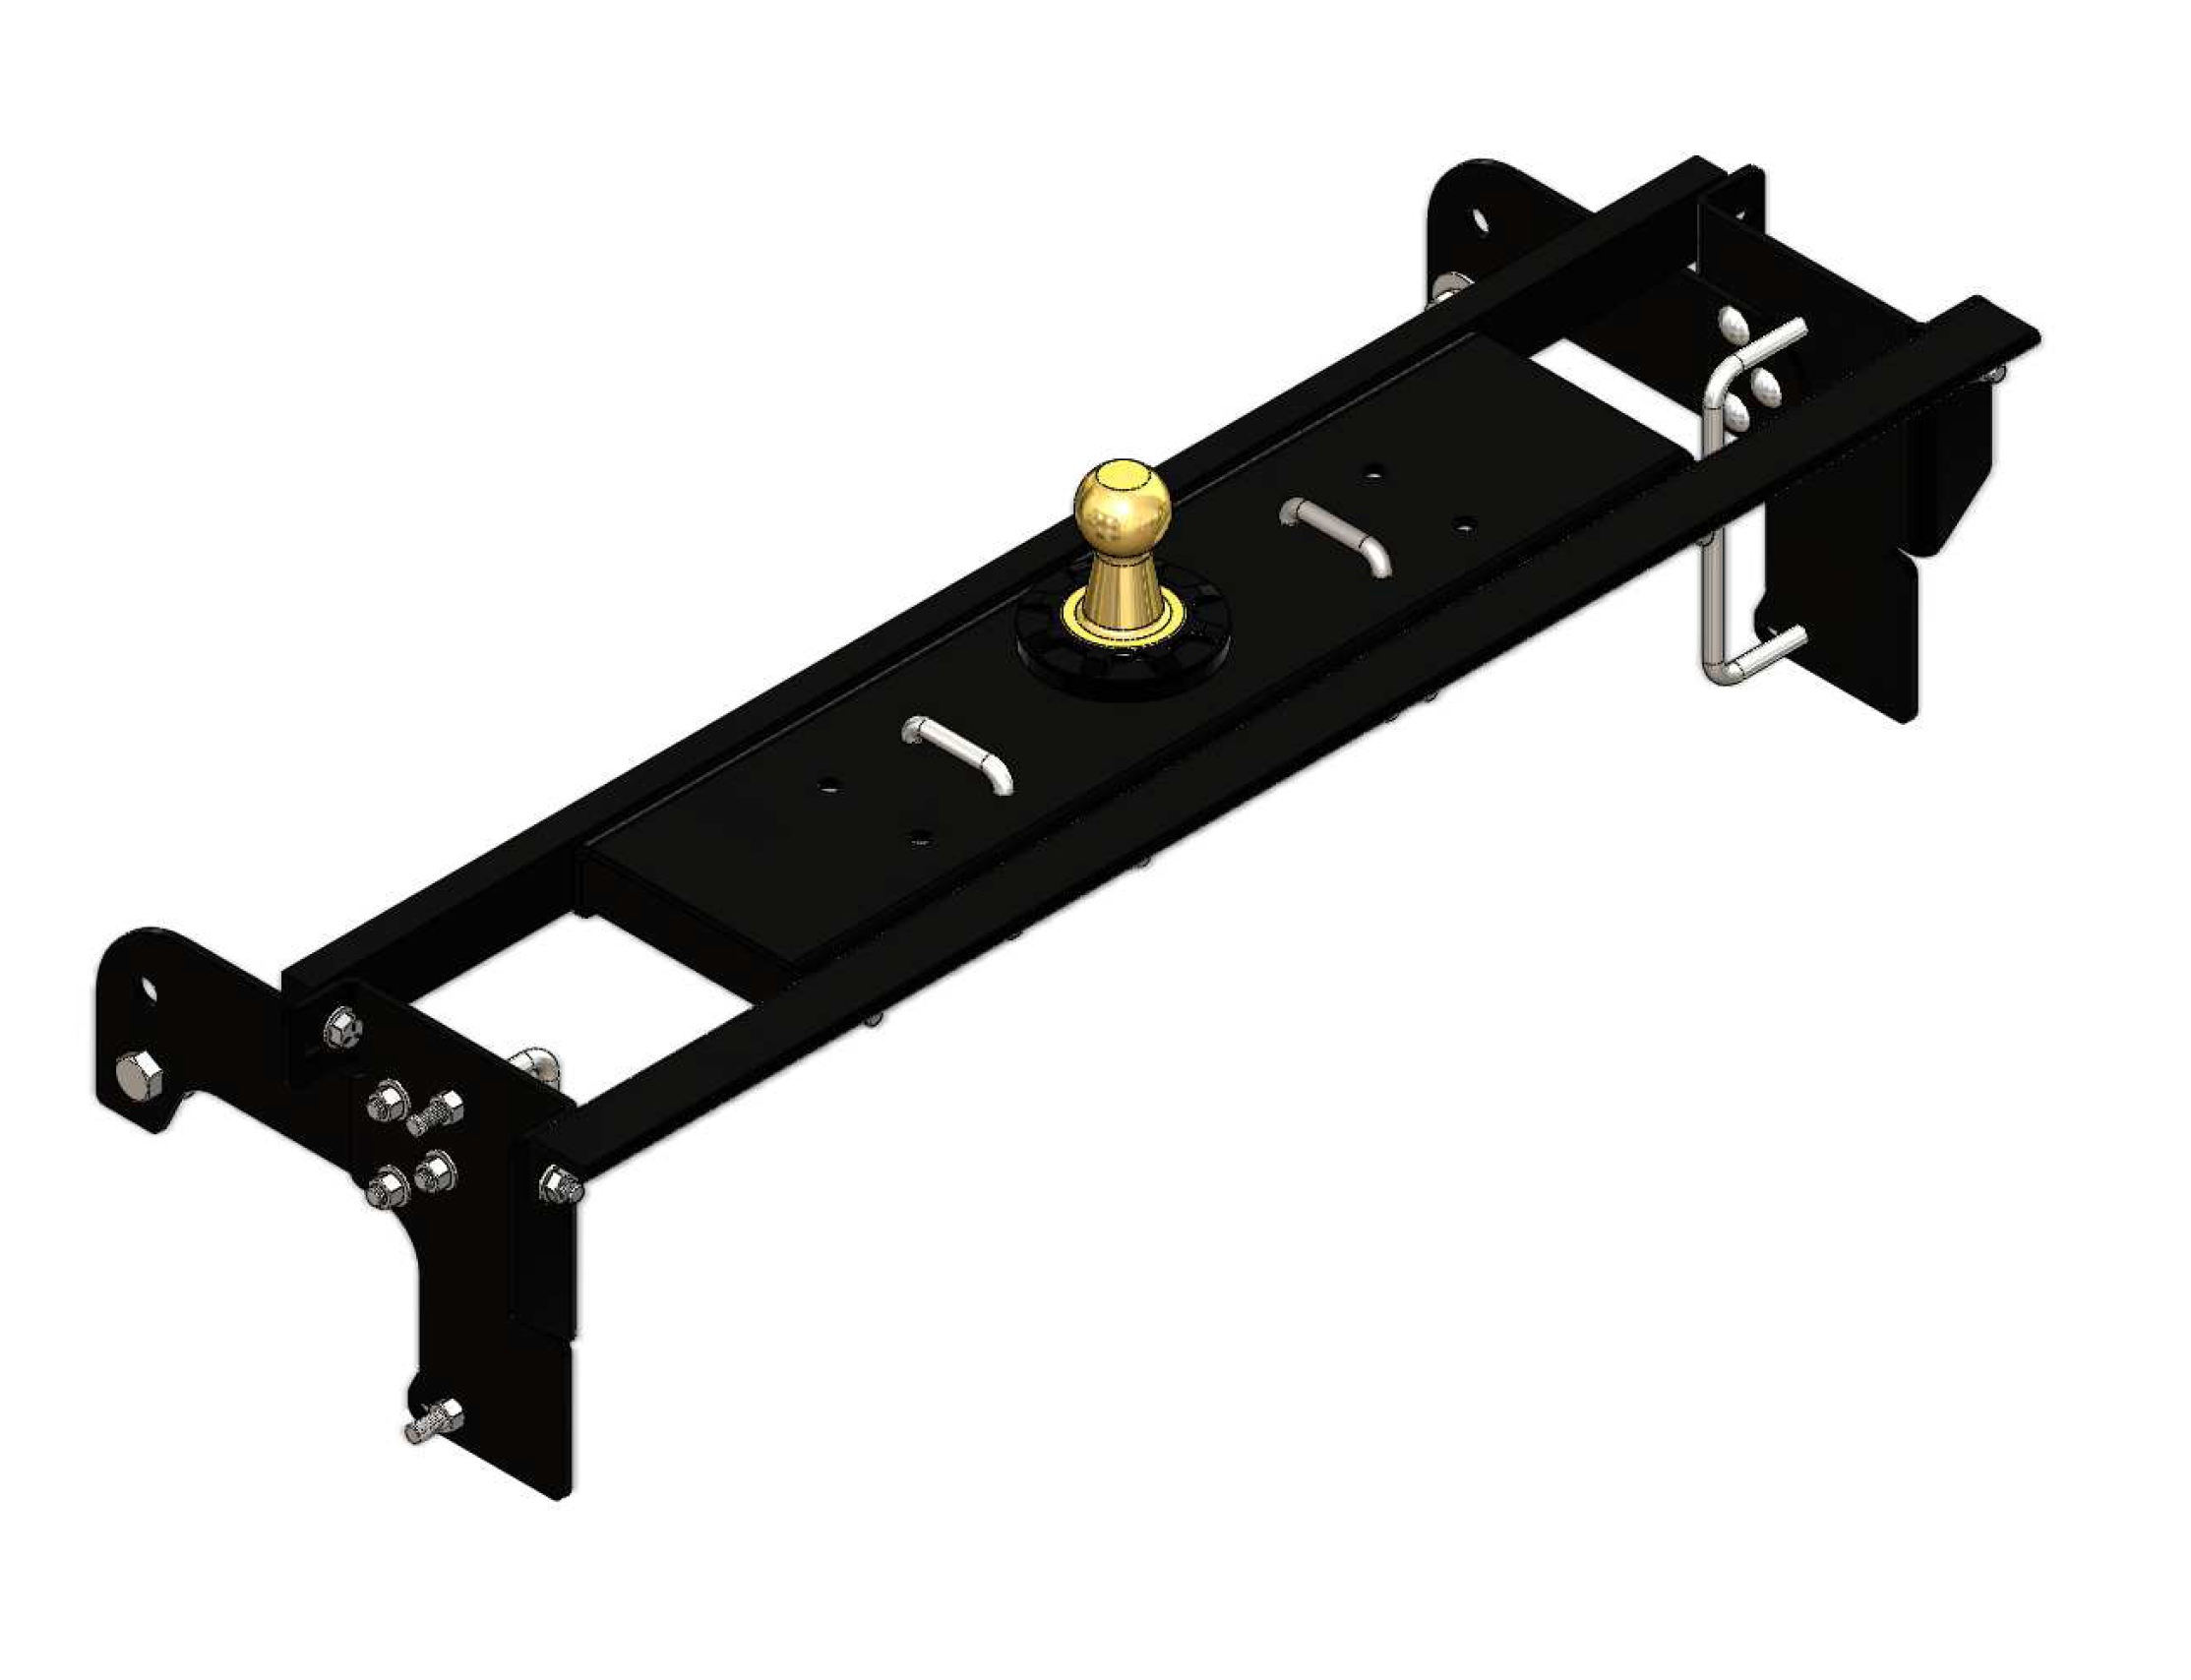
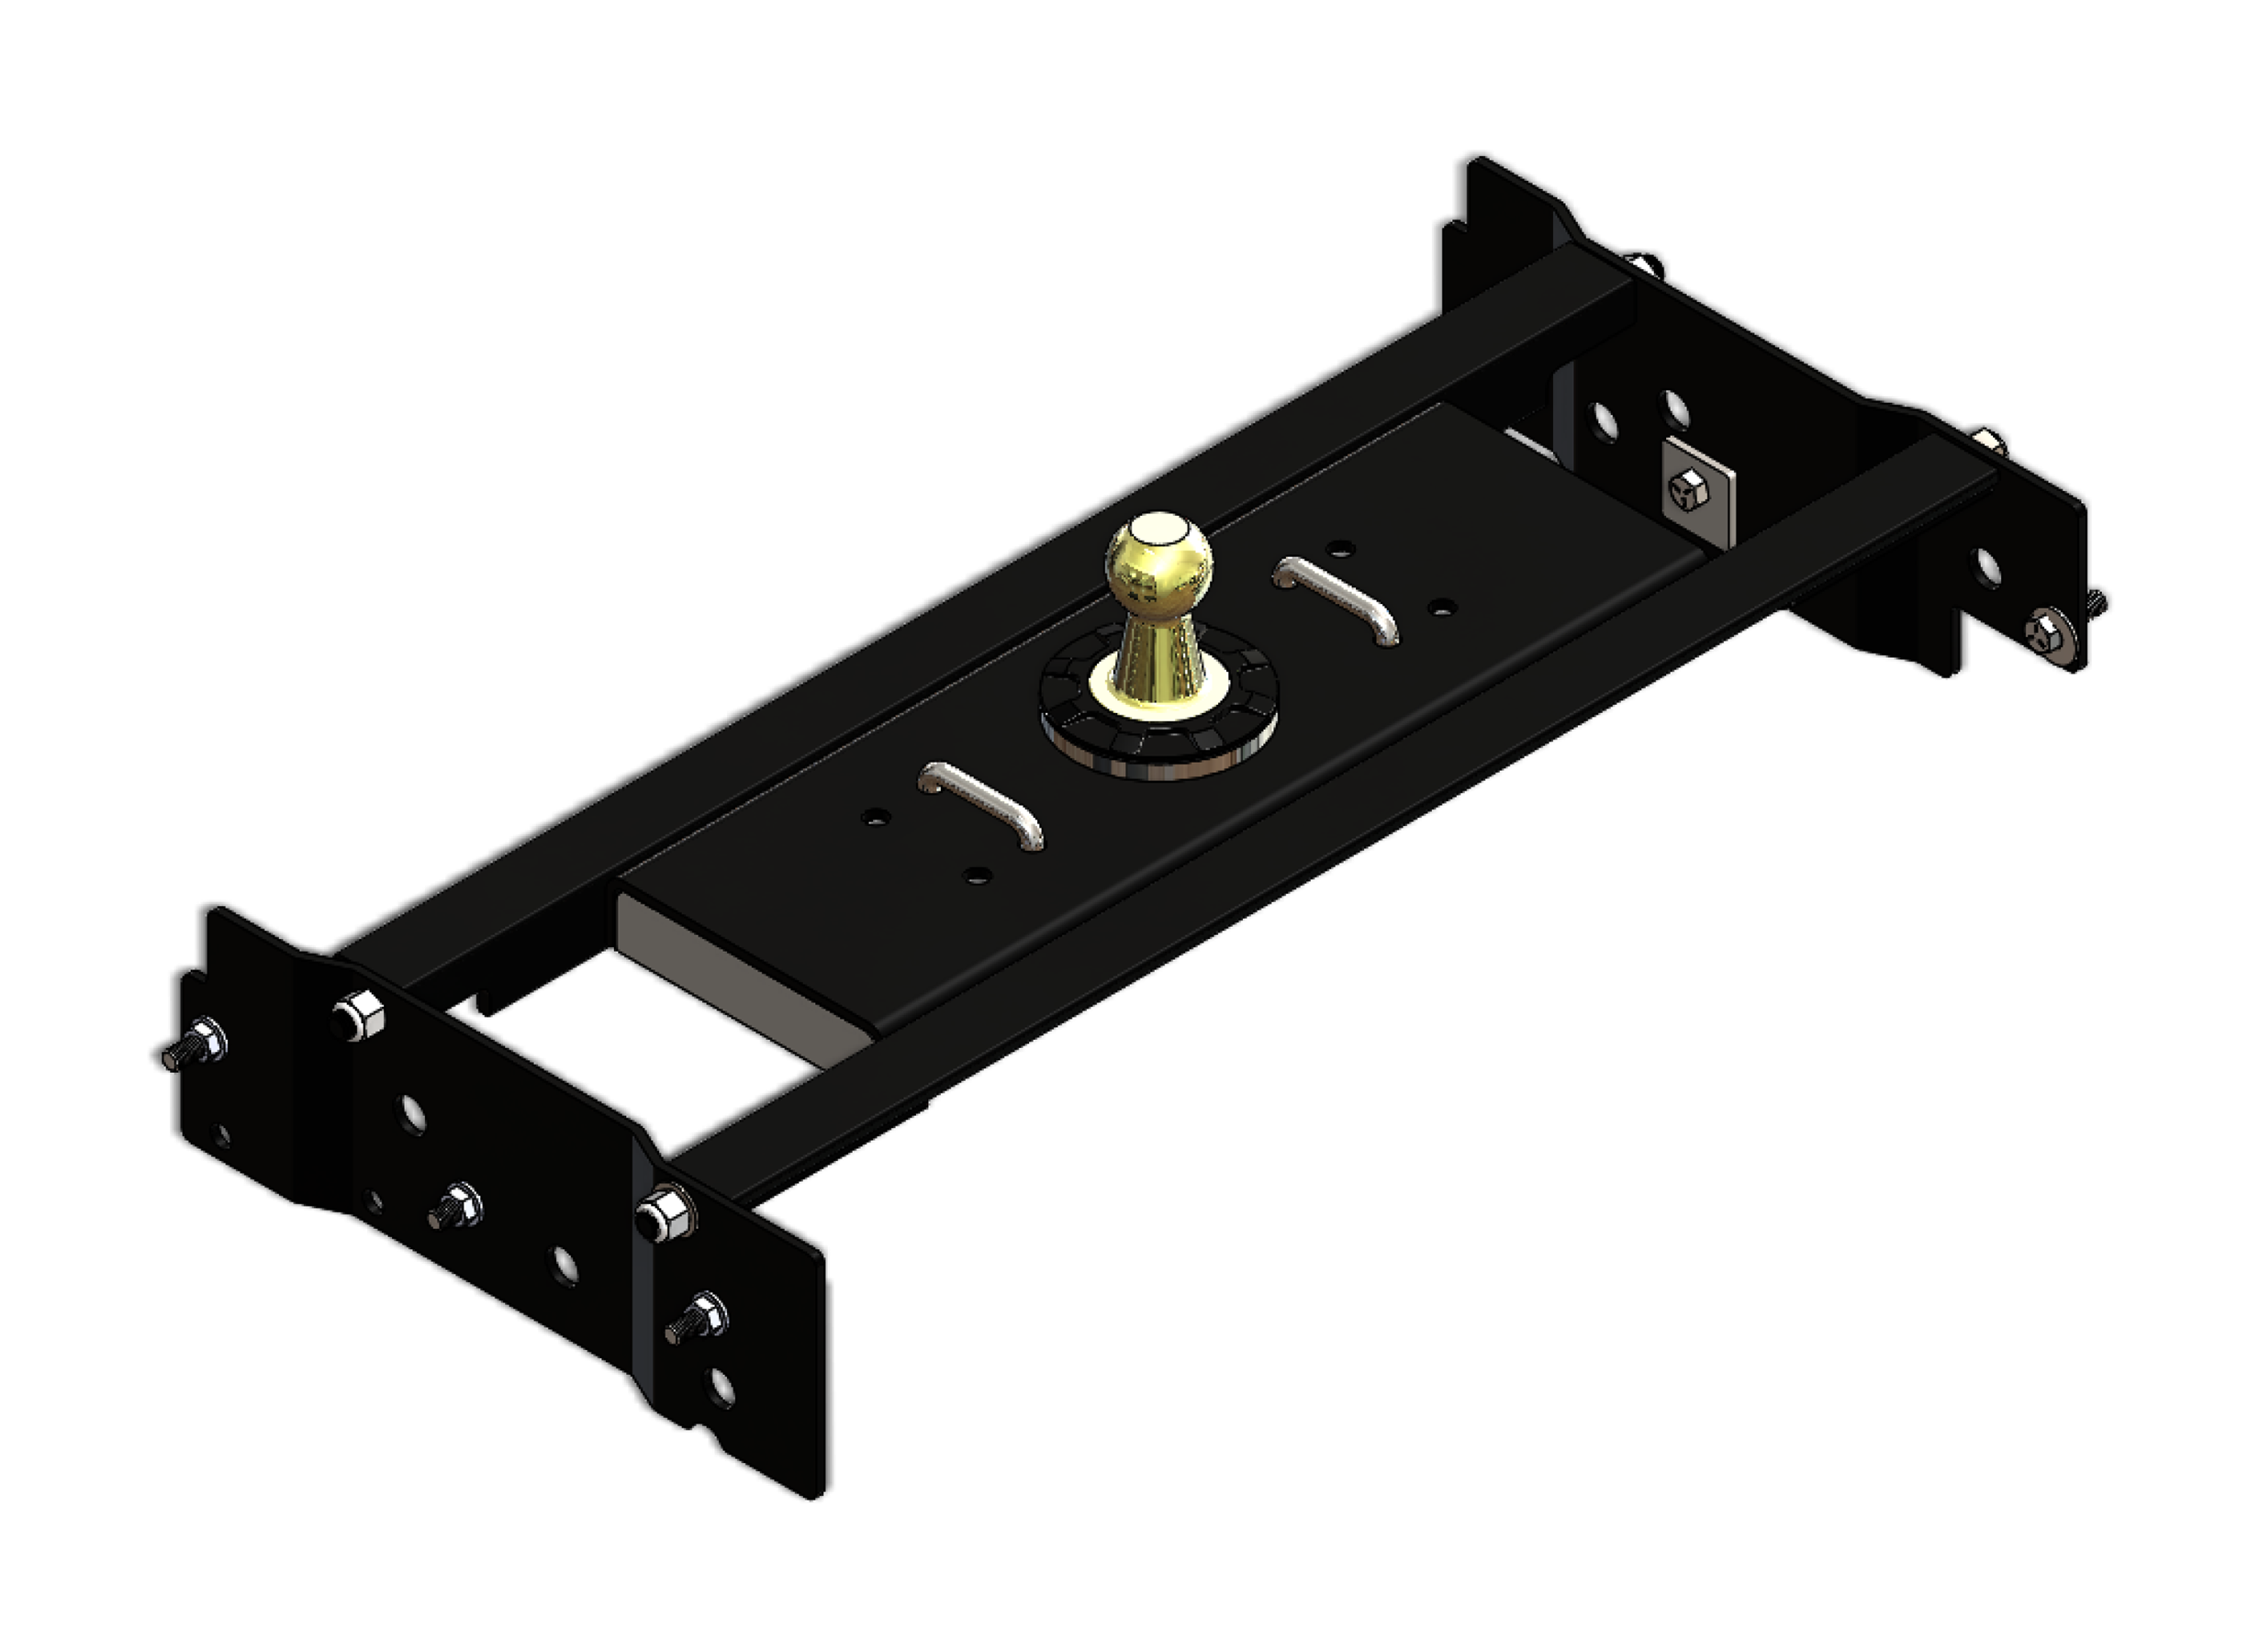
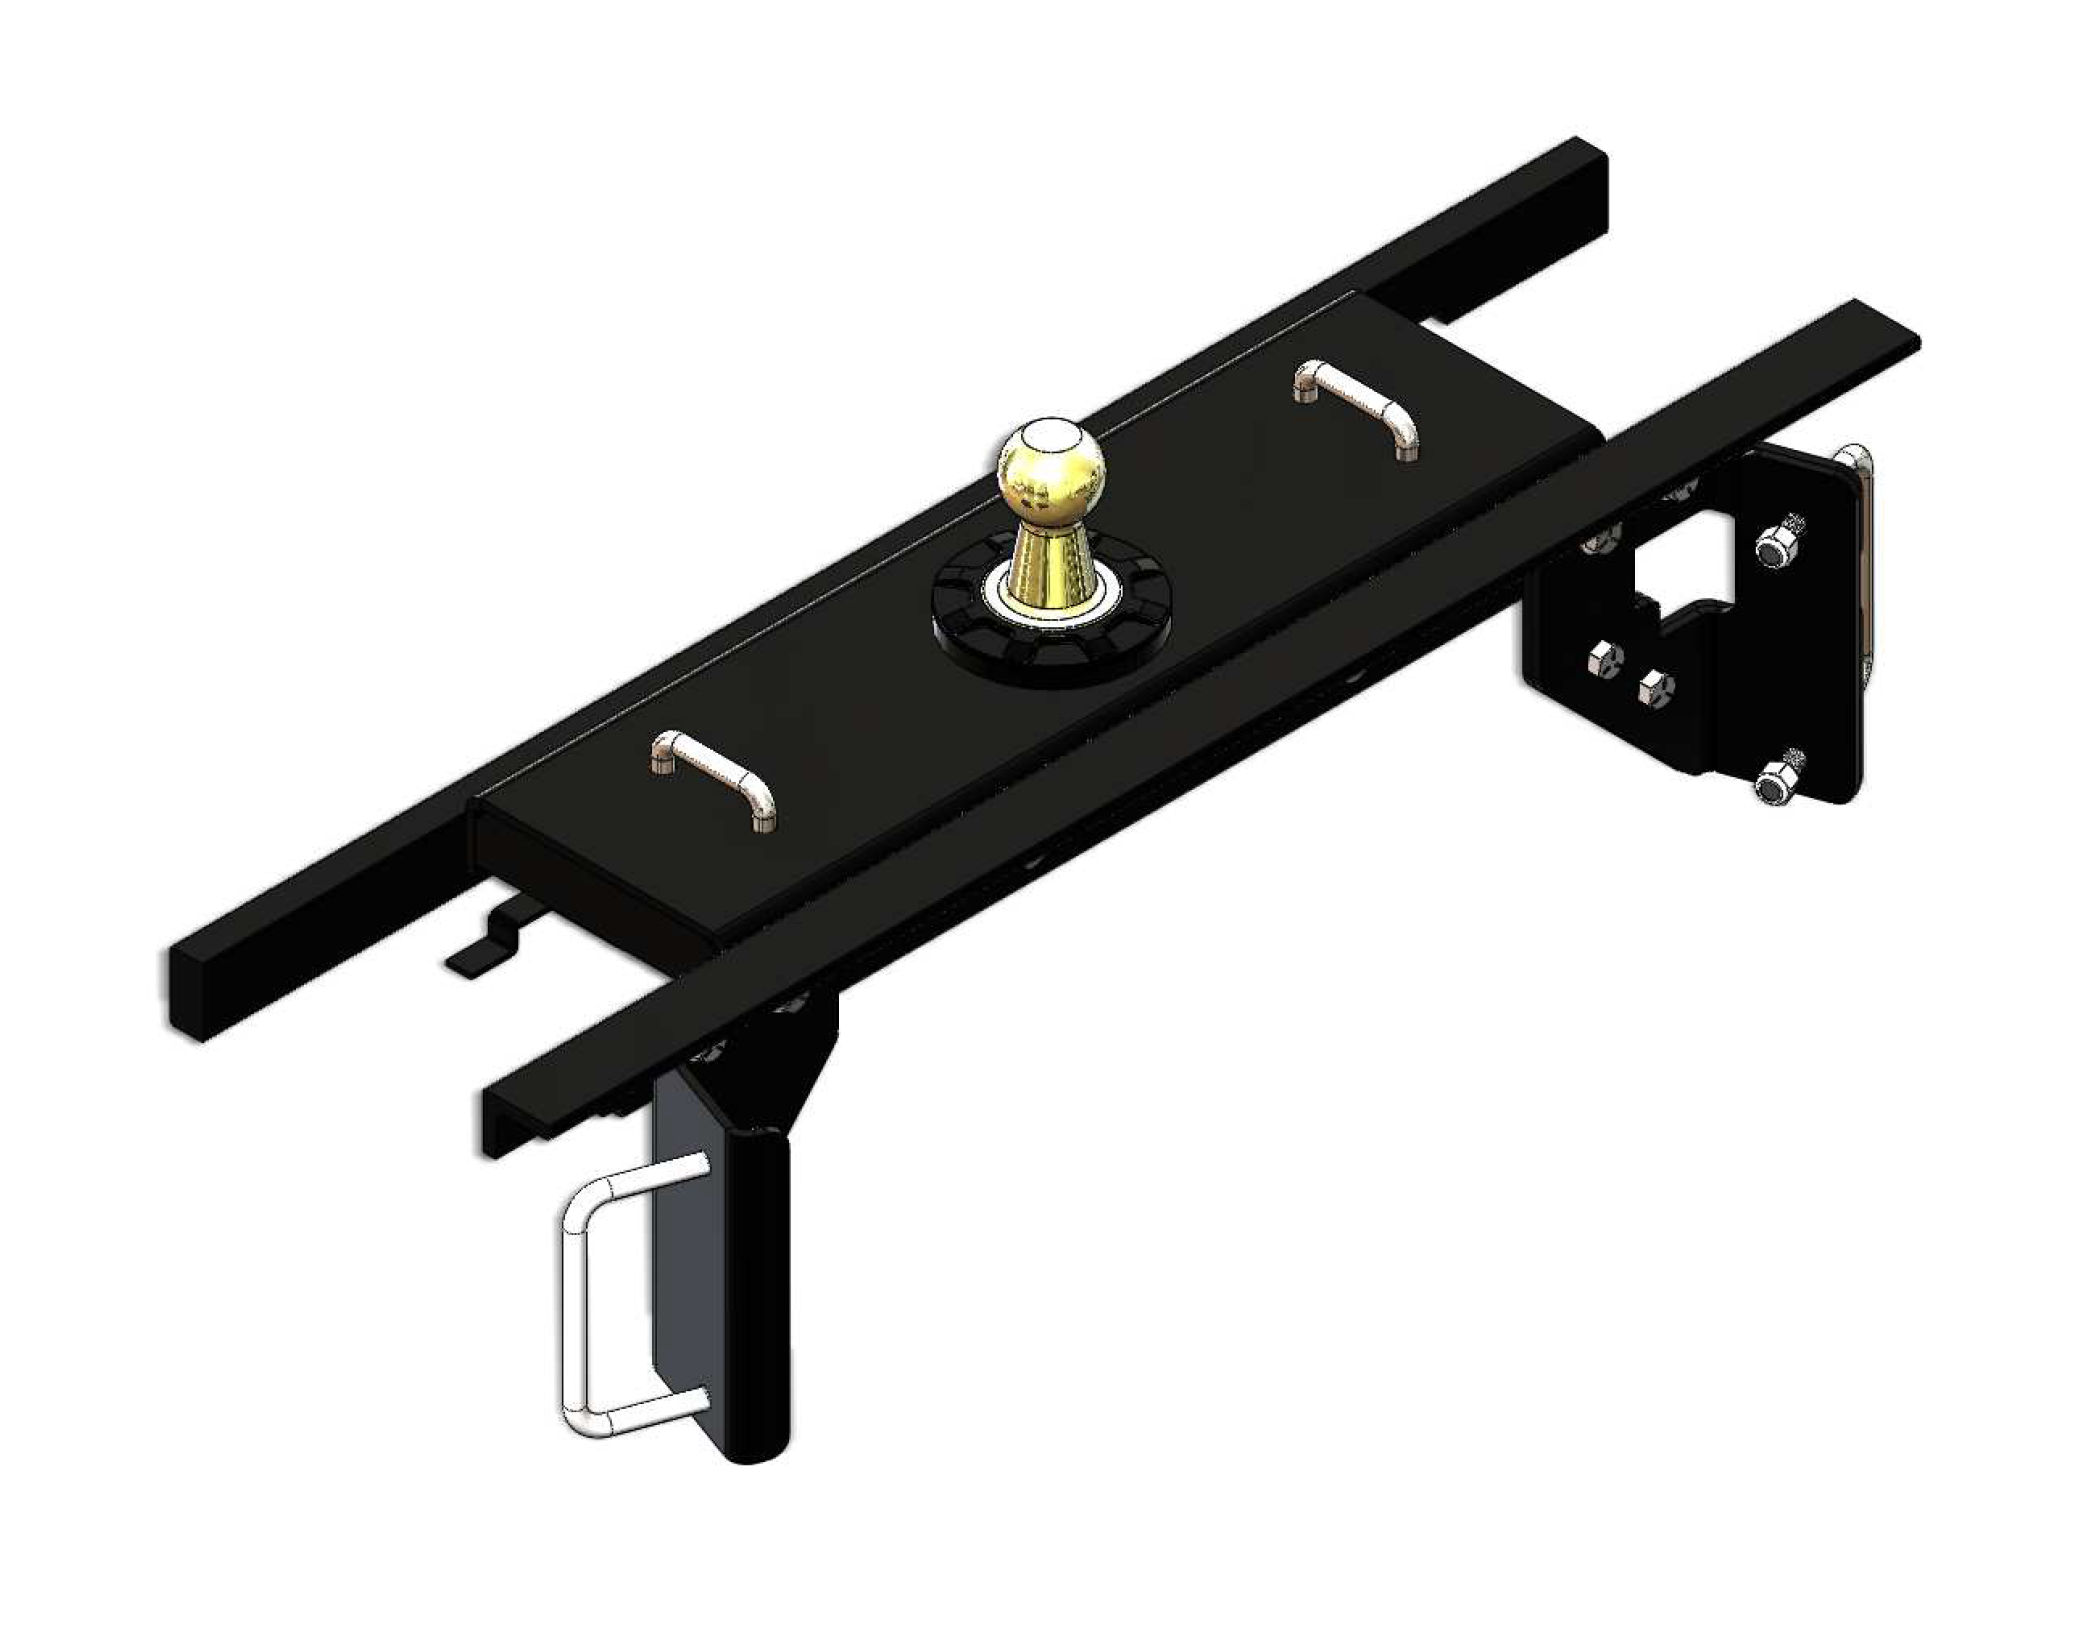
Meet the Diamond Hitch by Blue Ox - the DH2302 Gooseneck Trailer Hitch, designed for heavy-duty hauling needs. With an impressive 30,000 lb. Gross Towing Weight and 7,500 lb. Tongue Weight capacity, this hitch is suitable for a range of applications, from horse or livestock transportation, to moving race or antique cars, RVs, or other large supplies. Featuring an under-bed mounting system, it provides full utilization of the truck bed when the hitch ball is in the inverted position. Installation is a breeze, with no need to remove the truck bed, minimal drilling into the truck frame, and no drilling required on Dodge hydraframes. This hitch comes complete with mounting bolts, brackets, instructions, and chain loops for a complete setup.

Blue Ox is known internationally for recreational and commercial towing products, manufacturing in Pender, Nebraska since 1925. The line covers tow bars and vehicle-specific baseplates for flat towing behind a motorhome, sway control and weight distributing hitches, supplemental braking accessories and towing wiring, backed by patented designs and long-standing customer service.
Blue Ox has manufactured since 1925 and is recognised internationally for towing products and customer service. The company operates from Pender, Nebraska, where it grew out of Automatic Manufacturing Co., a business that started with cattle oilers and developed into agricultural equipment, tractor accessories and trailer towing hardware. That agricultural engineering heritage still shows in how the towing products are built, and the company holds patents across weight distribution, fifth wheel and tow bar designs.
Flat towing is the discipline Blue Ox is best known for. Towing a car with all four wheels on the ground behind a motorhome demands a system that stays rigid under braking, articulates properly over uneven ground, and connects to the towed vehicle at points strong enough to take the load. Blue Ox tow bars handle the first two, with self-aligning arms that latch under tension and release without a struggle when the load is off them. Vehicle-specific baseplates handle the third, engineered per make and model to tie into structural mounting points behind the fascia.
The wider flat towing range covers supplemental braking systems, safety cables and the accessories that make a complete legal setup, along with baseplate wiring and dinghy towing harnesses that pass lighting signals to the towed vehicle without back-feeding its electrical system.
For conventional trailer towing, Blue Ox weight distributing hitches with integrated sway control transfer tongue load onto the tow vehicle's front axle and resist the yaw that crosswinds and passing trucks induce.
The company describes its foundation as customer service, designing around what owners actually ask for, and it runs an RV park adjacent to the factory where customers can stay. Sister operations at the same Nebraska site include Automatic grain roller mills and MAD-RAMPS pivoting ramp systems.
Experts available to answer your questions
Call 888-634-94943 Years
10 compatible vehicles
| Year | Make & Model | Notes |
|---|---|---|
| 2001 - 2004 | Chevrolet Silverado 2500 | [Available While Supplies Last |
| 2001 - 2010 | Chevrolet Silverado 2500 HD | [Available While Supplies Last |
| 2007 | Chevrolet Silverado 2500 HD Classic | [Available While Supplies Last |
| 2007 | Chevrolet Silverado 3500 Classic | [Available While Supplies Last |
| 2007 - 2010 | Chevrolet Silverado 3500 HD | [Available While Supplies Last |
| 2001 - 2004 | GMC Sierra 2500 | [Available While Supplies Last |
| 2001 - 2010 | GMC Sierra 2500 HD | [Available While Supplies Last |
| 2007 | GMC Sierra 2500 HD Classic | [Available While Supplies Last |
| 2007 | GMC Sierra 3500 Classic | [Available While Supplies Last |
| 2007 - 2010 | GMC Sierra 3500 HD | [Available While Supplies Last |
Yes, the DH2302 is designed for both standard and long box configurations on 2001-10 Chevy/GMC 2500 and 2007-10 Chevy/GMC 3500 trucks. The ball location differs by bed length: measure 45 inches from the rear for a 6'-6" bed, or 50-1/4 inches for an 8-foot bed, measured from the rear (not the tailgate) forward on the inside of the bed.
The manual states that when a bed liner is installed, compensation of the bed liner thickness must be accounted for when measuring the ball location in the box bed. However, the manual does not specify the maximum liner thickness or provide detailed guidance on installation with liners. Contact Blue Ox customer service at (402) 385-3051 for specific compatibility with your bed liner.
The DH2302 is rated for a maximum Gross Towing Weight (GTW) of 30,000 lbs and a tongue weight of 7,500 lbs. However, you must not exceed your vehicle's maximum towing capacity as stated in your vehicle's owner's manual. Always refer to your vehicle manufacturer's recommendations, as they may be lower than the hitch rating.
Required tools are: torque wrench, drill, tape measure, 5-inch hole saw, 19/32-inch drill bit, 3/4-inch socket, 3/4-inch wrench, 1-1/16-inch socket, and 1-1/16-inch wrench. You will also need Loctite Red to apply to all bolts before tightening.
Yes. The first installation step is to remove the spare tire using the vehicle's jack handle tool, following the procedure in your vehicle's owner's manual. The spare tire is reinstalled after the hitch installation is complete (Step 15).
Yes, drilling is required. You must drill a 5-inch hole through the truck bed at a measured location (50-1/4 inches from the rear for an 8-foot bed, or 45 inches for a 6'-6" bed). Later, you must also drill two 19/32-inch holes closest to the ball on both sides of the center section. The manual recommends using a board while drilling to prevent the bit from wobbling and deburring the hole so the hitch sits tight.
Yes. The heat shield must be trimmed by cutting between two bed frame rails on the underside of the bed above the axle, as shown by dotted lines in the installation diagram. This is a required modification for proper hitch installation.
Lifting the bed is optional. The manual states: "Optional: Loosen the bed bolts and lift the bed to clear cross members." This may make it easier to slide the cross members into position, but it is not required.
Do not fully tighten any bolts during assembly (Steps 6-10). After all components are installed and aligned, tighten and torque all bolts in this order: first torque the 3/4-inch bolts, then torque the outside 1/2-inch bolts, and finally work inward to the 1/2-inch center section bolts.
The manual provides torque specifications by bolt size and grade. For Grade 5 bolts: 1/2-inch = 78 ft-lbs, 3/4-inch = 257 ft-lbs. For Grade 8 bolts: 1/2-inch = 119 ft-lbs, 3/4-inch = 380 ft-lbs. Metric equivalents are also provided. All bolts must have Loctite Red applied before tightening. Refer to the bolt torque chart on page 1 for the specific grade and size of each fastener.
To install the ball: (1) Rotate the locking collar to release the latch pawl. (2) Align the ball with the collar and drop the ball into the hitch. (3) Release the locking collar. (4) Pull up on the ball to ensure it is locked into the housing. Always ensure the hitch ball is locked before towing.
To remove the ball: (1) Rotate the locking collar to release the latch pawl. (2) Pull straight up on the ball to remove it from the hitch. A plug is included with the hitch that can be used to cover the socket when the ball is removed.
To store the ball: (1) Rotate the locking collar to release the latch pawl. (2) Align the ball with the collar and drop the ball into the hitch. (3) Release the locking collar. The included plug can be used to cover the socket when the ball is stored in the hitch.
Before beginning work: (1) Vehicle must be securely blocked and brakes set. (2) Do not use any open flame under the truck bed to cut or weld—there is extreme danger of explosion or fire. (3) When using power drills, be aware of the dangers of torque and drill bit length. (4) When using a reciprocating saw, be aware of objects behind the cutting surface. (5) Do not clamp the hitch over any wiring or brake lines.
If the hitch is in an accident, it must be replaced and not reused. Do not use it again. An accident can cause unseen damage, and using it again could result in more damage or serious injury. Do not use the hitch if it is damaged or missing parts.
Yes, trailer brakes are required. This is stated as a requirement in the warnings section of the manual.
Always make sure the trailer is loaded slightly tongue-heavy. Do not pull a trailer that is lighter on the tongue end. This ensures proper weight distribution and safe towing.
Periodically clean any dirt and debris from the ball and ball housing. Moderately lubricate them with white lithium grease or equivalent grease. This maintenance helps ensure proper operation and longevity of the hitch.
After installing the center section and side plates, check the rotation of the top collar to ensure the bed is not rubbing against it and that it can rotate freely. If necessary, drop the center section and remove any obstructions. This check must be completed before final torquing of all bolts.
Two u-bolts are installed around the frame through the side plates with lock nuts (Step 9). Later, two additional 1/2-inch u-bolts are inserted through drilled holes from the topside of the bed (Step 14). On these top u-bolts, install in order: 1/2-inch flat washer, spring, another 1/2-inch flat washer, and 1/2-inch lock nut. Tighten until the washers are touching the spring without compressing it.
The DH2302 includes: 7 pieces of 1/2-inch Grade 5 hex head bolts (1-1/2 inches long), 6 pieces of 1/2-inch Grade 5 carriage bolts (1-1/4 inches long), 2 pieces of 1/2-inch Grade 5 u-bolts (3-3/4 x 2-1/2 inches), 2 pieces of 3/4-inch Grade 5 hex head bolts (2-1/2 inches long), 4 pieces of 1/2-inch Grade 8 hex head bolts (1-3/4 inches long), 2 pieces of 1/2-inch Grade 8 u-bolts (8-5/16 x 4-1/4 inches), 6 pieces of 1/2-inch hex flange Whiz Lock nuts, 14 pieces of 1/2-inch hex nylon lock nuts (Grade 8), 2 pieces of 3/4-inch hex nuts, 24 pieces of 1/2-inch flat washers, 2 pieces of 3/4-inch flat washers, 6 pieces of 1/2-inch lock washers, 2 pieces of 3/4-inch lock washers, 4 compression springs, and 1 ball housing plug.
The main components are: (1) 1/2-inch bolt plate, (2) hitch ball, (3) DH2302 center section, (4) two rear side plates, (5) driver side (DS) side plate, (6) passenger side (PS) side plate, (7) two side plate bushings, (8) brake relay plate, (9) rear cross member, and (10) front cross member. All components are listed with their part numbers in the parts list.
Use only genuine factory replacement parts on your hitch. Do not substitute homemade or non-typical parts. If a bolt is lost or needs replacement, use a replacement bolt of the same grade (in most cases Grade 5; refer to the parts list). Replacement parts may be ordered through your nearest Blue Ox dealer or distributor. Failing to follow these instructions will void the manufacturer's warranty.
Do not use the hitch if it is damaged or missing parts. If a bolt is lost or in need of replacement, use a replacement bolt of the same grade (refer to the parts list for the correct grade). Replacement parts may be ordered through your nearest Blue Ox dealer or distributor. Using a damaged or incomplete hitch could result in serious injury or death.
Slide the cross members in from the side. Push the flat end in just ahead of the rib. Slide the angle in part way, lift up and bend the rib, then finish pushing it in, then bend the rib back. Turn the cross members so that the holes are on the lower side, facing down and to the back. Optionally, you may loosen the bed bolts and lift the bed to clear the cross members.
Install the center section by sliding it in from the backside over the axle, then aligning it with the hole in the bed. Secure it in place. The center section is then bolted to the cross members with supplied 1/2-inch hardware (do not fully tighten at this stage).
Install the rear plates onto the driver side and passenger side side plates with 1/2-inch carriage bolts and hardware (do not fully tighten). Then install both side plates onto the cross members with appropriate hardware (do not fully tighten). All bolts are fully tightened and torqued only after all components are aligned and the collar rotation is checked.
Install the u-bolt around the frame through the side plate and loosely install the lock nut on both sides of the vehicle. Do not fully tighten at this stage. Be sure to avoid pinching any wires or lines when installing the bolts. These u-bolts are fully torqued only after all components are aligned.
Adjust the rear plate if needed and install the 3/4-inch bolt through the frame with the oval bushing and 3/4-inch hardware on the inside of the frame. Do this on both sides of the vehicle. Do not fully tighten the hardware at this stage. These bolts are fully torqued first, before the 1/2-inch bolts.
Using a 19/32-inch drill bit, drill the two holes closest to the ball through the bed. Do this on both sides of the center section. These holes are used to insert the 1/2-inch u-bolts from the topside of the bed.
Insert the 1/2-inch u-bolts through the drilled holes from the topside. On each u-bolt stud, install in order: 1/2-inch flat washer, spring, another 1/2-inch flat washer, and 1/2-inch lock nut. Tighten until the washers are touching the spring without compressing it. Do not over-tighten or the spring will be compressed.
Place all components that are removed on a flat, sturdy surface. All items will be reinstalled unless otherwise noted after the hitch is installed. For example, the spare tire is removed first and reinstalled at the end of the installation.
The dimensional variations between otherwise identical vehicles can be considerable. While the DH2302 was designed for easy installation, it may be necessary to modify the hitch slightly to compensate for vehicle manufacturer's tolerances. The manual notes that some drilling and trimming is required, and you may need to make minor adjustments during assembly.
Check the rotation of the top collar to ensure the bed is not rubbing against it and that it can rotate freely. If the ball does not rotate freely, drop the center section and remove any obstructions. This check must be completed before final torquing of all bolts.
When inverting the ball, ensure proper clearance between the ball and the truck's differential and driveline. Failure to do so may result in damage. A plug is included with the hitch that can be used for covering the socket when the ball is removed.
Yes. Use a good quality paint to spray cut edges of frame to prevent rusting. This helps protect the frame from corrosion after drilling.
Loctite Red is a threadlocker compound that must be applied to all bolts before tightening. It prevents bolts from loosening due to vibration during towing. Be sure to use Loctite Red on all bolts before tightening them according to the torque chart.
The DH2302 fits 2001-10 Chevy/GMC 2500 and 2007-10 Chevy/GMC 3500 trucks in both standard (6'-6") and long (8-foot) box configurations. Verify your truck model and bed length before purchasing.
The DH2302 is rated for 30,000 lbs Gross Towing Weight and 7,500 lbs tongue weight. However, you must not exceed your vehicle's maximum towing capacity as stated in your vehicle's owner's manual.
Yes. You must drill a 5-inch hole through the truck bed and two 19/32-inch holes for the u-bolts. The heat shield must also be trimmed. These are permanent modifications.
You need: torque wrench, drill, tape measure, 5-inch hole saw, 19/32-inch drill bit, 3/4-inch and 1-1/16-inch sockets and wrenches, and Loctite Red. A board for drilling and deburring tools are also recommended.
For Grade 5 bolts: 1/2-inch = 78 ft-lbs, 3/4-inch = 257 ft-lbs. For Grade 8 bolts: 1/2-inch = 119 ft-lbs, 3/4-inch = 380 ft-lbs. Apply Loctite Red to all bolts before tightening. Torque 3/4-inch bolts first, then outside 1/2-inch bolts, then center bolts.
Yes, trailer brakes are required. Always ensure the hitch ball is locked before towing, and load the trailer slightly tongue-heavy.
The hitch must be replaced and not reused. Do not use a damaged hitch, as unseen damage could cause serious injury or death.
Periodically clean dirt and debris from the ball and housing, and moderately lubricate with white lithium grease or equivalent.
Check the rotation of the top collar to ensure the bed is not rubbing against it. If the ball does not rotate freely, drop the center section and remove any obstructions. This must be done before final torquing of all bolts. If obstructions cannot be removed, contact Blue Ox customer service at (402) 385-3051.
Use a board while drilling to decrease the chances of the bit wobbling out of position. Place the board under the drill point to provide support and stability. It is also recommended to deburr the hole after drilling so the hitch will sit tight against the bed.
Ensure you are following the correct installation procedure: (1) Rotate the locking collar to release the latch pawl. (2) Align the ball with the collar and drop the ball into the hitch. (3) Release the locking collar. (4) Pull up on the ball to ensure it is locked. If the ball still will not lock, the hitch may be damaged or misaligned. Contact Blue Ox customer service at (402) 385-3051.
Stop immediately and do not tighten the bolts further. Carefully remove the u-bolt and inspect the wire or brake line for damage. If the wire or line is damaged, it must be repaired or replaced before the hitch can be used. The manual warns: 'Be sure to avoid pinching any wires or lines when installing the bolts.' Do not clamp the hitch over any wiring or brake lines.
On Sale Today
Original price was $699.99. Current price is $505.50.You save $194.49 (28%)
Free Shipping
Ships free on all orders
 Authorized Dealer

FREE ShippingFREE SHIPPING
Estimated delivery Thu, Sep 17 - Sun, Sep 20
Order before 2 PM EST Monday–Friday for same-day processing
Guaranteed safe & secure checkout
No reviews have been added for this product.