BlueOx Tow Bar Base Plate, Front Mount, RV Flat Towing for Select, VOLKSWAGEN JETTABlue OxOriginal price was $699.99. Current price is $609.00.Out of Stock
View productOur in-house experts typically reply within one business day.

Blue Ox
Verify Fitment
Select your vehicle to confirm this part fits.
2007 - 2009 Volkswagen Rabbit
Confirmed to Fit
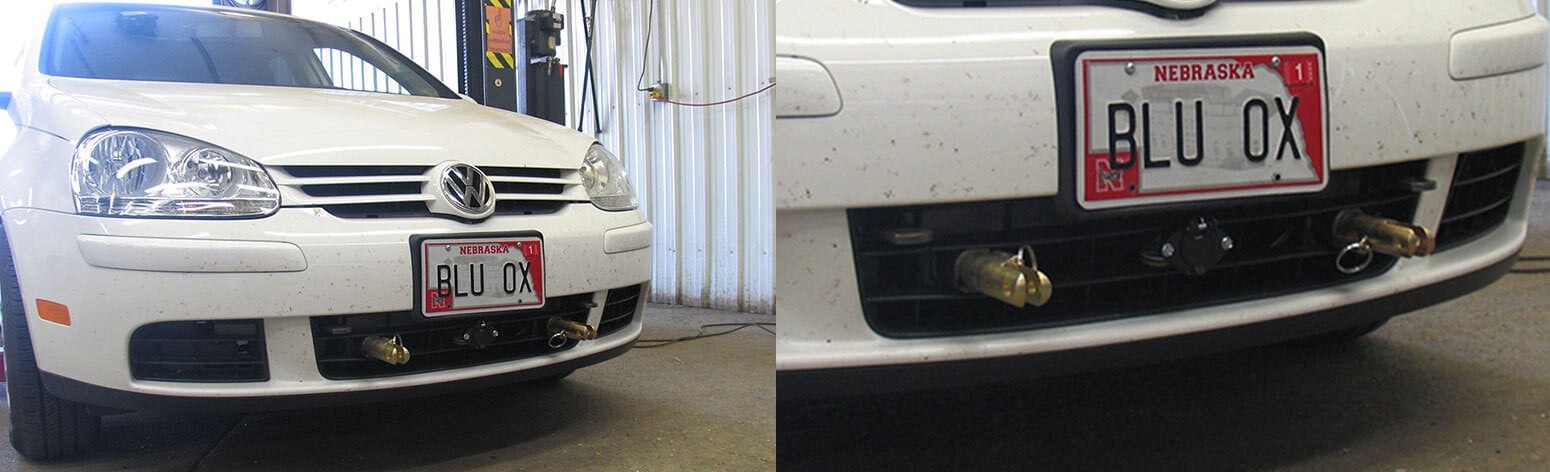

Always the correct part
We know our products
Quality Products
Free Shipping!
Always the correct part
We know our products
Quality Products
Free Shipping!
On Sale Today
Original price was $699.99. Current price is $609.00.You save $90.99 (13%)
Free Shipping
Ships free on all orders
 Authorized Dealer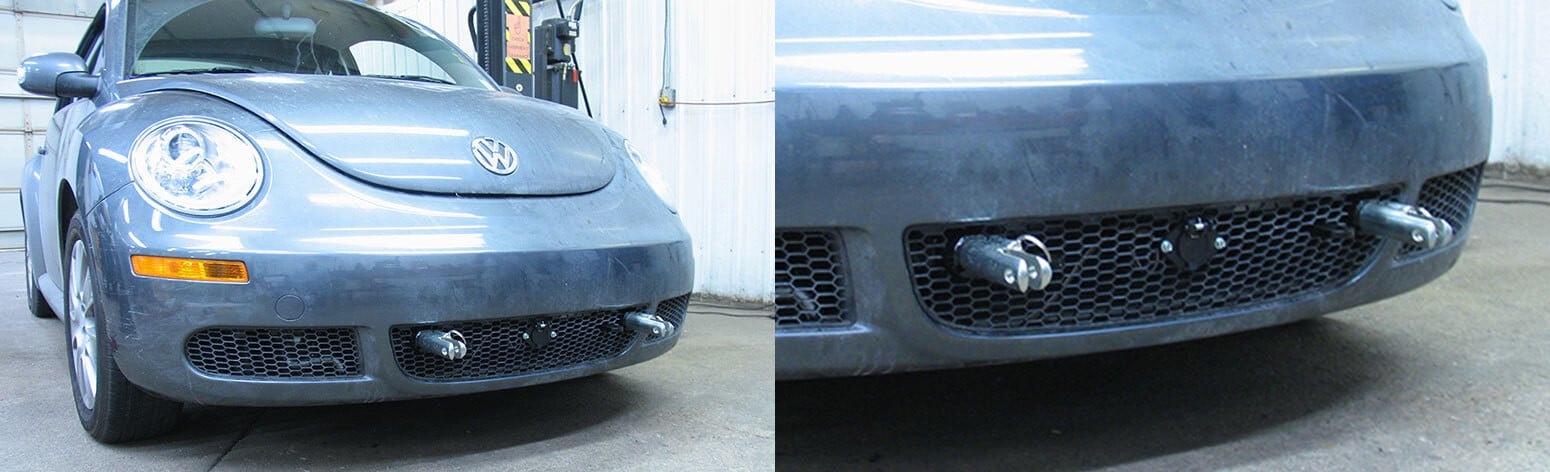

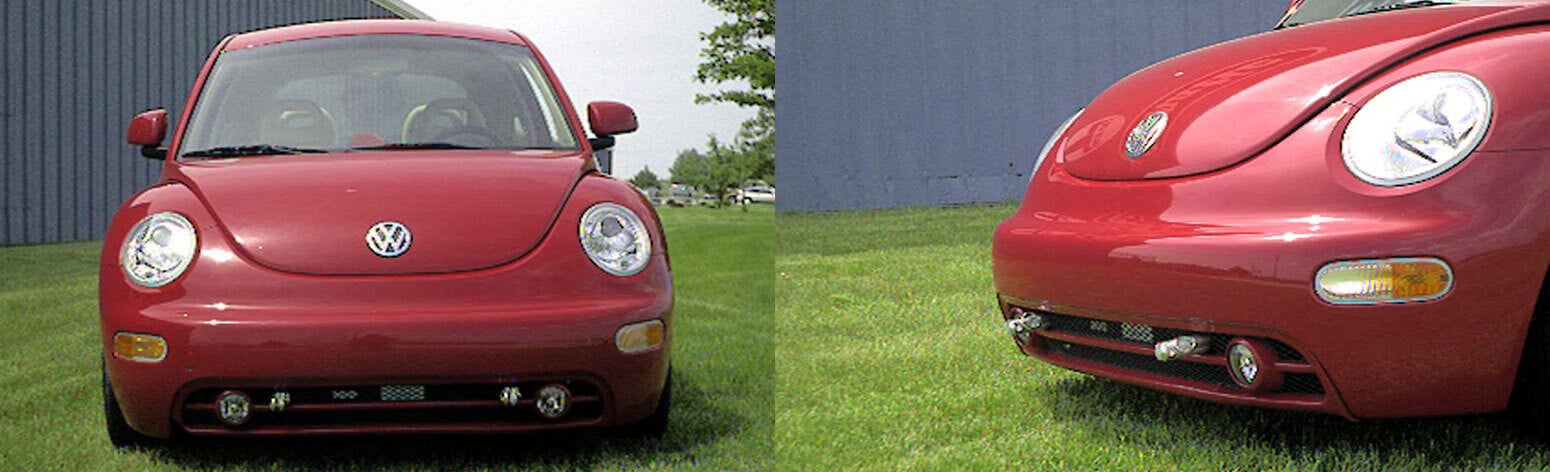

Quick Ship
In stock and ready to ship — order now!
FREE ShippingFREE SHIPPING
Estimated delivery Mon, Sep 28 - Thu, Oct 1
Order before 2 PM EST Monday–Friday for same-day processing
Guaranteed safe & secure checkout

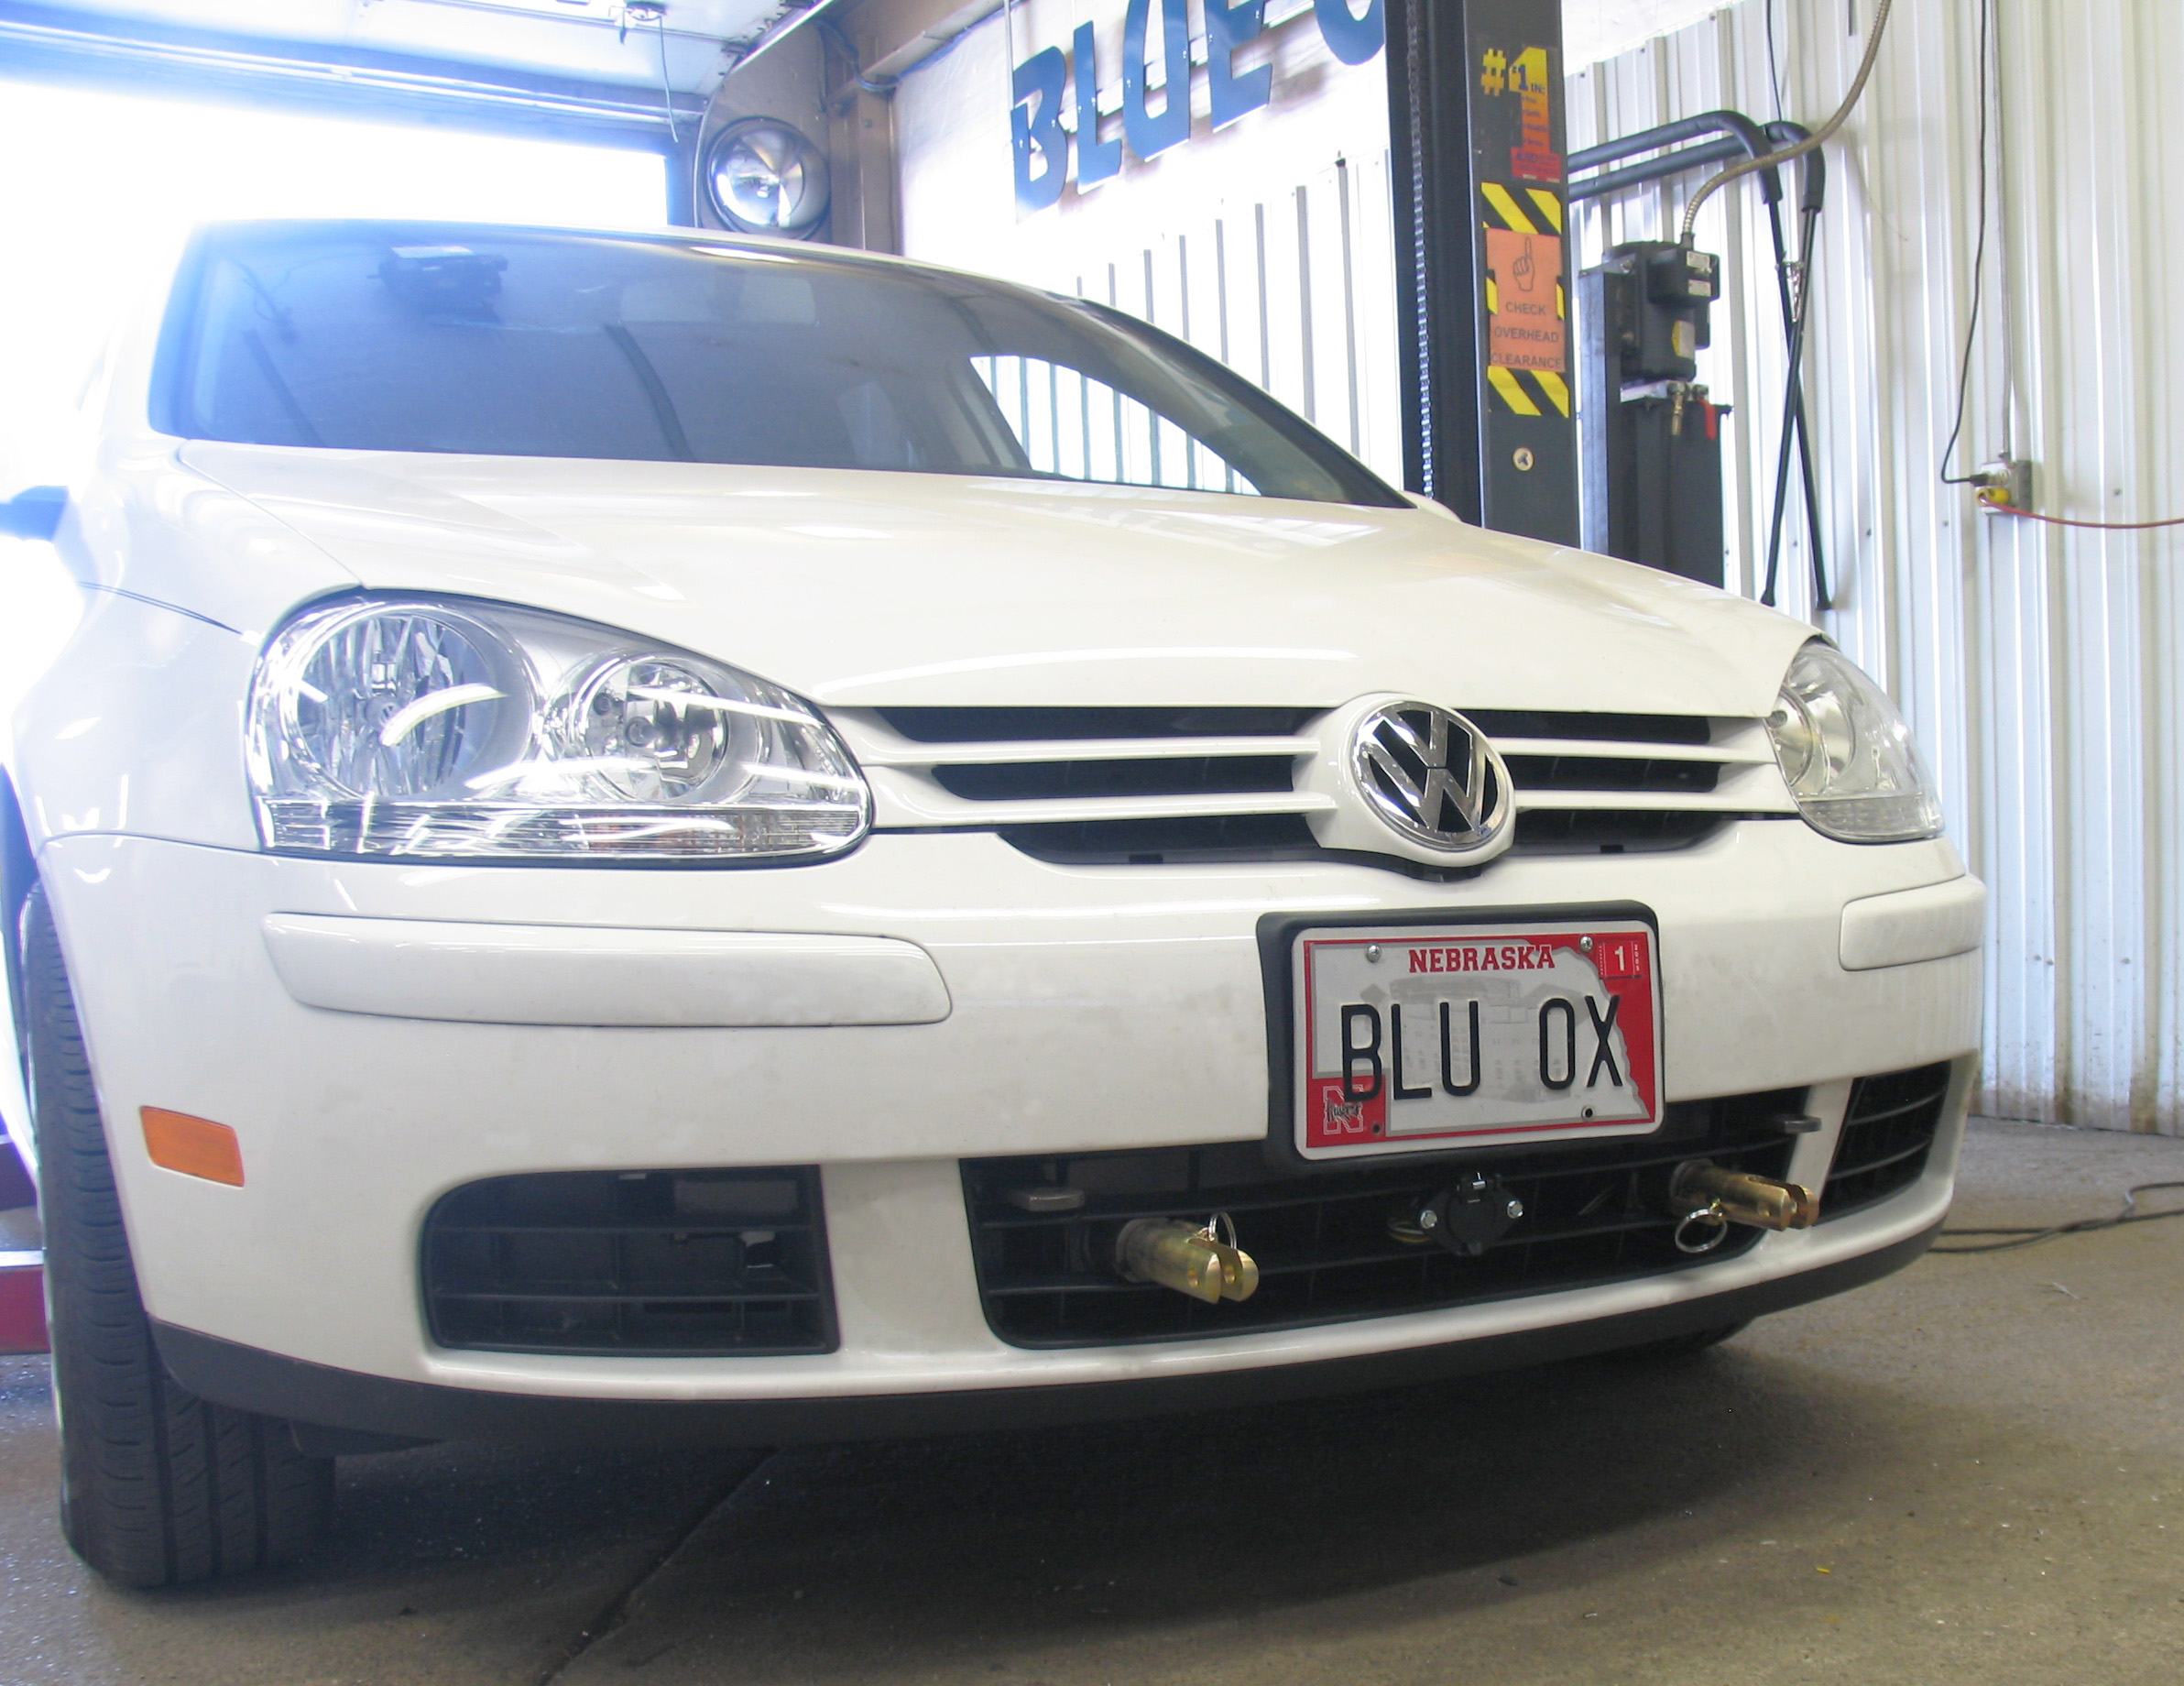
High-quality Steel Material: Ensures sturdiness and long-lasting durability.
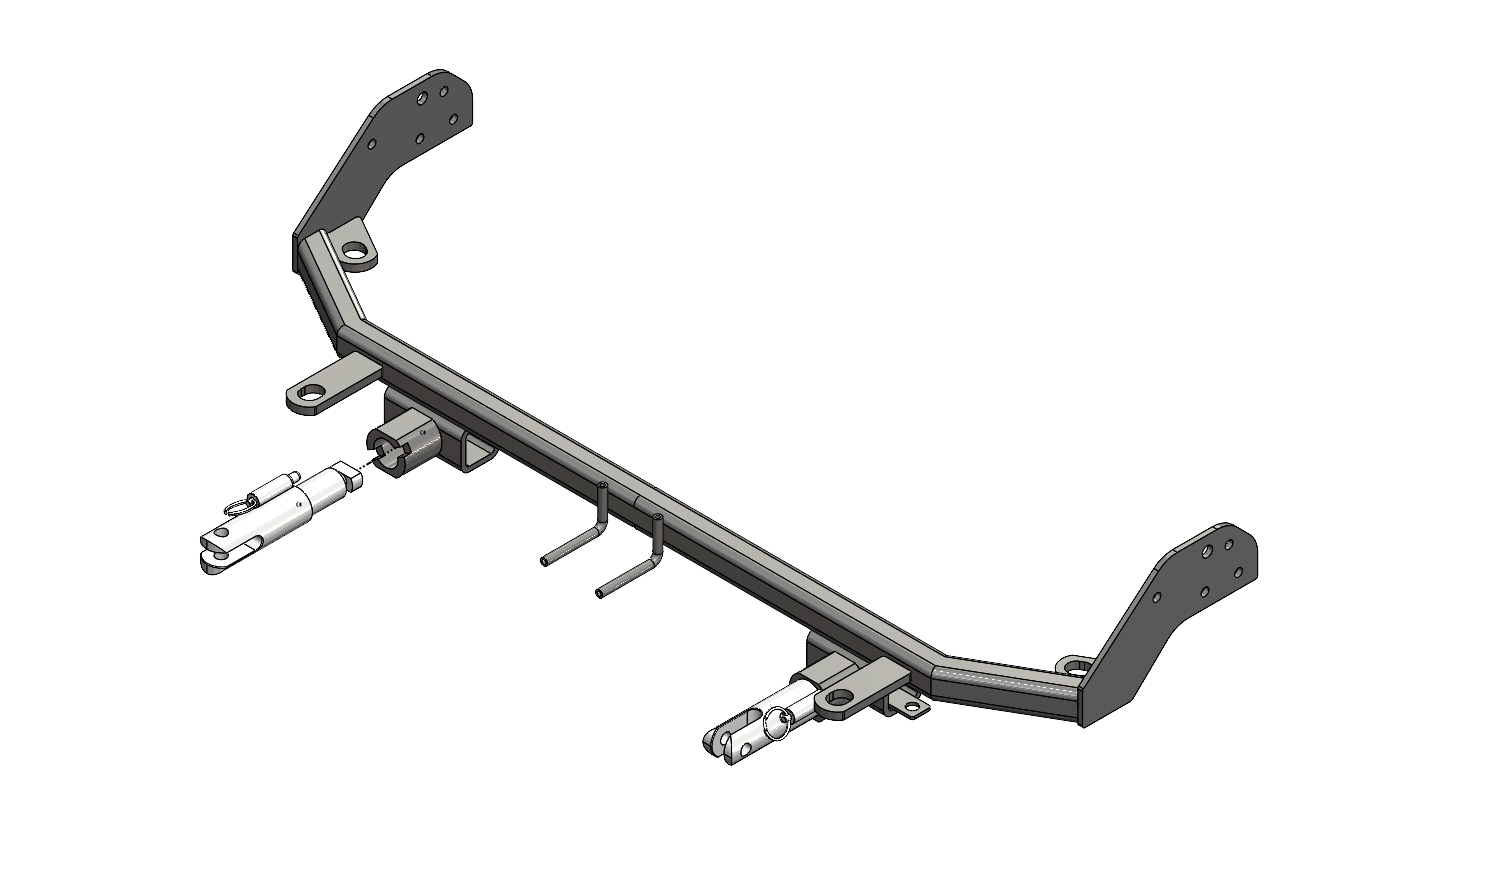
Material: Steel
Color: Black
Finish: Powder Coat
Mounting Type: Bolt On
Mounting Hardware Included Yes/No: Yes
The Blue Ox BX3826 Tow Bar Bracket is your heavy-duty solution for towing needs. Engineered to perfection using high-quality steel, this base plate is custom designed for specificity, ensuring a perfect fit for your towed vehicle. The bracket comes in a sleek black finish, offering durability and resistance to wear and tear with its powder coat. Featuring a convenient bolt-on mounting type, the installation process is effortless and straightforward. The package includes all the necessary mounting hardware, eliminating the need for additional purchases. With its robust design and superior functionality, this Blue Ox Tow Bar Bracket is the ultimate choice for your towing needs.

Blue Ox is known internationally for recreational and commercial towing products, manufacturing in Pender, Nebraska since 1925. The line covers tow bars and vehicle-specific baseplates for flat towing behind a motorhome, sway control and weight distributing hitches, supplemental braking accessories and towing wiring, backed by patented designs and long-standing customer service.
Blue Ox has manufactured since 1925 and is recognised internationally for towing products and customer service. The company operates from Pender, Nebraska, where it grew out of Automatic Manufacturing Co., a business that started with cattle oilers and developed into agricultural equipment, tractor accessories and trailer towing hardware. That agricultural engineering heritage still shows in how the towing products are built, and the company holds patents across weight distribution, fifth wheel and tow bar designs.
Flat towing is the discipline Blue Ox is best known for. Towing a car with all four wheels on the ground behind a motorhome demands a system that stays rigid under braking, articulates properly over uneven ground, and connects to the towed vehicle at points strong enough to take the load. Blue Ox tow bars handle the first two, with self-aligning arms that latch under tension and release without a struggle when the load is off them. Vehicle-specific baseplates handle the third, engineered per make and model to tie into structural mounting points behind the fascia.
The wider flat towing range covers supplemental braking systems, safety cables and the accessories that make a complete legal setup, along with baseplate wiring and dinghy towing harnesses that pass lighting signals to the towed vehicle without back-feeding its electrical system.
For conventional trailer towing, Blue Ox weight distributing hitches with integrated sway control transfer tongue load onto the tow vehicle's front axle and resist the yaw that crosswinds and passing trucks induce.
The company describes its foundation as customer service, designing around what owners actually ask for, and it runs an RV park adjacent to the factory where customers can stay. Sister operations at the same Nebraska site include Automatic grain roller mills and MAD-RAMPS pivoting ramp systems.
Experts available to answer your questions
Call 888-634-94943 Years
1 compatible vehicles
| Year | Make & Model | Notes |
|---|---|---|
| 2007 - 2009 | Volkswagen Rabbit | Comes with Removable Attachment Tabs Install Rating 3 Bumper Fascia Must Be Removed/Replaced During Install Requires Some Trimming of Bumper Fascia/Plastic/And/Or Grill Minor Drilling Required Requires Some Trimming of the Air Dam Use only w/Motorhome Mount Tow Bars Or PN BX8833/BX88151 Adapters Only Use Acclaim w/23”: 30” Spaced Removable Tab Baseplates Only Use Adventurer with 18”: 41” Spaced Removable Tab Baseplatess Removable Tabs w/Only 1 Hole Will Not Attach to Car Mount Tow Bars or Adapter |
The BlueOx Tow Bar Base Plate, Front Mount, RV Flat Towing for Select, VOLKSWAGEN RABBIT (Part #FDRWBX3826) fits 2007-2009 Volkswagen Rabbit models. The 2009 model year is the last year covered by this part number. For newer models, check for an updated version.
The BlueOx Tow Bar Base Plate, Front Mount, RV Flat Towing for Select, VOLKSWAGEN RABBIT (Part #FDRWBX3826) fits the following vehicles: 2007-2009 Volkswagen Rabbit. Always verify your specific year, make, and model before ordering.
Yes, the BlueOx Tow Bar Base Plate, Front Mount, RV Flat Towing for Select, VOLKSWAGEN RABBIT (Part #FDRWBX3826) is designed to fit the 2007-2009 Volkswagen Rabbit.
The BlueOx Tow Bar Base Plate, Front Mount, RV Flat Towing for Select, VOLKSWAGEN RABBIT (Part #FDRWBX3826) Refer to the included instructions for installation details. Basic hand tools are typically all you need.
The BX3826 is designed for 2007-09 VW Rabbit 2.5 without foglights. If your vehicle has foglights or is a different model year or engine size, this baseplate is not compatible. Confirm fitment with a Blue Ox Dealer before purchasing.
Motorhome mount tow bars are recommended for use with the BX3826. The RangeFinderII, Adventurer, and Ambassador tow bars cannot be used due to the design of the removable tabs. The Acclaim tow bar may be used, but will not fold and store on the front of the vehicle. Adapters, except the BX8833 and BX88151, cannot be used with this baseplate.
The BX3826 attachment tab height is 12 inches and the attachment tab width is 22 inches.
Required tools include: T-25, T-27, and T-30 Torx sockets; 9/16", 10MM, 13MM, and 16MM sockets; 1 1/4" hole saw; 13/32" drill bit; reciprocating saw; large clamp; and utility knife.
The kit includes: 1 welded baseplate (61-6410); 8 nut plates (61-5208); 8 3/8-16 x 1 1/4" Grade 5 hex head bolts (201-0368); 8 3/8" lock washers (203-0010); 6 3/8" flat washers (203-0003); 1 6MM-1.00 x 45MM Grade 8.8 hex bolt (201-0702); 1 6MM lock washer (203-0161); 1 5/16" flat washer (203-0002); 2 #12-14 x 1" self-drilling screws (201-0979); 2 10-32 x 1/2" slot round head screws (201-0192); 2 #10 lock washers (203-0054); 2 #10-32 hex nuts (202-0047); 2 4-way connector adapters (101-5822); 2 attachment tab assemblies (62-3468); 2 36" Class III baseplate safety cables (226-0046); 2 3/8" zinc-plated quicklinks (229-0359); and 2 receiver cap plugs (290-0437).
Blue Ox towing products are intended to be installed by Blue Ox Dealers who are familiar with the products and have the equipment and knowledge necessary for fit work. Blue Ox Dealers can be found at www.blueox.us or by contacting the Customer Care Department at (402) 385-3051. The installation involves removal and reinstallation of multiple front-end components, cutting and trimming, and drilling, which requires specialized knowledge and tools.
The front fascia, headlight assemblies, hood latch, horn bracket, turbo cooler, air dam, and metal bumper must be removed and reinstalled. The water reservoir must also be removed and reinstalled. These components are removed in a specific sequence and set aside for later reinstallation.
Yes, drilling is required. You must drill holes in the metal bumper using a 1 1/4" hole saw (step 14) and additional holes using a 13/32" drill bit to align with the baseplate (step 19). The frame webbing must also be cut using a reciprocating saw (step 10), and the air dam and belly pan must be trimmed.
The frame webbing must be cut using a reciprocating saw. Measure 2" and 5 1/2" down from the top edge of the frame end and mark on the side of the frame webbing on both sides. Cut the webbing to the side of the frame rail and make a vertical cut flush with the side of the frame between the first two cuts. All cut edges of the frame must be painted with good quality paint to prevent rusting.
The metal bumper must have areas cut out to match marks made from the bumper bracket (step 12), and all cut areas must be painted to prevent corrosion. The air dam must be trimmed as shown in step 16. The fascia webbing inserts must be trimmed around the baseplate on both the driver's and passenger's sides (steps 27-29). On the backside of the fascia, measure and mark 1" to 1 1/8" down to the crease in the fascia existing loop and trim on both sides.
Torque specifications depend on bolt size and grade. For Grade 5 bolts: 1/4" = 10 ft-lbs, 5/16" = 19 ft-lbs, 3/8" = 33 ft-lbs, 7/16" = 54 ft-lbs, 1/2" = 78 ft-lbs, 5/8" = 154 ft-lbs. For Grade 8 bolts: 1/4" = 14 ft-lbs, 5/16" = 29 ft-lbs, 3/8" = 47 ft-lbs, 7/16" = 78 ft-lbs, 1/2" = 119 ft-lbs, 5/8" = 230 ft-lbs. For metric Grade 8.8 bolts: 6MM = 6 ft-lbs, 8MM = 16 ft-lbs, 10MM = 31 ft-lbs, 12MM = 54 ft-lbs, 14MM = 89 ft-lbs. For metric Grade 10.9 bolts: 6MM = 8 ft-lbs, 8MM = 22 ft-lbs, 10MM = 40 ft-lbs, 12MM = 70 ft-lbs, 14MM = 117 ft-lbs. Use Loctite Red on all bolts before tightening.
The 3/8-16 bolts are Grade 5 bolts. According to the torque chart, Grade 5 3/8" bolts should be torqued to 33 foot-pounds. Loctite Red must be applied to all bolts before tightening.
The removal sequence is: (1) Remove top fascia bolts and clips using T-25 socket and flat screwdriver; (2) Remove Torx bolts from wheel wells using T-25 socket; (3) Remove Torx bolts under the fascia using T-25 socket; (4) Release plastic clips on front of fascia and remove fascia; (5) Remove bumper bolts using 16MM socket and T-30 socket; (6) Remove center bumper bolts using T-30 socket; (7) Remove water reservoir bolts using 10MM socket and disconnect fluid lines and electrical plugs; (8) Remove bolts behind water reservoir using 10MM socket; (9) Remove horn bolts using 13MM socket. Set all components aside for later reinstallation.
Slide and align the baseplate back onto the frame rail with the nose facing downwards (step 17). Align the baseplate with the back existing hole on the passenger side, trying to center the holes as much as possible. Level the baseplate on the driver's side and clamp in place (step 18). Using a 13/32" drill bit, drill the top back hole. Install the 3/8" hex bolt and lock washer with the 3/8" nut plate inserted into the frame end. Using the baseplate as a template, drill the remaining holes using a 13/32" drill bit, ensuring attachment tabs are level with the vehicle (step 19). Insert nut plates into the 1 1/4" holes on the bumper and tighten 3/8-16 bolts and lock washers on both sides.
A temporary sensor must be removed by cutting the tab holding it with a reciprocating saw, being careful not to cut into the radiator (step 15). The sensor is then reinstalled to the clip on the baseplate next to the removable tab insert (step 20).
When reinstalling the water reservoir, use 1/2" spacers for the reservoir and ensure they do not slide off (step 22). Install six 3/8" lock washers between the reservoir and baseplate using a 6MM hex bolt and lock washer, then tighten the water reservoir to its original location (step 23).
Remove the black plastic webbing insert on the driver's side from the backside of the fascia by releasing the clip (step 25). On the passenger side, remove the plastic black webbing insert and the single screw holding it in place using a Phillips screwdriver (step 26). On the backside of the fascia, measure and mark 1" to 1 1/8" down to the crease in the fascia existing loop and trim on both sides (step 27). Reinstall the fascia. Replace the black plastic webbing insert on the passenger side as close to its original position as possible, trimming around the baseplate to make it fit, and replace the screw just below the original location (step 28). Replace the black plastic webbing on the driver's side as close to its original position as possible, trimming around the baseplate on the driver's side to make the webbing fit and snap back into place (step 29).
Permanent baseplate safety cables are strongly recommended when towing a vehicle with a tow bar. The kit includes 2 36" Class III baseplate safety cables (226-0046) and 2 3/8" zinc-plated quicklinks (229-0359). The cables must be connected from the baseplate to the frame rail or cross member of the vehicle's frame. Do not mount the permanent baseplate safety cables against wires, hoses or brake lines. These cables should remain installed as long as the baseplate is installed on the vehicle. Permanent baseplate safety cables are to be used in conjunction with, and NOT a replacement for legally required safety cables attaching the towed vehicle to the towing vehicle.
Before each towing trip, inspect all towing equipment for cracked welds, missing or worn parts, and loose bolts. Ensure all bolts are tightened to the recommended torque specifications using Loctite Red.
All electrical connections must be plugged in properly and functioning before installing the fascia. This is critical to ensure the towing system operates correctly.
Yes, the attachment tabs should be removed when not in use.
If a bolt is lost or needs replacement, use a replacement bolt of the same grade as the original. In most cases, this will be Grade 5. Replacement parts may be ordered through your nearest Blue Ox Dealer or Distributor, or by calling the 24/7 Customer Care Team at (402) 385-3051. Do not substitute homemade or non-typical parts.
The Bx8848 4 Diode Wiring Kit is recommended for this vehicle.
Blue Ox Customer Care can be reached at 1-800-228-9289 or (402) 385-3051. For additional towing information, contact REMCO at 1-800-228-2481. Blue Ox Dealers can be found at www.blueox.us.
The BX3826 is designed for 2007-09 VW Rabbit 2.5 without foglights only. Confirm fitment with a Blue Ox Dealer before purchasing.
Motorhome mount tow bars are recommended. RangeFinderII, Adventurer, and Ambassador tow bars cannot be used. The Acclaim tow bar may be used but will not fold and store on the front.
You need T-25, T-27, and T-30 Torx sockets; 9/16", 10MM, 13MM, and 16MM sockets; 1 1/4" hole saw; 13/32" drill bit; reciprocating saw; large clamp; and utility knife.
Yes. You must drill holes in the metal bumper using a 1 1/4" hole saw and additional holes using a 13/32" drill bit. The frame webbing must be cut with a reciprocating saw, and the air dam and belly pan must be trimmed.
Grade 5 3/8" bolts should be torqued to 33 foot-pounds. Apply Loctite Red to all bolts before tightening.
Yes, two 36" Class III baseplate safety cables and two 3/8" quicklinks are included. They are strongly recommended and must be connected from the baseplate to the frame rail or cross member.
All electrical connections must be plugged in properly and functioning before installing the fascia.
The manual specifies that when drilling the remaining holes using a 13/32" drill bit, you must ensure that attachment tabs are level with the vehicle. If they are not level after drilling, you may need to make minor adjustments by filing a hole slightly or bending end plates to compensate for auto manufacturer's tolerances, as noted in the instructions.
When sliding and aligning the baseplate back onto the frame rail, try to center the holes as much as possible with the baseplate. The manual notes that dimensional variations between otherwise identical vehicles can be considerable, and minor adjustments may be necessary, including filing a hole slightly or bending end plates to compensate for auto manufacturer's tolerances.
Total for 1 item:
$609.00$699.99
No reviews have been added for this product.