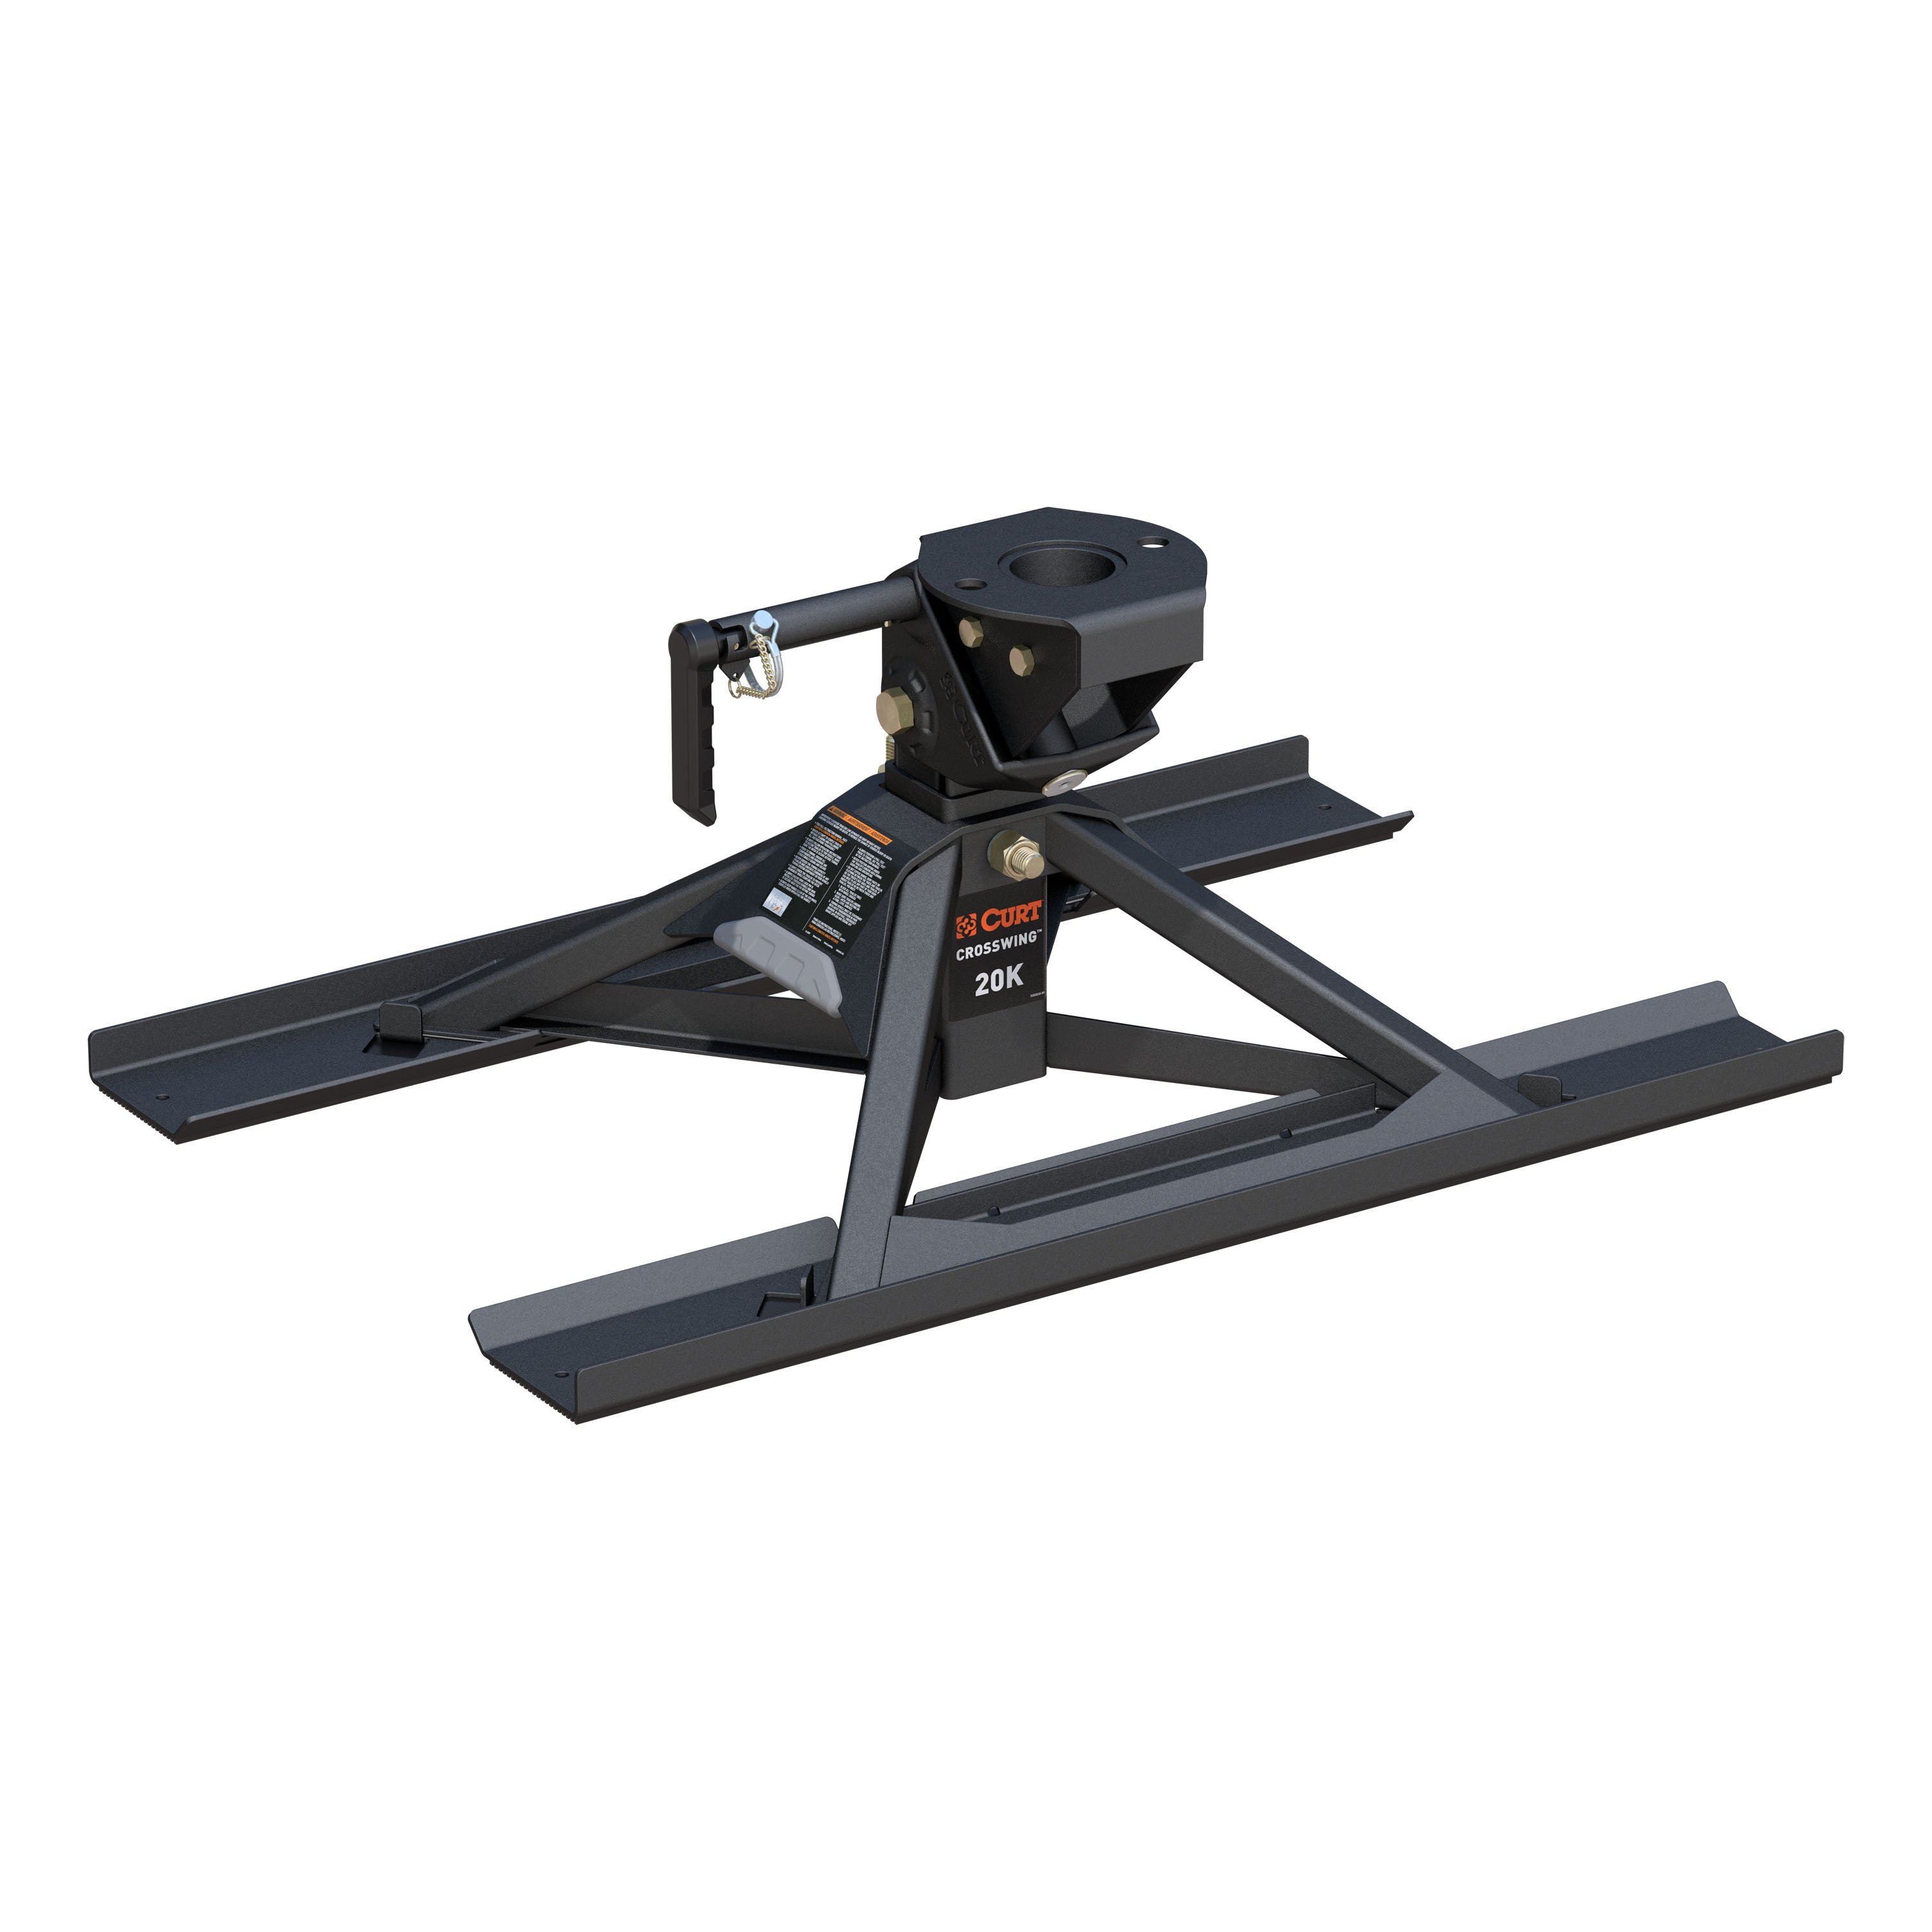
CURT CrossWing 20K 5th Wheel Hitch with Bed Protectors for 2-5/16" GooseneckCURTOriginal price was $1,317.95. Current price is $997.95.In Stock
View productOur in-house experts typically reply within one business day.

CURT




Always the correct part
We know our products
Quality Products
Free Shipping!
Always the correct part
We know our products
Quality Products
Free Shipping!
On Sale Today
Original price was $1,087.95. Current price is $824.95.You save $263.00 (24%)
Free Shipping
Ships free on all orders
 Authorized Dealer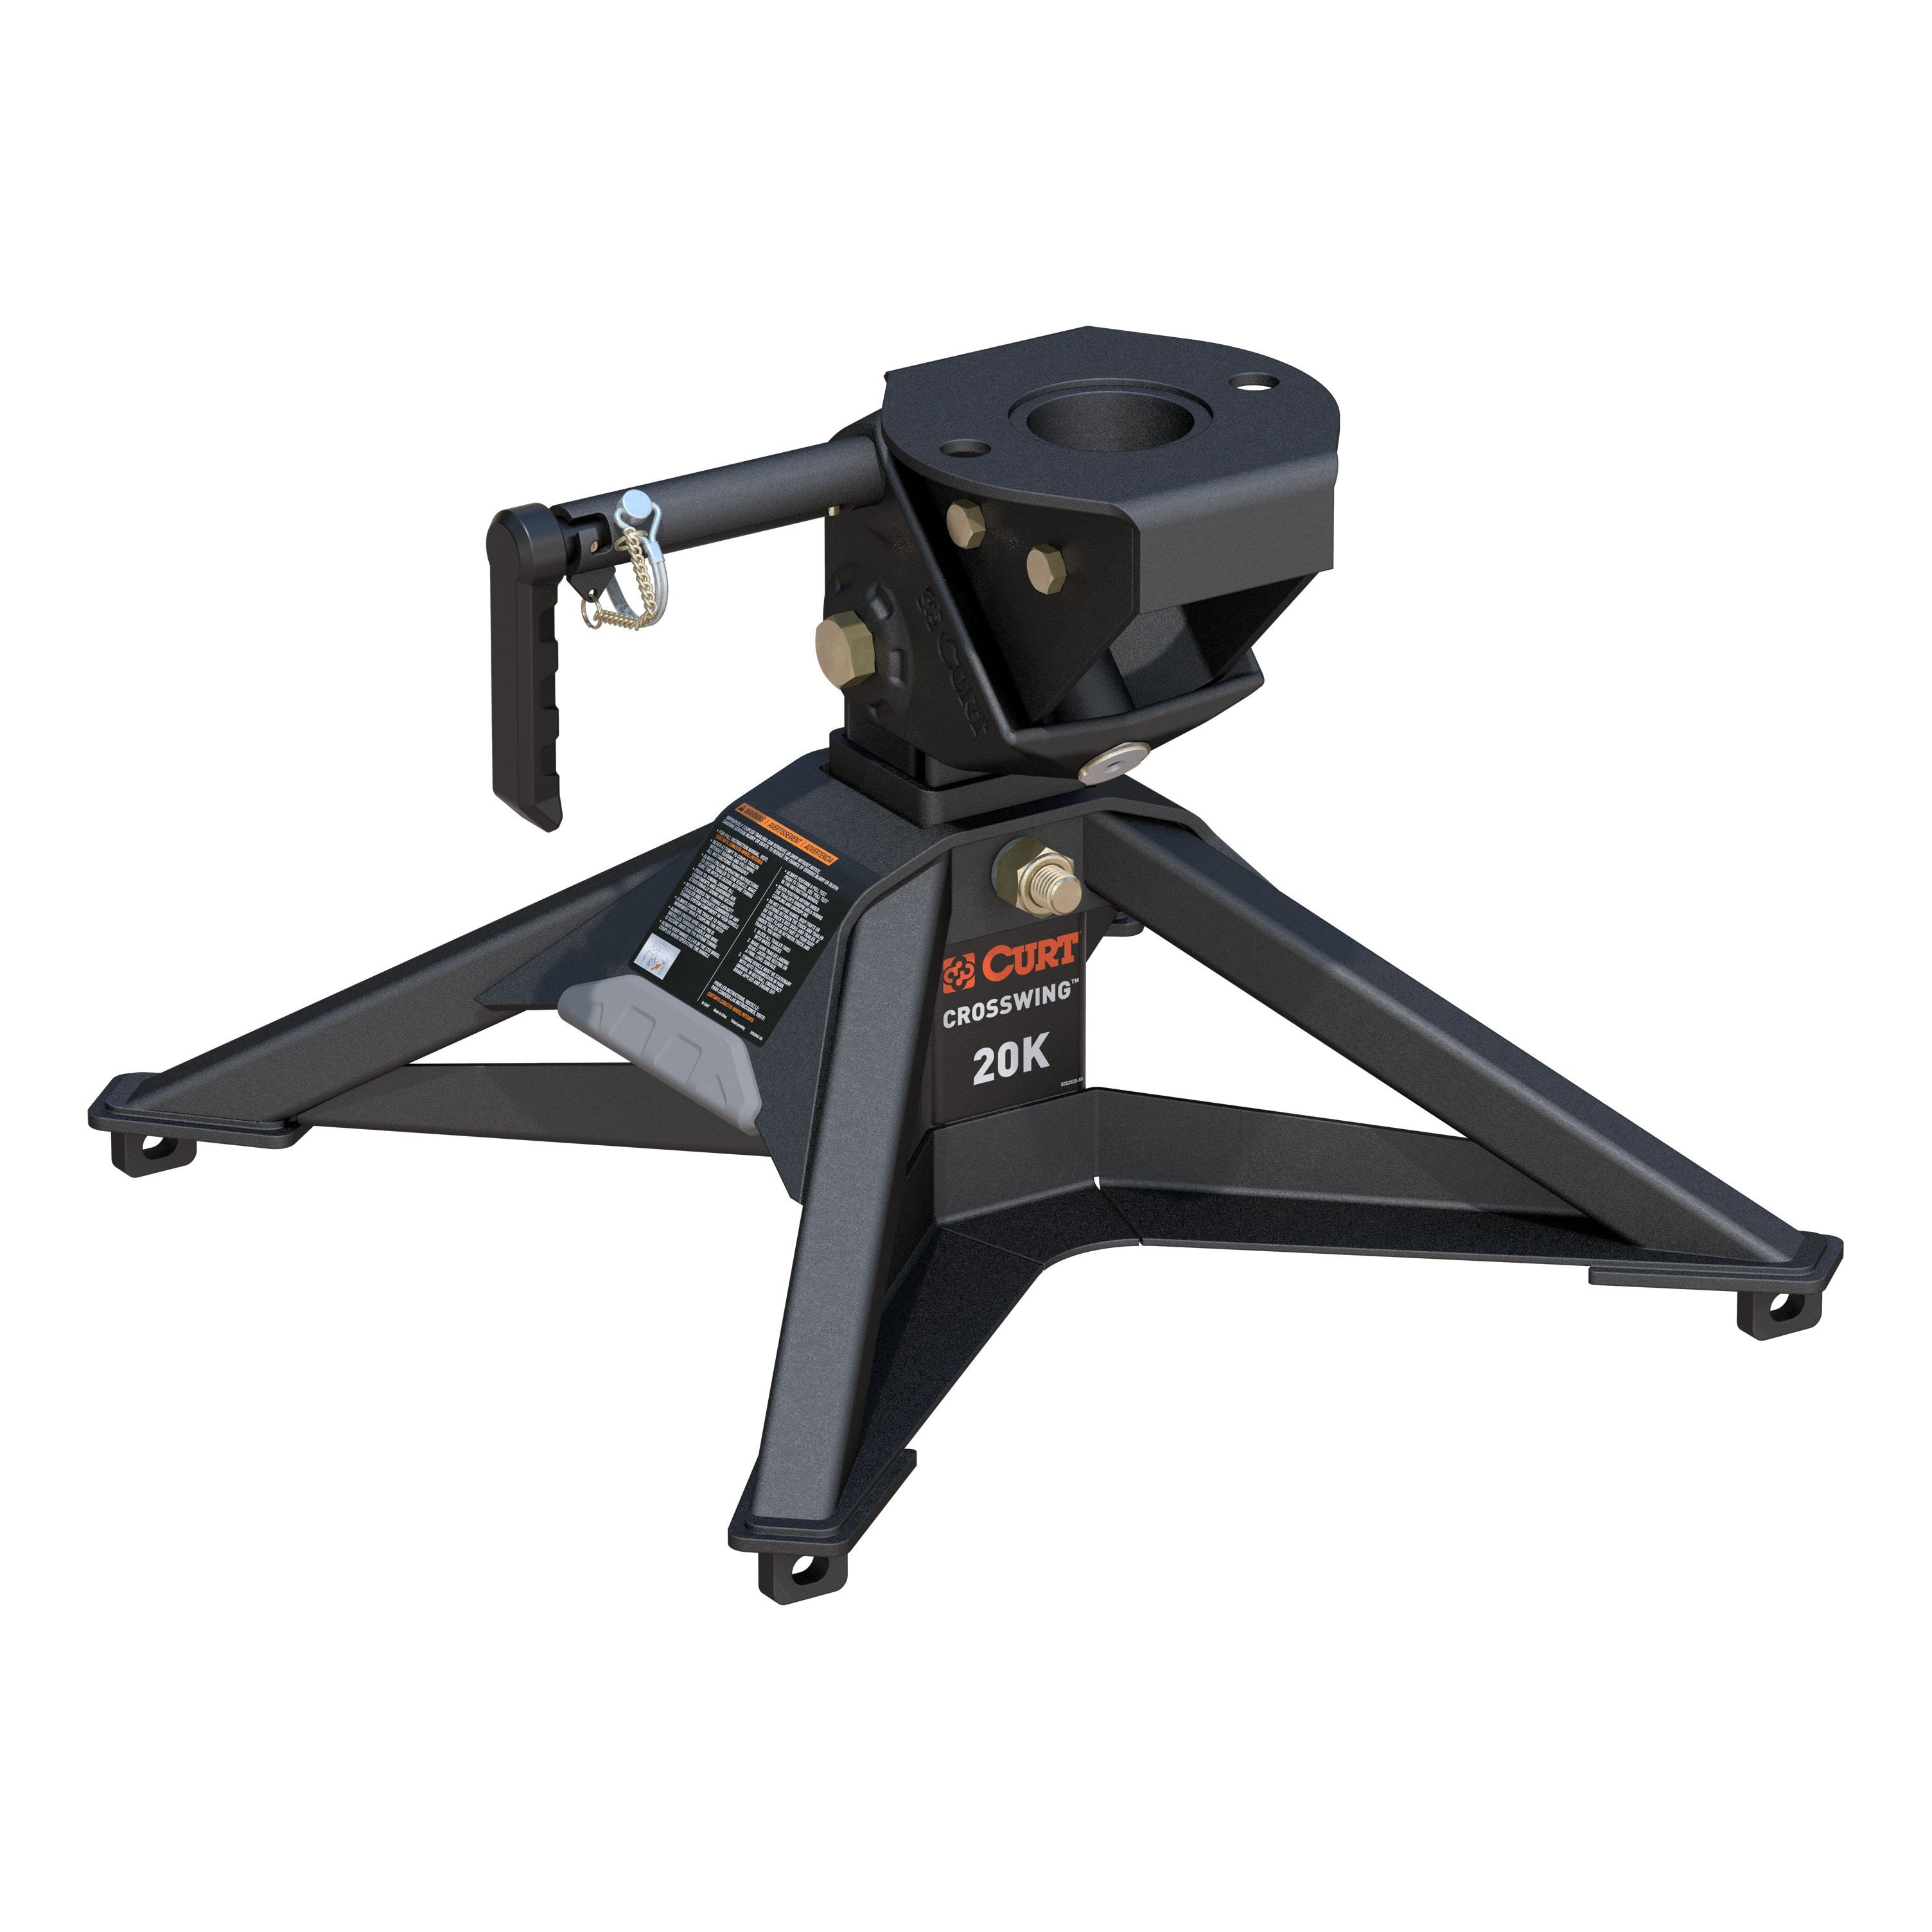
Quick Ship
In stock and ready to ship — order now!
Shipping from Eau Claire, WIFREE SHIPPING
Estimated delivery Thu, Sep 17 - Sat, Sep 19
Order before 2 PM EST Monday–Friday for same-day processing
Guaranteed safe & secure checkout
Patent pending
Capacity limited to lowest-rated towing component

Warranty: Limited Lifetime
Finish: TEXTURED BLACK POWDER COAT
Gross Trailer Weight (Pounds): 20,000 LBS
Installation Time Exact (Minutes): 0
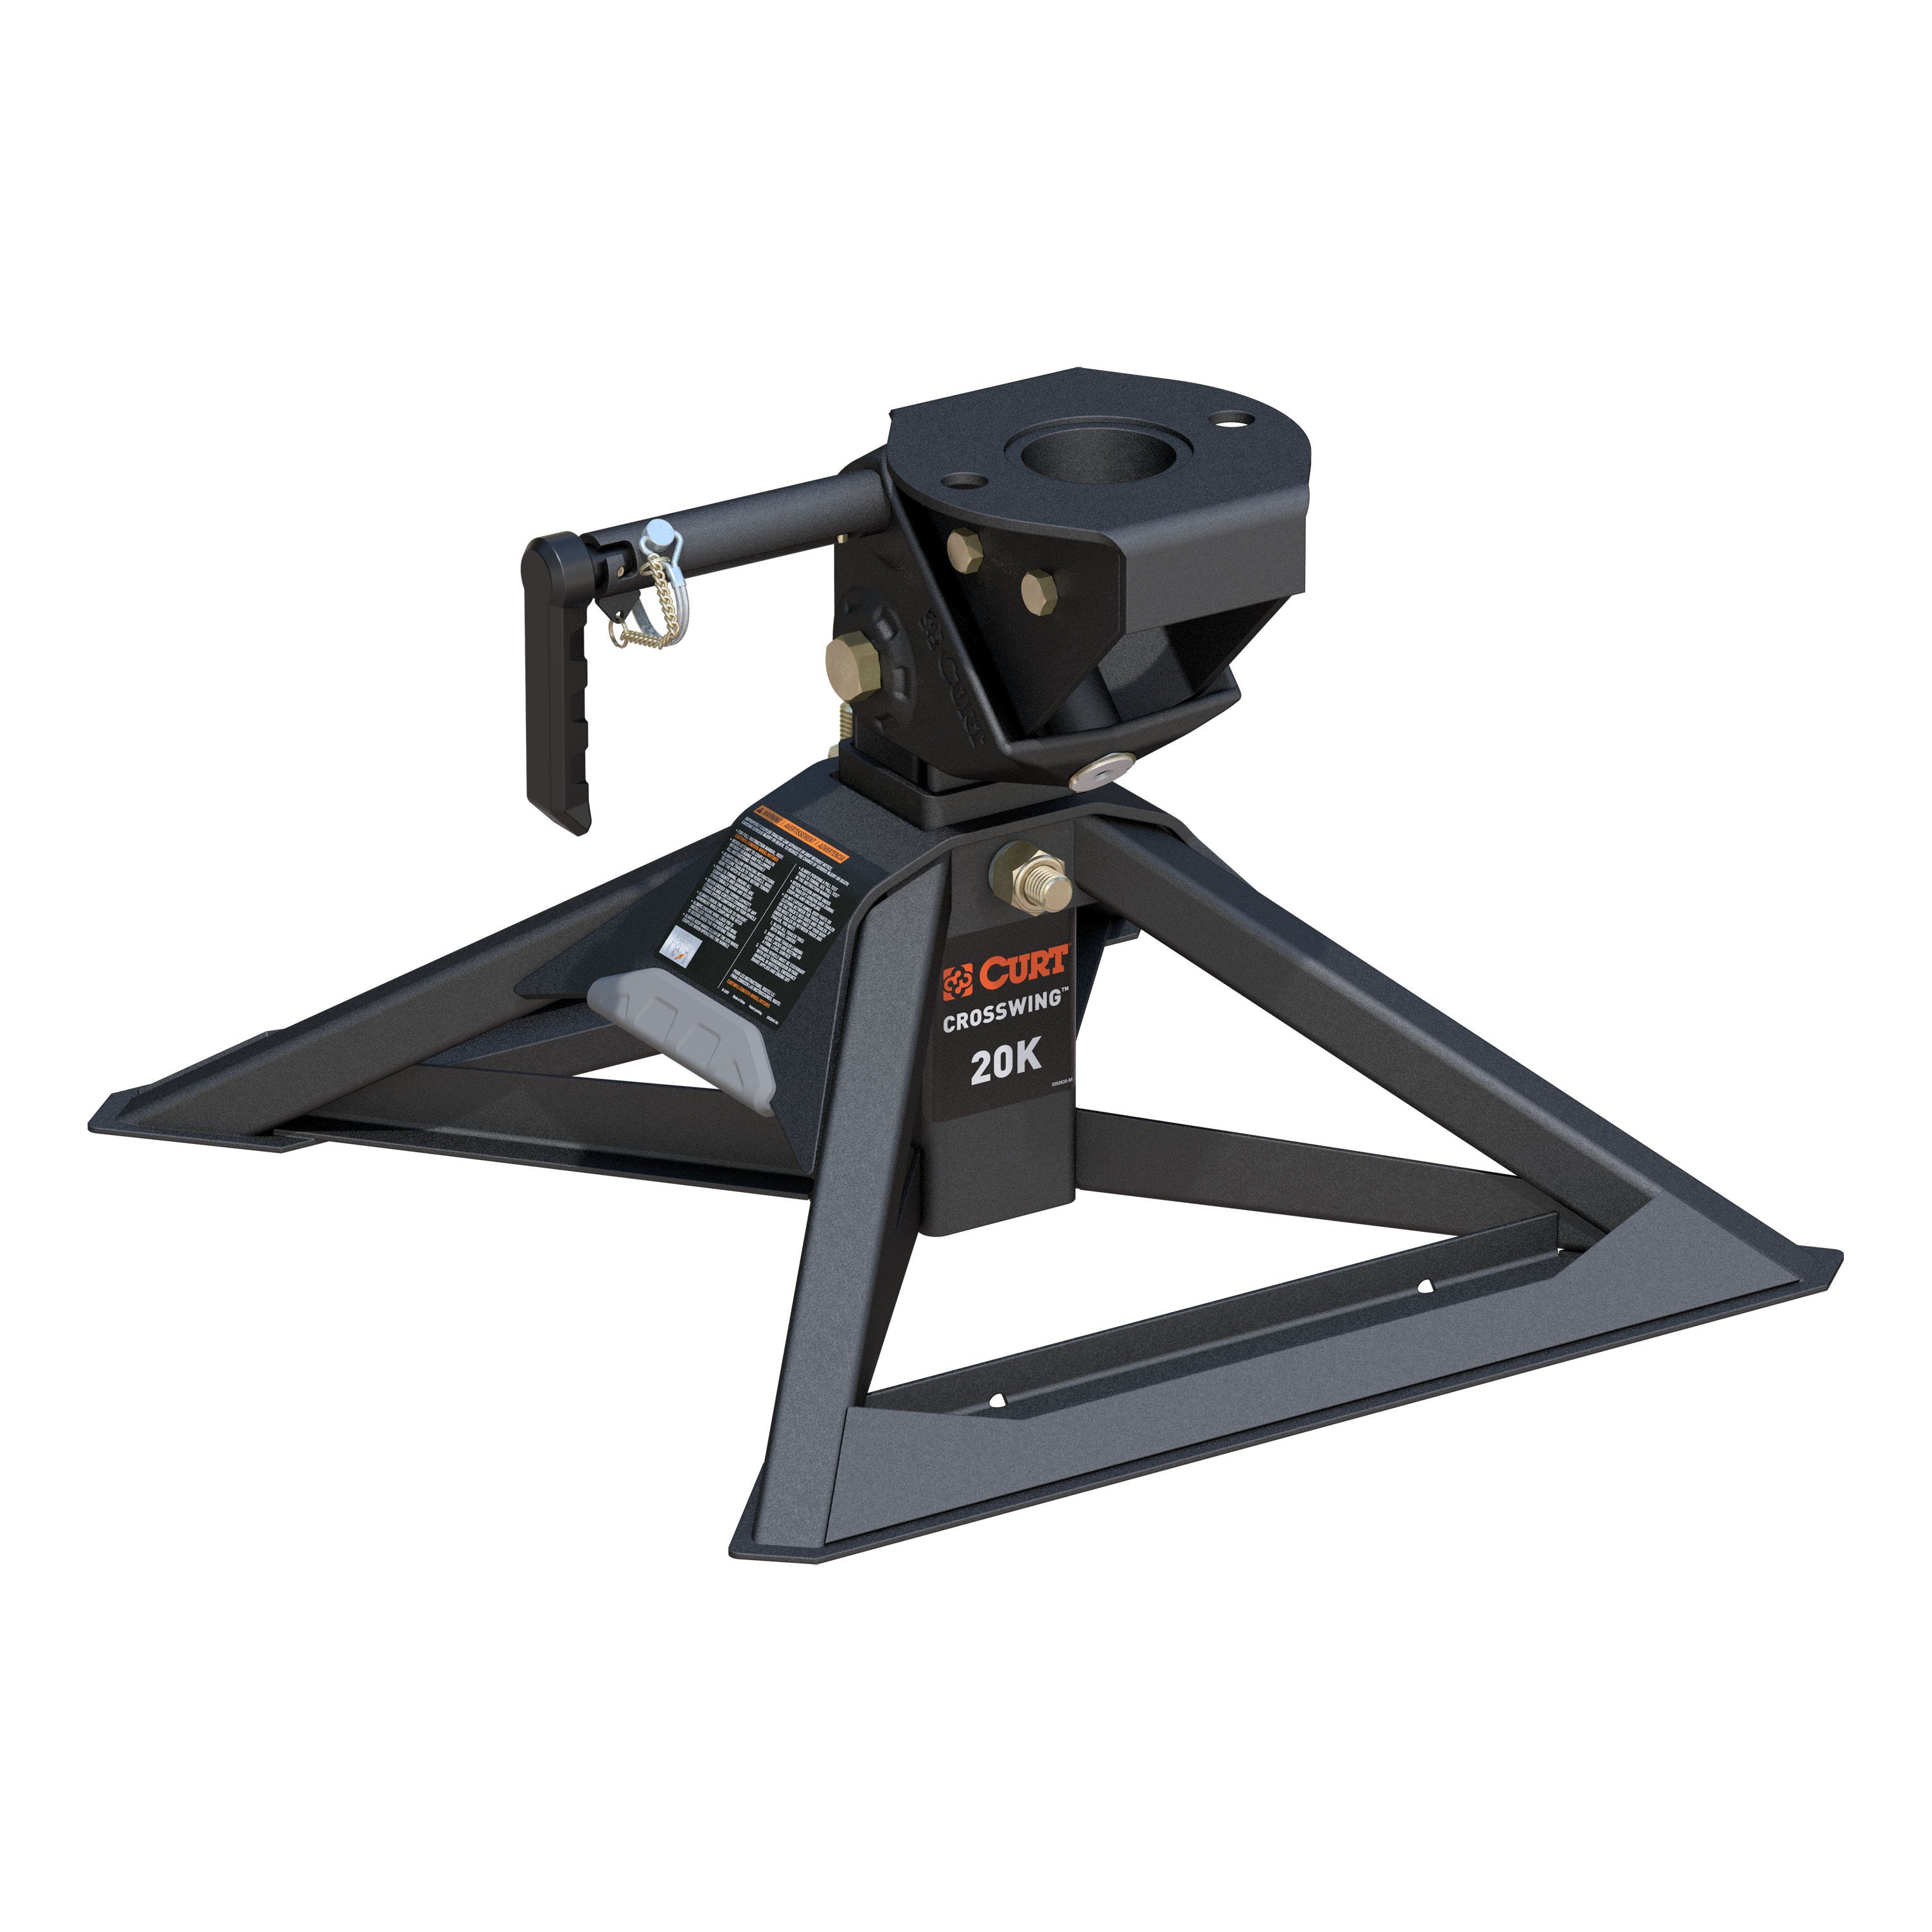
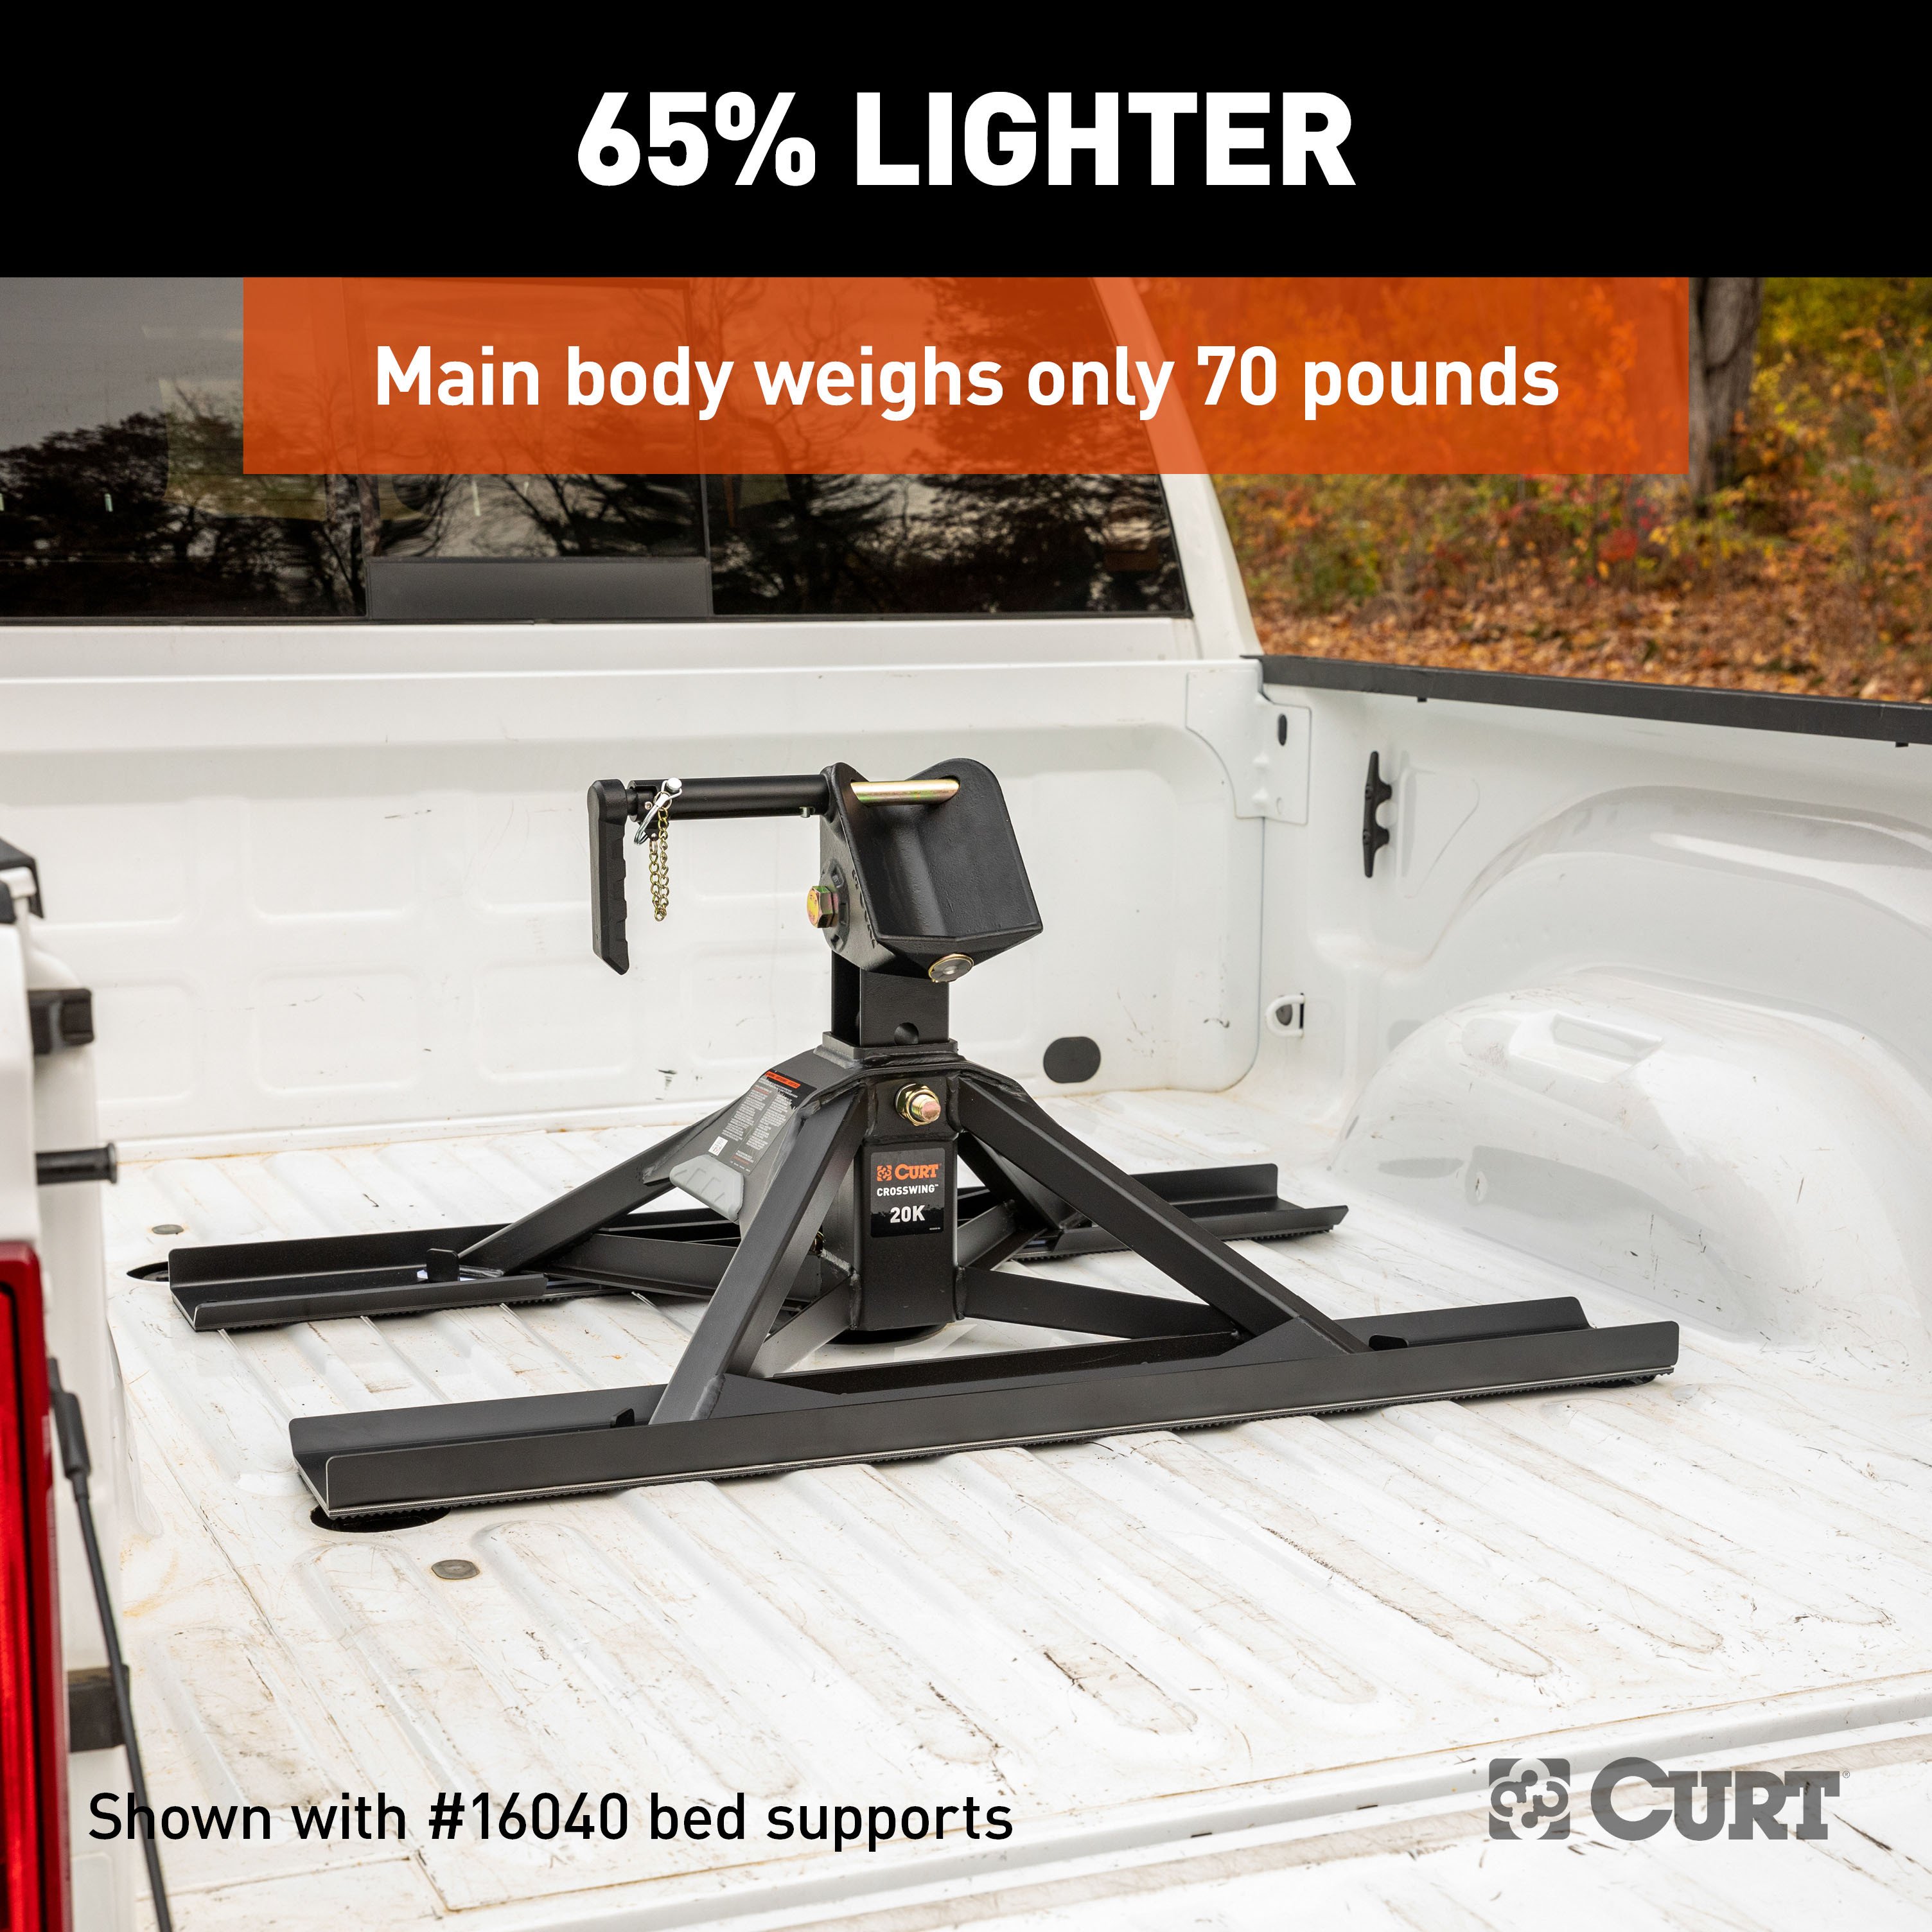
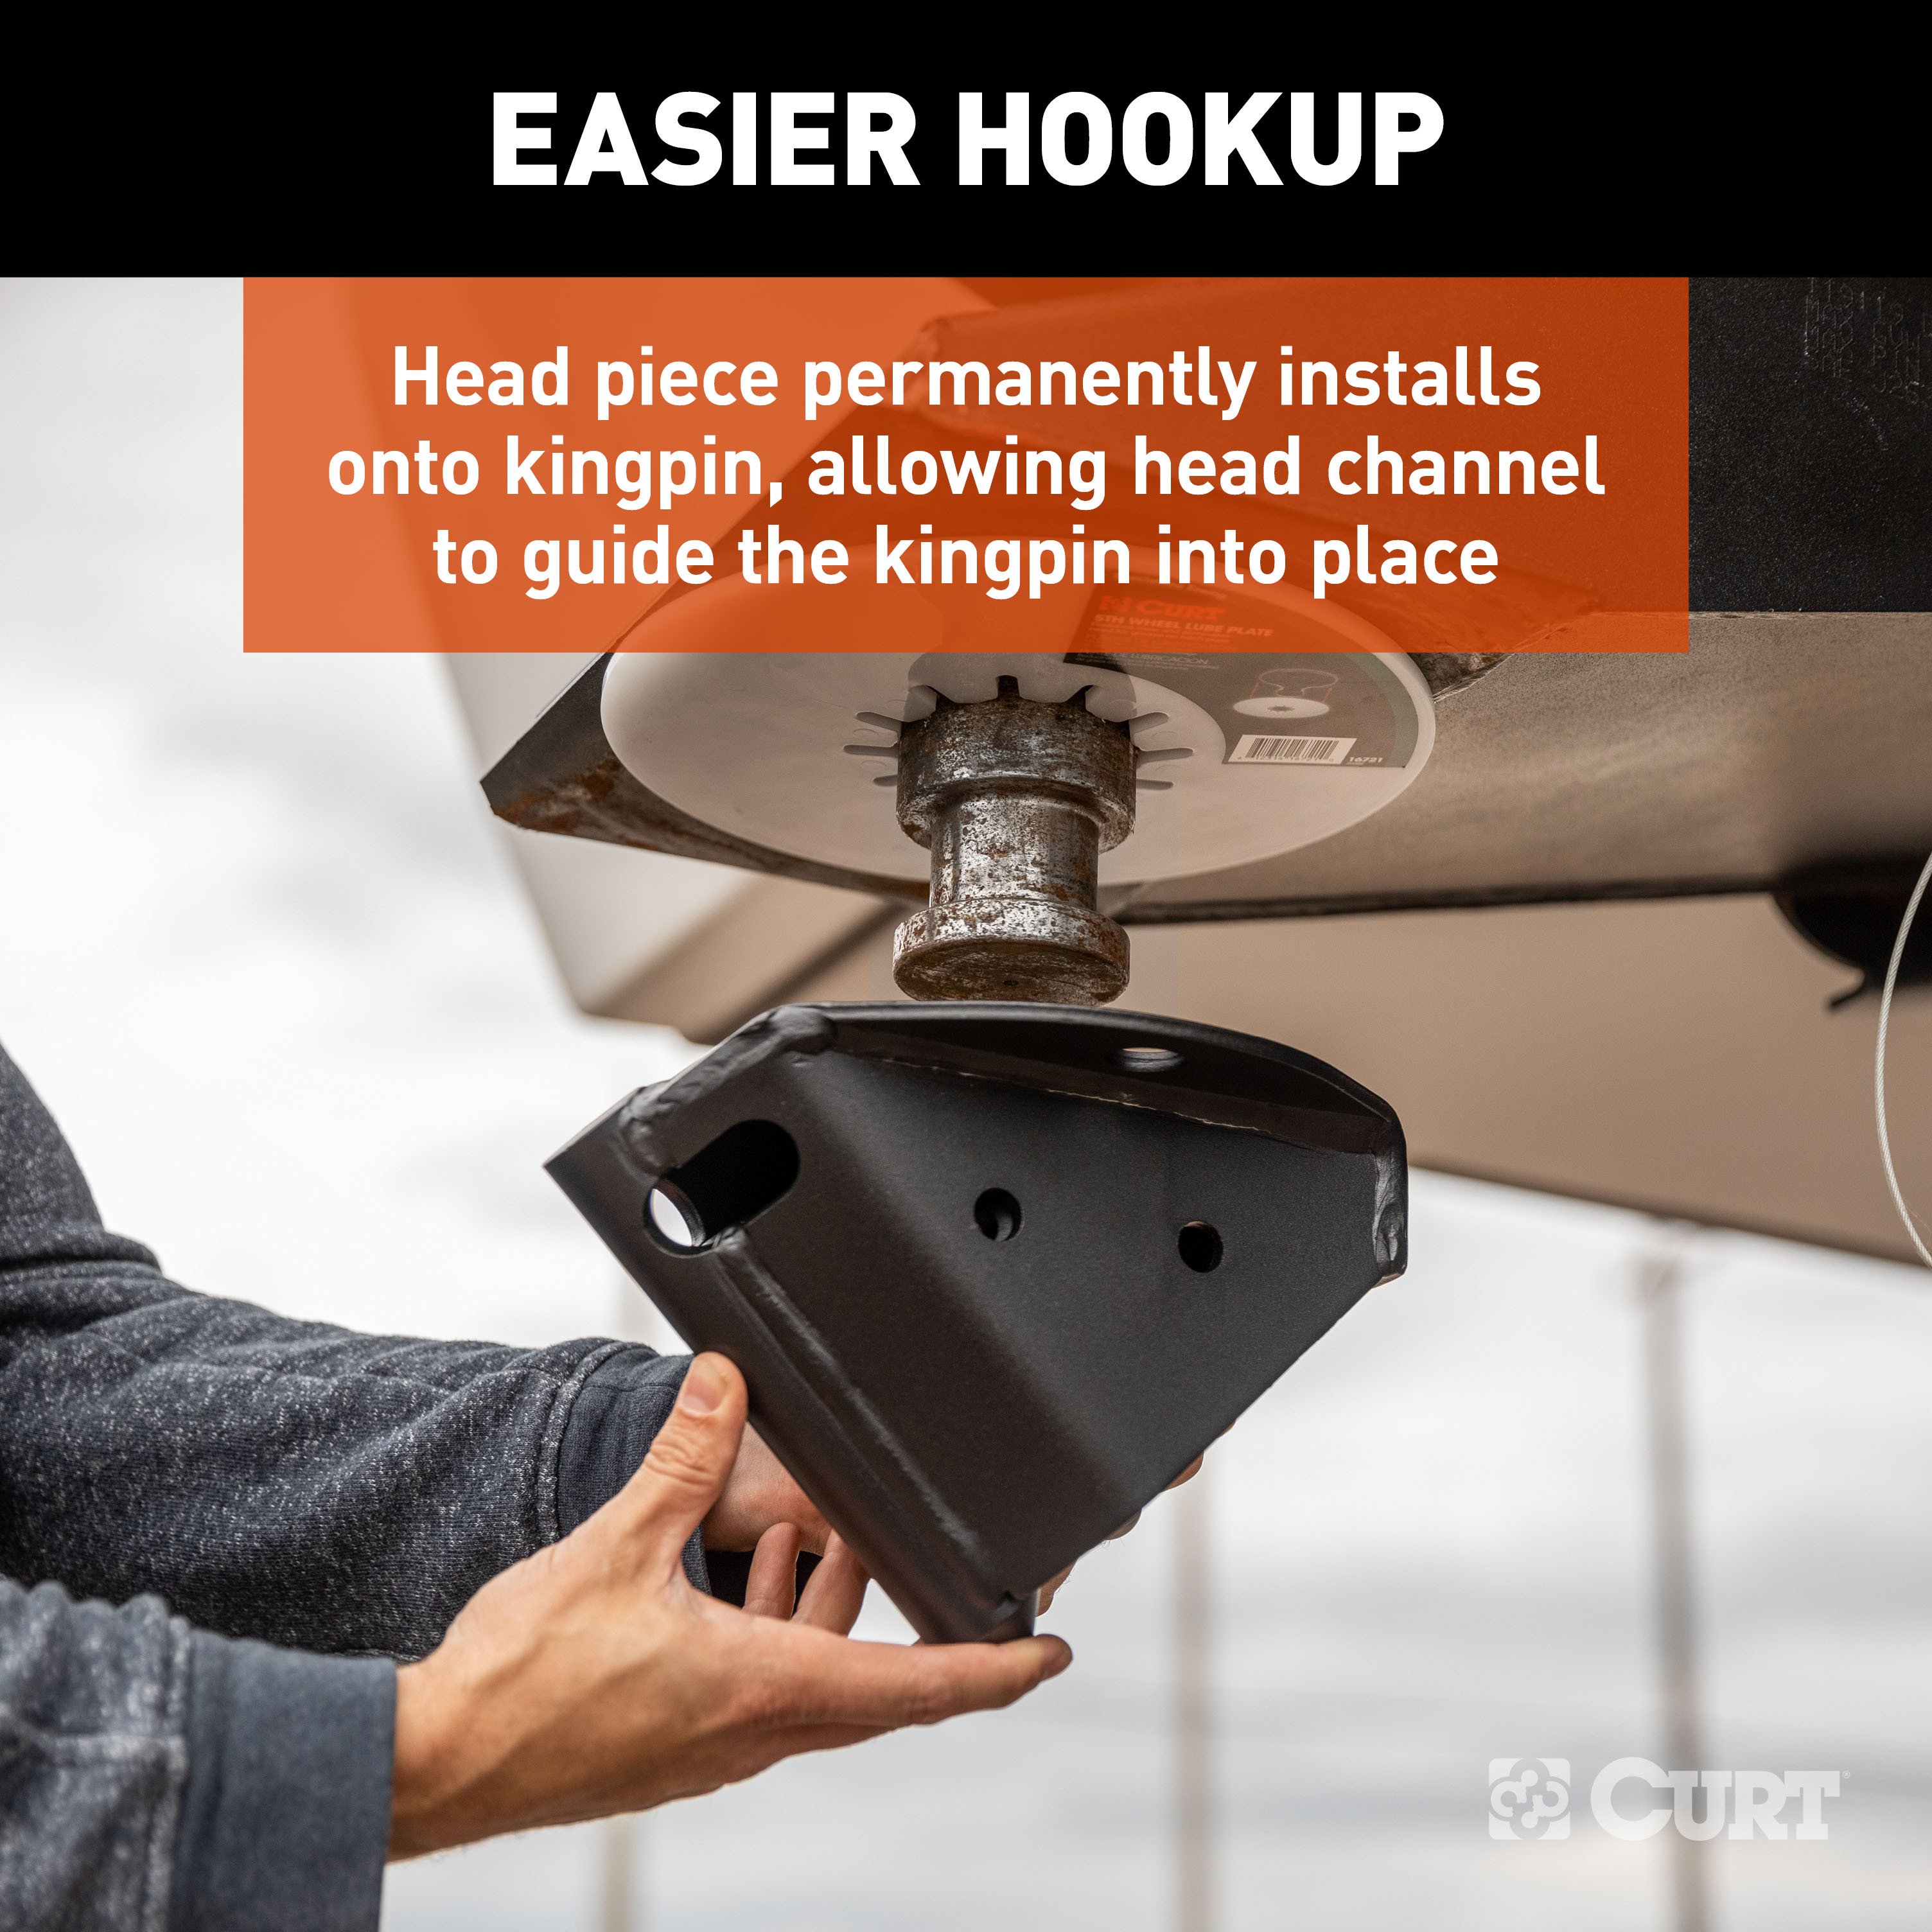
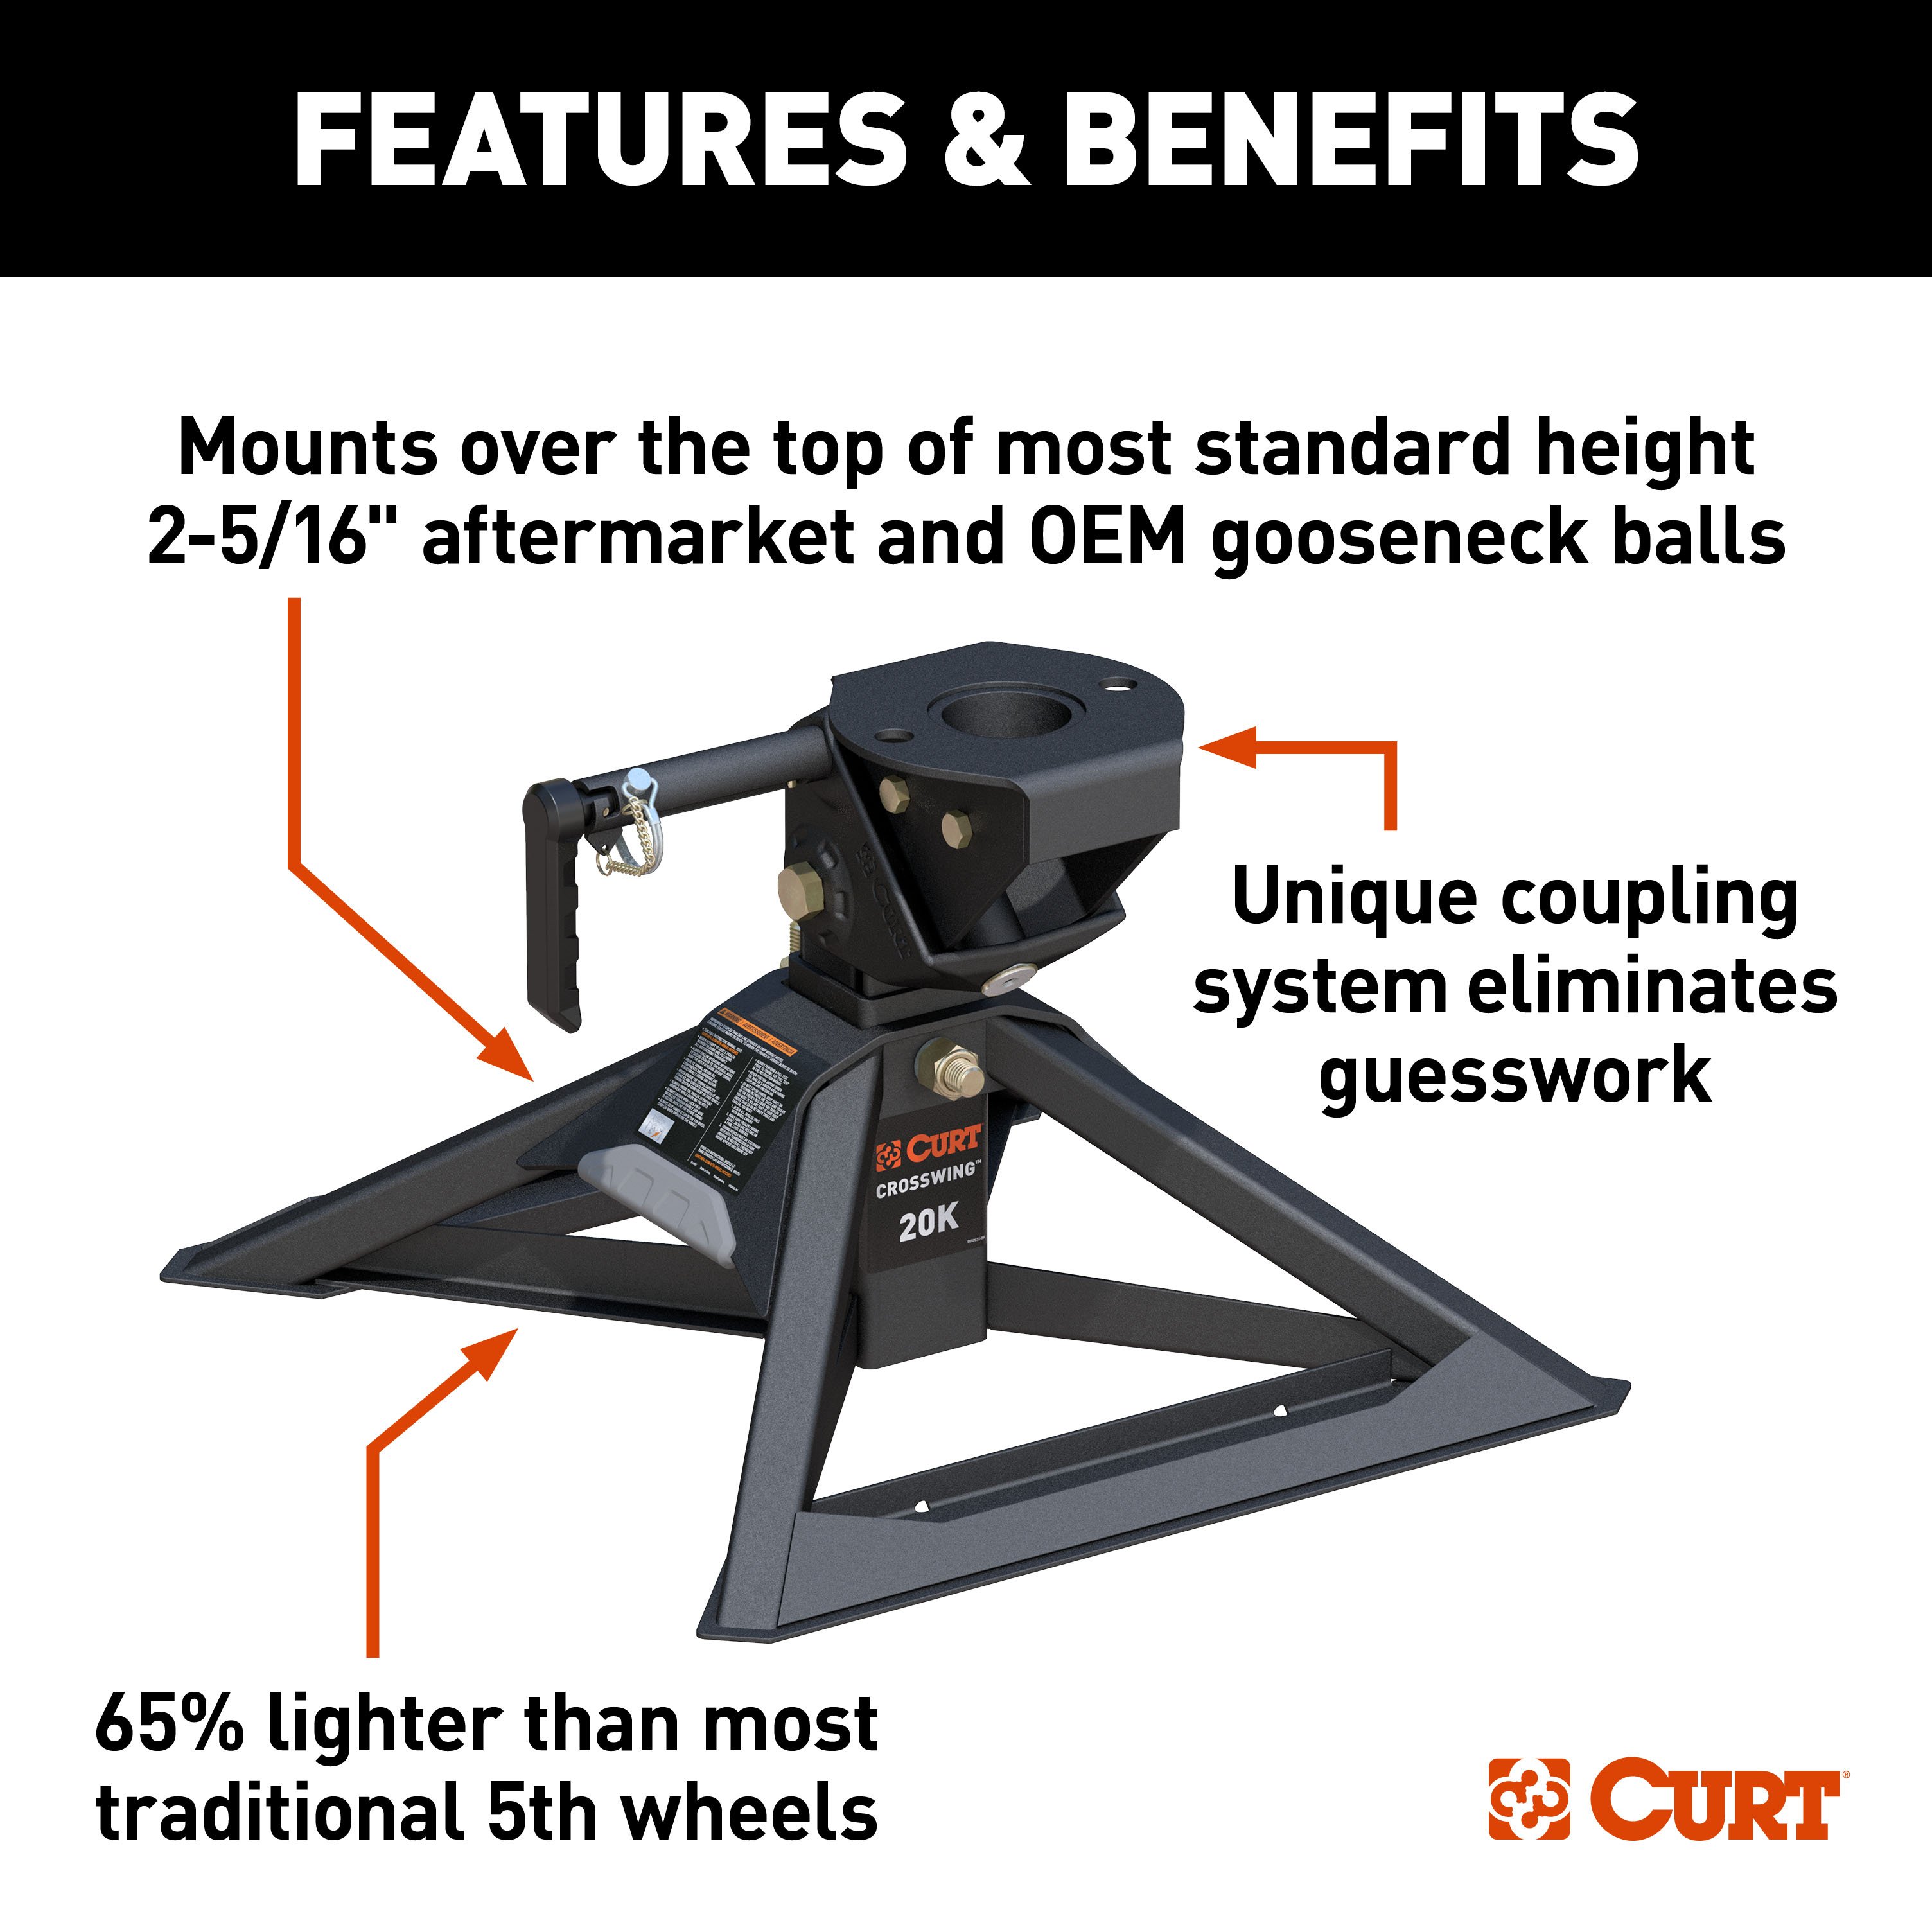
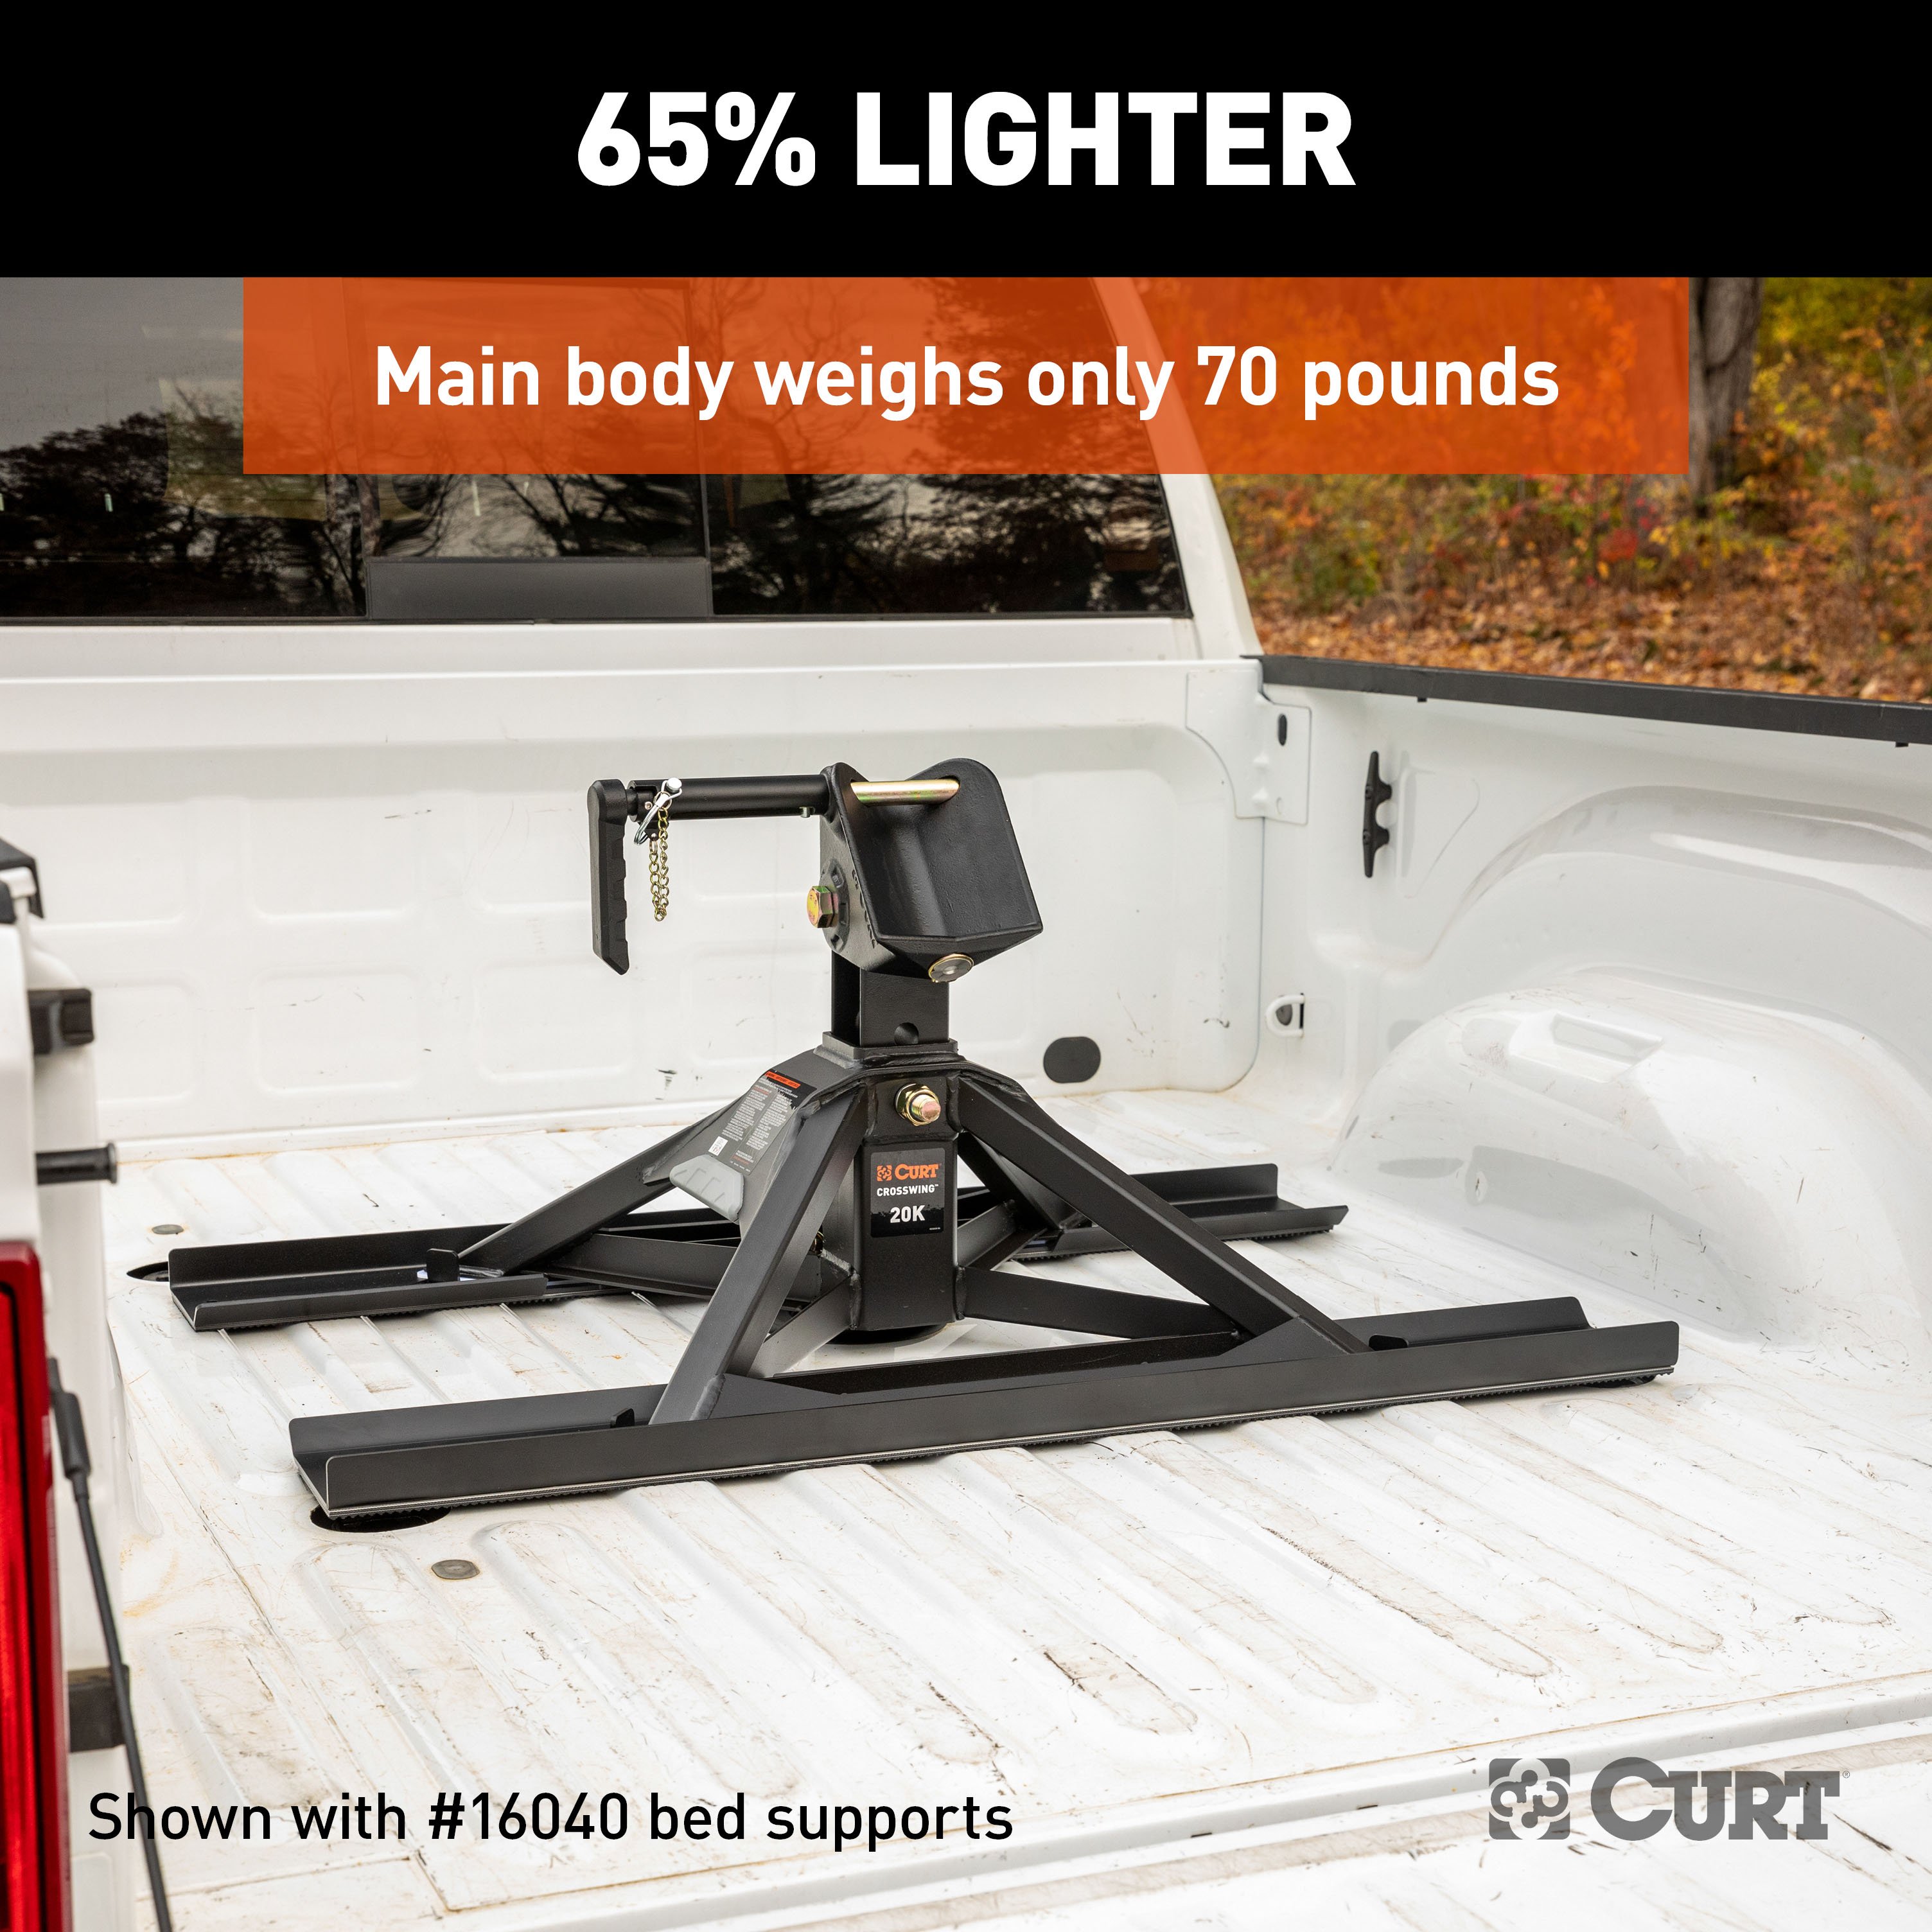
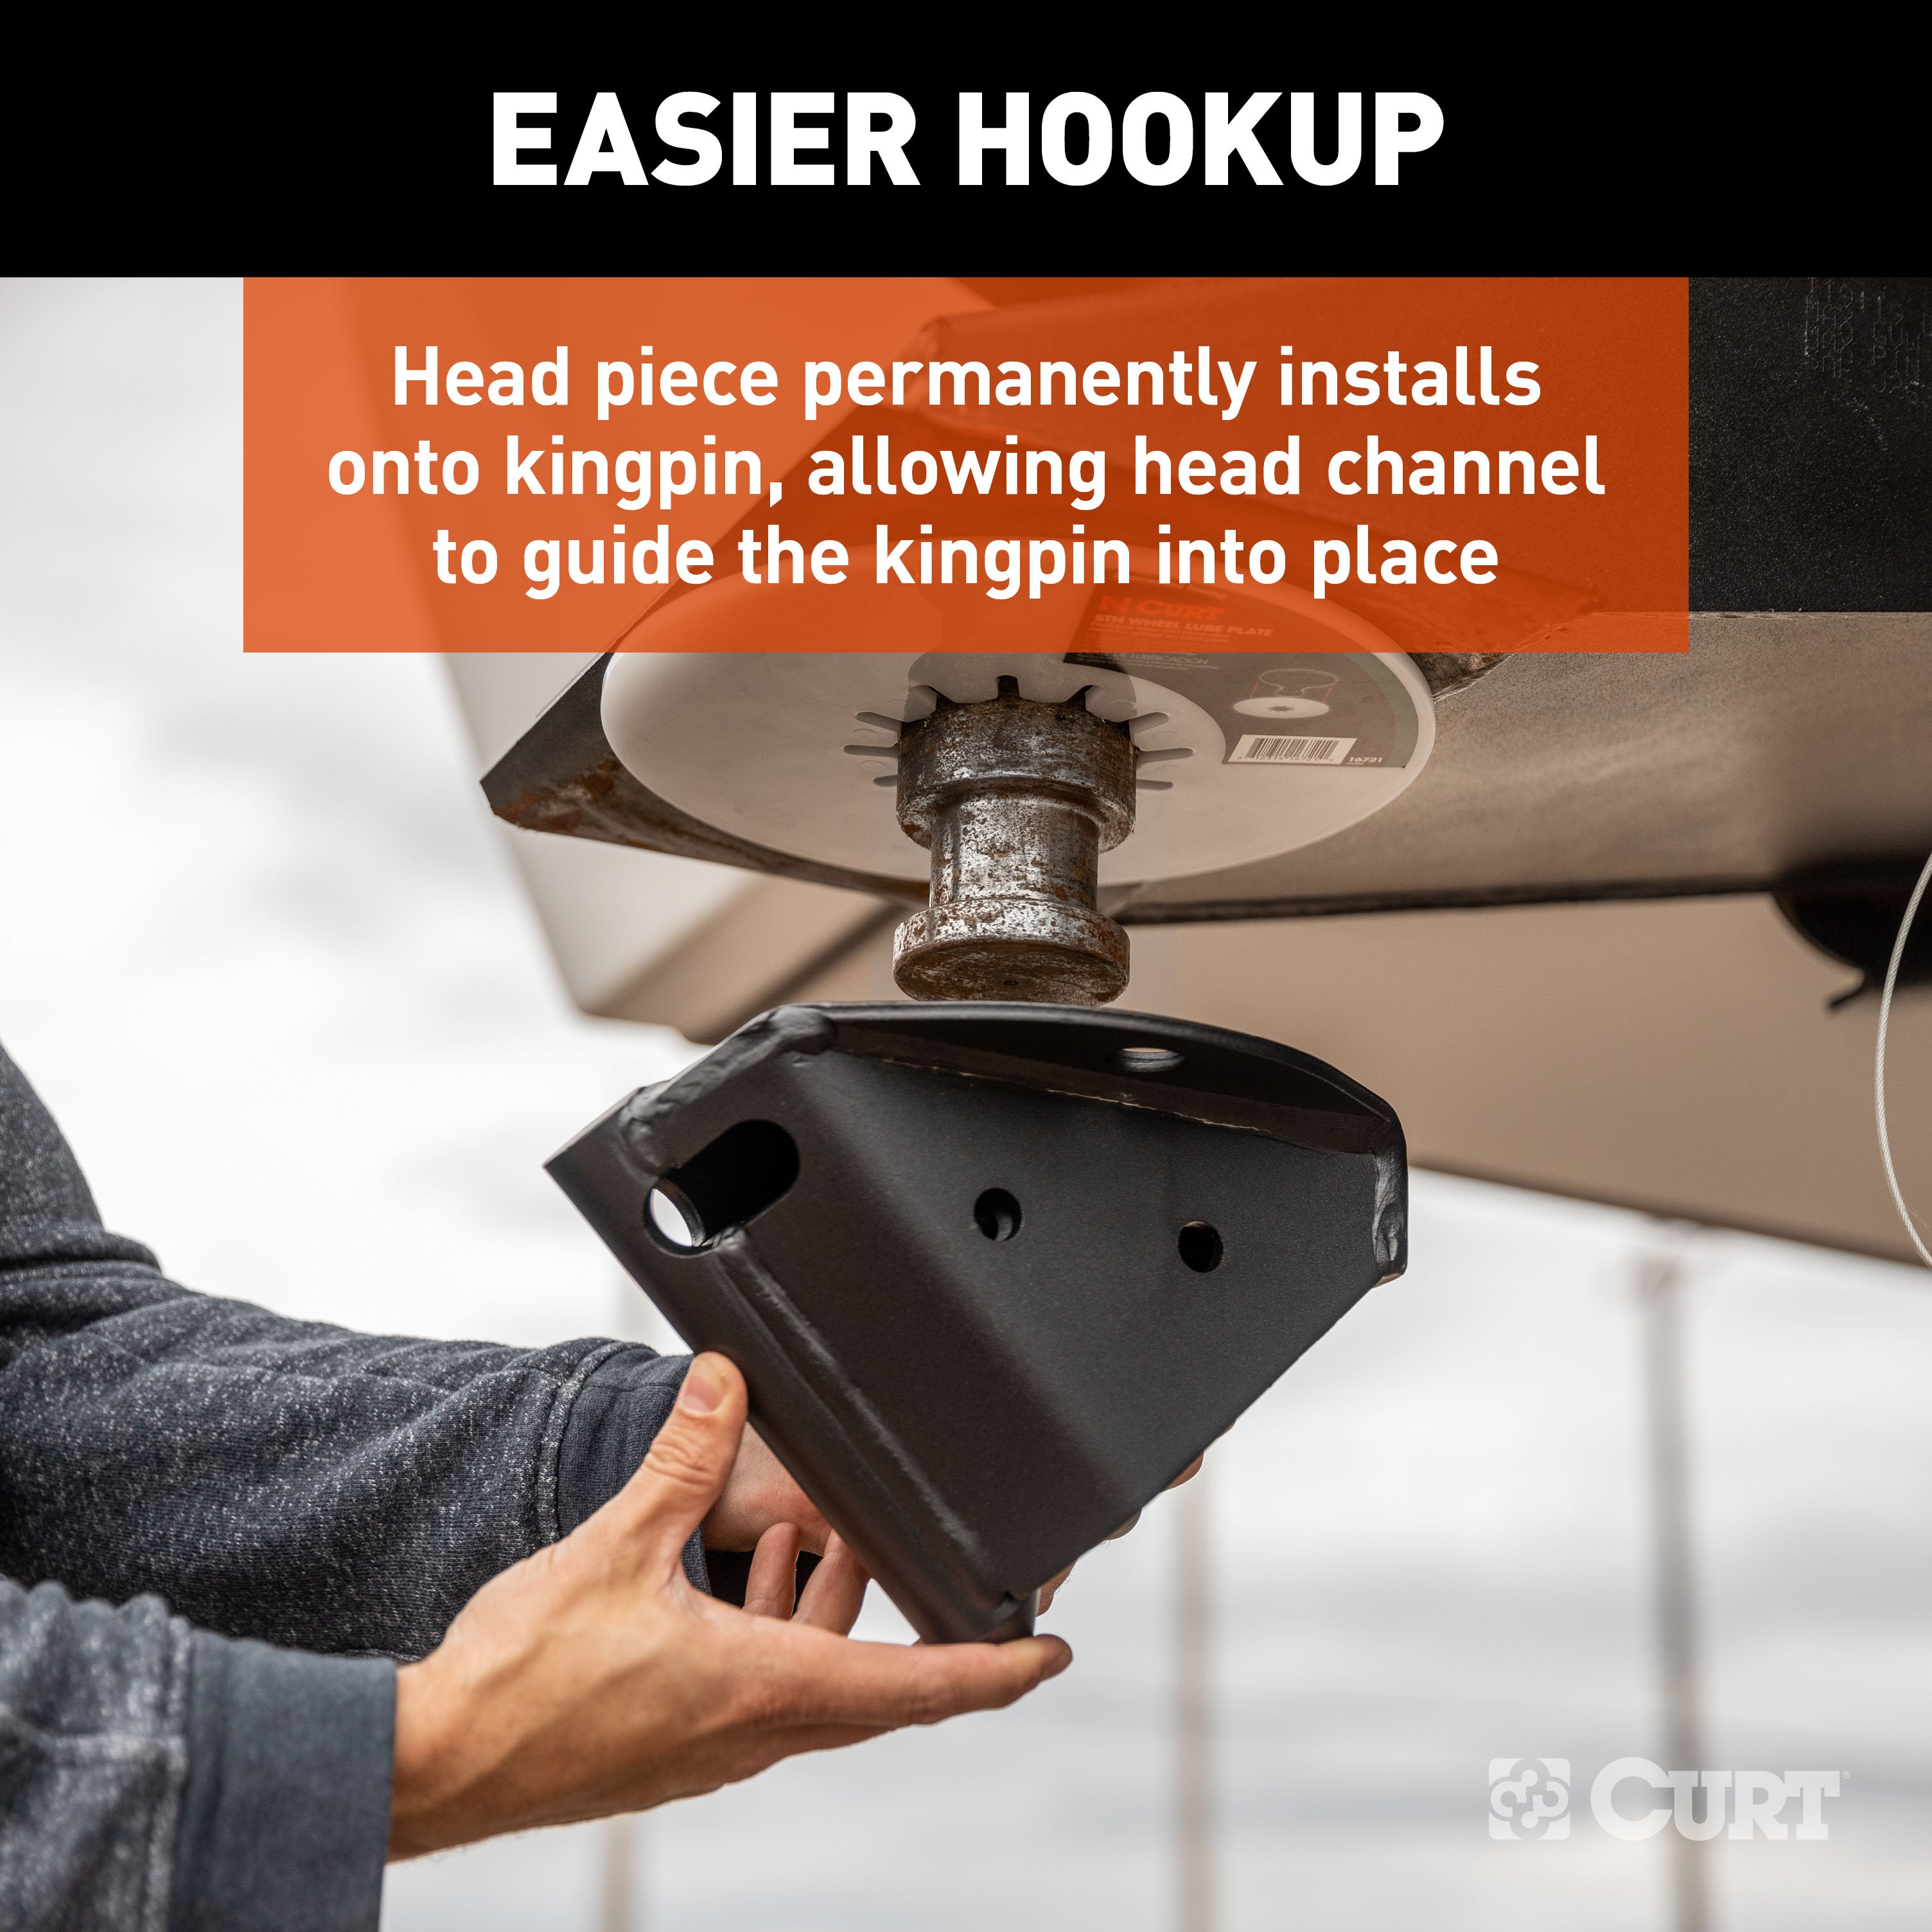
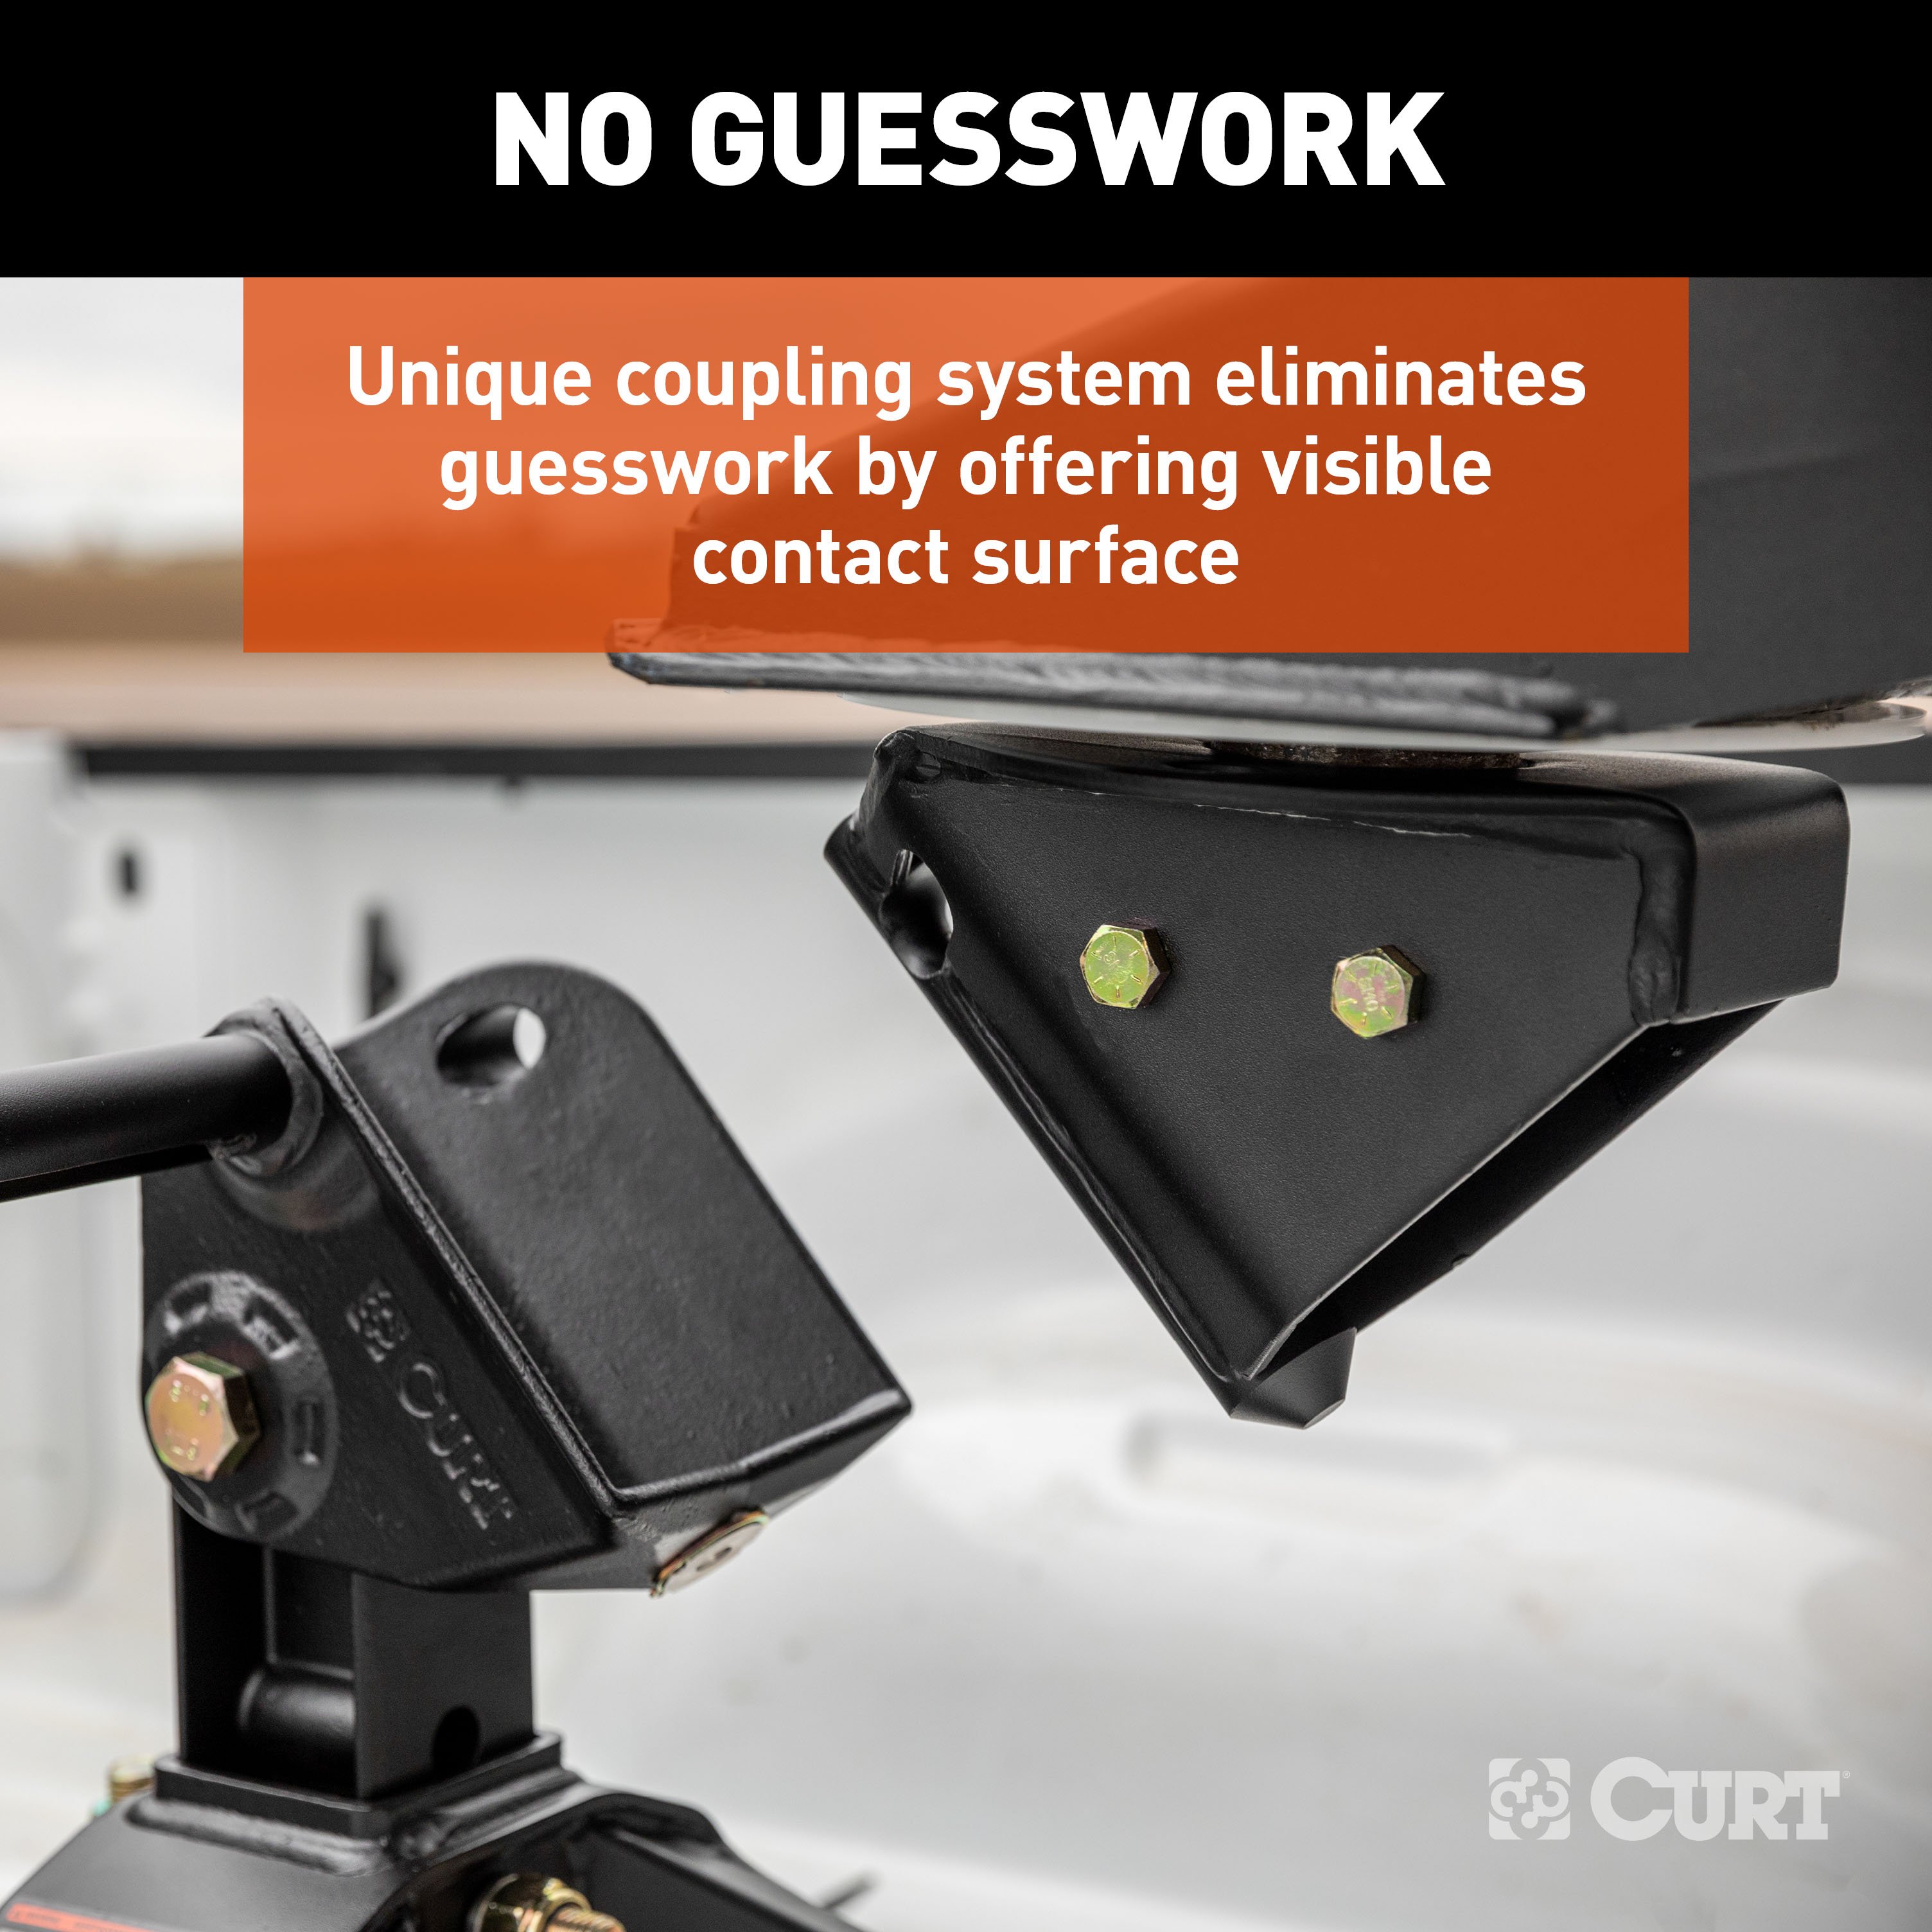
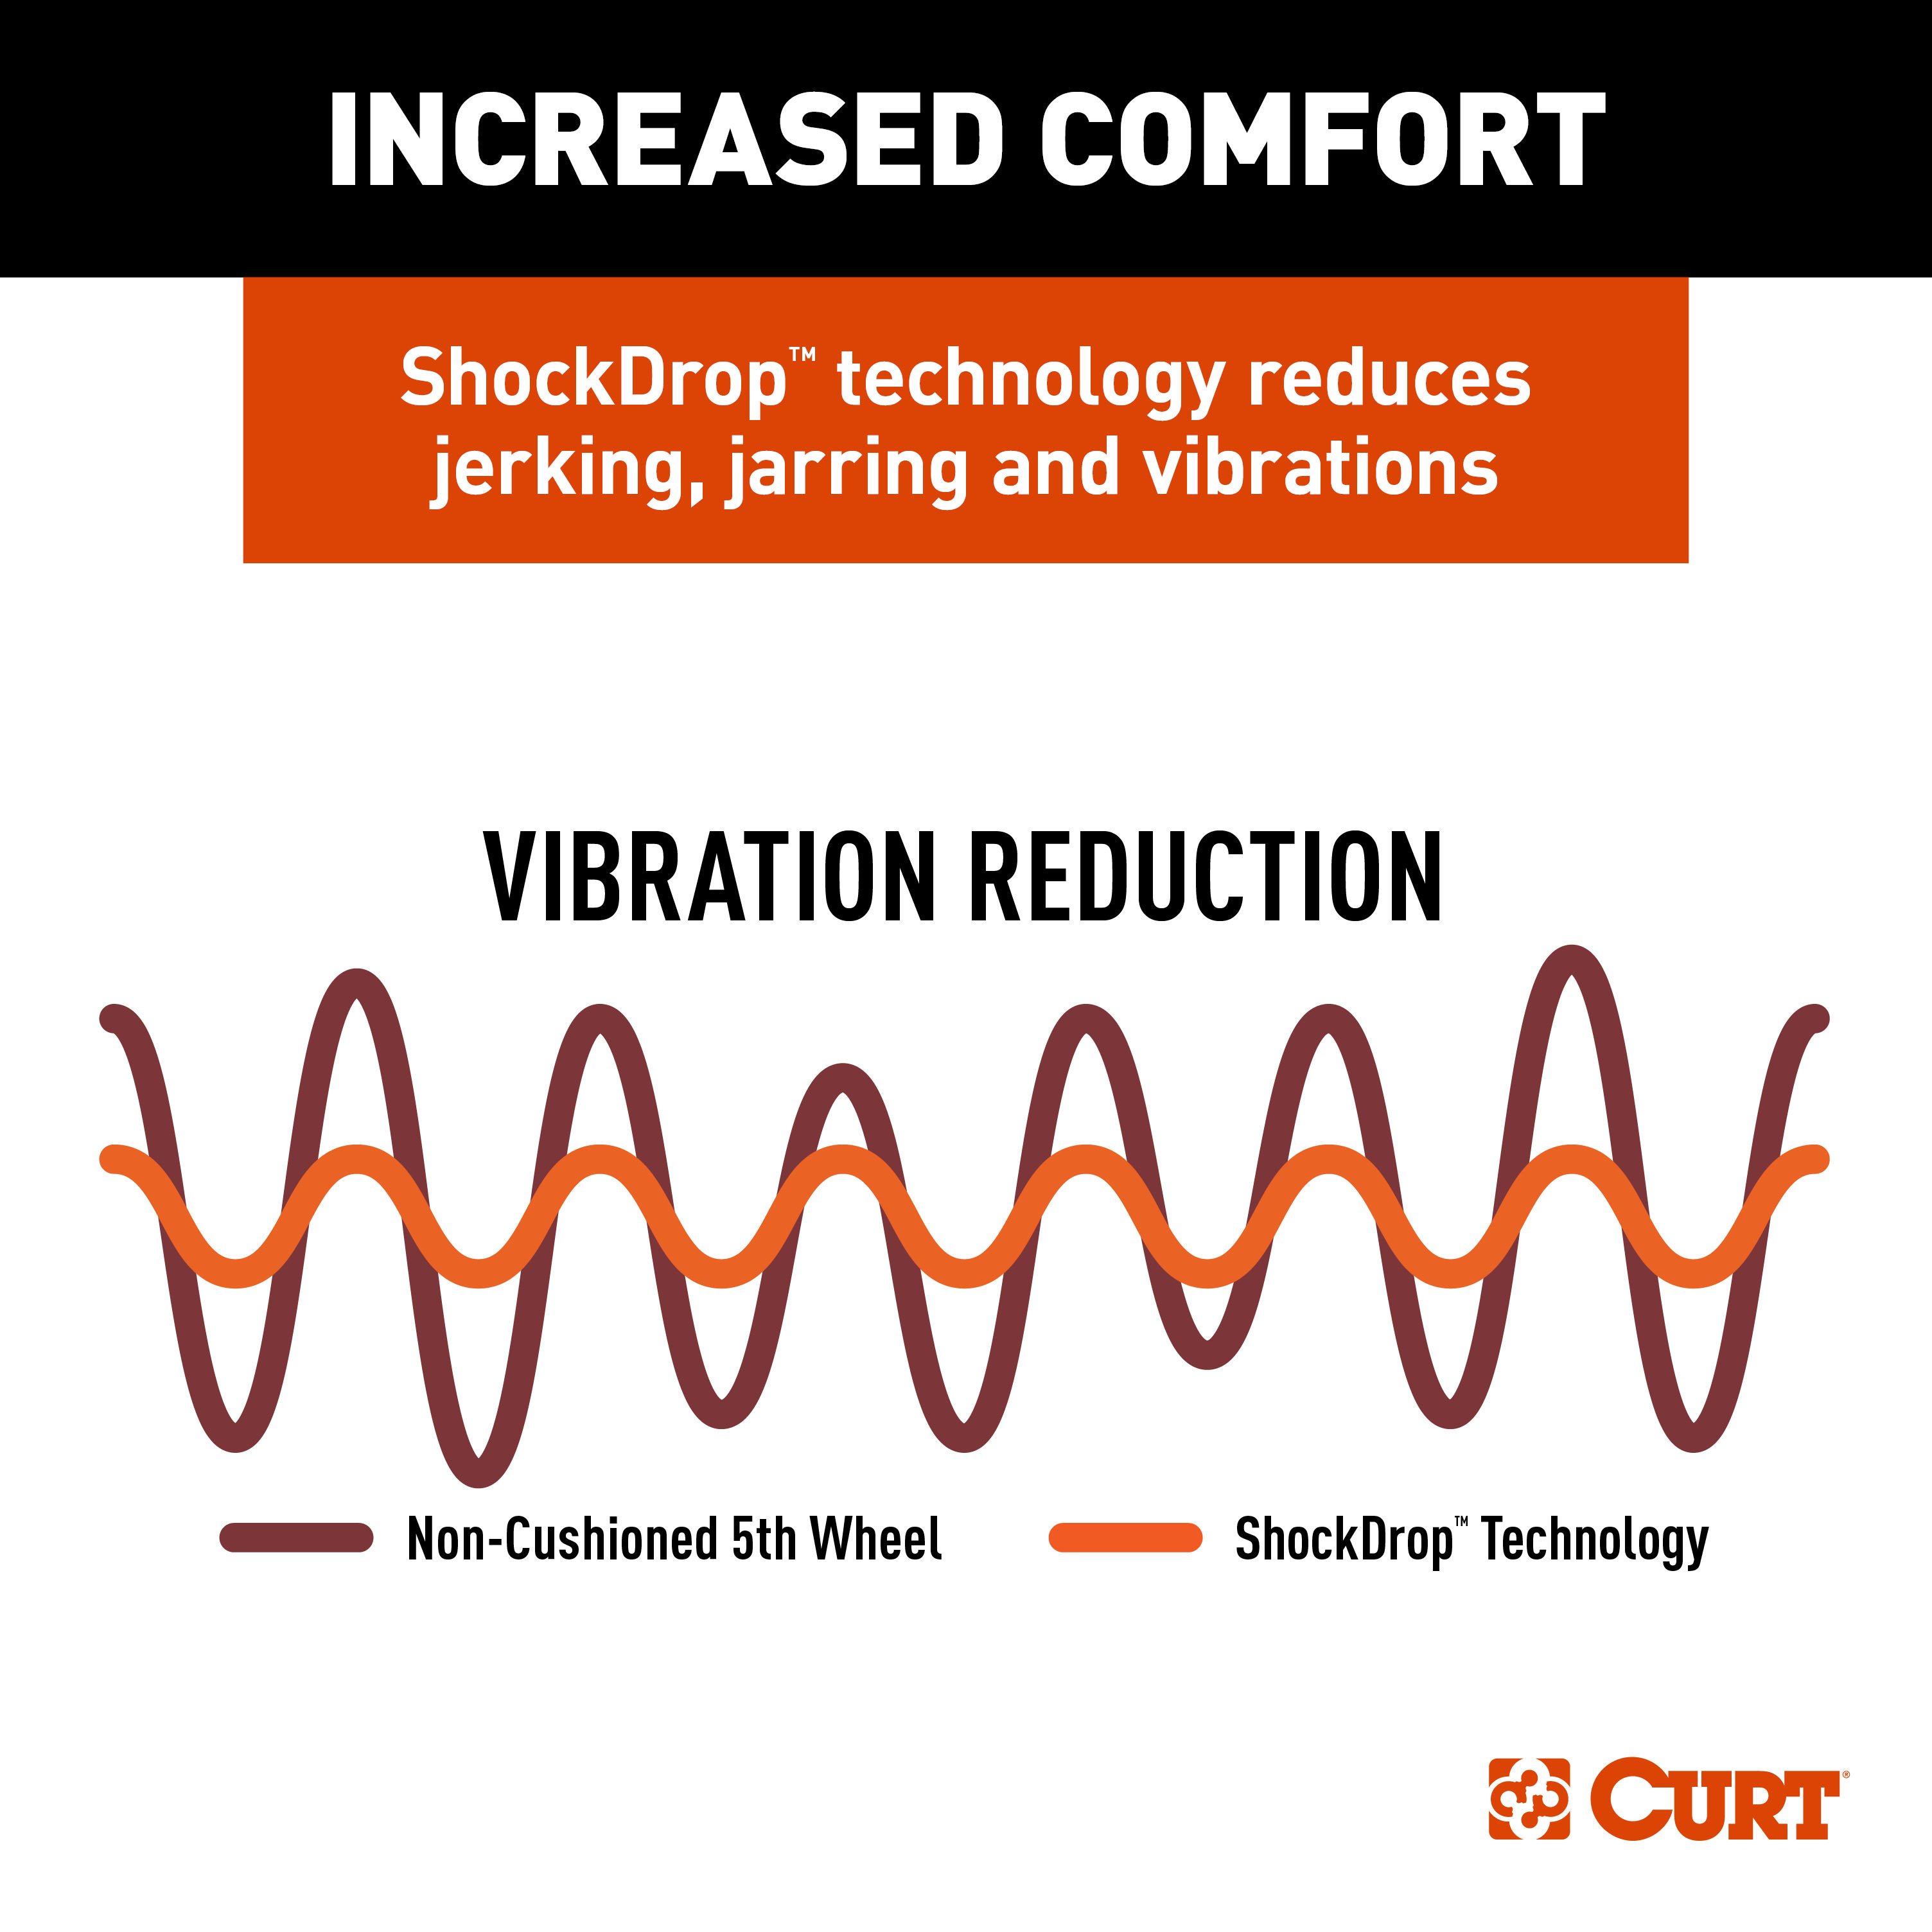
The CrossWing 5th wheel hitch gives you the best of both worlds by packing extraordinary strength into one light weight hitch. With a main body weight of only 70 pounds, it is 65% lighter than most traditional 5th wheel hitches while still offering a 20,000 lb. weight capacity, so strength and muscle are not sacrificed. To add to its superior strength and integrity, it is made with high-grade steel vs. aluminum to ensure that its durability and solidity are truly uncompromised. The CrossWing combines a solid build with robust strength and state-of-the-art technology. Its patent-pending ShockDrop tech provides a smoother towing experience by reducing jerking and jarring, and its structure allows fore, aft and lateral head articulation when connecting on uneven terrain, so you can be comfortable and confident in your ride no matter what type of rugged roads you encounter. The CrossWing also features a reinforced head connection point that provides exceptional strength, along with a unique coupling system that eliminates guesswork by offering a visible contact surface. Made to create a simpler, smoother experience all around, the CrossWing contains an easy-to-reach release handle for ergonomic operation, and three points of height adjustment ranging from 17-1/2" to 21-1/2". Plus, with its light weight, three-bolt assembly that is ready right out of the box, and head channel that guide the kingpin into place for easier hookup, the CrossWing can be installed and removed by one person with ease. It is finished with a premium, carbide textured black powder coating for long-lasting rust resistance, providing an all-around hitch that takes towing up a notch. If you're an adventurer looking for reliable power, stability, and advanced towing technology all in one, the CrossWing 5th wheel hitch is undoubtedly the way to go.

CURT offers a variety of high-quality trailer hitches and accessories for select vehicle models. Find the perfect fit for your towing needs at TowUniverse.
CURT, a Lippert brand, offers a complete line of towing products and is the leading manufacturer of custom-fit trailer hitches. We offer the broadest selection of custom-fit hitches, and each one is designed, welded, and coated in Wisconsin.
CURT is also a leader in flat towing products, as well as 5th wheel, gooseneck, and weight distribution hitches, ball mounts, electrical components, cargo solutions, and other towing accessories.
For everything from passenger cars and vans to full-size pickups and SUVs, CURT is 'The First Name in Towing Products®.'

Experts available to answer your questions
Call 888-634-9494Rediscover "Us" Time | Tested. Proven. Safe. Towing Products
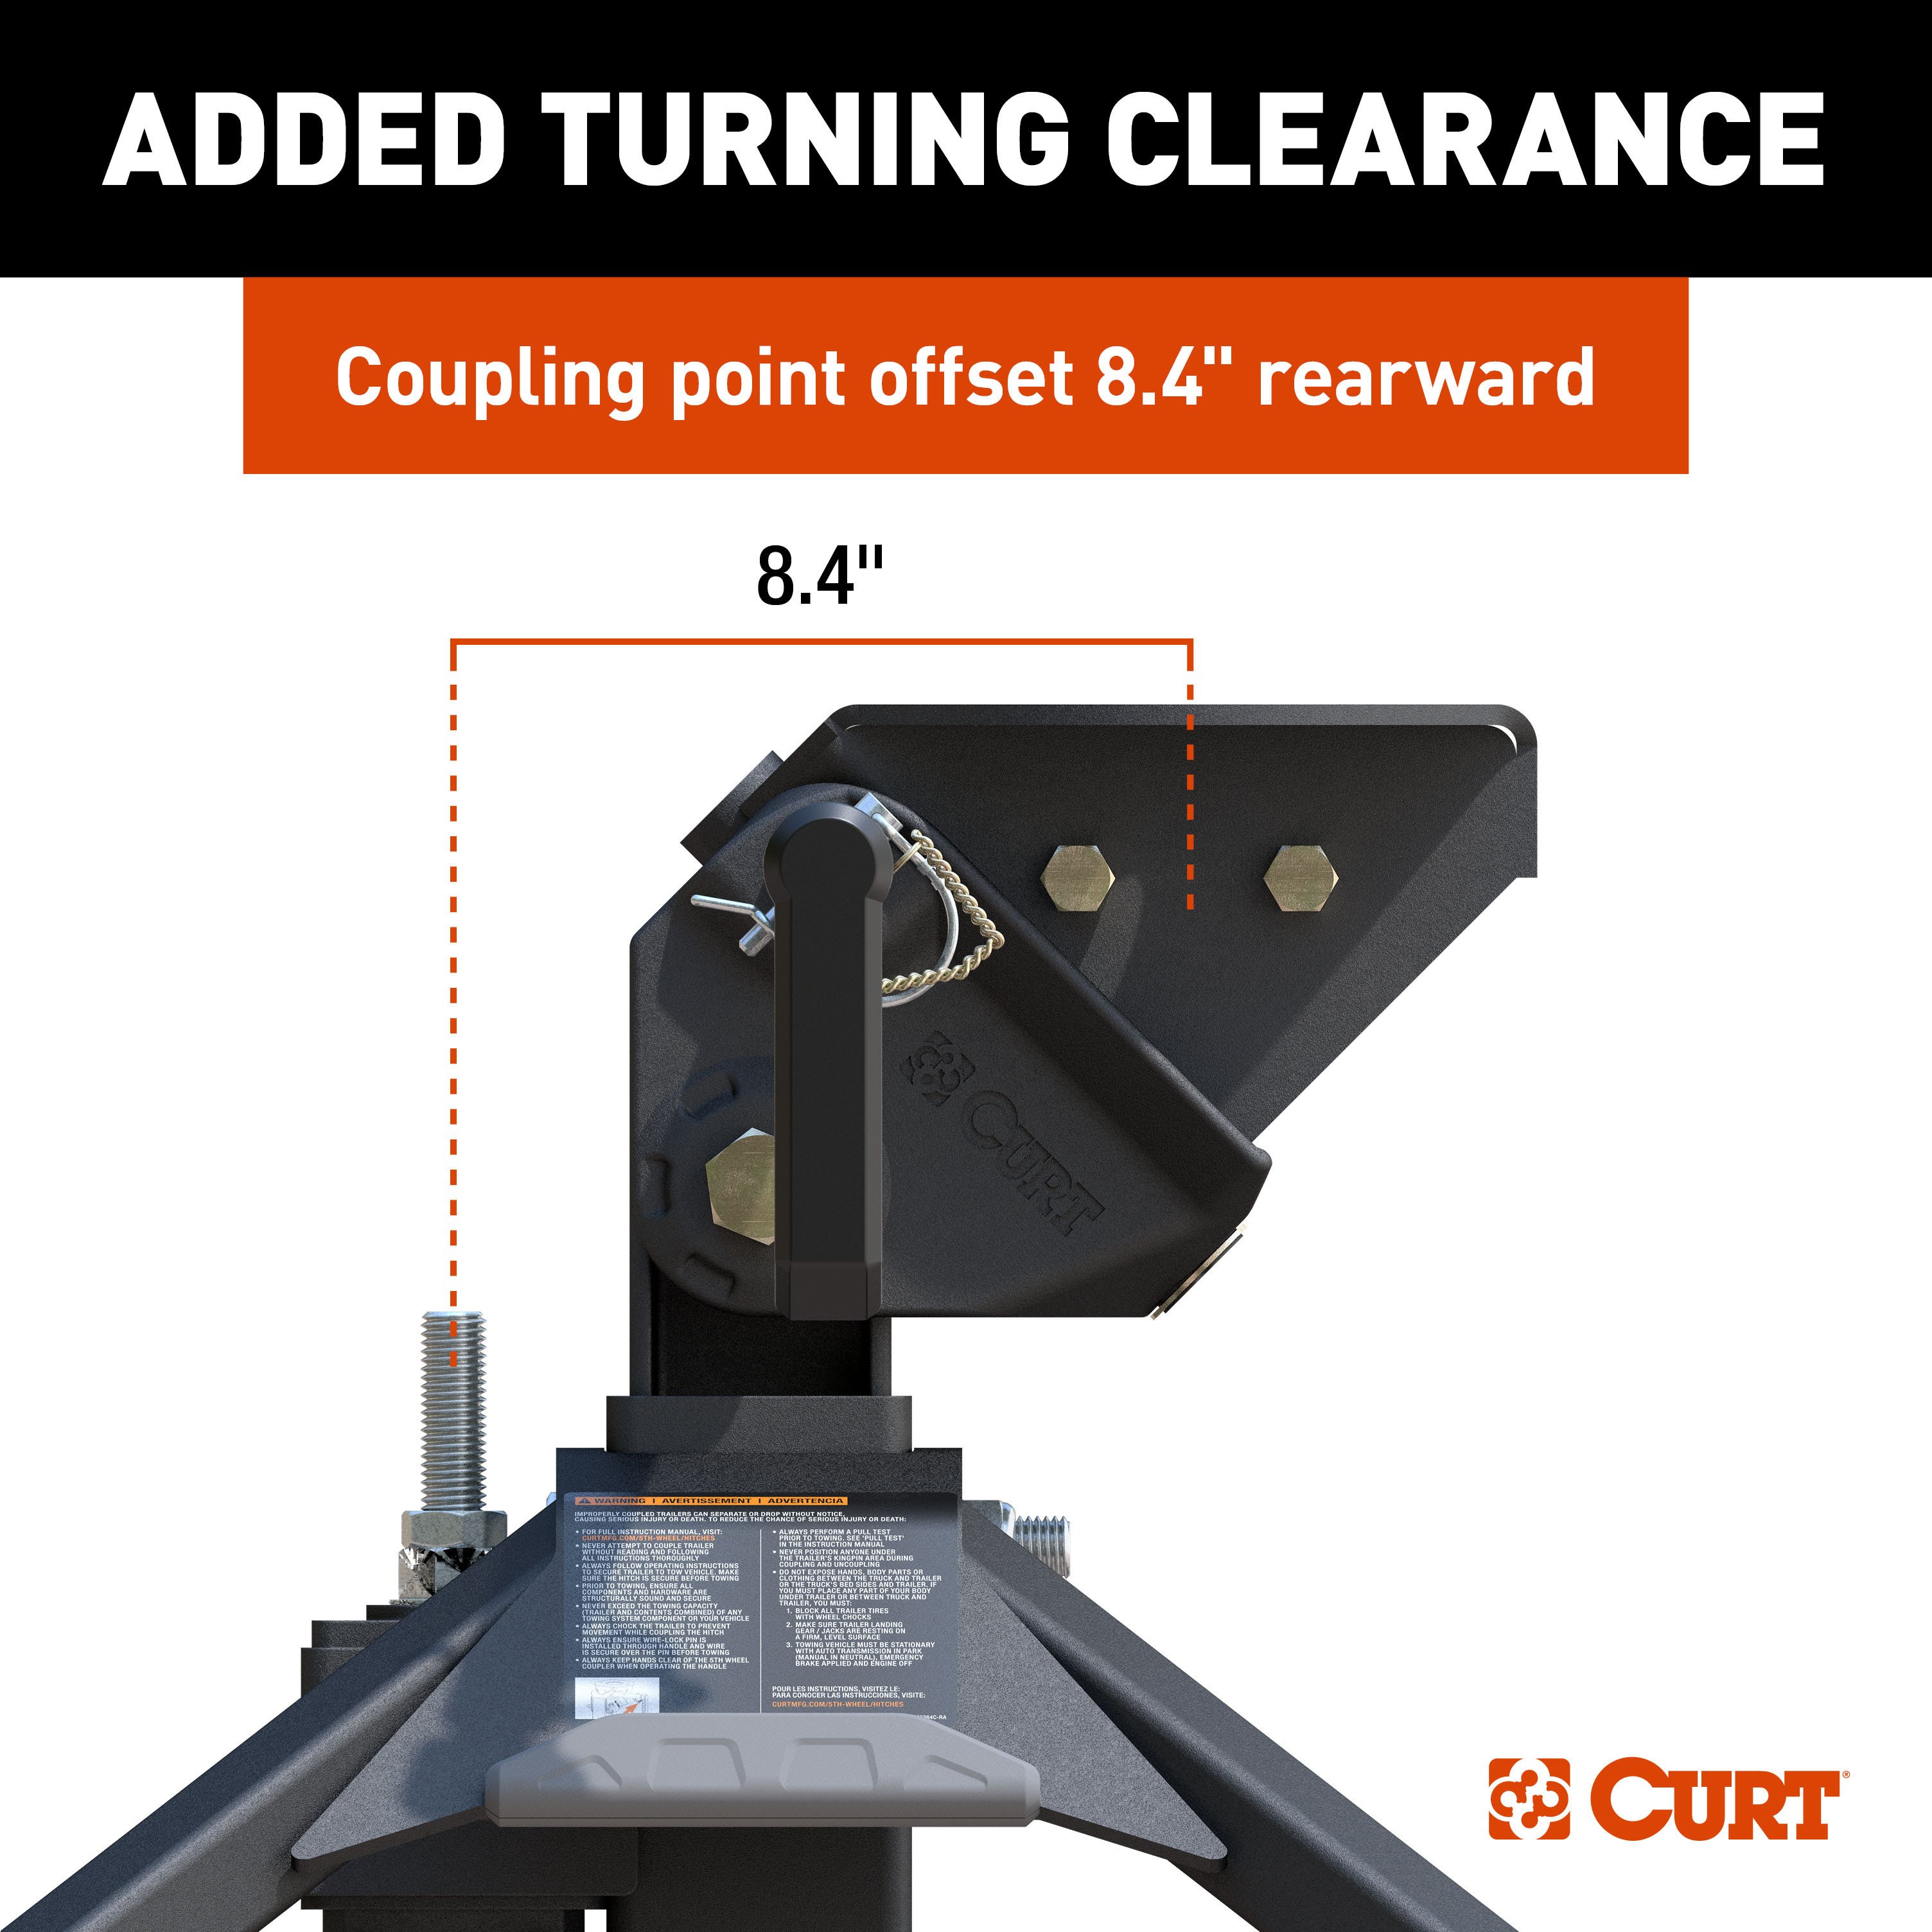
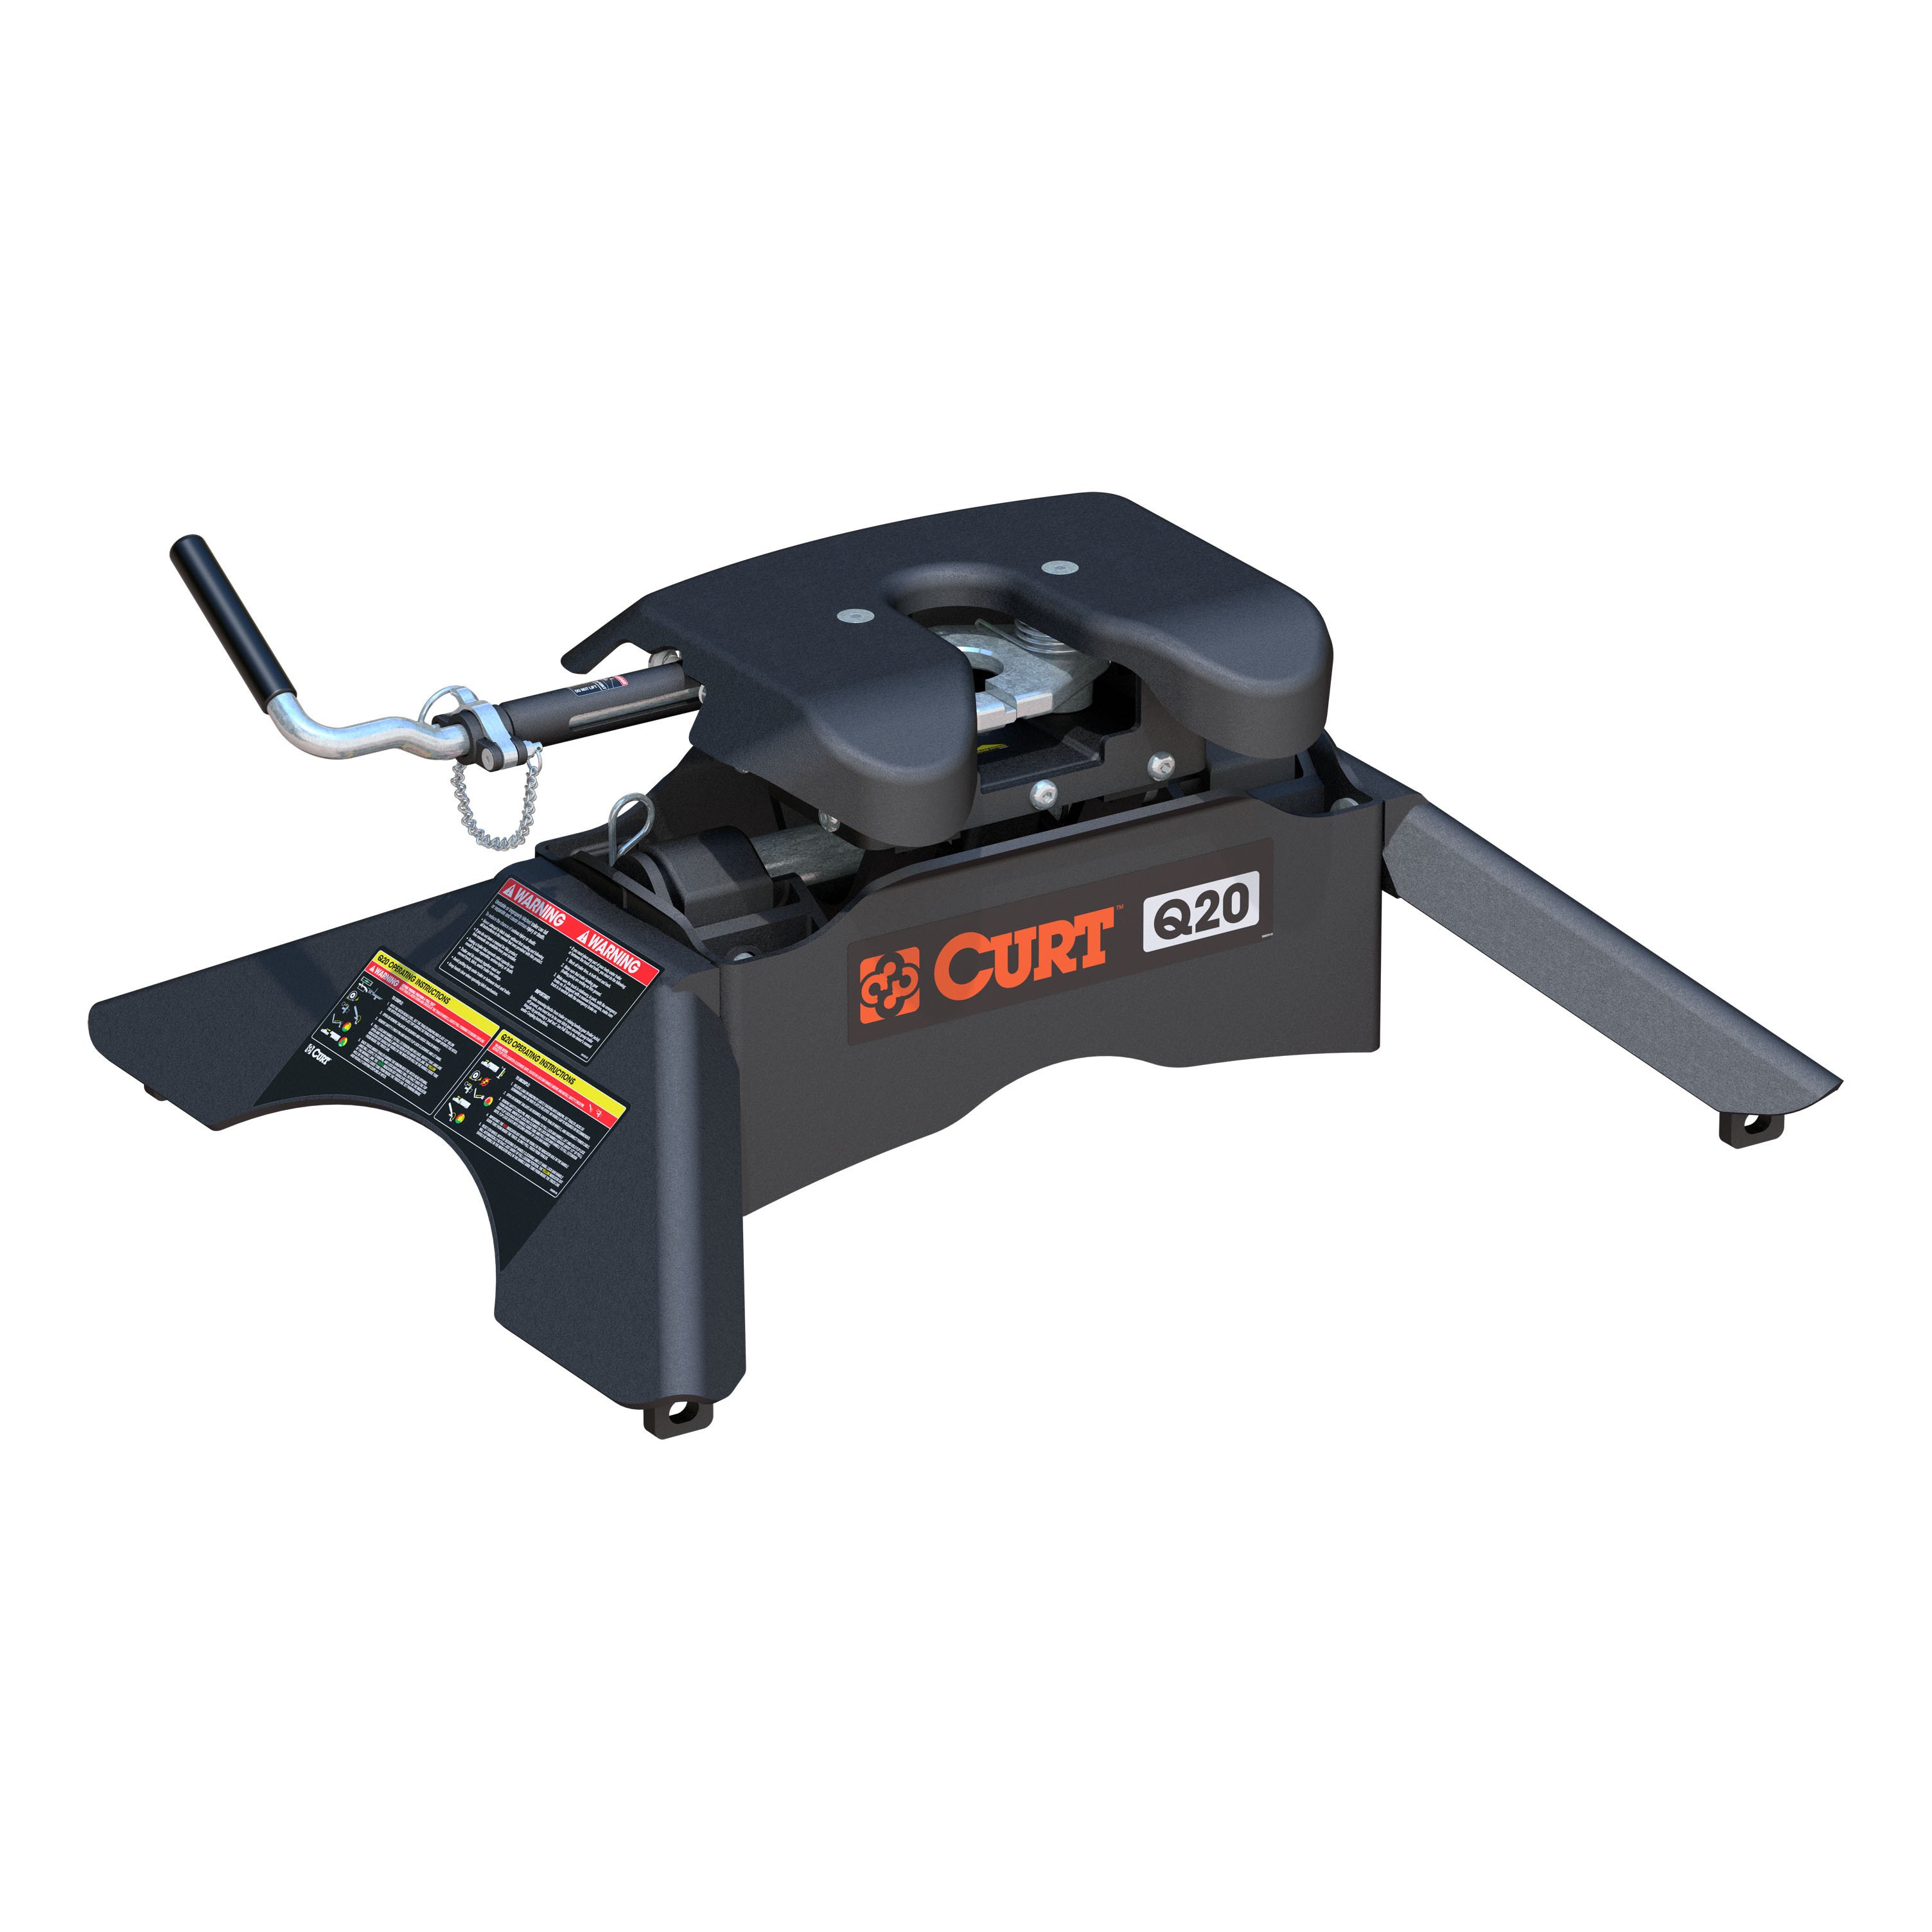
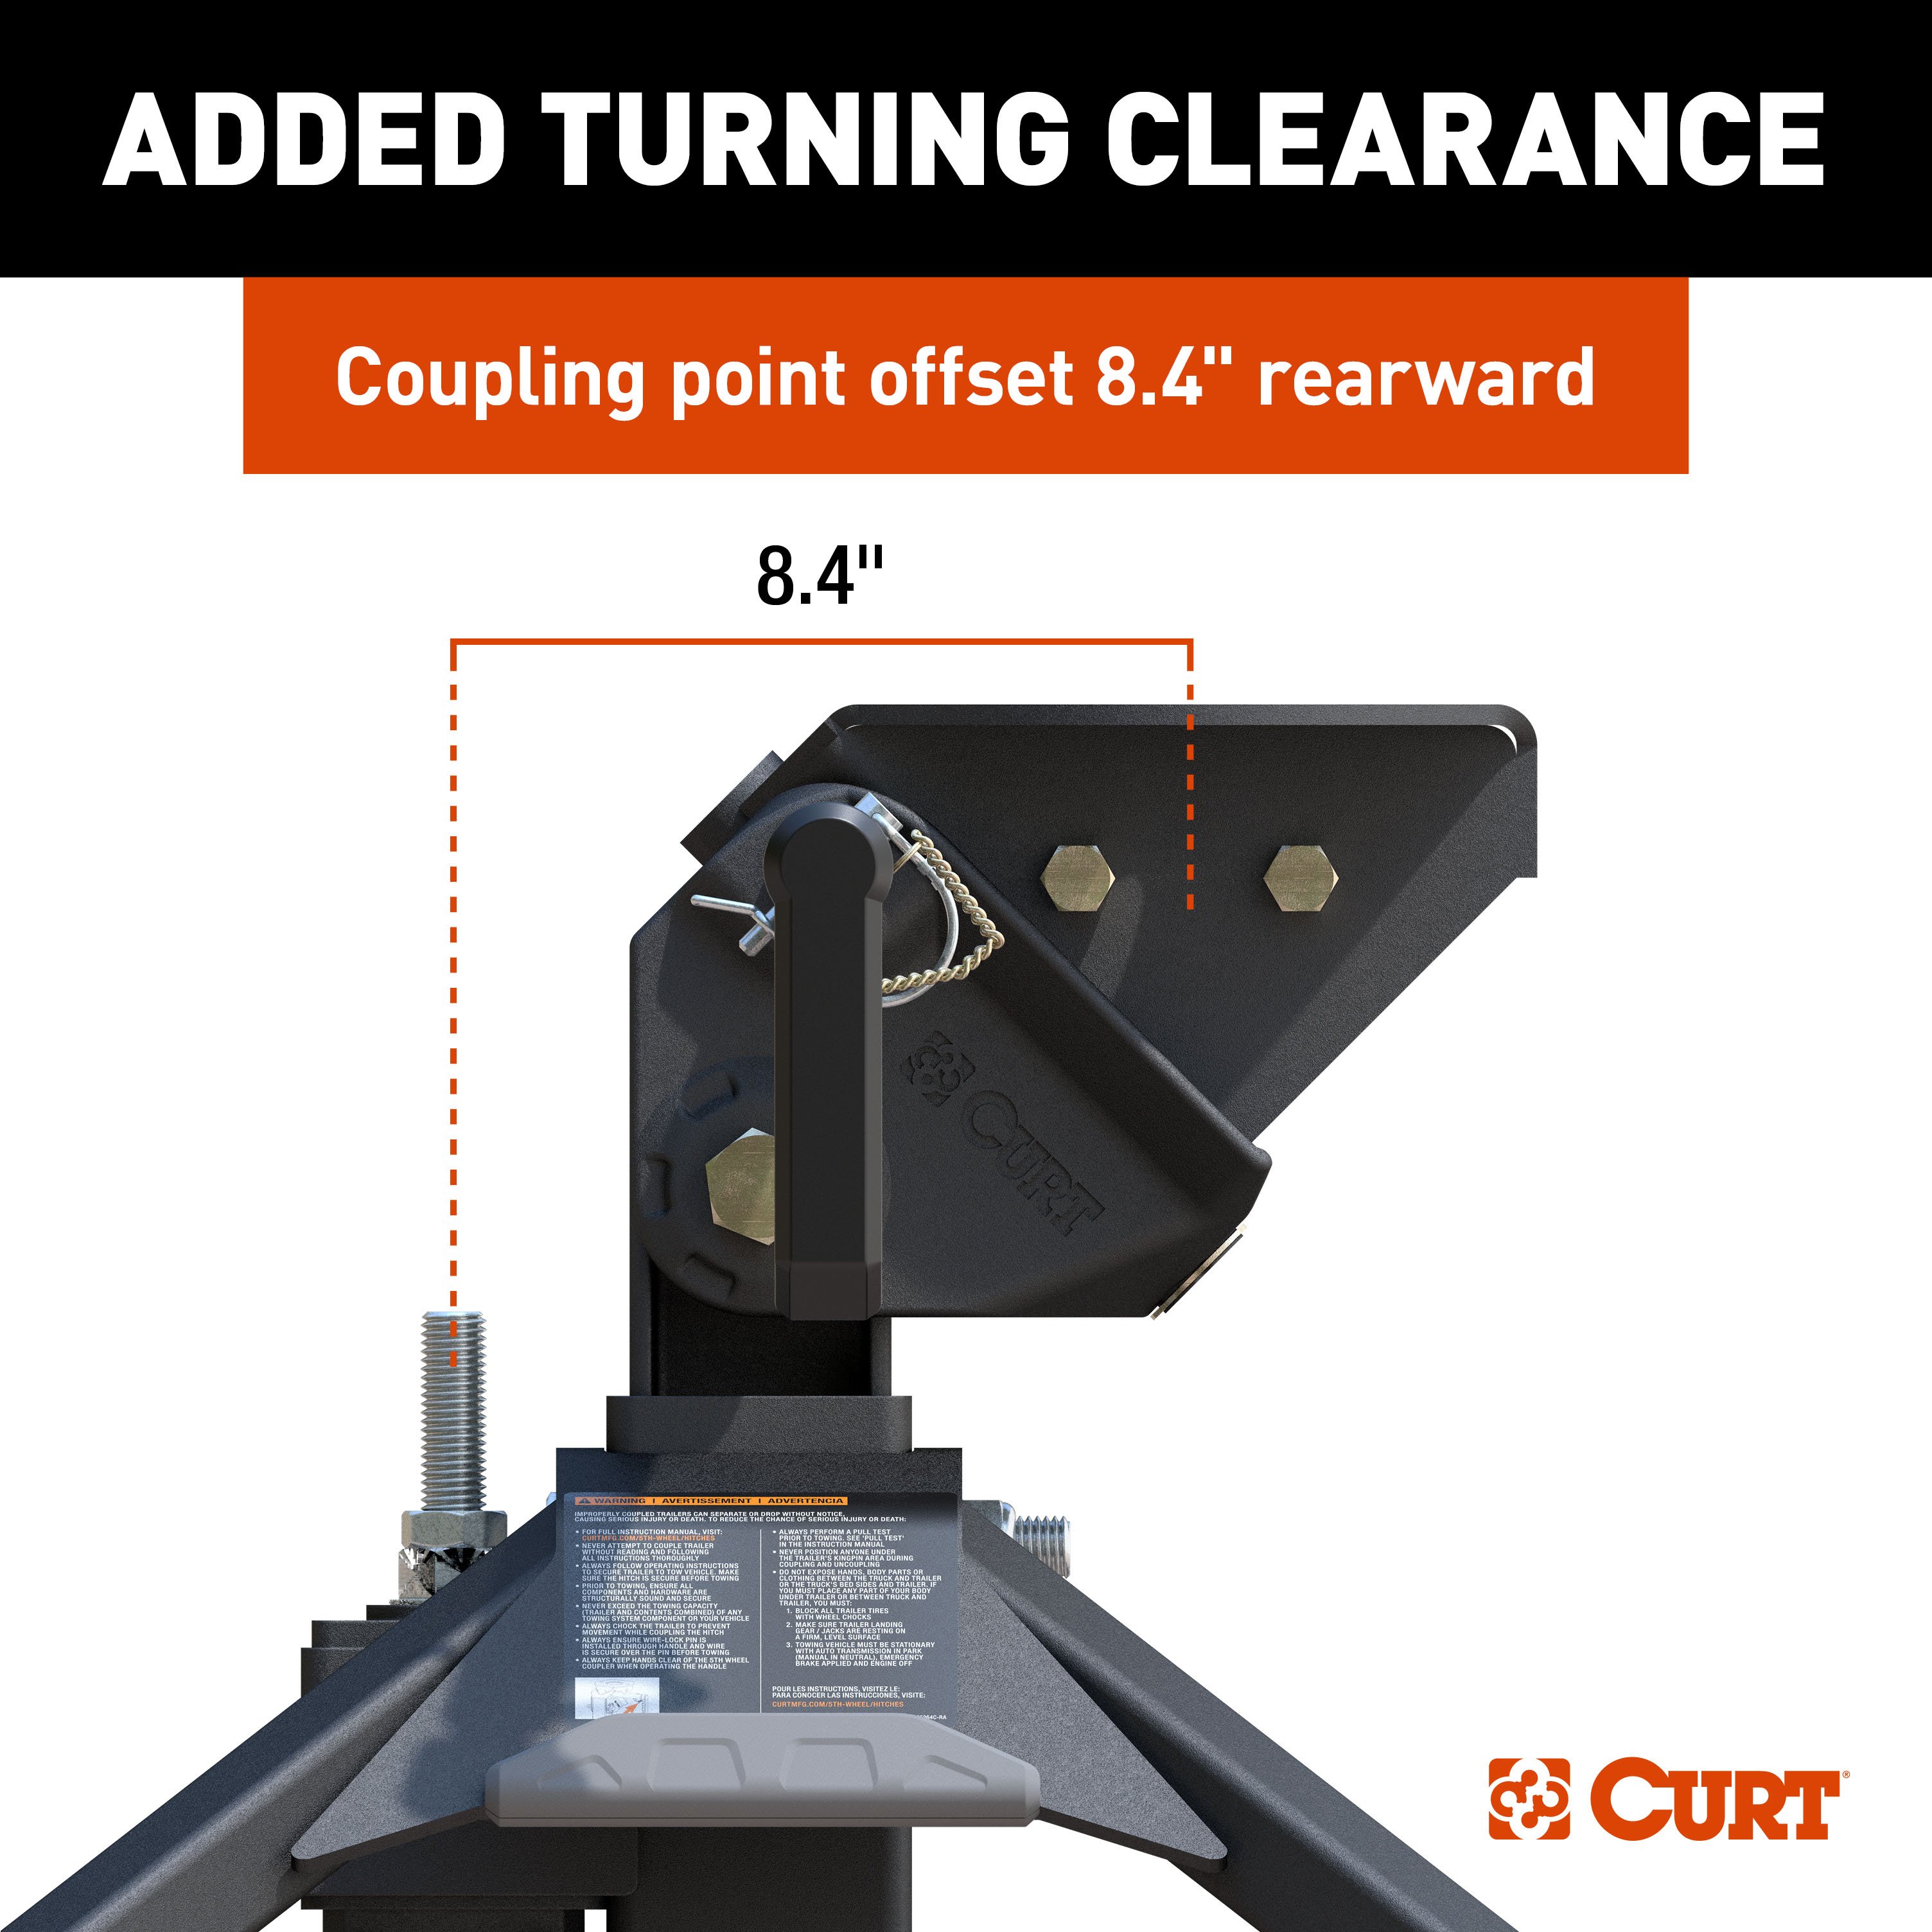
The CURT 16602 is a 5th wheel hitch designed to couple gooseneck trailers to pickup trucks. It features a 5" offset that provides more turning clearance than traditional over-axle 5th wheel hitches. The hitch is adjustable in height from 17-1/2" to 21-1/2" (measured from truck bed rails to the top of its skid plate) to accommodate different trailer ride heights and truck bed configurations.
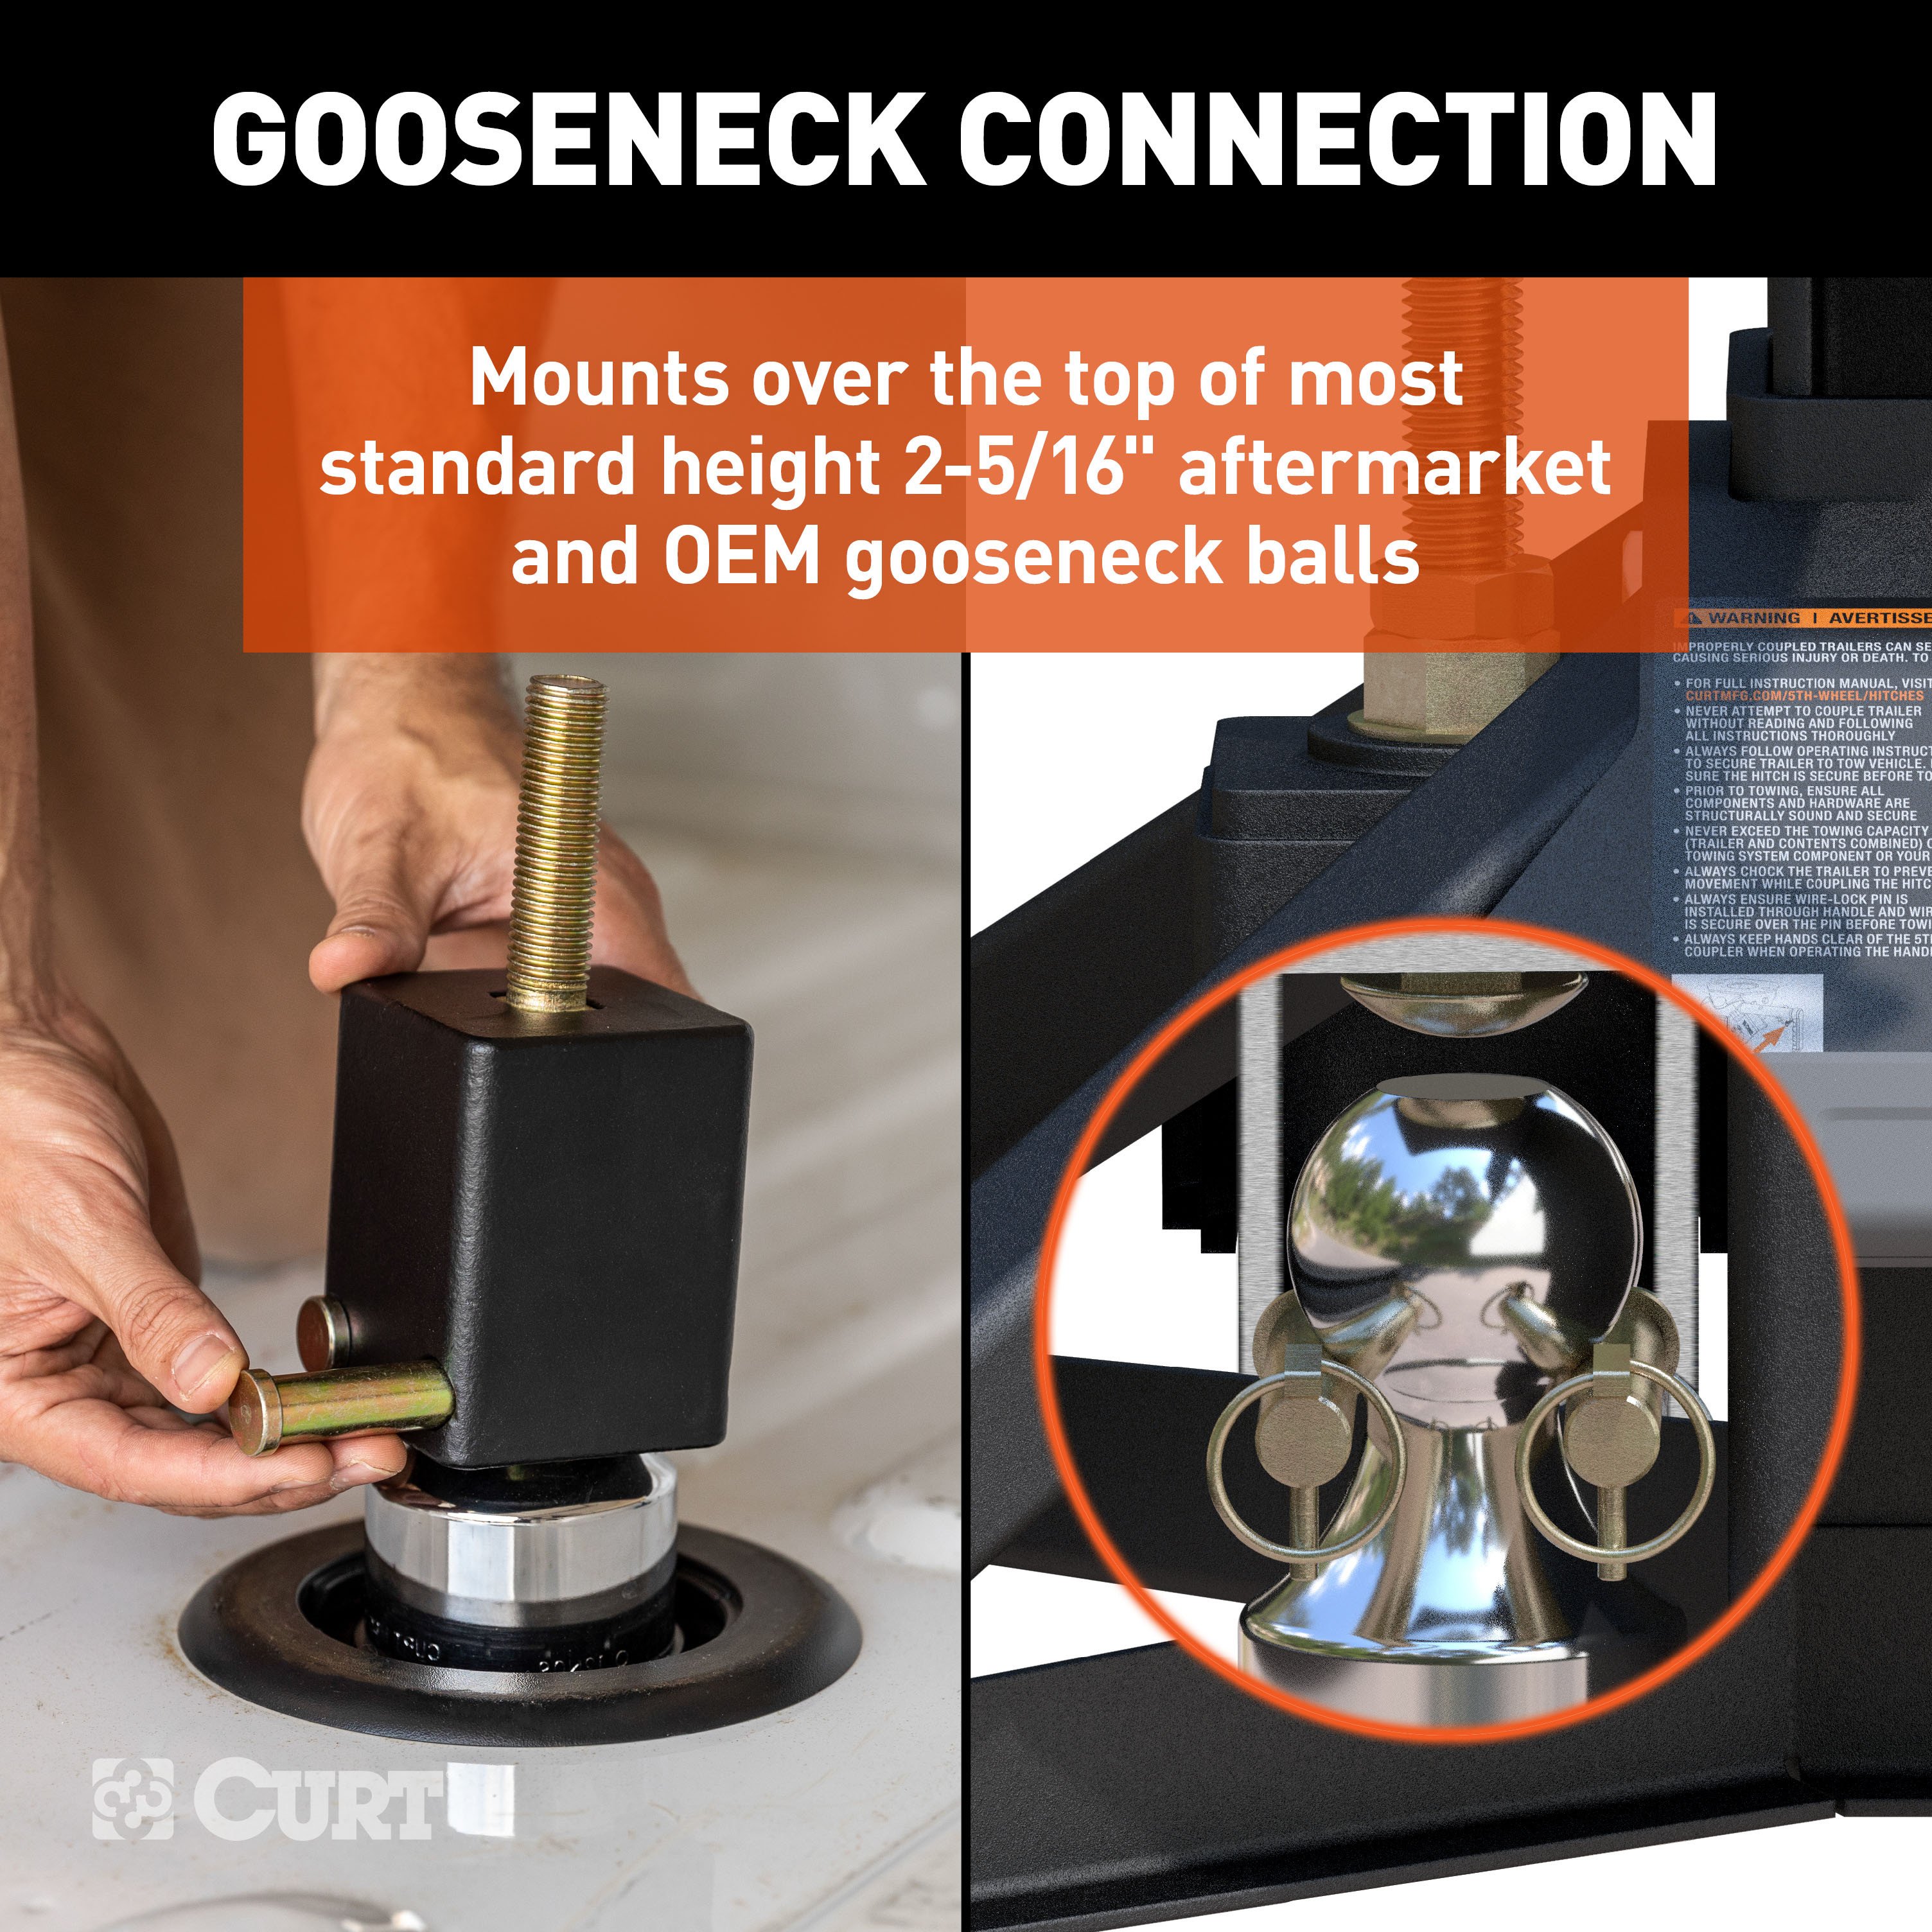
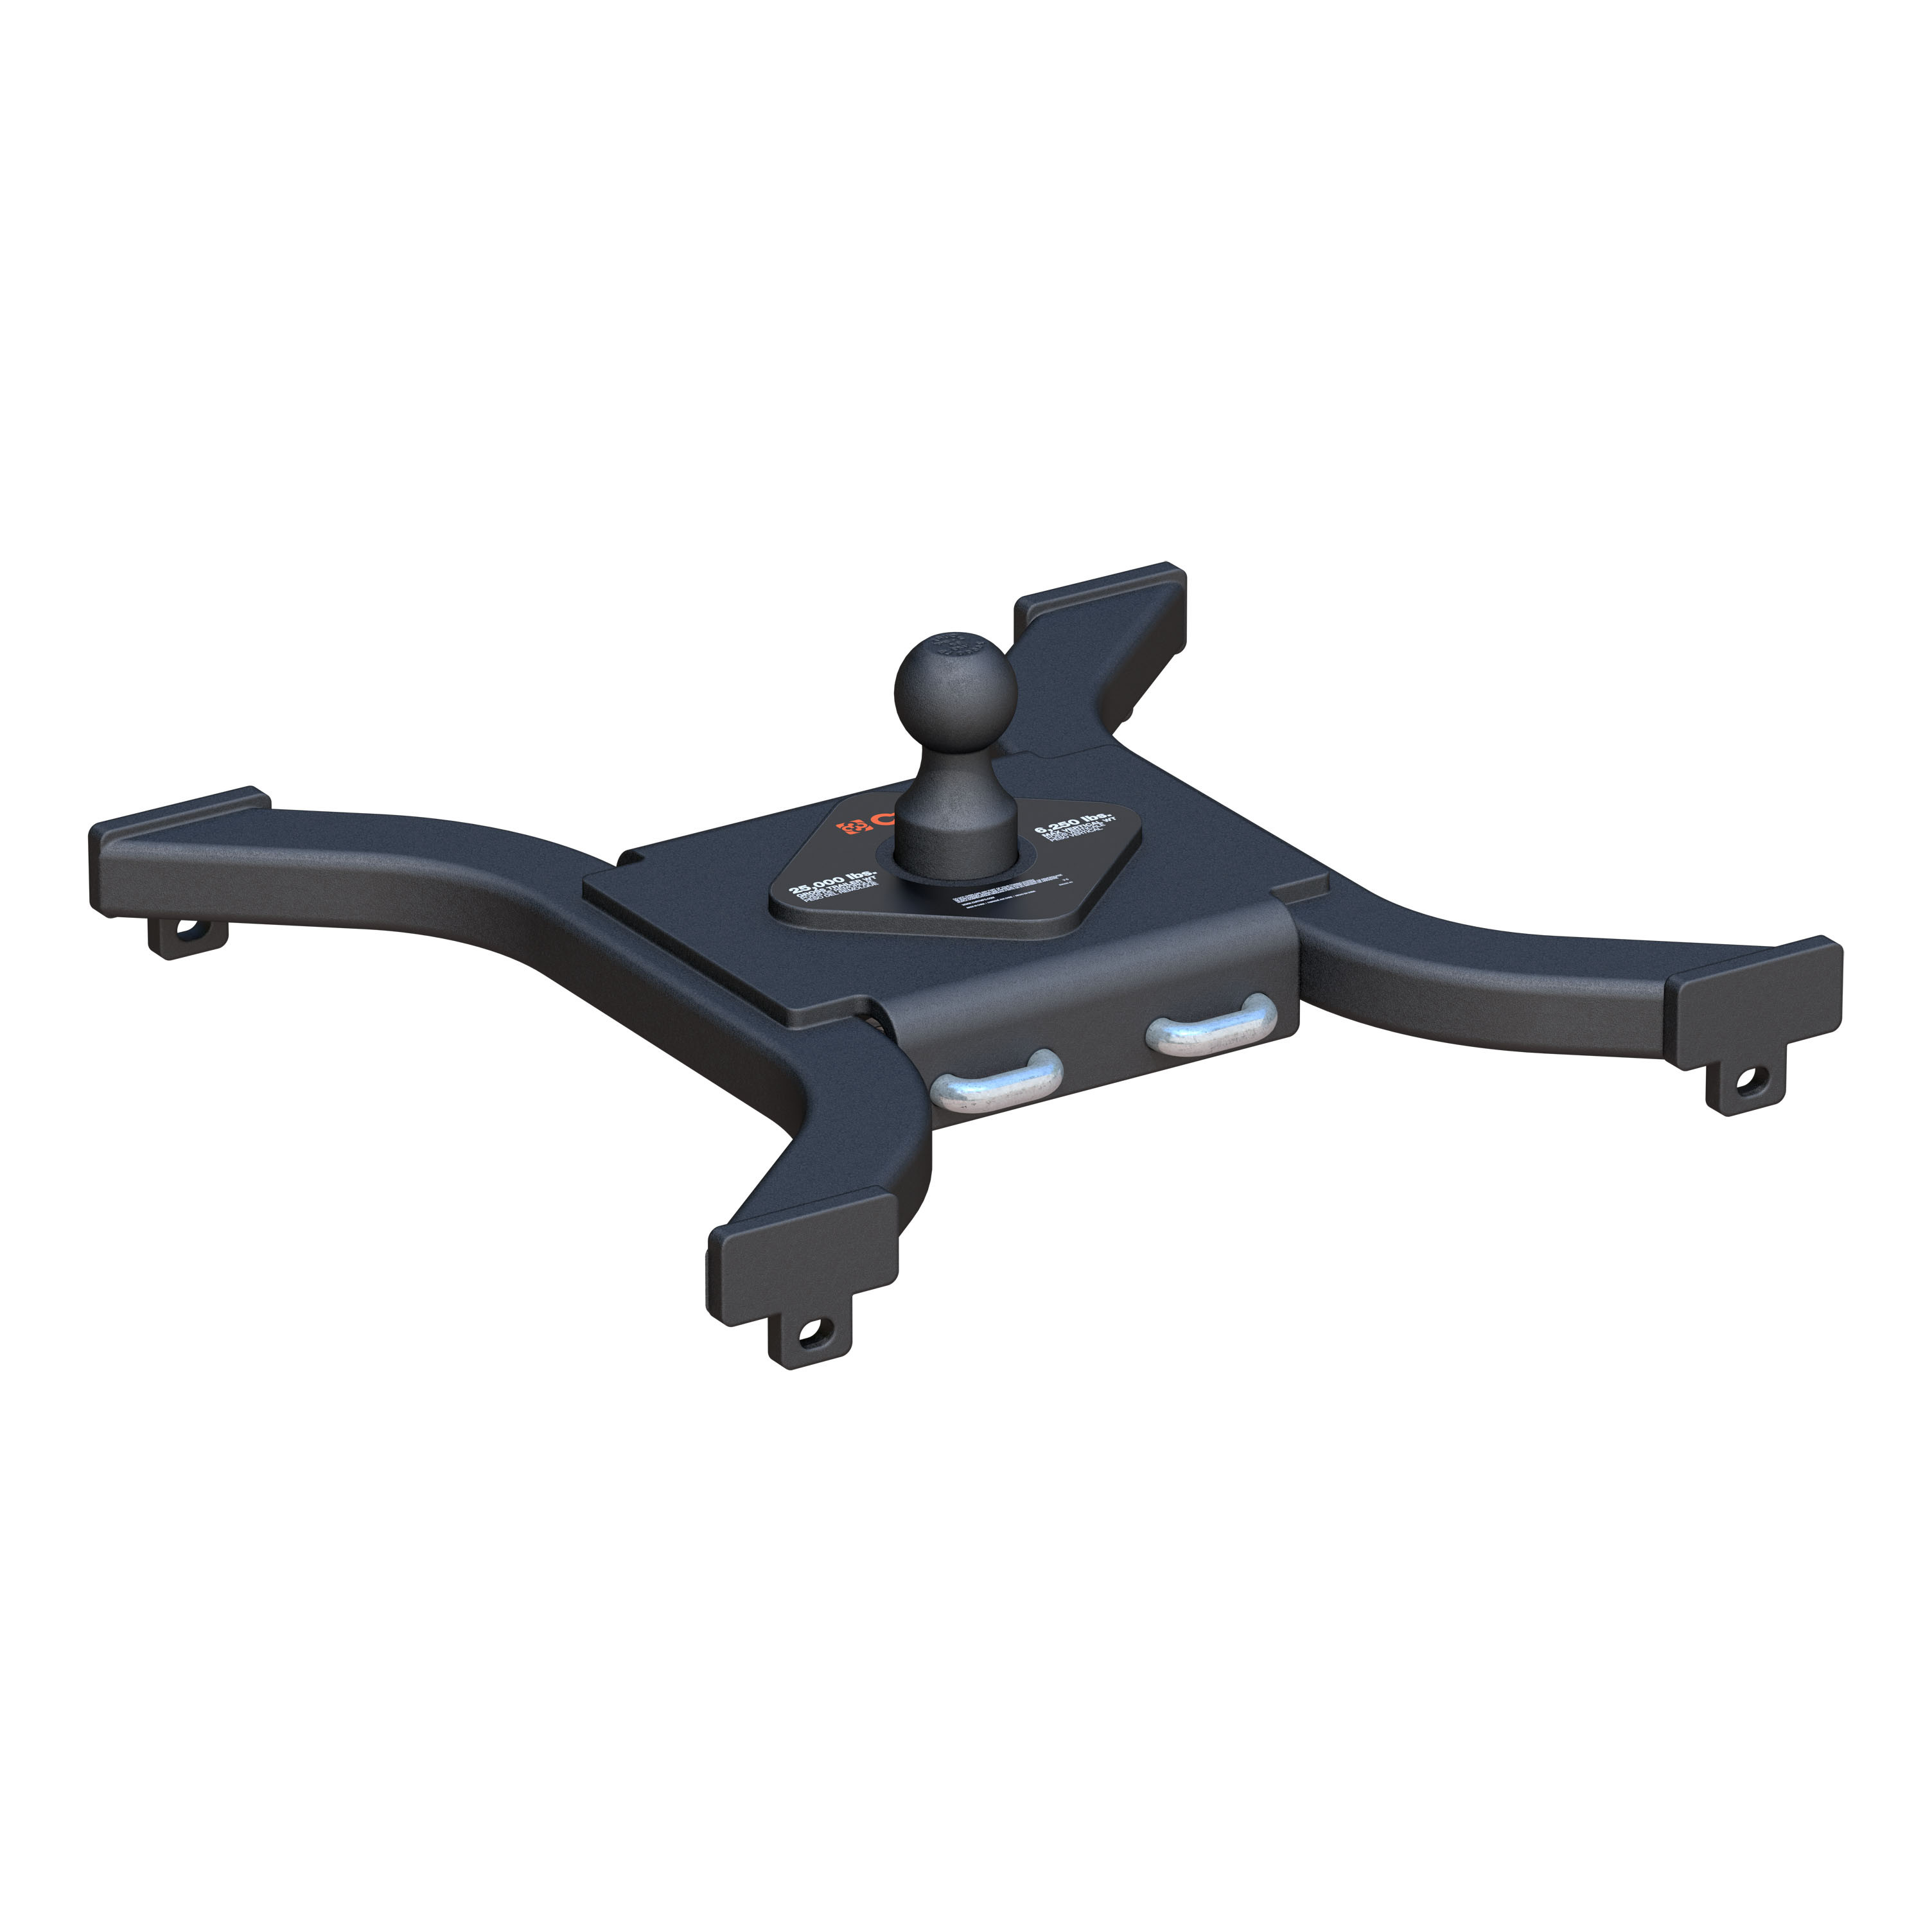
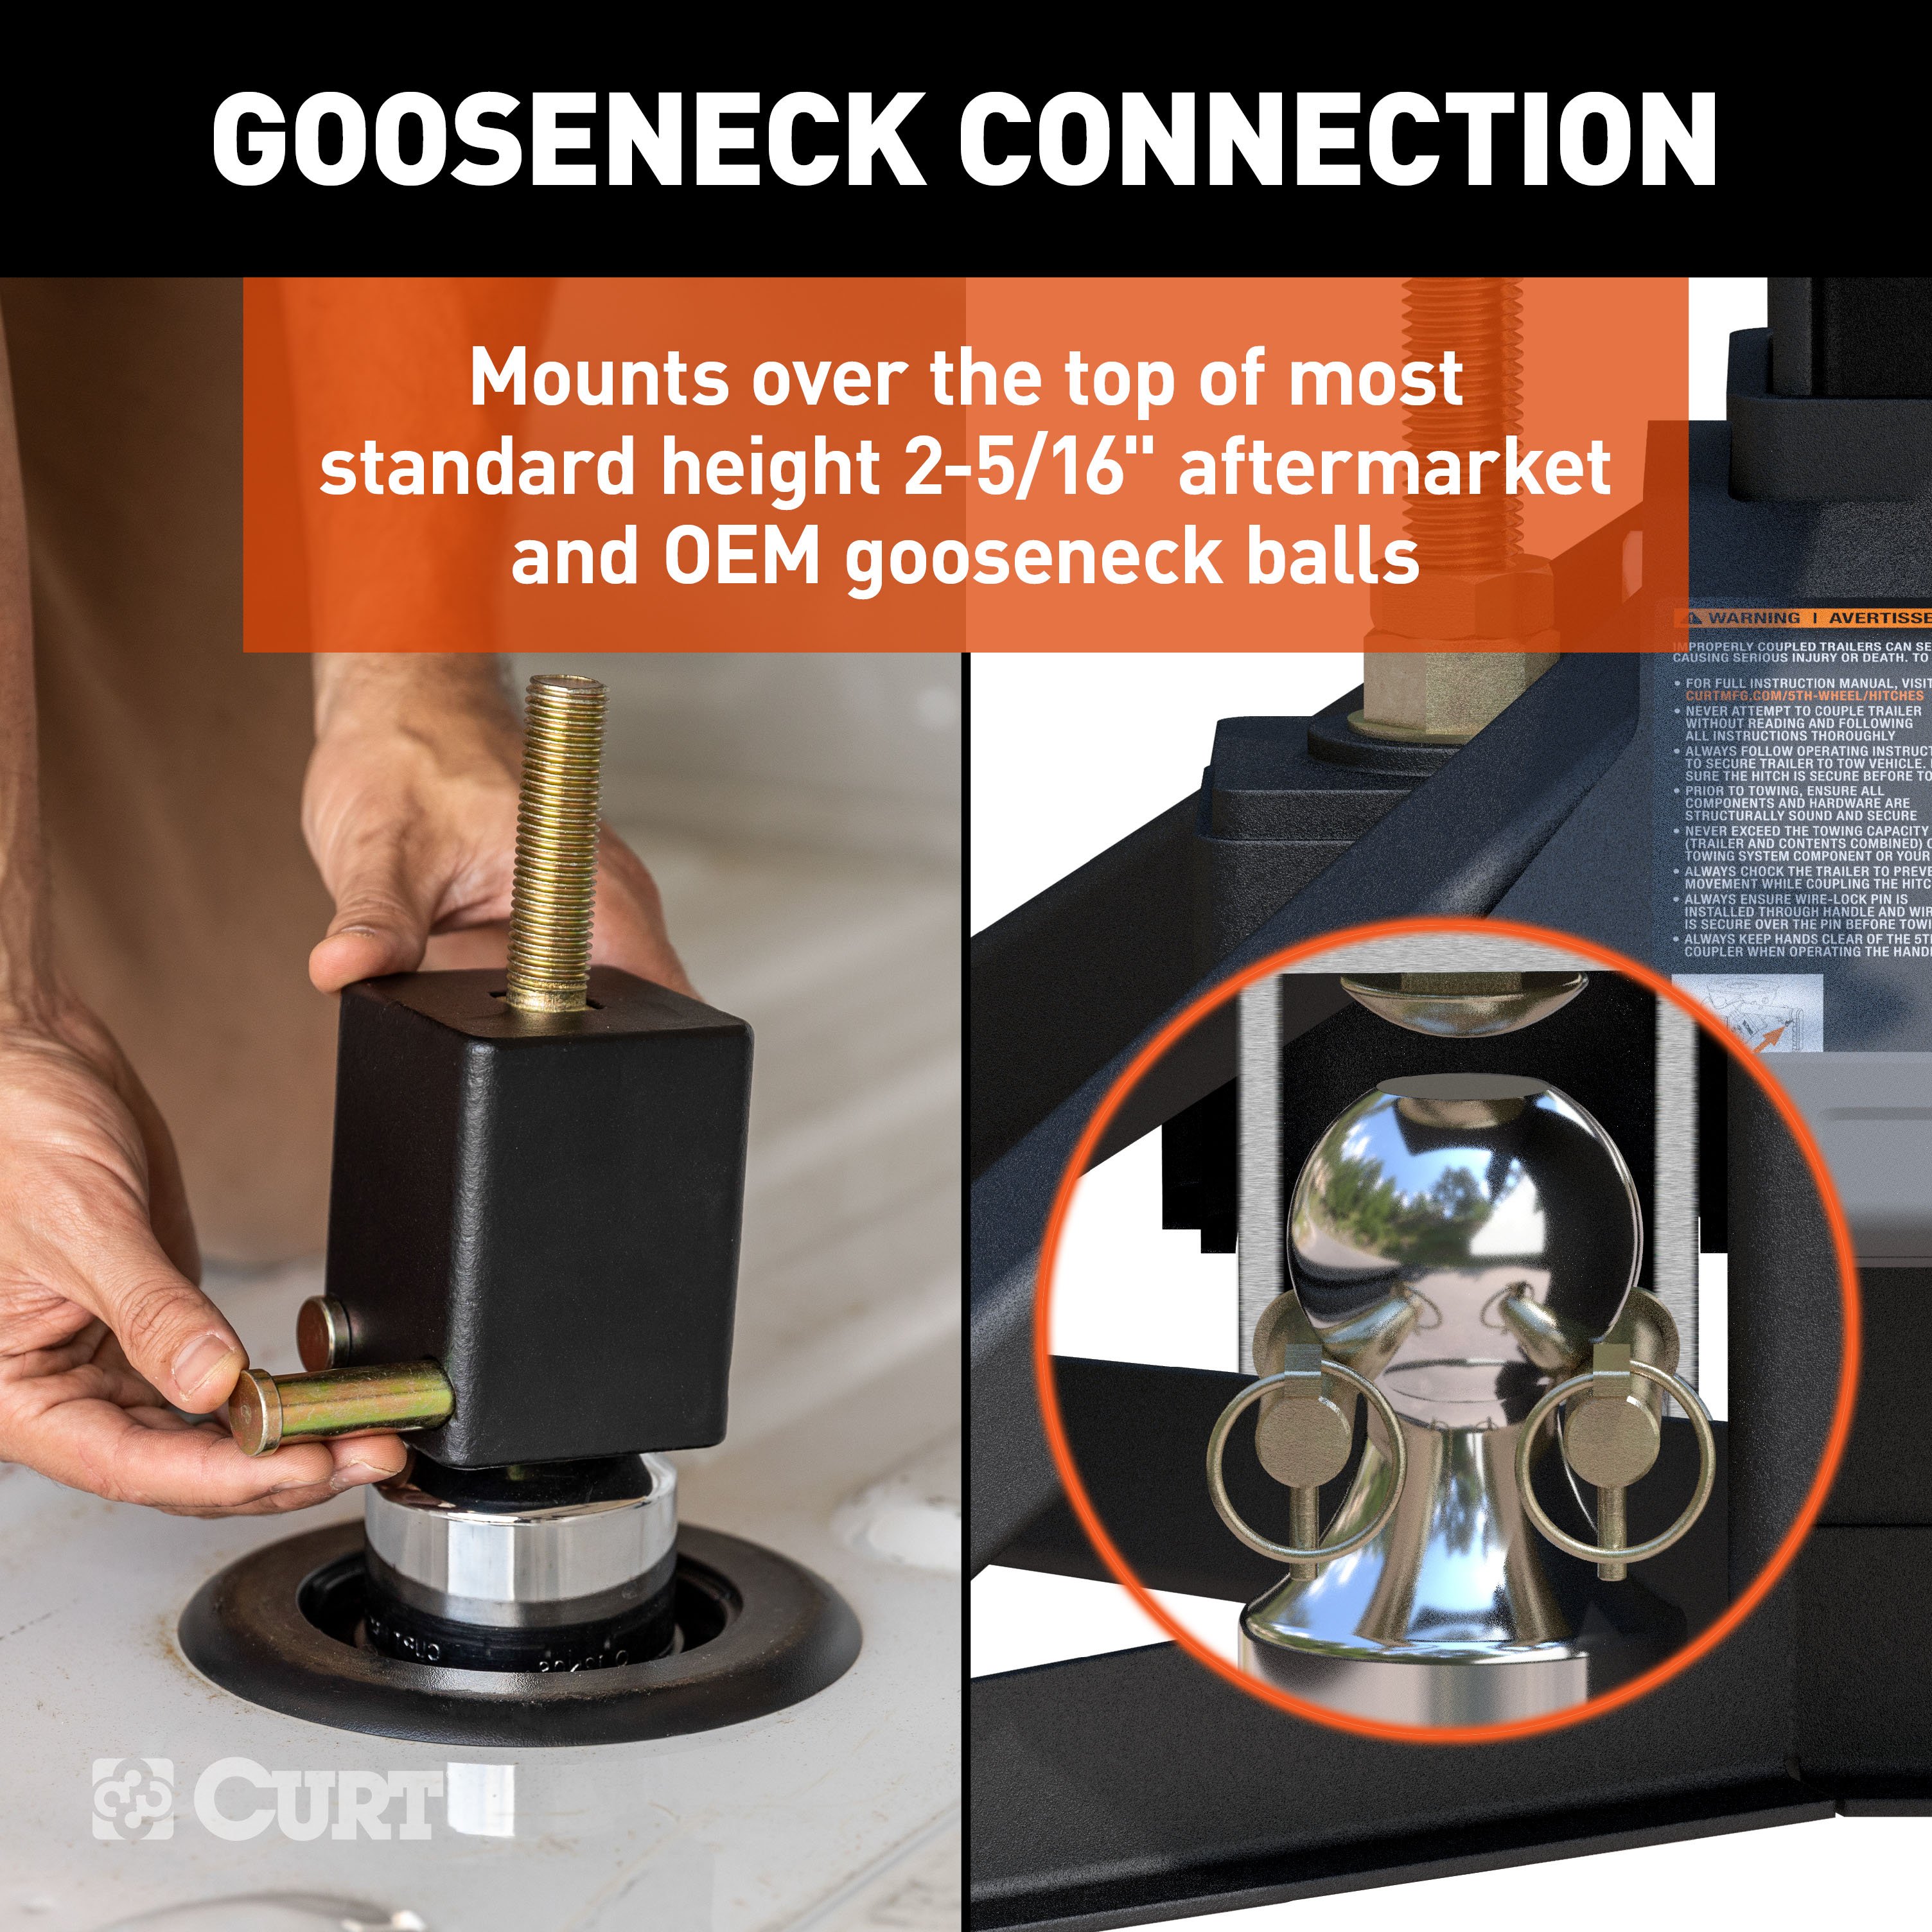
The CURT 16602 gooseneck ball coupler (#19) will only work with a 2-5/16" diameter gooseneck ball.
Yes, bed support rails and plastic pads are required for installation into a traditional pickup truck bed. These are sold separately (not included with the hitch). Failure to use them in certain applications may void the vehicle warranty.
The CURT 16602 has a gross trailer weight (GTW) capacity of 20,000 lbs. and a vertical load capacity of 5,000 lbs. Never exceed the towing capacity of any component or your vehicle.
Follow these steps: (1) Place the trailer on a firm, level surface and set wheel chocks in front and behind the tires. Extend the front trailer lifting jacks and adjust to set the trailer at or near level. (2) Measure from the ground to under the trailer's kingpin box skid plate or lube plate. (3) Measure from the ground to the surface of your truck bed. (4) Subtract the measurement from step 2 from the measurement in step 1. This value will be near the height requirement for the 5th wheel. The hitch is adjustable from 17-1/2" to 21-1/2" in 2" increments. Typical clearance between truck bed rails and trailer should be a minimum of 5-1/2".
The following tools are required: ratchet, torque wrench, socket set, and wrench set.
The torque specifications are: 1/2" bolt: 65 ft-lbs.; M14 bolt: 50 ft-lbs.; M20 bolt: 300 ft-lbs.; M20 carriage bolt: 100 ft-lbs. Use these settings unless otherwise noted in the installation instructions.
Installation occurs in three main stages: (1) Lower Coupler Attachment: Attach the lower coupler assembly (#3) to the base weldment (#1) at the height position you determined, ensuring the bushing is installed toward the rear. Torque the M20 bolt and nut to 300 ft-lbs. (2) Place Coupler on Gooseneck Ball: Insert either the 90mm or 130mm M20 carriage bolt into the gooseneck ball coupler, ensuring the square neck is seated. Lower the coupler onto the gooseneck ball, insert both clevis pins, and secure with lynch pins facing forward. (3) Mount Hitch to Gooseneck Coupler: Place the assembled hitch onto the carriage bolt with lynch pins facing forward. Pull the carriage bolt through, place a flat washer over it, and secure with the flange nut torqued to 100 ft-lbs. Add the jam nut. Thread the two M14 hex head cap screws into the M14 nuts and torque each to 50 ft-lbs., ensuring they contact the gooseneck coupler.
Place the upper weldment (#2) and lube plate (#4) on the trailer kingpin. While holding the upper weldment tight against the pin box, insert two 1/2" hex bolts (#5) through the upper weldment and secure with 1/2" nylock nuts (#6). Torque the 1/2" hex bolts and nuts to 65 ft-lbs. Verify that the upper weldment spins freely around the kingpin.
Before coupling: (1) Perform the connection on a firm, level surface. (2) Use multiple wheel chocks in front of and behind the trailer tires—do not substitute stones, wood blocks, or other objects. (3) Open or remove the tailgate as needed to safely back the tow vehicle under the trailer. (4) Center the trailer coupler with the hitch opening. (5) Stop when the trailer coupler is approximately 2" from the hitch head. (6) Ensure trailer wheels are chocked and raise or lower the trailer jacks to position the coupler 1" above the hitch head. (7) Check the 5th wheel for any signs of damage to the locking mechanism before use. (8) Ensure the locking mechanism is free of dirt, rust, grease, snow, ice or other foreign material. (9) Never position yourself or others under the trailer's kingpin area during coupling.
The pull test must be performed after coupling and before removing trailer wheel blocks or raising front trailer jacks. Set the towing vehicle in forward gear and lightly tug on the trailer to ensure 100% coupling has taken place. If resistance is felt, release forward pressure, set the vehicle to park (automatic) or neutral (manual), and activate the emergency brake. If resistance is not felt, the trailer may not be coupled correctly. Do not continue applying forward pressure. Stop immediately and back the tow vehicle into its original position. Do not allow the truck and trailer to separate, as this can cause damage and serious injury or death. Review coupling instructions, apply corrective action, and repeat the coupling steps.
After preparing the vehicle and trailer: (1) Remove the safety pin on the 5th wheel's handle. Push the handle in and turn counterclockwise until rotation stops, then pull the handle completely out to allow coupling. (2) Back the tow vehicle slowly until the trailer coupler contacts the face of the hitch. Set the parking brake and raise the trailer jacks until the trailer coupler has fully seated into the hitch coupler. If the coupler does not seat fully, move the vehicle slightly forward to relieve tension. (3) Push the hitch handle in and turn clockwise to the locked position. Re-insert the safety pin. Check that the handle is fully inserted and the safety pin is in place before performing the pull test, raising the camper jacks fully, and removing wheel chocks.
To uncouple: (1) Park on a firm, level surface. Set automatic transmission vehicles to park and activate the emergency brake; set manual transmission vehicles to neutral and activate the emergency brake. Chock the trailer wheels with multiple wheel chocks in front and behind the tires—do not substitute stones or wood blocks. Disconnect all harnesses, lanyards, and safety devices as required. Lower or remove the truck tailgate as needed. Begin extending the front trailer lifting jacks just enough to remove the weight of the trailer from the 5th wheel skid plate. Do not lift the rear of the vehicle with trailer jacks. (2) Remove the safety pin on the 5th wheel's handle. Push the handle in and turn counterclockwise until rotation stops, then pull the handle completely out. Lower the jacks until the trailer coupler clears the hitch coupler. (3) Remove the parking brake and slowly drive the tow vehicle out from under the trailer. If resistance is encountered, determine the corrective action and repeat the uncoupling steps.
Before towing: (1) Confirm the handle safety latch pin has been installed. (2) Attach electrical harnesses. (3) Attach the lanyard and insert the electric brake break-away plunger. If hydraulic surge brakes are present, attach the lanyard from the surge brake assembly as required. (4) Fully retract the front trailer lifting jacks. (5) Close the truck tailgate or reinstall it as required. (6) Remove tire chock blocks. (7) Check running lights, directional signals, and brake lights for proper operation. (8) Pull forward a few feet and apply brakes to check that trailer brakes are activating. Adjust the electric brake controller if necessary.
Follow this maintenance schedule: Before each use: inspect the lube plate condition, spray light dry film lubricant on the head pivot point and handle pin, torque the lower M20 bolt to 300 ft-lbs., torque the M20 flange nut on the M20 carriage bolt to 100 ft-lbs. and secure the M20 jam nut, torque the M14 bolts to 50 ft-lbs. and secure the M14 jam nuts, and inspect lynch pins and clevis pins for wear or damage. Every 1,000 miles: re-torque the two 1/2" hex bolts to 65 ft-lbs. (re-torque after initial 500 miles and every 1,000 miles thereafter), torque the lower M20 bolt to 300 ft-lbs., torque the M20 flange nut to 100 ft-lbs. and secure the M20 jam nut, torque the M14 bolts to 50 ft-lbs. and secure the M14 jam nuts, and inspect lynch pins and clevis pins for wear or damage. After each use and before long-term storage: clean the 5th wheel hitch with warm soapy water and dry with towels or compressed air. For extended storage, remove the hitch from the vehicle or cover it and spray exposed surfaces with a light coat of rust inhibitor. If the lube plate is worn, replace it with CURT# 16722.
After torquing the 1/2" hex bolts and nuts to 65 ft-lbs., manually verify that the upper weldment (#2) spins freely around the kingpin. If it does not spin freely, the installation may not be correct.
To remove: (1) Loosen the M14 jam nuts (#18) and M14 hex head cap screws (#17). (2) Remove the M20 jam nut (#15), M20 flange nut (#14), and M20 washer (#10). (3) Lift the hitch off from the M20 carriage bolt (#12 or #13). (4) Remove the lynch pins (#16) and clevis pins (#11) from the gooseneck ball coupler. To reinstall, reverse the removal order.
Torque the M20 bolt and nut connecting the lower coupler assembly (#3) to the base weldment (#1) to 300 ft-lbs. This bolt must be checked and re-torqued before each use and every 1,000 miles.
Torque the M20 flange nut (#14) on the M20 carriage bolt (#12 or #13) to 100 ft-lbs., then secure the M20 jam nut (#15) on top. This fastener must be checked and re-torqued before each use and every 1,000 miles.
Torque each of the two M14 hex head cap screws (#17) to 50 ft-lbs., then tighten the M14 nuts (#18). These fasteners must be checked and re-torqued before each use and every 1,000 miles. Ensure the M14 hex head cap screws are allowed to place pressure on the gooseneck hitch coupler.
Torque the two 1/2" hex bolts (#5) and their nylock nuts (#6) to 65 ft-lbs. These bolts must be re-torqued after the initial 500 miles and every 1,000 miles thereafter.
Do not torque the upper M20 head pivot bolt (#8). The nut is designed to only make contact but not apply clamping force. If the bolt is torqued, it could cause the bolt to fail, resulting in hitch separation during use and leading to severe injury or death. If the hitch head appears loose, the M20 bolt can be removed and inspected for damage. If any cracks or damage are visible, immediately discontinue use of the hitch.
Before coupling, check for any signs of damage to the locking mechanism. If any components are missing or damaged, do not attempt to use the hitch until it has been repaired. Also check that the M20 bolt holding the lower coupler assembly to the base is not loose; if needed, re-torque it to 300 ft-lbs. Ensure the locking mechanism is free of excessive dirt, rust, grease, snow, ice, or other foreign material preventing it from cycling properly. Clean excessive dirt, snow, or ice with warm soapy water. Lightly lubricate exposed surfaces with a rust inhibitor to restore proper operation. Components with excessive amounts of rust may require replacement.
Use the 130mm long M20 carriage bolt (#12) for lower gooseneck balls and the 90mm long M20 carriage bolt (#13) for taller gooseneck balls. The correct bolt length ensures the square neck is properly seated in the coupler and the fasteners align correctly.
The 5" offset adds more turning clearance than traditional over-axle 5th wheel hitches, which may lessen the need for a slider. However, each truck-trailer configuration is different. Be sure to review each configuration and always ensure adequate trailer-to-cab clearance when maneuvering.
Assembly and coupling should be performed on a firm and level surface. Multiple wheel chocks should be used in front of and behind the trailer tires. Do not substitute objects such as stones, wood blocks, or other materials for proper wheel chocks.
The danger zone is the area under the trailer's kingpin. Never position yourself or others under the trailer's kingpin area during coupling and uncoupling. If you must place any part of your body under the trailer or between the truck and trailer, you must: (1) Block all trailer tires with wheel chocks (not stones or wood blocks). (2) Make sure the trailer landing gear/jacks are resting on a firm, level surface. (3) Ensure the towing vehicle is stationary with the automatic transmission in park (manual in neutral), emergency brake applied, and engine off.
The CURT 16602 works with gooseneck trailers that have a 2-5/16" diameter gooseneck ball. It is adjustable from 17-1/2" to 21-1/2" in height to fit different truck bed heights. Bed support rails and plastic pads (sold separately) are required for traditional pickup truck beds. Consult the manual's height calculation steps to confirm fitment for your specific truck and trailer.
You will need a ratchet, torque wrench, socket set, and wrench set.
The manual does not specify whether drilling is required. The installation instructions focus on assembling the hitch components and attaching them to the trailer kingpin and truck bed using existing holes, but do not explicitly state whether truck bed modifications are needed.
Key torque values: 1/2" bolts (upper coupler): 65 ft-lbs.; M14 bolts (gooseneck coupler): 50 ft-lbs.; M20 bolt (lower coupler to base): 300 ft-lbs.; M20 carriage bolt (hitch to gooseneck): 100 ft-lbs. Do not torque the upper M20 head pivot bolt—it should only make contact, not apply clamping force.
Place the trailer on a level surface with wheel chocks and extended jacks. Measure from the ground to the trailer's kingpin box skid plate. Measure from the ground to your truck bed surface. Subtract the first measurement from the second. This value indicates the required hitch height, which should fall within the 17-1/2" to 21-1/2" adjustable range.
Perform maintenance before each use (inspect lube plate, lubricate pivot points, check all fasteners and pins) and every 1,000 miles (re-torque all bolts and nuts, inspect pins). After each use, clean the hitch with warm soapy water. For long-term storage, apply rust inhibitor to exposed surfaces.
If the trailer coupler does not seat fully into the hitch coupler, the vehicle might need to be moved slightly forward to relieve tension on the hitch. Move the tow vehicle forward a small amount and try raising the trailer jacks again to achieve full seating. If the coupler still does not seat, stop and review the coupling instructions to identify any other issues before proceeding.
If resistance is felt during the pull test, it indicates that 100% coupling has taken place and the trailer is properly secured. This is the correct result. If no resistance is felt, the trailer may not be coupled correctly. In that case, do not continue applying forward pressure. Stop immediately, back the tow vehicle into its original position, and do not allow the truck and trailer to separate. Review the coupling instructions and repeat the coupling steps.
If the hitch head appears loose, the M20 bolt (#8) can be removed and inspected for damage. If any cracks or damage are visible, immediately discontinue use of the hitch. Do not attempt to torque the M20 bolt—the nut is designed to only make contact, not apply clamping force. If the bolt is undamaged, reinstall it without torquing and verify that the lower M20 bolt connecting the lower coupler assembly to the base is torqued to 300 ft-lbs.
Ensure the locking mechanism is free of excessive dirt, rust, grease, snow, ice, or other foreign material. Clean excessive dirt, snow, or ice with warm soapy water. Lightly lubricate exposed surfaces with a rust inhibitor to restore proper operation. If the mechanism has excessive amounts of rust, the components may require replacement to restore proper functionality.
If resistance is encountered when uncoupling, determine the corrective action and repeat the uncoupling steps. Ensure that the trailer jacks have been extended just enough to remove the weight of the trailer from the 5th wheel skid plate—do not lift the rear of the vehicle with the trailer jacks, as this will make it difficult to pull the handle out. Verify that all harnesses, lanyards, and safety devices have been disconnected. If resistance persists, stop and review the uncoupling instructions before proceeding.
These conditions may indicate that the gooseneck ball is at too low of a position to work with the hitch. This could cause the carriage bolt to fail, resulting in hitch separation during use and leading to severe injury or death. If either of these conditions occurs, do not use the hitch. Remove the M20 carriage bolt and inspect it for damage. If any cracks or damage are visible, immediately discontinue use of the hitch. Consult the manufacturer or an authorized dealer to determine if the gooseneck ball position can be adjusted or if a different hitch is required.
| Part # | Description | Intended Use | GTW / Vertical Load | Offset | Body Weight | Height Range |
|---|---|---|---|---|---|---|
| 16051 | Single-point hitch (16602) with bed protector supports (16040) | Standard truck beds | 20,000 / 5,000 lbs. | 8.4" | 70 lbs. | 16-3/8" - 20-3/8" |
| 16602 | Single-point hitch only | Flatbed truck beds | 20,000 / 5,000 lbs. | 8.4" | 70 lbs. | 16-3/8" - 20-3/8" |
| 16040 | Single-point hitch bed protector supports only | Replacement part | -- | -- | -- | -- |
No reviews have been added for this product.