
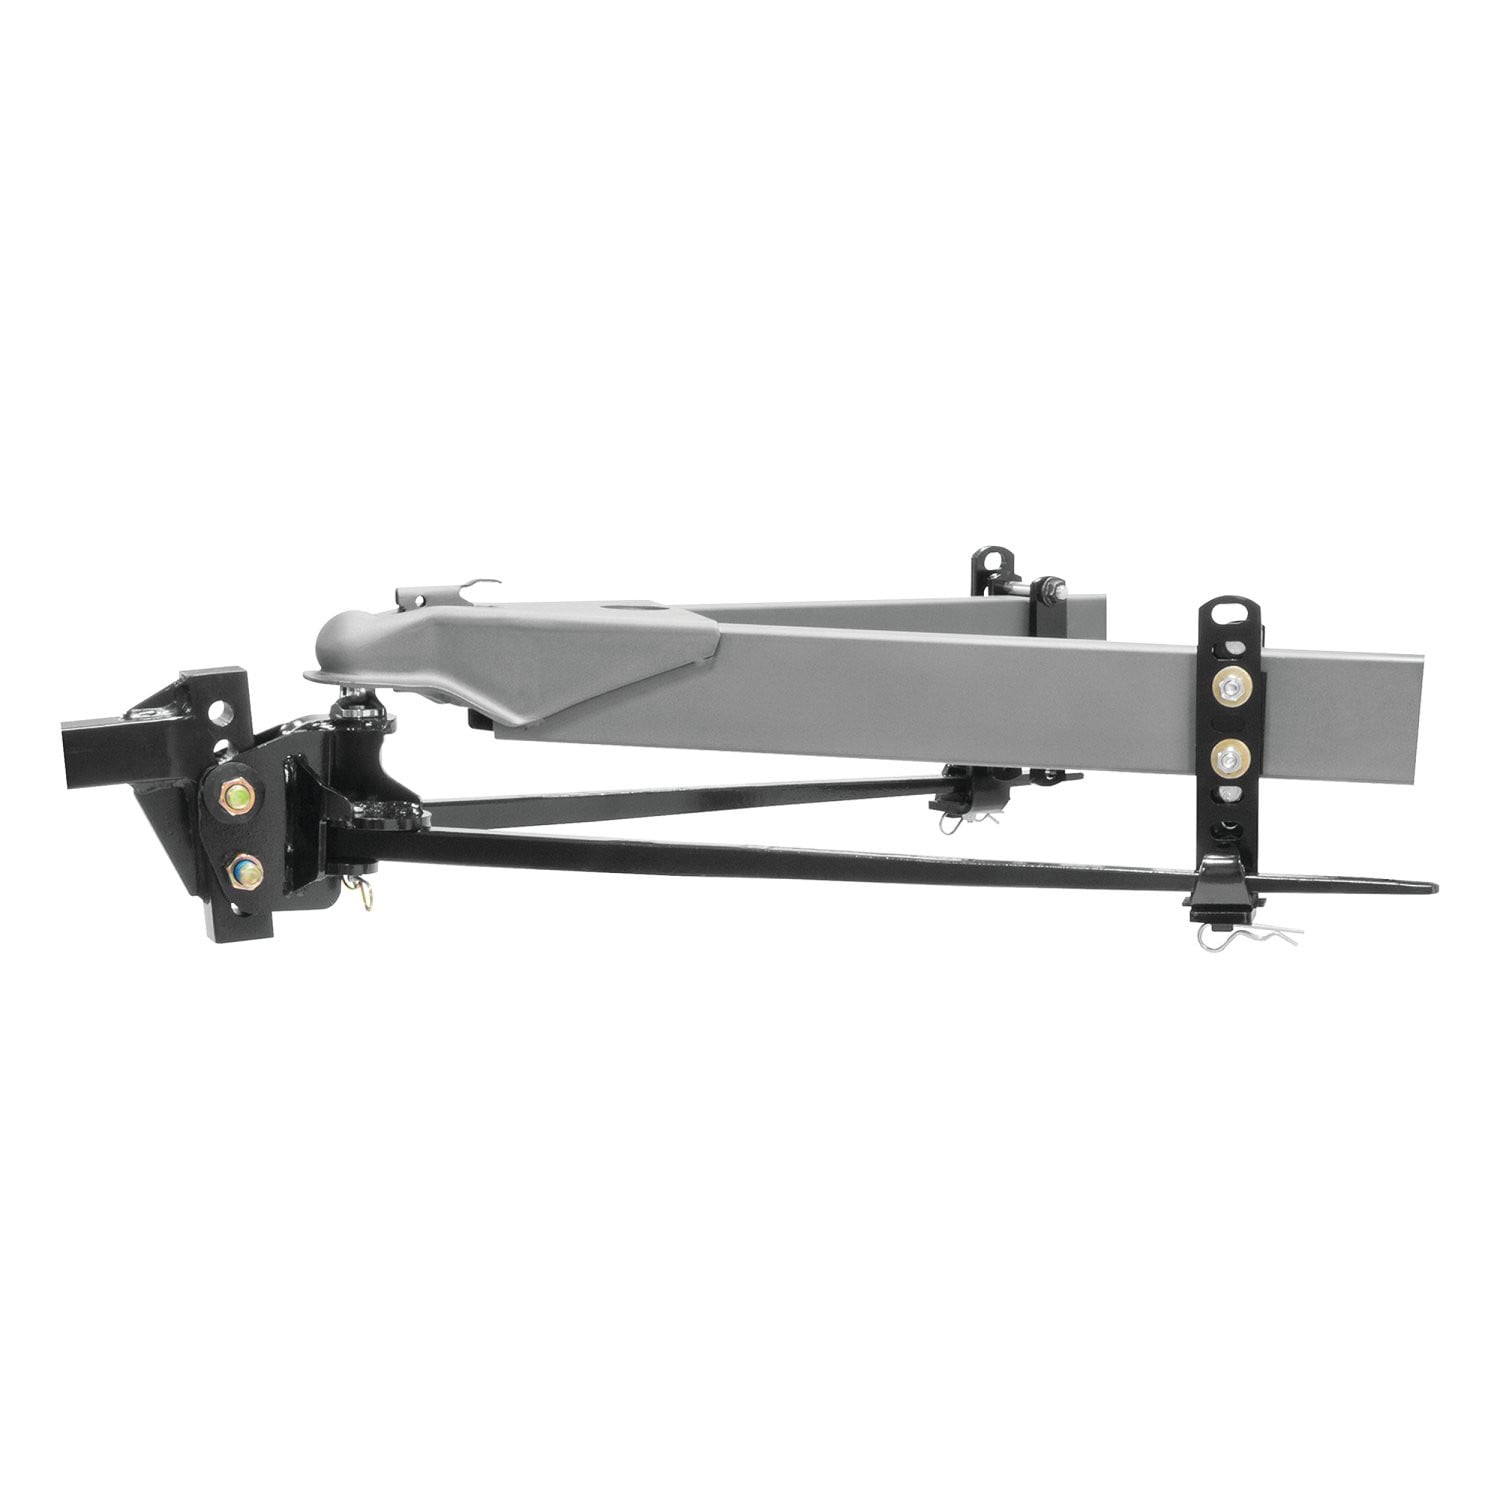
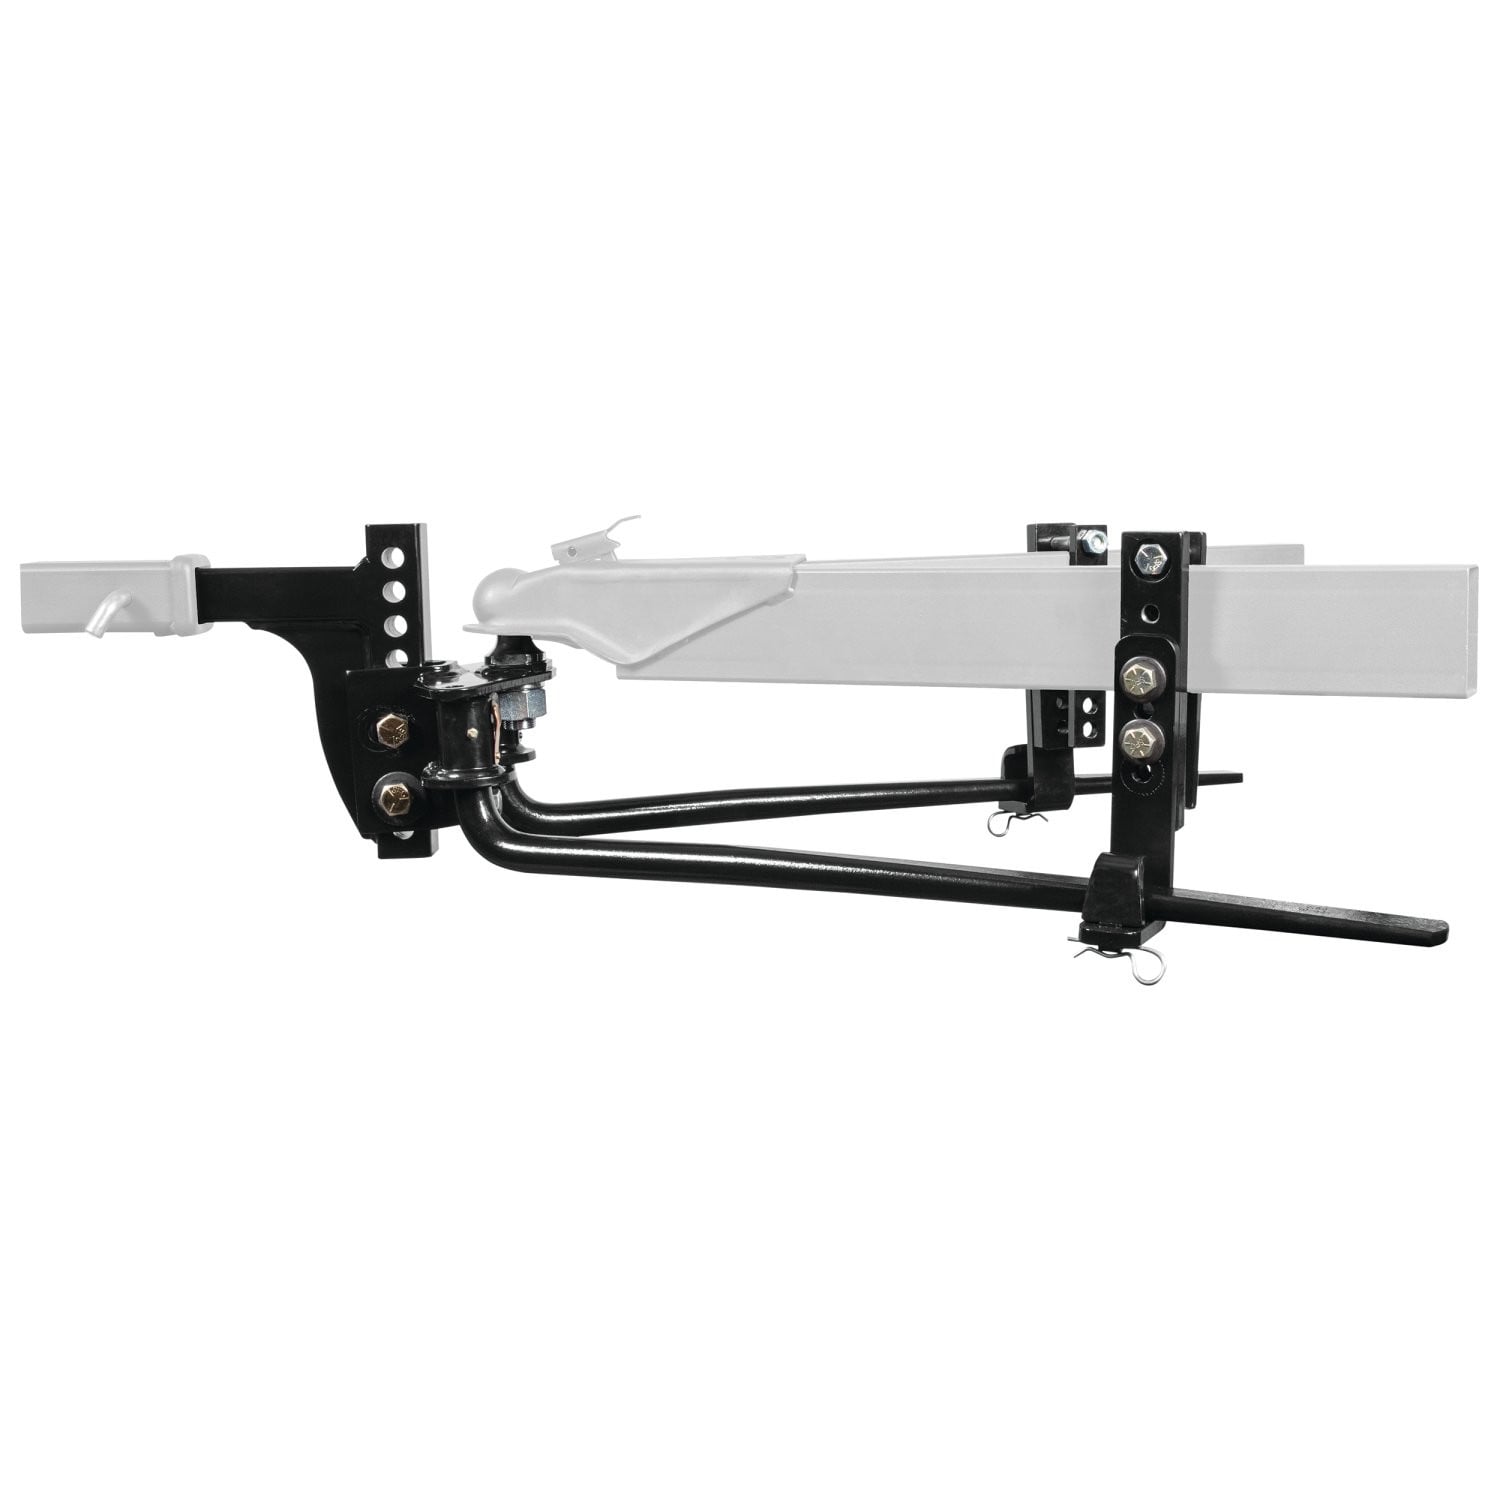
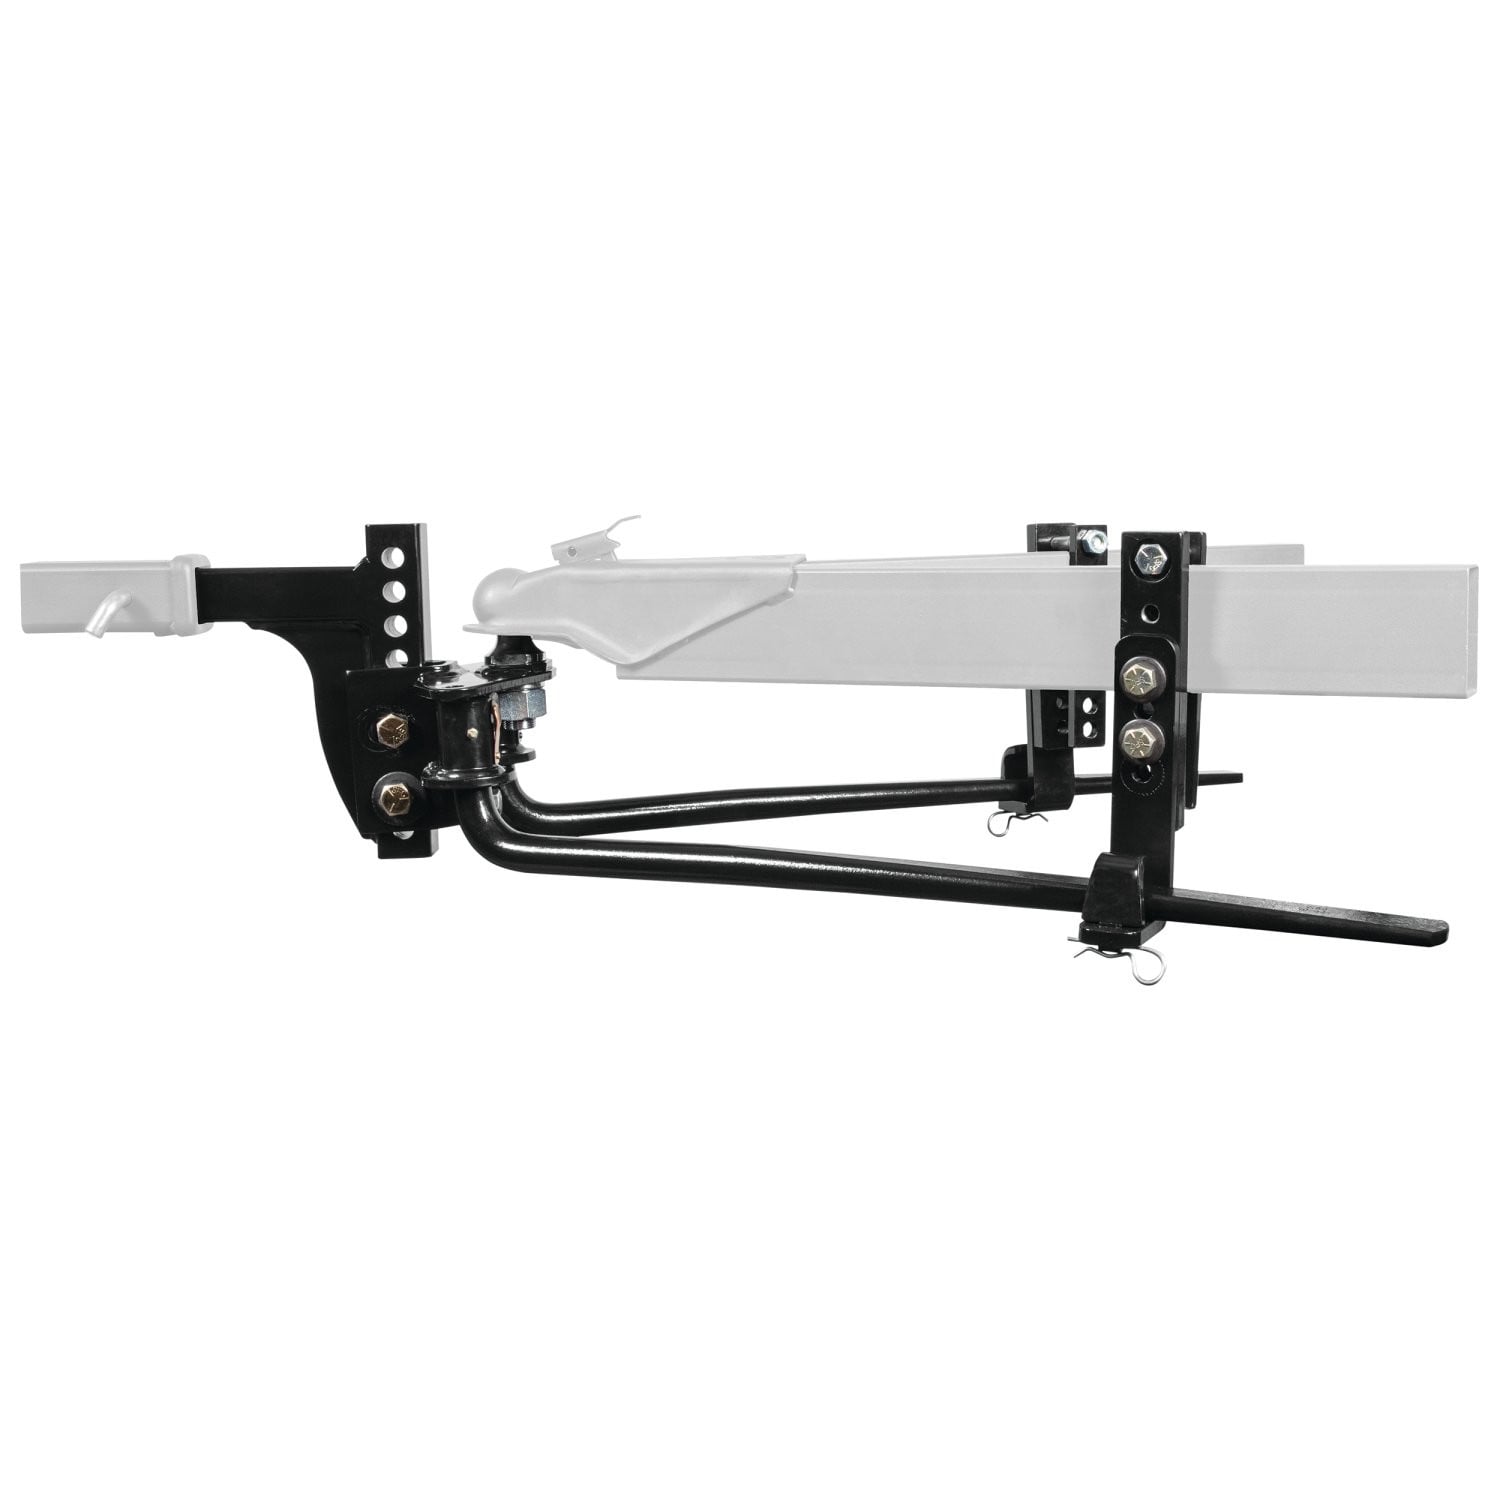
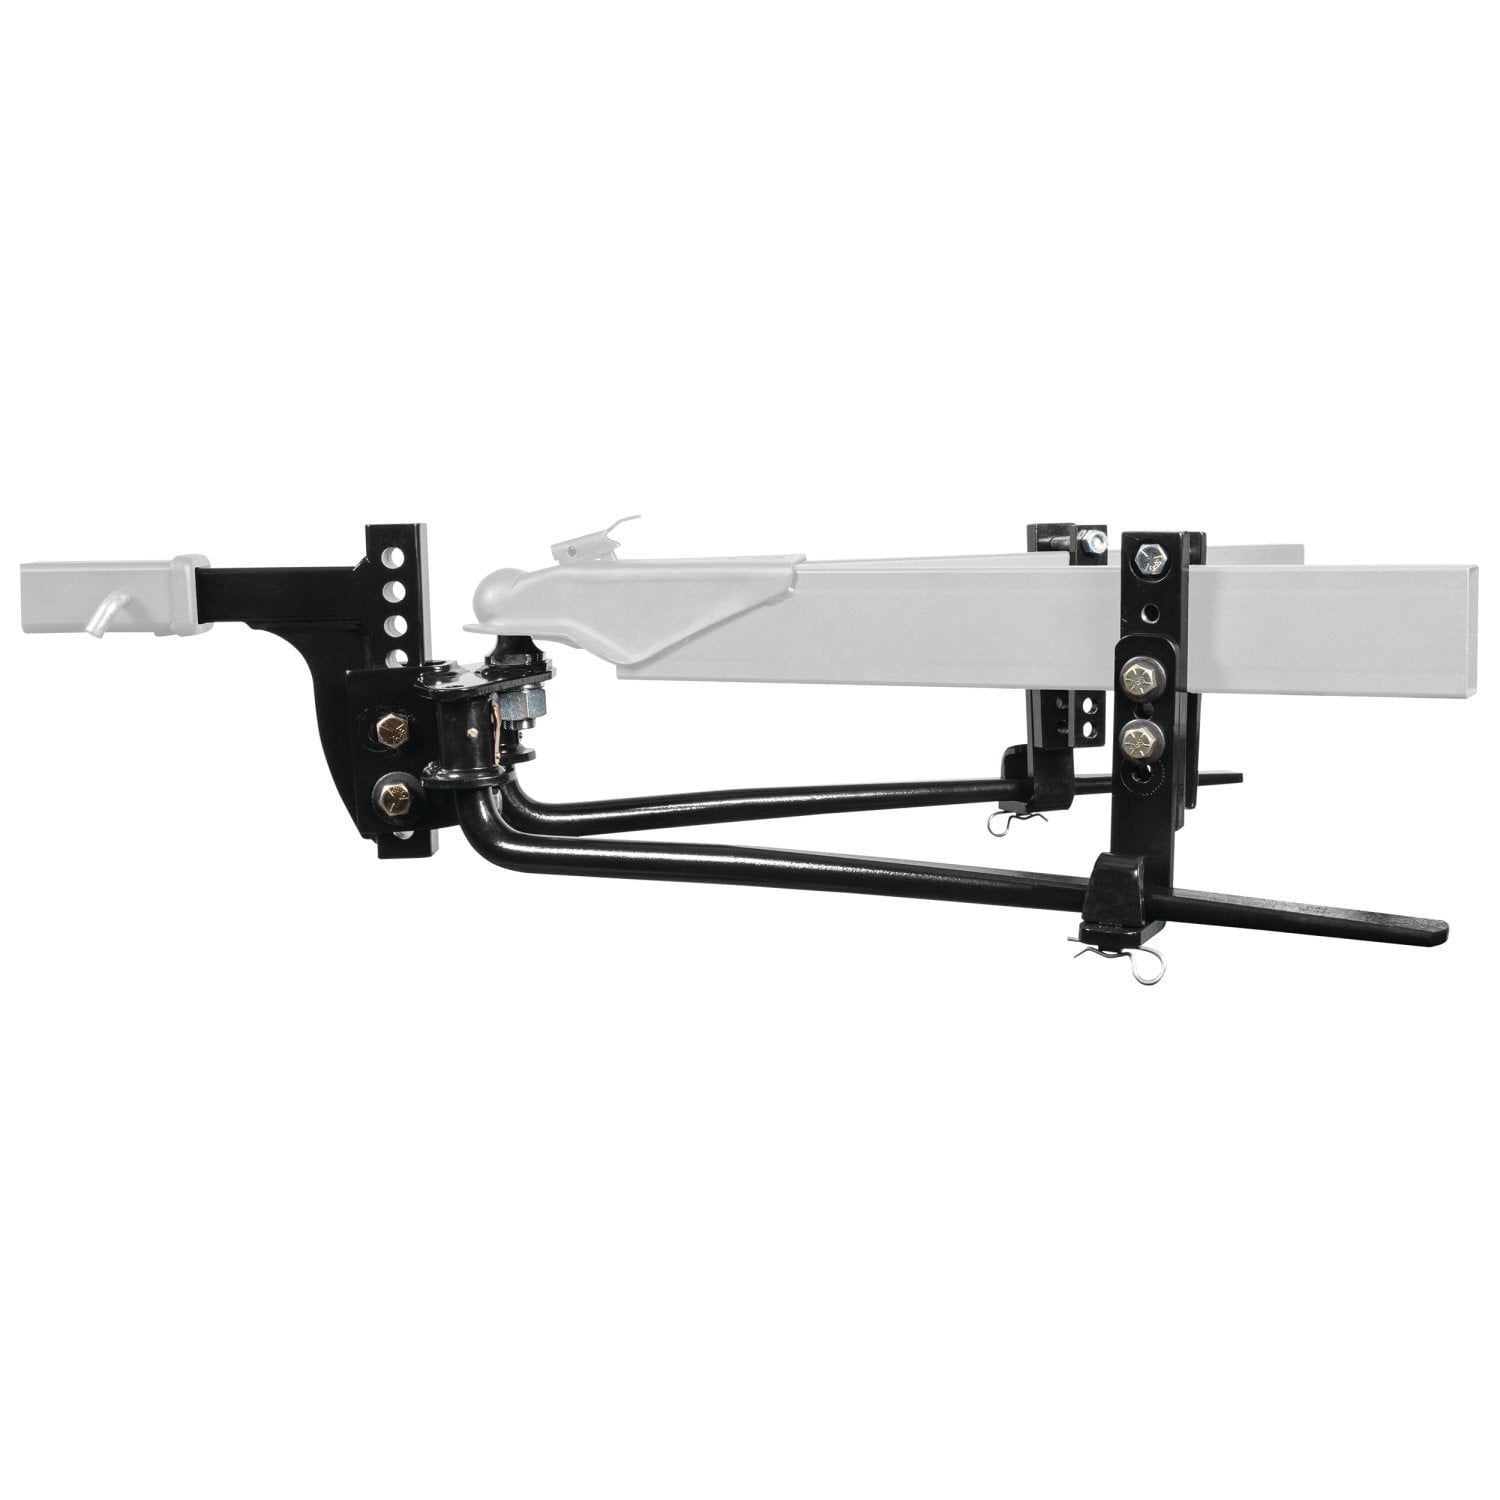
Reese Steadi-Flex Integrated Sway Control Weight Distribution Kit, 6,000 lbs. Capacity, Shank IncludedReeseOriginal price was $975.00. Current price is $809.68.In Stock
View productOur in-house experts typically reply within one business day.

Reese



Always the correct part
We know our products
Quality Products
Free Shipping!
Always the correct part
We know our products
Quality Products
Free Shipping!

| BRAND: | REESE |
| PART NUMBER: | 66560 |
| WARRANTY: | LIMITED LIFETIME WARRANTY |
| WEIGHT: | 110.5 LBS |
| CAPACITY: | 12,000 LBS. |
| GROSS TONGUE WEIGHT: | 1,200 LBS. |
| INCLUDES SWAY CONTROL: | YES |
| UNIVERSAL OR SPECIFIC FIT: | UNIVERSAL |
| LENGTH: | 37 IN. |
| SAFETY CHAINS INCLUDED: | NO |
| MATERIAL: | STEEL |
| MOUNTING HARDWARE INCLUDED: | YES |
| ADJUSTABLE ARMS: | YES |
| MOUNTING BRACKET POSITION: | 27 IN. TO 32 IN. |
| COLOR: | BLACK |
| BOLT GRADE: | GRADE 5 & GRADE 8 |

Reese has designed towing equipment since 1952 and remains a benchmark for heavy-duty towing. The line covers fifth wheel hitches such as the modular M5, gooseneck couplers including the Goose Box, air-ride and short-bed pin boxes, weight distribution systems with active sway control, and the accessories that connect them, all built to exceed published industry standards.
Reese has been pioneering towing performance since 1952, when Margaret Reese asked her husband TJ to stop travel trailers rocking every time somebody walked through them. His answer, the first pair of stabilising jacks, was simple and effective enough to change the RV industry. From that starting point Reese grew into a designer and manufacturer of complete towing systems, and today it anchors the heavy-duty end of the Horizon Global towing portfolio.
Fifth wheel towing is where the brand's engineering is most visible. The M5 fifth wheel hitch uses a modular design that breaks into manageable sections for assembly, with a wider stance, tighter tolerances and a shock absorption system aimed at the jolts that travel up through a truck bed. For owners who would rather tow from a gooseneck coupler and keep the bed clear, the Goose Box 20K replaces the trailer's king pin with a gooseneck connection carrying its own air-ride cushioning.
Pin boxes are a Reese speciality. The 5th Airborne uses air-ride technology to dampen road shock and reduce the chucking motion that makes fifth wheel towing tiring, while the Sidewinder was designed for short-bed pickups, pivoting the connection point so the trailer can turn sharply without the front cap meeting the cab.
For conventional towing, Reese weight distribution systems restore load to the tow vehicle's front axle and control sway. The Pro Round Bar distributes weight evenly while damping sway, and the Pro Dual Cam II uses active cam-based sway control that works harder the stronger the sway force becomes. Complete kits pair bars, head and shank to a rated tongue weight, and dedicated sway control kits can be added to existing setups. The products suit RV owners, horse and livestock haulers and anyone towing near the upper end of a vehicle's rating.
Experts available to answer your questions
Call 888-634-9494Lifetime
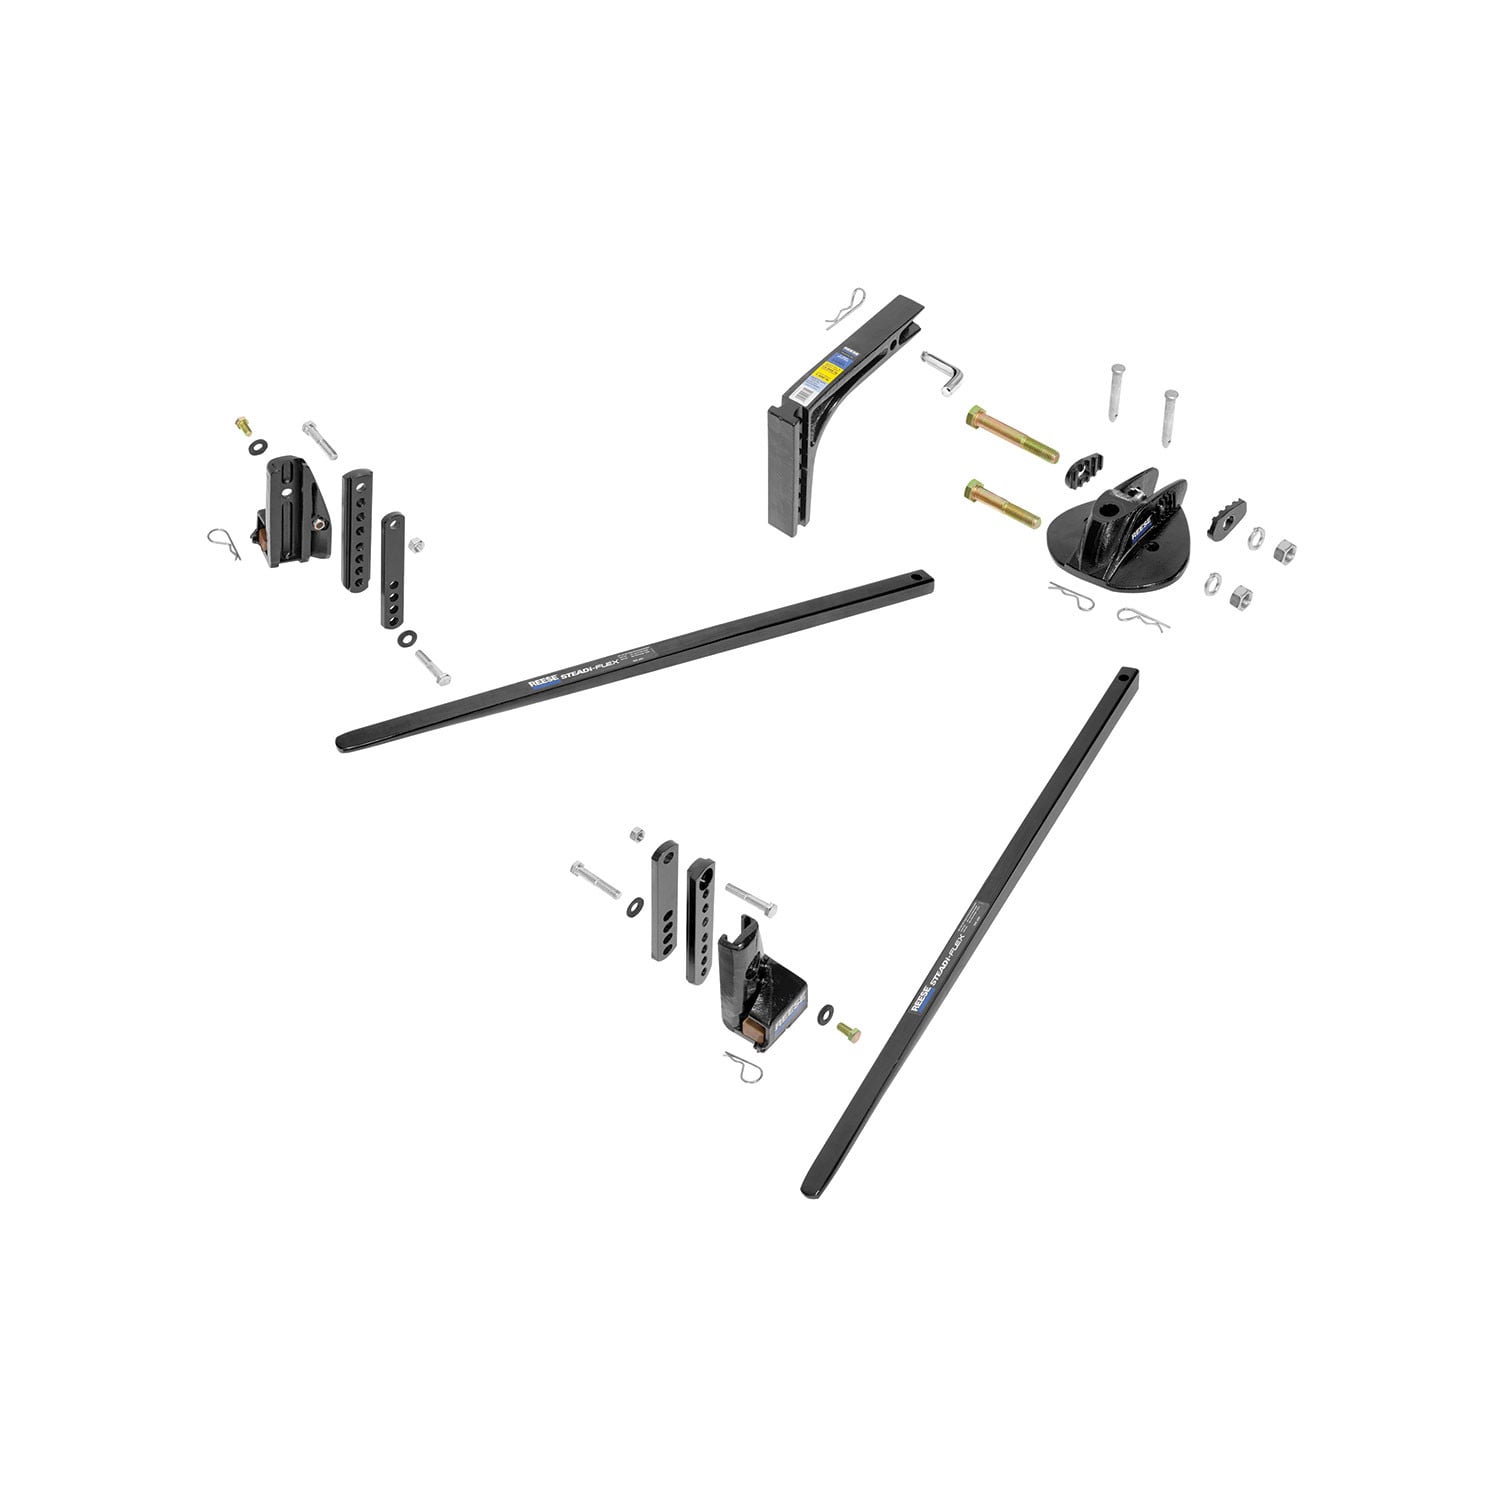
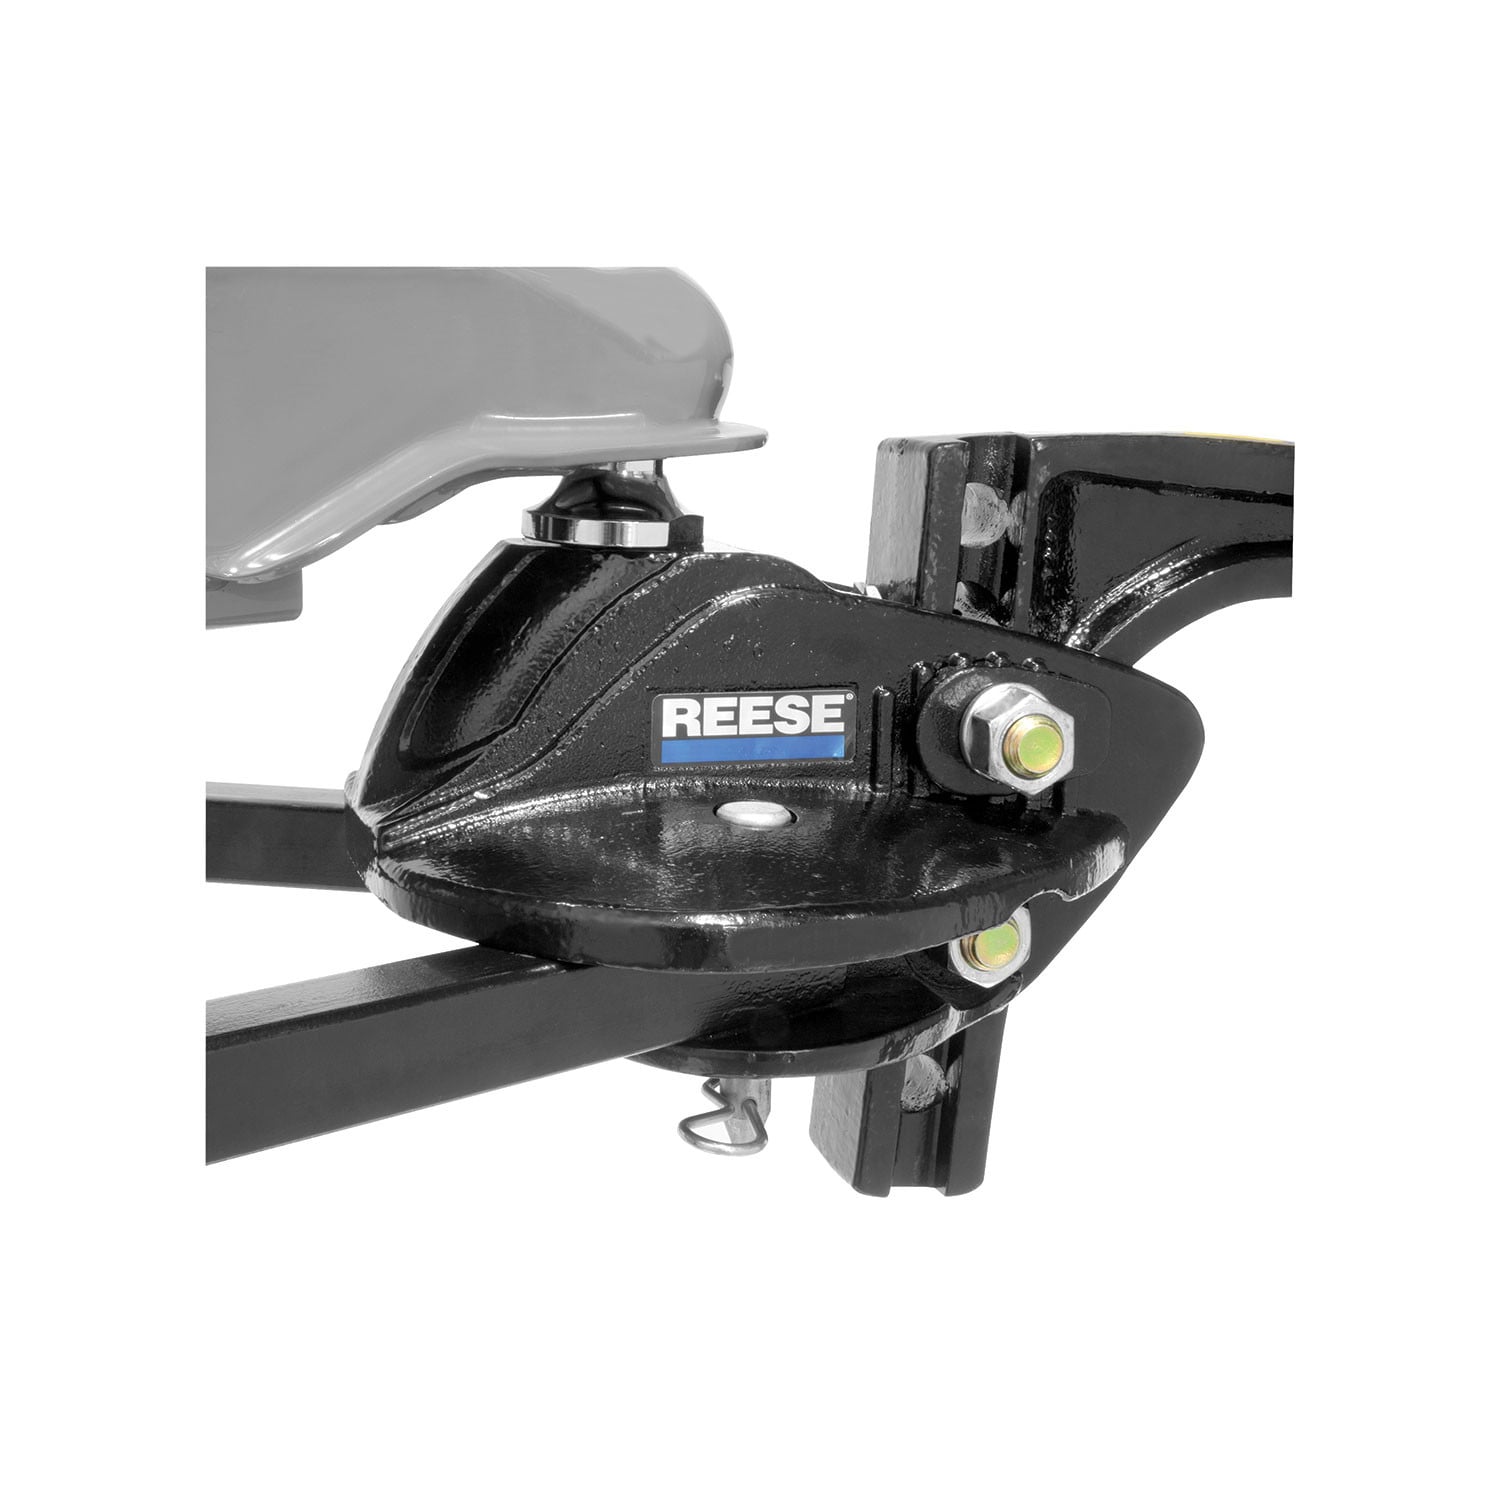
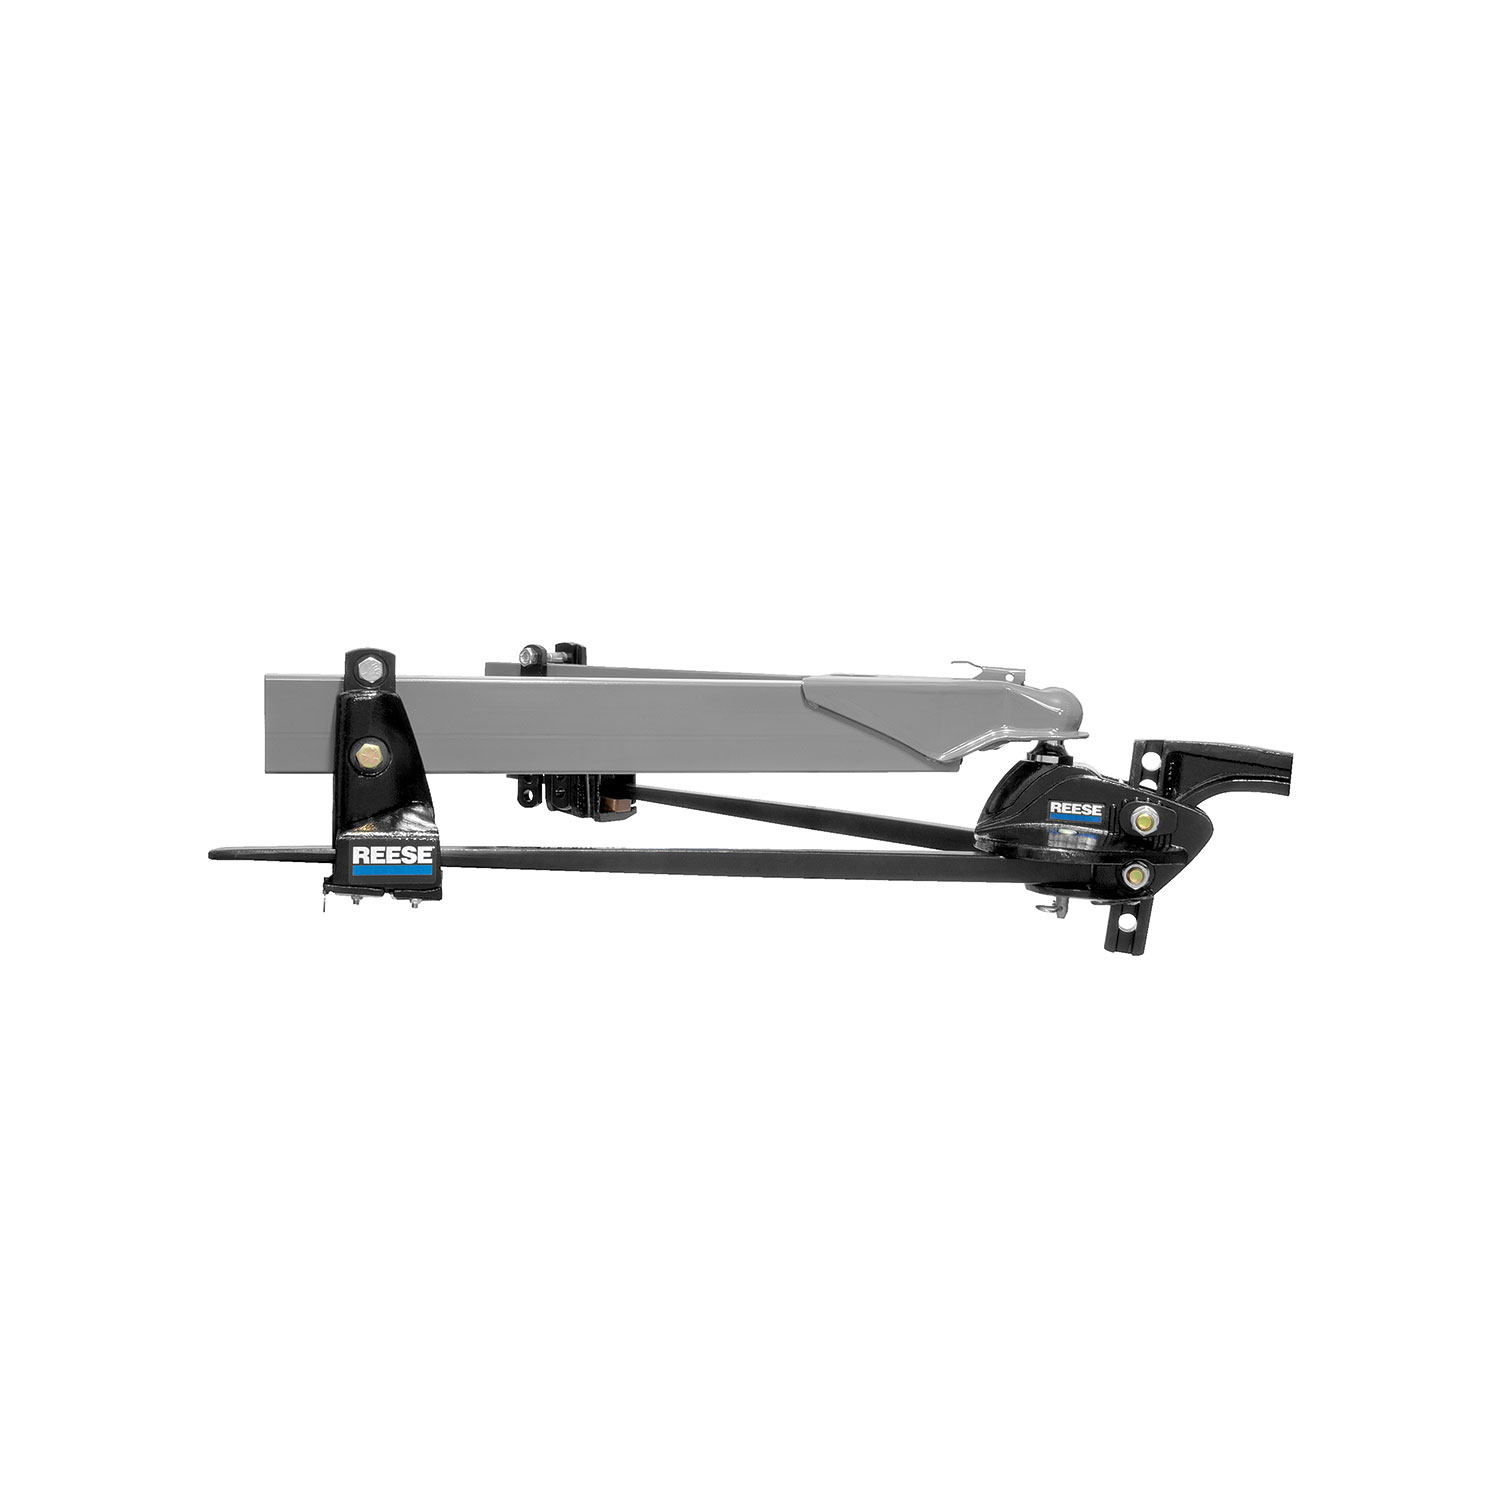
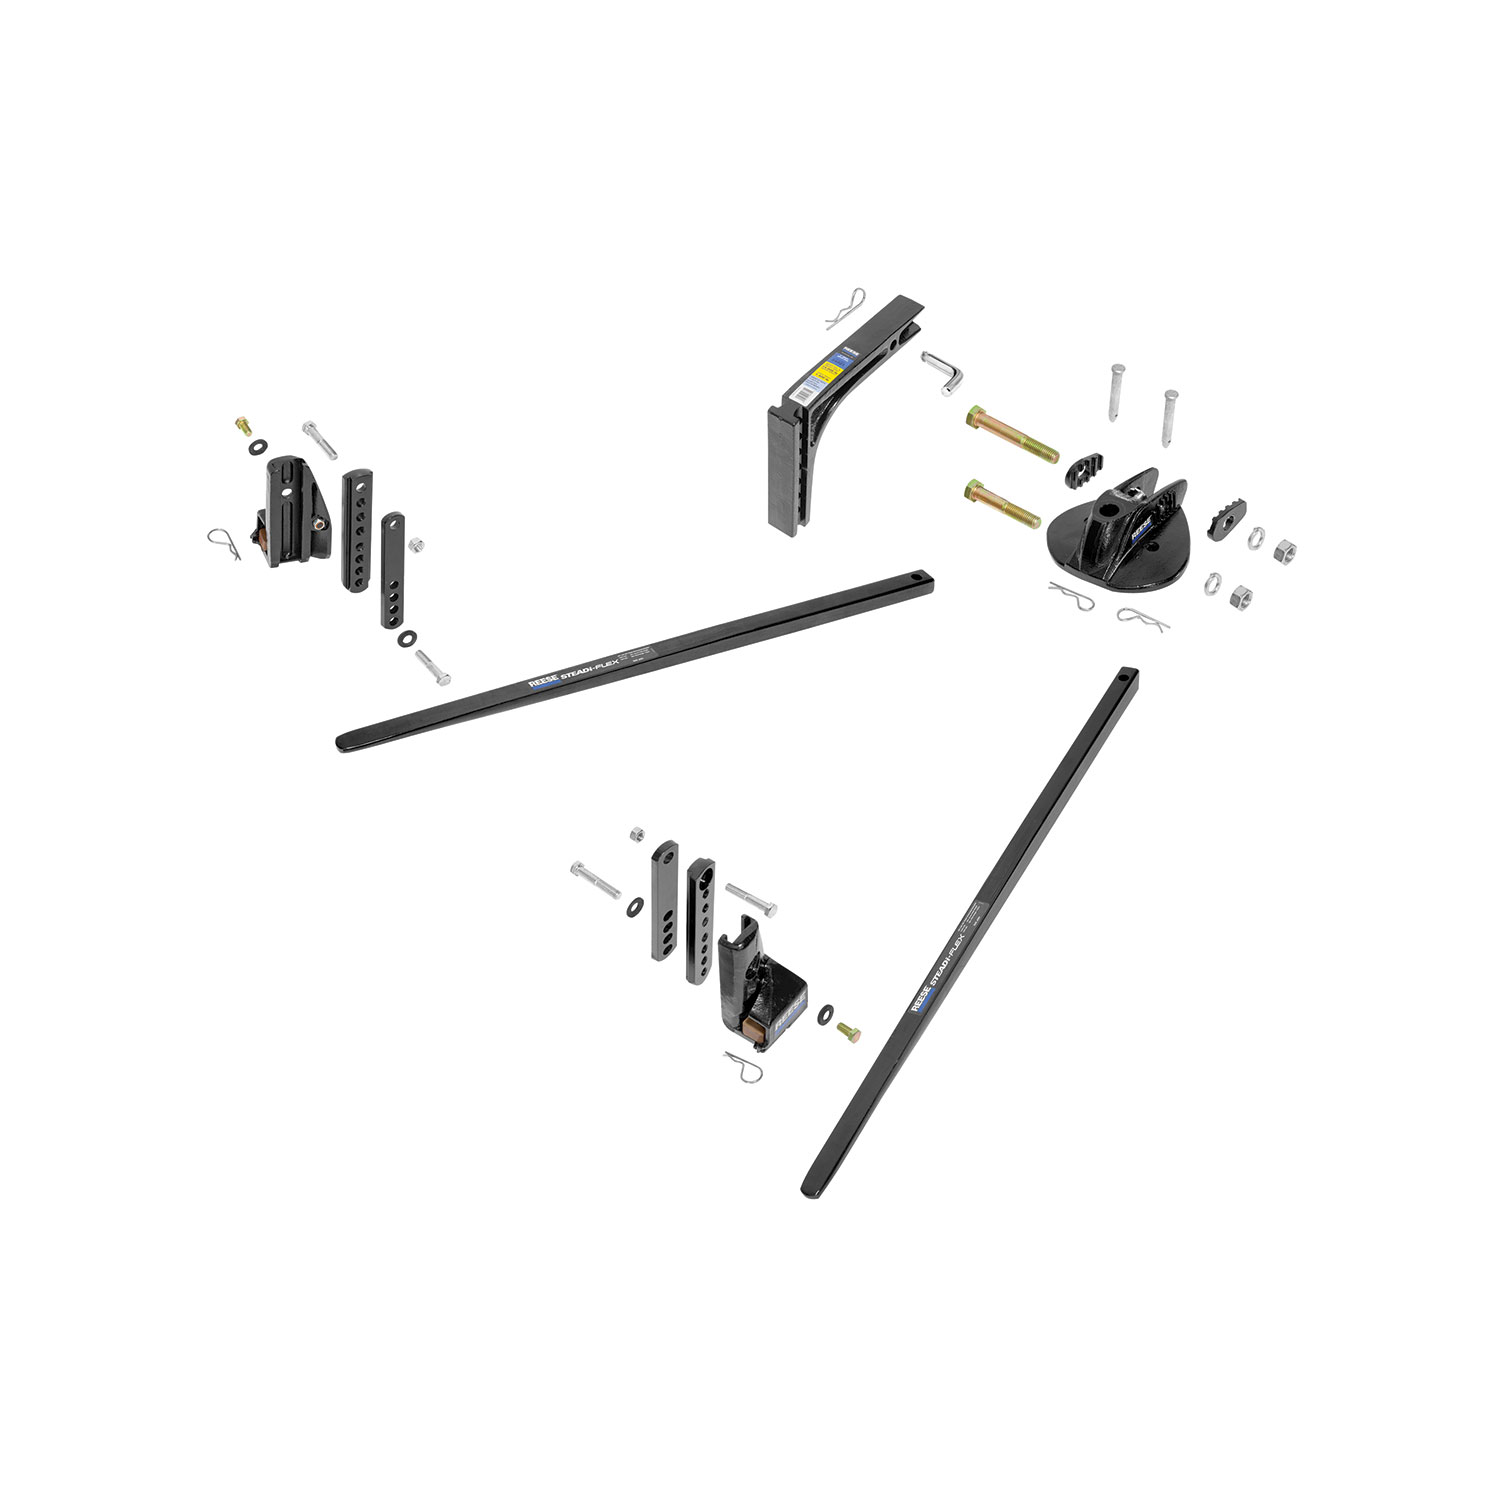
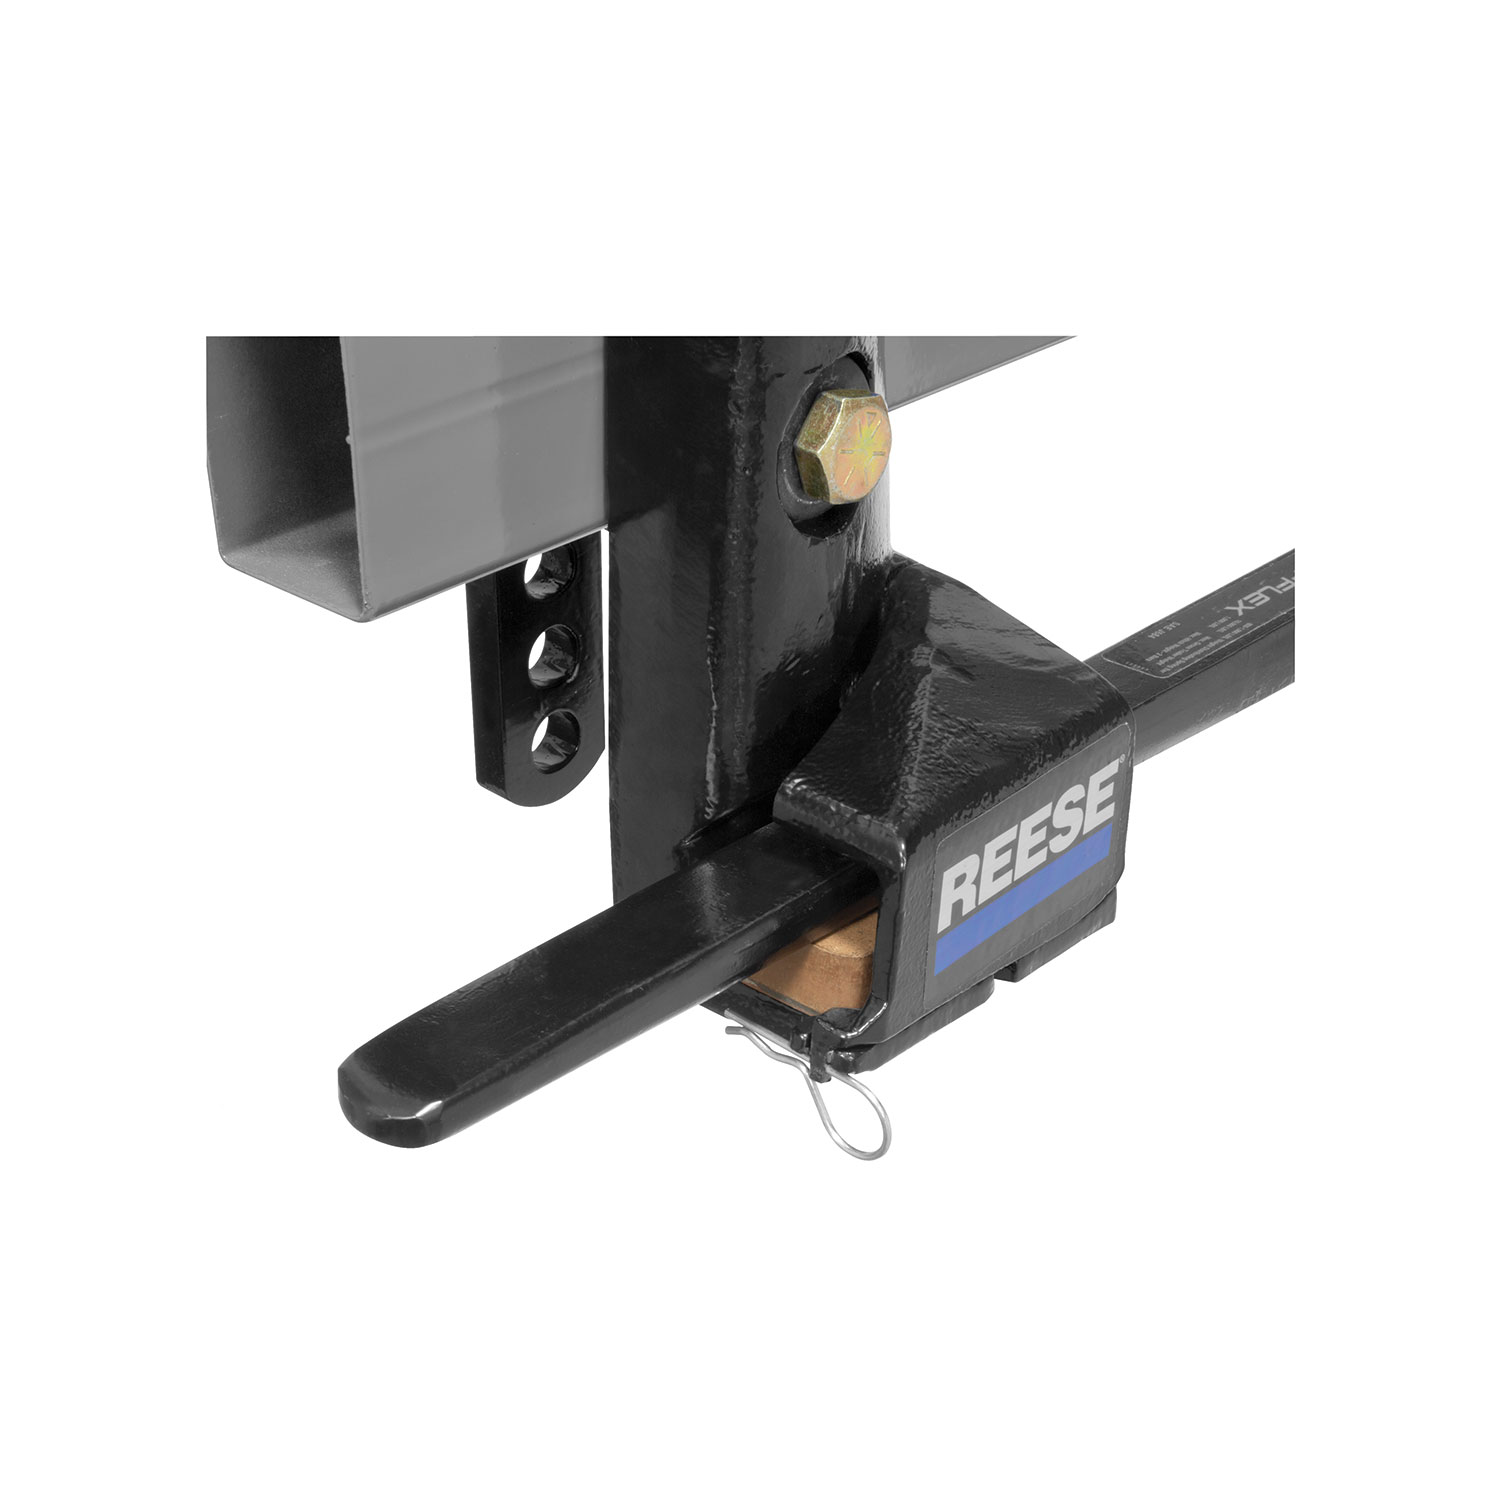
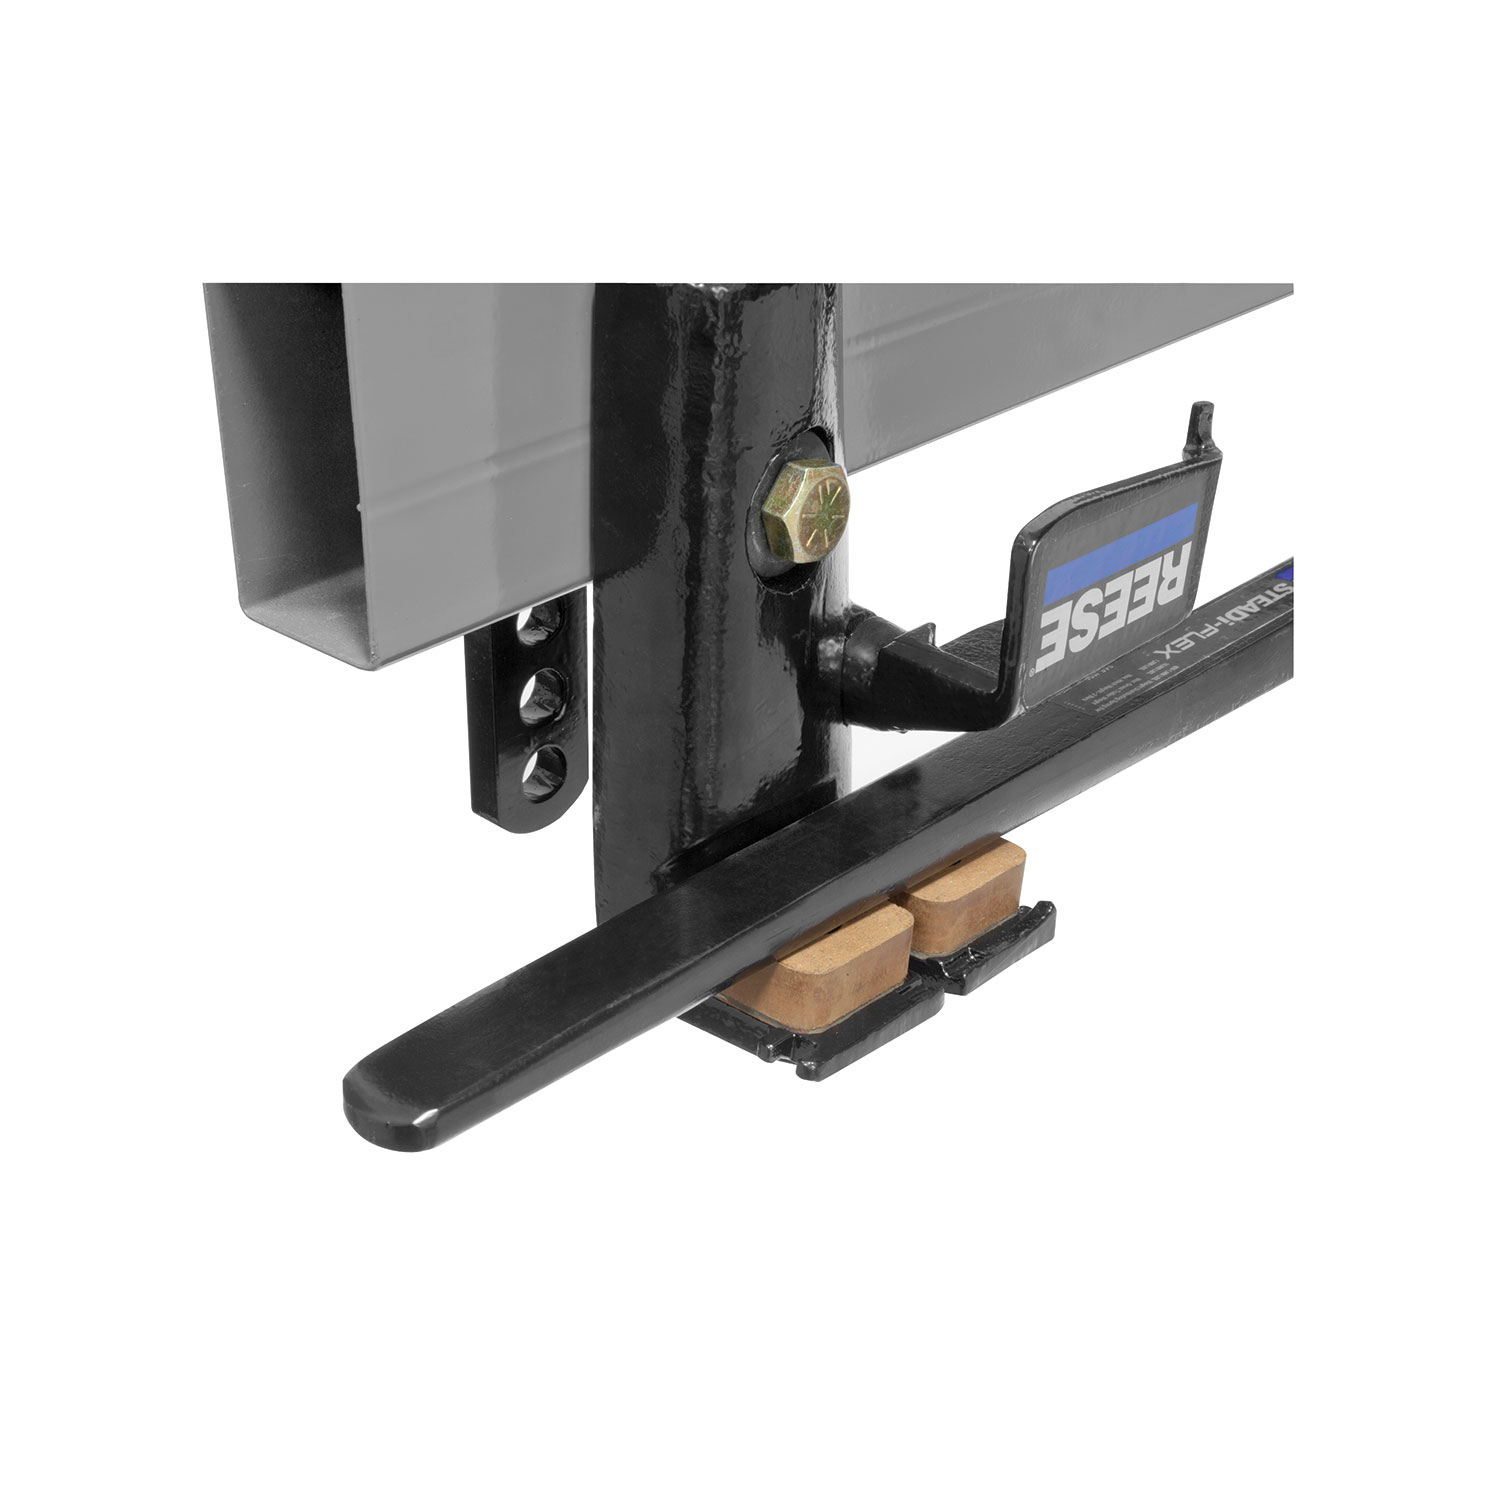
The REESE STEADI-FLEX is a weight distributing hitch system designed to distribute a portion of the trailer's tongue weight onto the front axle of the tow vehicle and the trailer axles. This provides superior resistance to sway and helps prevent rear axle overload, which can cause unsafe handling. The system works by loading spring bars and using leverage to level the tow vehicle and trailer, while friction between the friction pads and spring bars provides sway control.
The REESE STEADI-FLEX is available in three weight ratings: 1,000 lb (part number 66559), 1,200 lb (part number 66560), and 1,400 lb (part number 66561). Choose a kit with a rating that meets or exceeds your trailer's tongue weight requirements.
The system is designed to work with all 4"-7" tall trailer frames with bottom mount couplers, and all 4" tall frames with top mount couplers. For trailer frames 5"-7" tall with top mount couplers, refer to Technical Bulletin TB17-01 for detailed coupler design fitment information, as compatibility may vary.
Hitch balls with weight ratings above 1,000 lbs typically have 1-1/4" shafts. If a 1" shaft is used with a ball rated above 1,000 lbs, a bushing (sold separately) is required for use with this ball mount. The hitch ball must be the same size as required for the coupler on your trailer.
No, the hitch ball is not included with the kit. You must purchase a hitch ball separately with a rating that meets or exceeds the kit's rating. The ball must match the coupler size on your trailer.
Required tools are: torque wrench capable of 300 ft.-lbs, petroleum-based lubricant (e.g. WD-40), 15/16" socket and wrench, 1-1/8" socket and wrench, tape measure, pencil, flat head screwdriver, and hammer. Recommended tools include a torque wrench capable of 450 ft.-lbs, 1-7/8" socket, and safety gloves.
Yes, for best results install the system with the tow vehicle and trailer on level ground in the loaded condition. Failure to do so could result in improper system load, which could reduce performance. Level can be checked with a level or by confirming that measurements at the front and rear of the trailer are equal.
Chock (block) the trailer tires and uncouple the trailer to allow it to be stable for installation. Verify tire pressure matches the trailer owner's manual specification. Lower the trailer jack and raise the trailer so it is sitting level. Use a pencil to mark the center of the trailer coupler—this mark will be used to locate the A-Frame brackets during installation.
Verify that the tow vehicle, hitch, and all hitch components are capable of towing the trailer by referring to the vehicle's owner's manual. Inspect the vehicle to ensure it is in condition to tow. Refer to the owner's manual for towing recommendations.
Install the hitch ball and torque to the manufacturer's specified torque, typically 400 ft.-lbs for a 1-1/4" hitch ball. A locking feature is required, such as a lock washer or nylock nut. A 1-7/8" socket and torque wrench capable of the manufacturer's specified torque are needed. If you do not have these tools, your nearest Reese or RV dealer can perform the installation for a fee.
Locate a point between 27-32" along the A-Frame from the center of the coupler and mark this location with a pencil on both sides. Slide the T-Bar and Clamping Bar over the frame at the marked location. The T-Bar must be located on the outside of the A-Frame with the large hole facing outward. Allow 1" of clearance on either side of the T-Bar.
For top-mounted couplers, slide the Adjustable Frame Bracket onto the T-Bar so that one threaded hole is visible above the bracket. For bottom-mounted couplers, position the Adjustable Frame Bracket mounting bolt one bolt hole below the bottom bolt on the frame bracket. Use the vertical mounting location as a starting point; system adjustment may be needed later.
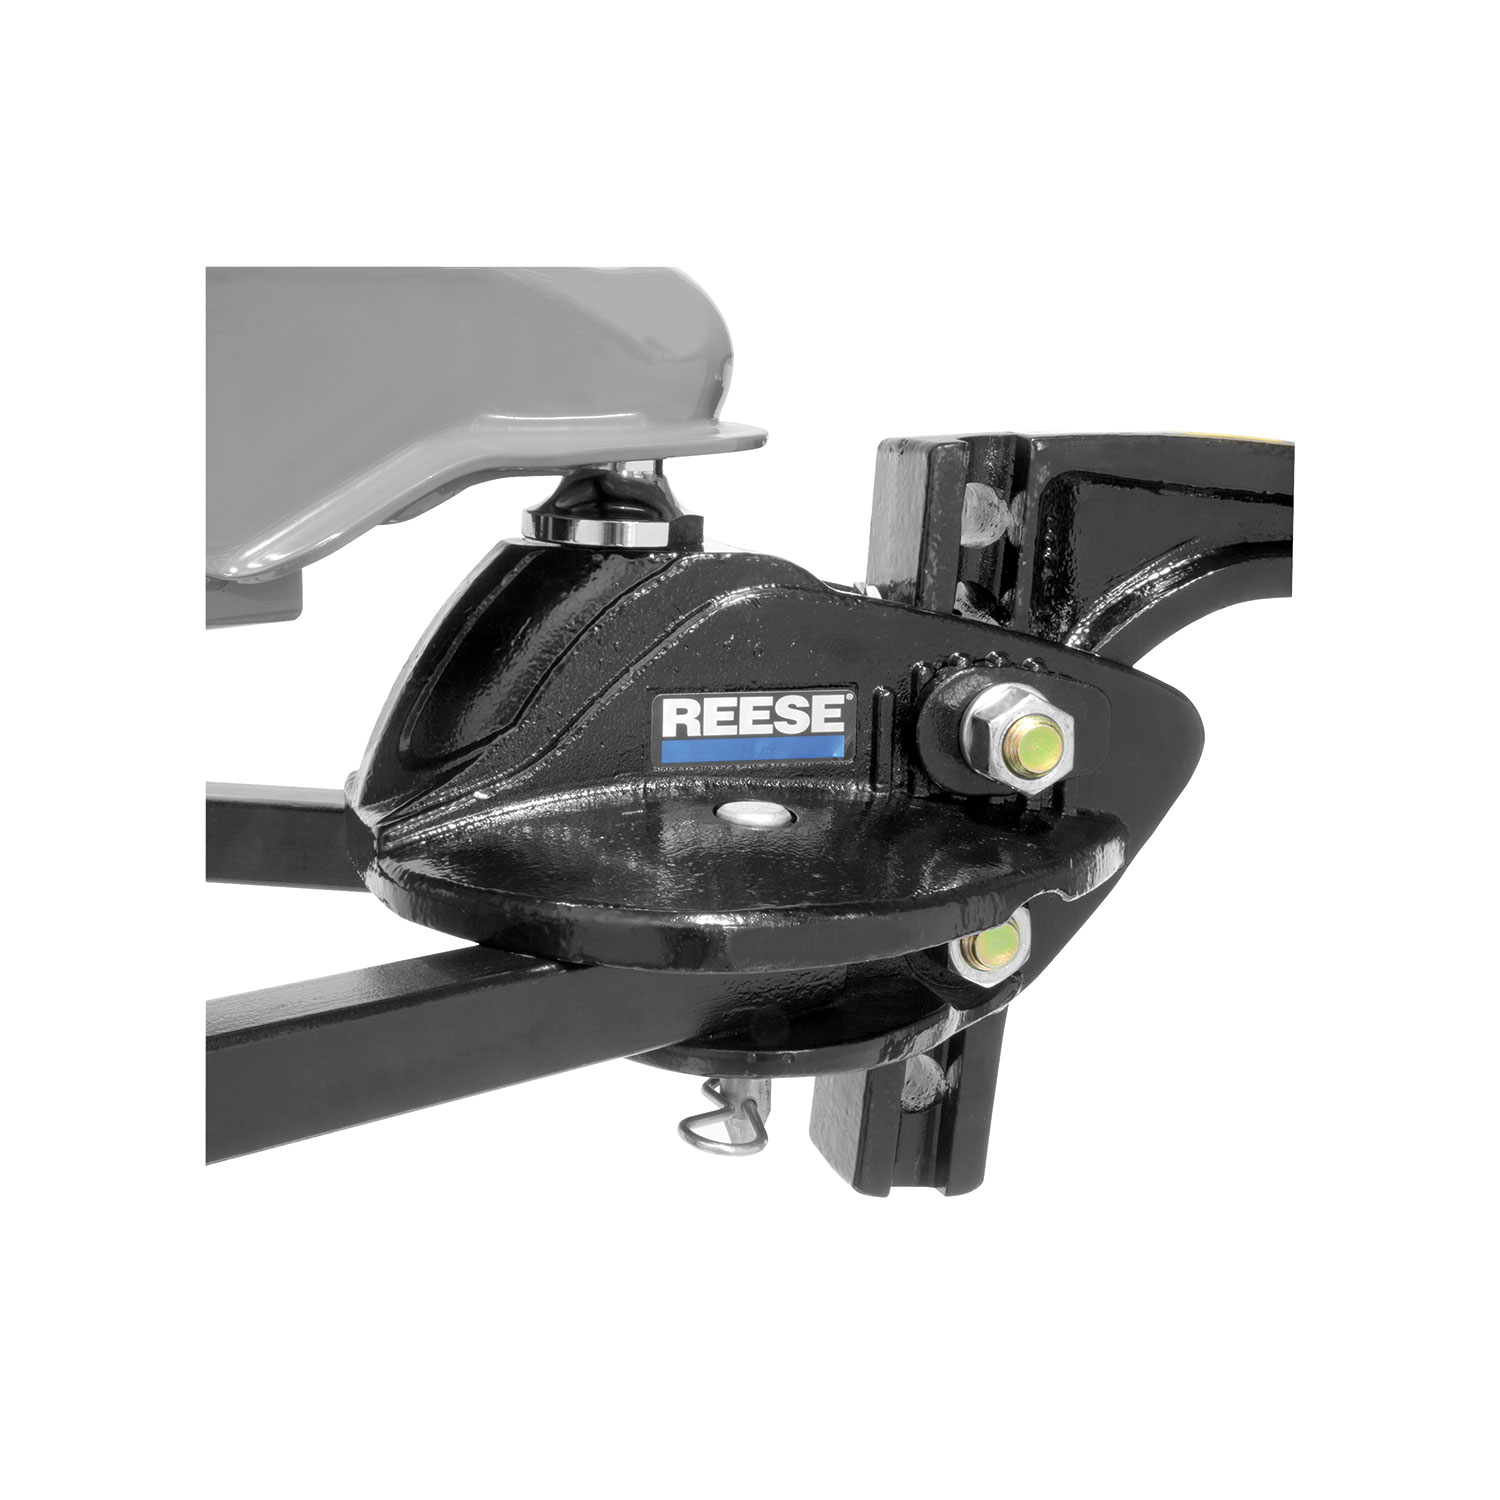
Position the ball mount so that the top of the ball is ½"-1" above the top of the coupler. This is the initial ball height setting. Measure from the top of the coupler to the ground with the trailer level, then insert the short ¾" bolt through the bottom hole of the ball mount into a hole in the hitch bar that will achieve this height.
Yes, both ¾" bolts are required. One or both shims may be required for a tight fit between the ball mount and hitch bar.
Torque the ¾" ball mount bolts to 300 ft.-lbs.
After the spring bars are placed on the friction pads and the system is properly positioned, torque all 5/8" nuts and bolts to 130 ft.-lbs. Before this final torque step, all 5/8" hardware should be snugged but not torqued.
Lubricate the contact surfaces of the spring bar to the ball mount (approximately the first 7 inches) with petroleum-based lubricant such as WD-40 before initial use. Do not lubricate the friction pads. Also lubricate the hitch ball with automotive grease to prevent unnecessary wear.
After inserting the spring bars into the ball mount and securing them with clevis pins and spring clips, swing the spring bars so they are positioned slightly outboard of the adjustable bracket.
There should be at least 4" of clearance past the end of the spring bars to the trailer. Verify this after placing the spring bars on the friction pads.
Insert the spring bars with the label/taper facing up and the flat side facing down into the ball mount. Secure with clevis pins and spring clips.
Extend the trailer jack and raise the front of the trailer and the back of the tow vehicle approximately 4" above level, or until the spring bars are clear of the friction pads.
Before hitching, measure the front wheel well height of the tow vehicle and record it as H1. After installing the weight distributing system and retracting the trailer jack, measure the front wheel well height again and record it as H2. H2 should never be less than H1, and H2 should be within ½" of H1. If measurements are outside this range, system adjustment is needed.
Before each trip, check that all bolts are properly tightened and the hitch pin and clip are securely in place. Verify that electrical hookups are in working order and that safety chains are connected.
Store the system out of the elements. Always wear hand protection when handling any part of the system. Touch up paint if necessary to prevent rust, but do not paint over warning labels. Keep these areas free of debris: the hitch ball (lubricate each use), inside the trailer coupler, spring bar contact surfaces in the ball mount, and spring bar contact surfaces on the friction pads. Lubricate spring bar contact surfaces to the ball mount when necessary, especially after extended non-use or if severe noise occurs.
No, do not lubricate the friction pads. Lubricate only the hitch ball and the spring bar contact surfaces to the ball mount (approximately the first 7 inches).
Loaded ball height should never be greater than uncoupled ball height. If it is, front wheel overload and loss of rear wheel traction can result, leading to unstable handling, reduced braking ability, and a tendency to "jackknife" when turning and braking at the same time. If loaded ball height is greater than uncoupled height, re-adjust the head and re-measure until proper height is obtained.
No, do not attempt to tow any type of trailer behind another trailer. Towing multiple trailers may cause severe instability, loss of control, and/or structural failure, and may result in vehicle accident, property damage, and personal injury. Towing multiple trailers is illegal in many jurisdictions.
Tongue weight should be about 10-15 percent of the gross trailer weight for most trailers. Too low a percentage of tongue weight will often produce a tendency to sway. Excess weight on the tongue can also lead to sway and damage the hitch and/or tow vehicle.
No, never disassemble or remove any part of the weight distributing system while the hitch is under load.
If any part of your towing system "bottoms" out, or if you suspect damage may have occurred in any other way, pull over and make a thorough inspection. Correct any problems before resuming travel.
Trailer sway can have several causes: (1) Tow capacity exceeded—do not tow if you exceed your tow vehicle manufacturer's rating, hitch rating, or tow system rating. (2) Tongue weight too light—if loaded tongue weight is below 10% of the loaded trailer rating, rearrange weight in the trailer forward to increase tongue weight to 10-15% of gross trailer rating without exceeding trailer manufacturer's recommendation or overloading the rear axle. (3) Not enough weight distributing—adjust the A-Frame bracket up one hole or adjust the head angle downward. (4) Hitch undersize or deflecting—make sure your hitch rating exceeds your trailer rating and tongue weight rating. (5) Incorrect tire pressure—ensure all tires are filled to tire manufacturer's recommendations.
If the trailer tongue is too low or H2 measurements are greater than H1+1/4", the causes and corrections are: (1) Initial ball height not set properly—readjust head height up one hole. (2) Not enough weight distributing—adjust the A-Frame bracket up one hole or adjust the head angle downward. (3) Hitch is undersize or flexing—replace hitch with the appropriate Reese WD system.
If the trailer tongue is too high or H2 is less than H1, the causes and corrections are: (1) Initial ball height not set properly—readjust head height down one hole. (2) Too much weight distributing—adjust A-Frame bracket down one hole or adjust the head angle upward.
Severe noise can be caused by: (1) Improperly attached system—inspect all components and hardware to ensure all parts are fastened appropriately. Tighten or replace components/hardware where necessary. (2) Extended non-use—the system may need to go through the break-in phase again. Remove spring bars and apply petroleum-based lubricant (e.g. WD-40) to the top and bottom surfaces of spring bars only where they contact the ball mount (approximately the first 7 inches, not the friction pads). Note: Some noise during use is normal, especially in slow, tight turning maneuvers. During break-in, noise is often more severe but usually subsides after the system is used a few times.
If the A-Frame bracket is moving on the frame, the clamping bar may be under tightened or over tightened. Review the proper clamping instructions on page 5 of the manual. Ensure the T-Bar and Clamping Bar are positioned correctly with 1" of clearance on either side, and that all 5/8" hardware is properly snugged and eventually torqued to 130 ft.-lbs.
Some noise during use is normal, especially in slow, tight turning maneuvers. This is due to the friction aspects of the Steadi-Flex system. During break-in, it is common for noise to be more severe, but it will usually subside after the system is used a few times. If noise is severe and persistent, inspect all components and hardware to ensure all parts are fastened appropriately, or apply petroleum-based lubricant to the spring bar contact surfaces.
To unhitch: (1) Place the truck in park and apply the emergency brake. (2) Chock (block) the trailer tires to ensure it does not roll. (3) Use the jack to lift the nose of the trailer slightly above level to remove load on the spring bars. (4) Use the lift handle to remove the spring bars from the friction pads and swing the bars outward. (5) Lower the trailer to unlatch the trailer coupler. (6) Use the trailer jack to lift the trailer high enough so the top of the ball is below the bottom of the trailer coupler. (7) Remove the clevis pin and spring clips from the ball mount and remove the spring bars. (8) Drive the tow vehicle forward about 4 feet. (9) Remove the hitch bar and ball mount from the tow vehicle receiver.
Set the ball mount angle by aligning the toothed washer with the grooves on the ball mount. Use this ball mount angle as a starting point. To adjust the head angle, position the toothed washer in the grooves that will allow the desired head angle. Refer to the Adjustment Guide on page 9 for guidance based on your H1 and H2 measurements.
Secure the ball mount position by turning the adjustment bolt counter-clockwise with a hammer and flat head screwdriver. Once snug, turn an additional ¼-½ turn.
For 1.5" wide frames, use the 5/8"-11 x 2-3/4" GR5 hex bolts (item 5) to fasten the bottom of the T-Bar and Clamping Bar, instead of the standard 3-1/2" bolts.
During frame bracket installation, snug all 5/8" hardware but do not torque at this time. After the spring bars are placed on the friction pads and the system is properly positioned, retract the jack, loosen the clamping bar bolts, adjust/angle the friction pads to settle flat against the spring bars, and then torque all 5/8" nuts and bolts to 130 ft.-lbs.
Conical washers are used when inserting bolts from the inside through the Clamping Bar and into the T-Bar during frame bracket installation. They help ensure proper seating and alignment of the fasteners.
The system fits trailers with 4"-7" tall frames with bottom mount couplers, and 4" tall frames with top mount couplers. For 5"-7" tall frames with top mount couplers, refer to Technical Bulletin TB17-01. Your trailer frame height and coupler type determine compatibility.
You need: torque wrench (300 ft.-lbs minimum), petroleum-based lubricant, 15/16" and 1-1/8" sockets and wrenches, tape measure, pencil, flat head screwdriver, and hammer. A 450 ft.-lbs torque wrench and 1-7/8" socket are recommended.
You can install the hitch ball yourself if you have a 1-7/8" socket and torque wrench capable of the manufacturer's specified torque (typically 400 ft.-lbs for a 1-1/4" ball). If you lack these tools, your nearest Reese or RV dealer can install it for a fee.
Torque the ¾" ball mount bolts to 300 ft.-lbs. Torque all 5/8" frame bracket nuts and bolts to 130 ft.-lbs (after final positioning). Hitch ball torque is typically 400 ft.-lbs per manufacturer specification.
Yes, lubricate the spring bar contact surfaces to the ball mount (approximately the first 7 inches) with petroleum-based lubricant like WD-40 before initial use. Do not lubricate the friction pads. Lubricate the hitch ball with automotive grease.
Loaded ball height must never be greater than uncoupled ball height. If it is, front wheel overload and loss of rear wheel traction can result, causing unstable handling and reduced braking ability. If this occurs, re-adjust the head and re-measure until proper height is obtained.
Measure the front wheel well height before installation (H1) and after installation (H2). H2 should never be less than H1, and should be within ½" of H1. If H2 is outside this range, adjust the system using the Adjustment Guide.
Before each trip, check that all bolts are tight and the hitch pin and clip are secure. Lubricate the hitch ball with each use. Keep the hitch ball, trailer coupler interior, and spring bar contact surfaces clean and free of debris. Touch up paint to prevent rust. Do not paint over warning labels.
The clamping bar is either under tightened or over tightened. Review the proper clamping instructions on page 5. Ensure the T-Bar and Clamping Bar are positioned with 1" of clearance on either side, and that all 5/8" hardware is properly snugged and eventually torqued to 130 ft.-lbs.
First, inspect all components and hardware to ensure all parts are fastened appropriately. Tighten or replace any loose or damaged components. If the system has been in extended non-use, remove the spring bars and apply petroleum-based lubricant (e.g. WD-40) to the top and bottom surfaces of the spring bars only where they contact the ball mount (approximately the first 7 inches, not the friction pads). Note that some noise is normal, especially during break-in and in slow, tight turning maneuvers.
Trailer sway can result from: (1) Exceeding tow capacity—do not tow if you exceed manufacturer's rating. (2) Tongue weight too light (below 10% of trailer weight)—redistribute weight forward to achieve 10-15% tongue weight. (3) Insufficient weight distribution—adjust A-Frame bracket up one hole or adjust head angle downward. (4) Undersized or deflecting hitch—verify hitch rating exceeds trailer and tongue weight ratings; if hitch bends before spring bars load, do not use. (5) Incorrect tire pressure—inflate all tires to manufacturer's recommendations.
Check and correct the following: (1) Verify initial ball height was set correctly—if not, readjust head height up one hole. (2) Check if weight distribution is sufficient—if not, adjust A-Frame bracket up one hole or adjust head angle downward. (3) Verify hitch is not undersized or flexing—if it is, replace with the appropriate Reese WD system.
Check and correct the following: (1) Verify initial ball height was set correctly—if not, readjust head height down one hole. (2) Check if weight distribution is excessive—if so, adjust A-Frame bracket down one hole or adjust head angle upward.
Free Shipping
Ships free on all orders
 Authorized Dealer
Jennifer
The staff was able to quickly assist me with locating the correct product I needed. Shipping was really fast. Item arrived in 2 days. Will be using TowUniverse again!!
May 22, 2023

Quick Ship
In stock and ready to ship — order now!
FREE ShippingFREE SHIPPING
Estimated delivery Mon, Oct 12 - Thu, Oct 15
Order before 2 PM EST Monday–Friday for same-day processing
Guaranteed safe & secure checkout