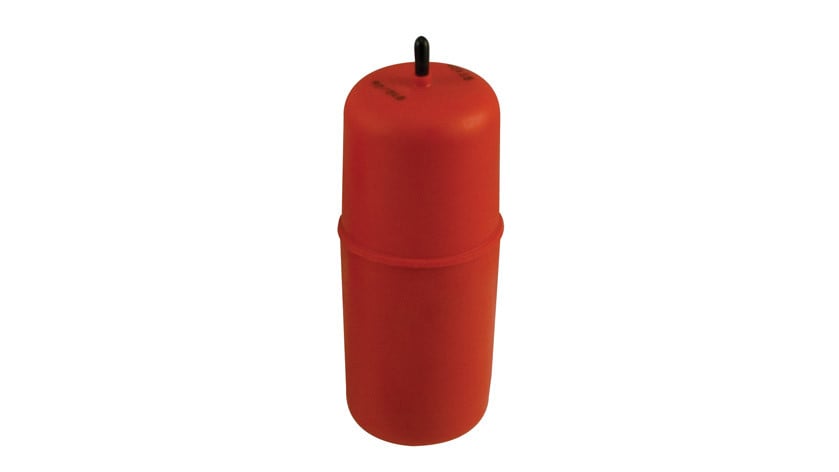
Air Lift AIR LIFT 1000 81260Air LiftOriginal price was $117.99. Current price is $92.60.In Stock
View productOur in-house experts typically reply within one business day.

Air Lift
Verify Fitment
Select your vehicle to confirm this part fits.
1984 - 1991 Jeep Cherokee
Confirmed to Fit
1986 - 1992 Jeep Comanche
Confirmed to Fit
1993 - 1998 Jeep Grand Cherokee
Confirmed to Fit
1993 Jeep Grand Wagoneer
Confirmed to Fit
1984 - 1990 Jeep Wagoneer
Confirmed to Fit
1997 - 2006 Jeep Wrangler
Confirmed to Fit

Always the correct part
We know our products
Quality Products
Free Shipping!
Always the correct part
We know our products
Quality Products
Free Shipping!
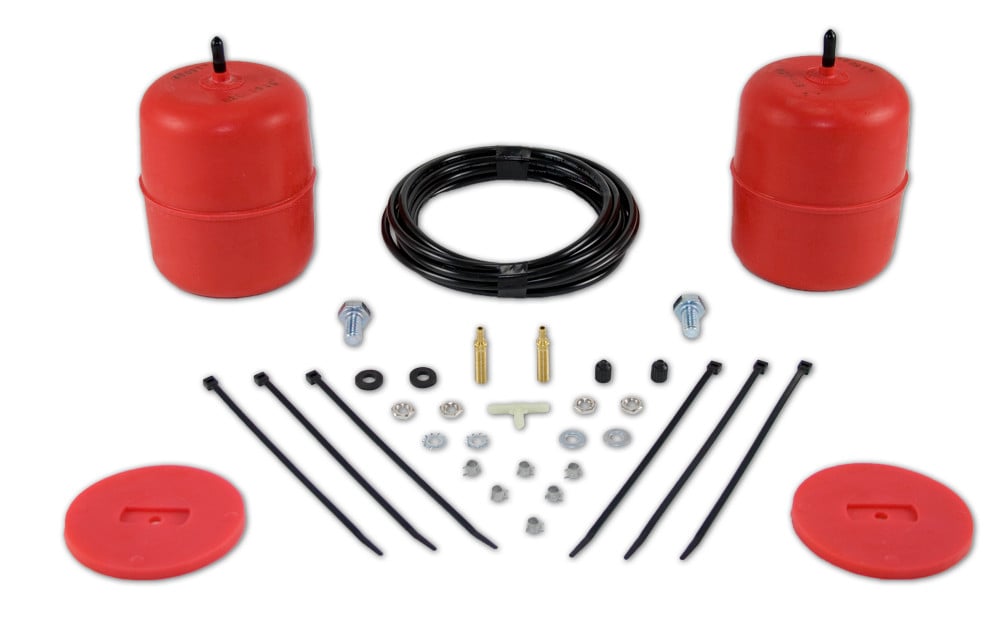
Air Lift 1000
Coil Spring
Front
No Drill

Air Lift adjustable air helper springs level your load, and give your truck, van, or SUV a safer, more comfortable ride. Air springs are easy to install inside the existing coil spring with common mechanic's tools. Just add air when towing or hauling a heavy load, and reduce air pressure when unloaded, they are fully adjustable for a great ride. Air Lift air springs eliminate sag, sway, and bottoming out. They are made with rugged, durable components for long, reliable service. Air Lift 1000 kits fit many popular customer vehicles with coil springs. They're designed to: add support to rear springs on many popular SUVs, replace OEM front air springs on P-30 motor homes, provide front end support for snowplows, winches, etc., improve muscle car traction for drag racing, and improve ride and handling for full-size vans and trucks with front coil springs. Air adjustable with quick connecting, easy-to-use air fittings, Air Lift 1000 air helper springs have a typical max pressure of 35 PSI on cars and SUVs, and 90 PSI on motorhomes. They also have up to 1000 pounds of leveling capacity, right up to the manufacturer's recommended Gross Vehicle Weight Rating. Air Lift 1000 kits also come standard with a limited lifetime warranty and an exclusive 60 day ride satisfaction guarantee.
Air Lift Company has developed dependable air spring suspension products since our inception in 1949. Our original product, a rubber air spring inserted into a car’s factory coil spring, was created and patented in 1950. We’ve come a long way since 1949 and are proud to be a dedicated suspension specialist company.
Today, Air Lift load support products are sold worldwide and are engineered to fit over 540 vehicles. Our extensive product line offers air helper springs for trucks, RVs, SUVs, CUVs, and vans, as well as the most technologically advanced on-board air compressor systems for on-the-go air spring control.
Air Lift leads the industry in no-drill applications – kits that bolt onto your vehicle’s frame, speeding the installation process. Our teams work constantly to bring innovative products to you and upgrade existing products with the latest technology.
All of our efforts are spent ensuring your safety and comfort by designing, engineering, and manufacturing the highest quality suspension products. We are a family-owned business based in Lansing, Michigan, and make your family and cargo’s safety our top priority.
Experts available to answer your questions
Call 888-634-9494Limited Lifetime
6 compatible vehicles
| Year | Make & Model | Notes |
|---|---|---|
| 1984 - 1991 | Jeep Cherokee | — |
| 1986 - 1992 | Jeep Comanche | — |
| 1993 - 1998 | Jeep Grand Cherokee | — |
| 1993 | Jeep Grand Wagoneer | — |
| 1984 - 1990 | Jeep Wagoneer | — |
| 1997 - 2006 | Jeep Wrangler | — |
The Air Lift AIR LIFT 1000 80702 (Part #BBCG80702) fits 1984-1991 Jeep Cherokee models. The 2006 model year is the last year covered by this part number. For newer models, check for an updated version.
Yes, the Air Lift AIR LIFT 1000 80702 (Part #BBCG80702) is designed to fit the 1984-1991 Jeep Cherokee.
The Air Lift AIR LIFT 1000 80702 (Part #BBCG80702) fits the following vehicles: 1984-1991 Jeep Cherokee; 1986-1992 Jeep Comanche; 1993-1998 Jeep Grand Cherokee; 1993 Jeep Grand Wagoneer; 1984-1990 Jeep Wagoneer; 1997-2006 Jeep Wrangler. Always verify your specific year, make, and model before ordering.
The Air Lift AIR LIFT 1000 80702 (Part #BBCG80702) Refer to the included instructions for installation details. Basic hand tools are typically all you need.
The MN-138 is an air springs installation kit that converts a vehicle's coil spring suspension to an air spring system. It includes air cylinders that nest inside the existing coil springs, air line kits (Tee or Dual options), inflation valves, and a protector to replace the jounce bumper. The system allows you to adjust suspension stiffness and vehicle height by controlling air pressure between 10 and 50 p.s.i.
The MN-138 is designed for catalog-listed applications on cars, vans, light trucks, and motorhomes. The manual does not specify exact makes, models, or years. You must verify compatibility with Air Lift's catalog or contact Air Lift Company at 1-800-248-0892 before purchasing to confirm the kit fits your specific vehicle.
No. Adding air springs will not change your vehicle's weight ratings (GAWR, GCWR, or GVWR). You must not exceed your vehicle manufacturer's maximum gross vehicle weight rating, as doing so is dangerous and voids the Air Lift warranty.
The manual specifies channel lock pliers (to remove the rubber jounce bumper) and a drill with a 3/4 inch bit (for the lower spring seat hole) and a 5/16 inch bit (for the inflation valve hole). Pliers are also needed to compress air line clamp ears. The manual does not specify other tools such as socket sets, torque wrenches, or jacks, but these are implied for removing and reinstalling bolts. Consult the manual's tool list or contact Air Lift at 1-800-248-0892 if you need a complete tool specification.
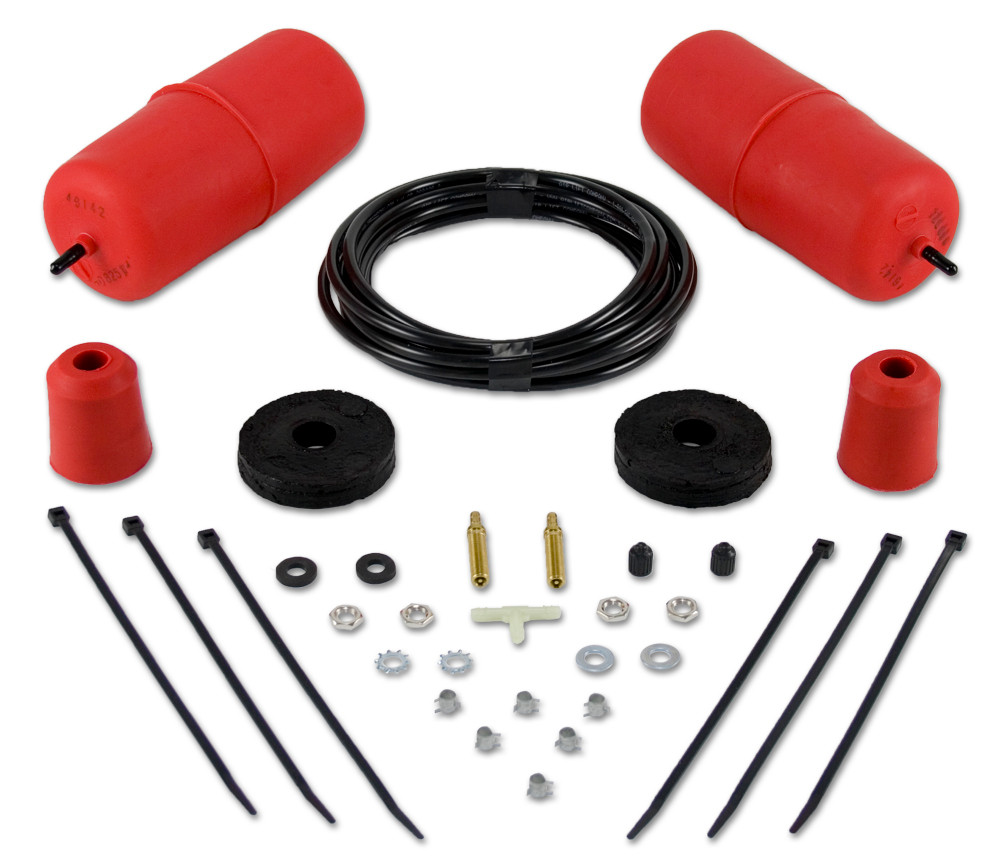
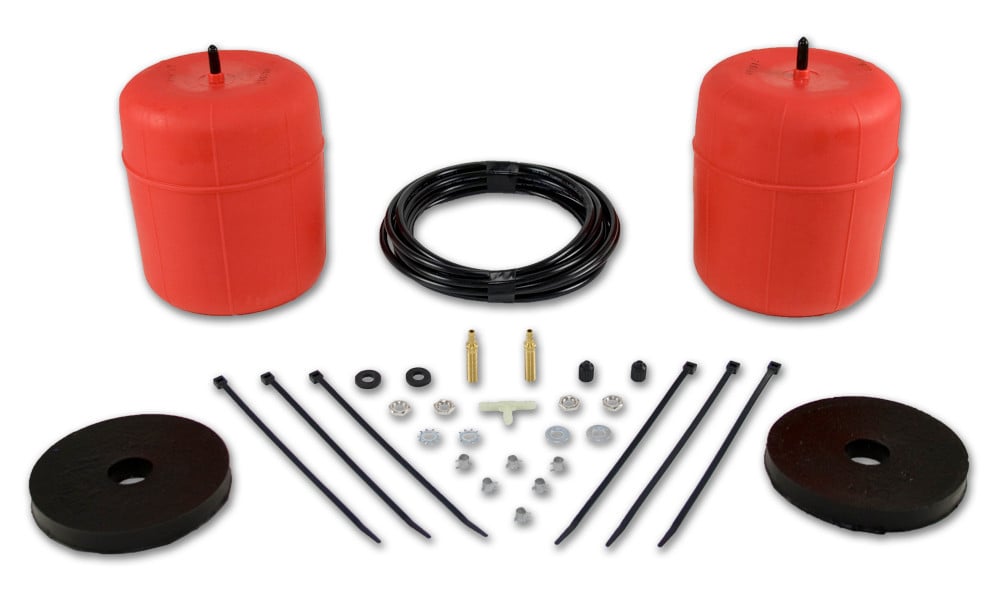
The kit includes air cylinders, a protector (to replace the jounce bumper), air line kits (Tee or Dual option), air line clamps, inflation valves, rubber washers, flat washers, lock washers, and hex nuts. The manual does not provide a complete parts list with quantities. For a detailed inventory, refer to the kit packaging or contact Air Lift Company at 1-800-248-0892.
The manual does not specify whether the battery must be disconnected. Contact Air Lift Company at 1-800-248-0892 for guidance on this step.
Raise the vehicle and place jack stands under the frame. Then remove the wheel and tire assemblies. The manual emphasizes using jack stands for safety and does not recommend relying on a jack alone.
You must remove: (1) lower shock absorber attaching bolts, (2) lower spring retaining strap and bolts, (3) stabilizer bar upper link retaining nuts, washers, and bushings, (4) one bolt on the lower control arm (the non-adjustable end if possible; if you remove the adjustable end, front suspension alignment will be required), (5) track bar attaching bolt, and (6) the rubber jounce bumper using channel lock pliers. Carefully lower the axle while observing brake lines to avoid straining them.
The manual recommends removing the non-adjustable end bolt to remove the coil spring. If you must remove the adjustable end bolt instead, the front suspension will have to be aligned after installation. Plan for this alignment service if you cannot access the non-adjustable bolt.
Yes. Two holes must be drilled: (1) a 3/4 inch hole in the center of the lower spring seat (using the indentation as a guide) to nest the air cylinder valve base, and (2) a 5/16 inch hole for the inflation valve. The 3/4 inch hole must be no less than 3/4 inch and centered to properly nest the valve base and prevent wear damage. These are permanent modifications to the vehicle.
Drill the 3/4 inch hole in the center of the lower spring seat. The manual states to use an indentation as a guide. The hole must be no less than 3/4 inch and centered to properly nest the air cylinder valve base and prevent wear damage. Mark the index location of the coil spring end on the lower seat before removing the spring to help with alignment.
Select a location for the inflation valve in the hood release, front bumper, fender flange, or behind the license plate, assuring that the valve will be protected and accessible with an air hose. Drill a 5/16 inch hole at that location and mount the valve as illustrated in Figure 11, with the rubber washer on the outside for weather sealing.
Insert the air cylinder into the coil spring with the stem located at the bottom. When installing the coil spring and air cylinder assembly, ensure the inflation valve base is nested in the drilled hole in the spring seat.
Tee Air Line routing connects both left and right air cylinders to a single tee fitting on the frame, then to one inflation valve. This is recommended for most vehicles. Dual Air Line routing uses separate air lines from the inflation valve to each cylinder, allowing independent pressure adjustment on each side. Dual Air Line is recommended only when weight in the vehicle varies from one side to the other and unequal pressures are needed to level the load. Both options require the air line to be kept at least 8 inches from the exhaust system to prevent melting.
Keep the air line at least 8 inches from the exhaust system to prevent melting. Leave sufficient air line slack to prevent any strain on fittings during axle motions. Route the air line along the cross member, lower control arm, or upper spring seat to the air cylinder. For Tee Air Line, route along the frame to the desired inflation valve location and attach with plastic straps or wire. For Dual Air Line, route along the control arm and frame to the inflation valve location.
Use this procedure for all air line connections: (1) Slide an air line clamp onto the air line, (2) Push the air line over the barbed stem until all barbs are covered, (3) Use pliers to compress the ears on the air line clamp and slide it forward to fully cover the barbed section. Repeat for each connection. The manual provides this procedure in Figure 5-8 and references it throughout the air line routing sections.
After raising the axle: (1) Replace lower spring retaining strap and bolts, (2) Replace stabilizer bar upper link retaining nuts, washers, and bushings (torque 14 ft. lbs.), (3) Replace lower shock absorber attaching bolts (torque 25 ft. lbs.), (4) Replace track bar attaching bolt (torque 55 ft. lbs.), (5) Replace forward lower control arm attaching bolts (torque 133 ft. lbs.). Repeat on the other side of the vehicle. Then inflate air springs to 50 p.s.i., check for leaks, replace wheels, remove safety stands, and lower the vehicle to the ground.
Torque the stabilizer bar upper link retaining nuts to 14 ft. lbs.
Torque the lower shock absorber attaching bolts to 25 ft. lbs.
Torque the track bar attaching bolt to 55 ft. lbs.
Torque the forward lower control arm attaching bolts to 133 ft. lbs.
Minimum air pressure: 10 p.s.i. Maximum air pressure: 50 p.s.i. A minimum of 10 p.s.i. must be maintained at all times to prevent chafing, coil pinch, bottoming-out on large bumps and chuckholes, and premature cylinder failure. Failure to maintain minimum pressure voids the warranty.
No. The kit does not require a dedicated compressor system. Air pressure can be adjusted with any type of compressor as long as it can produce sufficient pressure to service the springs. Even a bicycle tire pump can be used, though it requires significant manual effort. The system is purely pneumatic with no electrical components.
Inflate the air springs to 50 p.s.i. before adding payload. This allows the air cylinder to properly mesh with the coil spring. After the vehicle is loaded, adjust the air pressure downward to level the vehicle and for ride comfort. Do not inflate the air cylinders before reading the Maintenance and Operating Tips section of the manual.
Deflate the air springs in 10 p.s.i. intervals to determine the best ride and handling. A minimum of 10 p.s.i. must be maintained. After the vehicle is loaded, adjust air pressure downward to level the vehicle and for ride comfort. Pressure determination depends on three factors: level vehicle, ride comfort, and stability. Stability should be the priority for safety, meaning you may need to sacrifice a perfectly level and comfortable ride.
If the vehicle is leaning to one side, raise the air pressure to level the vehicle. If loads such as water, fuel, and appliances cause the vehicle to be heavier on one side, it may be necessary to maintain different pressures on each side. As much as a 50 p.s.i. difference is not uncommon. If you installed Dual Air Line routing, you can adjust each side independently. If you installed Tee Air Line routing, you may need to switch to Dual Air Line routing to achieve independent side-to-side leveling.
If the front of the vehicle dives while braking, increase the pressure in the front air bags if equipped. This is a stability issue that should be addressed to ensure safe braking performance.
When carrying payload, increase tire inflation pressure in proportion to the overload condition. Air Lift recommends a 2 p.s.i. increase above normal (not to exceed tire manufacturer's maximum) for each 100 lbs. of additional load on the axle. Do not exceed the tire manufacturer's maximum pressure.
After inflating the air springs to 50 p.s.i., check for air leaks at all fittings and the valve core using a soapy water solution. Make any necessary repairs before proceeding. Then replace the wheels, remove safety stands, and carefully lower the vehicle to the ground.
Check the air pressure weekly. Maintaining at least 10 p.s.i. air pressure at all times prevents chafing and coil pinch. Failure to maintain minimum pressure voids the warranty.
If the air springs are properly installed and maintained, they can last indefinitely. Proper maintenance includes checking pressure weekly, maintaining at least 10 p.s.i. air pressure at all times, and addressing any air leaks promptly using a soapy water solution to identify the source before removing the cylinder.
Use a soapy water solution to check all air line connections and the valve core. Apply the solution to each connection and look for bubbles indicating a leak. Make any necessary repairs before removing the cylinder. If the leak cannot be identified or repaired, contact Air Lift Company at 1-800-248-0892.
Yes, the vehicle can be lifted on a hoist for short-term service work such as tire rotation or oil changes. However, if the vehicle will be on the hoist for a prolonged period, support the axle with jack stands to take the tension off the air springs and prevent damage.
The MN-138 is designed for catalog-listed applications on cars, vans, light trucks, and motorhomes. Verify compatibility with Air Lift's catalog or call 1-800-248-0892 before purchasing.
You need channel lock pliers, a drill with 3/4 inch and 5/16 inch bits, and pliers to compress air line clamps. A torque wrench and socket set are implied for bolt removal and reinstallation.
Yes. Drill a 3/4 inch hole in the lower spring seat and a 5/16 inch hole for the inflation valve. Both are permanent modifications.
Minimum 10 p.s.i., maximum 50 p.s.i. Always maintain at least 10 p.s.i. to prevent damage and avoid voiding the warranty.
Stabilizer bar upper link nuts: 14 ft. lbs. Lower shock absorber bolts: 25 ft. lbs. Track bar bolt: 55 ft. lbs. Lower control arm bolts: 133 ft. lbs.
Inflate to 50 p.s.i. before adding payload to allow proper meshing of the air cylinder with the coil spring. Then adjust downward after loading for comfort and leveling.
Check weekly. Maintain at least 10 p.s.i. at all times to prevent damage and voiding the warranty.
The vehicle is not level. Raise the air pressure to correct this problem and level the vehicle. If loads such as water, fuel, or appliances cause uneven weight distribution, you may need to maintain different pressures on each side (as much as a 50 p.s.i. difference is not uncommon). If you installed Tee Air Line routing and cannot achieve level with equal pressures, consider switching to Dual Air Line routing for independent side-to-side adjustment.
A rough and harsh ride may be due to either too much pressure or not enough pressure. Try different pressures to determine the best ride comfort. Start with the vehicle level or slightly above, and adjust the pressure up and down to find the best ride.
Stability issues including sway and body roll are usually resolved by increasing air pressure. Adjust the air pressure to reduce movement. Stability should be the priority for safety, even if it means sacrificing a perfectly level and comfortable ride.
Front dive during braking is a stability issue. Increase the pressure in the front air bags if equipped. This will improve braking stability and control.
If it is suspected that the air cylinders have bottomed out, increase the air pressure. Bottoming out occurs when the air cylinder compresses fully and loses support. Increasing pressure prevents this condition and maintains proper suspension support.
Use a soapy water solution to check all air line connections and the valve core. Apply the solution to each connection and look for bubbles, which indicate a leak. Once you identify the leaking connection, make any necessary repairs. If the leak persists or cannot be identified, contact Air Lift Company at 1-800-248-0892 for technical assistance.
No reviews have been added for this product.
On Sale Today
Original price was $194.99. Current price is $179.56.You save $15.43 (8%)
Free Shipping
Ships free on all orders
 Authorized Dealer

Quick Ship
In stock and ready to ship — order now!
FREE ShippingFREE SHIPPING
Estimated delivery Thu, Sep 17 - Sun, Sep 20
Order before 2 PM EST Monday–Friday for same-day processing
Guaranteed safe & secure checkout