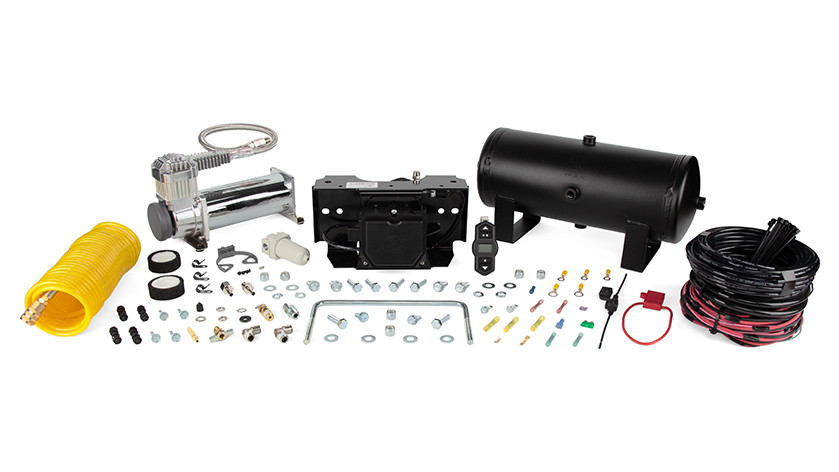
Air Lift Air Lift WirelessOne Tank + EZ Mount 25981EZAir LiftOriginal price was $1,842.99. Current price is $1,335.99.In Stock
View productOur in-house experts typically reply within one business day.

Air Lift
On Sale Today
Original price was $760.99. Current price is $551.99.You save $209.00 (27%)
Free Shipping
Ships free on all orders
 Authorized Dealer




Always the correct part
We know our products
Quality Products
Free Shipping!
Always the correct part
We know our products
Quality Products
Free Shipping!
Quick Ship
In stock and ready to ship — order now!
FREE ShippingFREE SHIPPING
Estimated delivery Tue, Sep 22 - Fri, Sep 25
Order before 2 PM EST Monday–Friday for same-day processing
Guaranteed safe & secure checkout
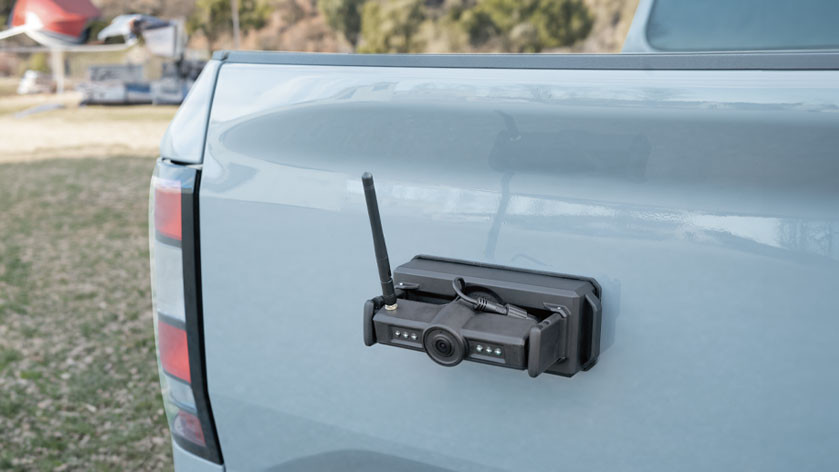
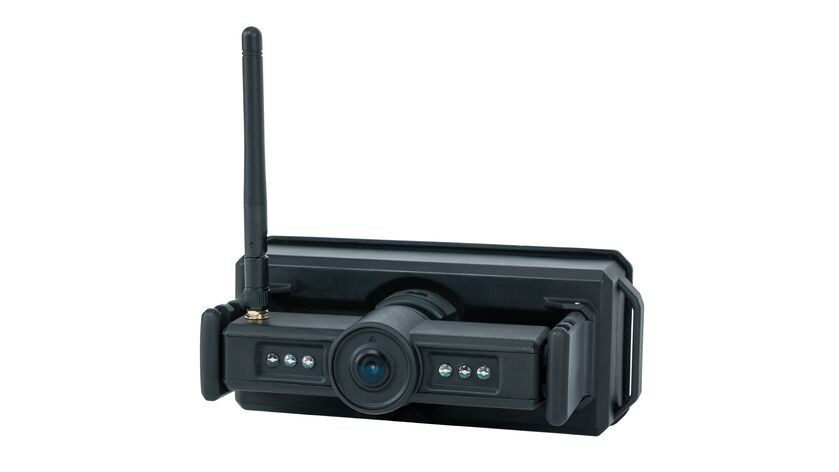
Air Lift’s Towtal View HD Camera with versatile mounts provides a high-quality color video feed via the free mobile app. The camera easily swaps between the permanent hardwired mount and the portable battery pack suction cup mount.

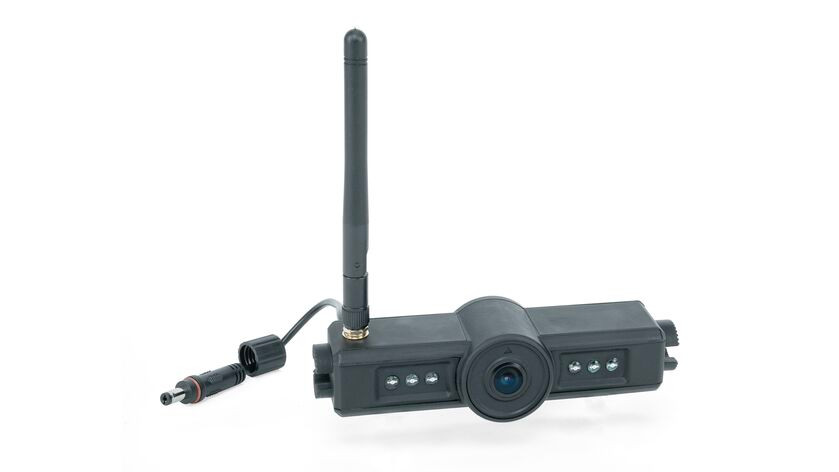
Air Lift’s Towtal View HD Camera with versatile mounts provides a high quality color video feed via the free mobile app. The HD camera features a quick-connect mount, allowing easy, no-tool swapping between the included permanent hardwired mount and battery pack suction cup mount. The mounts are also multi-position adjustable for various viewing angles, and the permanent mount easily wires into the vehicle’s trailer lights. Through the free app, view the camera, record video, capture photos, add or remove backup-assist lines, mirror the image, and rotate the image. The camera’s infrared LED lights allow for night vision, maintaining color viewing rather than traditional black-and-white night vision. Towtal View has over 100 feet of reliable range via a strong, secure Wi-Fi connection. The camera’s multi-coated lens provides 80° vertical and 110° horizontal field of view. Use the Towtal View camera on the back of your trailer to help you back up that boat. Precisely guide your trailer into tight parking spaces while knowing your contents are safe. This is the perfect tool to monitor your precious cargo, livestock, race cars, or UTVs. With the live video feed, you can monitor your parking spot and watch over your race site or campsite, even when you’re away from your vehicle. Towtal View has a 2-year warranty, and the app is compatible with larger devices like iPads and Android tablets.
Air Lift Company has developed dependable air spring suspension products since our inception in 1949. Our original product, a rubber air spring inserted into a car’s factory coil spring, was created and patented in 1950. We’ve come a long way since 1949 and are proud to be a dedicated suspension specialist company.
Today, Air Lift load support products are sold worldwide and are engineered to fit over 540 vehicles. Our extensive product line offers air helper springs for trucks, RVs, SUVs, CUVs, and vans, as well as the most technologically advanced on-board air compressor systems for on-the-go air spring control.
Air Lift leads the industry in no-drill applications – kits that bolt onto your vehicle’s frame, speeding the installation process. Our teams work constantly to bring innovative products to you and upgrade existing products with the latest technology.
All of our efforts are spent ensuring your safety and comfort by designing, engineering, and manufacturing the highest quality suspension products. We are a family-owned business based in Lansing, Michigan, and make your family and cargo’s safety our top priority.
Experts available to answer your questions
Call 888-634-94942 Year Limited
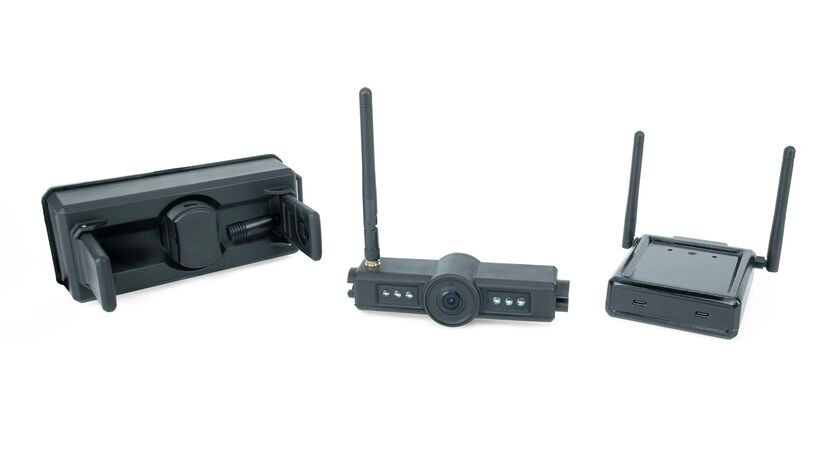
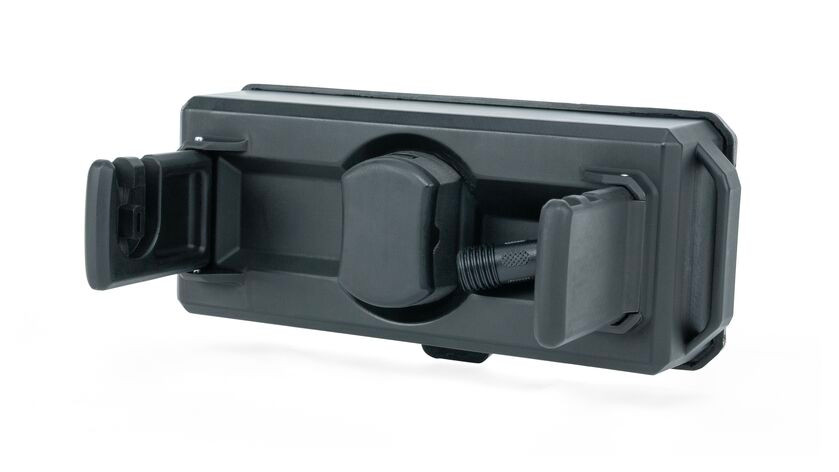
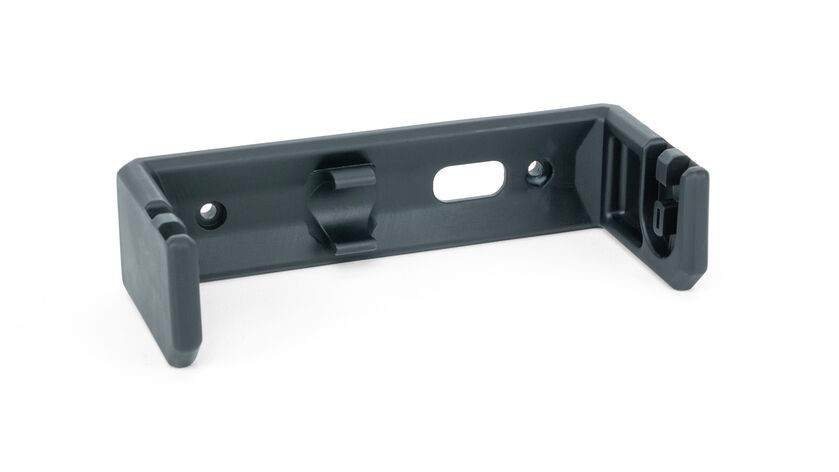
The Towtal View HD Camera is a wireless HD camera system designed for towing applications. It consists of an HD camera that mounts to a vehicle or trailer, a battery-backed receiver (housed in the trailer mount), and a camera interface that connects to your smartphone. The system transmits wireless video to your mobile device via a dedicated app available on iOS and Android, allowing you to monitor your surroundings while towing. The system features two mounting options: a permanent trailer mount for fixed installation and a portable suction cup power pack mount for temporary use.
The kit includes: one portable suction cup power pack mount, one permanent trailer mount, one camera interface, one Towtal View HD camera, one grommet, two wire taps, one 15-foot HD camera power harness, two M3.9 19mm Phillips head screws, one 12v car lighter to USB-C adapter, one 1m USB-C cable, and three antennas.
Yes. The system is designed for mounting on the exterior of both vehicles and trailers. The permanent trailer mount is intended for fixed installation on trailers or vehicles, while the portable suction cup power pack mount can be used on any vehicle with a clean, flat surface. The manual specifically references installation on trailers and notes that on trailers over 35 feet, the camera interface can be mounted on the interior front where 12v power is available.
Required tools include: needle-nose pliers, wire strippers, electrical tape, a 5/8" drill bit, a 1/8" drill bit, safety glasses, and a spray bottle with isopropyl alcohol solution. A soldering iron is listed as optional. You will also need a Phillips head screwdriver (not explicitly listed but required for the M3.9 screws). A mobile device with sufficient battery charge is needed for pairing and configuration.
The manual does not explicitly require professional installation. However, it recommends seeking professional electrical or mechanic help if you are uncertain about how to connect to your vehicle's electrical system. For the permanent trailer mount installation, you must be aware of everything behind the wall where you are drilling to avoid damaging internal components. If you are not confident in your ability to safely identify power and ground wires or drill accurately, professional installation is recommended.
The mounting surface must be clean and flat. Clean the surface by applying an isopropyl alcohol solution to a clean cloth and wipe thoroughly to remove dirt, grease, or residue. The surface must be completely dry before installation. Choose a location with a relatively flat surface, avoiding areas with pronounced curves or irregularities. The bottom of the suction cup mount must also be free from debris, dust, or foreign materials. Failure to properly clean and prepare a flat surface will cause the mount to fall and damage the camera system.
Select an area on the trailer where the permanent trailer mount will be high enough for your desired viewing angle and will not obstruct doors, hatches, or prevent any function of your trailer equipment or its safety functions. The manual recommends positioning it preferably near the rear clearance or parking lights on the top of the trailer for optimal positioning. You should remove one of the clearance or parking lights to gain better access to the wiring for a more straightforward installation.
Drilling is required only for the permanent trailer mount installation. You must drill two holes using the provided drilling template (Figure 16): one 5/8" hole and one 1/8" hole. The 5/8" hole is used to route the power and ground wires, and the 1/8" hole is for mounting. Before drilling, you must be aware of everything behind the wall to avoid damaging internal components. The portable suction cup mount requires no drilling.
The drilling template is provided in Figure 16 of the manual. The manual emphasizes that you must print this manual at 100% scale only. Using an incorrect scale will render the template dimensionally incorrect and cause you to drill in the wrong locations. To verify correct printing, measure the 1-inch or 1cm scale provided on the template with a measuring tool to confirm it measures exactly 1 inch or 1cm. Use the verified template to mark the installation holes accurately on your chosen location before drilling.
You need a 5/8" drill bit and a 1/8" drill bit. The 5/8" hole is used to route the power and ground wires through the trailer, and the 1/8" hole is for mounting the bracket. Both bits are included in the tools list.
1. Clean the mounting surface with isopropyl alcohol solution and let it dry completely. 2. Choose a flat location avoiding pronounced curves. 3. Inspect the bottom of the mount for debris and clean if necessary. 4. Verify the mount is oriented horizontally with the tether attachment point on the right side. 5. Position the mount onto the cleaned surface with gentle pressure. 6. Open each arm of the mount and turn the dial clockwise to engage the suction (the dial should reach the "LOCKED" position). 7. Gently tug the mount to confirm it is securely attached. 8. Attach your own tether device to the tether attachment point and connect the opposite end to a firm attachment point on the vehicle for additional safety.
1. Select a mounting location on the trailer that is high enough for your desired viewing angle and does not obstruct doors, hatches, or trailer functions. 2. Remove one clearance or parking light to access the wiring. 3. Use the provided drilling template (Figure 16) to mark the installation holes accurately, noting the hole pattern orientation. 4. Carefully drill the marked holes, ensuring you are aware of everything behind the wall. 5. If required, secure the grommet to the drilled hole to prevent water intrusion. 6. Thread the power and ground wires from the HD camera power harness through both the slotted trailer mount hole and the 5/8" drilled hole. 7. Using the included wire taps or soldering method, connect the power and ground wires to the 12-volt and ground wires from the clearance/parking light. If not connecting to an existing ground wire, clean the metal before grounding. 8. Tuck the wires into the channel behind the mount to prevent pinching. 9. Screw the permanent trailer mount onto the trailer using the M3.9 19mm Phillips head screws. 10. Verify all connections are secure and the mount is firmly attached.
1. Note the embossed label (small triangle or arrow) on the top of the HD camera that indicates the "up" position. 2. Slide the HD camera into the mount at a 90-degree angle so the lens faces the ground. The slotted wings of the camera will seat in the slotted arms of the mount. 3. Attach the power plug to the HD camera housing and tighten the collar to secure the connection. 4. Rotate the HD camera up to your desired viewing angle. The camera has multiple angles that automatically lock into place.
Connect the camera interface using the supplied 1m USB-C cable (J) either directly into a USB-C port in the vehicle cab or using the included 12v car lighter adapter (I). The camera interface must be powered for the HD camera to connect to your mobile device. On trailers over 35 feet, you can mount the camera interface on the interior front of the trailer where 12v power is available to plug in the 12v car lighter adapter.
Use the included wire taps (F) or a soldering method (soldering iron not included) to connect the power and ground wires from the HD camera power harness (G) to the 12-volt and ground wires from the clearance or parking light you identified. If you are not connecting to an existing ground wire, you must clean the metal surface before grounding the HD camera to the trailer to ensure a secure connection. The power harness is 15 feet long.
The HD camera power harness is 15 feet long, providing adequate length for routing from the power source to the camera mount on most trailers and vehicles.
1. Power up the HD camera from either the portable suction cup power pack or by turning on the parking lights if powered through the towing vehicle's parking lights. 2. Within 45 seconds, press and HOLD the center button on the camera interface until the green light begins to blink to initiate pairing. 3. The camera and interface should pair automatically after initial syncing. 4. If pairing does not occur, press the Sync Button on the underside of the HD camera to restart the pairing process.
1. After pairing the HD camera with the camera interface, use your mobile phone to search for the wireless network generated by the camera interface. 2. Connect your mobile phone to the identified wireless network to establish a stable connection with the camera interface. 3. Complete the installation by securing the camera interface in a location that ensures optimal signal strength and functionality, taking into account potential interference or obstructions. 4. Download the Towtal View app from the iOS App Store (for Apple devices) or the Android Google Play Store (for Android devices) to view the wireless video feed.
Distracted driving is dangerous and you must pay attention to the road. Do not adjust the app when driving. Only view the monitor when it is safe to do so, and only when your phone is dash mounted. Before use, check your local laws and regulations on the use of cell phones when driving. The camera interface is not rated for exterior mounting and must not get wet—mount it only in the vehicle cab or interior of the trailer. The portable suction cup mount will fall if the mounting surface is not properly cleaned and flat, which could damage the camera system.
The camera interface must be mounted in the vehicle cab or interior of the trailer where it will not get wet. The camera interface is not rated for exterior mounting. On trailers over 35 feet, you can mount it on the interior front of the trailer where 12v power is available. Choose a location that ensures optimal signal strength and functionality, taking into account potential interference or obstructions.
The grommet (E) is used to prevent water intrusion at the drilled hole on the trailer. If your permanent trailer mount installation location requires it, secure the grommet to the drilled trailer hole to enhance the longevity and reliability of the installation. The manual indicates this is conditional based on your specific installation location.
The two M3.9 19mm Phillips head screws (H) are used to screw the permanent trailer mount onto the trailer securely through the permanent trailer mount installation holes to ensure a stable and robust attachment.
The tether safety loop is an attachment point on the side of the portable suction cup power pack mount. To protect the system from damage, you should attach your own tether device to this attachment point and connect the opposite end of the tether to a firm attachment point on the vehicle. This provides additional safety in case the suction cup loses its seal.
After installation, verify that: 1) all electrical connections are secure, 2) the mount is firmly and reliably attached to the trailer or vehicle, 3) the portable suction cup mount (if used) is securely attached by gently tugging on it, 4) the HD camera is properly seated in the mount and rotated to your desired angle, 5) the camera interface is powered and the green light is blinking after pairing, 6) your mobile device is connected to the wireless network generated by the camera interface, and 7) the video feed is displaying correctly on your mobile device.
Air Lift Company provides a 2-Year Limited Warranty to the original purchaser from the date of original purchase. The warranty covers defects in workmanship and materials when the product is used on cars and trucks as specified by Air Lift Company and under normal operating conditions. Warranty coverage does not apply to damage caused by incorrect installation, use, or weather conditions affecting the mounting surface. For full warranty details, visit https://www.airliftcompany.com/support/warranty/. To register your warranty, visit https://www.airliftcompany.com/support/warranty/register/.
Yes, the system is designed for mounting on both vehicles and trailers. The permanent trailer mount is for fixed installation, and the portable suction cup mount works on any vehicle with a clean, flat surface.
You need a 5/8" drill bit, 1/8" drill bit, Phillips head screwdriver, needle-nose pliers, wire strippers, electrical tape, isopropyl alcohol solution, safety glasses, and optionally a soldering iron. A mobile device with sufficient battery is also required for pairing.
Drilling is required only for the permanent trailer mount (5/8" and 1/8" holes). The portable suction cup mount requires no drilling—only a clean, flat surface.
Mount the camera interface only in the vehicle cab or interior of the trailer where it will not get wet. It is not rated for exterior mounting. On trailers over 35 feet, mount it on the interior front where 12v power is available.
Clean the surface thoroughly with isopropyl alcohol solution and let it dry completely. The surface must be flat and free of debris. Failure to properly clean and prepare a flat surface will cause the mount to fall.
Power up the HD camera, then within 45 seconds press and HOLD the center button on the camera interface until the green light blinks. They should pair automatically. If needed, press the Sync Button on the underside of the HD camera to restart pairing.
No reviews have been added for this product.