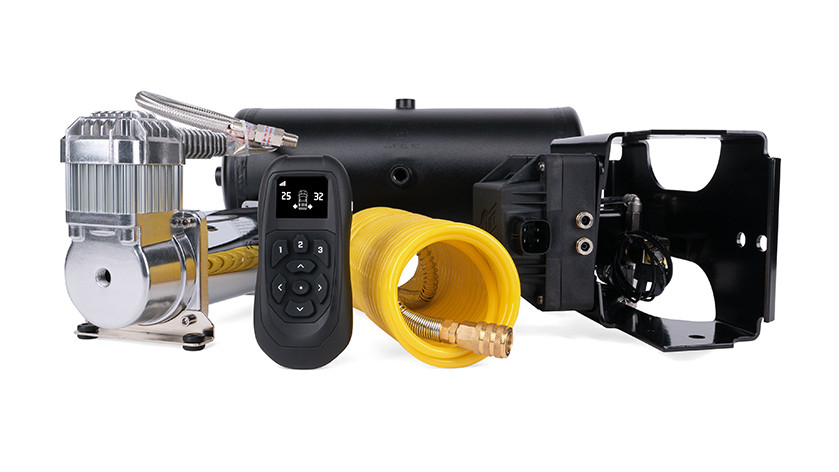
Air Lift WirelessAir Tank + EZ Mount Kit 74100EZAir LiftOriginal price was $1,881.99. Current price is $1,515.95.In Stock
View productOur in-house experts typically reply within one business day.

Air Lift



Always the correct part
We know our products
Quality Products
Free Shipping!
Always the correct part
We know our products
Quality Products
Free Shipping!
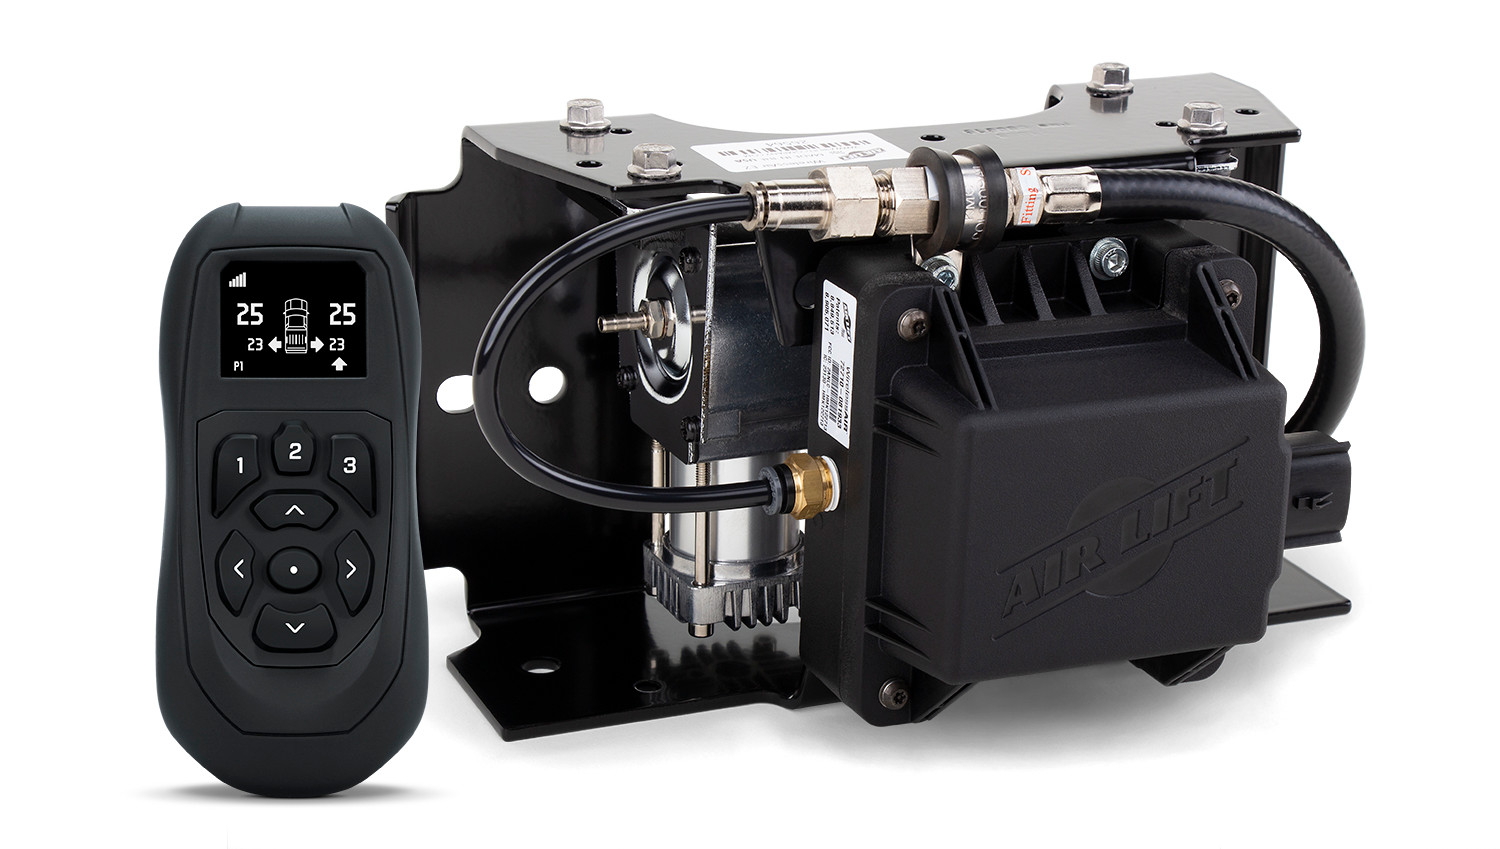
EZ Mount WirelessAIR
Leveling Compressor Control System
Incl. Compressor/Manifold/Control Box

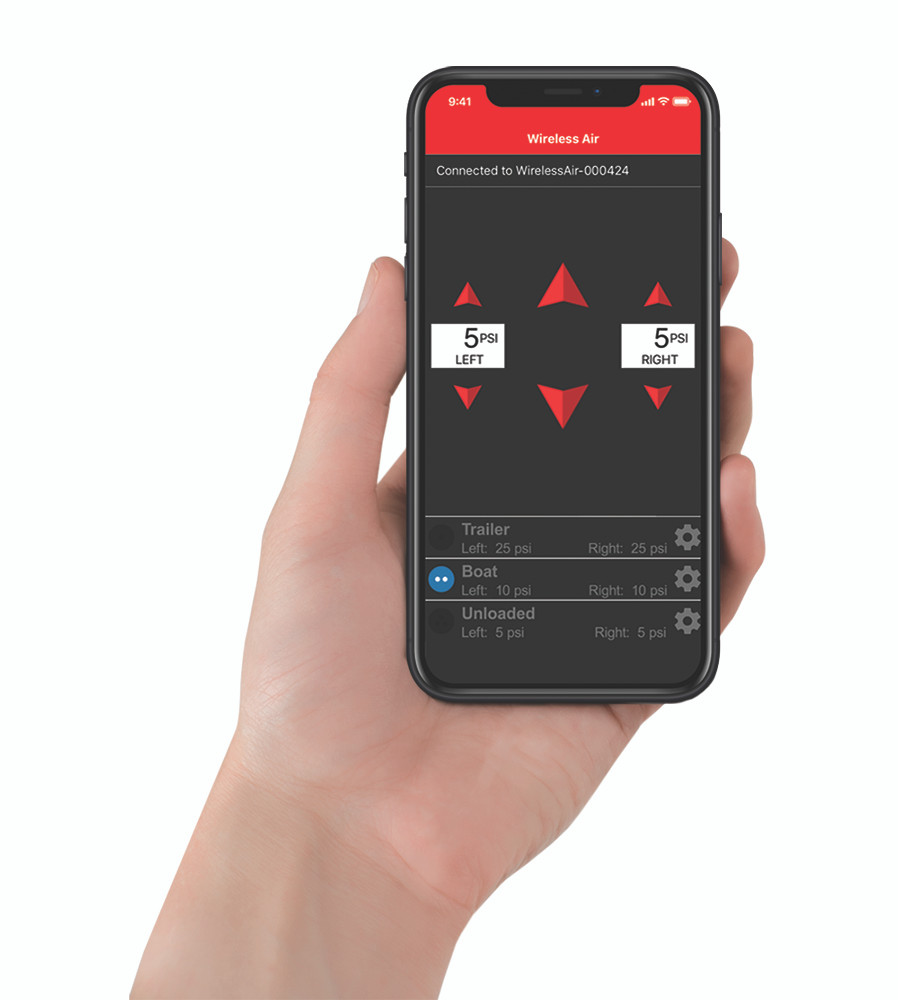
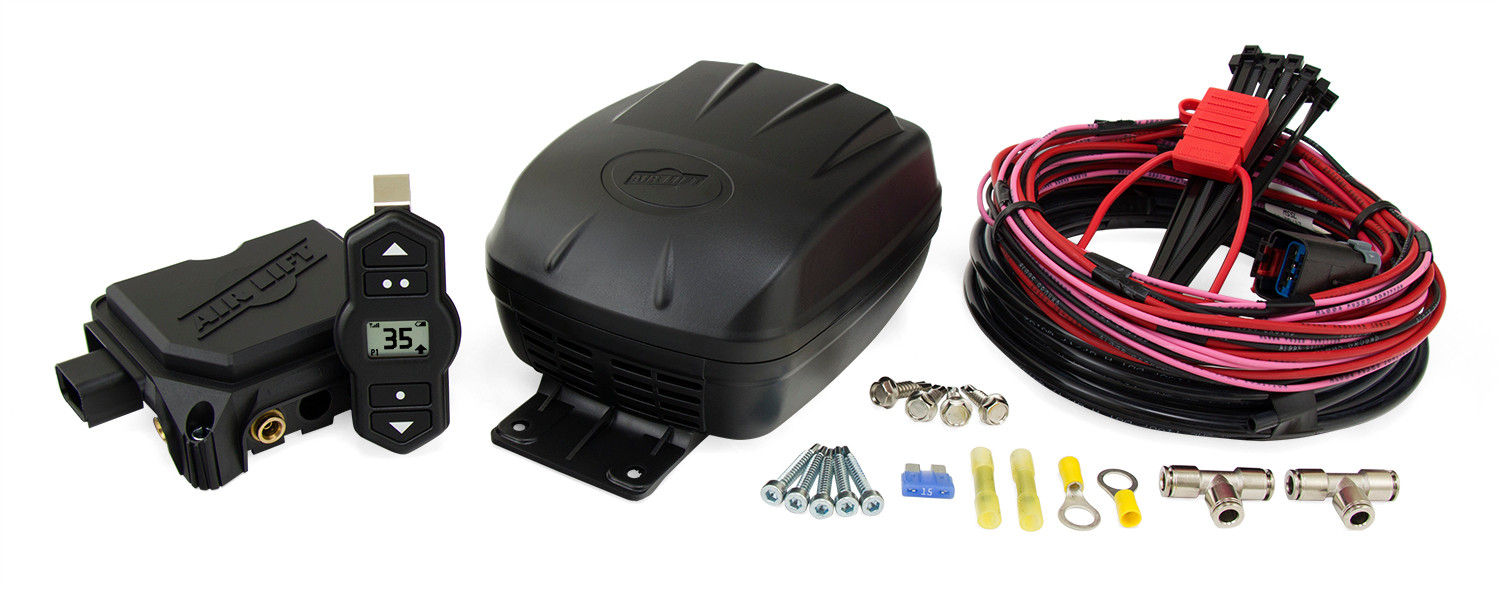
Offering easy and convenient air pressure adjustment for any brand of aftermarket air spring, the WirelessAir on-board air compressor system from Air Lift is ideal for the elite air spring user. This dual-path WirelessAir(TM) allows users to inflate or deflate each air spring separately, this allows each air spring to be filled to different air pressures, to better handle uneven or top-heavy loads, all powered by a heavy-duty compressor. This second-generation system offers easy control of your air springs through an upgraded, wireless handheld controller or the new mobile app. Installing the system is simple, with no air line or wiring needing to be routed through the cab of the vehicle. The included wiring harness, installation hardware, and a fully illustrated instruction manual ensure that WirelessAir(TM) will be up and running in no time. WirelessAir(TM) is now available with the EZ Mount system, which packages the manifold and heavy-duty compressor into a factory-assembled and tested bracket, making installation even easier. Backed by Air Lift's two-year limited warranty and 60-day, no-questions-asked, money-back guarantee, WirelessAir(TM) can be purchased with peace of mind.
Air Lift Company has developed dependable air spring suspension products since our inception in 1949. Our original product, a rubber air spring inserted into a car’s factory coil spring, was created and patented in 1950. We’ve come a long way since 1949 and are proud to be a dedicated suspension specialist company.
Today, Air Lift load support products are sold worldwide and are engineered to fit over 540 vehicles. Our extensive product line offers air helper springs for trucks, RVs, SUVs, CUVs, and vans, as well as the most technologically advanced on-board air compressor systems for on-the-go air spring control.
Air Lift leads the industry in no-drill applications – kits that bolt onto your vehicle’s frame, speeding the installation process. Our teams work constantly to bring innovative products to you and upgrade existing products with the latest technology.
All of our efforts are spent ensuring your safety and comfort by designing, engineering, and manufacturing the highest quality suspension products. We are a family-owned business based in Lansing, Michigan, and make your family and cargo’s safety our top priority.
Experts available to answer your questions
Call 888-634-94942 Years
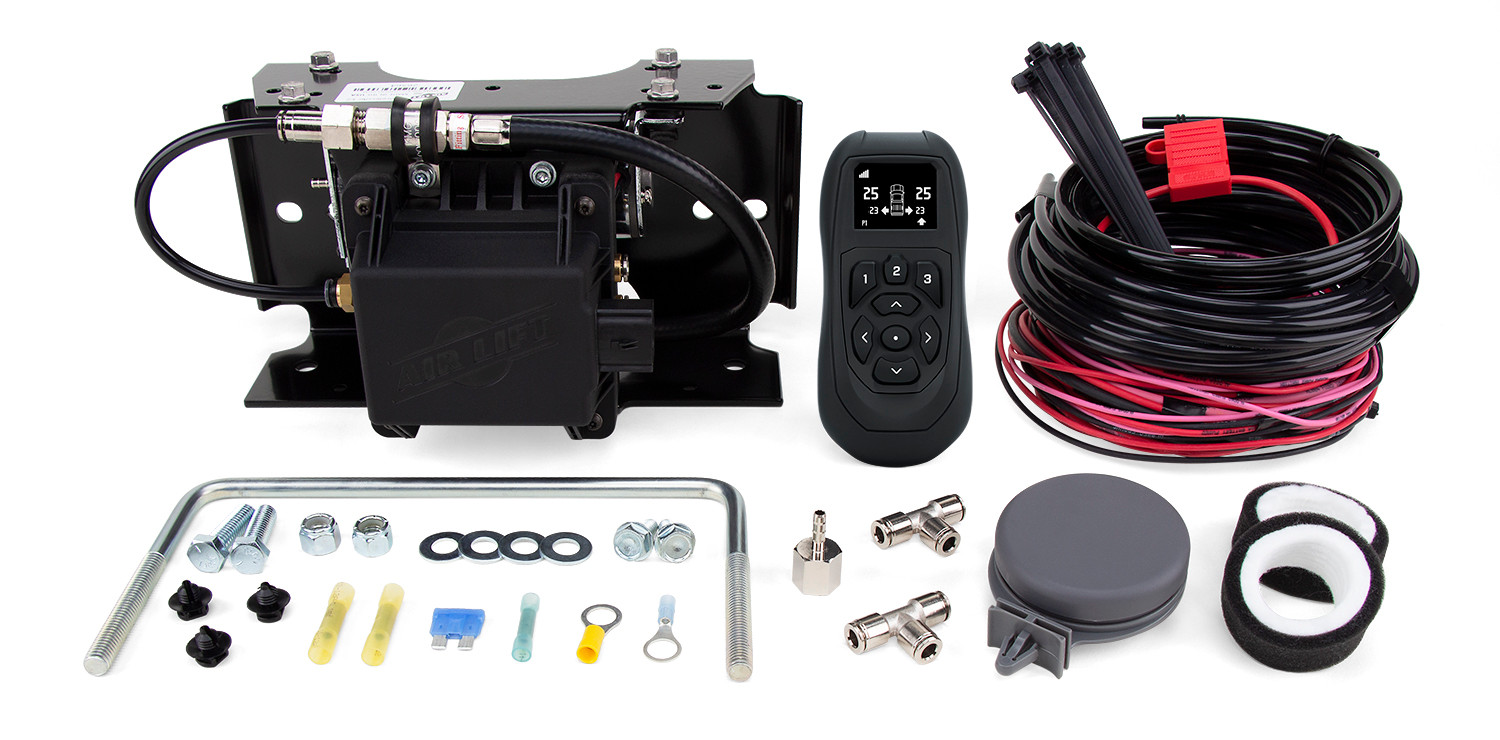
The WirelessAIR EZ Mount (kit number 74000EZ, part MN-1100) combines a manifold and compressor into a single unit designed for easy installation. The kit includes the EZ Mount assembly (manifold and compressor), wireless controller, 25 ft. of 1/4" air line, wiring harness, and hardware pack with fittings, fuses, terminals, zip ties, and mounting brackets. Air spring kits are sold separately and must be purchased to complete the system.
Air springs are not included with the EZ Mount system. The manual states that air spring kits are sold separately. You must purchase an air spring kit separately to complete your suspension system.
No. The U-bolt mounting option (part 11104) requires specific frame dimensions: frame width must be 2.25" to 3.75" (57–95 mm) and frame height must be 7.5" to 8.5" (191–216 mm). If your vehicle frame does not fall within these dimensions, use the hex cap bolt or self-tapping screw mounting options instead.
The EZ Mount must not be mounted with the logo upside down or with the logo facing the ground. These orientations are unacceptable and will result in improper installation. The unit can be mounted in any other orientation using the available mounting holes in the side of the bracket or the top.
Ideally, mount the EZ Mount in the middle of the vehicle to optimize wireless performance. The suggested component layout diagram (Figure 2) shows the optimal zone marked by a yellow square. However, the layout may need modification based on your specific application. The unit must be mounted in an area shielded from direct splash, at least 6" away from heat sources such as the exhaust system.
You will need: a power drill, 3/8" drill bits, 3/8", 1/2", 5/16", and 9/16" sockets and ratchet, a wire stripping/crimping tool, and a sharp razor knife. If using self-tapping screws for mounting, you will also need a 1/4" drill bit to make pilot holes.
The hardware pack includes: 2 tee fittings (1/4" PTC), 1 ATC fuse (spade 15A), 2 heat shrink butt splices (10–12 ga), 1 ATC/ATO fuse holder, 18 zip ties (8"), 1 ring terminal (3/8", 10–12 ga), 1 U-bolt, 2 nylon lock nuts (3/8"-16), 4 flat washers (3/8"), 2 hex cap bolts (3/8"-16 x 1.25"), 2 self-tapping hex screws (5/16"-18 x 0.75"), 3 tree mounts, 1 heat shrink butt splice (14–16 ga), and 1 ring terminal (3/8", 14–16 ga).
Before drilling, you must ensure that the back side of the mounting location is clear of vehicle components, including brake lines, fuel lines, and wiring. Drilling through these components could cause serious damage to the vehicle. Use the included drilling template (Figure 5) printed at 100% scale to mark hole locations accurately.
The drilling template (Figure 5) must be printed at 100% scale. To verify correct scale, use a measuring tool to confirm that the printed 1-inch or 1-centimeter scale on the template measures exactly 1" or 1 cm. If the template is printed with any scaling other than 100%, the dimensions will be incorrect and drilling may damage the vehicle. Print at 100% scale only.
You can mount the EZ Mount using one of three methods: (1) hex cap bolts (part 17188) with flat washers (part 18444) and nylon lock nuts (part 18435); (2) U-bolt (part 11104) with washers and nylon lock nuts; or (3) self-tapping screws (part 17102). The choice depends on your vehicle frame dimensions and structure. For U-bolt mounting, frame width must be 2.25"–3.75" and height 7.5"–8.5".
1. Screw the 1/4" FNPT x 1/4" barbed tube fitting onto the inlet air filter and hand-tighten (no thread sealant needed). 2. Attach 1/4" air line to the barbed fitting on the filter. 3. Locate a dry area away from heat sources with unblocked inlet slots. 4. Secure the filter using proper fastening methods, or drill a 3/8" mounting hole and push the filter bracket pin into it. 5. Route the air line to the compressor inlet port, keeping away from sharp edges and maintaining proper bend radius (minimum 1" for 1/4" line). 6. Cut the air line squarely and attach to the barbed fitting on the compressor inlet port.
Route one air line from port (1) of the manifold to the driver's (left) side air spring, and another air line from port (2) of the manifold to the passenger's (right) side air spring. If manual inflation is desired, install tee fittings (part 20946) and Schrader valves at these connections. Ensure clean, square cuts on all air lines and avoid routing near sharp edges. Support air lines every 8–12" with zip ties or other means.
Cut off the terminals on the red and black compressor wires. Connect the red compressor wire to the short red wire on the wiring harness using a heat shrink butt splice (part 24752, 10–12 ga). Connect the black compressor wire to the short black wire on the harness using the same splice type. The ground wire cannot be grounded to the chassis and must be connected to the harness. After all connections are made, connect the wiring to the battery and then install the fuse.
Attach the wiring harness to the top (preferred location) or bottom of the EZ Mount bracket using tree mounts (part 10868) and zip ties (part 10466). Route the wiring harness outside of the compressor hose to avoid interference. Secure the harness every 8–12" along its length.
Press the connector on the wiring harness completely onto the manifold connector and listen for an audible "click" to confirm proper seating. Then press the white lock on the connector toward the manifold to lock it in place. Ensure a proper drip loop exists in the wiring to prevent water intrusion. Install the fuse last after all other connections are complete.
Install the fuse (part 24652, ATC 15A) last, after all air line and wiring connections are complete. Do not install the fuse until the wiring harness is fully connected to the manifold and the battery. Once the fuse is installed, the system will automatically fill to 5 PSI (0.34 BAR).
Use a 1/4" drill bit to make pilot holes if you are mounting the EZ Mount with self-tapping screws (part 17102). Pilot holes help ensure proper screw seating and reduce the risk of stripping or damaging the mounting surface.
Use a sharp knife or hose cutter to make clean, square cuts perpendicular to the line. Do not use scissors or wire cutters, as these tools will deform the air line. Do not cut at an angle. The minimum bend radius for 1/4" air line is 1" (25 mm). After cutting, inspect the air line for lengthwise scratches. If the line is damaged, contact Air Lift customer service at (800) 248-0892.
Torque the hex cap bolts (part 17188) to 21–25 lb.-ft. (30–34 Nm). Use a torque wrench to ensure proper tightness and avoid over-tightening, which could damage the mounting bracket.
Torque the U-bolt (part 11104) to 4–6 lb.-ft. (5.4–8.1 Nm). This lower torque range is specific to U-bolt fasteners and differs from the hex cap bolt specification.
No torque specification is provided for the self-tapping screws (part 17102). The manual states that no torque spec is provided because there are too many variables affecting self-tapping screw installation. Tighten the screws firmly but do not over-tighten, as this could strip the threads or damage the mounting surface.
Once the fuse is installed and power is applied, the system will automatically fill to 5 PSI (0.34 BAR). This is the default initial pressure setting.
The kit includes an ATC fuse (part 24652) rated at 15 amperes (15A). This fuse protects the electrical circuit and must be installed last, after all other connections are complete.
No. The manual explicitly states: "To keep voltage drop within industry standards, do not extend wires. Extending the wires could decrease compressor life." You must route the existing wiring harness directly to the battery without extending it. If the harness is too short, contact Air Lift customer service for guidance.
The optional ignition source connection allows the WirelessAIR system to make adjustments only when the ignition is turned on. Without this connection, the system will only activate when the vehicle moves or when woken up by the controller or mobile app. To install, connect the pink wire from the wiring harness to any wire that is active when the ignition is on. This should be connected to the output side of a 10A or smaller fuse-protected circuit. Hardware to connect to the ignition is not included in the kit.
A drip loop is a loop formed in the wiring where it connects to the manifold, designed to prevent water from running down the wire and entering the connector. The manual requires that a proper drip loop be created when connecting the wiring harness to the manifold to prevent water intrusion and potential electrical damage.
The EZ Mount, wiring, and air lines must be kept at least 6" away from heat sources such as the exhaust system. Excessive heat can damage the compressor and cause system failure. When routing air lines and wiring, avoid areas near the exhaust and other hot components.
Avoid routing air lines and wiring near sharp edges. If you must pass air lines or wiring through holes in the frame, use rubber grommets to protect them. Support wiring and air lines every 8–12" (200–300 mm) with zip ties or other means to prevent movement and chafing.
Remove all fuses from the system before jump-starting or welding on the vehicle. Failure to remove the fuses could damage the manifold. Reinstall the fuses after jump-starting or welding is complete.
The compressor inlet filter must be installed in a dry location, pointed up with the hose routed down. This orientation prevents moisture from entering the filter and damaging the compressor. Keep the filter away from heat sources and ensure the air inlet slots are free from blockage.
No. The manual explicitly states: "Do not remove components from the EZ Mount assembly." The manifold and compressor are integrated into a single unit and should not be disassembled.
Once the fuse is installed, the system will automatically fill to 5 PSI (0.34 BAR). After this initial fill, you should proceed to pair your mobile device or wireless controller with the system. Refer to the WirelessAIR User Guide (AD-963) included with your kit for detailed pairing instructions for Apple devices, Android devices, or the wireless controller.
For detailed instructions on pairing your Apple or Android mobile device, or the wireless controller (part 73006), refer to the WirelessAIR User Guide (AD-963) included with your kit. A QR code is provided in the installation guide that links to a short video demonstrating the pairing process.
The EZ Mount can be mounted using hex cap bolts, U-bolts, or self-tapping screws. U-bolt mounting requires frame width 2.25"–3.75" and height 7.5"–8.5". For other vehicles, use hex cap bolts or self-tapping screws. Air springs are sold separately.
You need a power drill, 3/8" drill bits, 3/8", 1/2", 5/16", and 9/16" sockets and ratchet, wire stripping/crimping tool, and sharp razor knife. For self-tapping screw mounting, also use a 1/4" drill bit for pilot holes.
Yes, drilling is required for hex cap bolt or self-tapping screw mounting. Before drilling, verify the back side is clear of brake lines, fuel lines, and wiring. Use the included 100% scale drilling template (Figure 5) to mark hole locations accurately.
Hex cap bolts: 21–25 lb.-ft. (30–34 Nm). U-bolt: 4–6 lb.-ft. (5.4–8.1 Nm). Self-tapping screws have no torque spec due to variables; tighten firmly without over-tightening.
Keep the EZ Mount, wiring, and air lines at least 6" away from heat sources such as the exhaust system. Excessive heat can damage the compressor and cause system failure.
Remove all fuses before jump-starting or welding on the vehicle. Failure to do so could damage the manifold. Reinstall fuses after the work is complete.
On Sale Today
Original price was $1,291.99. Current price is $936.99.You save $355.00 (27%)
Free Shipping
Ships free on all orders
 Authorized Dealer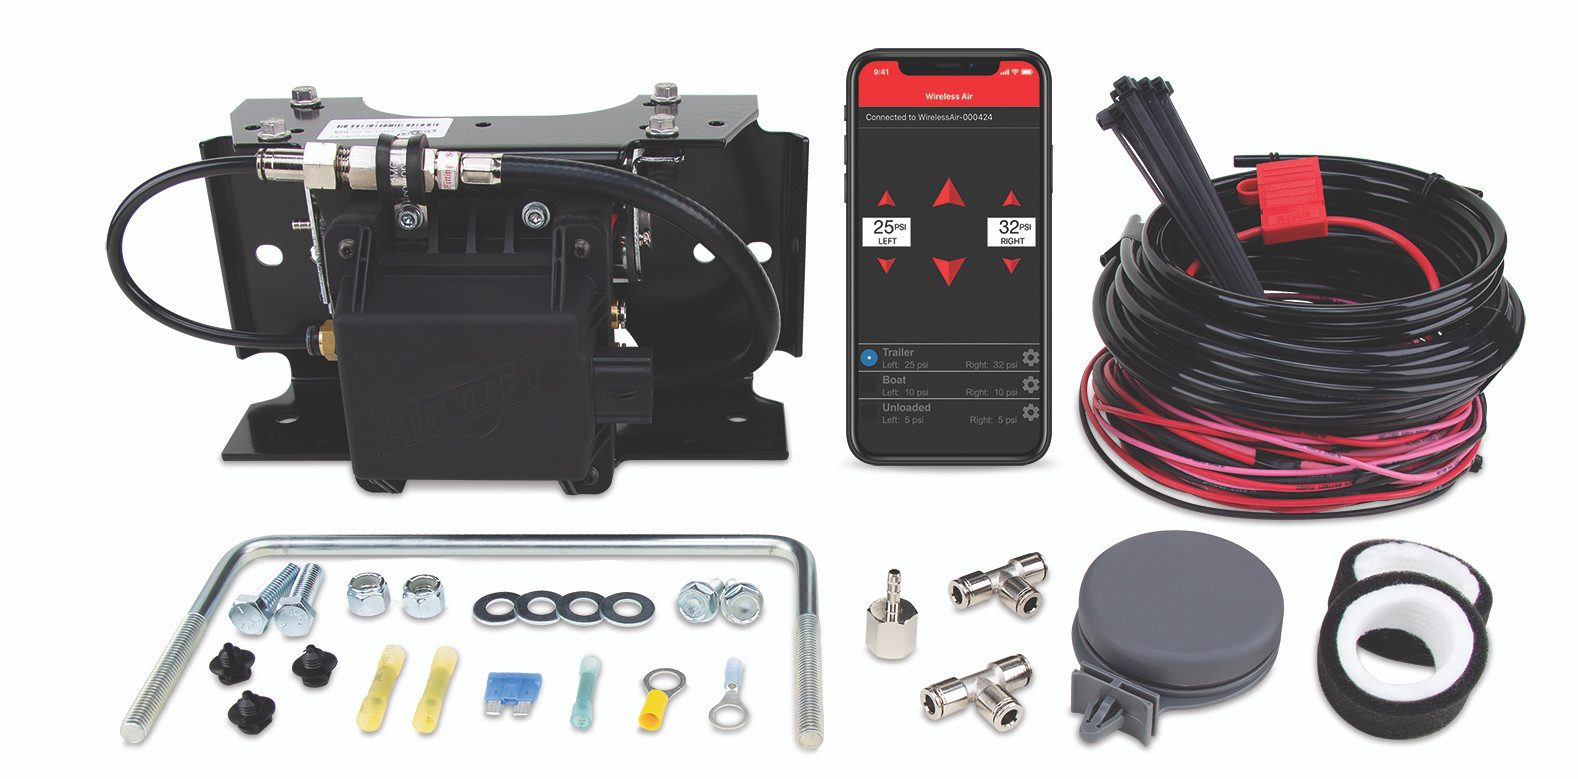

Quick Ship
In stock and ready to ship — order now!
FREE ShippingFREE SHIPPING
Estimated delivery Tue, Sep 22 - Fri, Sep 25
Order before 2 PM EST Monday–Friday for same-day processing
Guaranteed safe & secure checkout
No reviews have been added for this product.
