
ARIES 2070465 Black Aluminum Cargo Cover Storage Box Lid, Select Jeep Wrangler JK UnlimitedARIESOriginal price was $789.95. Current price is $420.00.Out of Stock
View productOur in-house experts typically reply within one business day.

ARIES
Verify Fitment
Select your vehicle to confirm this part fits.




Always the correct part
We know our products
Quality Products
Free Shipping!
Always the correct part
We know our products
Quality Products
Free Shipping!
Includes complete lid and mounting hardware
Complete kit number ships in two boxes

Warranty: Limited Lifetime Warranty (Five-Year Finish, One-Year Parts)
Finish: TEXTURED BLACK POWDER COAT
Material: Blank
Color: Black
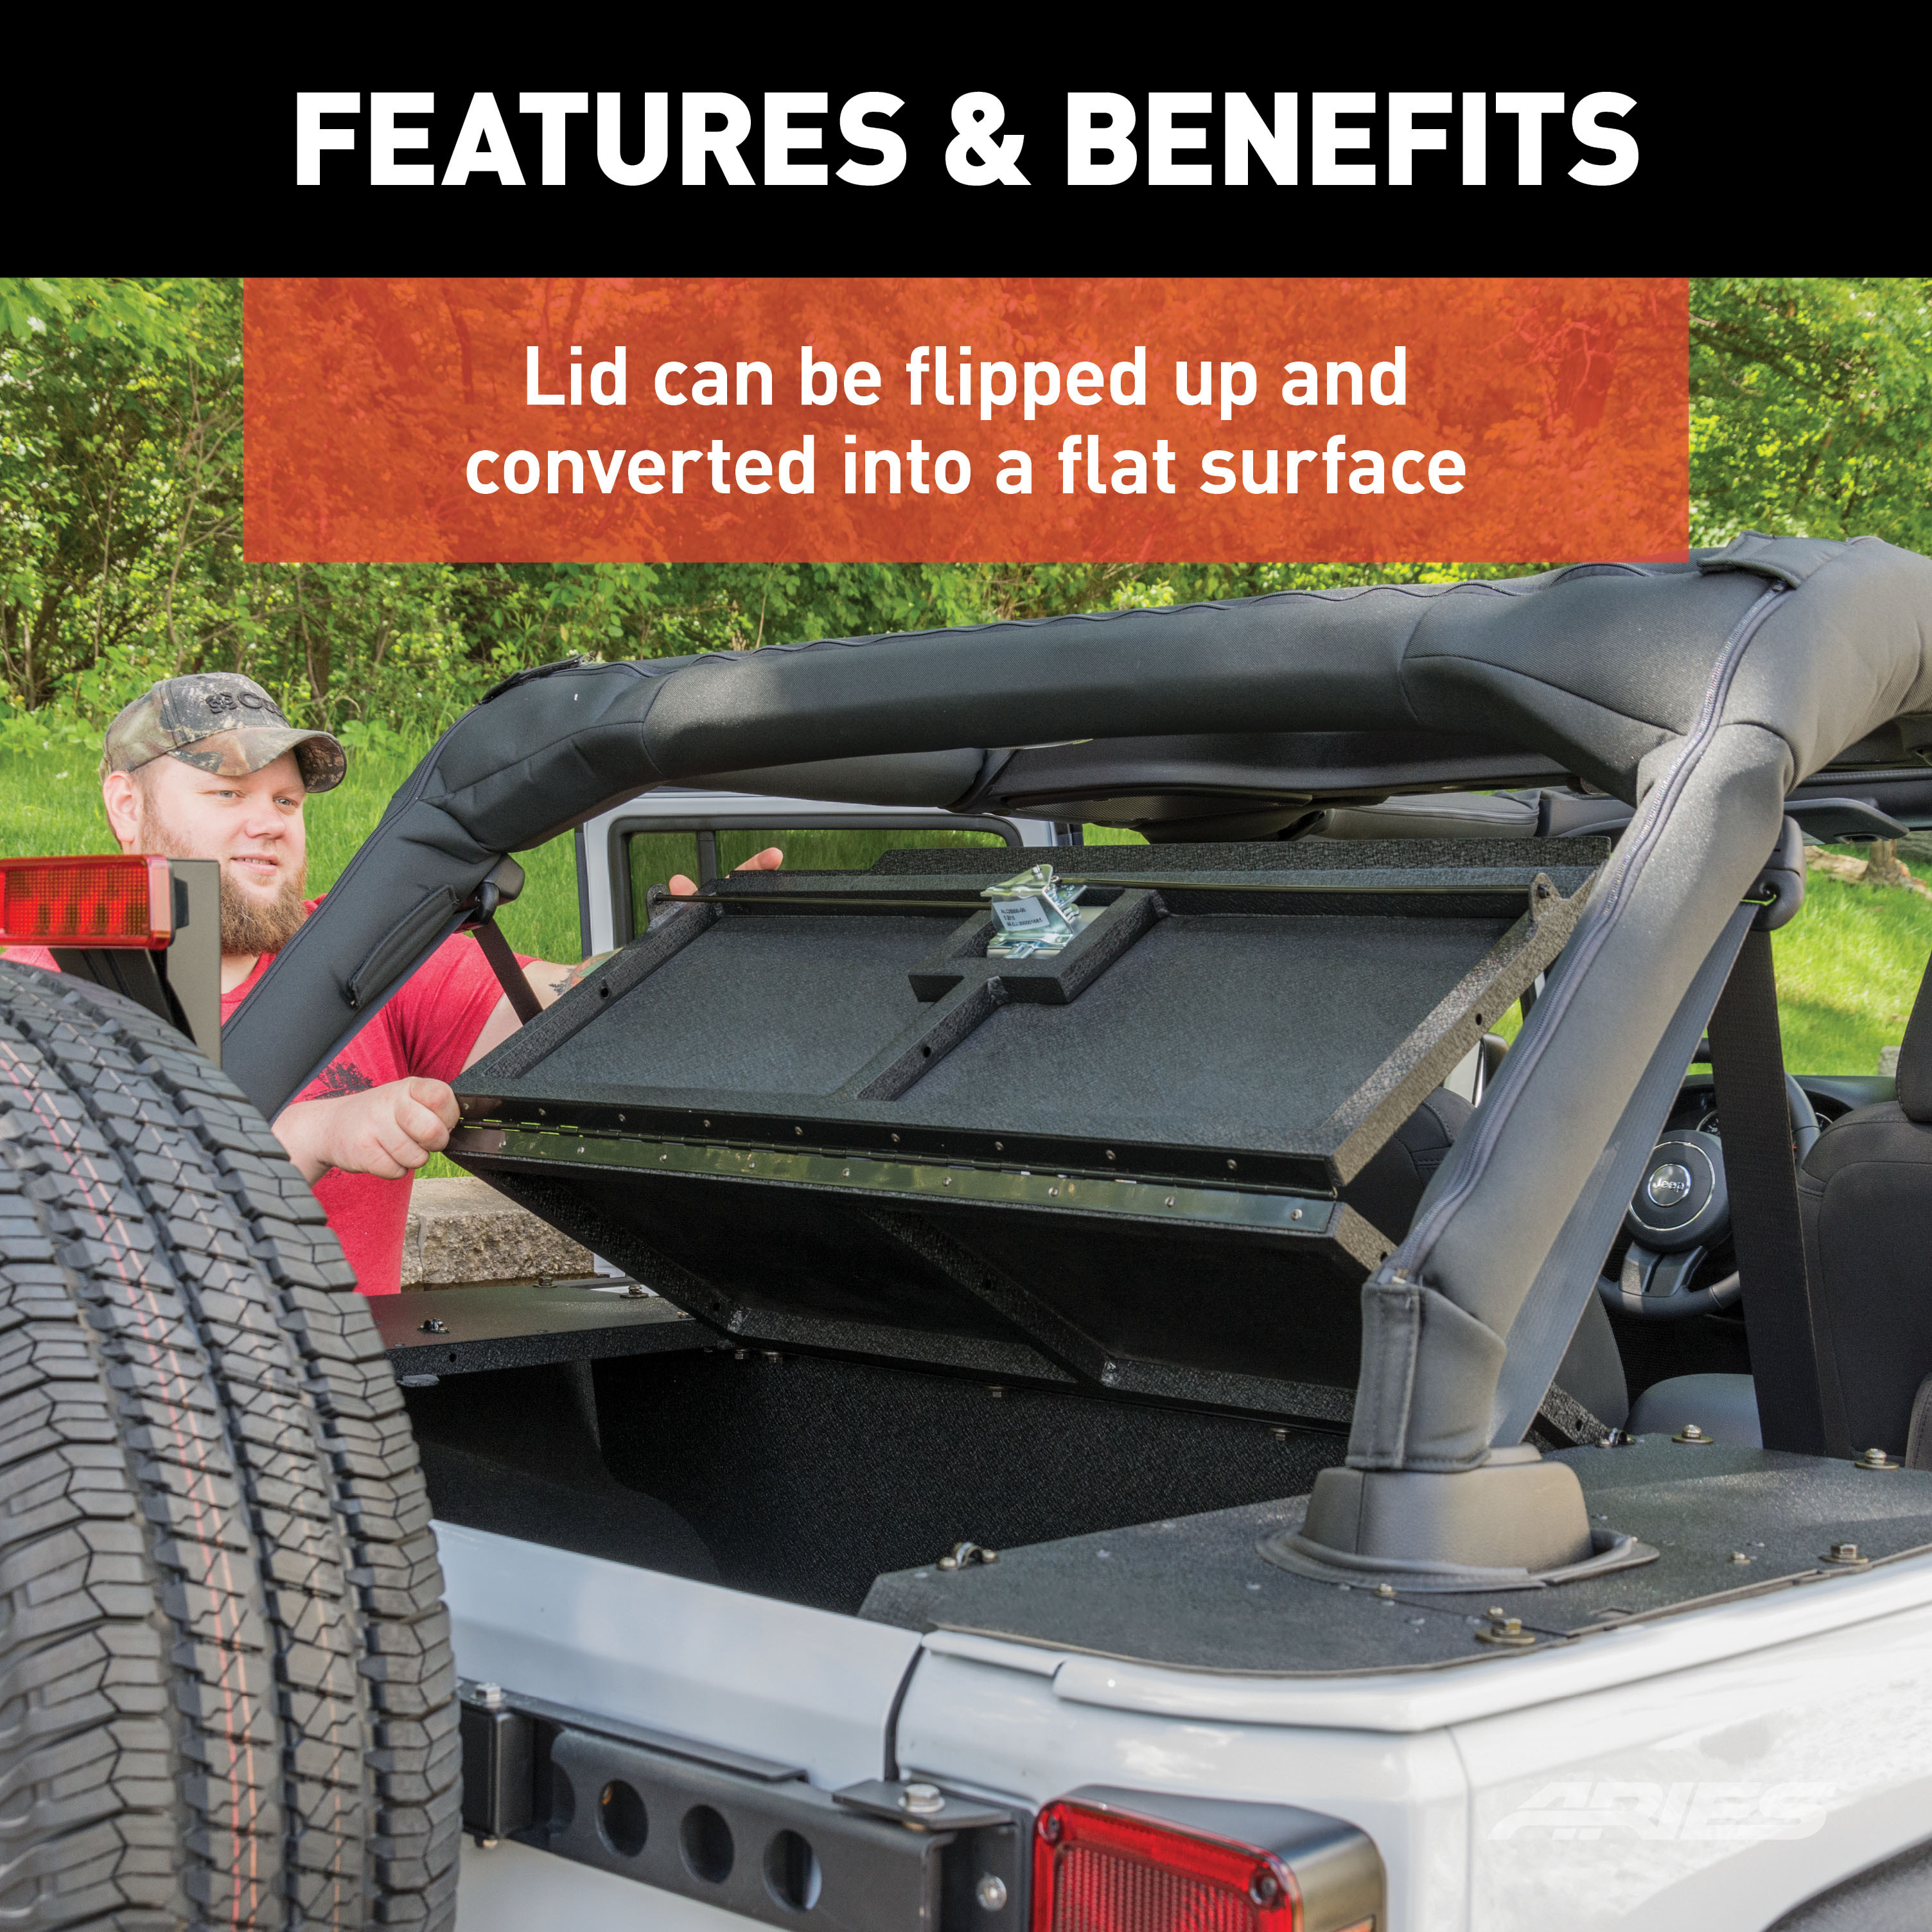
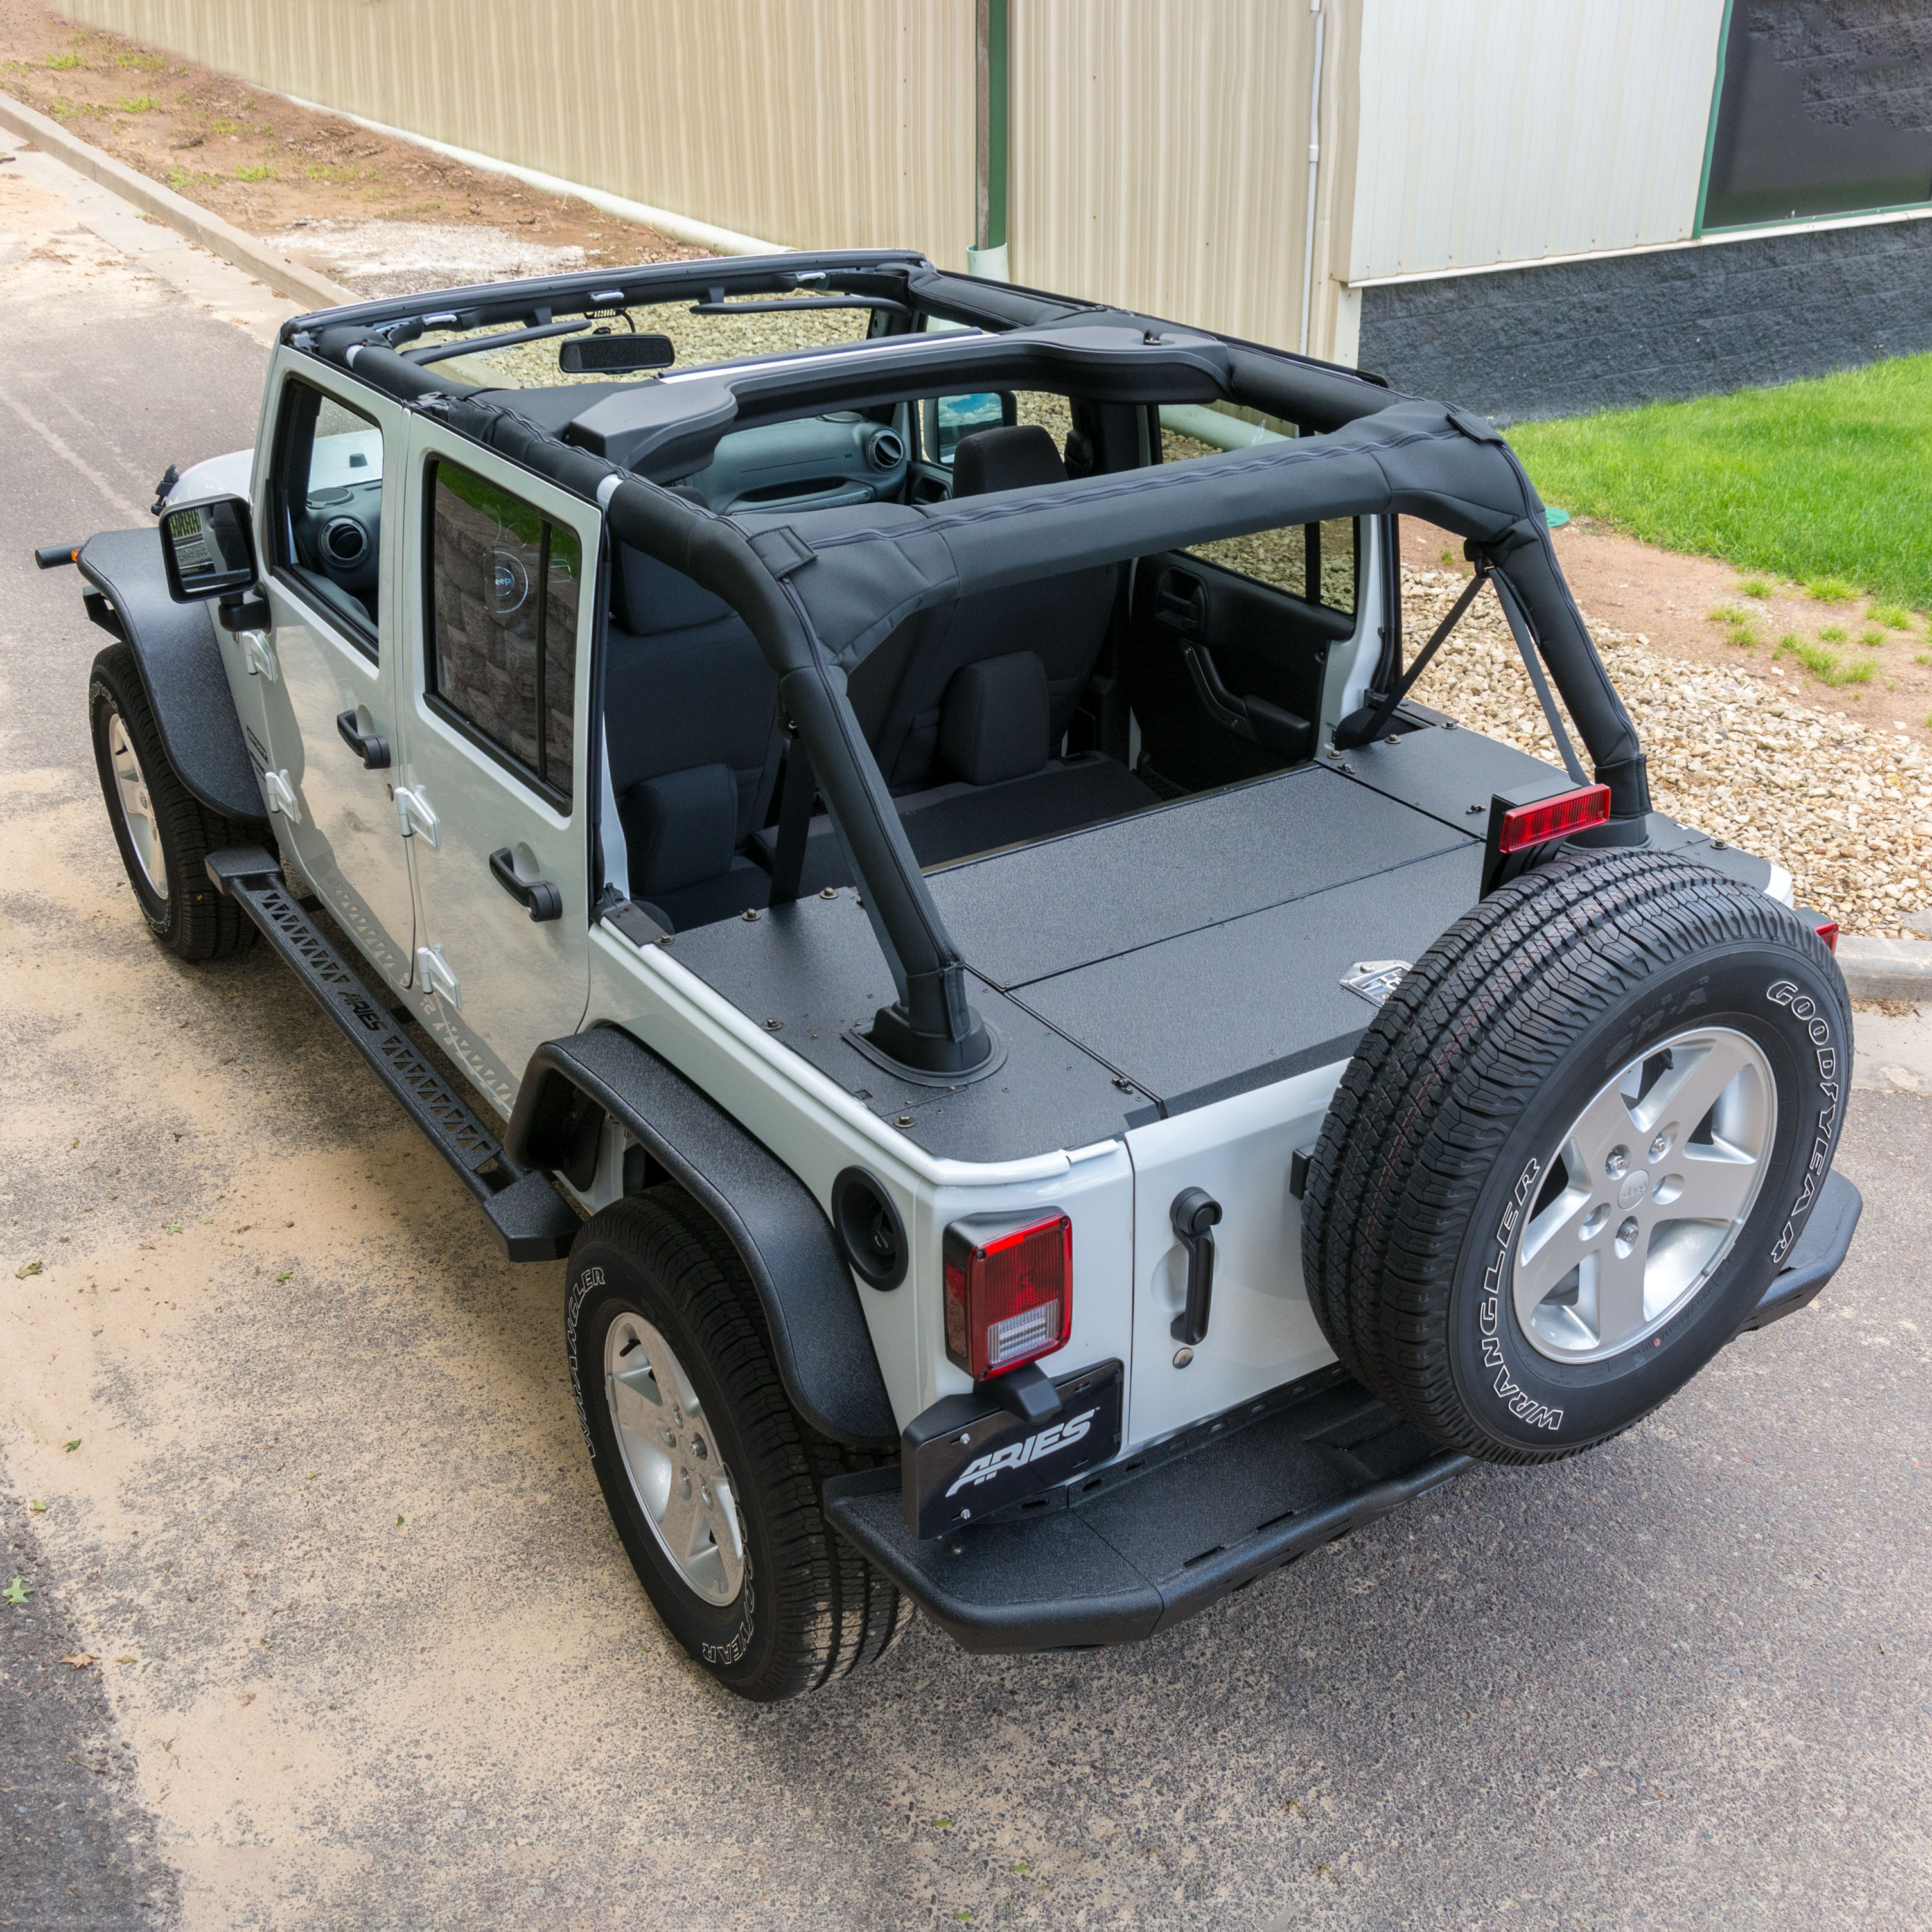
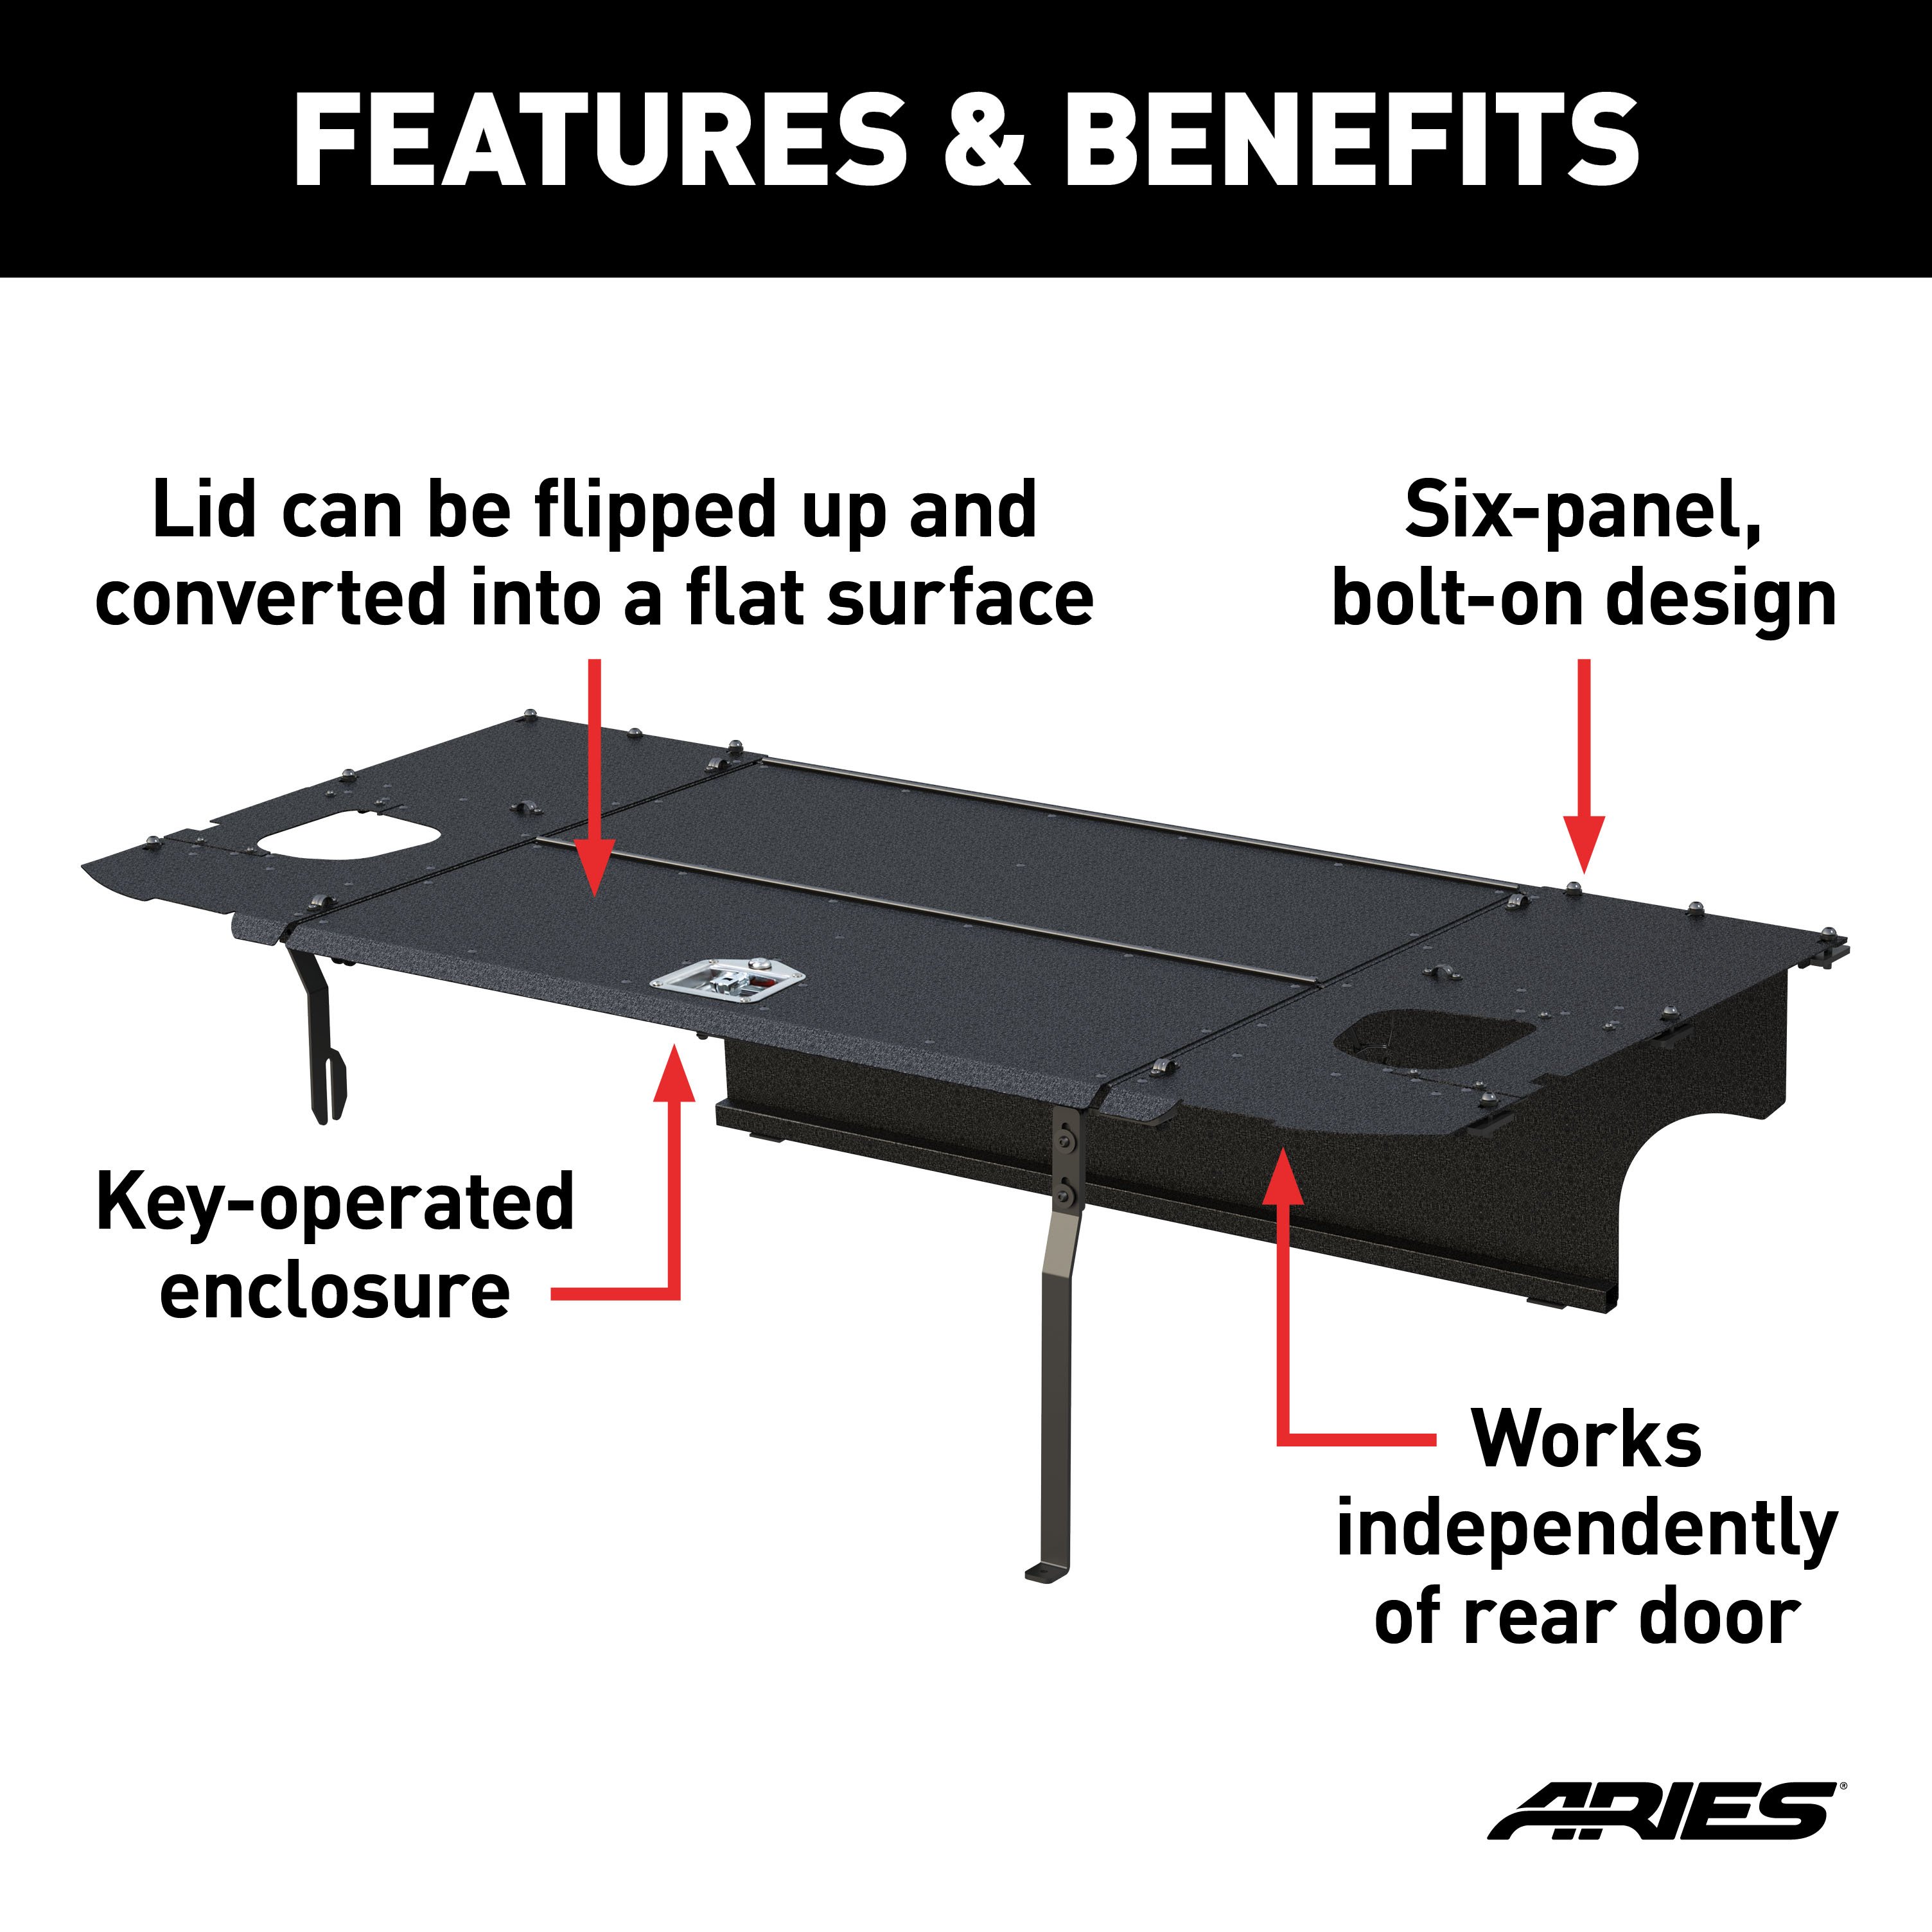
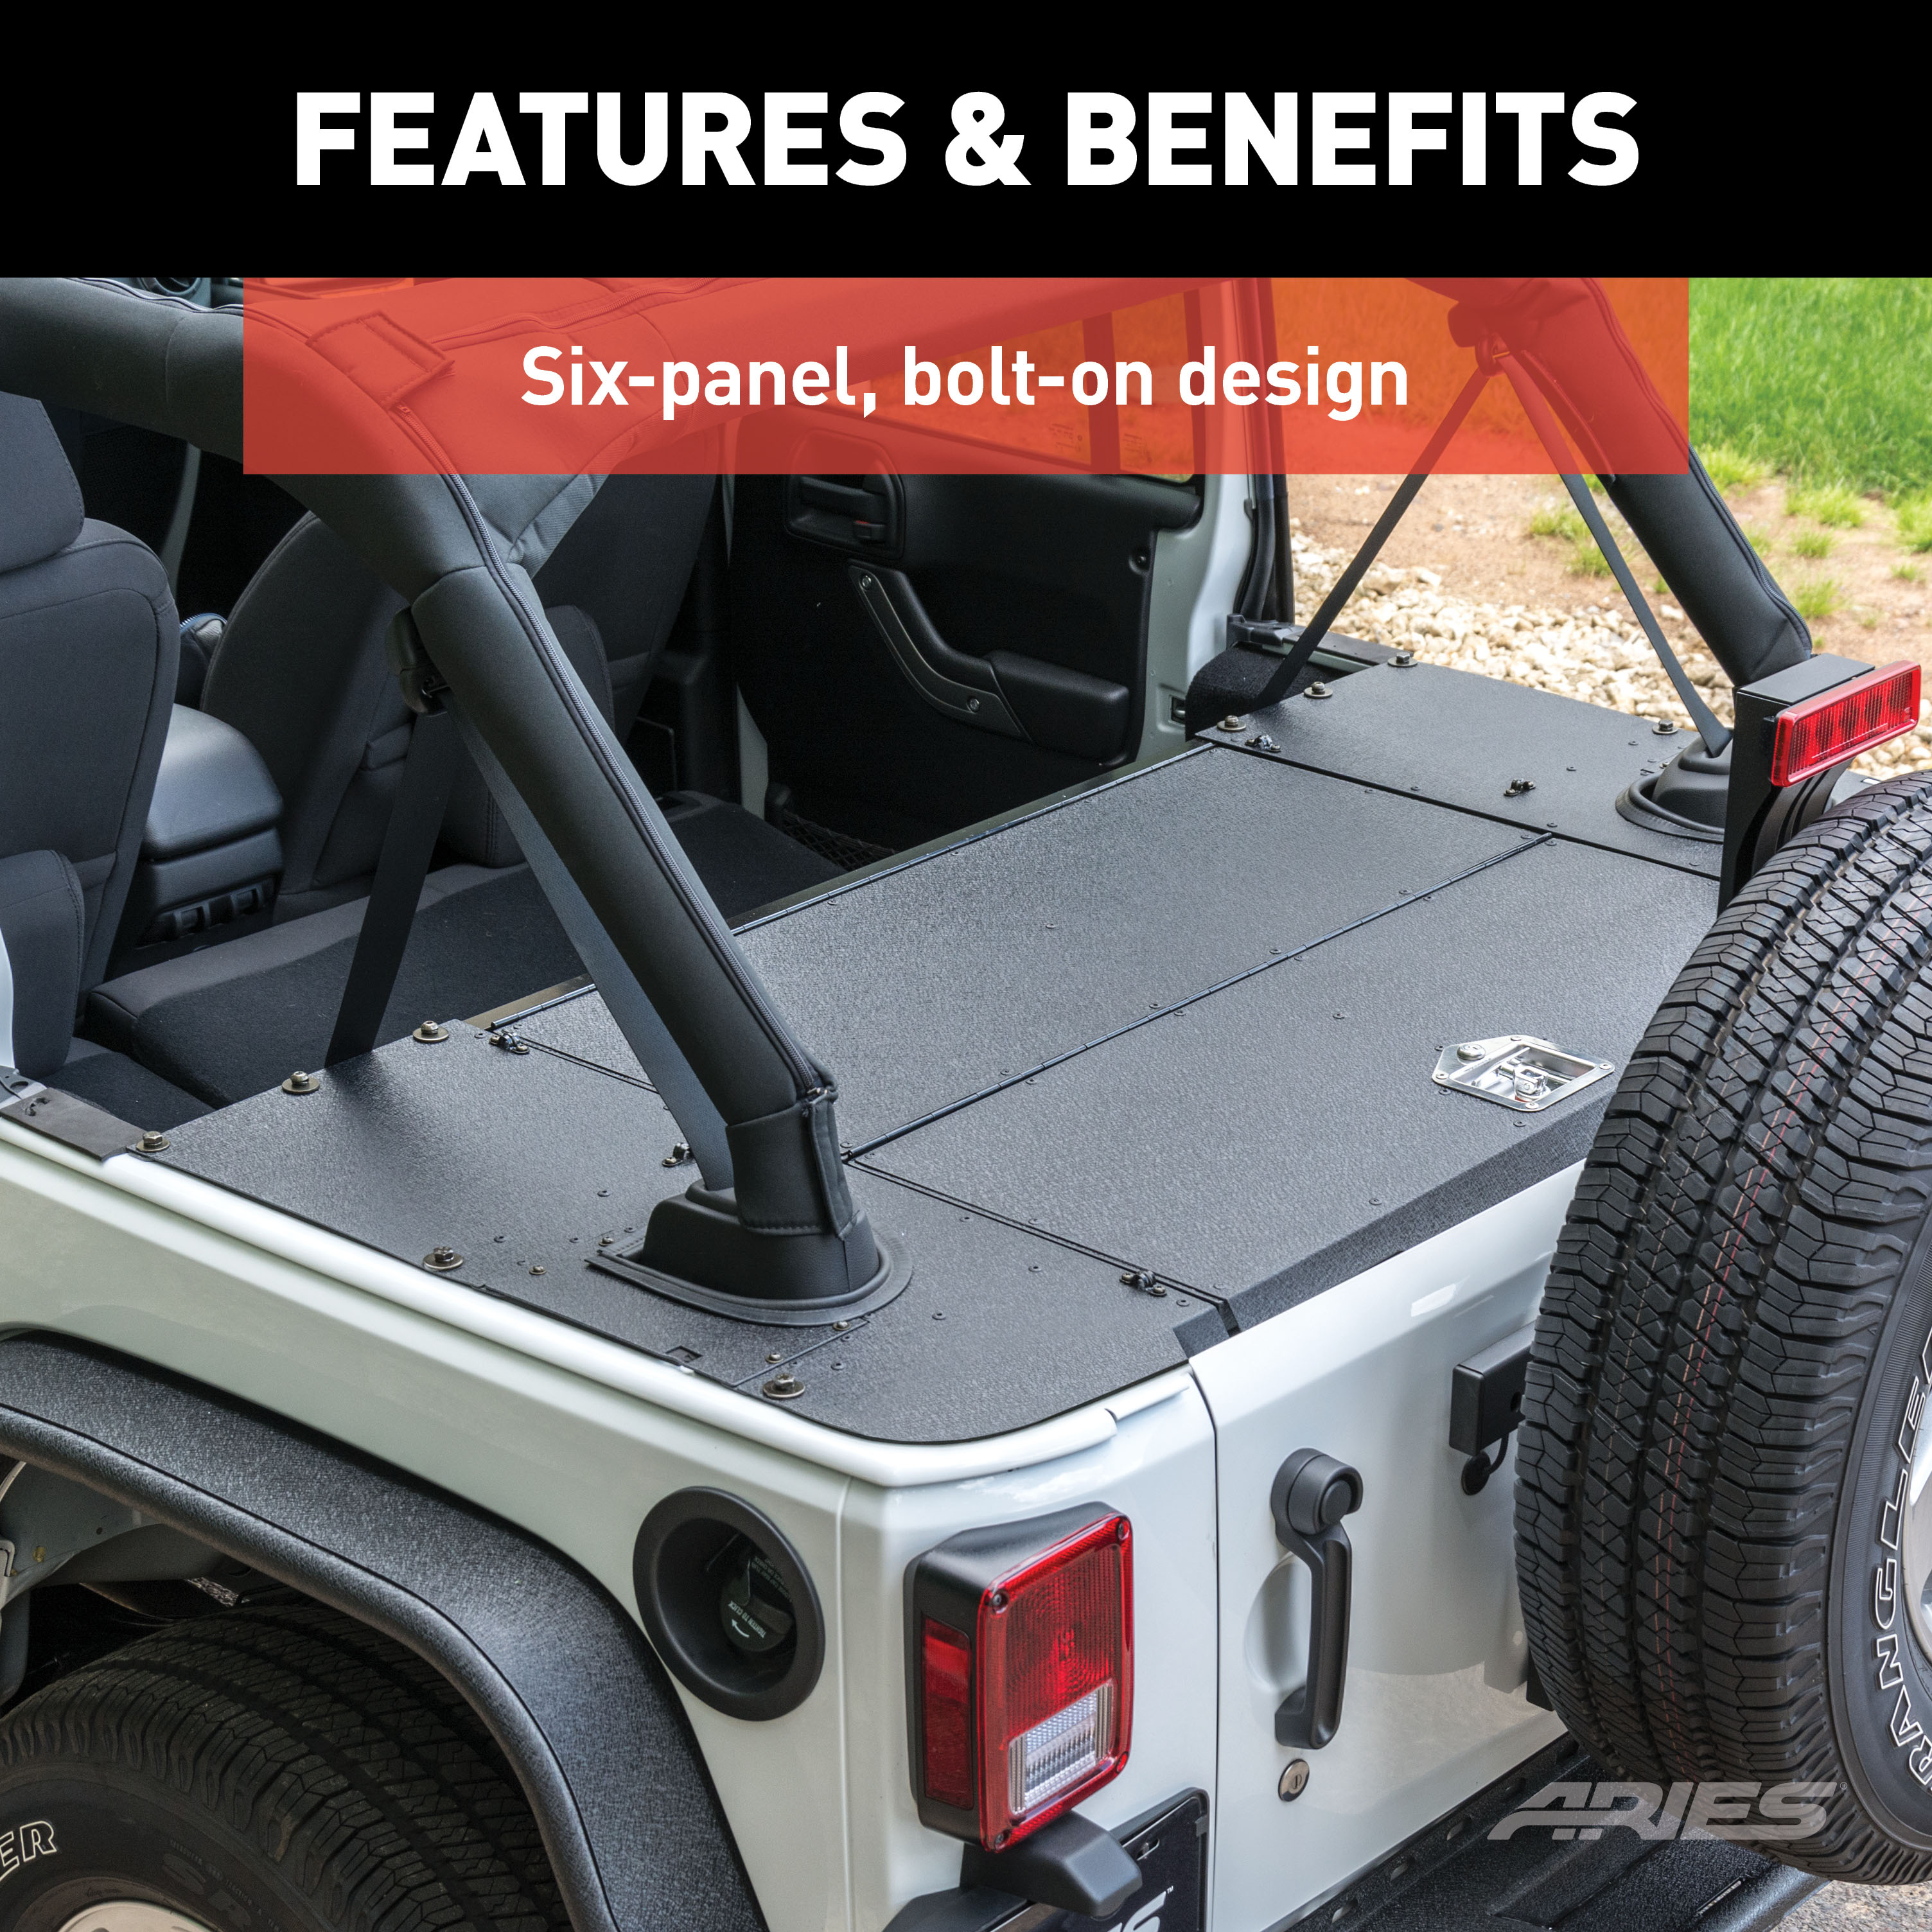
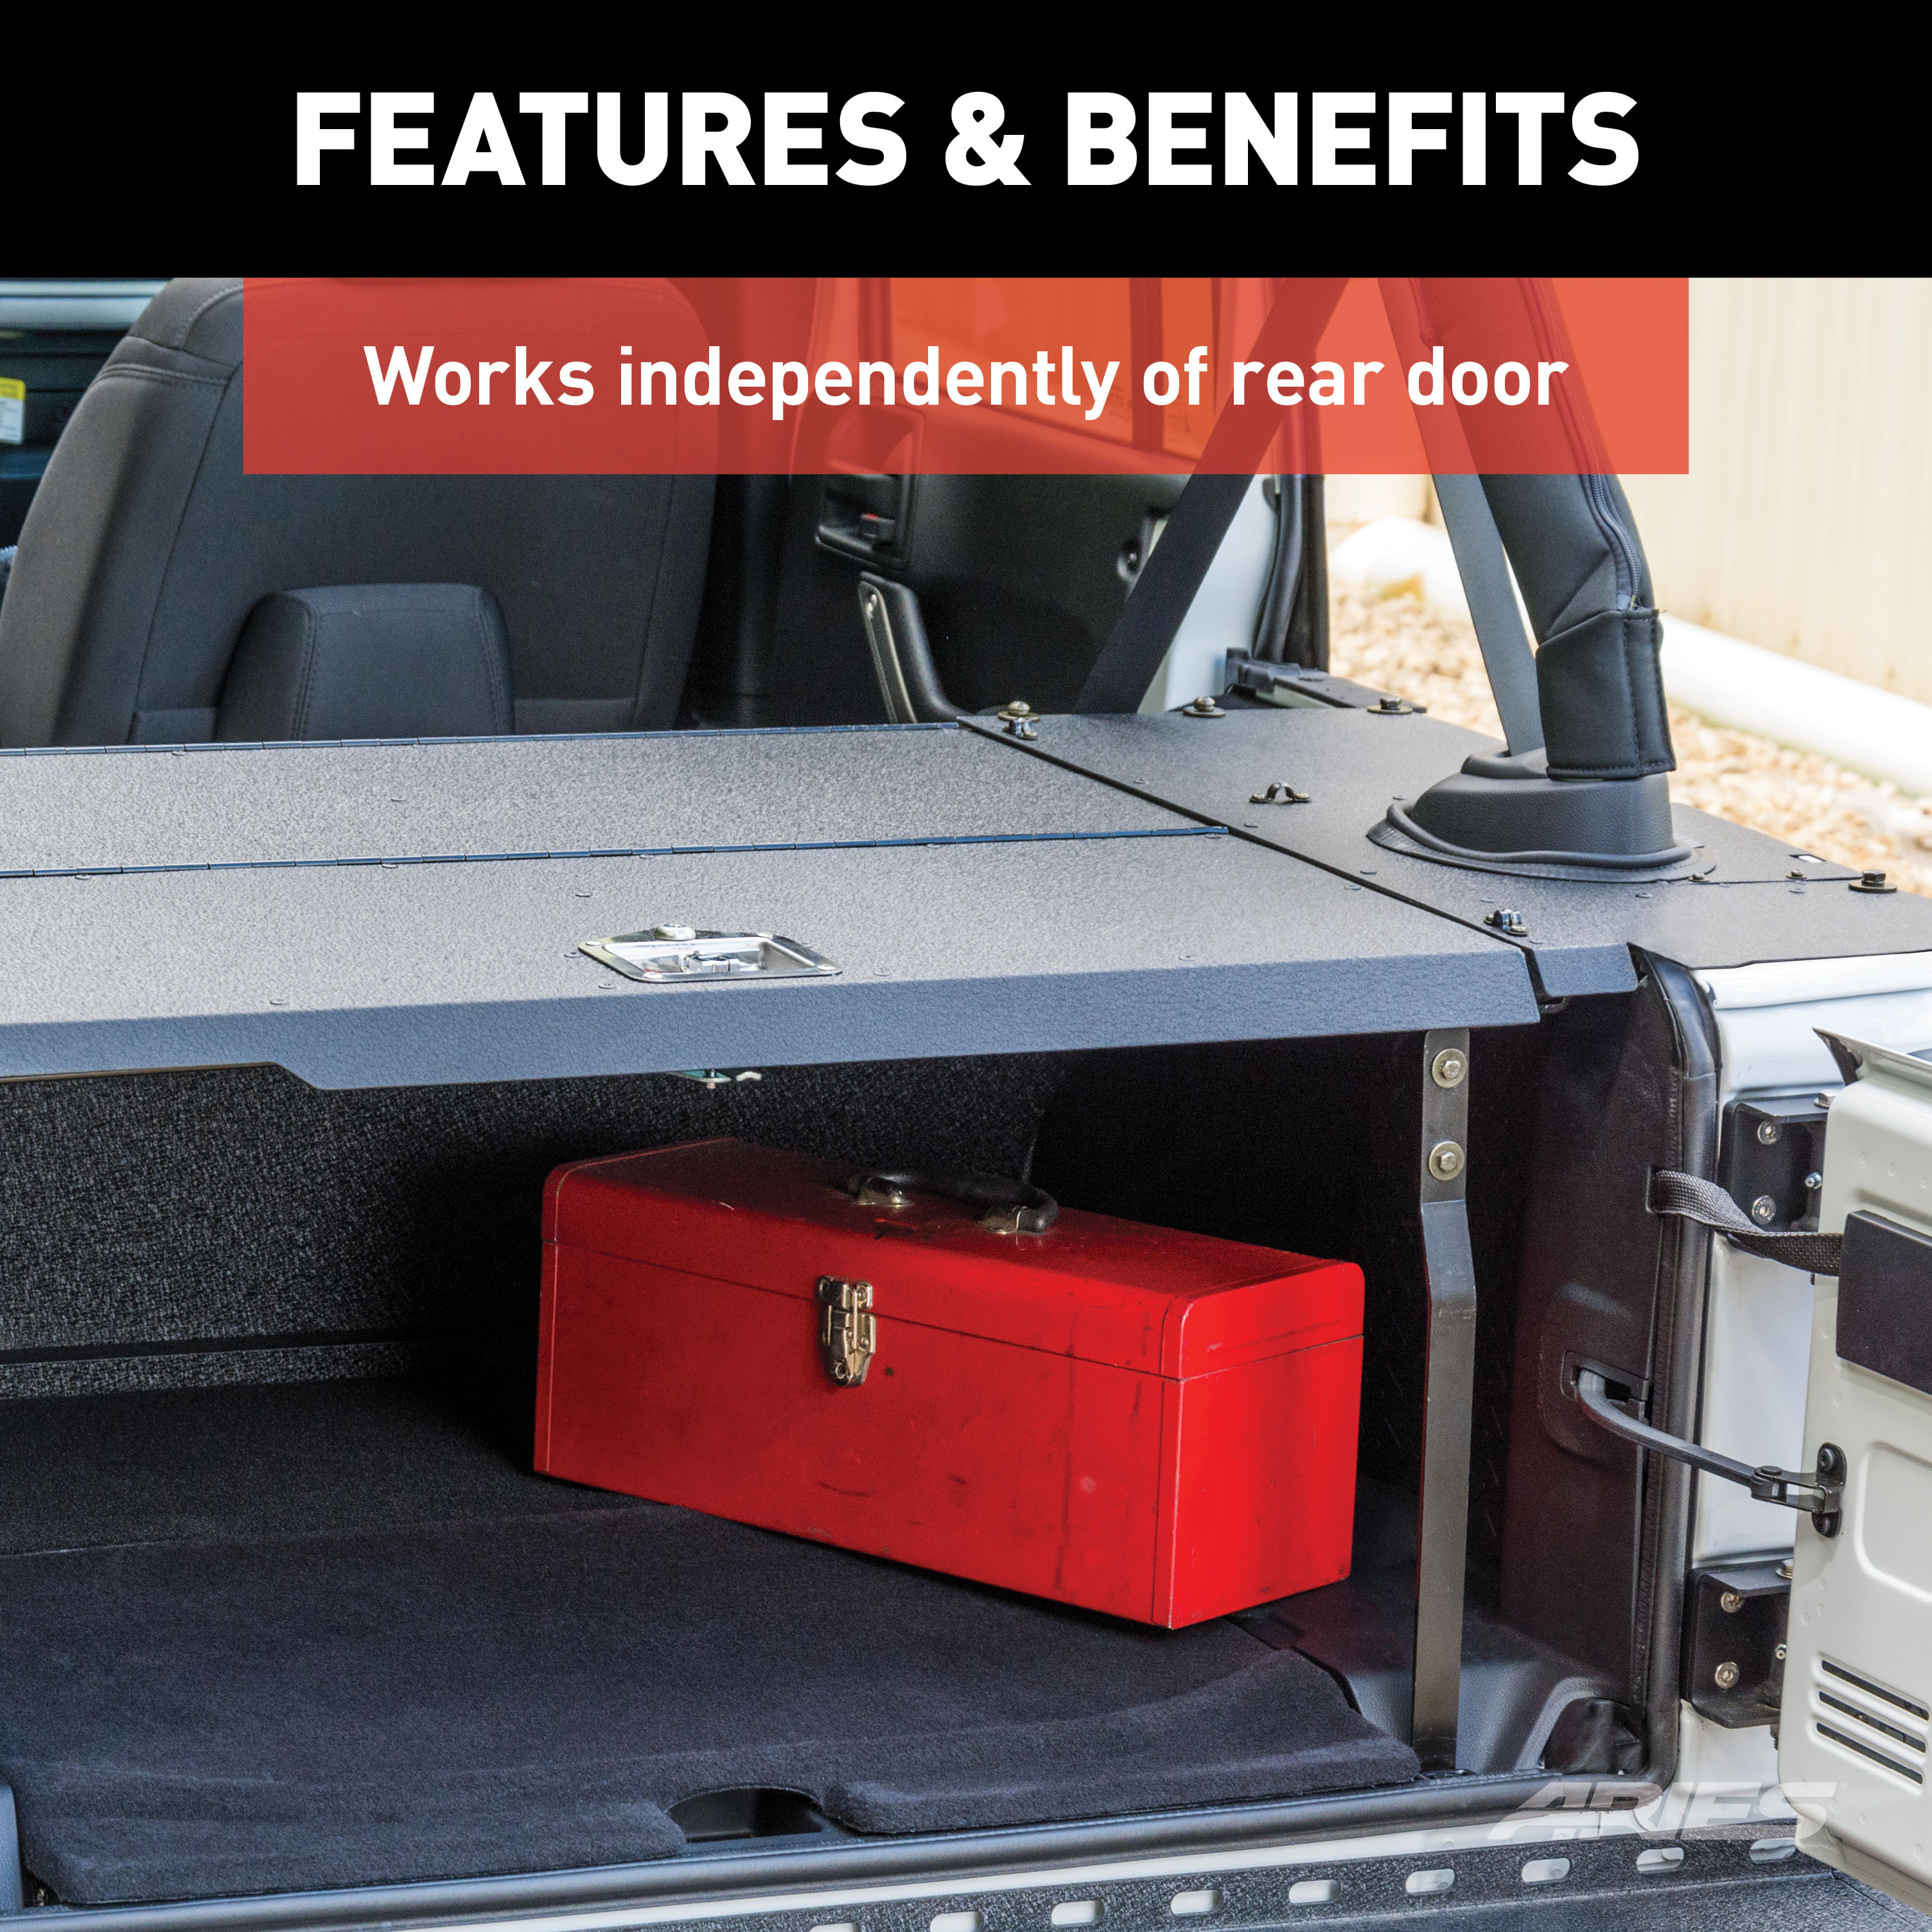
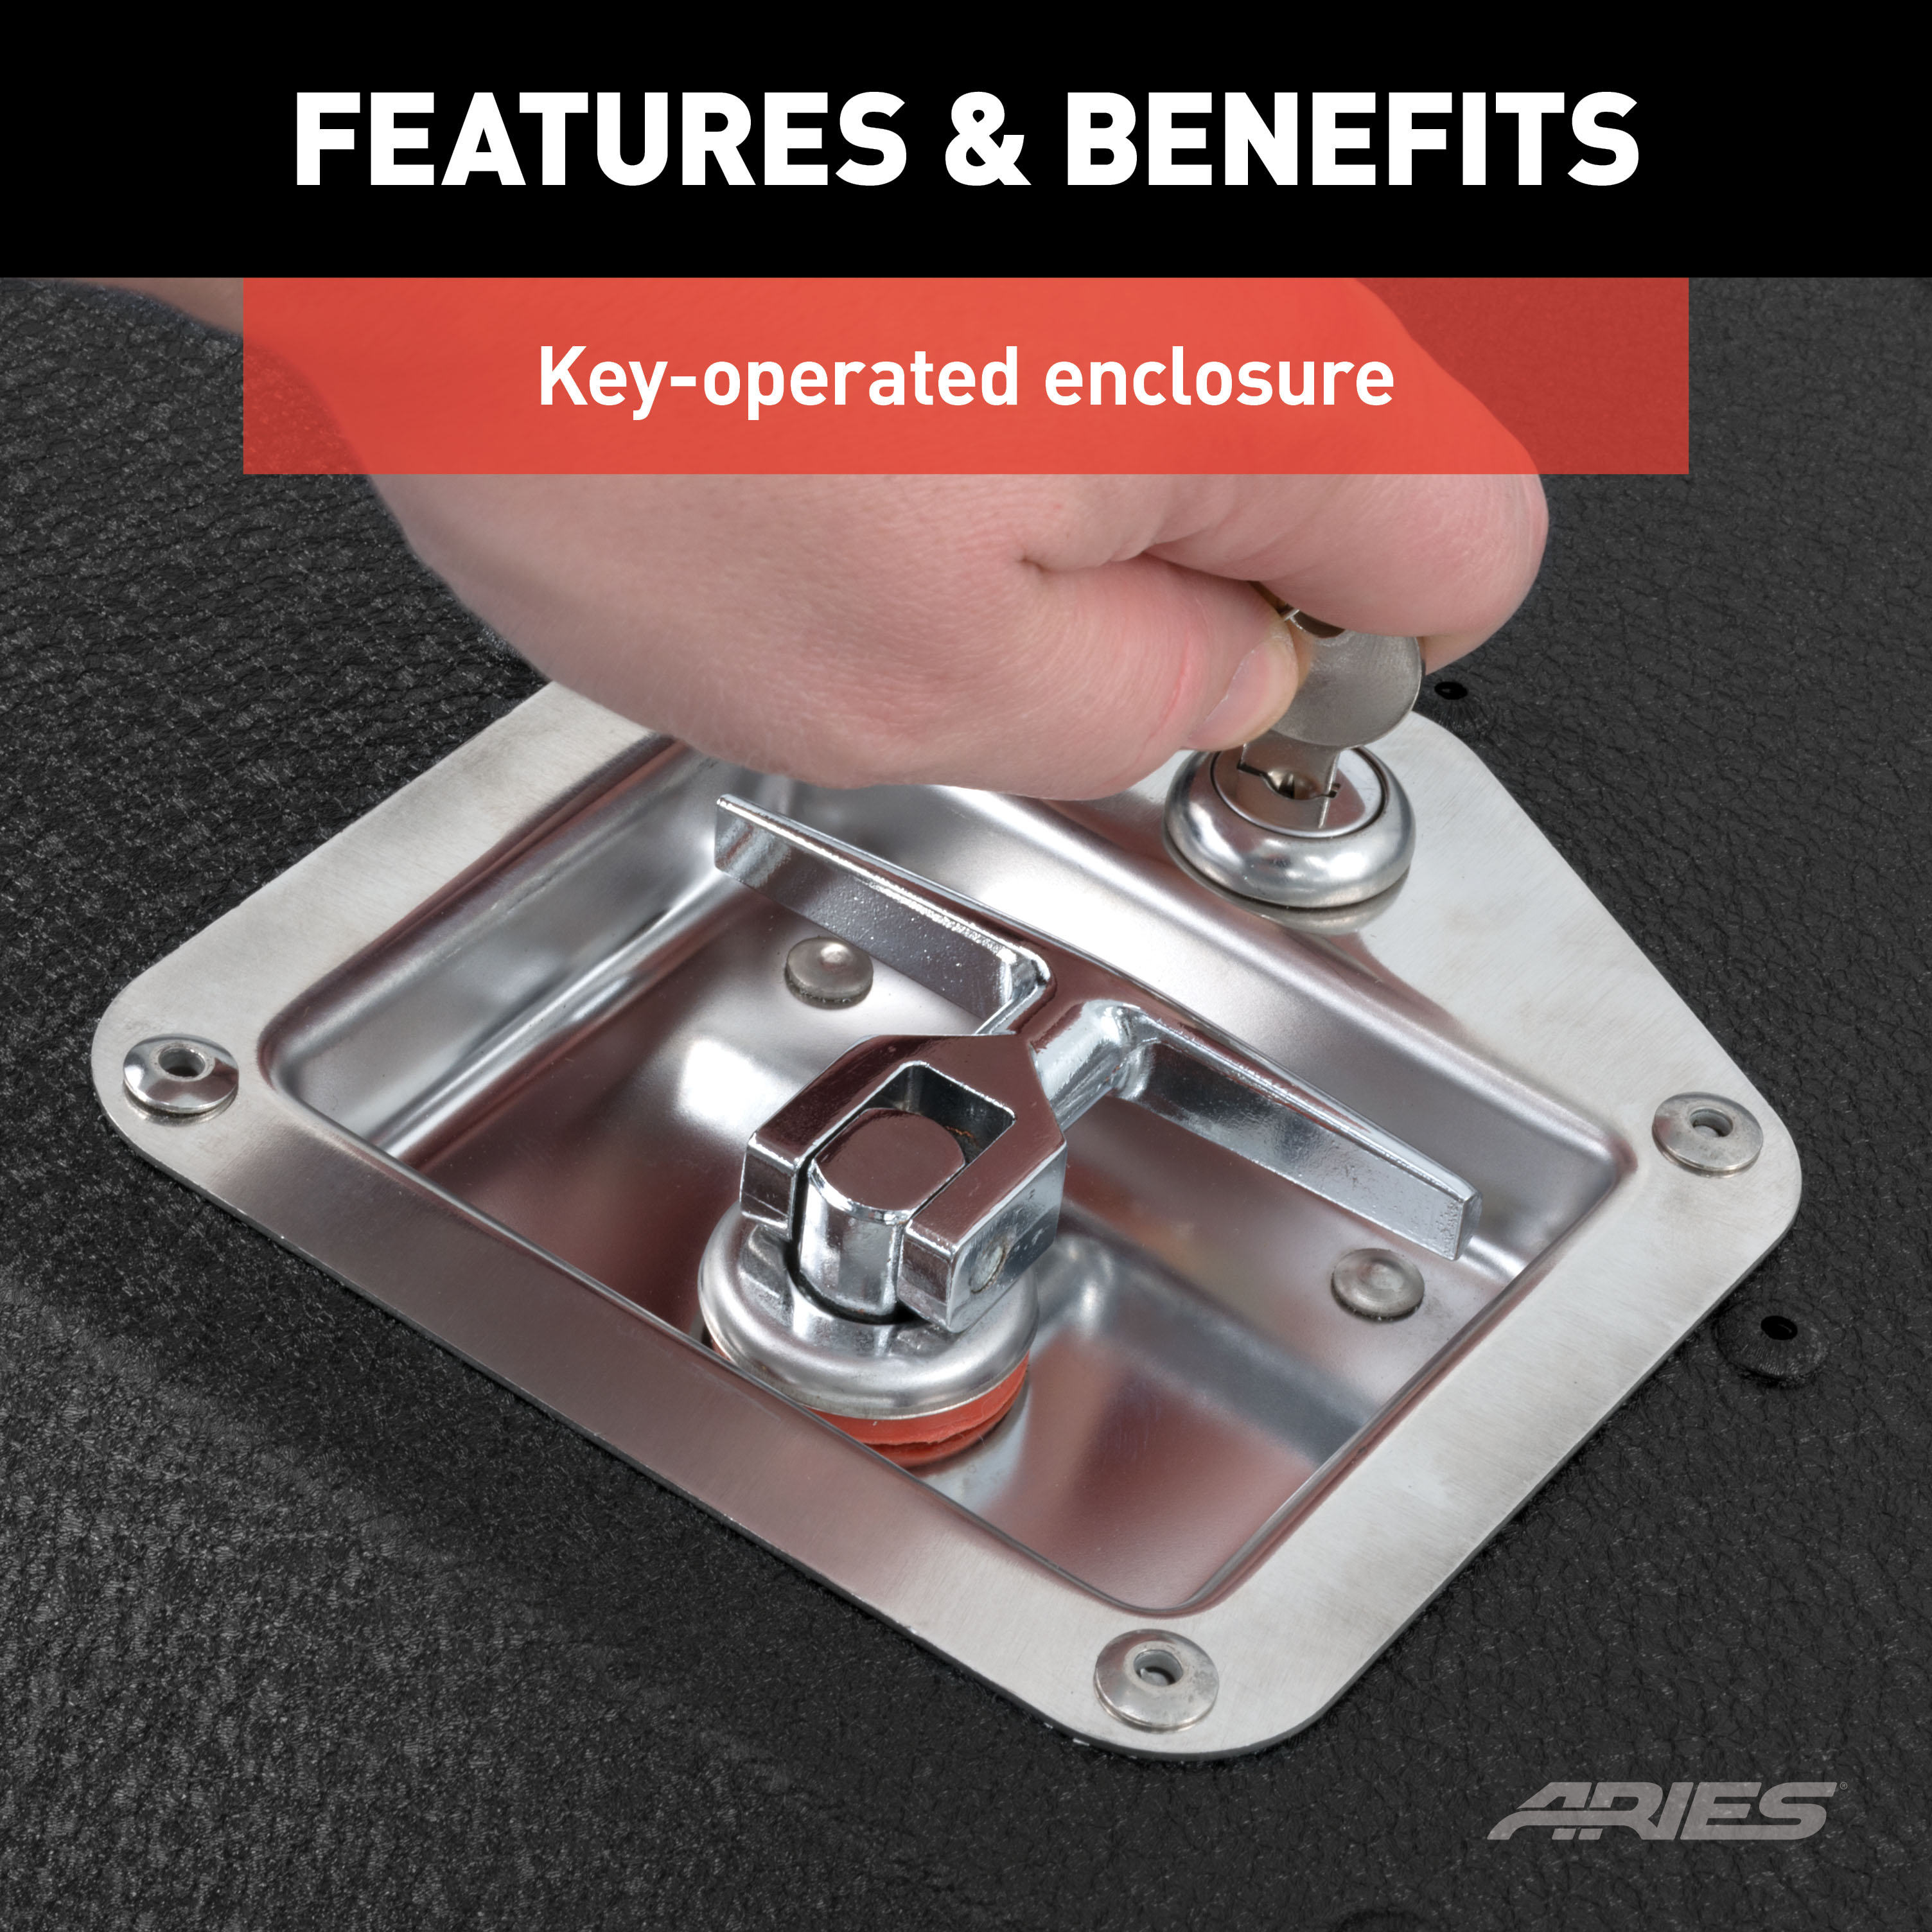
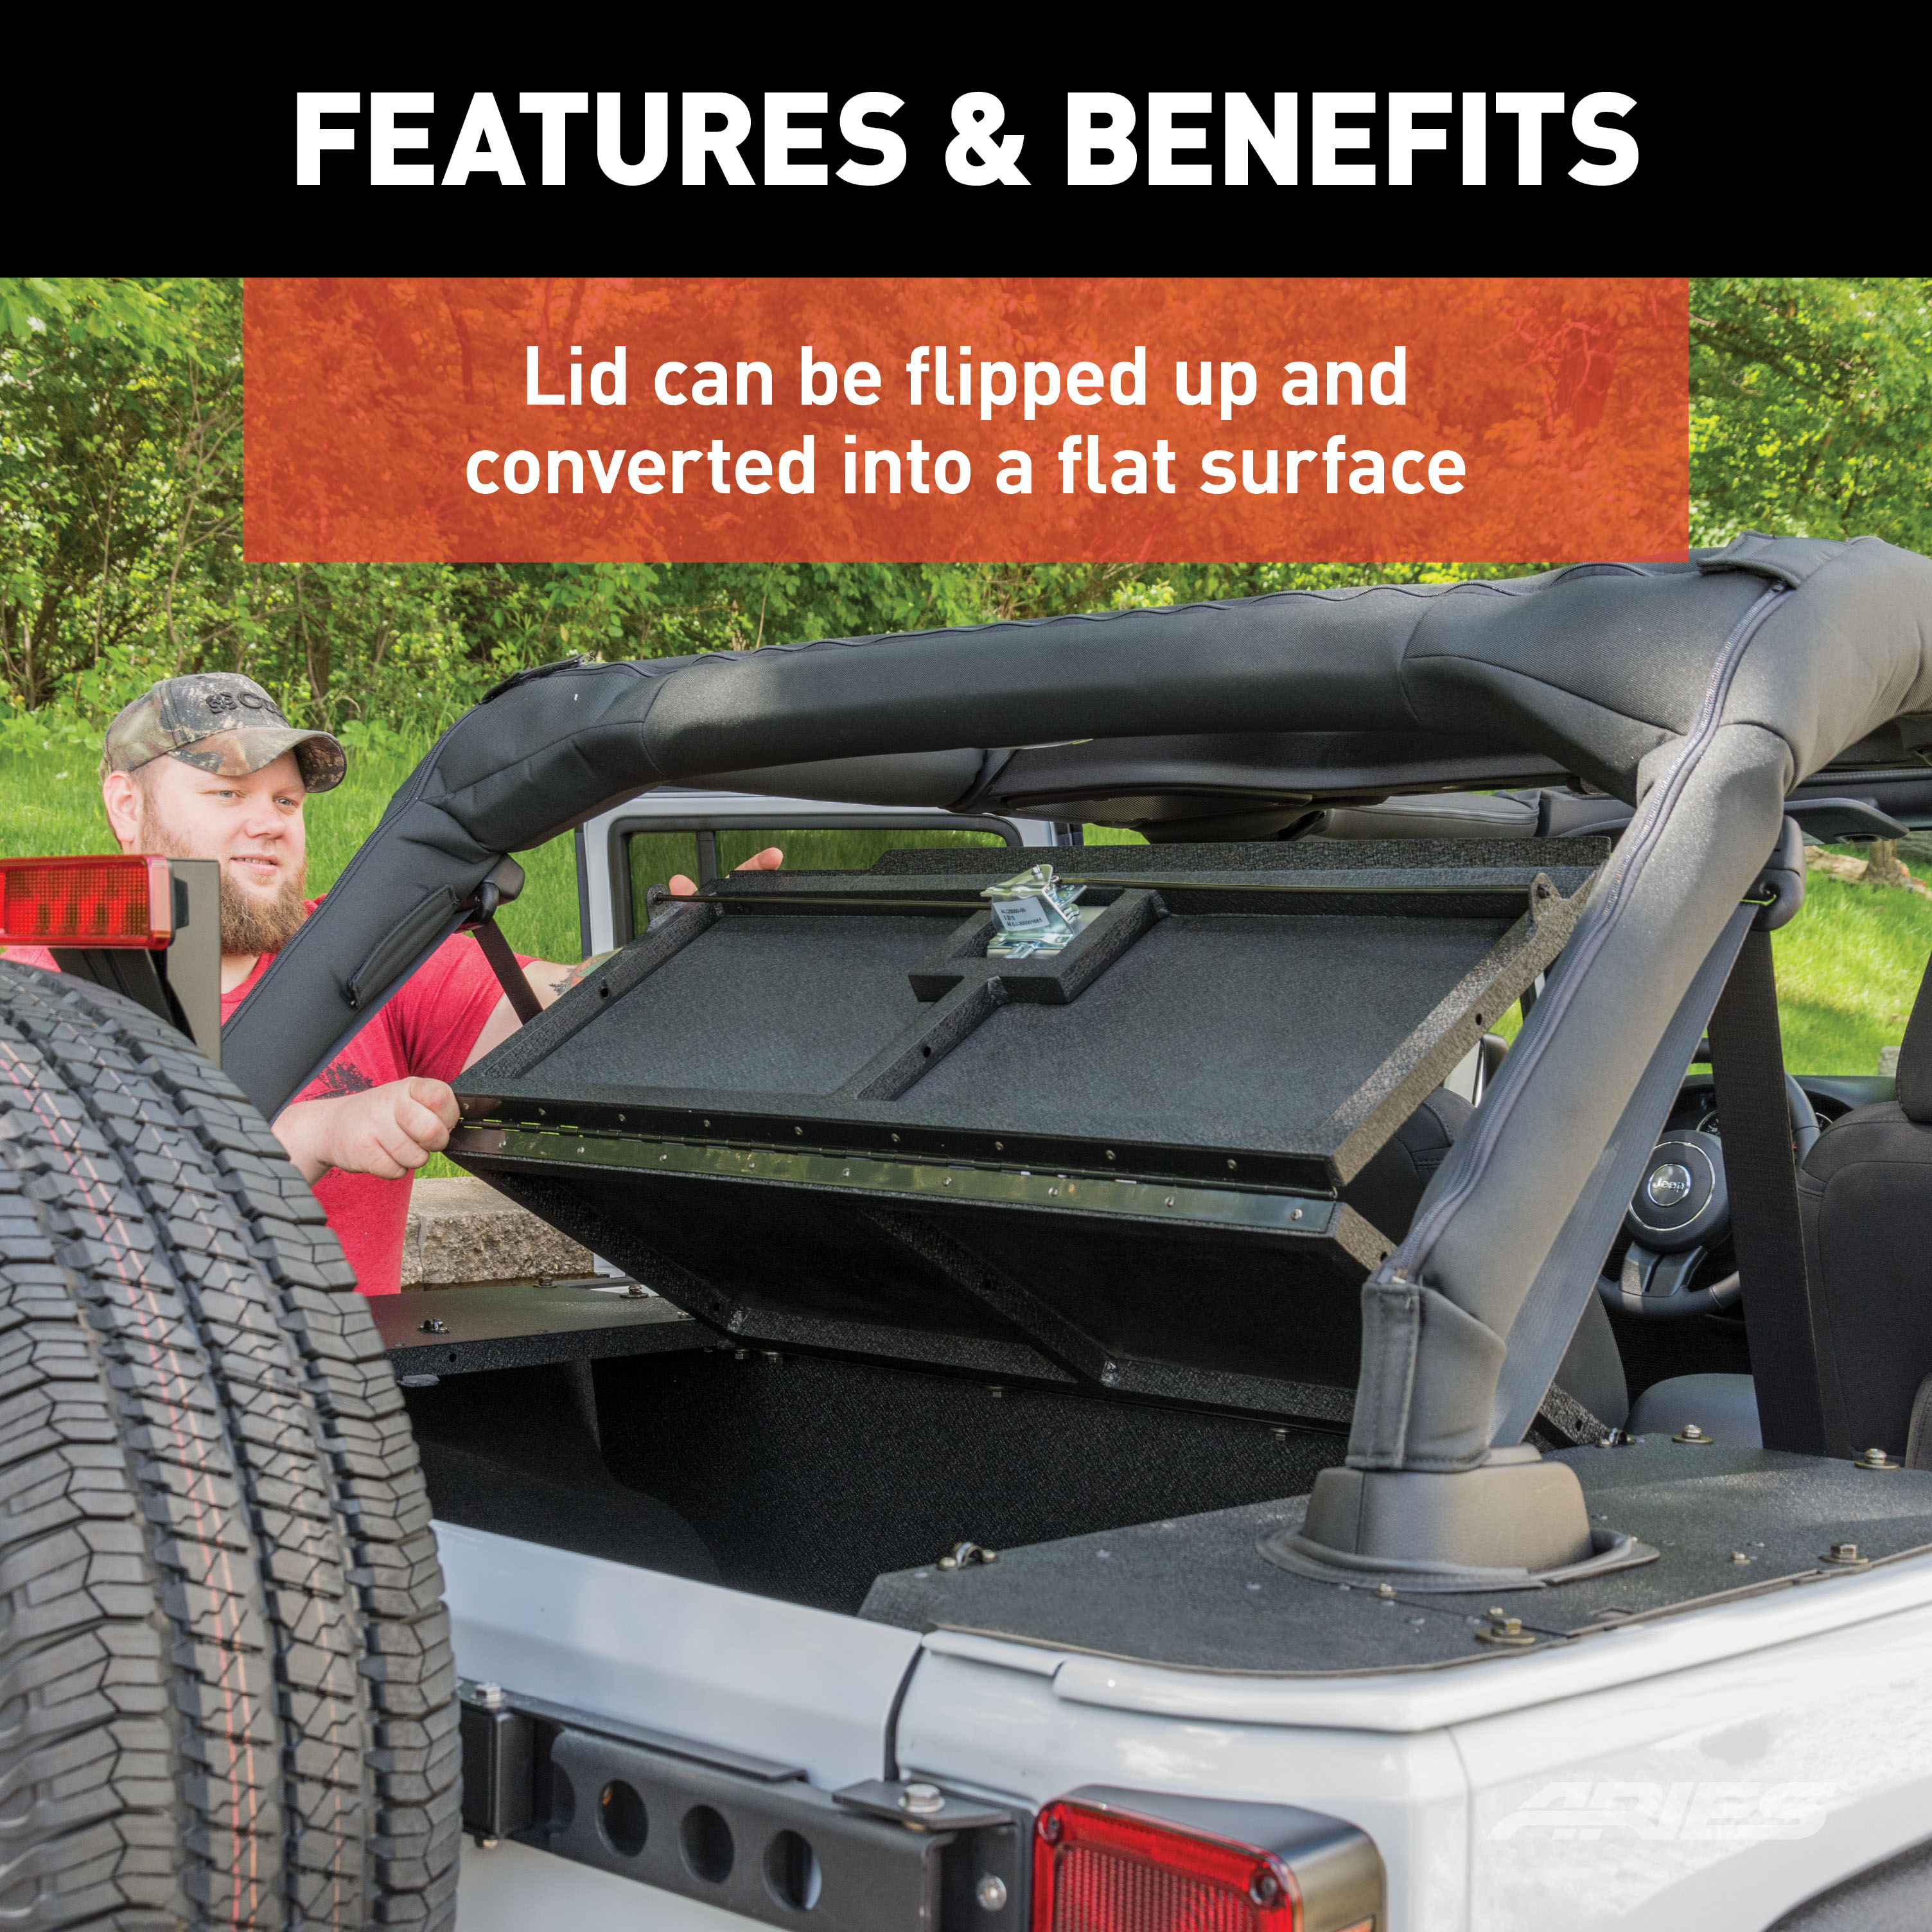
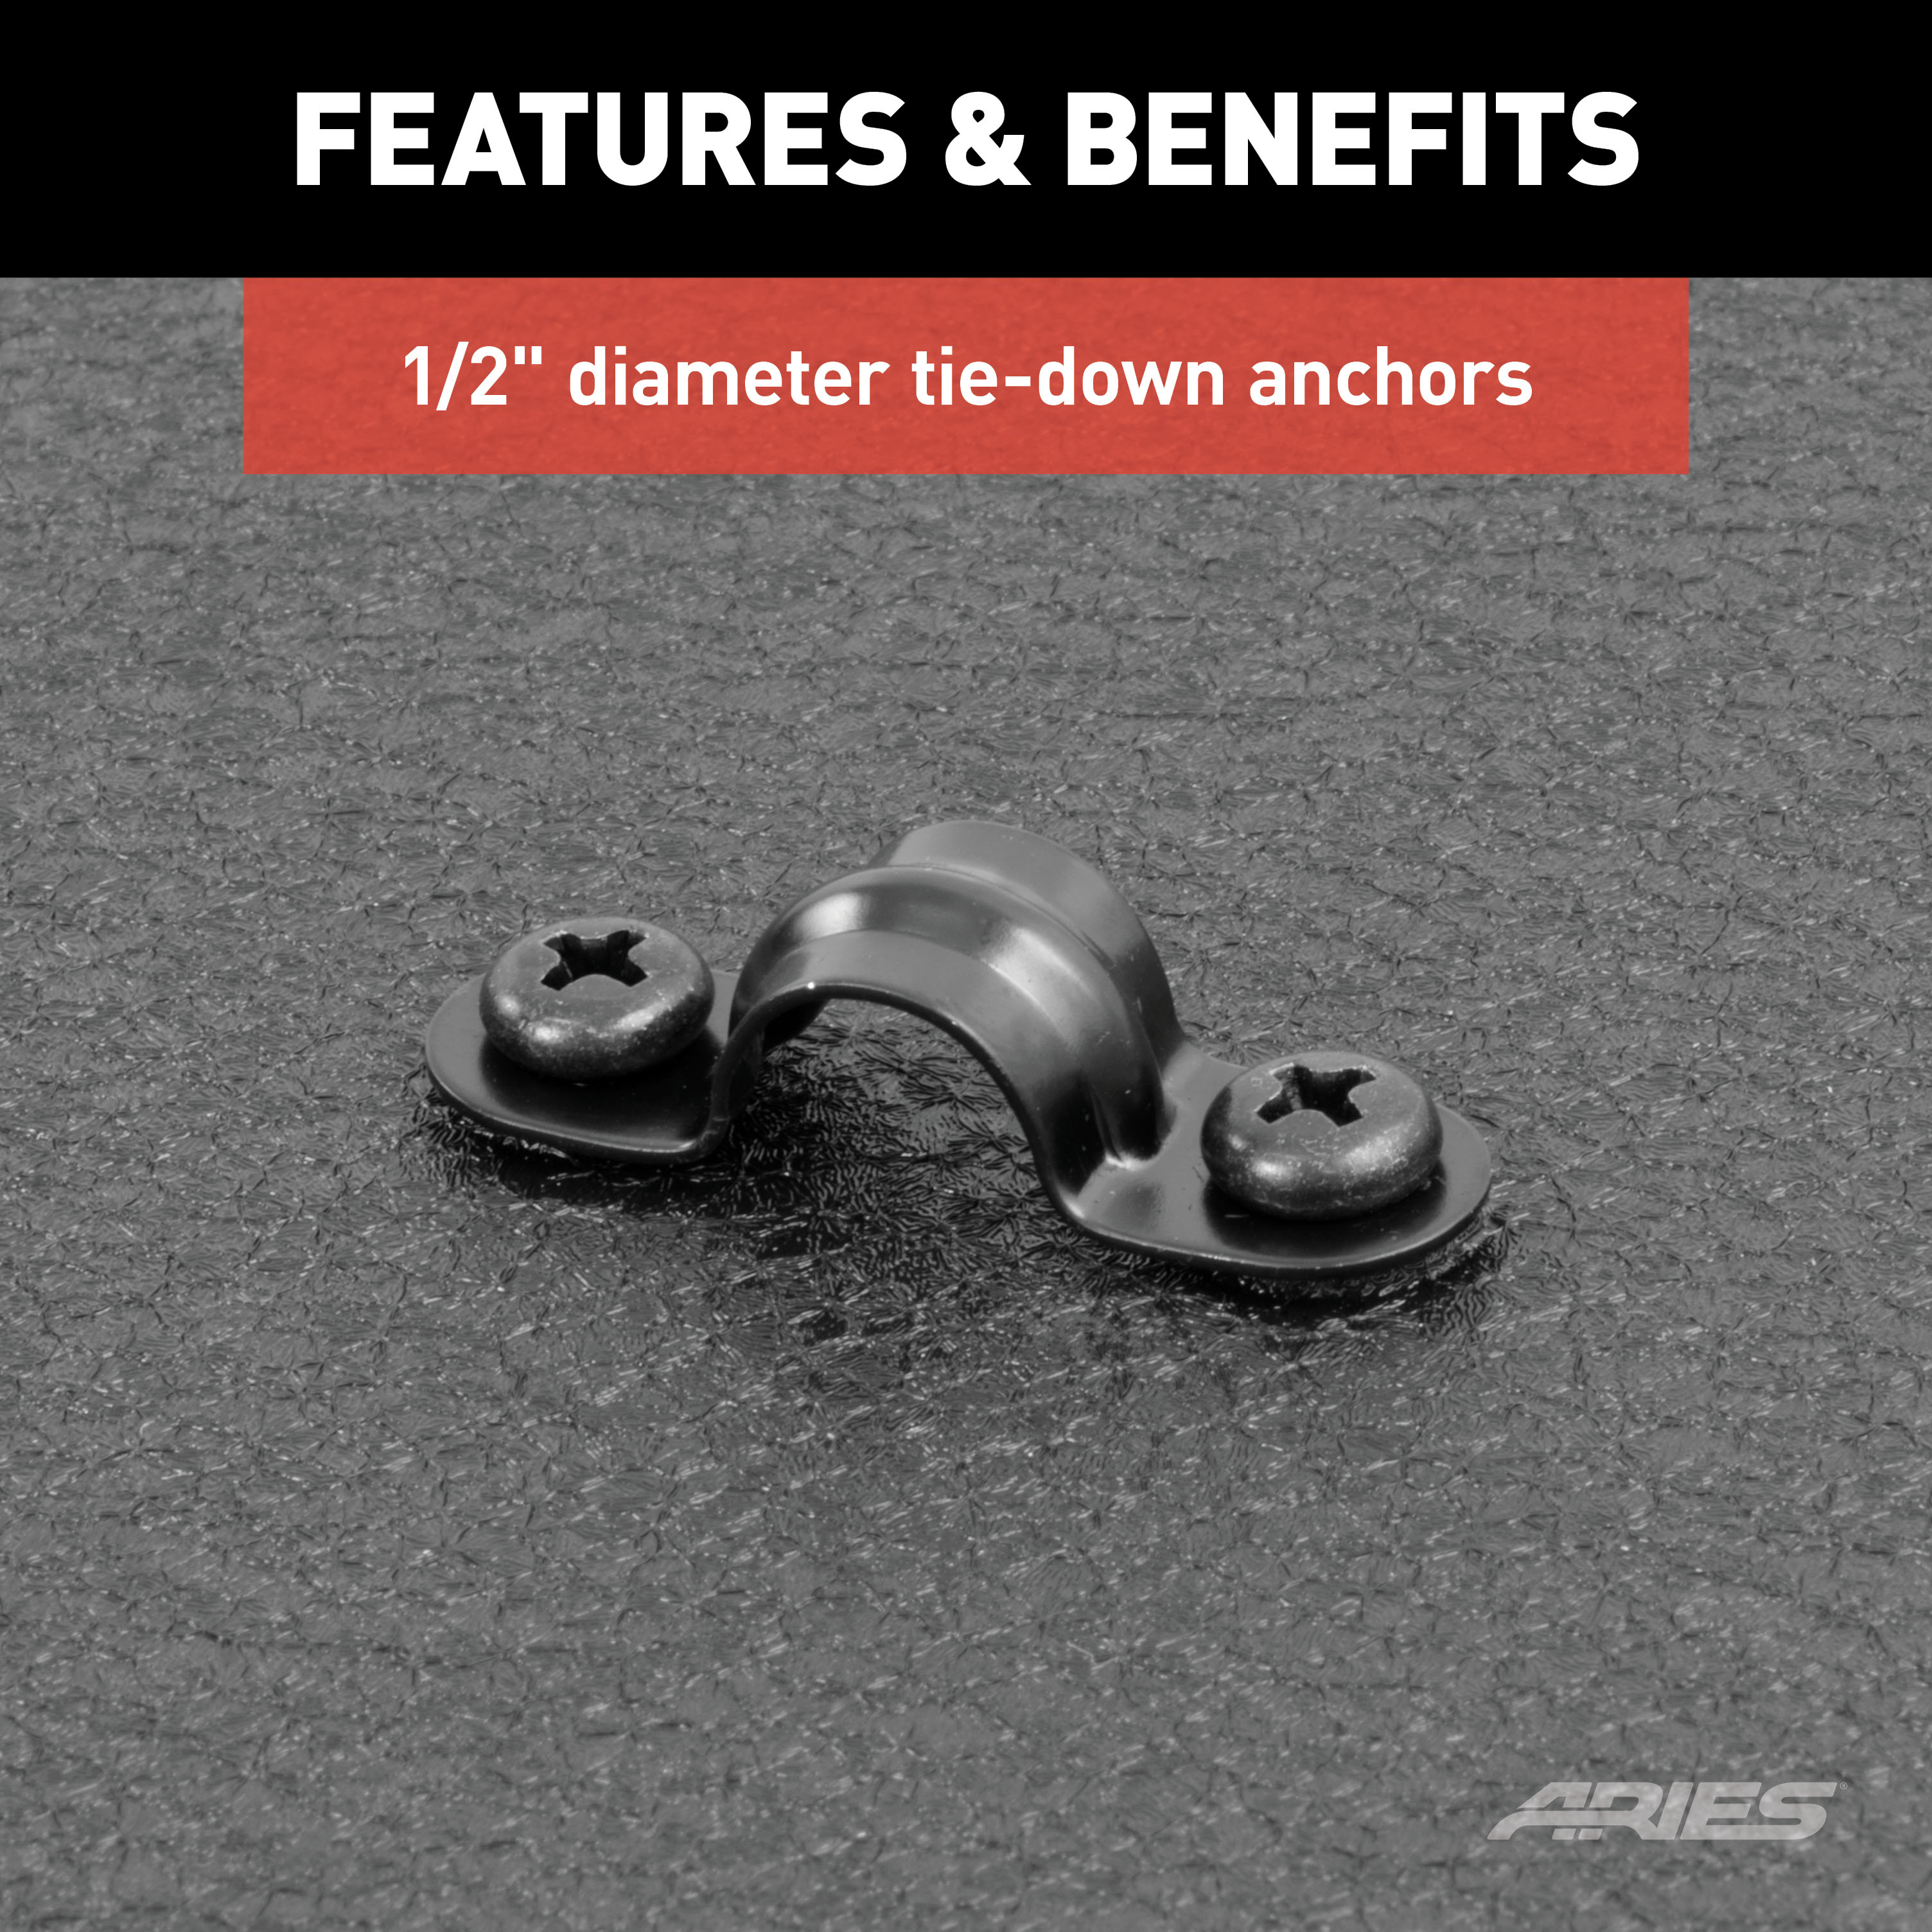
The ARIES Jeep security cargo lid is the perfect line of defense for your items, whether you're out on the trail or just putting in another day at the office. This six-panel, aluminum enclosure works with the layout of the Jeep JK 4-door to turn the rear compartment into a large, fully lockable storage area. The simple, six-panel design bolts directly into the bed of the Jeep Wrangler, utilizing the existing space and layout. This allows for a convenient storage area that works independently of the rear door and is compatible with the hardtop off or on, as well as with a soft top or subwoofer. It features a key-operated, quarter-turn latch for quick, convenient access to the cargo area. Simply insert the key, turn the latch and lift the lid. The locking latch mechanism is made with durable metal components and is covered in a chrome finish for lasting rust resistance. Tie-down anchors and a weight capacity of 75 lbs. allow additional items to be stored on top of the Jeep security cargo lid. The tie-down anchors have a 1/2" diameter to accept various cargo straps or bungees. The lid can also be flipped up and converted into a usable surface, such as a table or workbench. Part of building the ultimate off-roading machine is keeping your Jeep agile and lightweight. The ARIES security cargo lid is made with hardened, T6 aluminum construction, making it strong, rust-free and lightweight. An aluminum construction allows the lid to keep valuables safe, while easily withstanding the elements. Each panel is also covered in a textured black powder coat finish that is specifically designed to hide scratches and grime. For a complete installation, the ARIES Jeep security cargo lid comes with all necessary hardware.

Explore ARIES products at TowUniverse for top-tier grille guards, side bars, nerf bars, headache racks, and more. Upgrade your vehicle with ARIES today!
ARIES is a fast-paced marketer and innovator of truck, Jeep, SUV and CUV accessories. From automotive enthusiasts to professional builders, our products are built for the champions of individualism, innovation and attitude.
We offer the perfect combination of unique style and durable construction, specializing in custom-fit grille guards, bull bars, side bars and running boards, as well as Jeep Wrangler and Jeep Gladiator accessories.
ARIES products are made vehicle-specific for a custom fit, and they are available for a wide variety of makes and models sold in North America.
Experts available to answer your questions
Call 888-634-9494Limited Lifetime Warranty (Five-Year Finish, One-Year Parts)
2 compatible vehicles
| Year | Make & Model | Style | Notes |
|---|---|---|---|
| 2011 - 2017 | Jeep Wrangler | Sport Utility · 4-Door | — |
| 2018 | Jeep Wrangler JK | Sport Utility · 4-Door | — |
Yes, the ARIES 2070475 Black Aluminum Cargo Cover Storage Box Lid, Select Jeep Wrangler JK Unlimited (Part #BBDR2070475) is designed to fit the 2011-2017 Jeep Wrangler.
The ARIES 2070475 Black Aluminum Cargo Cover Storage Box Lid, Select Jeep Wrangler JK Unlimited (Part #BBDR2070475) fits 2011-2017 Jeep Wrangler models. The 2018 model year is the last year covered by this part number. For newer models, check for an updated version.
The ARIES 2070475 Black Aluminum Cargo Cover Storage Box Lid, Select Jeep Wrangler JK Unlimited (Part #BBDR2070475) fits the following vehicles: 2011-2017 Jeep Wrangler; 2018 Jeep Wrangler JK. Always verify your specific year, make, and model before ordering.
The ARIES 2070475 Black Aluminum Cargo Cover Storage Box Lid, Select Jeep Wrangler JK Unlimited (Part #BBDR2070475) Refer to the included instructions for installation details. Basic hand tools are typically all you need.
The kit includes: cargo center lid with keys, left and right side plates, left and right insert plates, upper and lower rear brackets, back seat plate, door latch bracket, bottom cross bar, rubber trim strip, six tie down brackets, two types of foam tape, fasteners (M4, M6, M8 button head bolts, washers, lock washers, nuts, and nut tabs), Phillips machine screws, and a 2.5mm hex key. All hardware and tools needed for installation are provided except for the ratchet, extensions, wrenches, sockets, Torx bits, utility knife, scissors, Phillips screwdriver, and marker.
Yes. The product is designed to work with both hard and soft tops. If reinstalling a soft top, the manual specifies placing three M8 nut tabs per side under the lip where the top will be fastened down. If not reattaching a top, the security cargo lid is secured directly using M8 x 25mm button head bolts at factory mounting points.
You must remove the hard or soft top per your vehicle's owner's manual, fold down the rear seats, and locate the two factory M18 nuts in the rear seat area. The product also requires access to factory tie down points in the cargo section and factory mounting points where the top attaches. Refer to your vehicle's owner's manual for top removal procedures.
Required tools are: ratchet, extension, 2.5mm and 4mm and 5mm Allen wrenches, 10mm wrench, 18mm socket, T30 and T45 Torx bits, utility knife, Phillips screwdriver, scissors, and marker. A mallet is also needed to adjust the center section closure during final positioning. The kit includes a 2.5mm hex key and M5 hex key.
Yes. The two factory M18 nuts from the rear seat area are removed and reused to secure the bottom cross bar. Additionally, the factory tie down in the rear cargo section is removed and reused to secure the passenger/right side rear lower bracket. All other fasteners are provided in the kit.
The manual rates installation difficulty as 'Easy' and provides step-by-step instructions. However, the installation involves multiple fastening points, foam tape application, alignment adjustments, and torque specifications. The process requires access to the rear seat area and cargo section, and a mallet for final adjustments. Whether professional installation is necessary depends on your mechanical skill and comfort with multi-step assembly.
Read all instructions thoroughly before beginning. For black finishes, mild soap may be used to clean the product. Ensure you have all required tools and parts listed in the manual. Prepare your vehicle by removing the hard or soft top per your owner's manual and folding down the rear seats.
Installation follows this sequence: (1) Remove hard/soft top; (2) Remove factory M18 nuts and install bottom cross bar; (3) Attach back seat plate to cross bar; (4–5) Apply foam tape to vehicle edges and mark mounting points; (6) Attach cargo center section to back seat plate; (7) Attach left and right side plates to upper cross bar; (8) Secure cross bar bottom to back seat plate; (9–10) Install door latch bracket; (11–12) Install rear brackets; (13) Install insert plates; (14) Install rubber trim; (15–16) Position and secure hardtop or cargo lid; (17–19) Tighten all hardware and perform final checks.
Snugging fasteners without fully tightening allows for alignment adjustments throughout the installation process. This is especially important for the center section, side plates, and rear brackets, which must align properly before final tightening. Once all components are aligned and positioned correctly, all hardware is fully tightened in Step 17.
Two types of foam tape are used: (1) 50mm wide tape: fold in half, cut, remove adhesive cover, and apply to the vehicle edge by the driver/left side rear door and passenger side. (2) 25mm wide tape: apply along the vehicle edge back to the rear door, then cut off excess. Use a utility knife to mark the three mounting points along the outer edge covered by the 25mm tape. Repeat on both sides.
The rubber trim strip serves two purposes: (1) During assembly (Step 14), it is slid over the edge of the side plates and wrapped around the vehicle post for protection and sealing. (2) After installation (Step 18), additional rubber trim is attached along the bottom edge of the side panels and center lid section to help seal the rear of the cargo lid.
With the rear door open, mark the latch plate location. Loosen (but do not remove) the factory latch plate to allow the door latch bracket to slide in between the latch plate and rubber gasket. Snug the latch plate hardware without fully tightening. Then secure the top of the door latch bracket to the driver/left side plate using one M8 x 25mm button head bolt, M8 lock washer, and M8 flat washer. Snug but do not fully tighten. In Step 17, after closing the rear door, check latch plate alignment and adjust if necessary before final tightening.
Place the hardtop in position on the vehicle and close the center section. Use a mallet to make any adjustments needed to close the center section properly. Once aligned, secure the top to the vehicle using M8 x 60mm button head bolts, lock washers, and flat washers at each factory mounting point. If not reattaching a top, secure the security cargo lid using M8 x 25mm button head bolts, lock washers, and flat washers at each factory mounting point. Do not fully tighten until Step 17.
Six tie down brackets are included. They are secured to the cargo using two Phillips machine screws per bracket, for a total of 12 Phillips machine screws. The brackets are positioned after the cargo lid is fully installed and all other hardware is tightened.
No drilling of the vehicle is required. The product uses existing factory mounting points (factory M18 nuts, factory tie down points, and factory mounting points where the top attaches). The installation uses a utility knife to mark mounting points on foam tape applied to the vehicle, but no holes are drilled into the vehicle itself.
Yes, minor cutting is required. The 50mm and 25mm foam tapes must be cut to length using a utility knife. The rubber trim strip must also be cut to remove excess material. These are non-structural cuts to foam and rubber trim only; no vehicle modification is required.
Torque specifications are: M4 bolt = 3 ft.-lbs., M6 bolt = 3 ft.-lbs., M8 bolt = 7 ft.-lbs., M10 bolt = 16 ft.-lbs., M12 bolt = 28 ft.-lbs. The kit uses M4, M6, and M8 fasteners. SAE equivalents are also provided: 1/4" = 3 ft.-lbs., 5/16" = 7 ft.-lbs., 3/8" = 16 ft.-lbs., 7/16" = 20 ft.-lbs., 1/2" = 28 ft.-lbs.
M8 bolts must be torqued to 7 ft.-lbs. This applies to all M8 fasteners used throughout the installation, including those securing the back seat plate, cargo center section, side plates, cross bar, door latch bracket, and rear brackets.
M6 bolts must be torqued to 3 ft.-lbs. This applies to the two M6 x 20mm button head bolts used to secure the upper and lower rear brackets together.
M4 bolts must be torqued to 3 ft.-lbs. This applies to the four M4 button head bolts used to secure each insert plate (driver and passenger sides).
Five M8 x 25mm button head bolts, five M8 flat washers, and five M8 lock washers are used to attach the back seat plate to the bottom cross bar.
Four M8 x 25mm button head bolts, four M8 lock washers, and four M8 flat washers are used at the four innermost mounting points to attach the cargo center section to the back seat plate.
Two M8 x 35mm button head bolts are used per side (driver and passenger) to align the mounting holes on each side plate with the mounting points on the upper cross bar.
Per side: two M8 x 25mm button head bolts with M8 lock washers and M8 flat washers on the two outer holes, and one M8 x 35mm button head bolt with M8 lock washer and M8 flat washer on the remaining mounting hole.
The upper rear bracket is secured to the passenger side plate using one M8 x 25mm button head bolt, M8 lock washer, and M8 flat washer. The upper and lower rear brackets are connected using two M6 x 20mm button head bolts, four M6 flat washers, two M6 lock washers, and two M6 hex nuts.
Four M4 button head bolts, four M4 lock washers, and four M4 flat washers are used per insert plate (driver and passenger sides).
If reattaching a hardtop: M8 x 60mm button head bolts, lock washers, and flat washers at each factory mounting point. If securing the security cargo lid without a top: M8 x 25mm button head bolts, lock washers, and flat washers at each factory mounting point.
Periodic inspections should be performed to ensure all mounting hardware remains tight. The manual does not specify an inspection interval, but regular checks are recommended to maintain proper fit and security of the cargo lid.
For black finishes, mild soap may be used to clean the product. The manual does not specify cleaning procedures for other finishes.
After tightening all hardware in Step 17, close the rear door and check the alignment of the latch plate. Adjust if necessary, then tighten the latch plate. Verify that the cargo lid closes properly and all fasteners are secure. Perform periodic inspections afterward to ensure all mounting hardware remains tight.
The product is designed for vehicles with rear hard or soft tops, factory M18 nuts in the rear seat area, factory tie down points in the cargo section, and factory mounting points for the top. Refer to your vehicle's owner's manual for top removal procedures and confirm your vehicle has these factory features. The manual does not list specific vehicle makes or models.
You need: ratchet, extension, 2.5mm/4mm/5mm Allen wrenches, 10mm wrench, 18mm socket, T30/T45 Torx bits, utility knife, Phillips screwdriver, scissors, marker, and mallet. The kit includes a 2.5mm hex key and M5 hex key.
Yes. You must remove the hard or soft top per your vehicle's owner's manual before beginning installation. The product replaces the top mounting area with a security cargo lid system.
M4 bolts: 3 ft.-lbs.; M6 bolts: 3 ft.-lbs.; M8 bolts: 7 ft.-lbs. Do not over-tighten fasteners.
Perform periodic inspections to ensure all mounting hardware remains tight. The manual does not specify an inspection interval.
Yes. Place three M8 nut tabs per side under the lip where the top will be fastened down, then secure the top using M8 x 60mm button head bolts, lock washers, and flat washers at factory mounting points.
On Sale Today
Original price was $845.95. Current price is $480.00.You save $365.95 (43%)
Free Shipping
Ships free on all orders
 Authorized Dealer
Shipping from Lancaster, TXFREE SHIPPING
Estimated delivery Wed, Sep 9 - Fri, Sep 11
Order before 2 PM EST Monday–Friday for same-day processing
Guaranteed safe & secure checkout
No reviews have been added for this product.