
CURT 60682 Double Lock EZr Gooseneck Hitch, 2-5/16-In. Flip-Over Ball 30K, Fits Select Dodge, Ram 2500, 3500CURTOriginal price was $793.95. Current price is $651.95.In Stock
View productOur in-house experts typically reply within one business day.

CURT
On Sale Today
Original price was $815.95. Current price is $609.95.You save $206.00 (25%)
Free Shipping
Ships free on all orders
 Authorized Dealer
2007 Chevrolet Silverado 2500 HD Classic
Confirmed to Fit
2007 Chevrolet Silverado 2500 HD Classic
Confirmed to Fit
2007 Chevrolet Silverado 2500 HD Classic
Confirmed to Fit
2007 Chevrolet Silverado 3500 Classic
Confirmed to Fit
2007 Chevrolet Silverado 3500 Classic
Confirmed to Fit
2007 Chevrolet Silverado 3500 Classic
Confirmed to Fit
2007 GMC Sierra 2500 HD Classic
Confirmed to Fit
2007 GMC Sierra 2500 HD Classic
Confirmed to Fit
2007 GMC Sierra 2500 HD Classic
Confirmed to Fit
Confirmed to Fit
Confirmed to Fit
Confirmed to Fit


Always the correct part
We know our products
Quality Products
Free Shipping!
Always the correct part
We know our products
Quality Products
Free Shipping!
Verify Fitment
Select your vehicle to confirm this part fits.
Quick Ship
In stock and ready to ship — order now!
Shipping from Eau Claire, WIFREE SHIPPING
Estimated delivery Fri, Oct 23 - Sun, Oct 25
Order before 2 PM EST Monday–Friday for same-day processing
Guaranteed safe & secure checkout
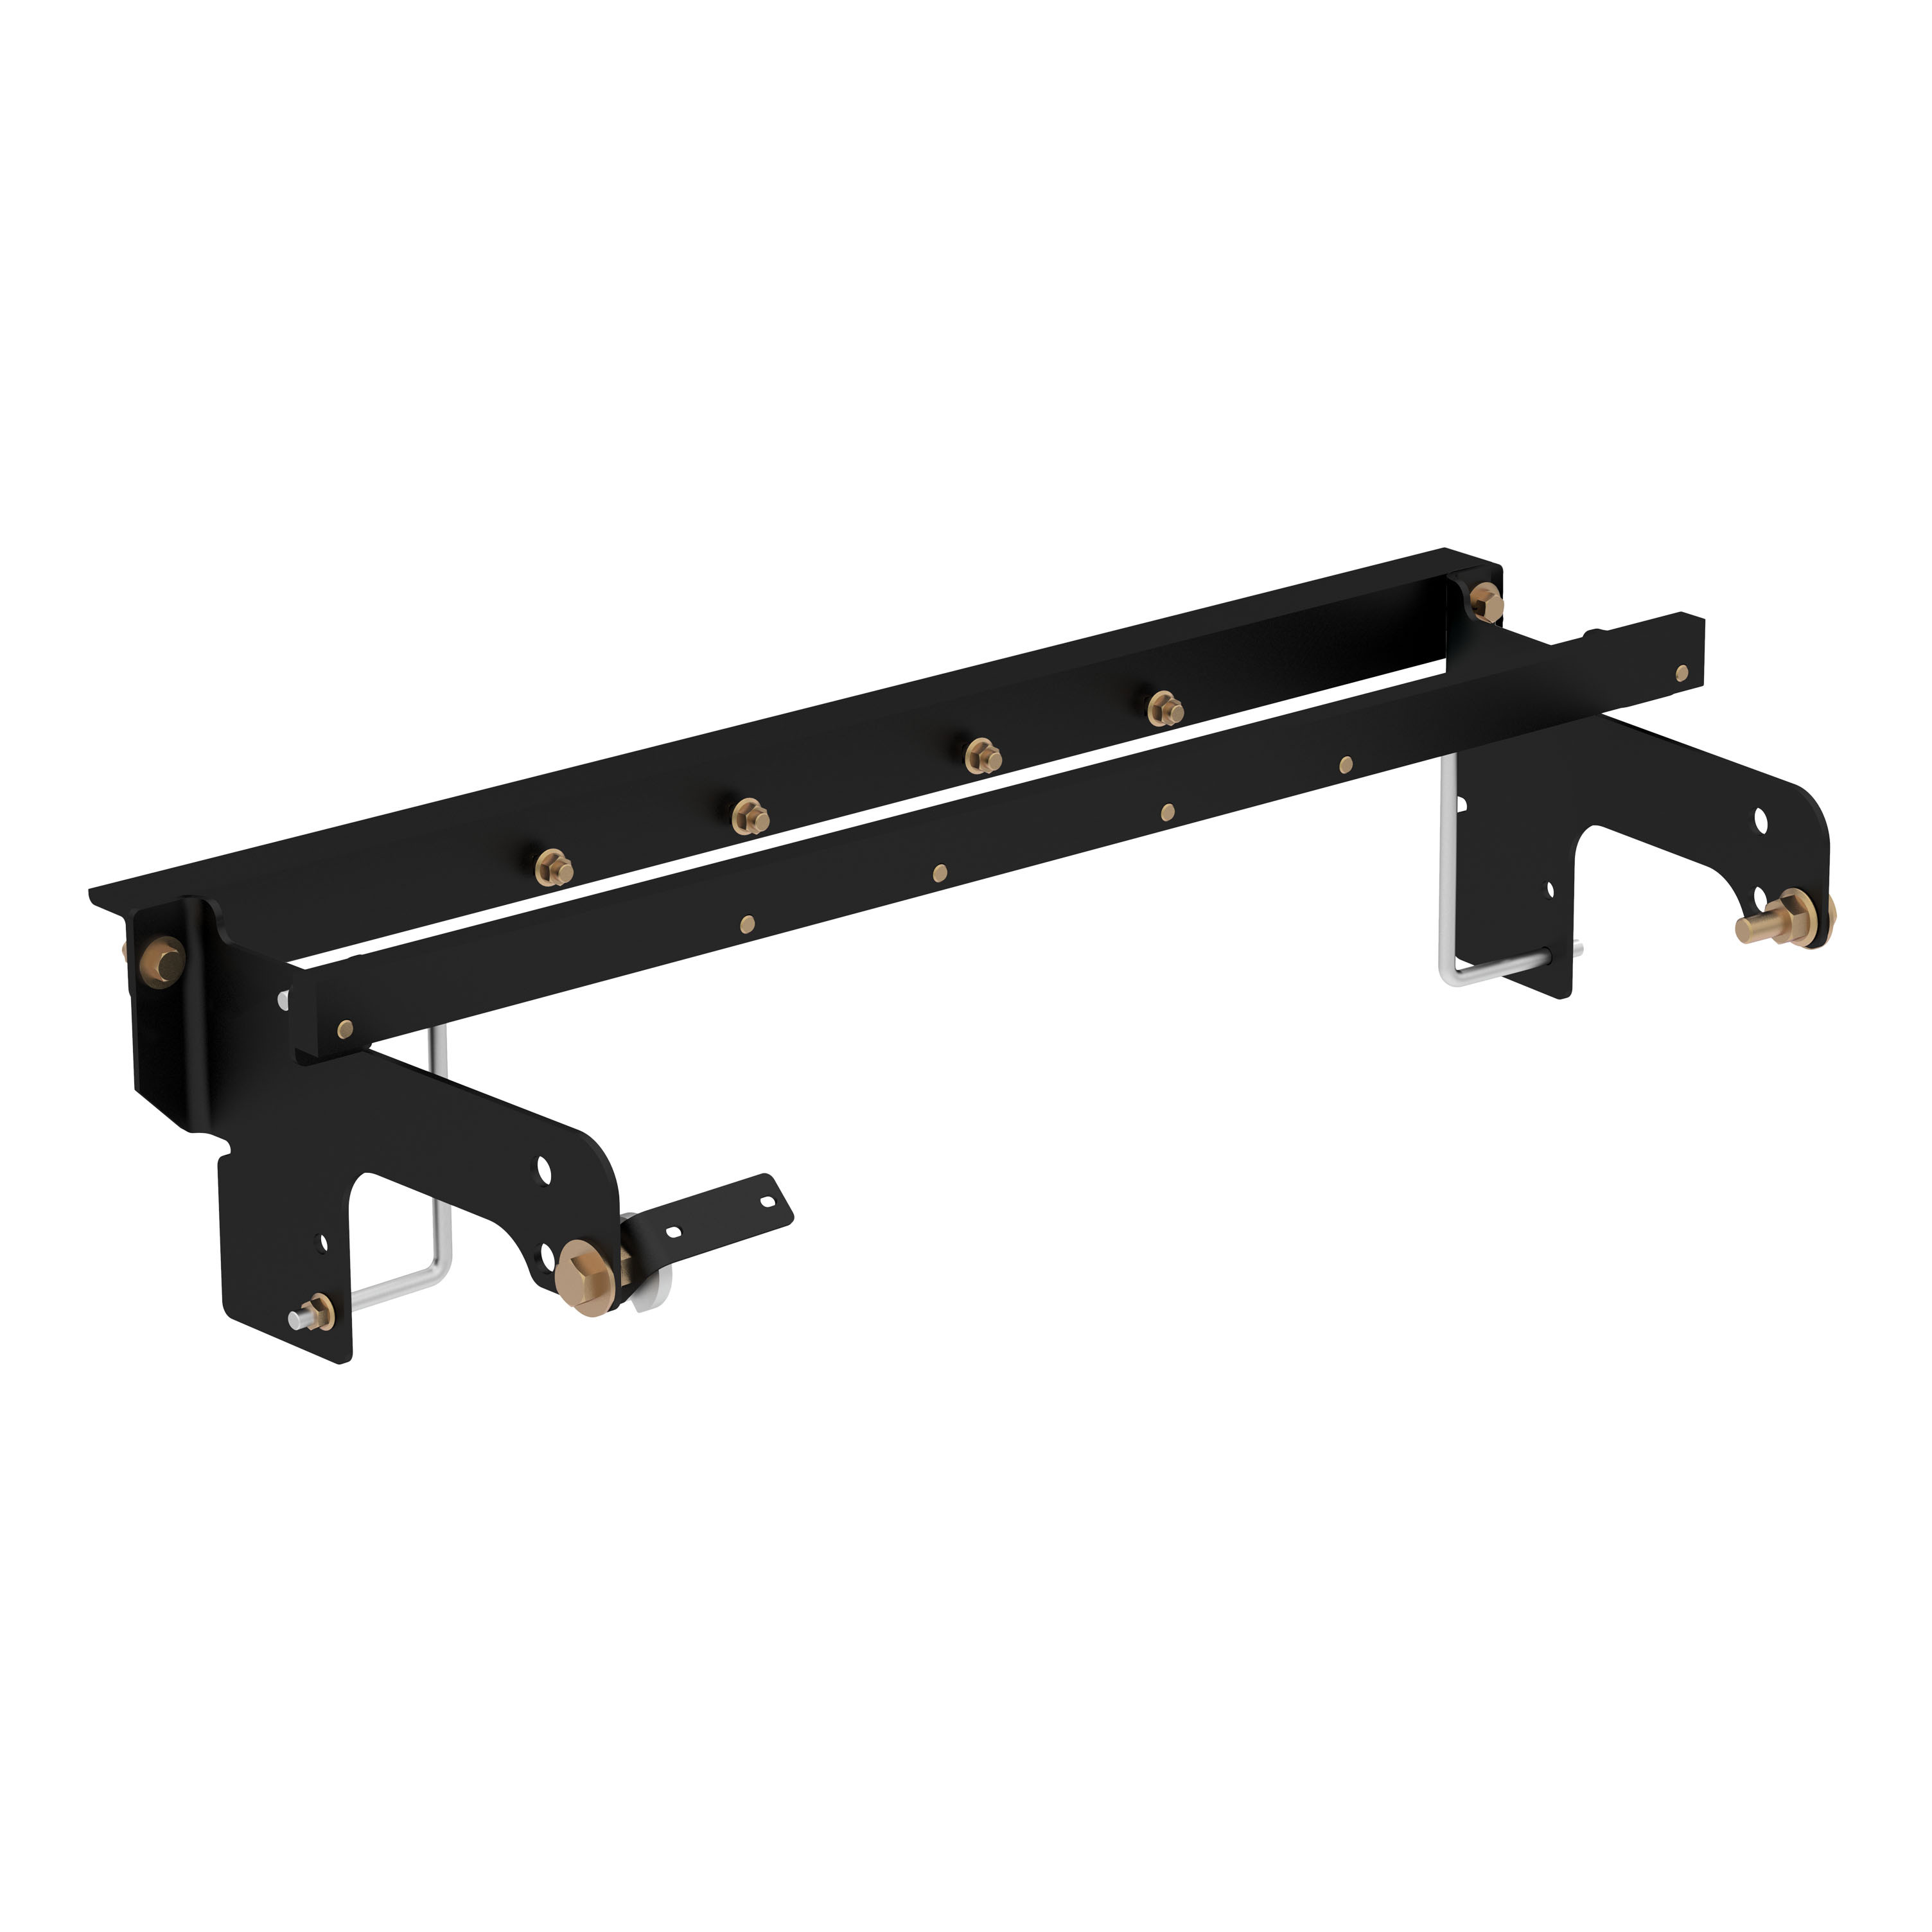
Includes gooseneck hitch #60619 and installation brackets #60648
Center locator patent# D685,299 S
Capacity limited to lowest-rated towing component

Includes gooseneck hitch #60619 and installation brackets #60648
Warranty: Limited Lifetime Warranty (One-Year Finish, One-Year Parts)
Finish: A-COAT
Gross Trailer Weight (Pounds): 30,000 LB
Ball Diameter (Inches): 2-5/16 IN
Installation Time Exact (Minutes): 0
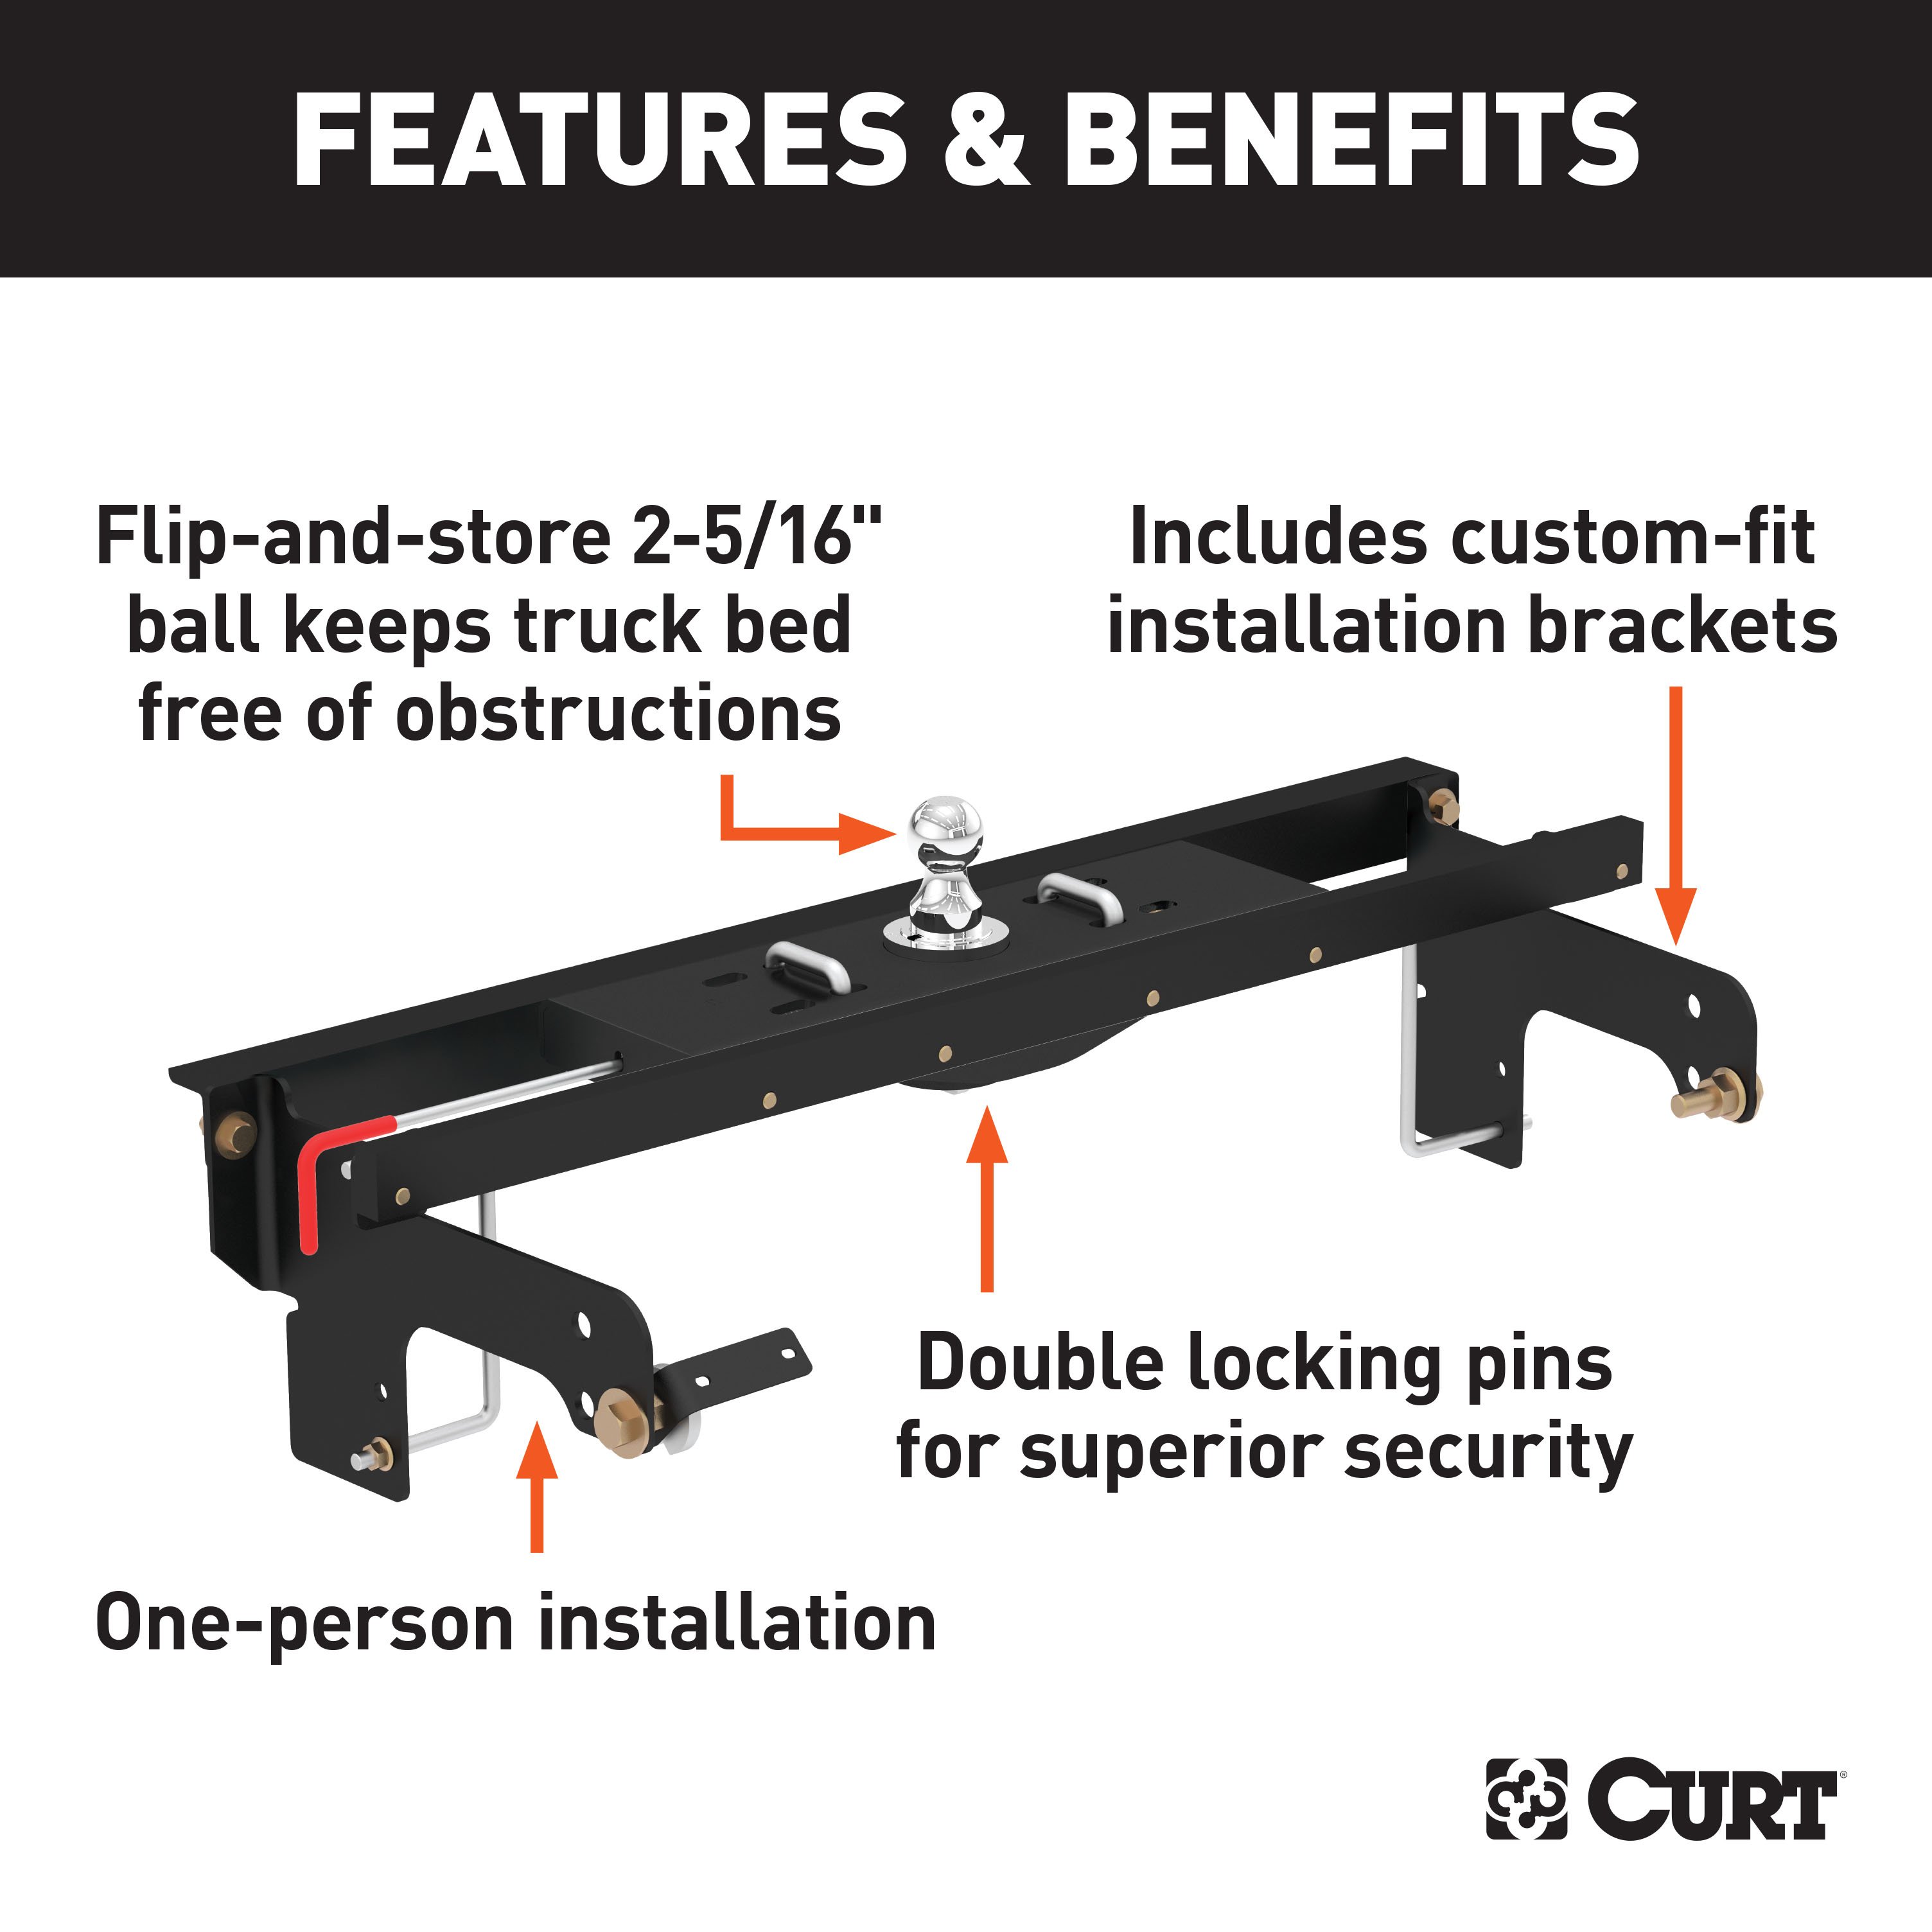
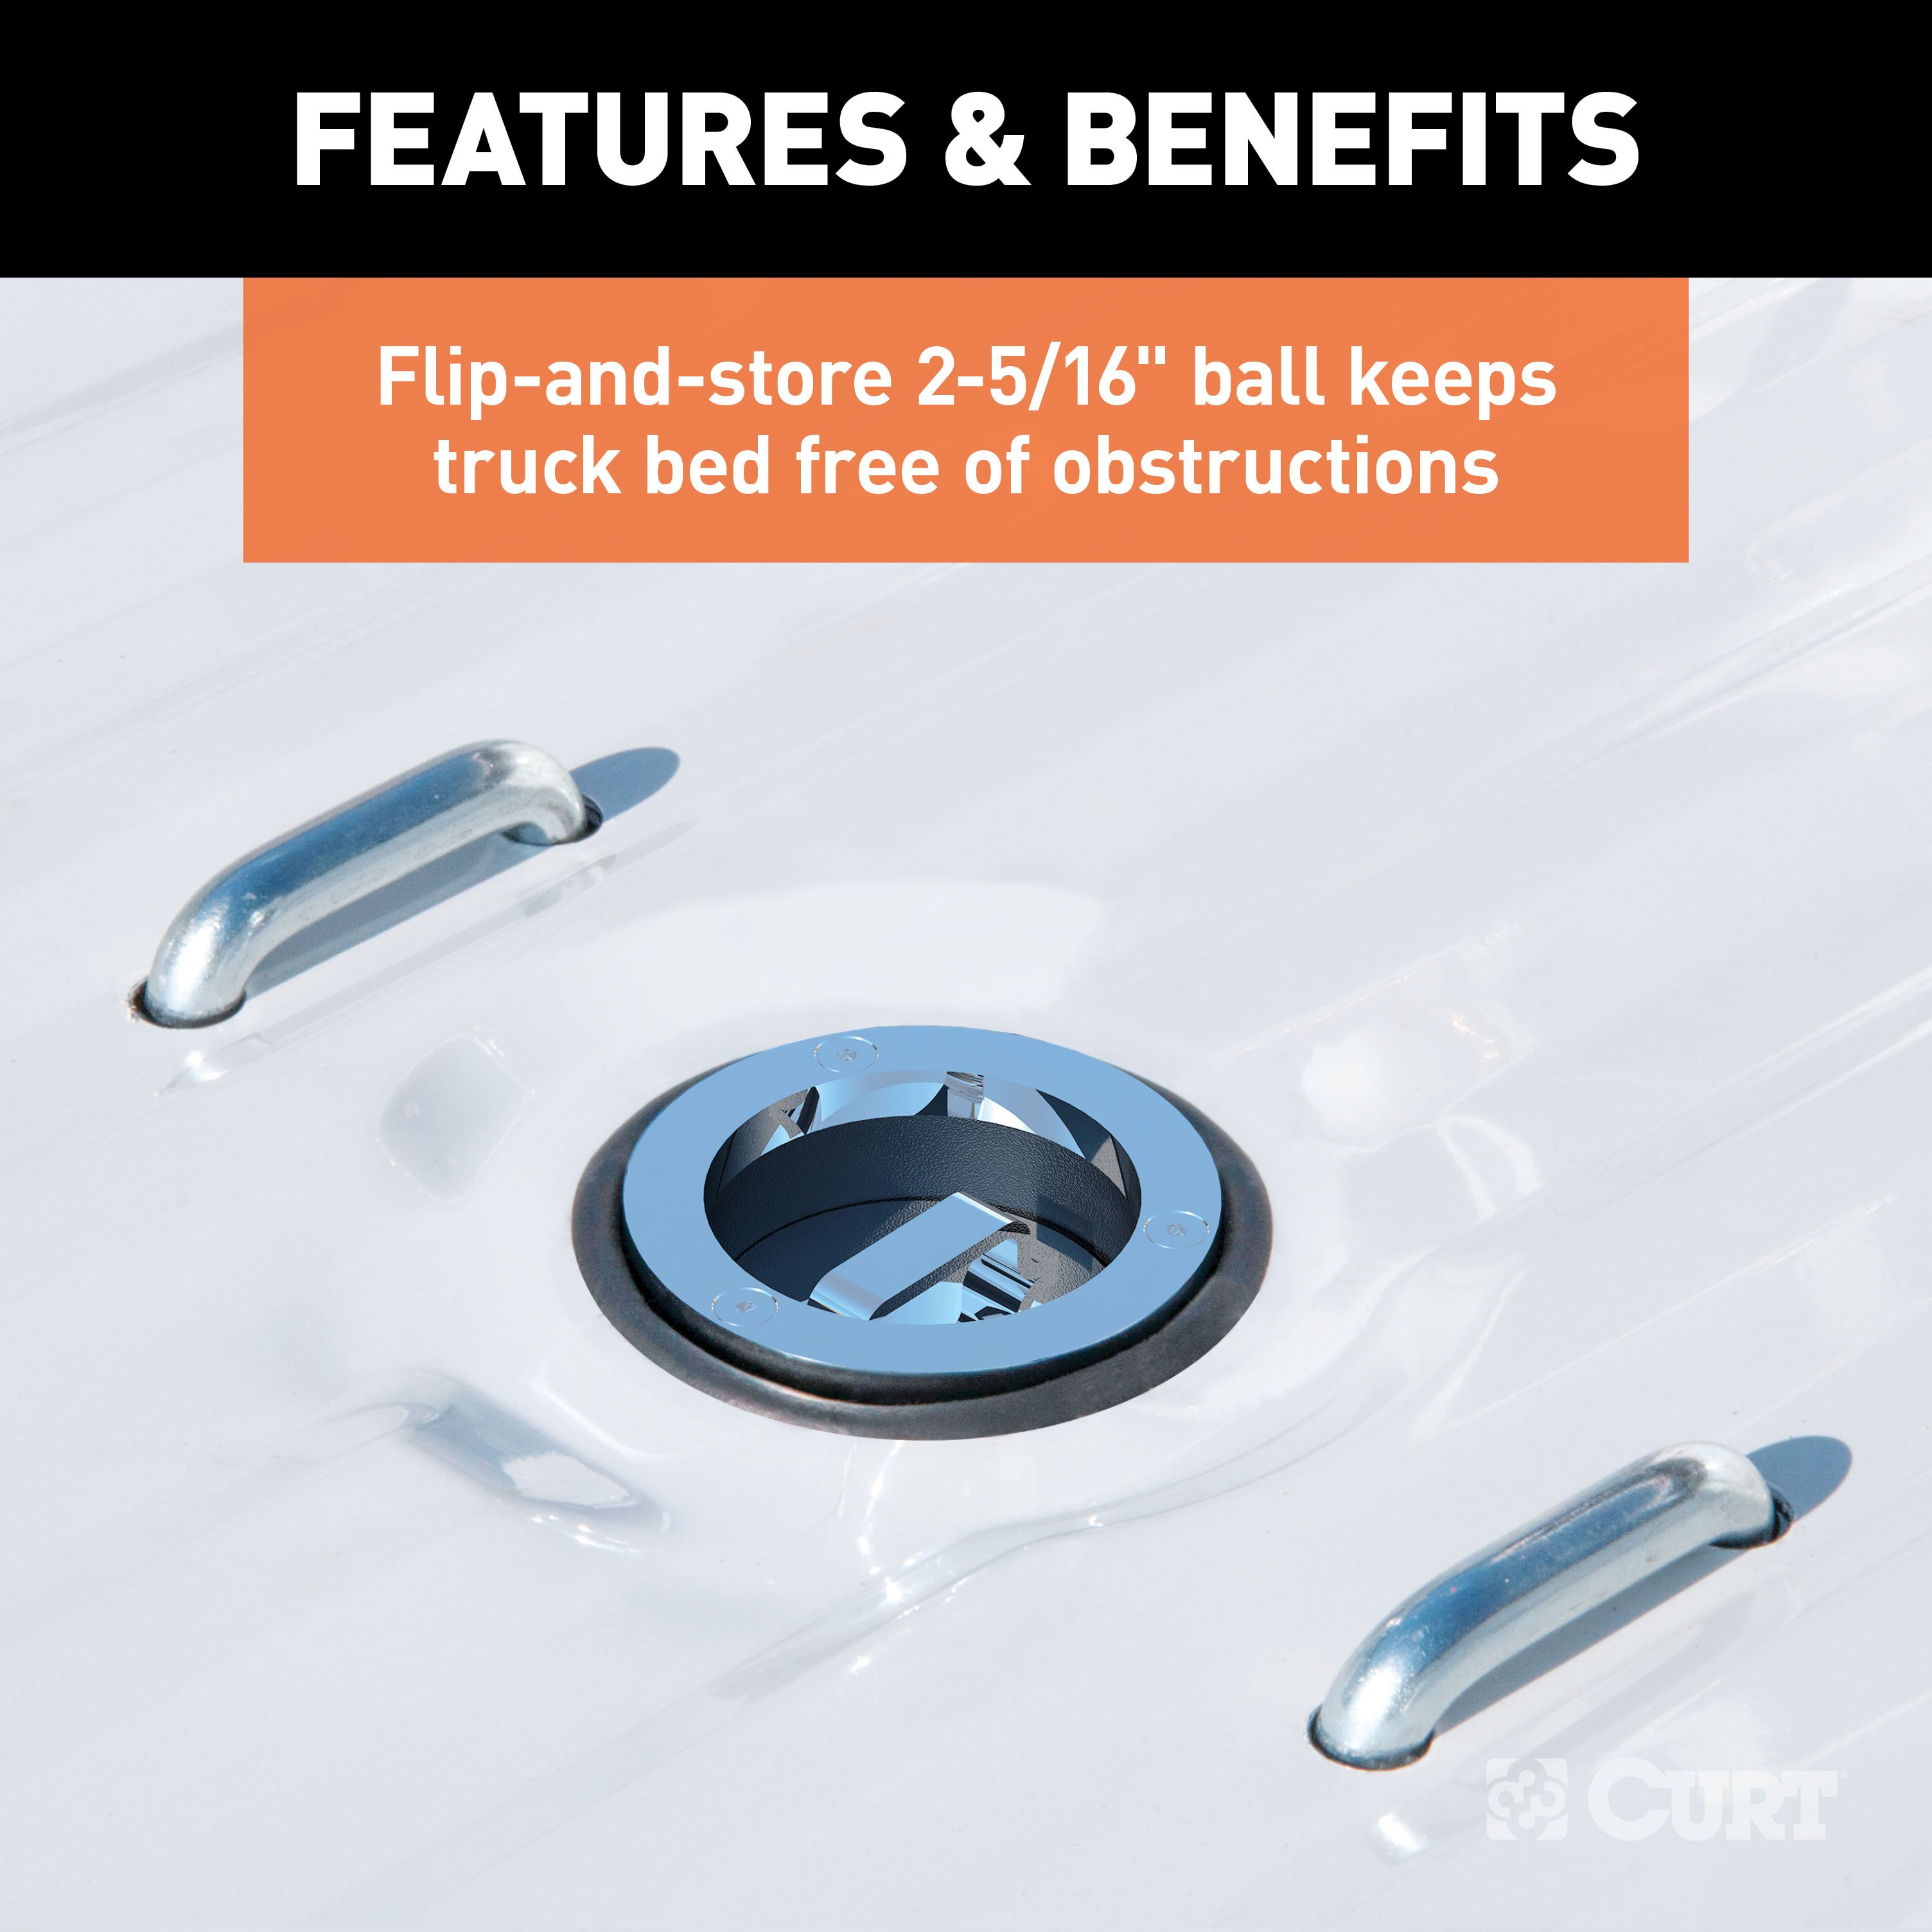
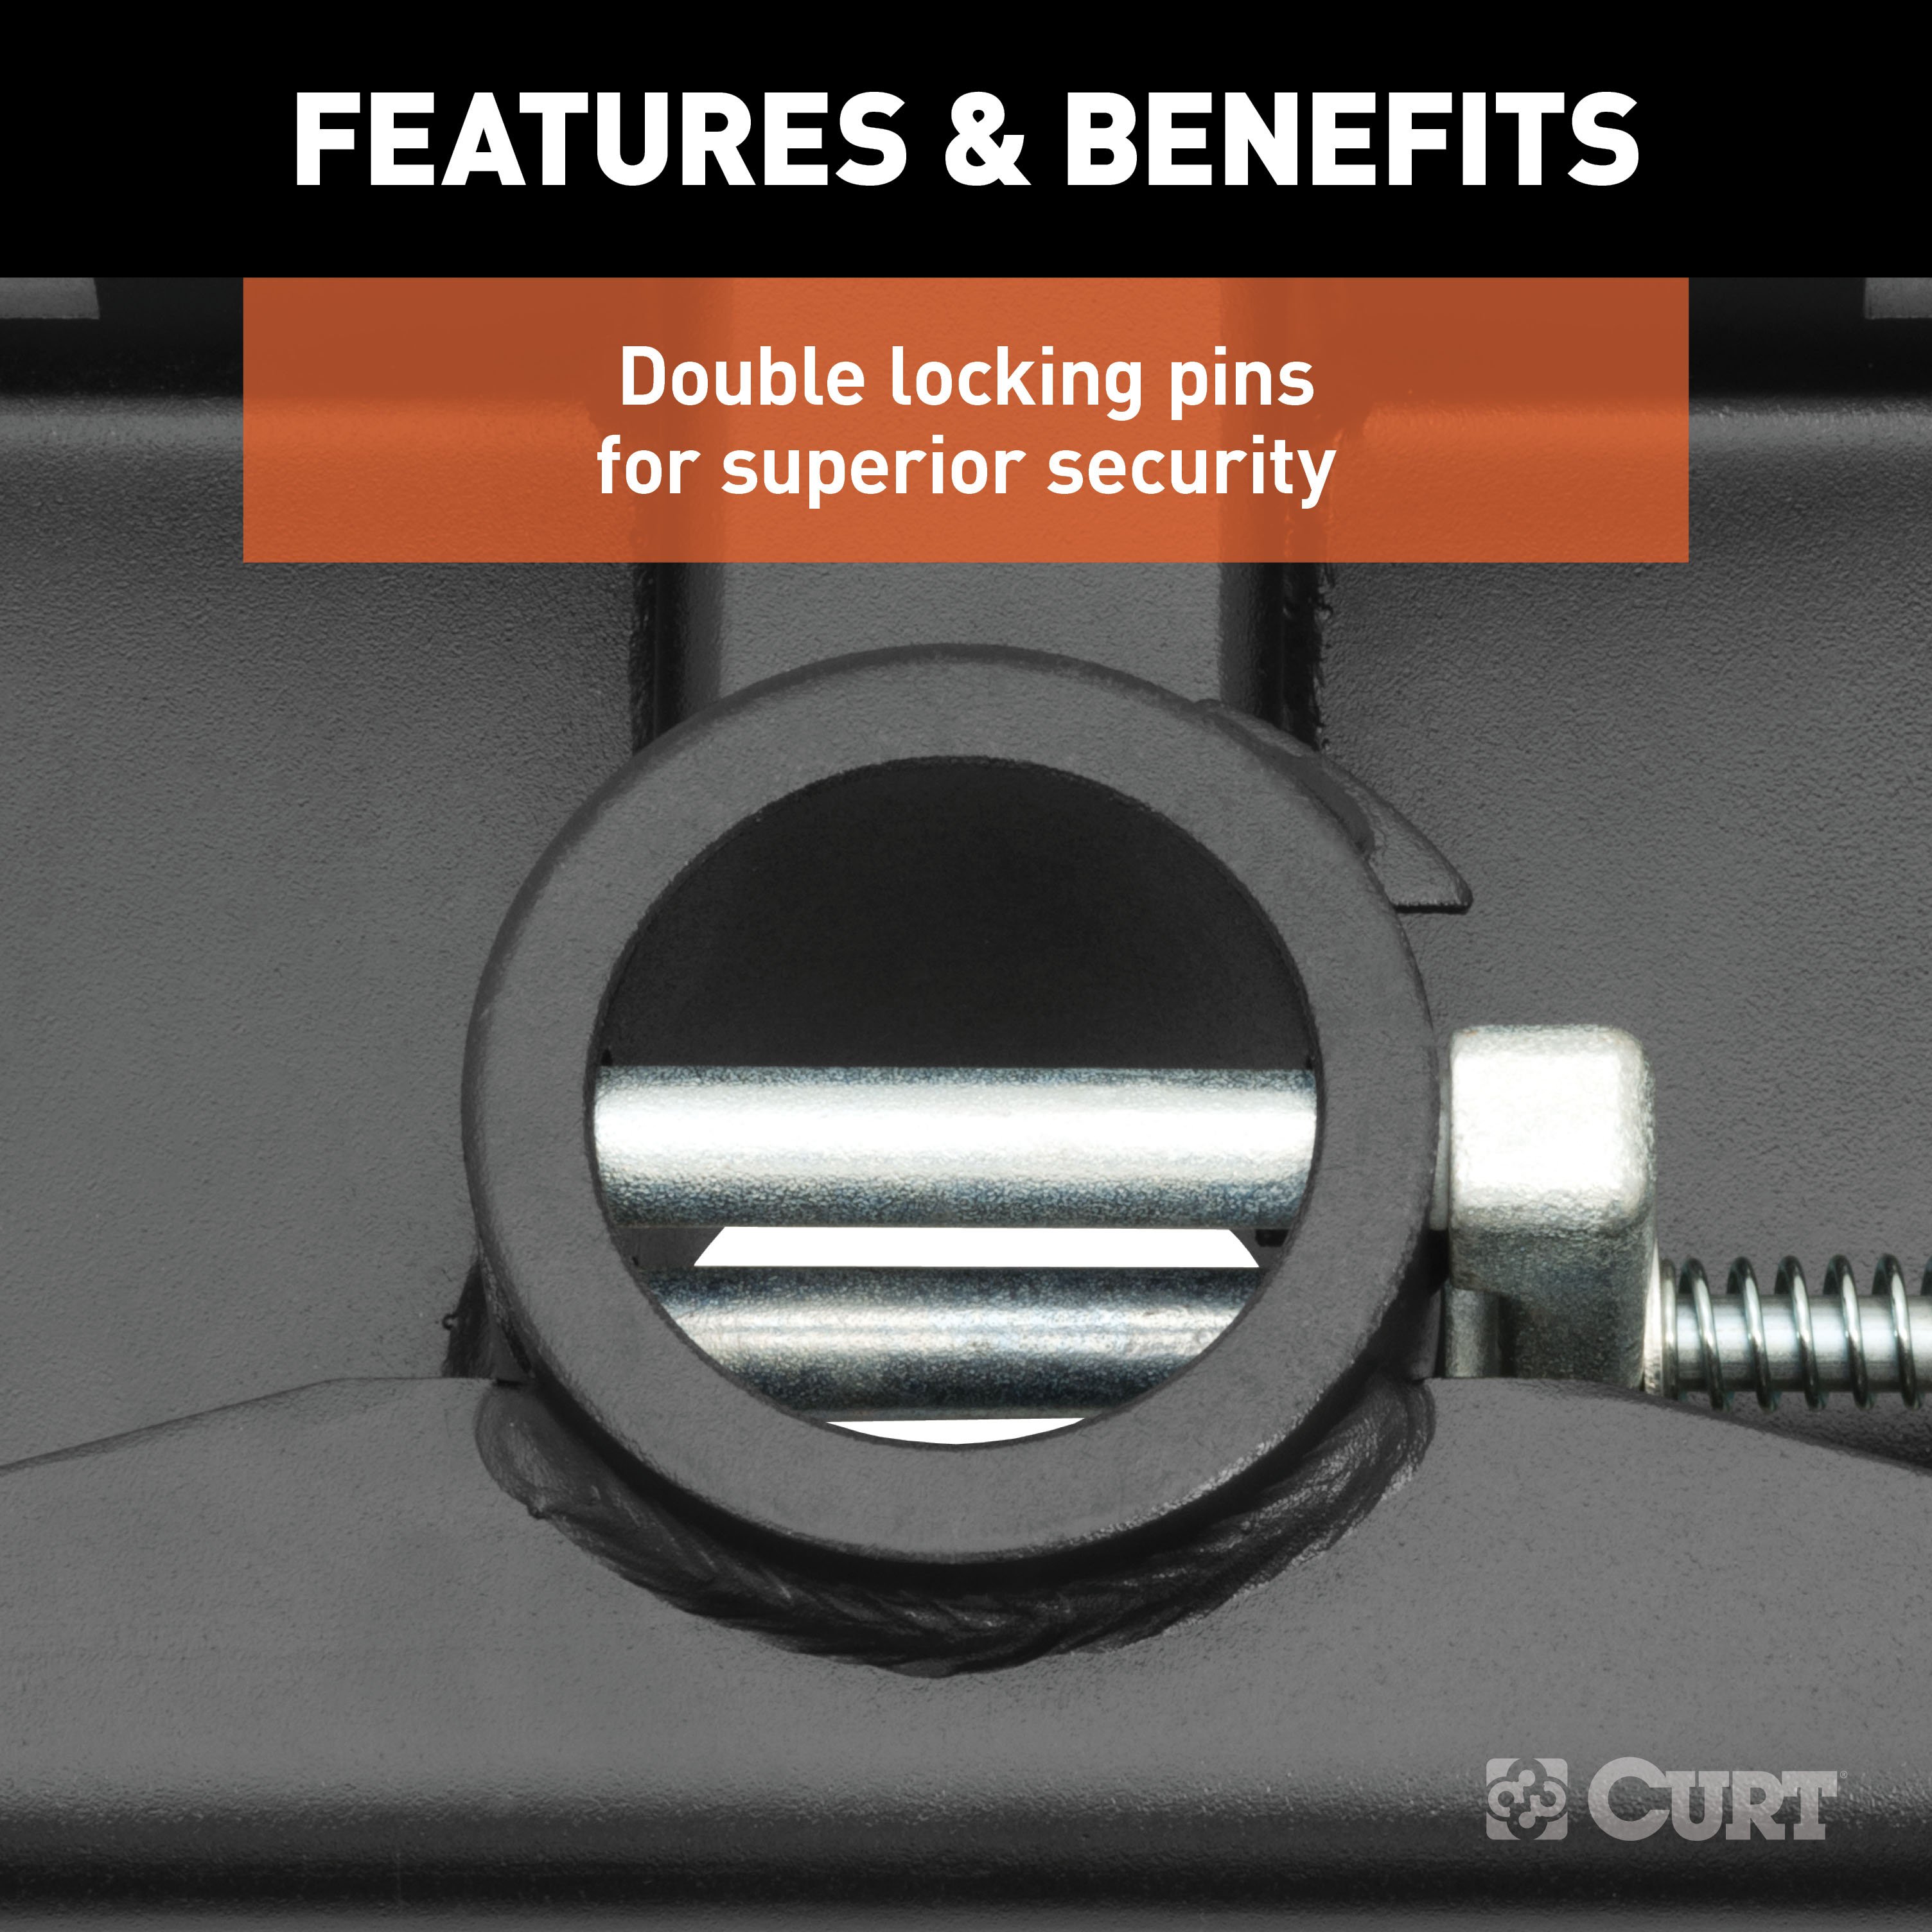
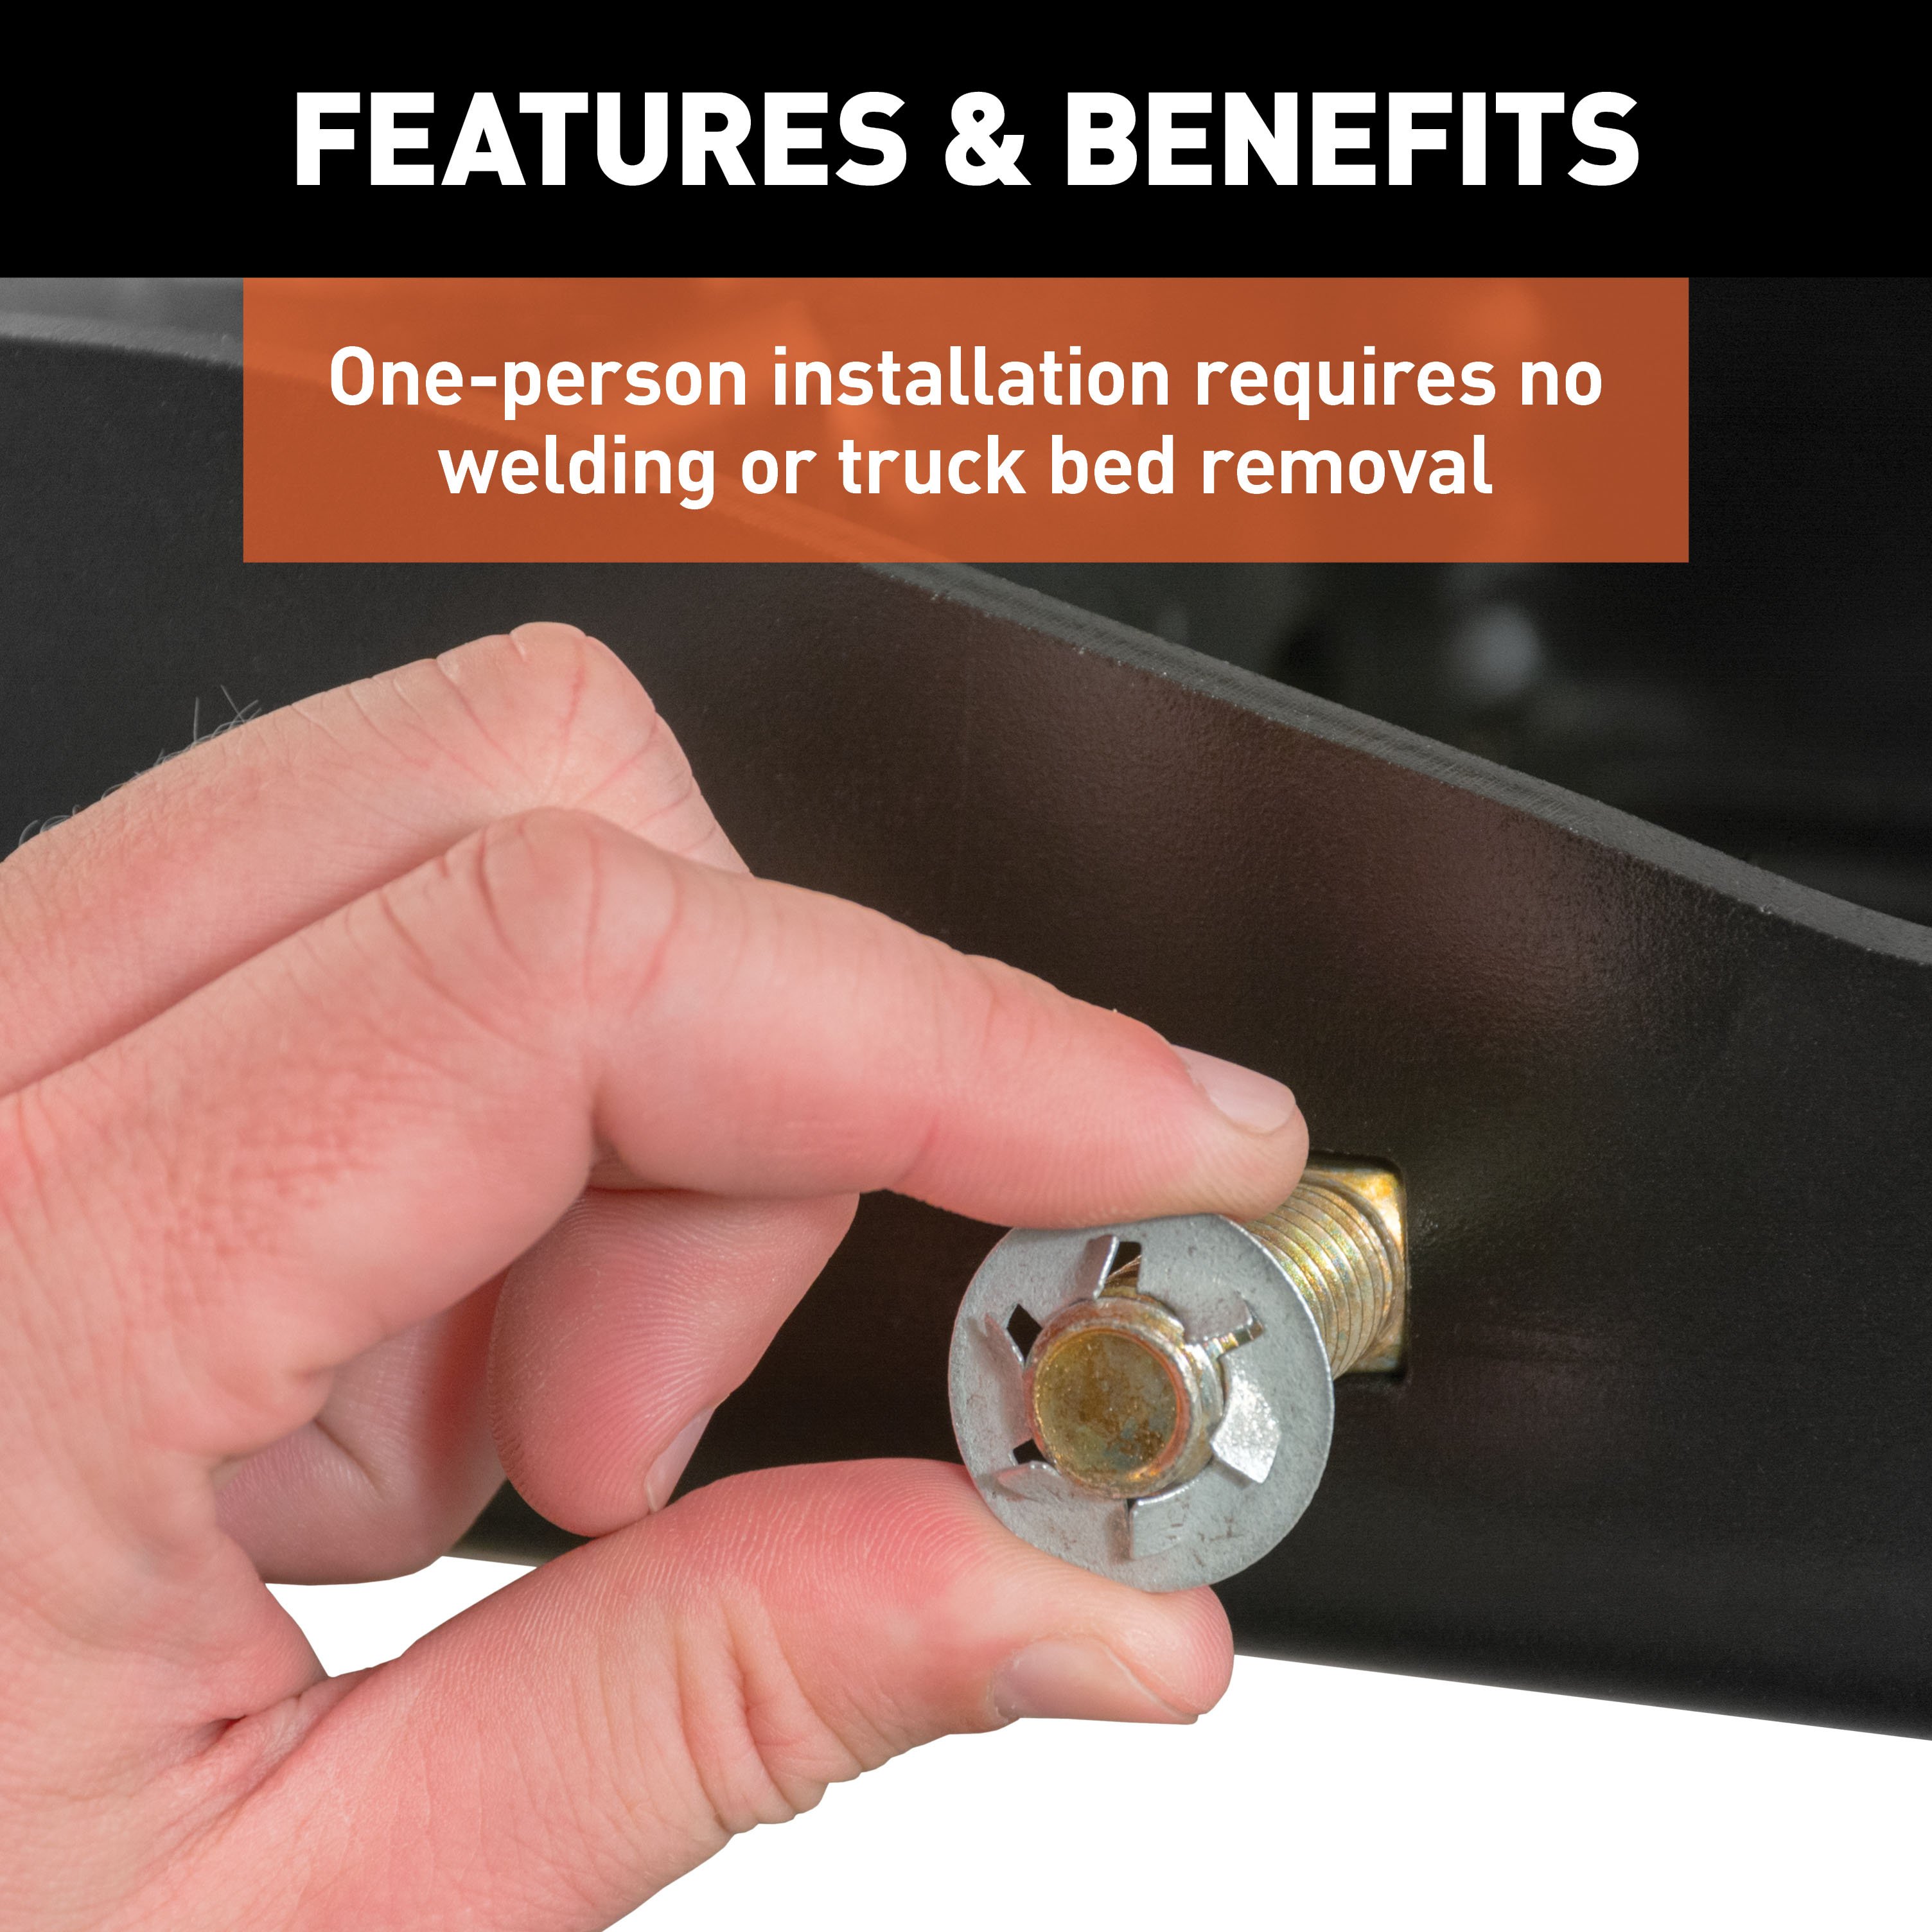
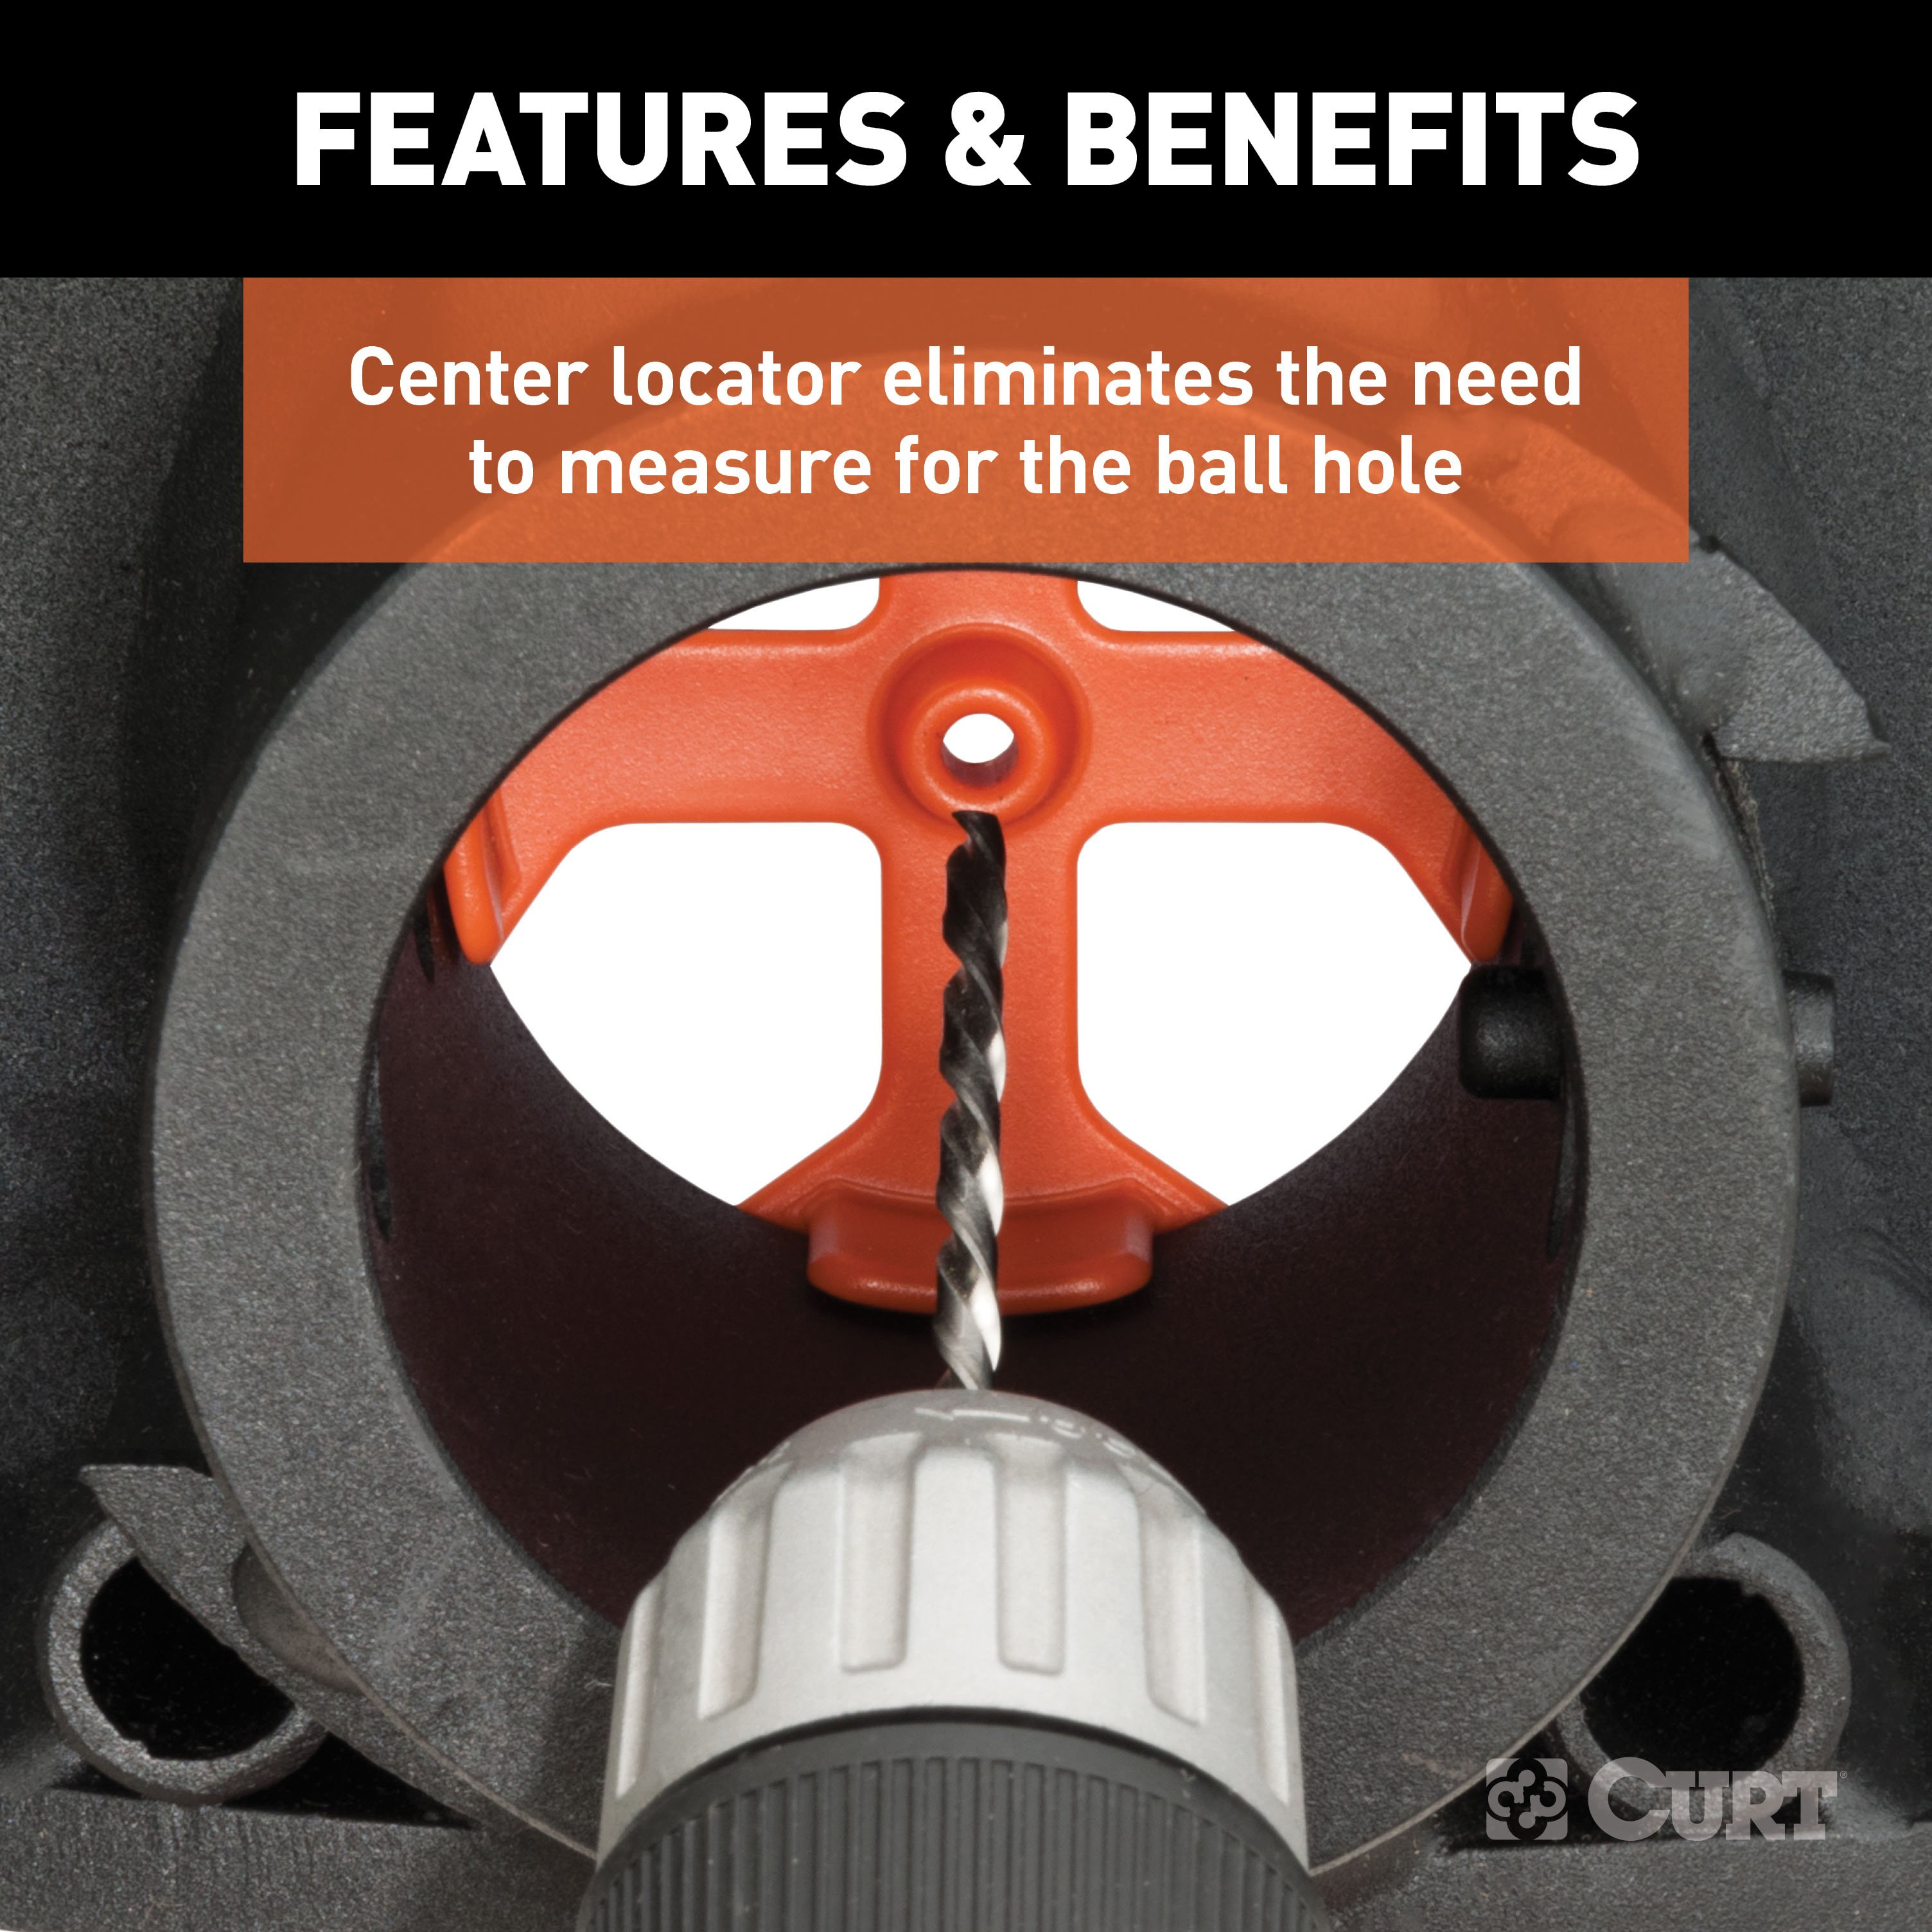
They've made the truck said to turn the world under its tires and the trailer that moves mountains in a day. But what about the hitch powerful enough to connect the two? The CURT Double Lock EZr gooseneck hitch boasts easier installation, easier operation and 30,000 lbs. of towing capacity to make towing that oversize gooseneck trailer look easy. To make things even easier, this gooseneck hitch kit includes both the under-bed gooseneck hitch and the vehicle-specific installation brackets. The combined kit makes it simple to get your truck ready for towing by eliminating the need to purchase two different parts. It includes the #60619 gooseneck hitch and the #60648 installation brackets to fit certain years of the Chevy Silverado or GMC Sierra 2500, 2500 HD, 3500 and 3500 HD (for a complete listing of compatibility, see the CURT application guide). Installation of the Double Lock EZr requires only one person, using retainer clips to keep bolts secure and the center section fully supported while mounting it into place. It also uses our patented center locator to eliminate meticulous measuring and ensure error-free drilling. The EZr also uses carriage bolts whenever possible for one-wrench tightening. Operation of the Double Lock EZr is simple and safe. It uses two locking pins and a 3/8" diameter handle to keep the gooseneck ball locked into the center section. The ball features a flip-over design that allows you to store it inside the receiver hole when not in use, keeping your truck bed completely free of obstructions. With a fortified center section, this hitch offers a gross trailer weight capacity up to 30,000 lbs. and a vertical load limit of 7,500 lbs., giving you the power you need to get the job done right. This CURT Double Lock EZr gooseneck hitch kit features a durable A-coat finish and includes a limited lifetime warranty. For safe, reliable towing you can count on, it is tested in accordance with SAE J2638 for safety.

CURT offers a variety of high-quality trailer hitches and accessories for select vehicle models. Find the perfect fit for your towing needs at TowUniverse.
CURT, a Lippert brand, offers a complete line of towing products and is the leading manufacturer of custom-fit trailer hitches. We offer the broadest selection of custom-fit hitches, and each one is designed, welded, and coated in Wisconsin.
CURT is also a leader in flat towing products, as well as 5th wheel, gooseneck, and weight distribution hitches, ball mounts, electrical components, cargo solutions, and other towing accessories.
For everything from passenger cars and vans to full-size pickups and SUVs, CURT is 'The First Name in Towing Products®.'
Experts available to answer your questions
Call 888-634-9494The CURT 60681 Double Lock EZr Gooseneck Hitch, 2-5/16-In. Flip-Over Ball 30K, Fits Select Chevrolet Silverado, GMC Sierra 2500, 3500 HD (Part #BKDK60681) fits 2001-2004 Chevrolet Silverado 2500 models. The 2010 model year is the last year covered by this part number. For newer models, check for an updated version.
Yes, the CURT 60681 Double Lock EZr Gooseneck Hitch, 2-5/16-In. Flip-Over Ball 30K, Fits Select Chevrolet Silverado, GMC Sierra 2500, 3500 HD (Part #BKDK60681) is designed to fit the 2001-2004 Chevrolet Silverado 2500.
The CURT 60681 Double Lock EZr Gooseneck Hitch, 2-5/16-In. Flip-Over Ball 30K, Fits Select Chevrolet Silverado, GMC Sierra 2500, 3500 HD (Part #BKDK60681) fits the following vehicles: 2001-2004 Chevrolet Silverado 2500; 2001-2010 Chevrolet Silverado 2500 HD; 2007 Chevrolet Silverado 2500 HD Classic; 2001-2006 Chevrolet Silverado 3500; 2007 Chevrolet Silverado 3500 Classic; 2007-2010 Chevrolet Silverado 3500 HD; 2001-2004 GMC Sierra 2500; 2001-2010 GMC Sierra 2500 HD; 2007 GMC Sierra 2500 HD Classic; 2001-2006 GMC Sierra 3500; 2007 GMC Sierra 3500 Classic; 2007-2010 GMC Sierra 3500 HD. Always verify your specific year, make, and model before ordering.
The CURT 60681 Double Lock EZr Gooseneck Hitch, 2-5/16-In. Flip-Over Ball 30K, Fits Select Chevrolet Silverado, GMC Sierra 2500, 3500 HD (Part #BKDK60681) Drilling is not required for installation. Typical installation time is . Basic hand tools are typically all you need.
Yes. The 60648 subkit is designed for 99-07 Chevy/GMC 1500 & 2500LD Silverado/Sierra with classic body style, all bed lengths. Verify your truck has the classic body style (not new body) and is within the 1999-2007 model year range.
Yes. The 60648 subkit is compatible with 01-10 Chevy/GMC 2500HD & 3500 Silverado/Sierra in both classic and new body styles, all bed lengths. Your 2008 2500HD falls within this range.
Yes, the 60648 subkit is compatible with all bed lengths. However, on short bed models you must check for adequate turning clearance between the front of all trailers and the truck cab before towing. Use the clearance calculation formula provided in the manual to verify the trailer will not interfere with the cab during turns.
No. The 60648 subkit installation requires no drilling. The manual explicitly states "NO DRILLING REQUIRED" on page 1. However, the 60619 gooseneck hitch assembly (which is installed after the subkit) does require drilling.
Yes. The manual states "LOWER SPARE TO EASE INSTALL" on page 1, and step 1 of the installation instructions requires you to remove the spare tire and heat shield before beginning installation.
Yes. The heat shield under the bed floor needs to be removed or a section cut out for the hitch assembly to be installed. If you choose to cut rather than remove it, trim the heat shield from in front of the bed support over the axle to the back of the bed support near the front of the wheel well.
Possibly. The manual warns that brake, fuel, and electrical lines may need to be loosened or repositioned to provide clearance for new hardware. Inspect these lines during installation and reposition them as needed to avoid pinching or damage.
The subkit includes: 2× 1/2-13 x 4 1/8 x 6 3/4 x 1 1/2 SQ U-bolts (CM-1201-UBS); 2× 1/2-13 x 4 3/4 x 8 3/4 x 2 SQ U-bolts (CM-1202-UBS); 2× 5/8-11 hex flange nuts; 2× 5/8-11 x 1 3/4 GR8 carriage bolts; 2× CM-SP9 spacers; 6× 1/2-13 x 1 1/2 GR8 hex bolts; 6× 1/2 conical toothed washers; 4× 1/2-13 x 1 1/2 GR8 carriage bolts; 8× HFN 1213 GR8 hex flange nuts; 1× CM-SP12 spacer; 4× CM-SP13 spacers; 2× 3/4 flat washers; 2× 3/4-10 x 2 1/2 hex head bolts; 2× 3/4-10 hex flange nuts; 2× 60648-SP obround spacers; 2× CM-11-CTM cable tie mounts; 2× CM-116415-CT cable ties; 2× 1/2 pushnut bolt retainers; 1× 1/2 fishwire; and 1× CM-EBB electrical box bracket.
1. Remove spare tire and heat shield; remove or cut out heat shield under bed floor. 2. Install rear crossarm between frame and truck bed above passenger side rear tire, then rotate vertically with holes toward bottom. 3. Install front crossarm between frame and truck bed above passenger side rear tire, rotate vertically with holes toward bottom, notching bed flange if needed. 4. Install center section by raising it above fuel tank from beneath truck; use optional pushnut bolt retainers if desired; thread fasteners finger tight. 5. Install sideplates, aligning large holes with frame slot; relocate electrical box on driver side frame (2500/3500 new body only) using supplied bracket. 6. Attach sideplate flanges to crossarms using hex bolts, conical washers, carriage bolts, spacers and flange nuts; thread finger tight. 7. Attach sideplates to frame using U-bolts and hex bolts; thread finger tight. 8. Torque all fasteners in specified order. 9. Optionally trim sideplate U-bolts for handle rod clearance.
The 1/2 fishwire is included to aid in the placement of the carriage bolt and spacer that attach the center section to the front crossarm above the driver side fuel tank. Thread the bolt and spacer through the fishwire to guide them into position.
The two optional 1/2 pushnut bolt retainers (item 18) are included to provide a "helping hand" during center section installation. If desired, insert two 1/2 x 1 1/2 carriage bolts through the centermost slots on the front side of the center section, angle the serrations in the bolt retainers away from the center section, and push the retainers onto the bolts using one of the included spacers as a tool. This helps support the center section during installation.
Position the U-bolt from the inside of the truck frame. Be careful not to damage or pinch the wiring harness or brake lines. For 3/4 and 1 ton applications, use the large U-bolt (CM-1202-UBS) to span the truck frame. For 1/2 ton and 3/4 ton light duty trucks, use the smaller U-bolt (CM-1201-UBS). Attach to the sideplate using two 1/2 flange nuts, threaded finger tight only at this stage.
Use the large U-bolt (CM-1202-UBS, 1/2-13 x 4 3/4 x 8 3/4 x 2 SQ) for 3/4 ton and 1 ton applications. Use the smaller U-bolt (CM-1201-UBS, 1/2-13 x 4 1/8 x 6 3/4 x 1 1/2 SQ) for 1/2 ton and 3/4 ton light duty trucks.
For 2007 and up 2500 and 3500 new body styles, remove the electrical box from the inside of the driver side frame and attach it using the supplied CM-EBB electrical box bracket. Attach the bracket to the frame using the 3/4 bolt that also attaches the sideplate, using the obround spacers (60648-SP) provided to fill the slot in the frame.
Torque all 1/2 inch fasteners to 110 lb-ft, all 5/8 inch fasteners to 210 lb-ft, and all 3/4 inch fasteners to 380 lb-ft. When torquing U-bolts, tighten them slowly alternating between the top and bottom of the U-bolt until equally tightened to a maximum of 40 ft-lbs.
Torque in three stages: First, torque the center section to the front and rear crossarms. Second, torque the sideplates to the truck frame on both sides (alternating U-bolt top and bottom until equally tightened to maximum 40 ft-lbs). Third, torque the sideplate flanges to the front and rear crossarms.
Yes. Before installing crossarms, run a 1/2-13 bolt or 1/2-13 tap through the crossarm holes to remove any powder or debris. This ensures clean threads and proper fastener seating.
The center locator (item 2 in the 60619 parts list) is a trim shield that helps guide the center section installation. It must be inserted into the center section prior to installation. It is removed after drilling the 4-inch hole from above the truck bed.
Yes. If desired, you can trim the sideplate U-bolts after installation completion to provide additional handle rod clearance.
Possibly. When installing the front crossarm, notch the bed flange as required if needed. The manual does not specify all cases where notching is necessary, so inspect the fit during installation and notch only if the crossarm does not fit properly.
Yes. The 60619 gooseneck hitch assembly is compatible with Toyota, Ford, Chevrolet/GMC, and RAM trucks, as shown in the vehicle selector on page 7 of the manual. However, the 60648 subkit is specific to Chevy/GMC Silverado/Sierra models. Consult the 60619 installation manual for complete compatibility details for your specific vehicle.
Do not exceed your vehicle manufacturer's recommended towing capacity. The manual repeatedly warns "DO NOT EXCEED RECOMMENDED VEHICLE TOWING WEIGHT" and "DO NOT EXCEED VEHICLE MANUFACTURER'S RECOMMENDED TOWING CAPACITY." Consult your truck's owner manual or manufacturer for the specific towing weight limit for your model.
On two-wheel drive trucks, you must perform a clearance check when the truck is both loaded and unloaded to verify the inverted ball will not interfere with the top of the differential. This is especially important when hauling heavy loads. Repeat this check under both conditions before towing.
Use the clearance calculation formula on page 5: (Cab to ball center) minus (1/2 trailer width) equals minimum clearance. If the trailer has a coupler overhang, use: [(Cab to ball center) minus (coupler overhang)] minus (1/2 trailer width) equals minimum clearance. If the result is positive, the trailer will not interfere with the cab. If negative, the trailer will interfere. The manual provides examples and a worksheet to complete your calculation.
Before towing for the first time, verify: adequate turning clearance between truck cab/box corners and trailer; minimum 6 inches clearance between bottom of trailer overhang and top of box sides; inverted gooseneck ball will not interfere with differential top when hauling heavy loads (especially important on two-wheel drive models); all hardware is torqued to proper specification; safety chain length has only enough slack for full turning without interference; trailer attachments to safety chain loops are secure; all fasteners are tight and structural components are sound; trailer tires are inflated to proper specification; trailer lights, electric brakes, and breakaway switches are working properly.
Before towing every time: attach trailer securely to both safety chain loops; ensure handle is in lock position and locking pin passes completely through ball and both walls of hitch cylinder; ensure trailer weight does not exceed any part of the towing system; verify load is heavier toward front of trailer without exceeding hitch tongue weight; ensure trailer load is centered left to right and secured to prevent shifting; never load the heaviest part of trailer behind the axle(s); check trailer tires are inflated to proper specification; verify trailer lights, electric brakes, and breakaway switches are working properly.
The handle must be in the lock position for towing. Never operate the vehicle with the handle in the unlocked position. To lock, rotate the handle counterclockwise until the locking pin snaps back into position. Confirm the locking pin passes completely through the ball and both walls of the hitch cylinder before towing.
Periodically check the gooseneck hitch to ensure that all fasteners are tight and that all structural components are sound. The manual does not specify an exact interval, but recommends regular inspection. Do not tow a trailer with worn or damaged parts.
Keep the gooseneck ball, cylinder, and trailer coupler lubricated regularly using silicone spray or equivalent to prevent wear and rust. Keep the hitch assembly and trailer coupler free of dirt and other foreign debris. When the gooseneck ball is in the inverted position, insert the supplied rubber hole cover to keep out dirt and debris.
Keep the gooseneck ball, cylinder, and trailer coupler lubricated regularly with silicone spray or equivalent to prevent wear and rust. Keep the hitch assembly and trailer coupler free of dirt and debris. Periodically check the hitch to ensure all fasteners are tight and all structural components are sound. When the ball is in the inverted position, insert the supplied rubber hole cover to keep out dirt and debris. Do not tow with worn or damaged parts.
1. Remove vacuum canister from OEM mount. 2. Clean surface with rubbing alcohol. 3. Apply two cable tie mounts (CM-11-CTM) approximately 3 inches apart and 5-6 inches lower than original location. 4. Insert cable tie (CM-116415-CT) into mounts but do not fasten. 5. Position vacuum canister over cable tie and fasten in new location. The new location should be 5.0 to 6.0 inches lower than the original location.
The 60648 subkit weighs 90 lbs.
Curt Manufacturing warrants the product to be free of defects in material and/or workmanship at the time of retail purchase by the original purchaser. If the product is found to be defective, Curt will repair or replace it at their option when returned prepaid with proof of purchase. Alteration, misuse, or improper installation voids the warranty. Curt's liability is limited to repair or replacement of defective products and excludes liability for incidental or consequential loss or damage. Failure to properly maintain and regularly inspect the product according to instructions also voids the warranty.
The 60648 subkit fits 99-07 Chevy/GMC 1500 & 2500LD Silverado/Sierra (classic body, all beds) and 01-10 Chevy/GMC 2500HD & 3500 Silverado/Sierra (classic & new body, all beds). Verify your model year and body style.
Yes. Remove the spare tire and heat shield before installation. The heat shield under the bed floor must also be removed or cut out for the hitch assembly to fit.
Torque 1/2-inch fasteners to 110 lb-ft, 5/8-inch fasteners to 210 lb-ft, and 3/4-inch fasteners to 380 lb-ft. U-bolts tighten to maximum 40 ft-lbs, alternating top and bottom. Torque in order: center section to crossarms, sideplates to frame, sideplate flanges to crossarms.
Do not exceed your vehicle manufacturer's recommended towing capacity. Consult your truck's owner manual for the specific limit.
On short bed models, verify adequate turning clearance between the front of all trailers and the truck cab using the clearance calculation formula on page 5. If the result is negative, the trailer will interfere with the cab.
On two-wheel drive trucks, verify the inverted ball will not interfere with the top of the differential when the truck is both loaded and unloaded. This check is especially important when hauling heavy loads.
Lubricate the gooseneck ball, cylinder, and trailer coupler regularly with silicone spray. Keep the hitch and coupler free of dirt and debris. Periodically check all fasteners are tight and structural components are sound. Insert the rubber hole cover when the ball is inverted.
Some models may require the use of pliers to bend the metal flange below the bed outward, allowing the handle to move without interference. If the plastic wheel-well cover also interferes, trim it as needed for reinstallation and access to the handle.
If needed, add or remove a 3/8-inch washer (item 14) to ensure proper pull length of the locking pin. This adjustment is made when securing the handle with the hex head flange screw and nylock nut.
If the groove on the gooseneck ball and the pin on the cylinder are not aligned, simply rotate the gooseneck ball until it drops into place. The ball should insert smoothly once the groove and pin are aligned.
Use the clearance calculation formula on page 5 to verify the trailer will not interfere with the cab. Calculate: (Cab to ball center) minus (1/2 trailer width) equals minimum clearance. If the trailer has a coupler overhang, use: [(Cab to ball center) minus (coupler overhang)] minus (1/2 trailer width). If the result is negative, the trailer will interfere. You may need to use a different trailer or adjust your turning radius.
Verify the inverted ball will not interfere with the top of the differential when the truck is both loaded and unloaded. If interference occurs, you may need to reduce the load weight, use a different hitch configuration, or consult with the manufacturer about alternative mounting options.
Before installing fasteners, run a 1/2-13 bolt or 1/2-13 tap through the crossarm holes to remove any powder or debris. This ensures clean threads and proper fastener seating.
Ensure the crossarm holes are clean by running a 1/2-13 bolt or tap through them to remove powder or debris. Verify you are using the correct fastener size and grade (GR8 where specified). Check that spacers are properly positioned. If fasteners still do not tighten, the holes may be stripped; consult the manufacturer.
25 compatible vehicles
| Year | Make & Model | Style | Notes |
|---|---|---|---|
| 2001 - 2004 | Chevrolet Silverado 2500 | — | No Drilling Required Installation Time - |
| 2001 - 2010 | Chevrolet Silverado 2500 HD | — | No Drilling Required Installation Time - |
| 2001 - 2006 | Chevrolet Silverado 2500 HD | — | Installation Time - No Drilling Required |
| 2007 | Chevrolet Silverado 2500 HD Classic | Crew Cab Pickup · 4-Door | No Drilling Required Installation Time - |
| 2007 | Chevrolet Silverado 2500 HD Classic | Extended Cab Pickup · 4-Door | No Drilling Required Installation Time - |
| 2007 | Chevrolet Silverado 2500 HD Classic | Standard Cab Pickup · 2-Door | Installation Time - No Drilling Required |
| 2001 - 2006 | Chevrolet Silverado 3500 | — | No Drilling Required Installation Time - |
| 2001 - 2005 | Chevrolet Silverado 3500 | — | Installation Time - No Drilling Required |
| 2007 | Chevrolet Silverado 3500 Classic | Crew Cab Pickup · 4-Door | Installation Time - No Drilling Required |
| 2007 | Chevrolet Silverado 3500 Classic | Extended Cab Pickup · 4-Door | No Drilling Required Installation Time - |
| 2007 | Chevrolet Silverado 3500 Classic | Standard Cab Pickup · 2-Door | No Drilling Required Installation Time - |
| 2007 - 2010 | Chevrolet Silverado 3500 HD | — | No Drilling Required Installation Time - |
| 2007 - 2010 | Chevrolet Silverado 3500 HD | — | Installation Time - No Drilling Required |
| 2001 - 2004 | GMC Sierra 2500 | — | No Drilling Required Installation Time - |
| 2003 - 2004 | GMC Sierra 2500 | — | Installation Time - No Drilling Required |
| 2001 - 2010 | GMC Sierra 2500 HD | — | No Drilling Required Installation Time - |
| 2007 | GMC Sierra 2500 HD Classic | Crew Cab Pickup · 4-Door | No Drilling Required Installation Time - |
| 2007 | GMC Sierra 2500 HD Classic | Extended Cab Pickup · 4-Door | No Drilling Required Installation Time - |
| 2007 | GMC Sierra 2500 HD Classic | Standard Cab Pickup · 2-Door | No Drilling Required Installation Time - |
| 2001 - 2006 | GMC Sierra 3500 | — | No Drilling Required Installation Time - |
| 2006 | GMC Sierra 3500 | — | Installation Time - No Drilling Required |
| 2007 | GMC Sierra 3500 Classic | Crew Cab Pickup · 4-Door | Installation Time - No Drilling Required |
| 2007 | GMC Sierra 3500 Classic | Extended Cab Pickup · 4-Door | No Drilling Required Installation Time - |
| 2007 | GMC Sierra 3500 Classic | Standard Cab Pickup · 2-Door | No Drilling Required Installation Time - |
| 2007 - 2010 | GMC Sierra 3500 HD | — | No Drilling Required Installation Time - |
No reviews have been added for this product.
