
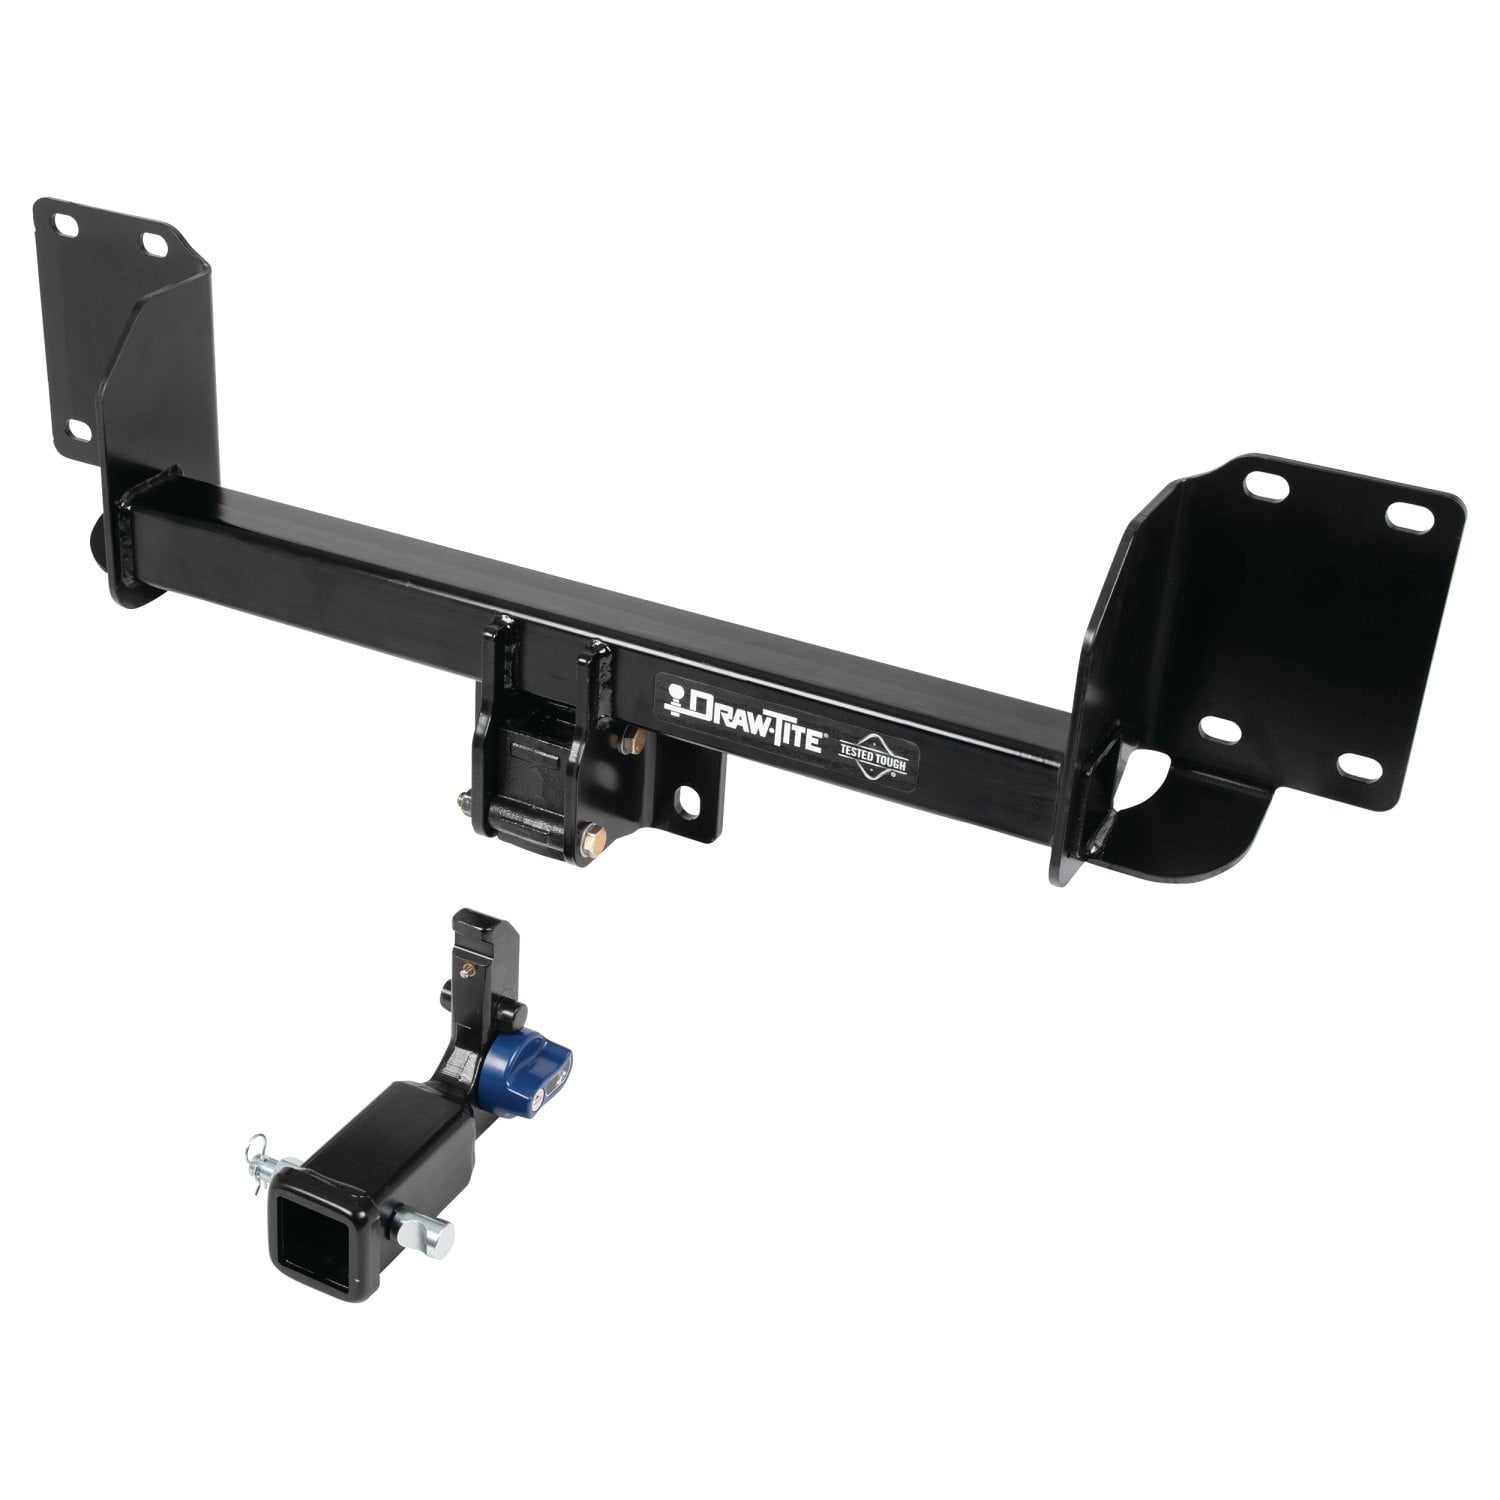
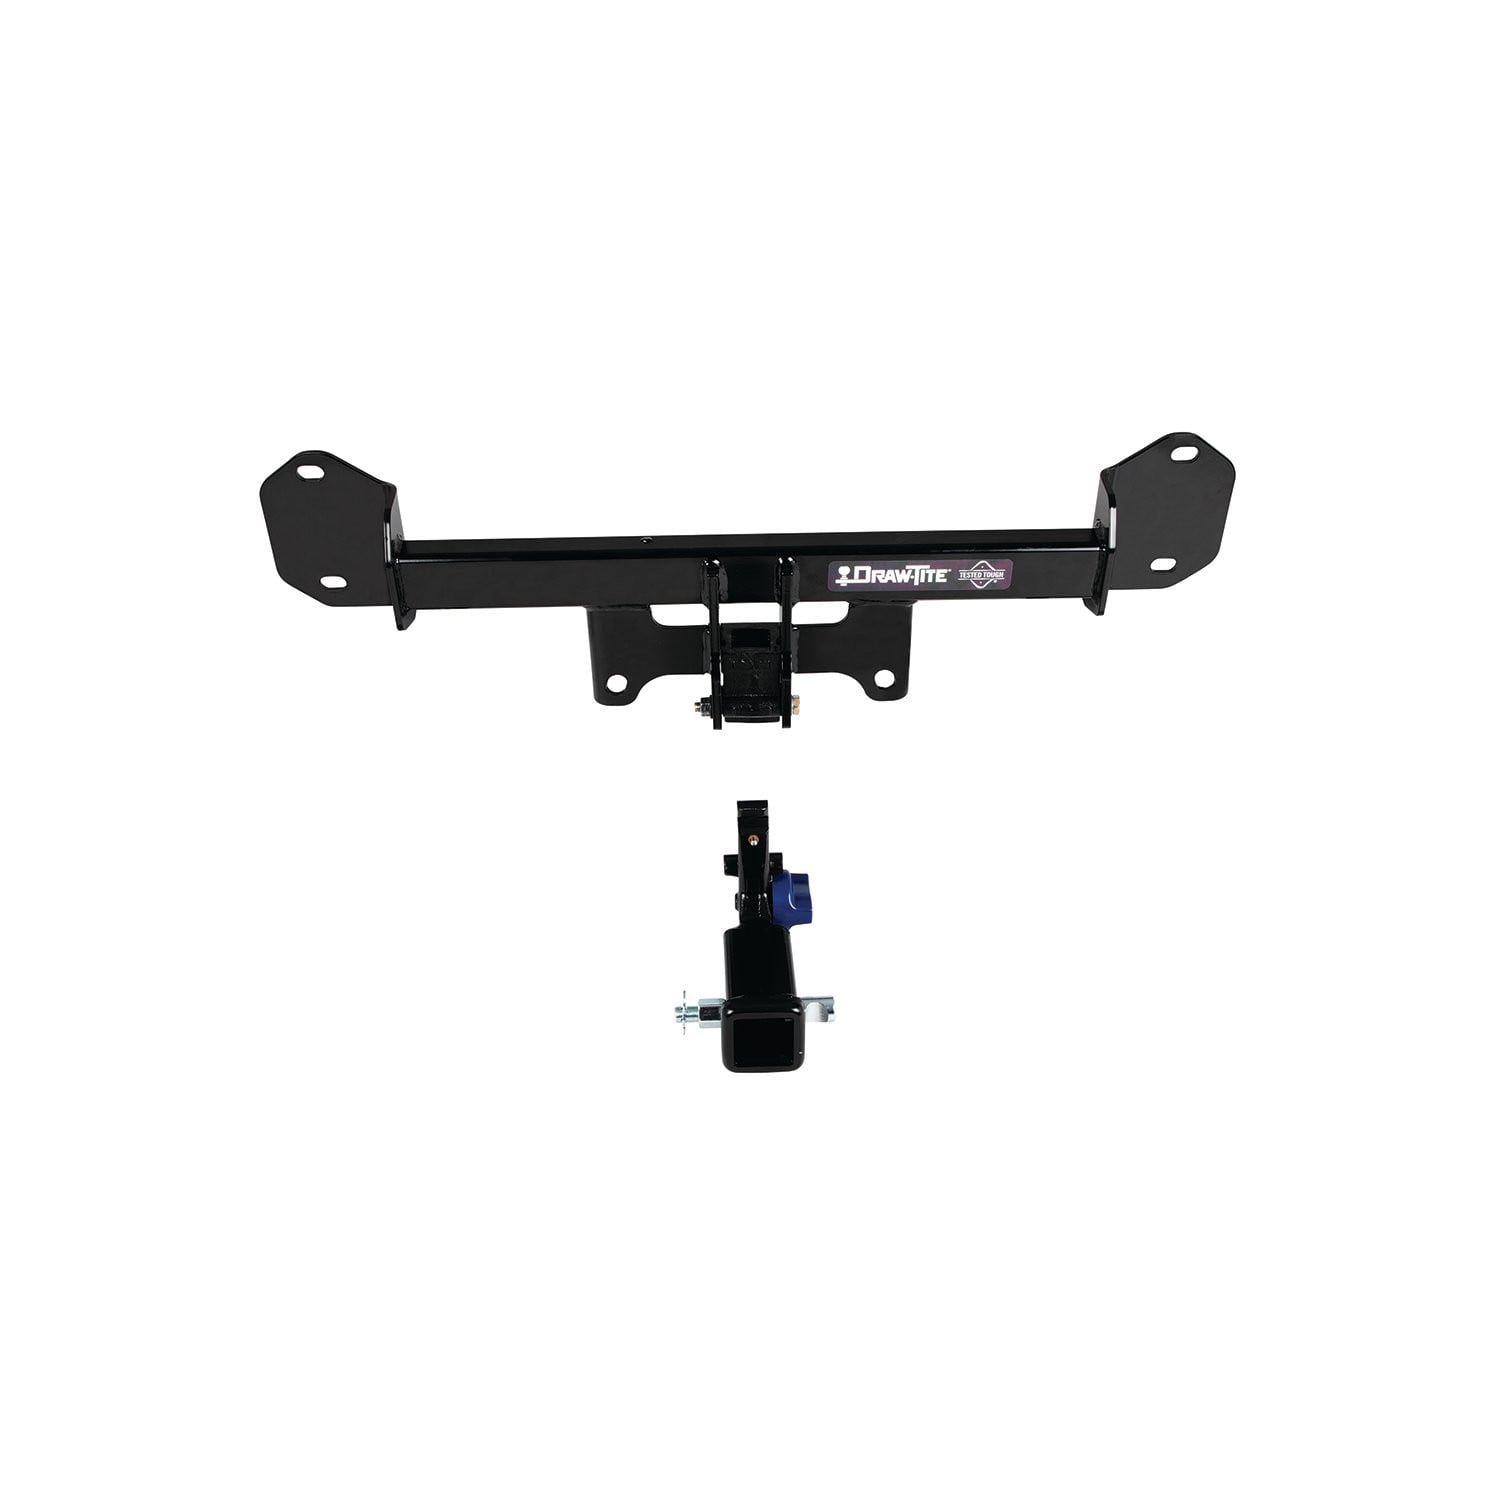
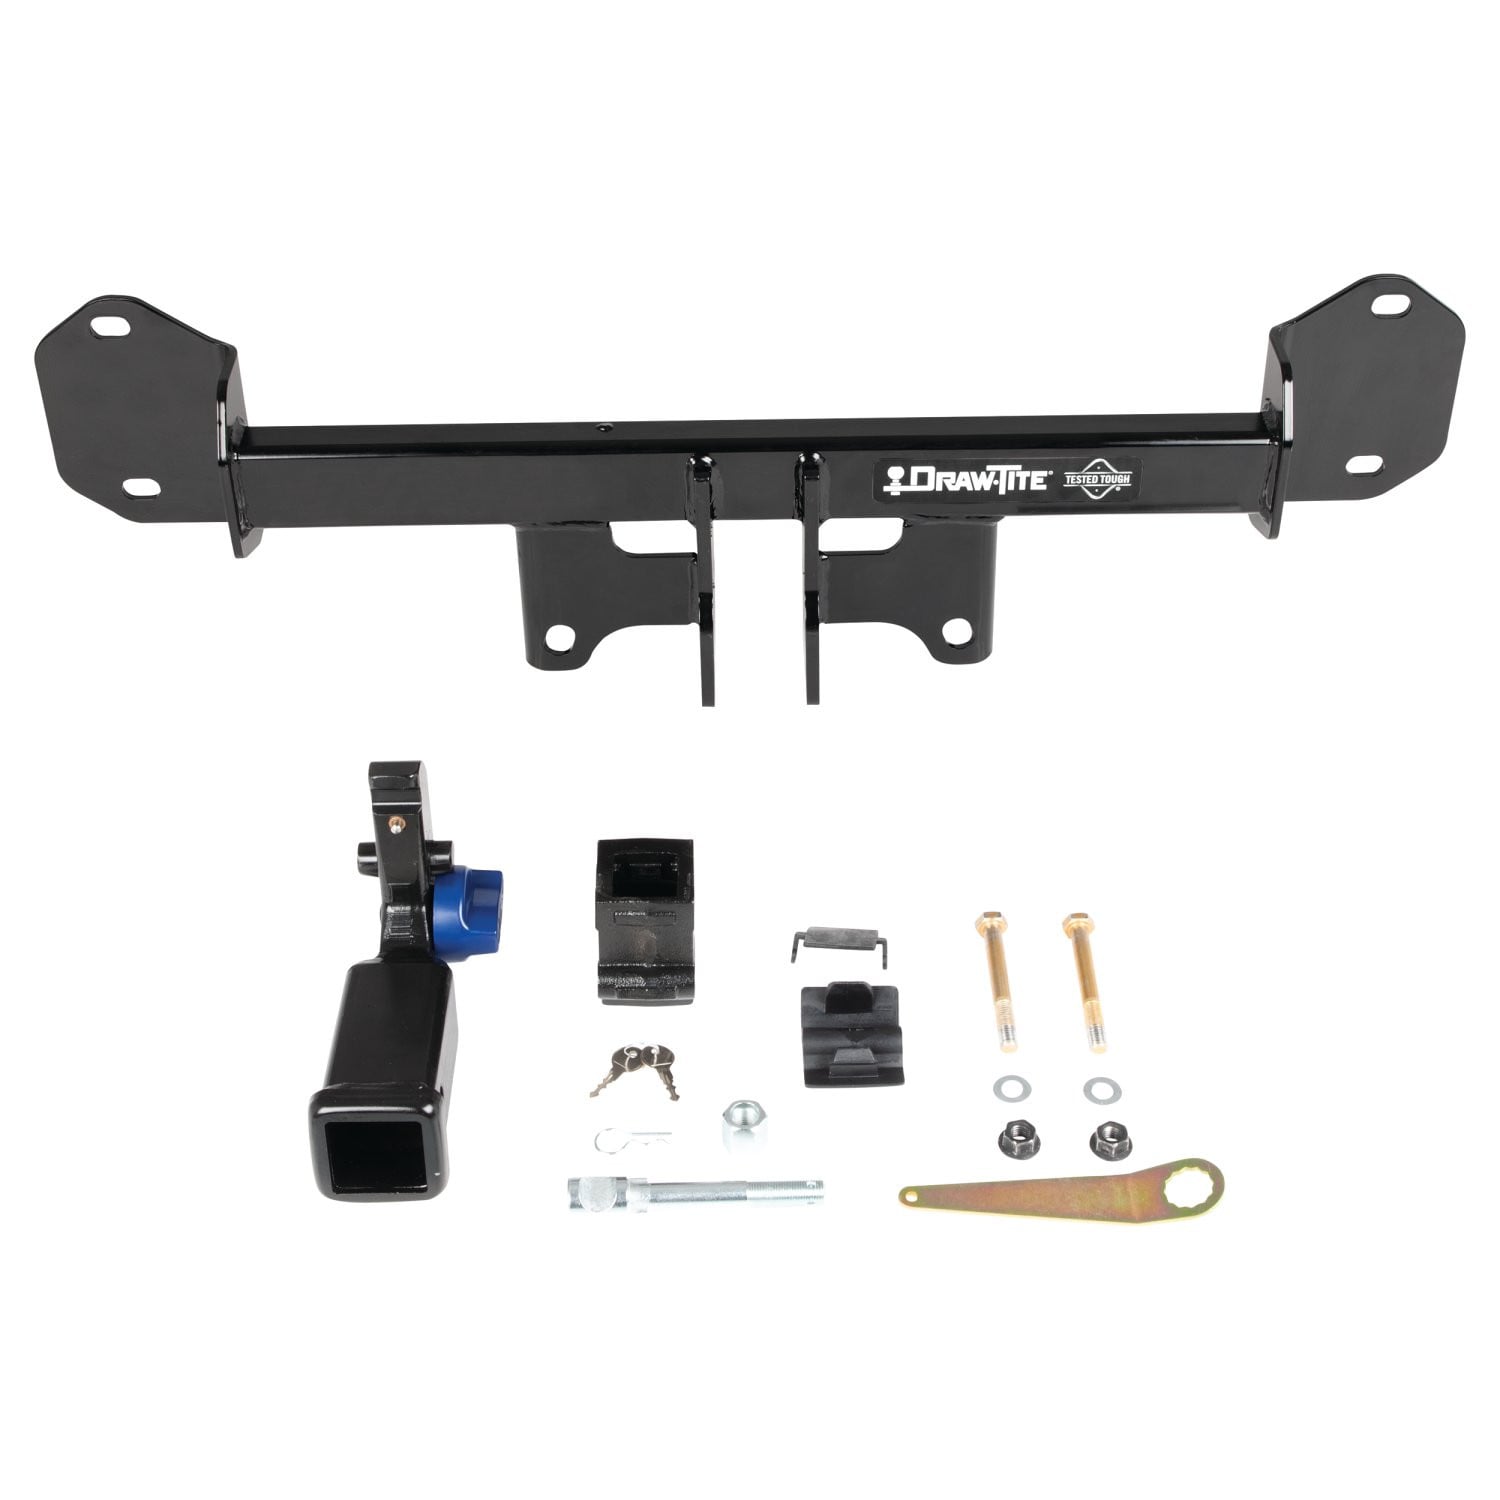
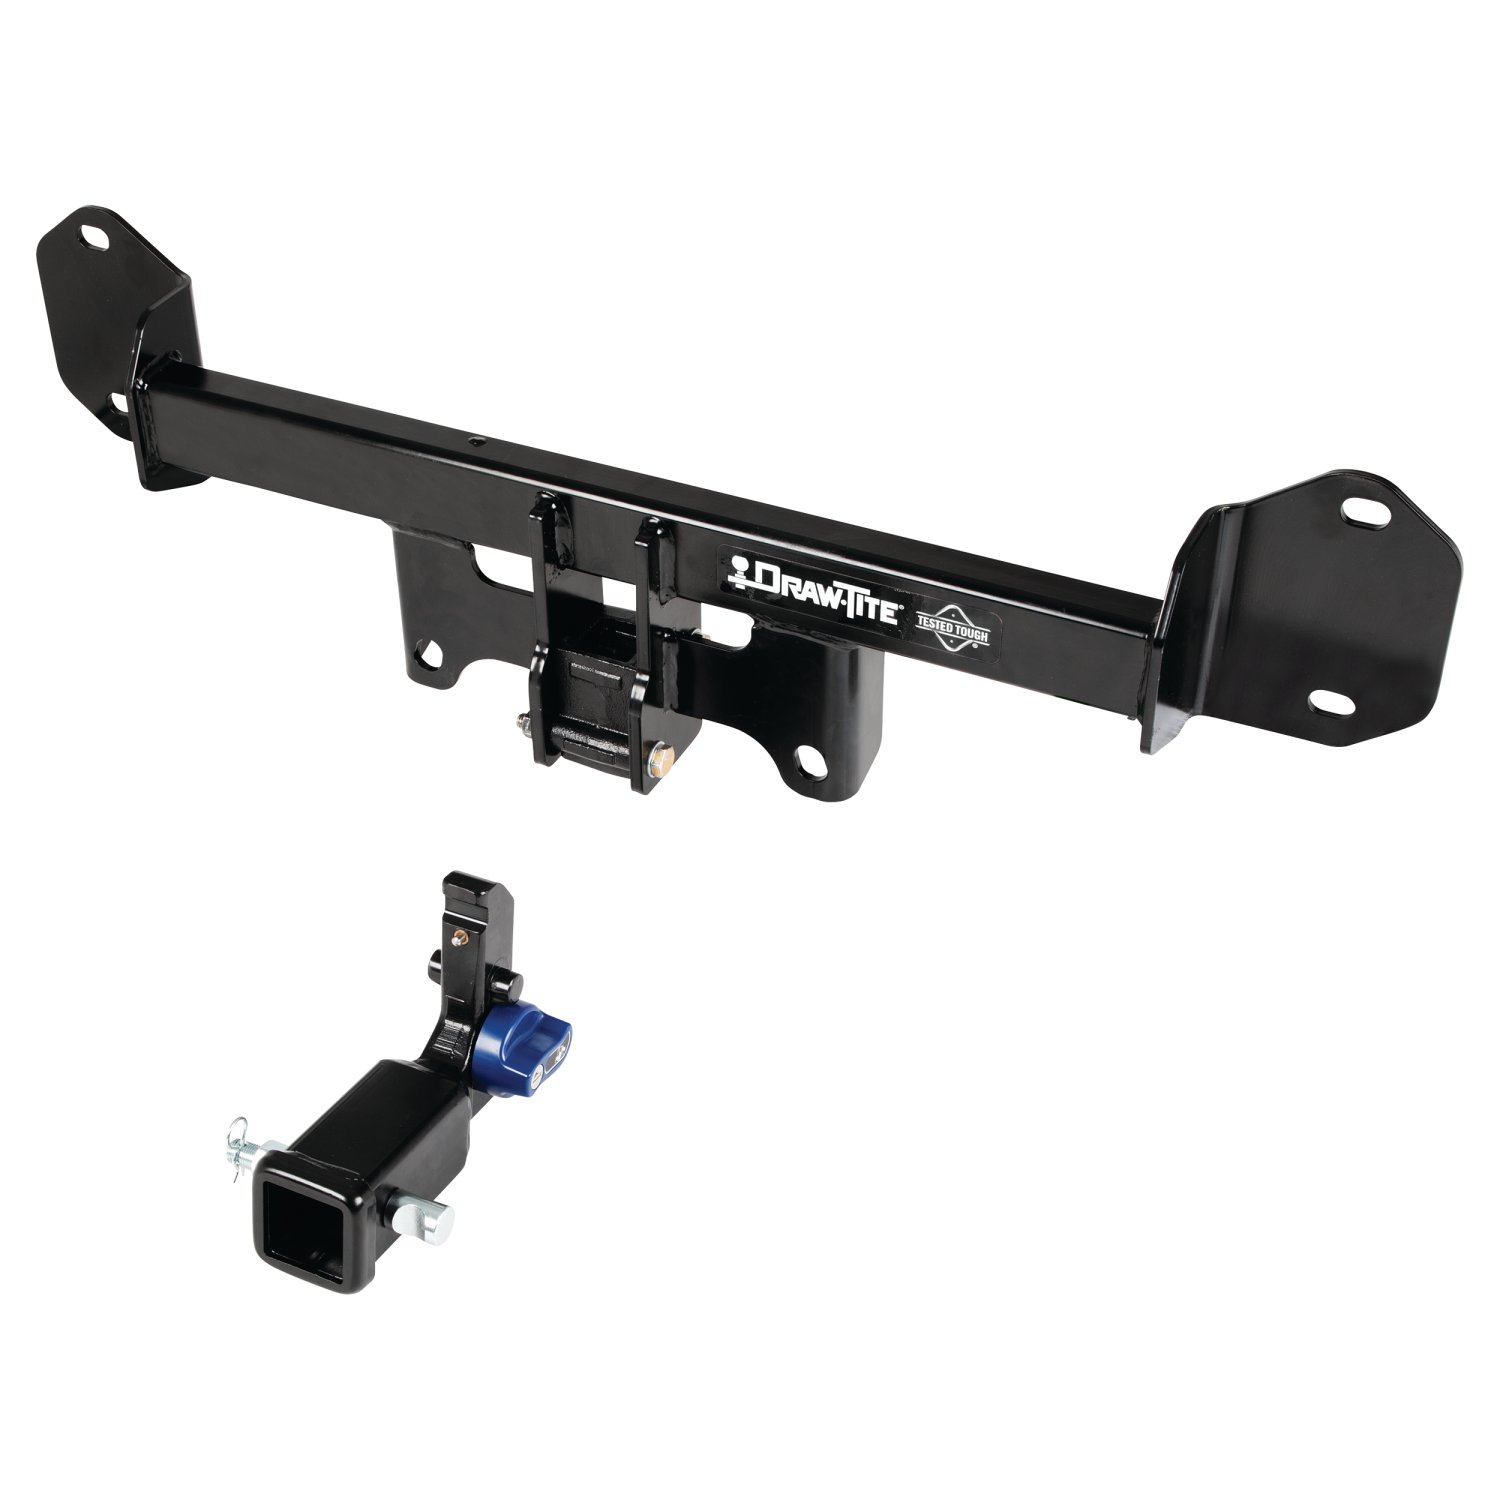
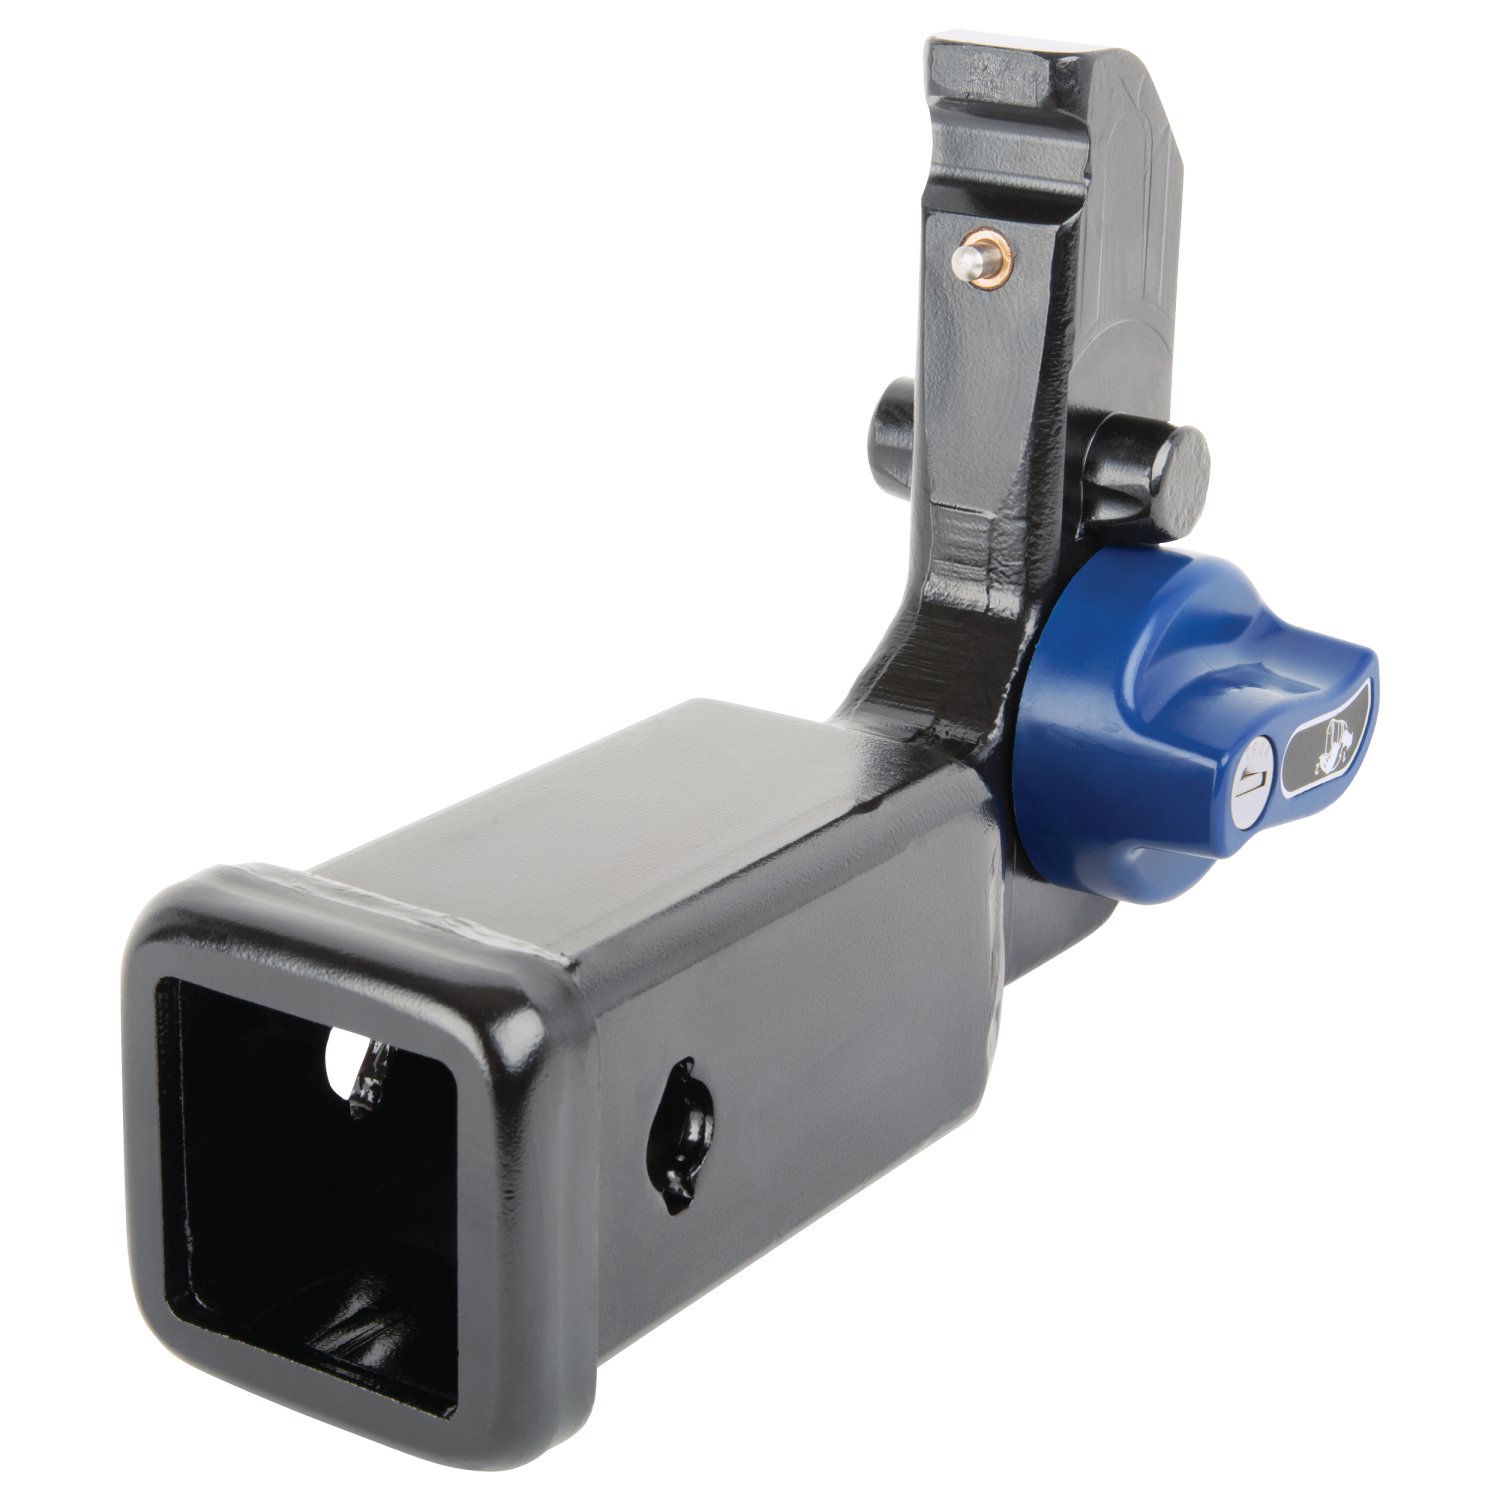
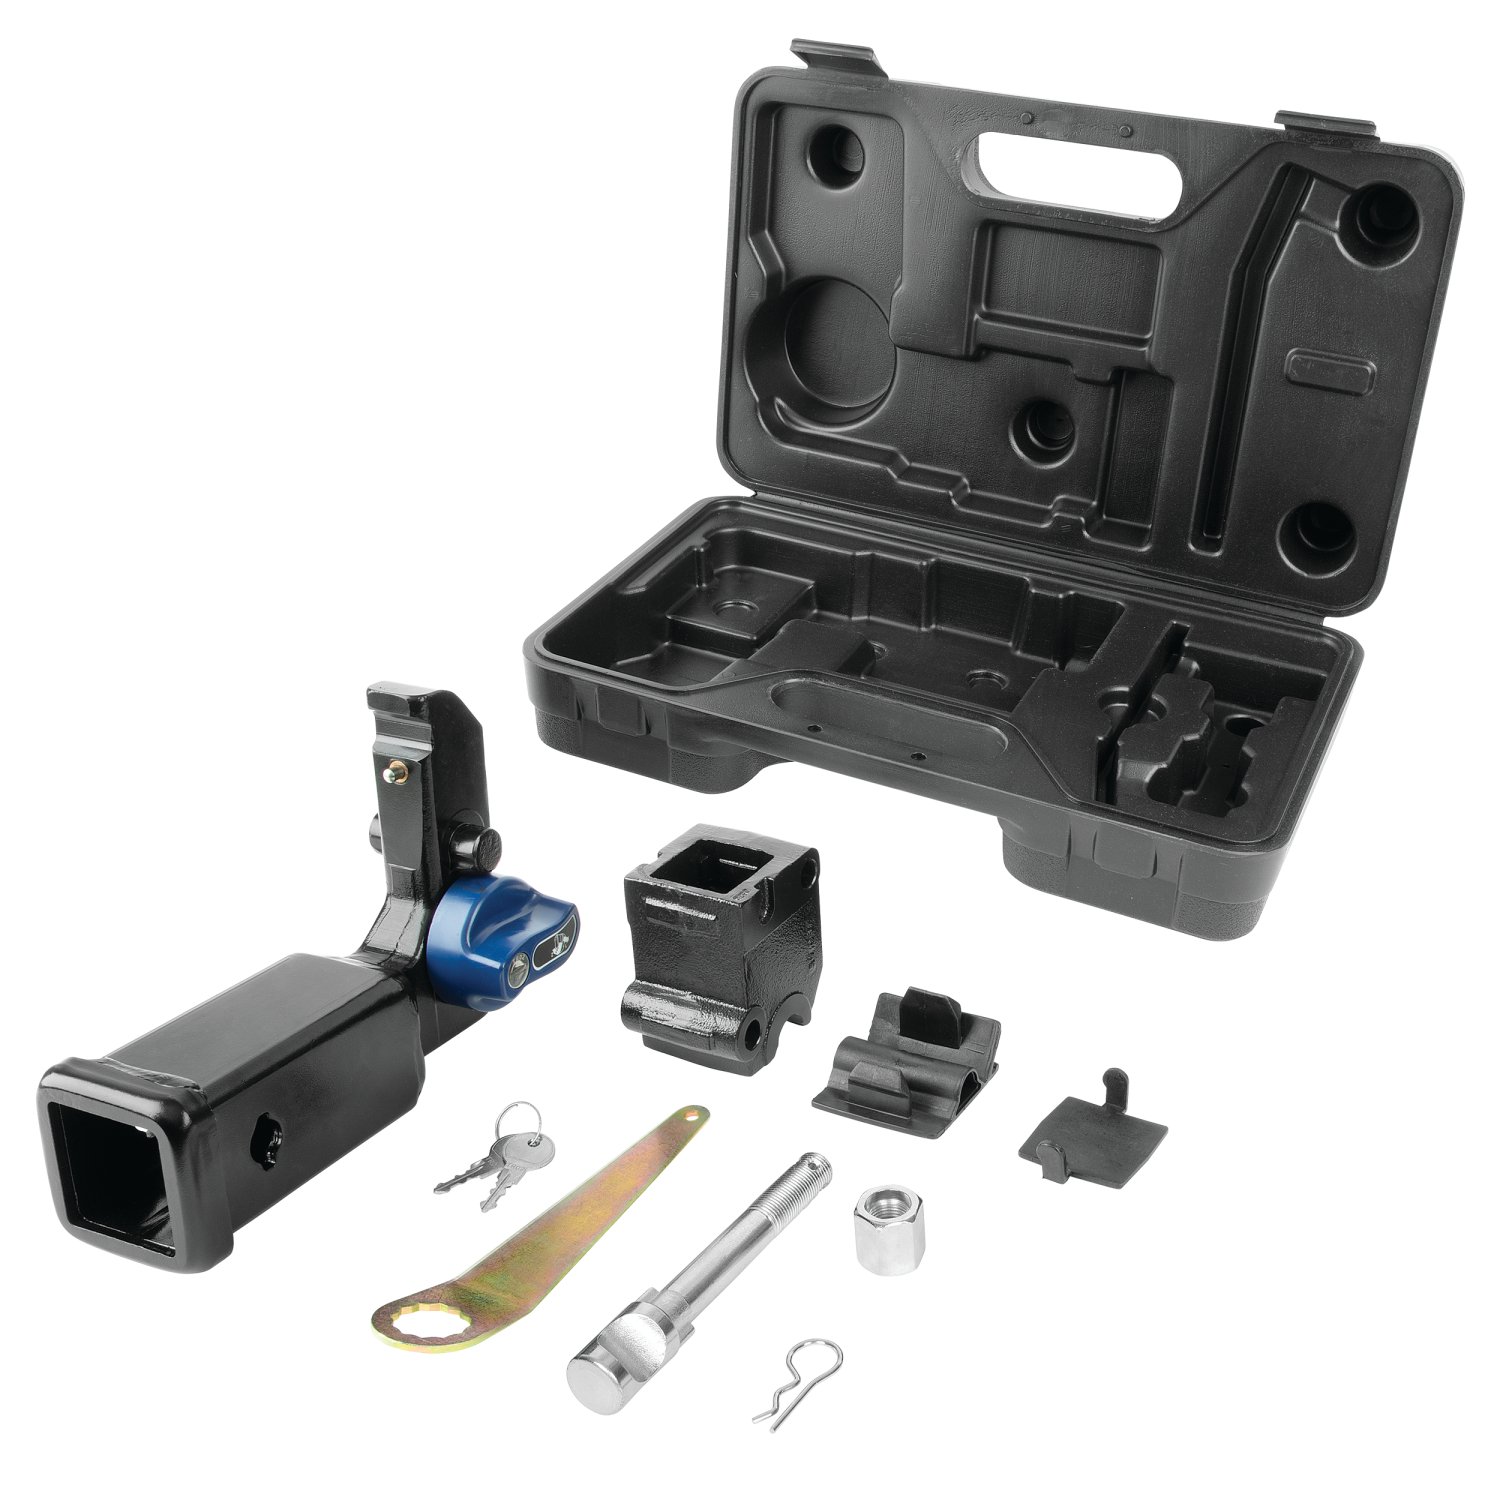
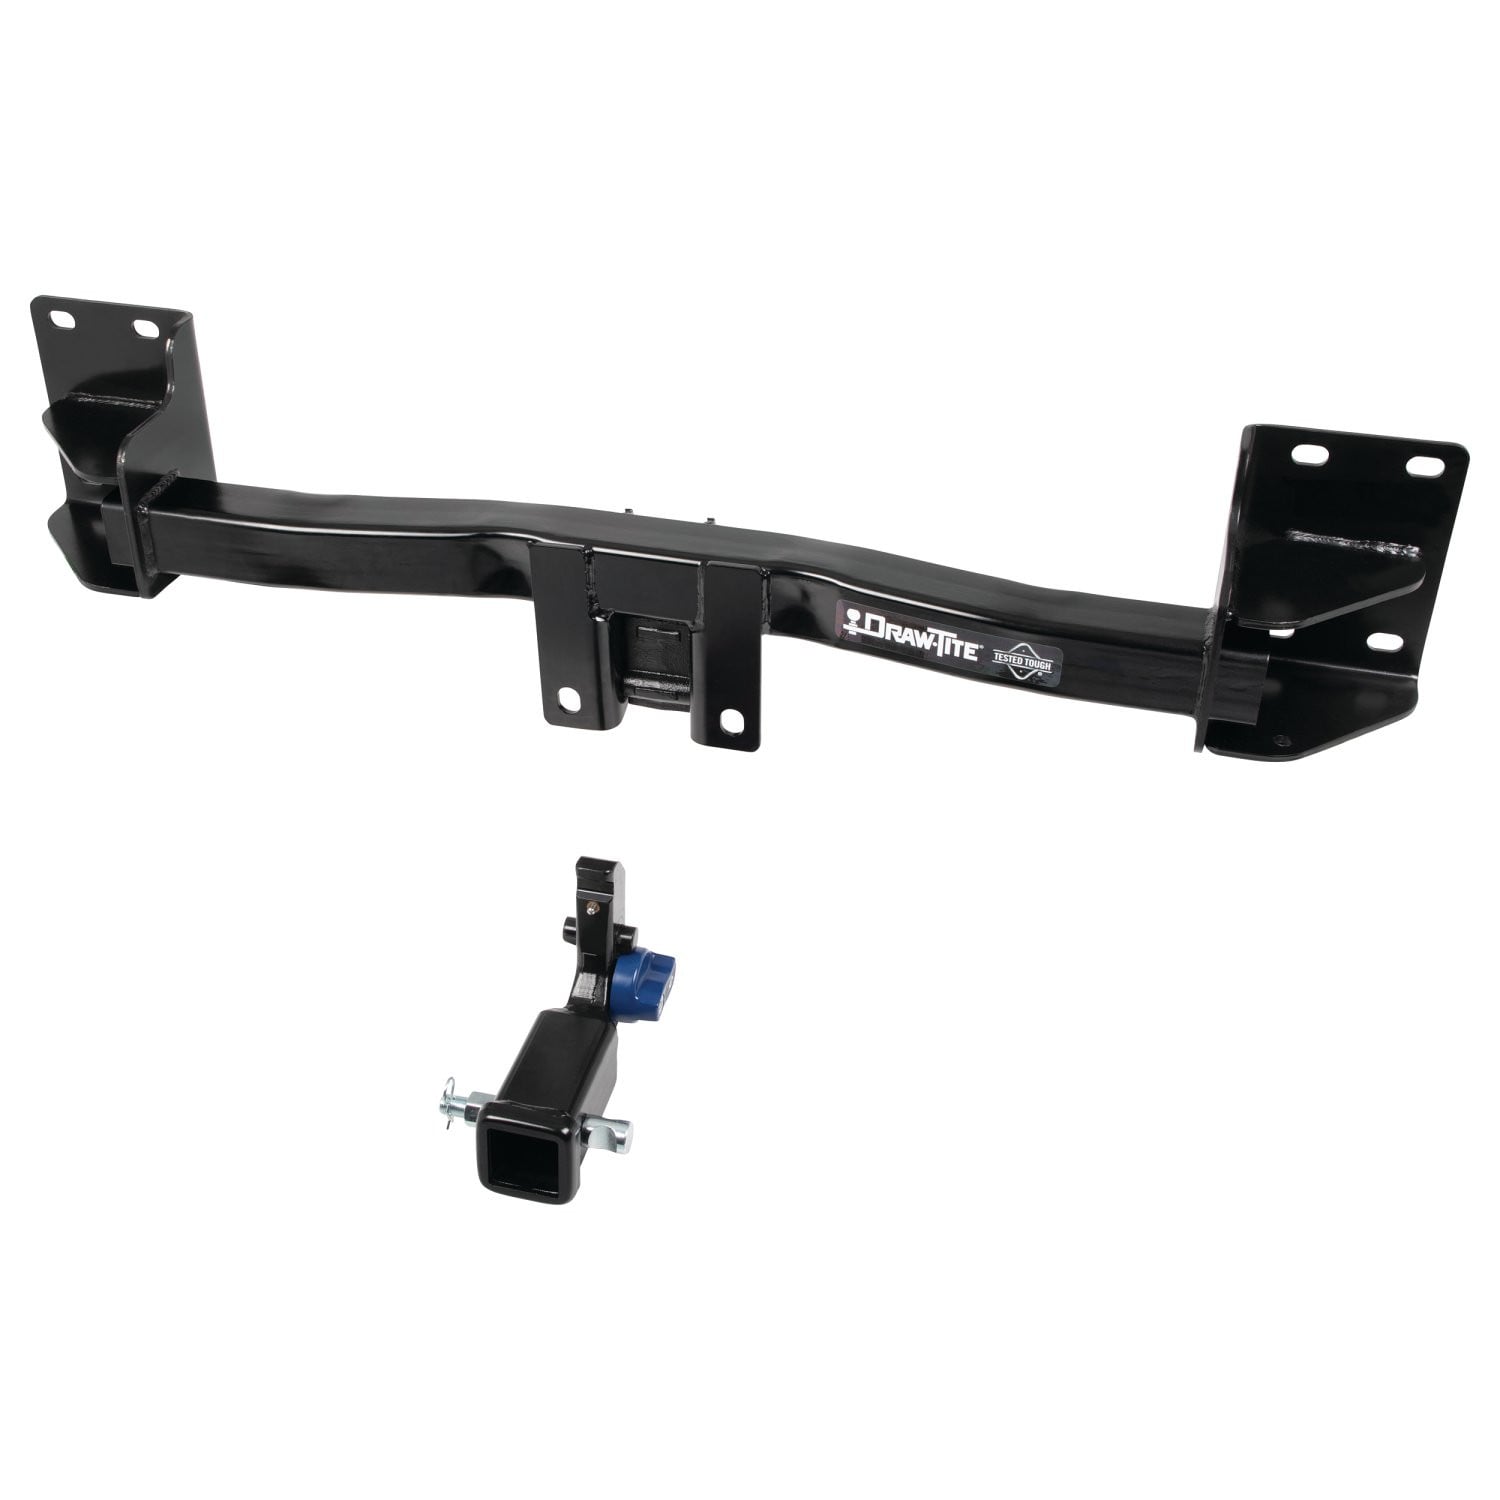
Draw-tite Hidden Hitch® Completely Hidden Trailer Hitch 2" Removable Receiver, Black for Select BMW X5 76908Draw-titeOriginal price was $780.00. Current price is $507.00.Out of Stock
View productOur in-house experts typically reply within one business day.

Draw-tite
Verify Fitment
Select your vehicle to confirm this part fits.
2011 - 2026 BMW X3
Confirmed to Fit
2019 - 2024 BMW X4
Confirmed to Fit





Always the correct part
We know our products
Quality Products
Free Shipping!
Always the correct part
We know our products
Quality Products
Free Shipping!
Select your vehicle to find the exact plug-and-play parts that fit — no cutting or splicing.

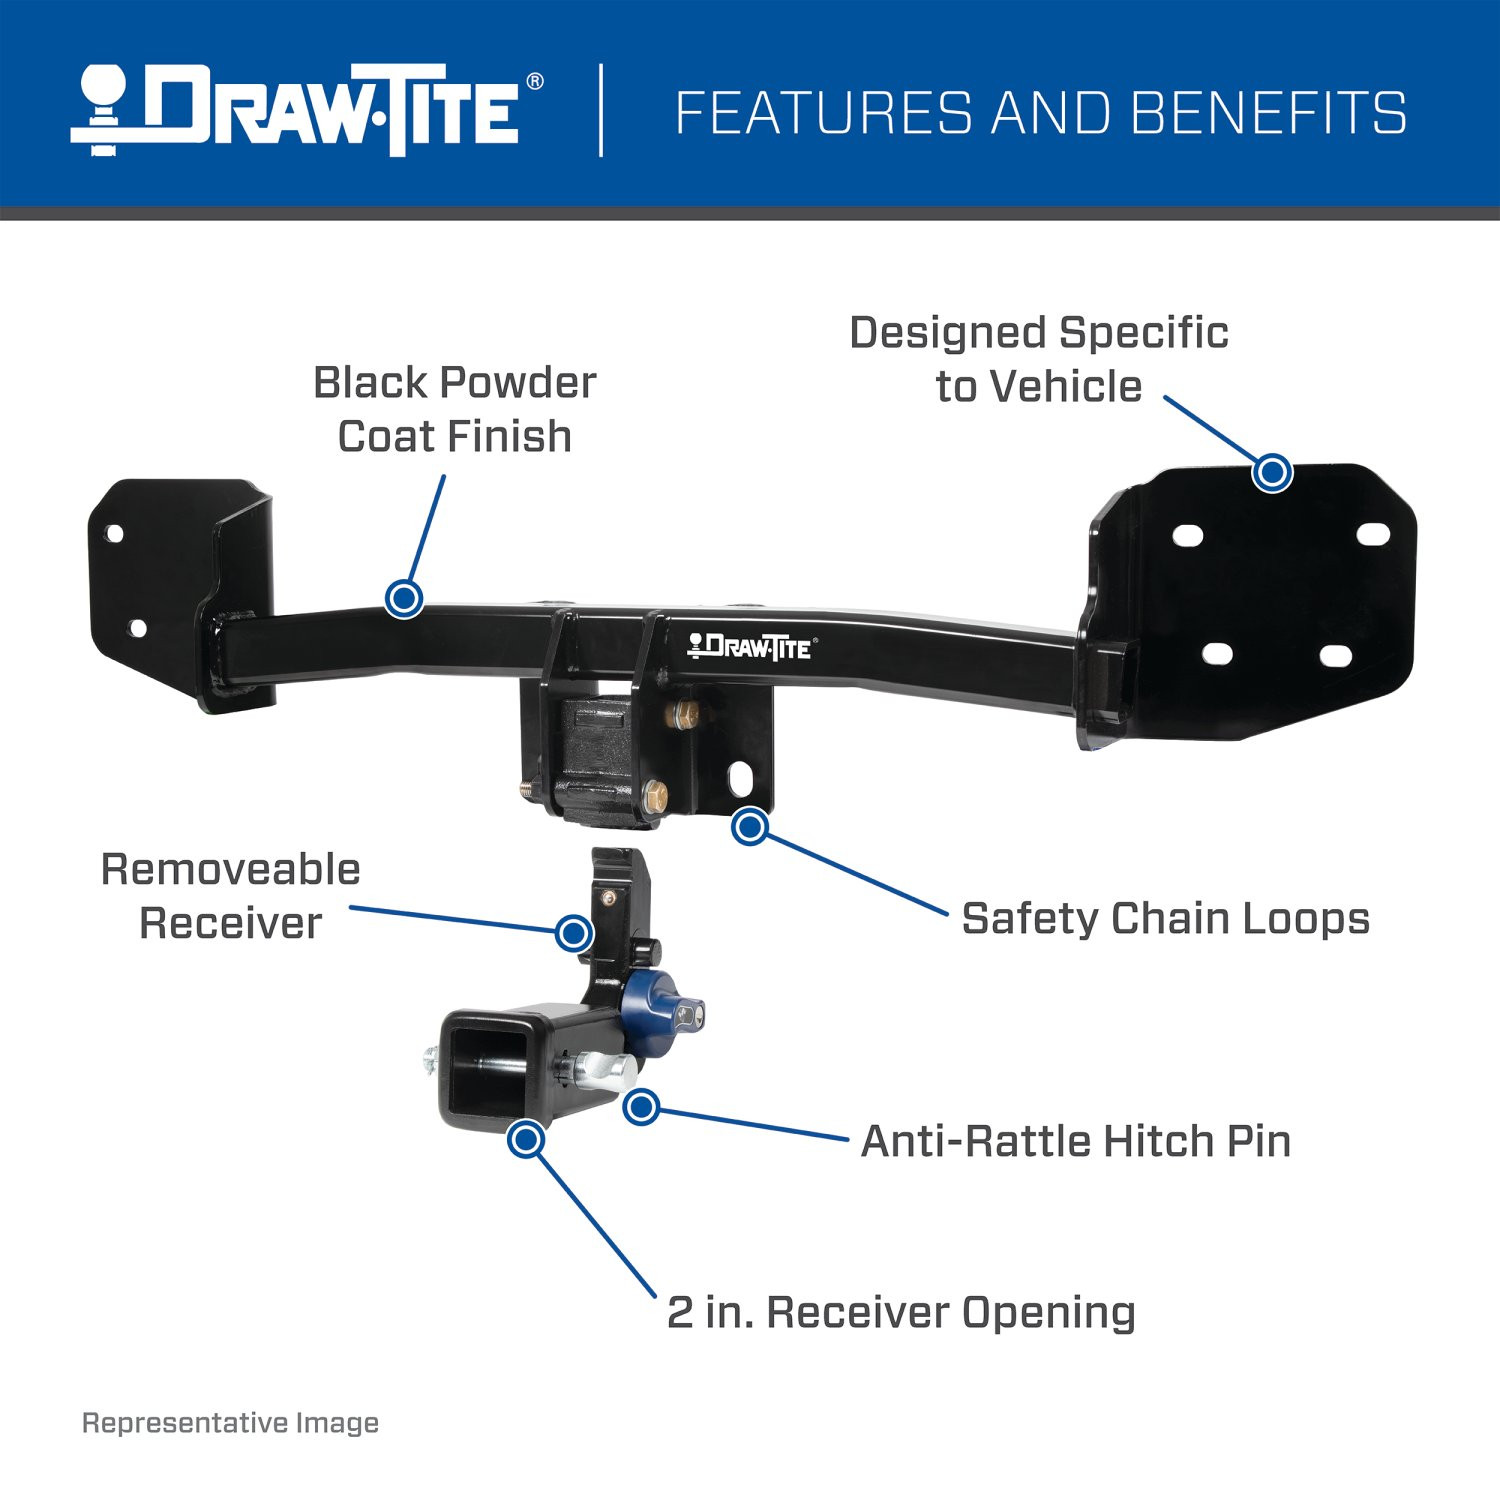
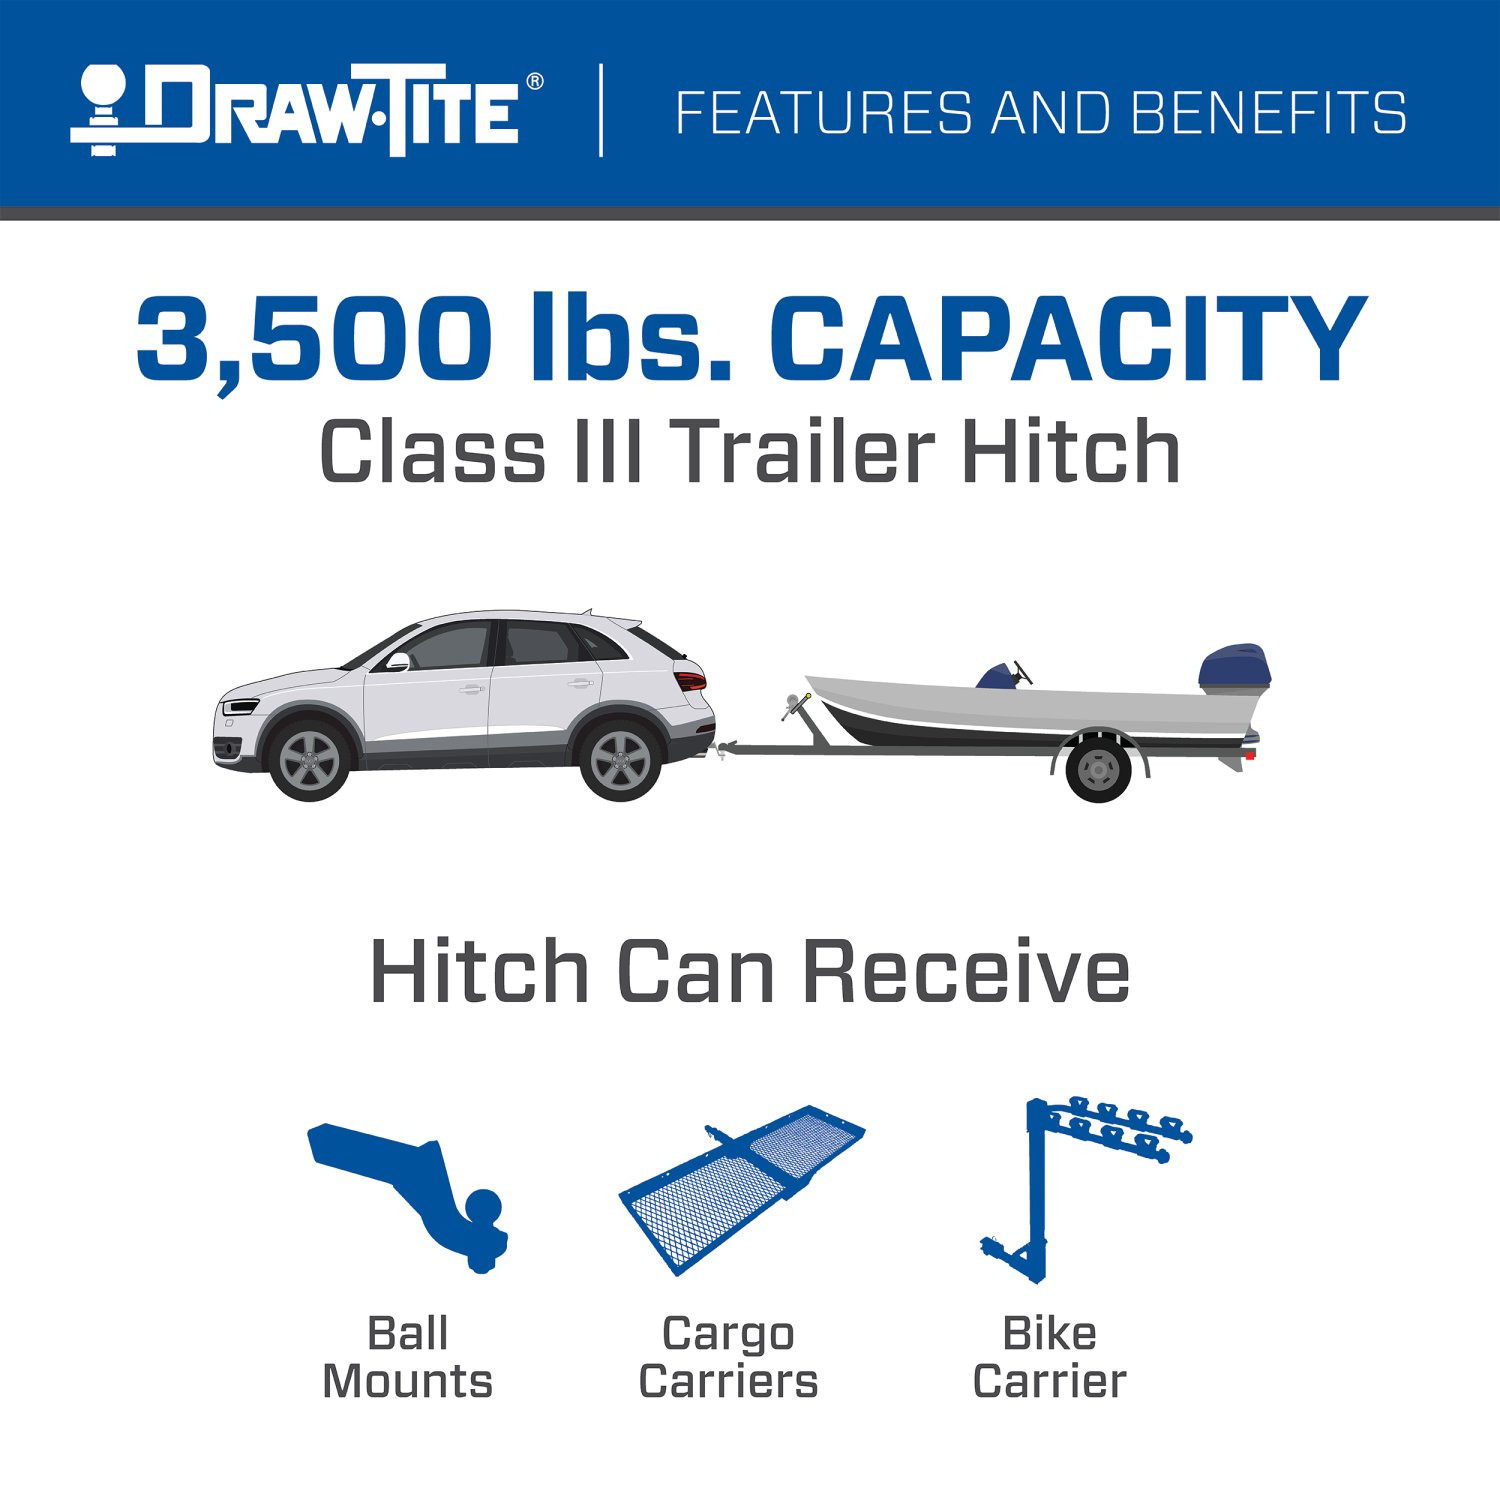
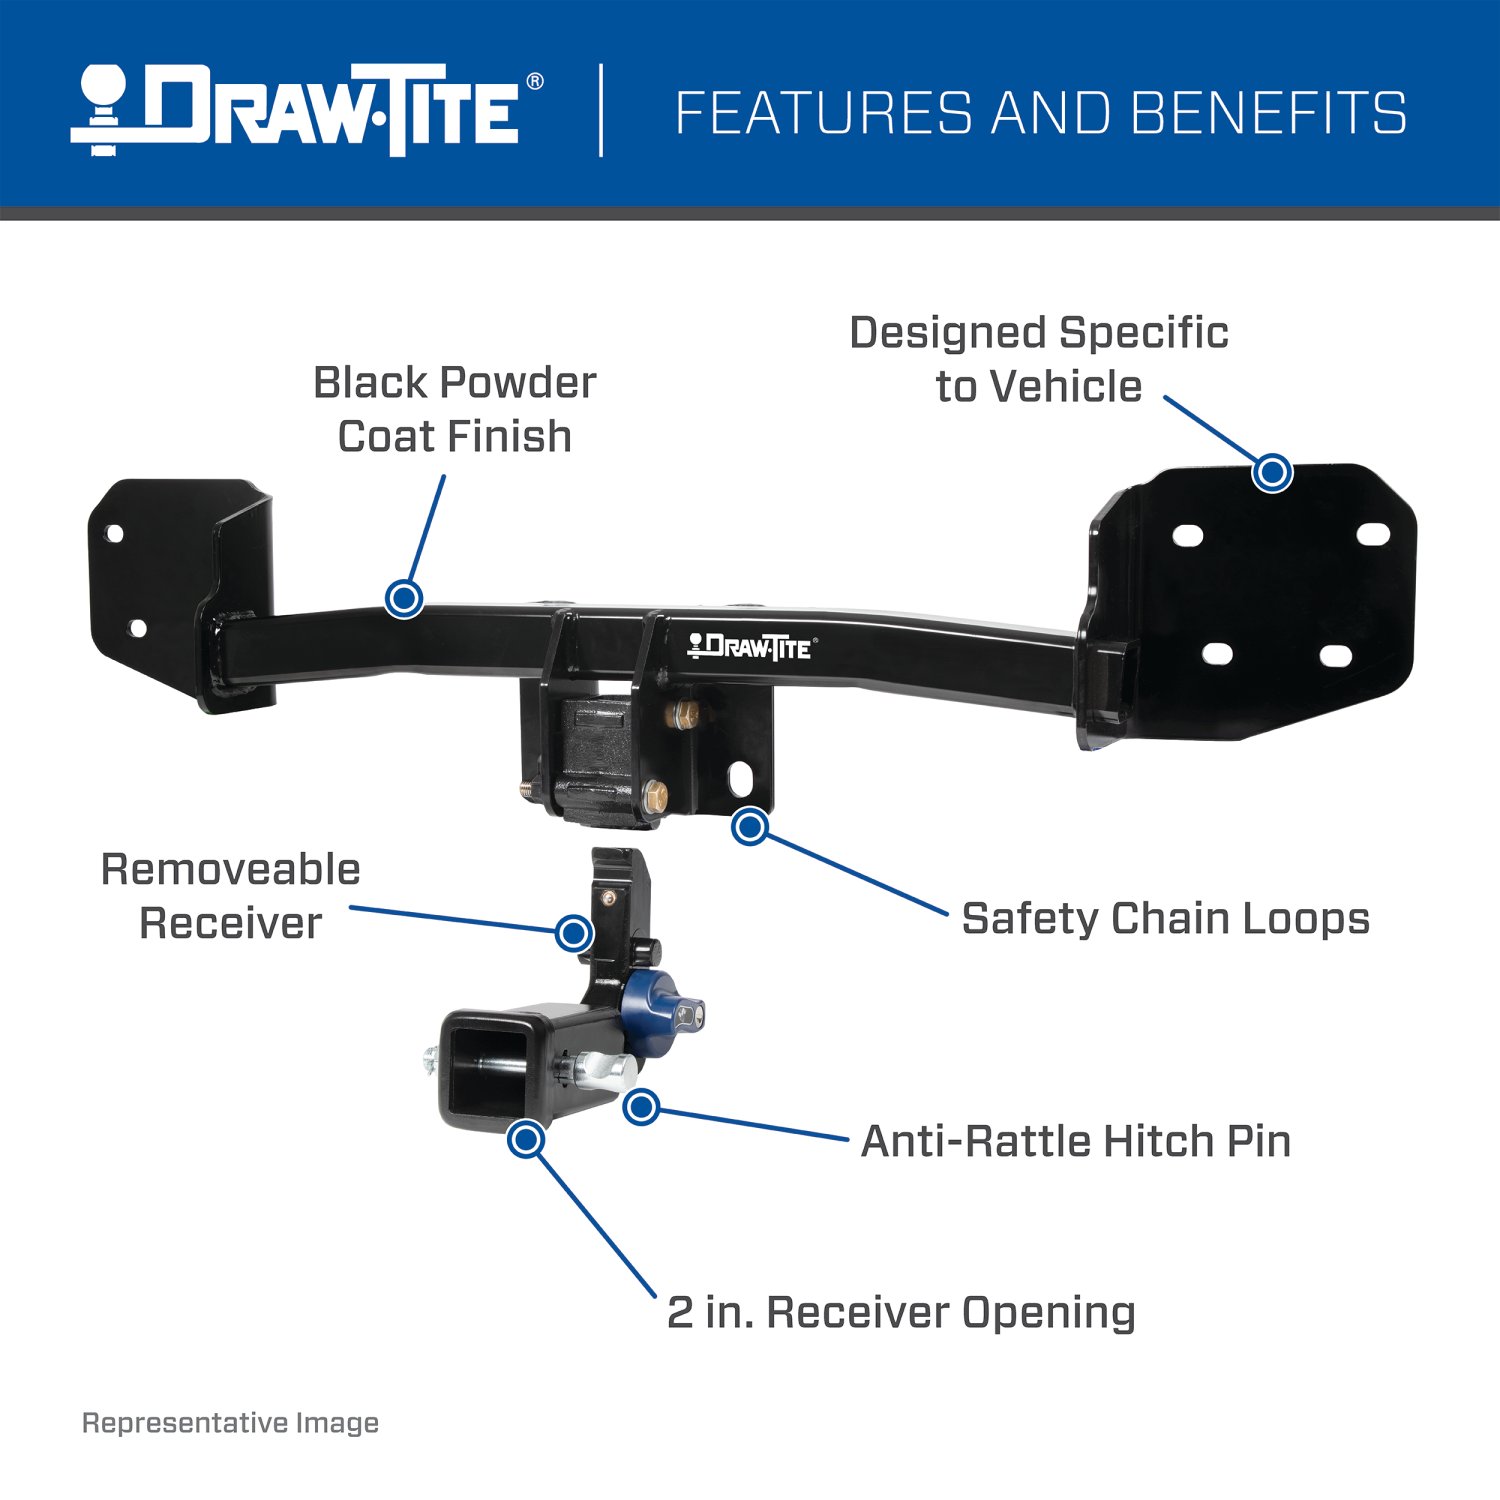
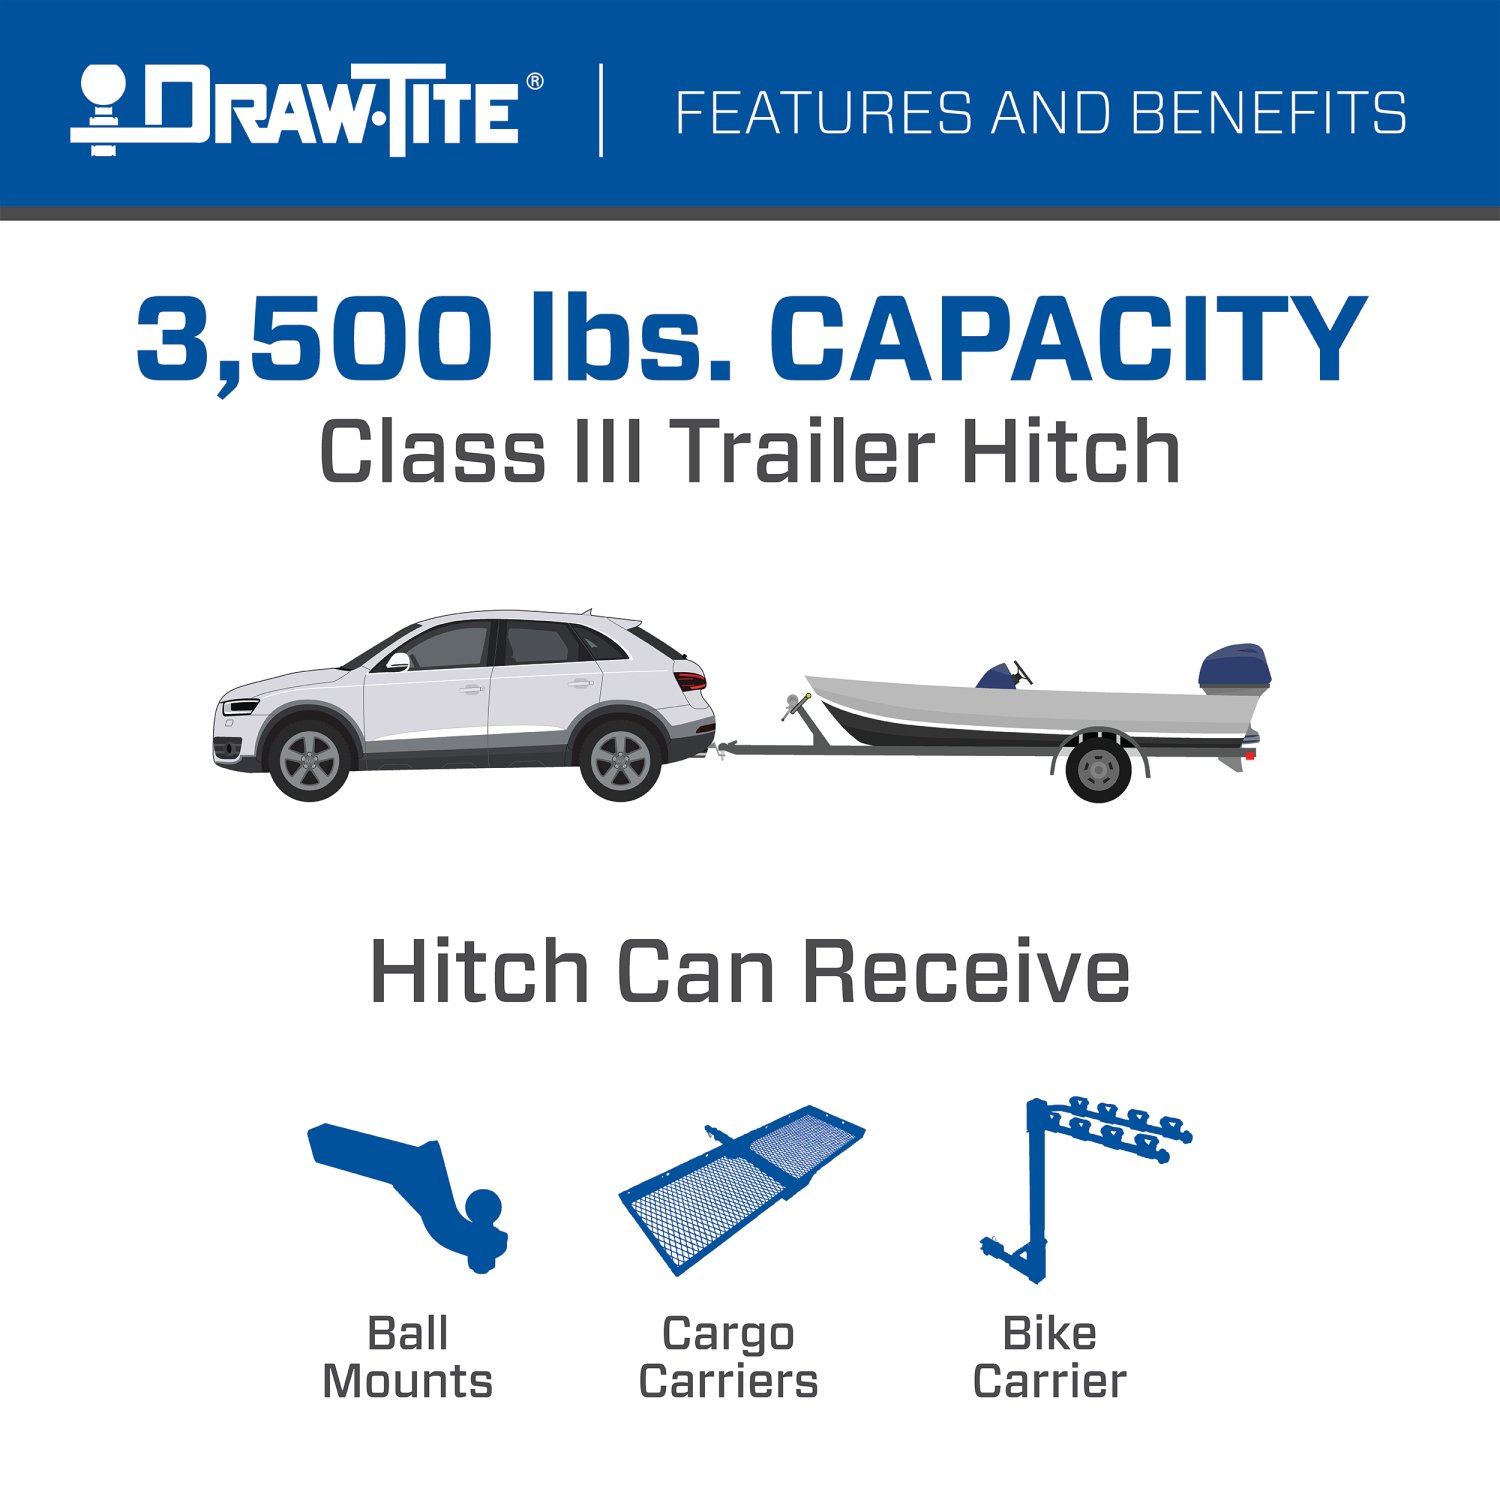
DRAW-TITE Class 3 trailer hitches are the perfect mix of style and stability for those times when youre working on a home project or heading out on an adventure. This DRAW-TITE Class 3 receiver hitch is rated for up to 3,500 lbs. gross trailer weight (GTW) and up to 350 lbs. tongue weight (TW). No weight distribution kits can be used on this specific trailer hitch. DRAW-TITE hitches are designed to provide top towing performance, with solid-all-welded construction and a black powder coat finish to resist rust and corrosion. The Class 3 trailer hitch has a 2 inch square receiver tube opening so you can easily attach accessories like a bike rack or cargo carrier, or a utility trailer. Includes all the mounting hardware needed for installation and are backed by a nationwide lifetime limited warranty. DRAW-TITE trailer hitches are tested to exceed V-5 and SAE J684 standards. DRAW-TITE: North Americas Favorite Hitch.
| BRAND: | DRAW-TITE |
| PART NUMBER: | 76906 |
| WARRANTY: | LIMITED LIFETIME WARRANTY |
| WEIGHT: | 42.15 LBS |
| GROSS TOWING WEIGHT: | 4,500 LBS. |
| GROSS TONGUE WEIGHT: | 450 LBS. |
| RECEIVER SIZE: | 2 IN. |
| HITCH CLASS: | III |
| DRILLING REQUIRED: | NO |
| MOUNTING HARDWARE INCLUDED: | YES |
| ATTACHMENT LOCATION: | REAR |
| HITCH VISIBILITY: | CONCEALED |
| CROSS-TUBE TYPE: | SQUARE TUBE |
| BALL MOUNT INCLUDED: | NO |
| COLOR: | BLACK |
| FINISH: | BLACK POWDER COAT OVER E-COAT |
| MATERIAL: | STEEL |
| MOUNTING LOCATION: | VEHICLE FRAME |
| MOUNTING TYPE: | BOLT-ON |
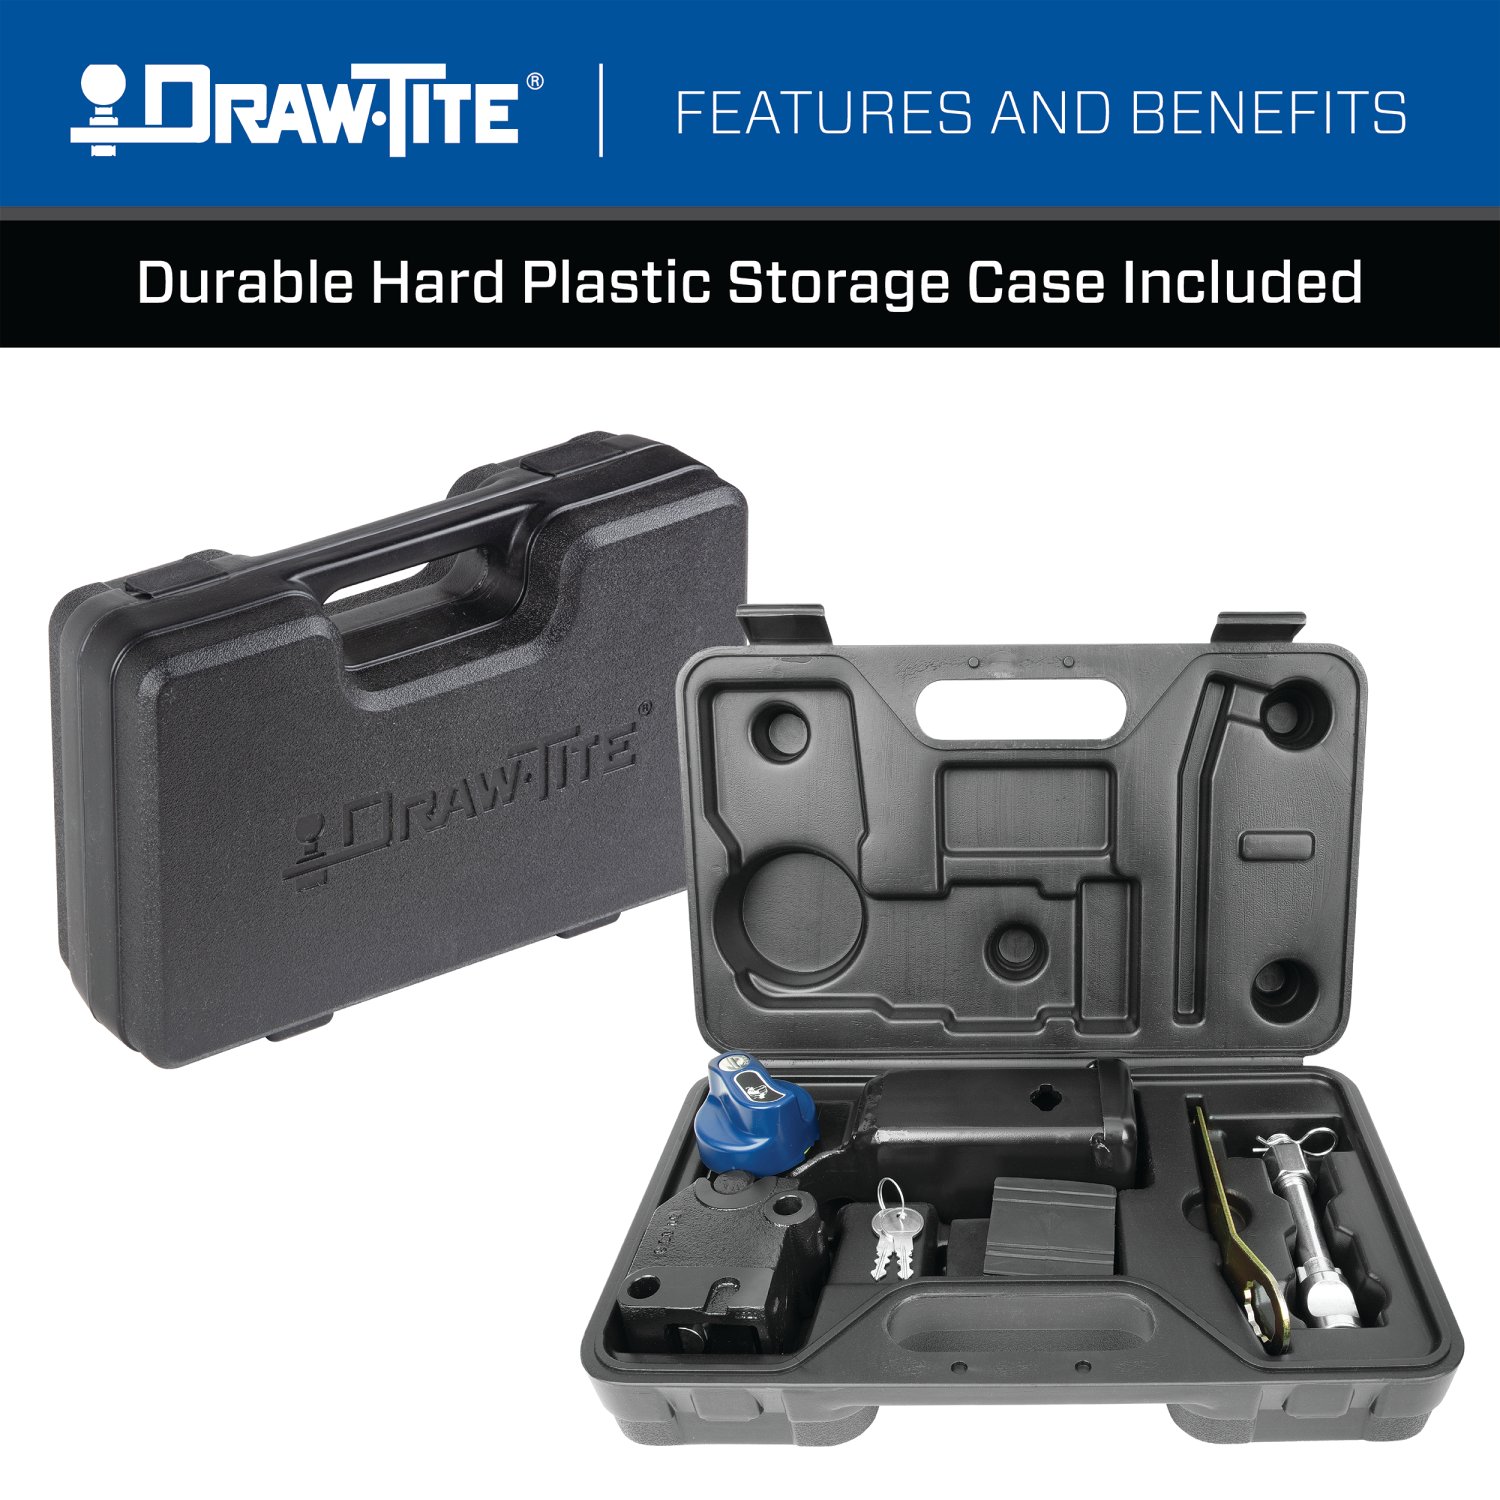
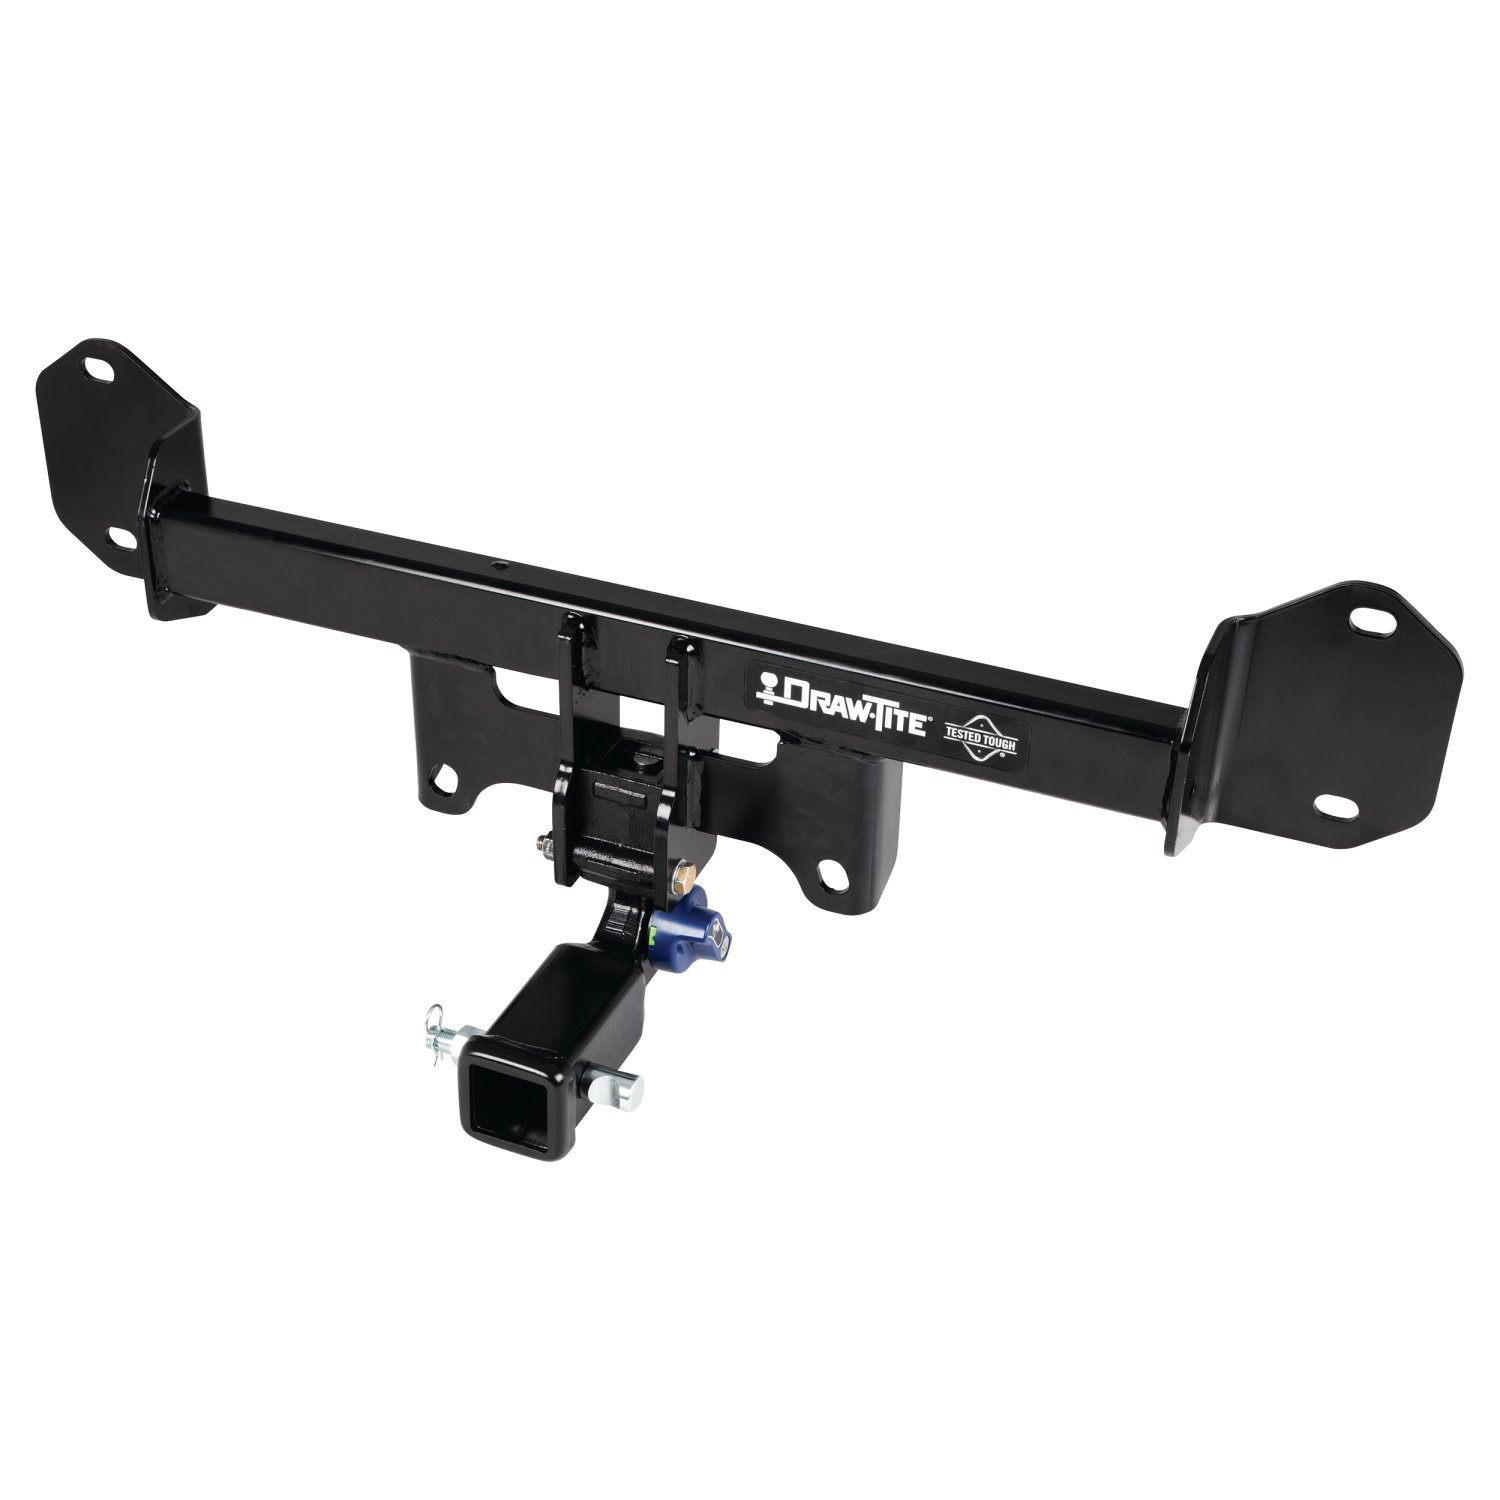
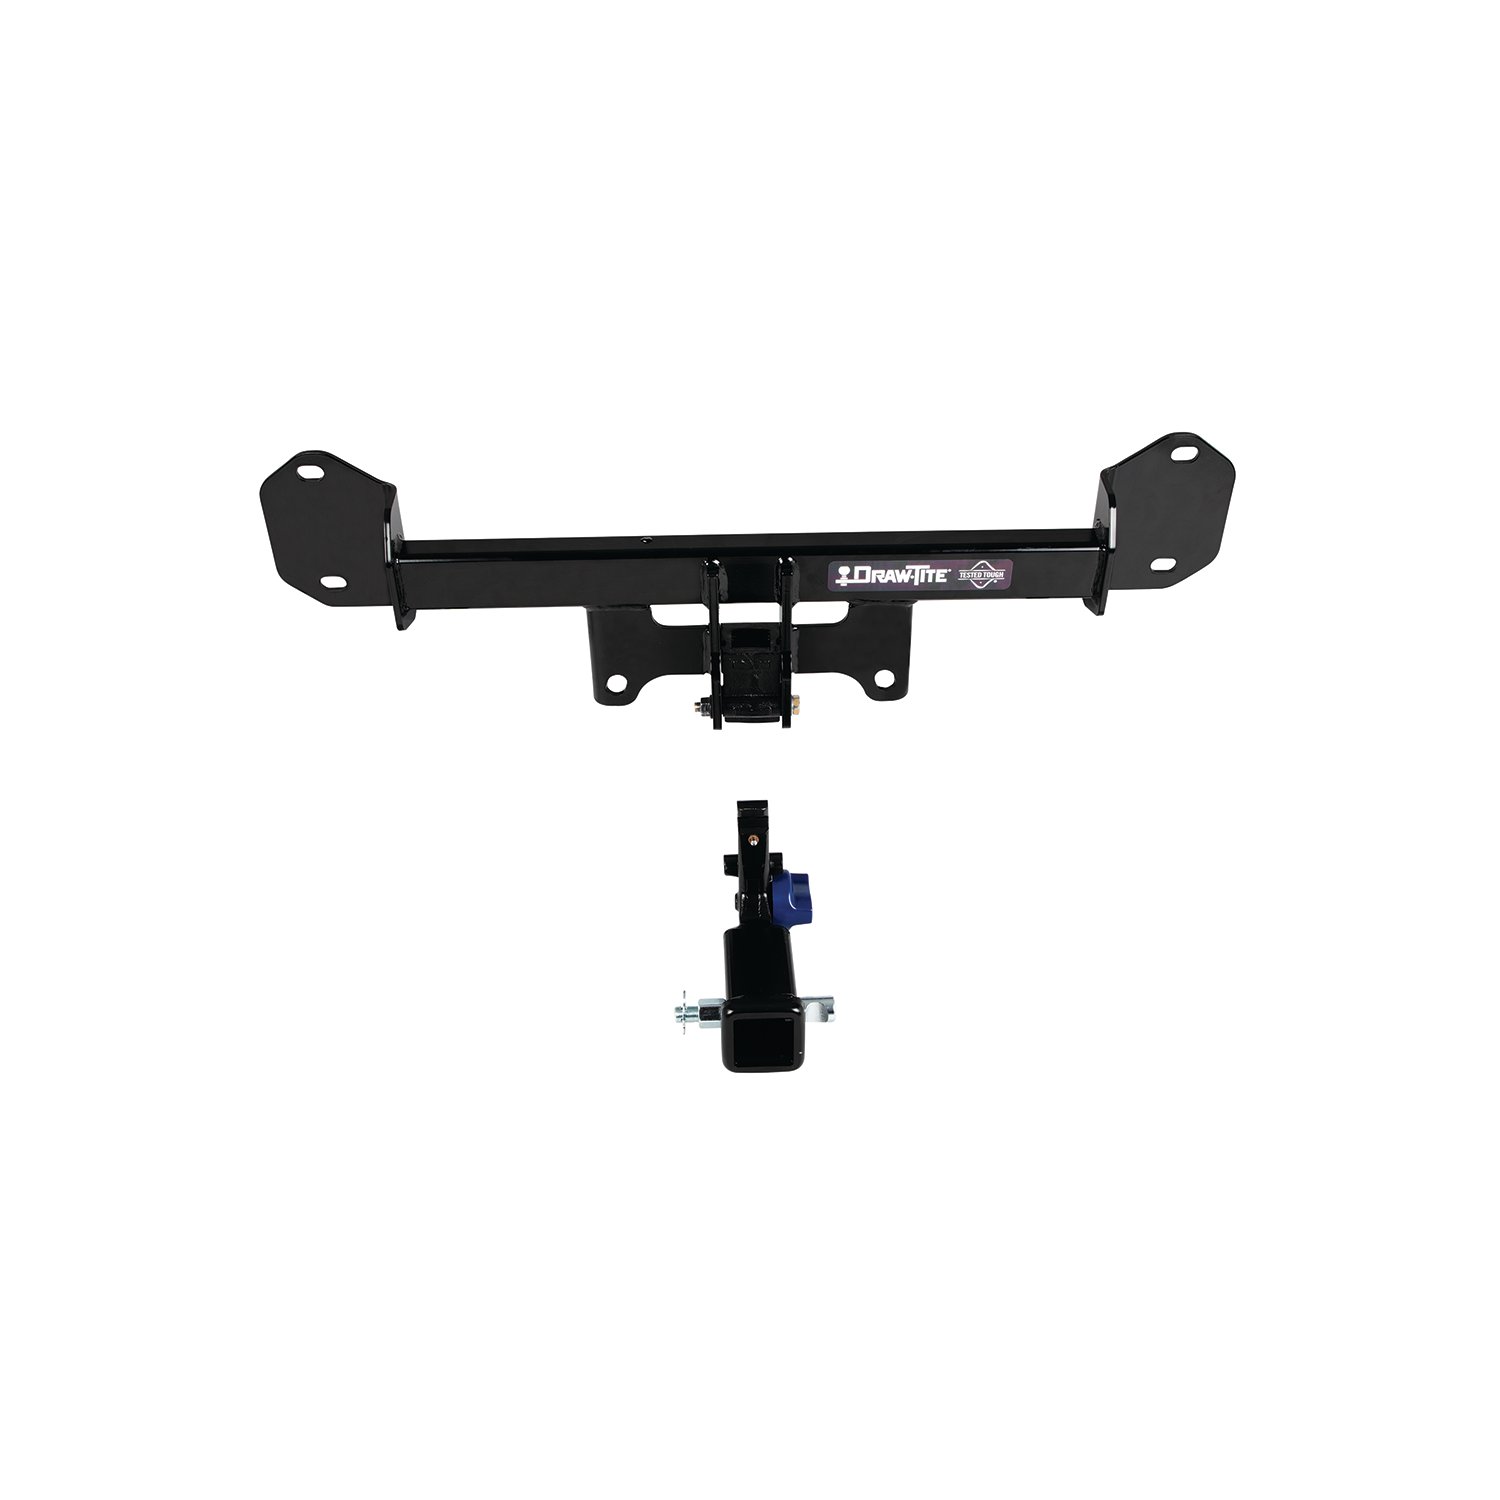
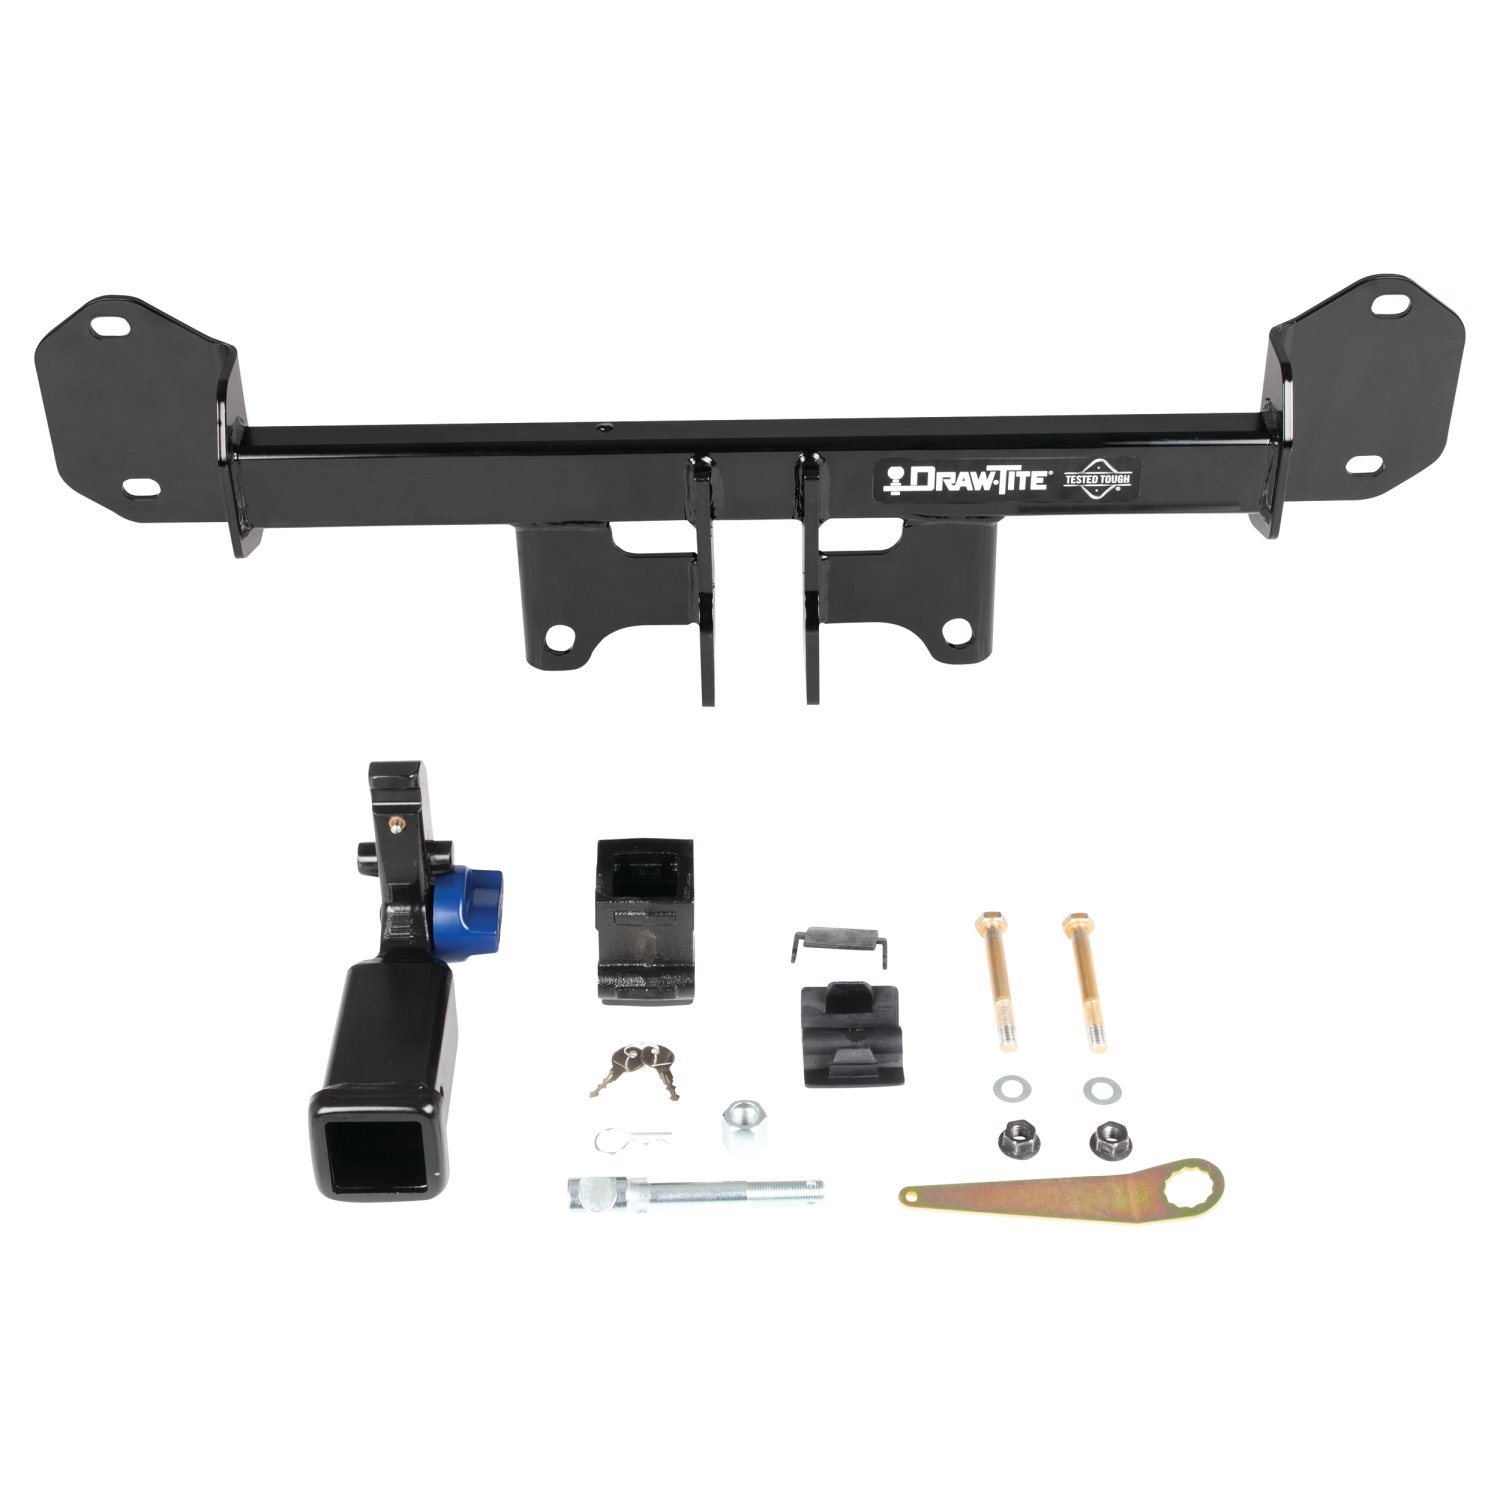

Draw-Tite has designed custom-fit trailer hitches since 1946 and is one of North America's most widely fitted hitch brands. Receiver hitches use solid all-welded construction and low-profile designs that follow modern vehicle contours, install with minimal bumper cutting or drilling, meet or exceed V5 CSA and SAE J684 standards, and carry a limited lifetime warranty.
Draw-Tite has been leading custom-fit trailer hitch design and engineering since its founding in 1946, and it remains one of the most widely fitted hitch brands in North America. The company's stated approach is straightforward: every hitch is tested rigorously so that it performs well beyond published industry standards, a philosophy it markets as Tested Tough. It sits within the Horizon Global towing group alongside Reese, Fulton, Bulldog, Tekonsha, Bargman and Wesbar.
Custom fit is the defining characteristic. Rather than adapting a universal design, Draw-Tite engineers a trailer hitch for a specific make, model and model year, so it bolts to existing frame locations with minimal bumper cutting or drilling. Low-profile designs follow the rear contours and aerodynamic styling of modern vehicles, which matters more than it once did now that rear fascias are shaped and sensor-equipped. Construction is solid all-welded steel for maximum strength, and every hitch meets or exceeds V5 CSA and SAE J684 standards and is backed by a nationwide limited lifetime warranty.
The range spans receiver sizes and classes to suit different loads, from 1-1/4 inch receivers for bike racks, cargo carriers and light trailers up through 2 inch receivers for heavier towing. Front mount hitches add a receiver at the front of the vehicle for winch mounts, snow plows, spare carriers and precise trailer positioning.
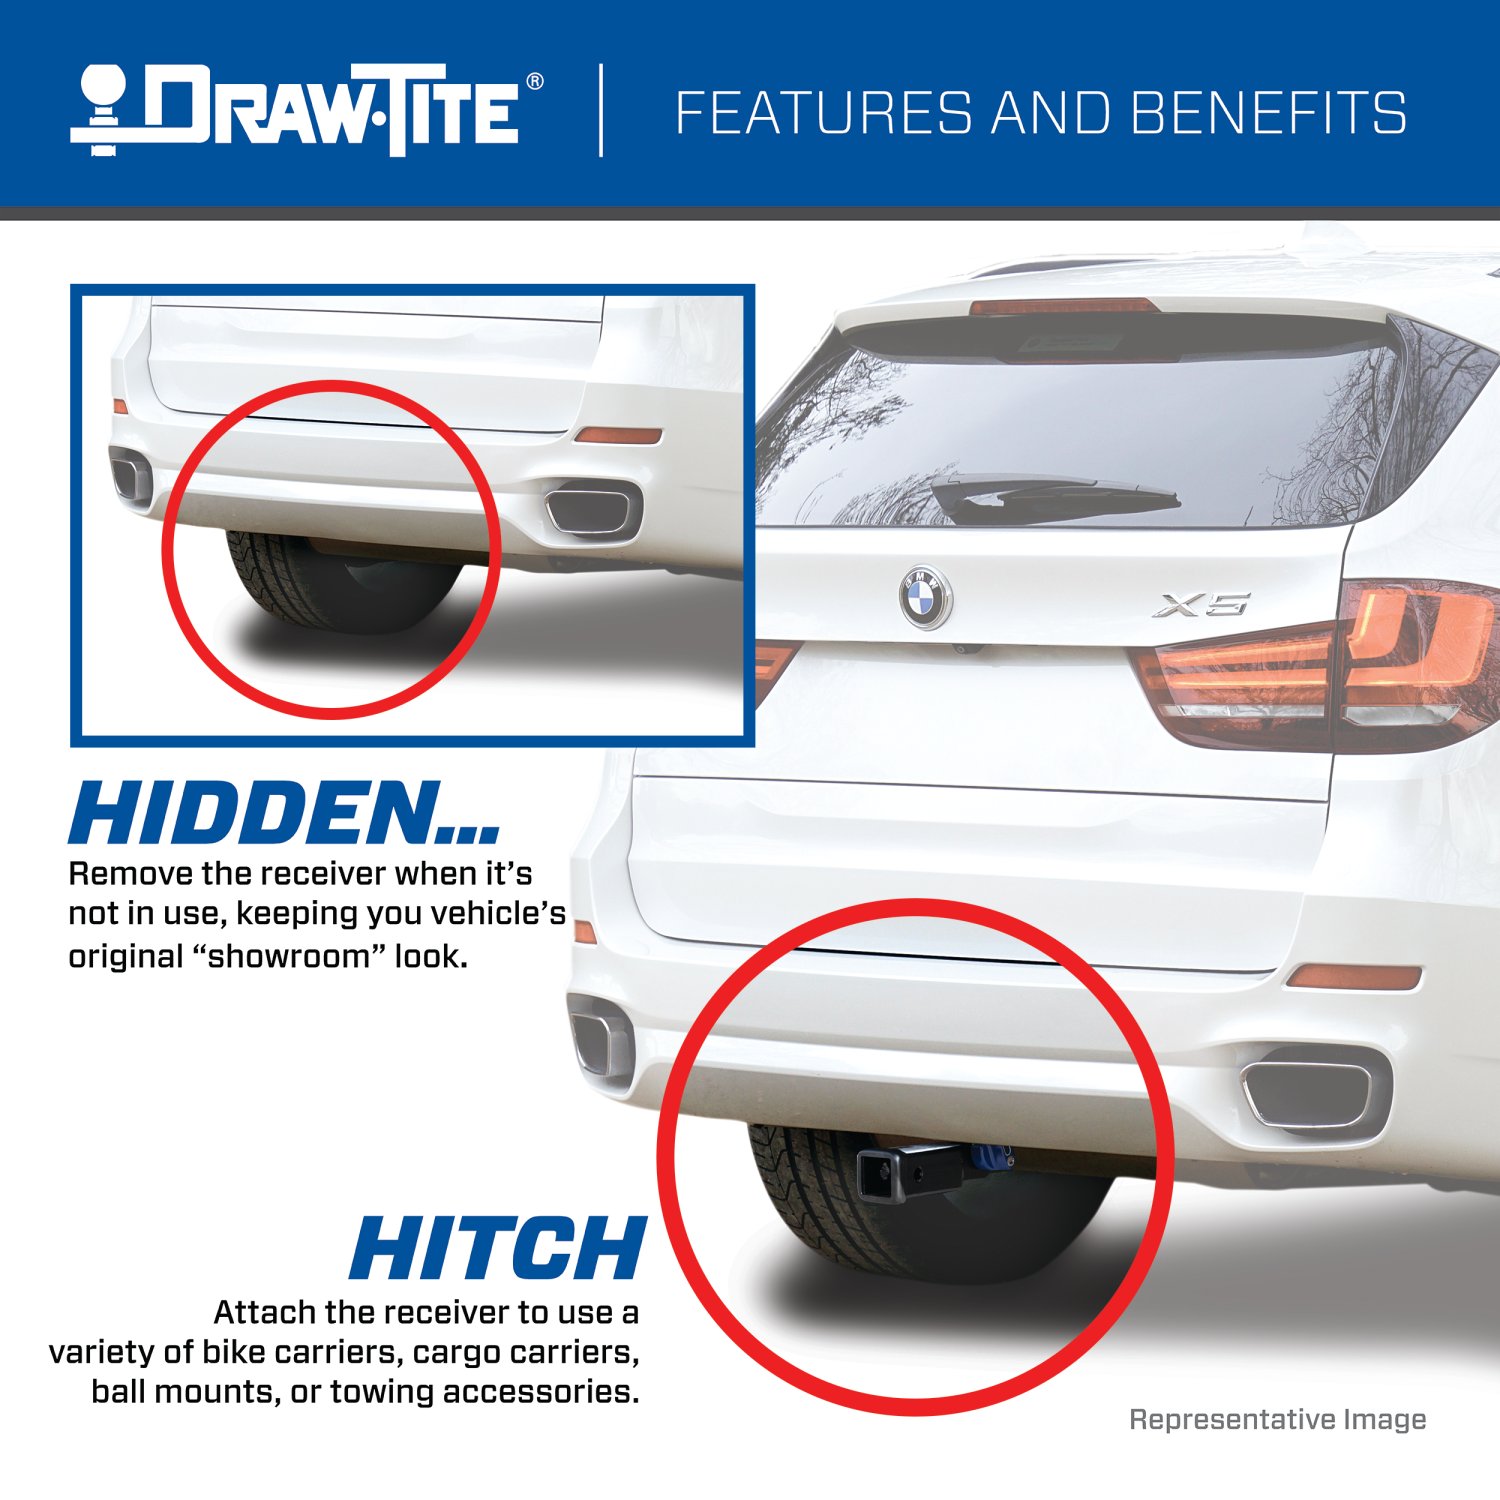
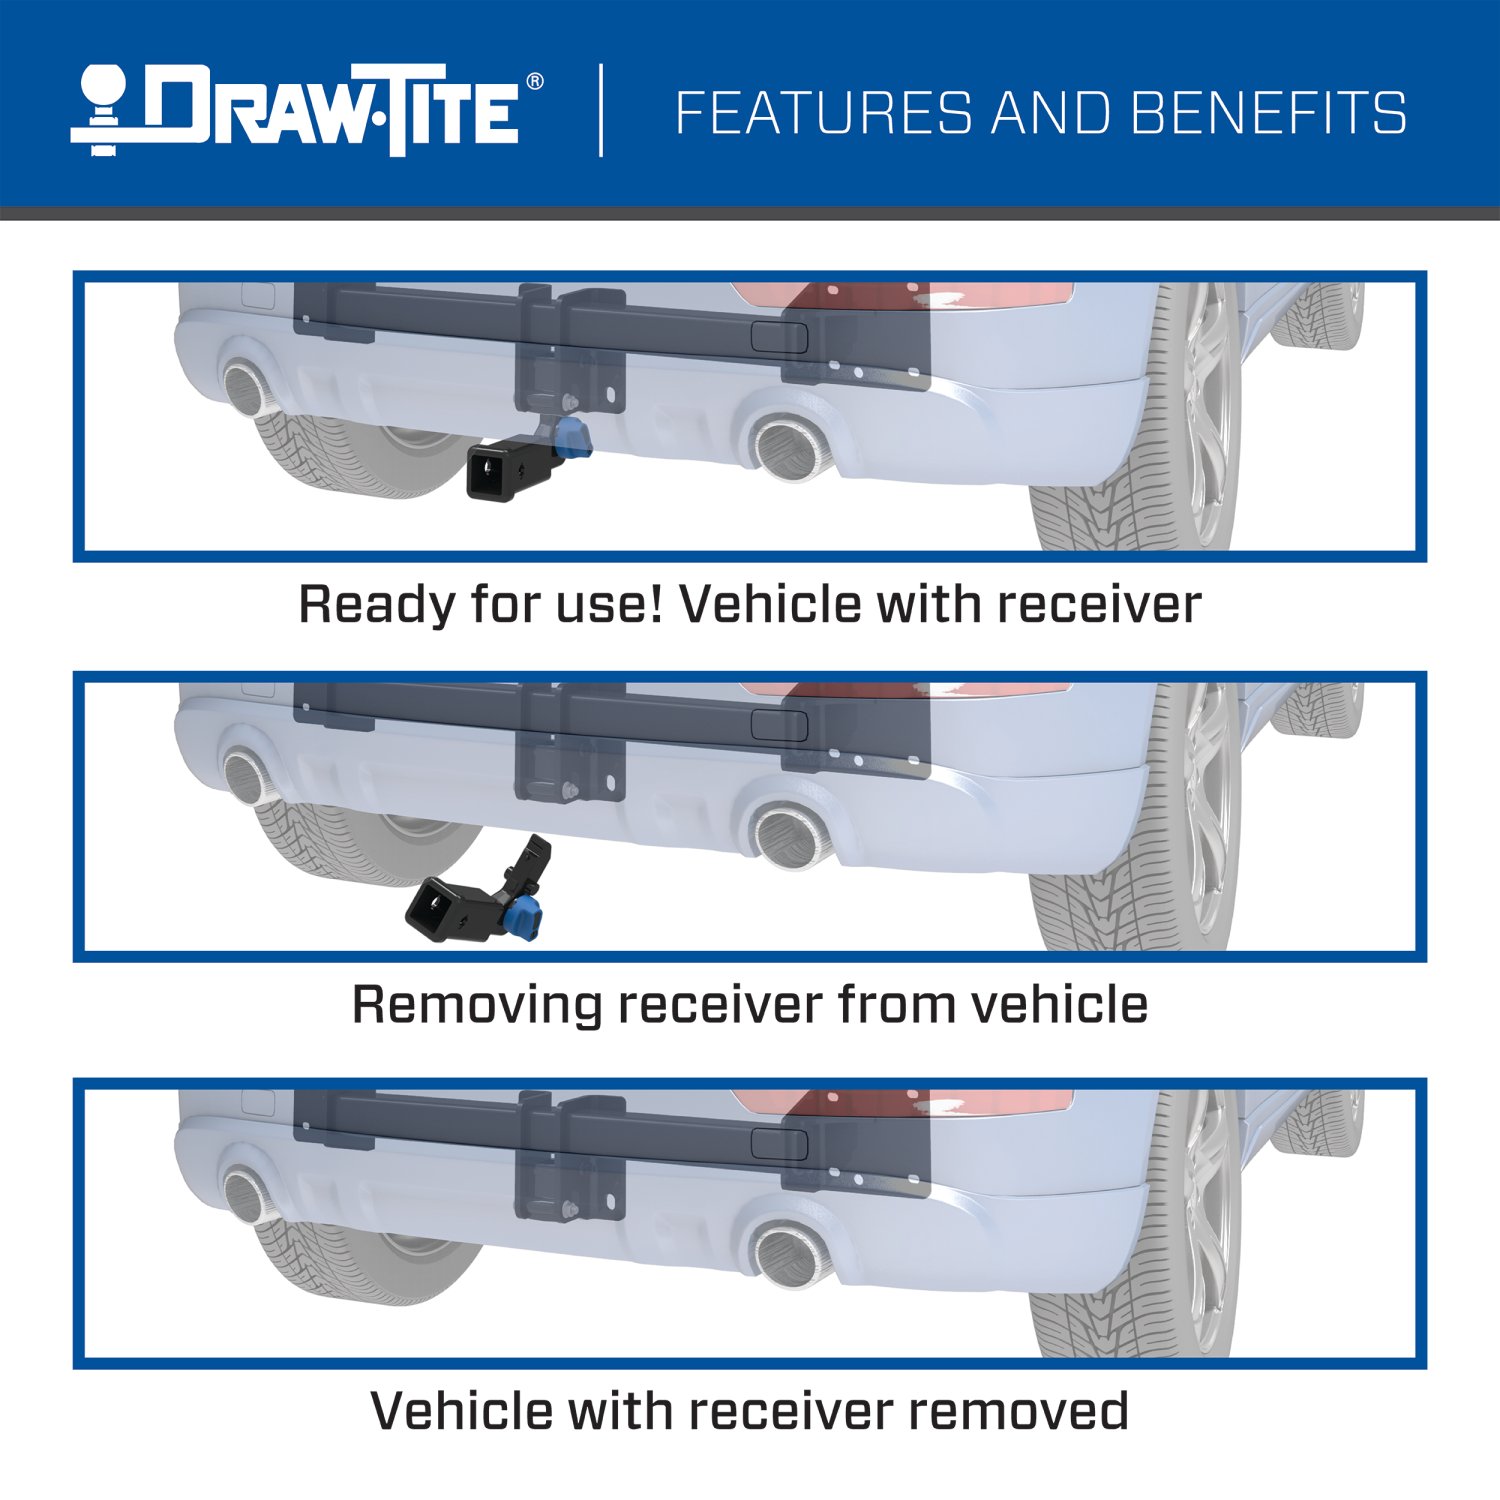
The Hidden Hitch series takes concealment further by mounting behind the vehicle's rear fascia, so the vehicle keeps its factory appearance until a removable receiver is fitted. Each is custom designed per make and model for a no-drill installation that does not compromise ground clearance, rated for up to 3,500 pounds gross trailer weight and 350 pounds tongue weight. Matching plug-and-play wiring completes the towing system.
Experts available to answer your questions
Call 888-634-9494Lifetime
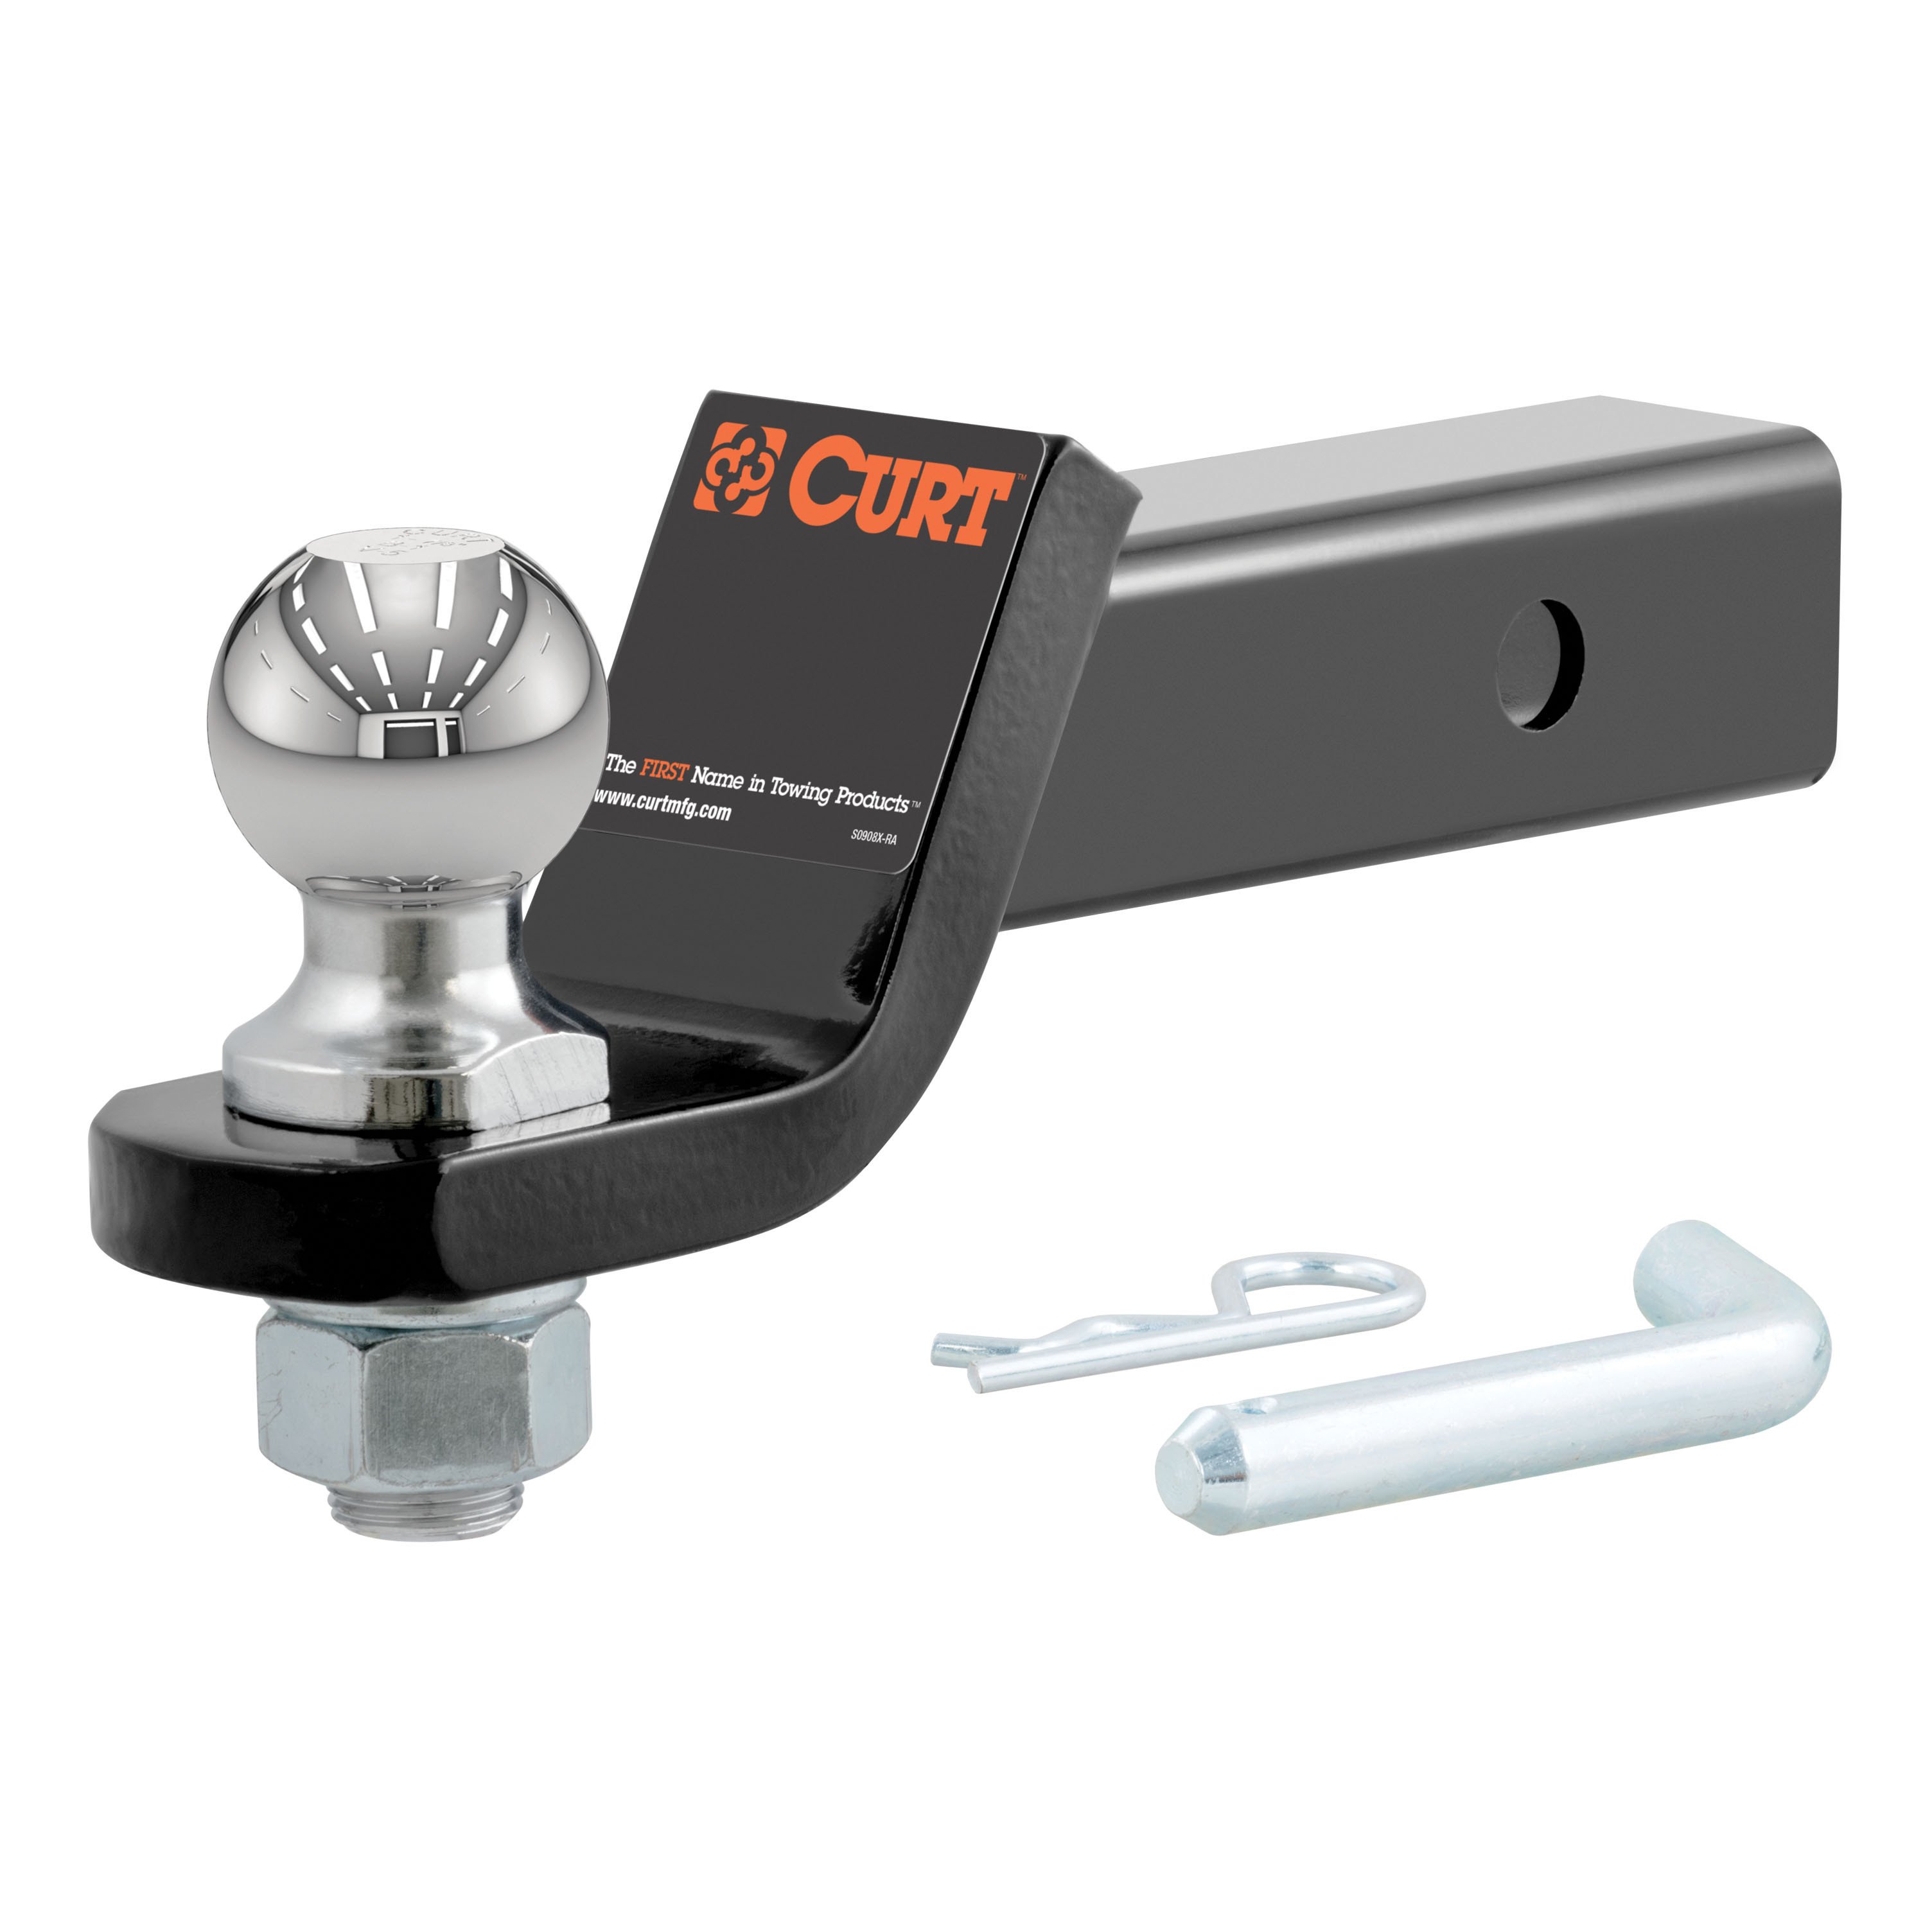
Equip your vehicle for towing and hitch-mounted accessories with a dependable CURT 2" trailer hitch. Designed for a vehicle-specific fit, CURT receiver hitches provide a strong and secure connection point for towing trailers, carrying bikes, transporting cargo and using other compatible 2-inch hitch accessories.
Our selection of CURT 2-inch receiver hitches includes options for trucks, SUVs, crossovers, vans and passenger vehicles. Each hitch is engineered to match specific vehicle mounting points, helping provide a clean installation and dependable performance. Depending on the vehicle application, available options may include Class 3, Class 4 and heavy-duty receiver hitches with different gross trailer weight and tongue weight capacities.
A 2" x 2" receiver opening is one of the most common hitch sizes and works with a wide range of towing accessories, including ball mounts, bike racks, cargo carriers, hitch steps and tow hooks. When towing a trailer, you may also need a properly rated trailer ball, hitch pin, wiring harness, brake controller or weight distribution system.
CURT trailer hitches feature a durable black finish designed to help protect against rust, scratches and exposure to road conditions. Many models install using existing holes in the vehicle frame, although drilling, trimming or temporary removal of vehicle components may be required for certain applications.
Use our vehicle fitment tools to find the correct CURT 2" trailer hitch for your year, make and model. Always compare the hitch rating with your vehicle’s towing capacity and the ratings of every component in your towing setup. The maximum towing capacity is determined by the lowest-rated component.
Shop CURT 2-inch trailer hitches at TowUniverse for vehicle-specific fitment, trusted towing performance and access to the accessories needed to complete your towing setup.
Draw-Tite® Trailer Hitches | Receiver Hitches
2 compatible vehicles
| Year | Make & Model | Notes |
|---|---|---|
| 2011 - 2026 | BMW X3 | Class 3 Trailer Hitch: 3500 lbs 350/3,500 lbs. Weight Carrying (tongue weight/gross trailer weight) Uses all existing holes. No Drilling required Install Time is 90 minutes |
| 2019 - 2024 | BMW X4 | Class 3 Trailer Hitch: 3500 lbs 350/3,500 lbs. Weight Carrying (tongue weight/gross trailer weight) Uses all existing holes. No Drilling required Install Time is 75 minutes |
The Draw-tite Hidden Hitch® Completely Hidden Trailer Hitch 2" Removable Receiver, Black for Select BMW X3, BMW X4 76906 (Part #DT76906) fits the following vehicles: 2011-2026 BMW X3; 2019-2024 BMW X4. Always verify your specific year, make, and model before ordering.
The Draw-tite Hidden Hitch® Completely Hidden Trailer Hitch 2" Removable Receiver, Black for Select BMW X3, BMW X4 76906 (Part #DT76906) fits 2011-2026 BMW X3 models. The 2026 model year is the last year covered by this part number. For newer models, check for an updated version.
Yes, the Draw-tite Hidden Hitch® Completely Hidden Trailer Hitch 2" Removable Receiver, Black for Select BMW X3, BMW X4 76906 (Part #DT76906) is designed to fit the 2011-2026 BMW X3.
The Draw-tite Hidden Hitch® Completely Hidden Trailer Hitch 2" Removable Receiver, Black for Select BMW X3, BMW X4 76906 (Part #DT76906) Refer to the included instructions for installation details. Basic hand tools are typically all you need.
Yes, part number 76906 is designed for BMW X3 and BMW X4 models. However, the manual directs you to visit the Horizon Global website for the most up-to-date information regarding specific application years, sub-models, and trim levels, as compatibility may vary.
The 76906 is a weight-carrying hitch with a maximum Gross Trailer Weight (GTW) of 3500 lb (1589 kg) and a maximum tongue weight of 350 lb (159 kg). Weight-distributing capacity is listed as N/A. Never exceed your vehicle manufacturer's recommended towing capacity or these hitch capacities.
Required tools include: ratchet, torque wrench, safety glasses, sockets (8mm, 10mm, 13mm, 18mm), socket extension, tape measure, utility knife, flat head screwdriver, marker, plastic trim tools, drill, 1/8 inch drill bit, plastic rivet gun, silicone sealant, blue thread locker, and T20 star drivers. A deep well socket is required for the 18mm socket. The manual lists these as 'Equipment Required.'
Yes, drilling is required. You must use a 1/8 inch drill bit to drill out the center of plastic rivets holding the wheel well trim. For X3 models, you will drill out 4 rearmost plastic rivets; for X4 models, you will drill out 3 plastic rivets. After drilling, use a trim panel tool to remove the remaining rivet heads.
Trimming is required on X4 models only. You must trim the fascia in a specific area using a tape measure, marker, and utility knife. The trim dimensions are 4.25 inches by 13.50 inches, with a measurement of 2.125 inches from the center of a screw and 1.50 inches. Additionally, for X3 models, you must cut a notch in the underbody panel. For X4 models, you must trim a sensor bracket in the area shown in Figure 13 (13.50 inches by 4.75 inches). The manual notes that the vehicle requires trimming and you must obtain the vehicle owner's permission before installation.
All M12 hex flange nuts holding the bumper beam to the end panel must be tightened to 68 lb-ft (92 N·m) using a torque wrench. The exhaust hanger hex flange nuts must be tightened separately to 25 lb-ft (34 N·m). Proper torque is needed to keep the hitch secure to the vehicle when towing.
Each of the two fastener assemblies (M12 bolt, flat washer, and prevailing torque nut) attaching the receiver housing to the hitch must be torqued to 92 lb-ft (125 N·m).
The installation sequence is: (1) Remove taillights; (2) Remove underbody panel (X3 models only); (3) Remove fascia; (4) Remove bumper beam; (5) Install hitch and bumper beam with blue thread locker and foam gasket; (6) Tighten all fasteners to specification using a torque wrench; (7) Trim fascia (X4 models only); (8) Reinstall fascia; (9) Reinstall wheel well trim with plastic rivets; (10) Reinstall taillights; (11) Trim and reinstall underbody panel. The manual emphasizes that this is an expert-level installation.
Yes, the bumper beam must be removed. For all models, use an 18mm deep well socket with a 6 inch extension to remove the 4 hex flange nuts holding the bumper beam to the end panel (2 per side). For X3 models, also disconnect the sensor wiring and plastic rivet. For X4 and X3 2018-current models, also remove 2 hex nuts holding exhaust hanger brackets using a 13mm socket. The bumper beam is then reinstalled after the hitch is positioned.
Key differences include: (1) X3 models require removal of an underbody panel; X4 models do not. (2) X4 models require fascia trimming; X3 models do not. (3) Taillight removal differs: X3 models use a 10mm socket to remove hex nuts; X4 and X3 2018-current models access taillights from inside the cargo area. (4) X4 models have different sensor bracket and wire routing requirements. (5) Underbody panel notch dimensions differ between X3 2011-2017 and X3 2018-current models. (6) Foam gasket handling differs: X3 2011-2017 models remove it; X3 2018-current and X4 models keep it. Consult the specific figures and steps for your model year.
Yes, blue thread locker must be applied to all studs on the vehicle end panel before installing the hitch and bumper beam. This is a required step in the installation process.
Silicone sealant is required in specific circumstances but is not provided with the hitch. For X4 models and X3 2011-2017 models, apply silicone sealant to hitch bracket mounting surfaces. For X3 2018-current models, apply silicone sealant only if the foam gasket is damaged. The sealant is applied between the hitch and aluminum bumper beam.
Fastener Kit 76906F includes: (2) Hex Bolts M12-1.75 x 100mm CL10.9, (2) Flat Washers 7/16 inch, (2) Flange locknuts M12-1.75 CL10, (8) Plastic Rivets, and (4) Cable ties. Fastener Kit 76906F2 includes: (1) Warning Card and (2) Warning Labels. The installation also reuses existing factory M12 hex flange nuts from the vehicle.
Yes, the existing factory M12 hex flange nuts holding the bumper beam to the end panel are reused during installation. These fasteners are loosely reinstalled in Step 5 and then tightened to specification in Step 6. The exhaust hanger hex nuts removed in Step 4 are also reattached in Step 5.
The foam gasket is a factory component located between the aluminum bumper beam and the end panel. For X3 2011-2017 models, remove the foam gasket completely. For X3 2018-current models, keep the foam gasket on the end panel; if damaged, apply silicone sealant to hitch bracket mounting surfaces. For X4 models, leave the foam gasket between the bumper and end panel attached to studs. In all cases where the hitch is installed, place the foam gasket between the hitch and aluminum bumper beam.
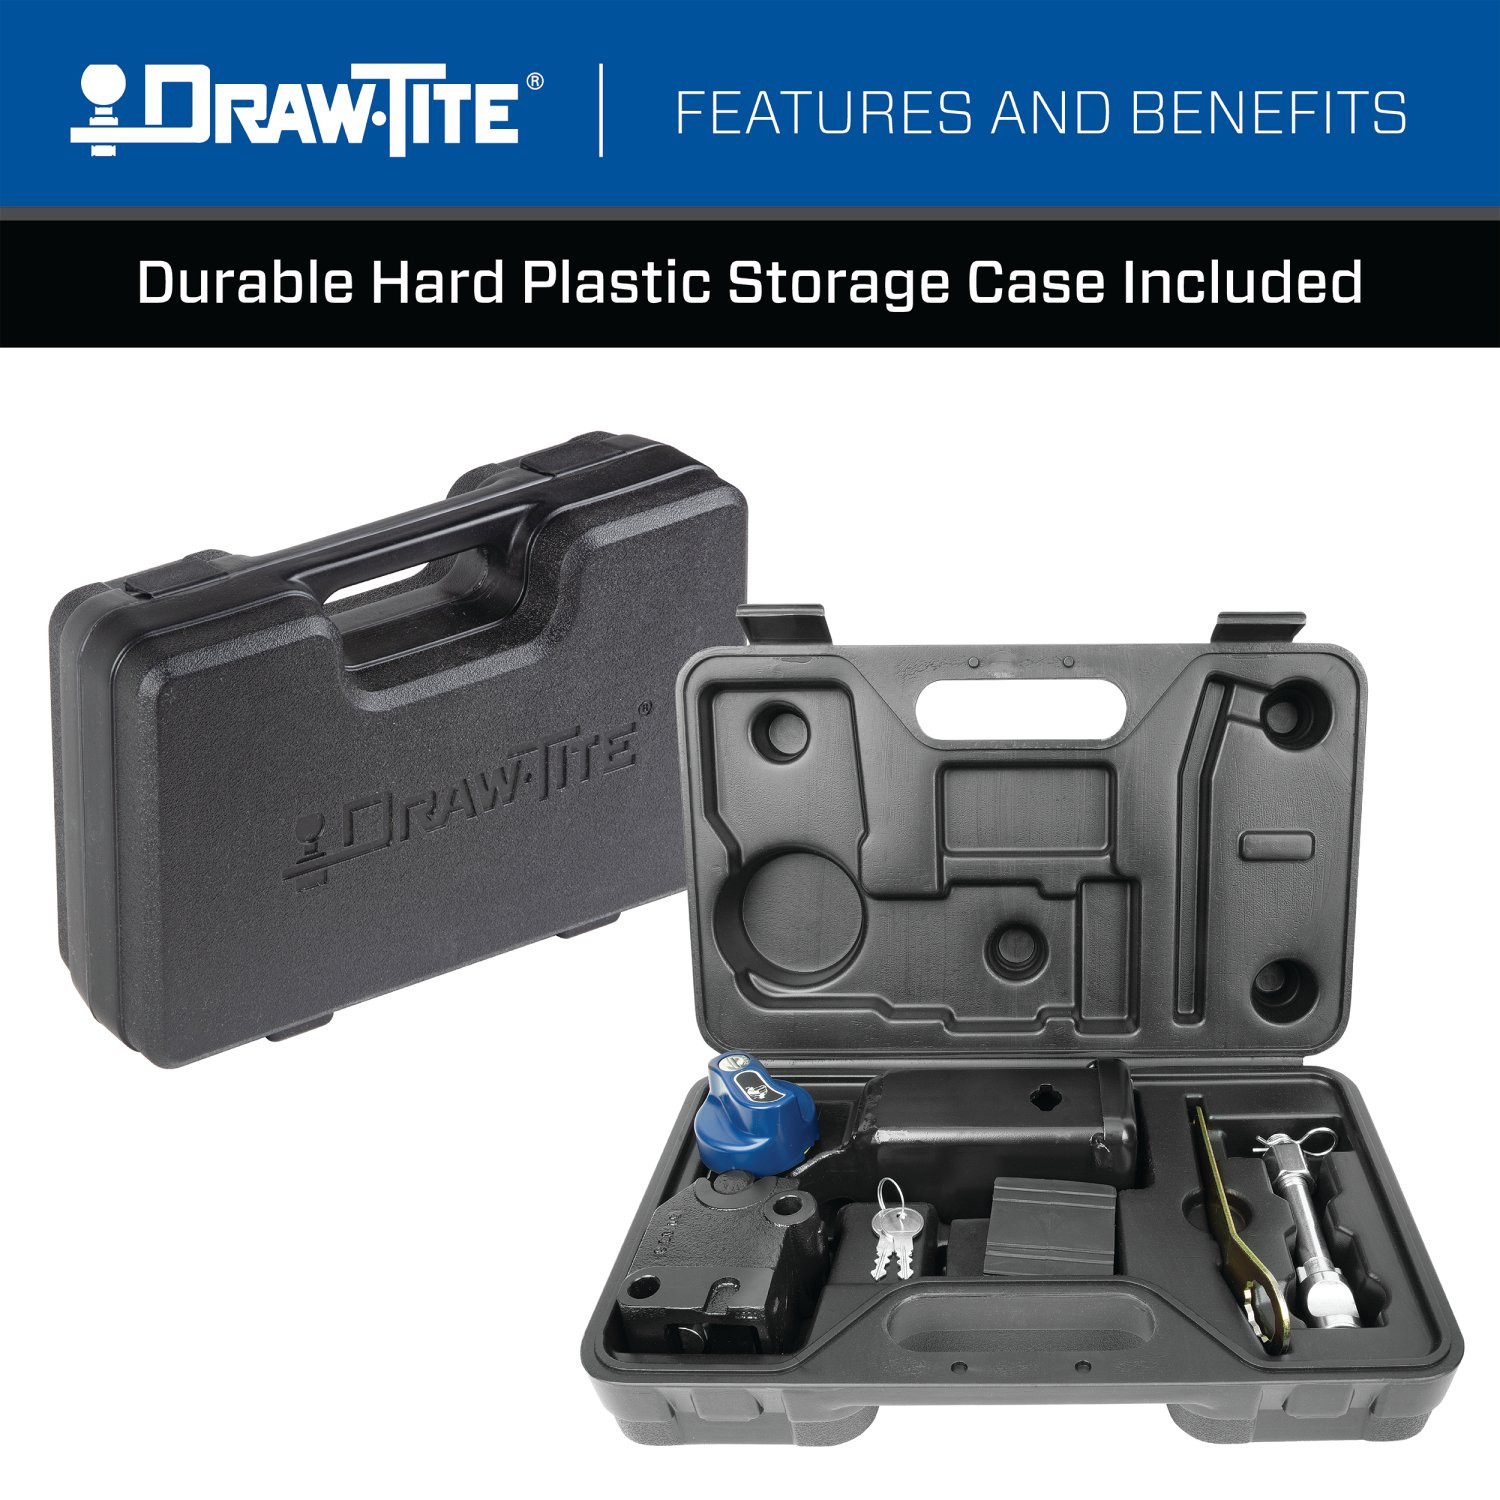
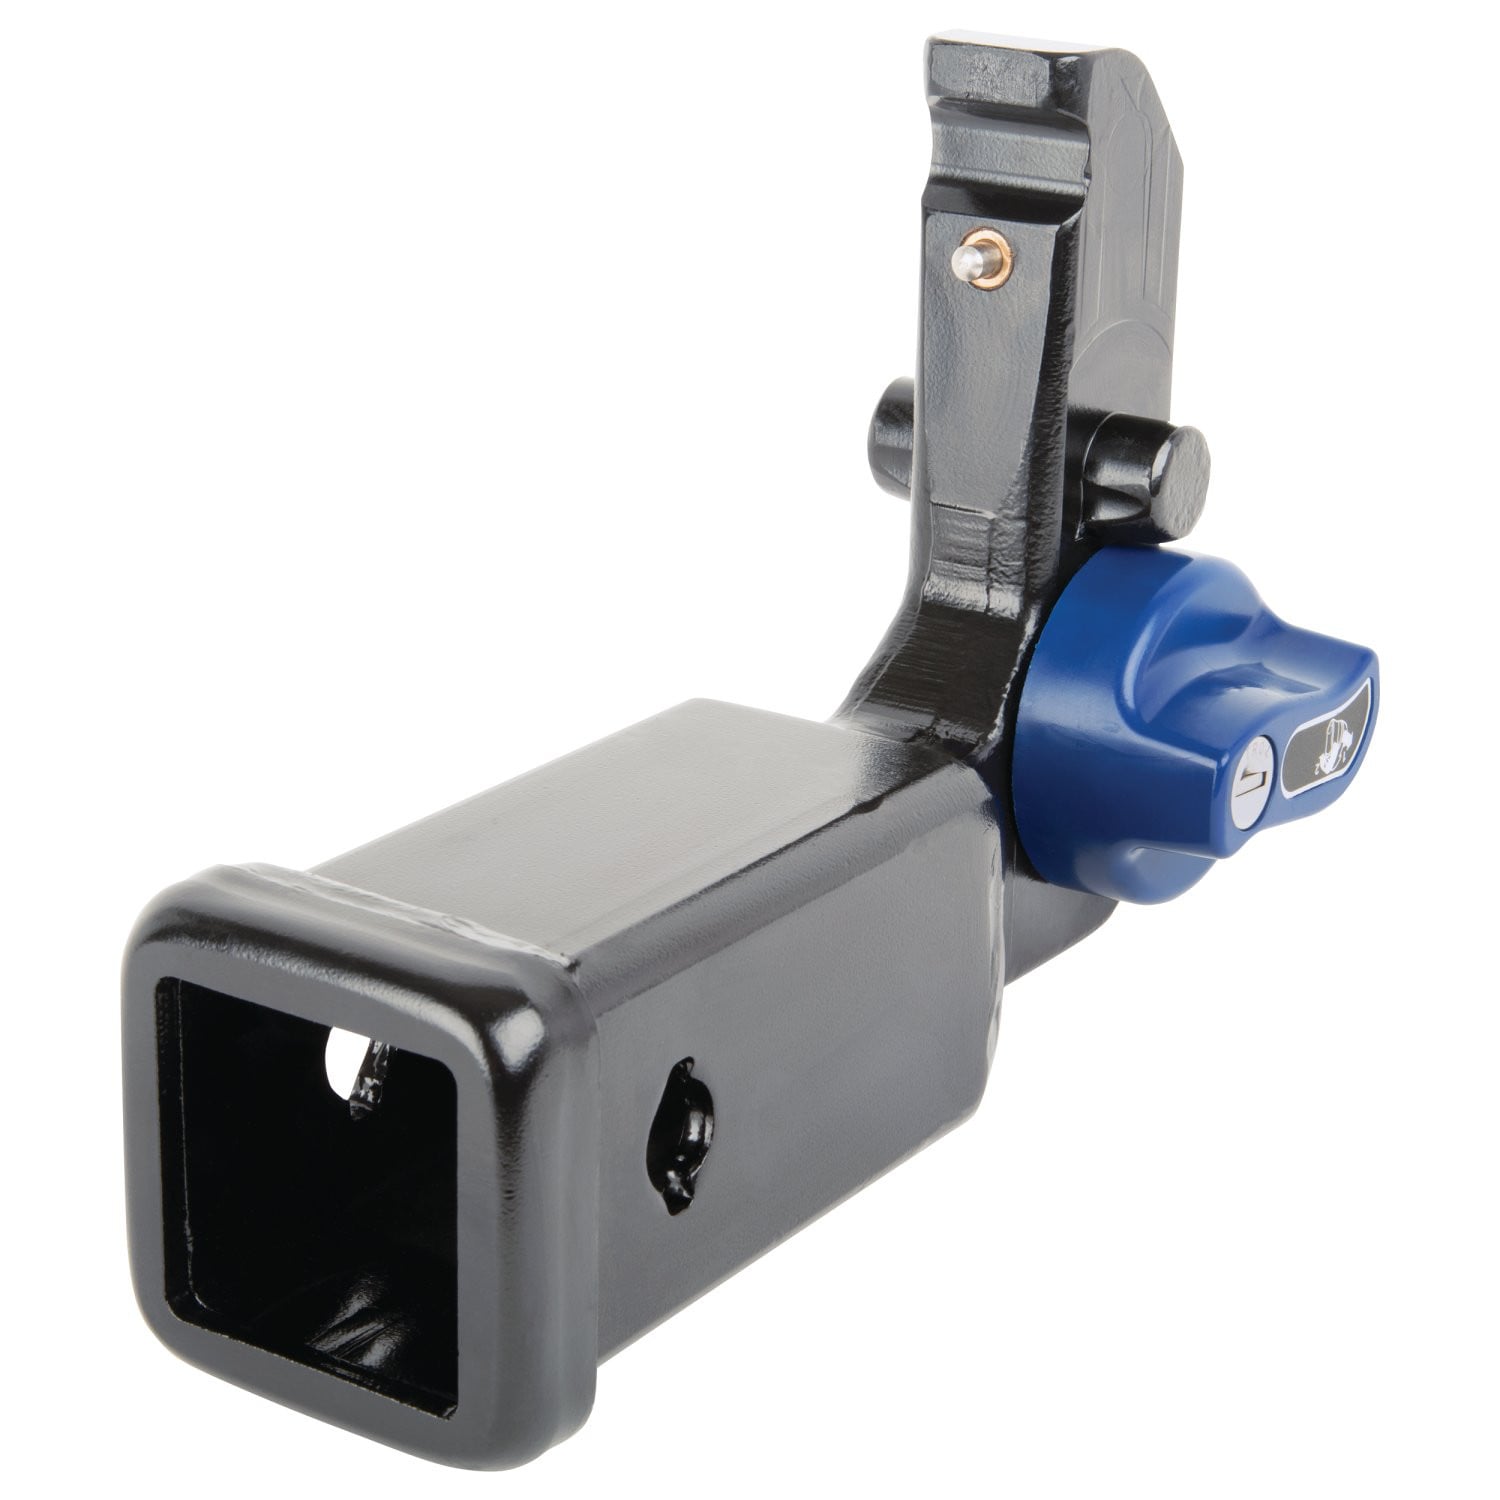
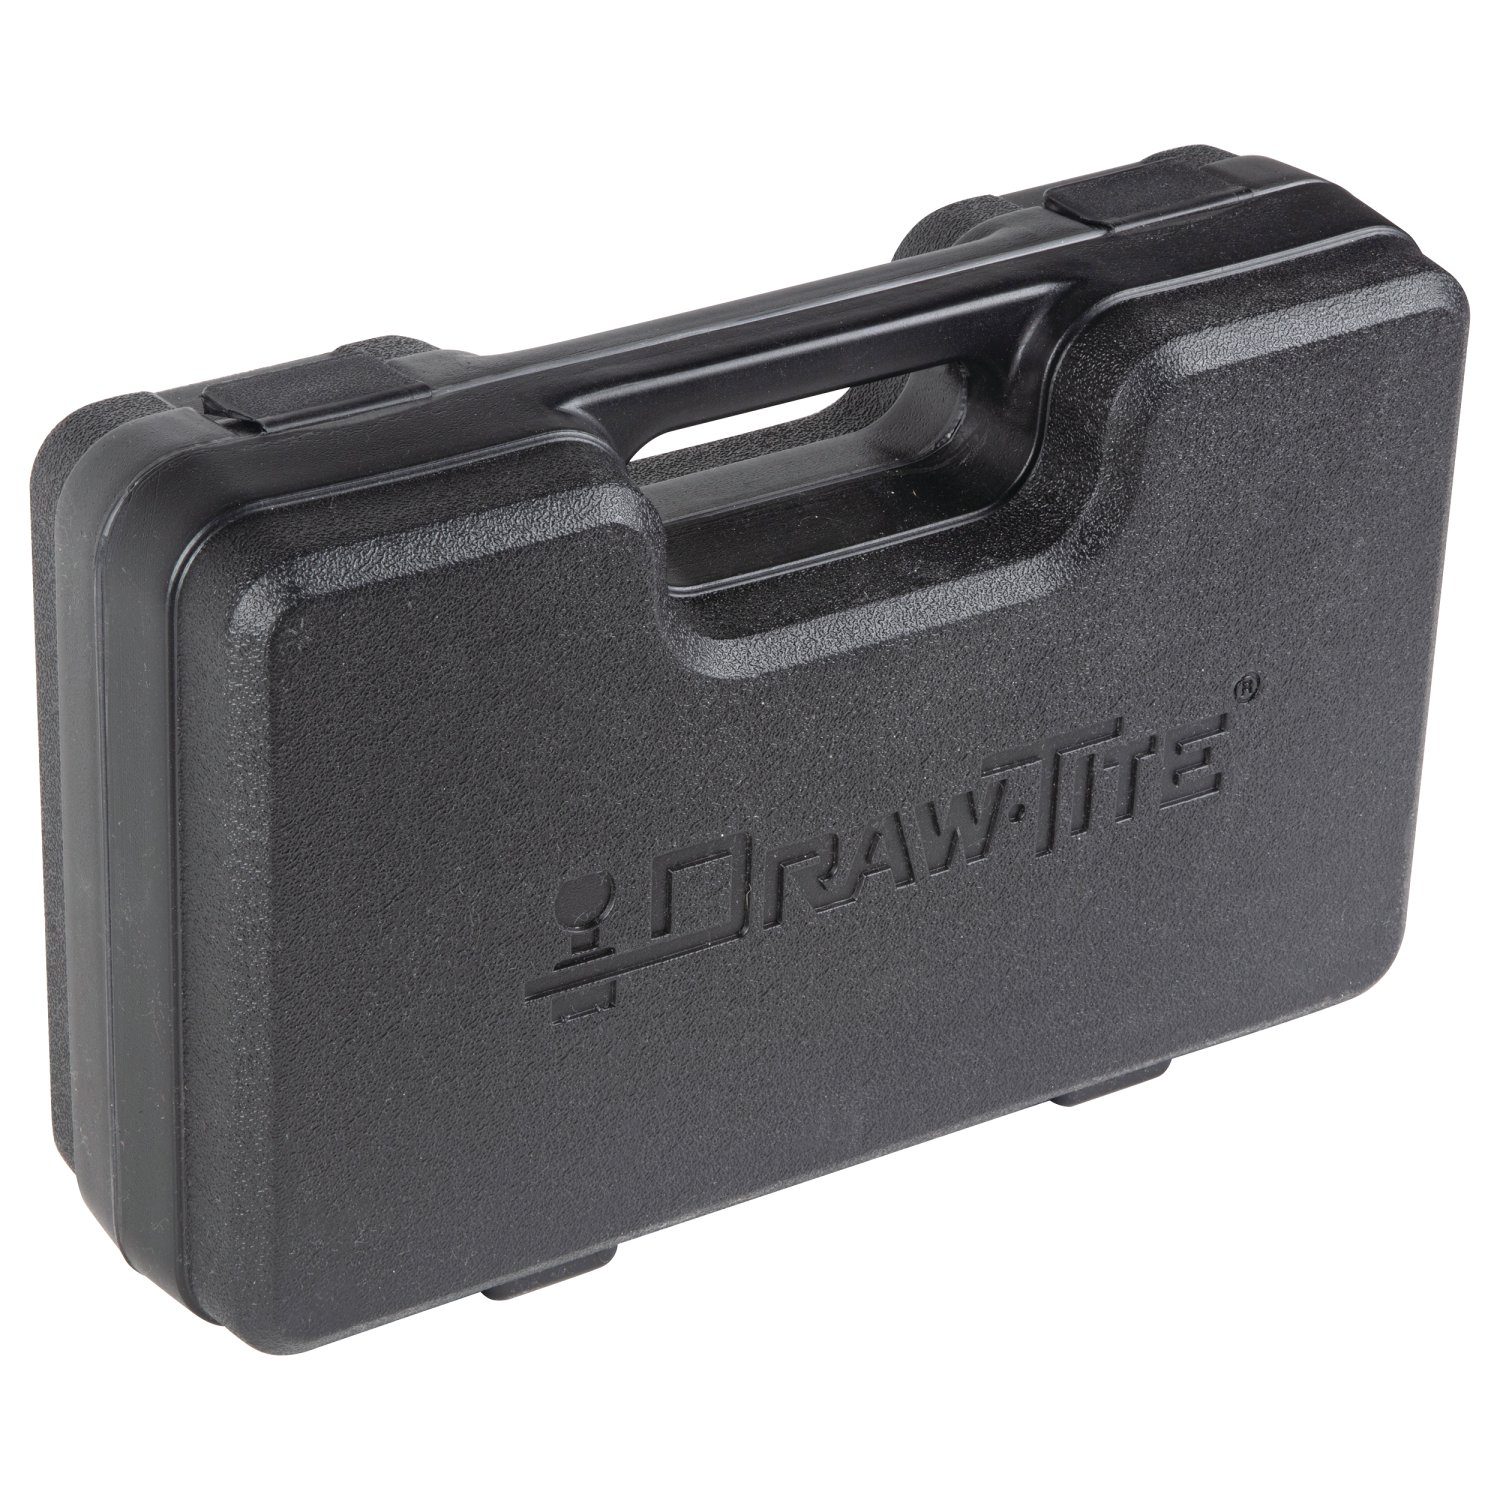
To install the receiver housing: (1) Remove the receiver assembly from the case. (2) Remove the receiver from the receiver housing by using the key to unlock the blue knob, pushing it in, and rotating clockwise until you hear a click. (3) Install the weather covers to the top and bottom of the receiver housing. (4) Attach the receiver housing to the hitch by inserting it between the hitch brackets, aligning with holes, and inserting 2 fastener assemblies (M12 bolt, flat washer, and prevailing torque nut). (5) Torque each fastener to 92 lb-ft (125 N·m). For receiver installation and use details, refer to instruction 76900N.
Keep the warning card in the vehicle glove compartment for future reference. Apply one label to the top of the receiver and one label to the vehicle door jamb. These materials are included in Fastener Kit 76906F2.
Always wear safety glasses when installing the hitch. Observe safety precautions when working beneath a vehicle. Do not cut access or attachment holes with a torch. The sensor wire on X4 models must not be cut. If the hitch is removed, plug all holes in the trunk pan or other body panels to prevent entry of water and exhaust fumes. A damaged hitch or ball should be removed and replaced immediately.
After installation, check that all fasteners are tight and the hitch is securely mounted to the vehicle. Regularly check that all fasteners remain tight and the hitch is securely mounted during vehicle use. Proper torque is needed to keep the hitch secure to the vehicle when towing. If the hitch is removed at any time, plug all holes in the trunk pan or other body panels to prevent entry of water and exhaust fumes.
The manual states you should regularly check that all fasteners are tight and the hitch is securely mounted to the vehicle. No specific interval is provided, but regular inspection is emphasized as important for safe towing.
No. The manual explicitly states: DO NOT cut, weld, or modify this trailer hitch. Doing so will compromise the hitch integrity and safety.
The manual does not address spare tire interference. However, the installation does involve working with exhaust hanger brackets. For X4 and X3 2018-current models, you must remove 2 hex nuts holding exhaust hanger brackets to the bottom of the bumper beam, then reattach them after the hitch is installed. For specific interference concerns with your vehicle, consult the Horizon Global website or contact technical support at 800-632-3290.
The manual addresses sensor wiring on X3 and X4 models. For X3 models, you must disconnect the sensor wiring and plastic rivet attached to the bumper beam. For X4 models, you must remove plastic rivets holding the sensor bracket to the bumper, detach the sensor wire from clips, and secure the sensor wire in 4 places using cable ties as shown in Figure 13. The sensor wire must not be cut. After installation, all wiring harnesses must be reconnected. Consult the Horizon Global website or technical support if you have concerns about specific sensor compatibility.
The installation difficulty is rated as 'Expert.' This rating is based on the time and effort involved, which may vary depending on installer level of expertise, condition of the vehicle, and availability of proper tools and equipment. The installation requires drilling, trimming, removal of multiple trim panels and the bumper beam, and precise torque specifications.
The manual provides ball mount selection criteria but does not specify which ball mounts are included or sold separately. The rise must be between 0.75 inches (minimum) and 10.5 inches (maximum). The distance from the center of the ball hole to the center of the pin hole is the length. For safety chain attachments, quick links are available separately: #49131 (5/16 inch, Max GTW 3,500) and #44133 (3/8 inch, Max GTW 3,500). Consult the Horizon Global website or contact technical support for specific ball mount recommendations for your application.
Yes, part 76906 is designed for BMW X3 and X4 models. Visit the Horizon Global website for the most up-to-date information on specific years, sub-models, and trim levels.
Maximum Gross Trailer Weight: 3500 lb (1589 kg). Maximum tongue weight: 350 lb (159 kg). Never exceed your vehicle manufacturer's recommended towing capacity.
Yes. You must drill out plastic rivets holding the wheel well trim using a 1/8 inch drill bit (4 rivets for X3 models, 3 for X4 models).
Yes. X4 models require fascia trimming (4.25 inches by 13.50 inches). All X3 models require underbody panel notch cutting. X4 models also require sensor bracket trimming. The manual notes the vehicle requires trimming and you must obtain the vehicle owner's permission.
M12 hex flange nuts: 68 lb-ft (92 N·m). Exhaust hanger nuts: 25 lb-ft (34 N·m). Receiver housing fasteners: 92 lb-ft (125 N·m). Use a torque wrench for all fasteners.
Yes. Use an 18mm deep well socket with a 6 inch extension to remove 4 hex flange nuts (2 per side) holding the bumper beam to the end panel. The bumper is reinstalled after the hitch is positioned.
Always wear safety glasses. Do not cut access holes with a torch. Do not cut the sensor wire. Observe safety precautions when working beneath the vehicle. Plug all holes if the hitch is removed to prevent water and exhaust fumes from entering the vehicle.
Verify all fasteners are tight and the hitch is securely mounted. Regularly check fastener tightness during use. Proper torque is essential for safe towing.
Tighten all fasteners immediately using the correct torque specifications: M12 hex flange nuts to 68 lb-ft (92 N·m), exhaust hanger nuts to 25 lb-ft (34 N·m), and receiver housing fasteners to 92 lb-ft (125 N·m). The manual emphasizes regularly checking that all fasteners are tight and the hitch is securely mounted to the vehicle. Loose fasteners compromise hitch safety during towing.
If the foam gasket is damaged during removal or installation, apply silicone sealant (not provided) to the hitch bracket mounting surfaces. This applies to X4 models and X3 2018-current models. For X3 2011-2017 models, the foam gasket is removed entirely, so damage is not a concern. Silicone sealant helps prevent water and exhaust fumes from entering the vehicle through the mounting area.
The manual explicitly warns: Sensor wire. DO NOT CUT! If the sensor wire is cut, the rear sensor system will not function properly. Do not proceed with installation. Contact Horizon Global technical support at 800-632-3290 or TechnicalSupport@horizonglobal.com for guidance on sensor wire repair or replacement before completing the installation.
A hitch or ball which has been damaged should be removed and replaced immediately. Do not use the hitch for towing if it is damaged. Contact Horizon Global at 47912 Halyard Drive, Suite 100, Plymouth, MI 48170, 1-800-632-3290, or visit www.horizonglobal.com for replacement parts and warranty claim information.
If the hitch is removed, plug all holes in the trunk pan or other body panels to prevent entry of water and exhaust fumes. This is important to protect the vehicle's interior and prevent corrosion or damage from moisture and exhaust gases.
Yes, a compatible bike rack, cargo carrier or other accessory with a 2" x 2" shank can generally be used. Make sure the accessory does not exceed the hitch’s tongue weight rating, the vehicle’s limits or the accessory manufacturer’s capacity. Account for the combined weight of the carrier and everything loaded onto it.


Total for 4 items:
$134.54$137.05
On Sale Today
Original price was $780.00. Current price is $570.34.You save $209.66 (27%)
Free Shipping
Ships free on all orders
 Authorized Dealer


FREE ShippingFREE SHIPPING
Estimated delivery Fri, Oct 9 - Mon, Oct 12
Order before 2 PM EST Monday–Friday for same-day processing
Guaranteed safe & secure checkout
Ann
The staff was able to quickly assist me with locating the correct product I needed. Shipping was really fast. Item arrived in 2 days. Will be using TowUniverse again!!
May 22, 2023